Reddit — Dive into anything
Alright guys, here it is! Even though this was something I thought up on my own, I’m very likely NOT the first person to do something like this, so I can’t really take full credit for it. I came up with this mod a while back shortly after I built my first rig (you’ll see it later on) and posted it on the overclock forum, but hadn’t formatted it for Reddit, so I figured I’d finally get around to that!
Hardware monitors are essential for overclockers, and just overall a super handy resource even for regular PC users/gamers. Temps, clock speeds, useage, and framerates are all things that are very nice to be able to watch while you have a game fullscreen.
However, the options that are currently available «commercially» quite plainly suck. They look horrible, are usually bulky and annoying to look at or use, and they can only do a small handfull of things.
You can just go oldschool and use an overlay, totally ruining the beauty of the game you painstakingly built your PC to experience with it’s bright yellow or green 8 bit font. Or you can buy a 5.25″ bay insert, if you’re really desperate. I won’t even go there.
So I decided this wasn’t gonna cut it and I embarked on a journey to find the best working and best looking hardware monitor I could build.
I feel as if I was successful
And when I moved into my new Build also
Before I start with everything, with my method I use the screen as an extension of my desktop, and I route the HDMI cable it uses through my case, out the back and up into my video card. You can use it with a Rpie and remote into it if you please, but you’ll still have cables running for the Rpie itself, and that will increase the cost drastically
The parts
Now, you have two options, buy from china and save a good bit, or buy from the US and spend way more than $50. I’m using a mixture of the two. In this case, it’s worth waiting the extra week or so because you save yourself almost $20.
The monitor itself: 5″ HDMI Rasberry Pi Touchscreen LCD. UPDATED LINK 1/17/21 ((Now this is one that comes with the acrylic bracket that I used the hardware from to get it all mounted. You can buy one without the bracket (You have to put it on yourself anyhow) but I feel like it helps protect the PCB and screen itself. Not to mention it gives you more options on how to use the screen. ))
The cable: 3ft ultra slim HDMI UPDATED LINK. Ultra slim makes it much easier to cable manage, and for the size of the screen you won’t have any issues with it. (Read the bottom of this post if you only have one HDMI port on your GPU)
The adapters: 90 or 270 degree HDMI angled adapter UPDATED LINK. This is for one of each, you’ll need the 270 to make the HDMI cable run towards the back of your case.
Edit 8/8/21 I found some INTERNAL USB 2.0 header mounted ports that should help with the USB power cable needing to snake outside of the case also. (https://smile.amazon.com/dp/B07YFXH5K9?psc=1&ref=ppx_yo2_dt_b_product_details)
(I actually use two additional 270 degree adapters to attatch both of the HDMI cables I have running into my graphics card so the cables run parallel to the case instead of straight into it, personal preference)
OR
One of these adapters to make the HDMI cable run straight down
How you plan to route the cable will determine which adapter you will need.
PAY ATTENTION TO WHICH ADAPTER IS WHICH WHEN PURCHASING, THEY’RE VERY EASY TO MIX UP
Pictures for mounting instructions for you visual learners like myself
Mounting to an acrylic case window
If you want to hard mount it to your acrylic window like I did on my original build, to get your holes drilled in the correct spots, just set the screen face down on the acryllic where you want to have it mounted, hold it there snugly and use something sharp (I used a tiny screwdriver) to go through each corner hole to make marks where your bolt holes are on each corner. Take the screen and put it aside for now, next, use a drill with a bit slightly larger than the bolts that come with the screen kit and carefully drill out your holes. Make sure they are smaller than the heads of the screws though.
I mounted my screen FLUSH to the inside of the acrylic, so I put the bolts through the front, next was the screen, then the plastic spacers, acrylic backplate (I did not use the front plate for this mounting method) and then finally bolts. Be VERY careful, remember this is just a tiny little LCD with no protective layer in front of it.
Using the cross pattern just like a cpu cooler tighten down your bolts till they’re snug. Not crazy tight but snug. By having the screen pressing on the acrylic, it acts like the front glass does on your cellphone LCD and gives you a nicer picture, and keeps dust from getting between the two.
Tempered glass cases
If you have a tempered glass window for your case like I do on my new build, just attatch the FRONT plate to the screen and use the included stand and rest it on your PSU shroud. Not attatched solidly, but it still performs exactly how it’s supposed to and looks nice and clean. You can use some zip ties to keep the stand where you want it if you really want it to not move at all.
There really isn’t a way to mount it similarly to the acrylic window method, unless you want to epoxy the bolt heads to your window. It’s plausible, but I can’t say I recommend it.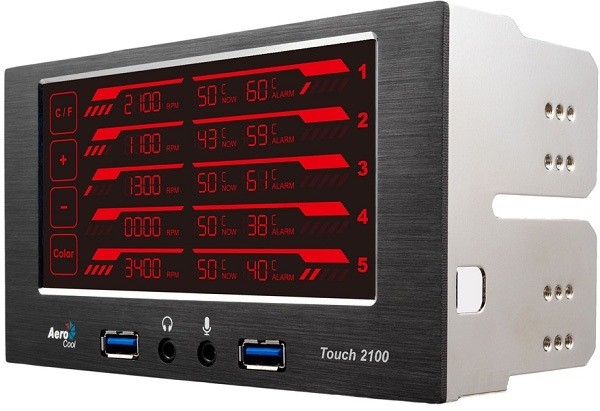 /u/RUST_LIFE pointed out that there is UV activated glues that would also work to mount via this method.
If you happen to have enough room between your PSU shroud and your window, that would be a perfect little nook to slip it into without really having to mount it. I was hoping my case had enough room, but sadly it does not, and I’m not about to go cutting metal just yet.
HOWEVER If you do that, make sure you insulate the rear of the screen somehow, just in case it decides to try and short (It is just bare pcb after all).
You could always cut the screws so they’re just long enough to put the rear plate on from the mounting kit and still fit in that little nook if you’re skilled enough.
I currently have mine set up so the very top of the front bracket of the screen is resting against the front of my GPU so it stands straight up to make the viewing angle better.
Alternate alternate mounting methods
If your case has 5.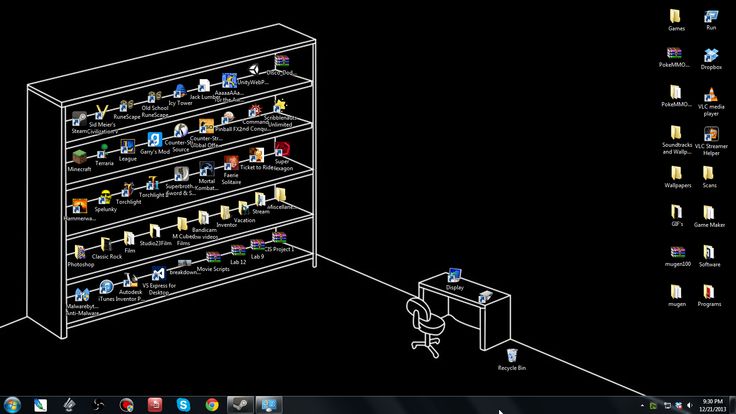 25″ bays with removeable covers, it could very well fit in the space of 2 of them if you want it to face out the front of your case. Vertically it should fit, horizontally you may have to figure out how to fill in a gap. If you are crafty enough you COULD dremel out your covers to mount the screen to them, and snap the covers back into place.
If you do decide to dremel your covers, first off please make sure to wear safety glasses and ear protection, but also it will be a huge help if you epoxy the two covers together on the small surface where they touch, this will allow you to have ONE cover to cut instead of trying to line up two different ones
And finally you can just use the included stand and bracket and set it up outside of your case wherever you please, on top of your PC, beside your PC, under your.. PC..(?) Basically you can use this any which way you want to!
Software and setup
I use Rainmeter and HWinfo64 for all of the information that I want to see. What skins you decide to use are fully up to you, there are literally thousands to choose from. I personally recommend and use Illustro Gadgets since it’s clean, simple and effective.
You will also need the HWinfo Rainmeter plugin in order to access the HWinfo SMV or «Shared Memory Viewer» in order to set up your skins to read and display the correct information. There are tons of tutorials already on how to do this so there’s no need for me to reiterate.
And there you have it! Sorry if it’s not as crazy difficult to do as you thought, but I thuroughly enjoy my little mod and HIGHLY doubt I’ll ever build another PC without it.
Please, feel free to ask any questions I’ll try to answer them the best I can!
And make sure to share pictures if/when you do this to your rig! Tag me!
T3ch Hippie out!
Edit: Added a few more pointers, and mounting methods
If you only have 1 HDMI output on your GPU and use that for your main display you will need to buy one of these Displayport to HDMI cables. If you use this adapter cable to run the mini screen you will have to use a micro USB cable to supply the screen with power, for some reason they don’t pull enough power over the adapter cable. You can alternatively just get a longer DP->HDMI and use it for your main display and shouldn’t have any problems, and won’t need the microUSB for the hardware screen
Sensor Panels from Lamptron | Custom PC Monitor Display
There are PC builders out there that can put a system together, check its function to make sure everything is running smoothly, and then use it without ever looking at its vital signs again.
I am not one of those people.
Temperatures, clock speeds, voltage readings, load percentages, throughput speeds – I want to see all the data I can, in real time.
If you’re a stat-checker like me, you’ve likely seen external system monitors in custom systems. If your available time for tinkering is like mine, you likely still look at those with envy, as getting them installed and set up all on your own takes time and a skillset that many don’t have.
The people at Lamptron have seen the need and responded in a big way.
Founded in Germany in 2005, Lamptron initially focused on fan controllers and lighting, bringing us some of the best examples of both.
Recently though, Lamptron has shifted their attention to PC monitoring hardware. They currently offer more than ten different hardware monitors in different sizes and styles, with more on the way!
All of Lamptron’s monitors are designed to display data reported by the diagnostic and monitoring software AIDA64, one of the oldest and most feature-packed system monitoring software packages available today.
First launched as ASMDEMO in 1995 and reintroduced as AIDA32 in 2001, AIDA64 is the culmination of decades of work and improvement and is among the best-known monitoring software packages on the market. The amount of information about your system that’s easily obtainable through AIDA64 is honestly incredible, and Lamptron’s system monitors make it easy to access.
Functionality
First and foremost, Lamptron’s hardware monitors currently all offer the same user interface and functionality. Powered by a micro USB connection and interfacing with your PC by way of a full-sized HDMI connection, they’re universal and easy to use.
Since they connect through HDMI, Lamptron’s system monitors function as an additional display. While that means that your video source will have to be multi-monitor capable in order to use them, it also makes them simple and eliminates any need for additional drivers.
You will of course need a copy of the AIDA64 software. If you don’t have a copy don’t worry – the flash drive included with your Lamptron monitor includes a fully-licensed copy of the software. Licensing for AIDA64 (as of the date of this post) starts at $49.99US, so this is a nice inclusion.
AIDA64 is capable of monitoring nearly every piece of data about your PC and displaying it on the Lamptron System Monitors. Anything from memory utilization to disk activity to per-core CPU temperatures. Temps, voltages, clock speeds, power values, disk space – pretty much anything you might want to know about what your PC is doing can be monitored in real time and displayed.
Custom data screen made with AIDA64’s Sensor Panel.
What’s more, AIDA64 allows you to build a completely custom screen for your new monitor. You can decide not only which pieces of data are displayed, but customize the way they’re displayed. Bars, graphs, gauges, simple numbers – the choice is yours. You can customize nearly every aspect of your screen, right down to the color and font used in the different data displays and more. You can add your own images and even make your own custom gauges if you’re savvy with image editing software.
We’ve put together a video tutorial on creating your own custom screen for your Lamptron display.
Form Factor and Options
Now that we know how they work, let’s take a look at the different models available and how they differ.
HM022
The HM022 is the smallest of the monitors that Lamptron offers, with a diminutive 2.2-inch LCD. Why would you want a monitor with a screen that small, you ask? Because this one is built into a graphics card support bracket.
You read that right – a tiny system monitor built into a graphics card support bracket. Not only that, it also offers an addressable RGB panel.
The HM022 is unique among Lamptron’s monitors in that it only requires only a USB connection to function – both power and data are supplied. The ARGB function has its own connection, with a passthrough plug to facilitate daisy chaining.
HC060
The HC060 monitor offers a six-inch LCD screen and comes with mounts to install in any dual 5.25” position in a PC case. Fully enclosed and only 6mm thick, the HC060 can also be housed outside your PC case, though no mounts or stands are included for this purpose.
HC070
Moving up in screen size brings us to the HC070. Offering a 7-inch screen and matching the 6mm thickness of the HC060, the HC070 is designed to mount in a PCI slot inside your case.
HM070v2
The HM070 monitor is a modification of the HC070. While using the same 7-inch screen, it provides an enclosure 10mm thick that allows it to function freestanding outside of the PC case. It also includes the same mounting options as the HC070.
HM070 LIFT
A further modification of the HC070, the HM070 LIFT places the 7-inch LCD screen in a larger housing that’s 30mm thick and includes an option for wall mounting.
HM088
Though the screen on the HM088 is an 8.8” LCD, its form factor is longer and narrower than the 070 series. Designed to be mounted inside your PC case in a PCI location, its length will cover a large portion of most side panel windows.
HM101
The HM101 moves away from the smaller screens used in previous models, offering a 10. 1-inch LCD and includes a single-position stand for placing it on a desk.
HM101 Touch
An evolution of the HM101, the HM101 Touch has the same screen size, but the bezel is larger and notably thicker along one of the long edges. Touch-control enabled, the HM101 Touch has a virtual keyboard function that allows the user to interact with the monitor directly.
The HM101 Touch also comes with a much-improved multi-position stand for ease of use.
HM140
Similar to the HM088, the HM140 offers a long narrow form factor, but with a full 14-inch LCD screen. Mounting for inside the PC case is included. While it is 14mm thick, the shape of the HM140 will not allow freestanding use without a stand of some sort.
HM140 Touch
The HM140 Touch brings a screen identical in size to the HM140, but wrapped in a thicker bezel and including the same multi-position stand that comes with the HM101 Touch. Virtual keyboard support is also present.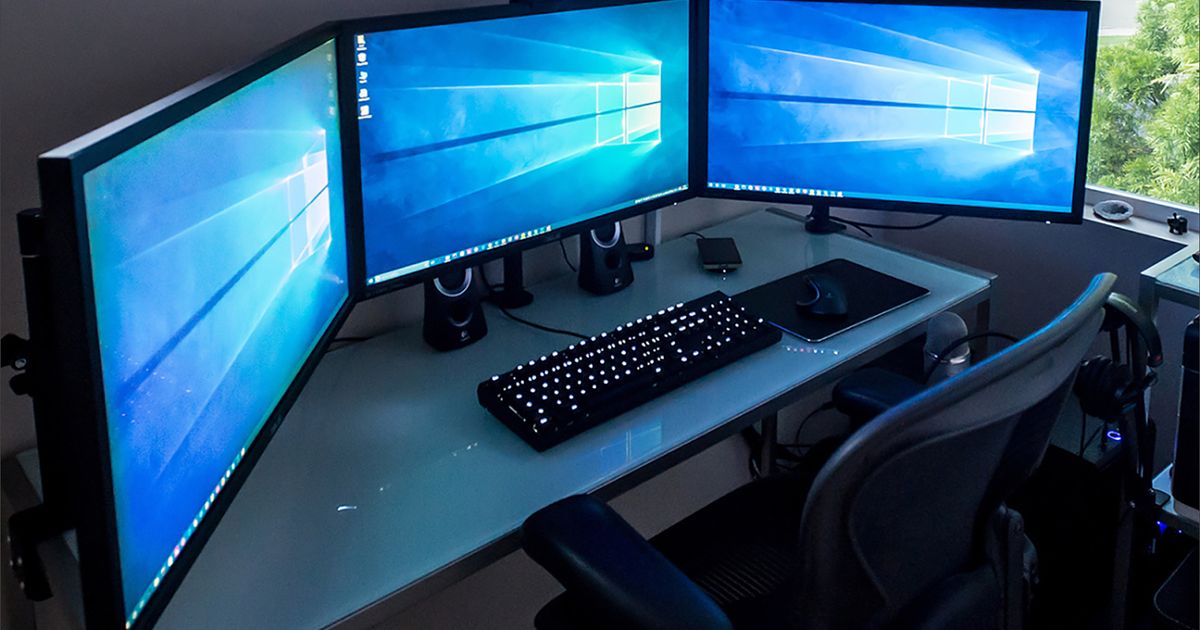
HM173
The largest of Lamptron’s monitors, the HM173 is a gargantuan 17.3 inches of screen. Sharing the same uniform narrow bezel as the HM101, it also comes a non-adjustable single-position stand.
Lamptron has really stepped up to the challenge with their new line of system monitors. By using AIDA64 as their data connection they’ve made installation simple and given users a huge array of data to choose from when deciding what to display. The sheer variety of size and shape options are amazing, and anyone wanting to get started with a separate system monitor will be able to find something to fit their needs.
Monitoring the consumption of system resources in Windows 10 and 11
In this article, friends, we will consider the means of consuming system resources in the current Windows 10 and 11 operating systems. Many of you know that if you need to monitor the load on certain computer components, you can turn to the system manager tasks.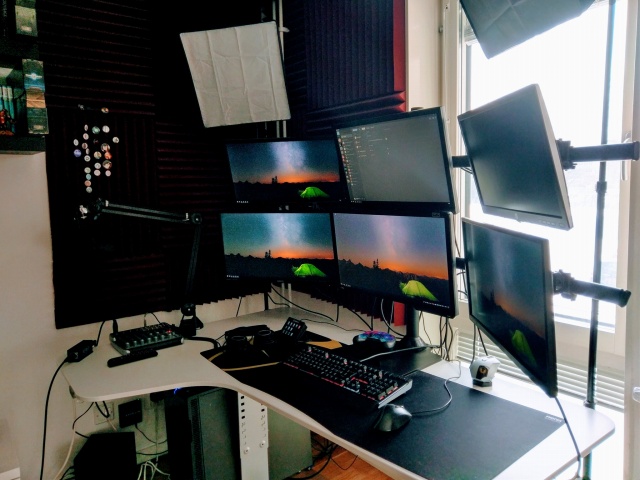 But perhaps few of you paid attention to all its remarkable features in modern Windows, we will talk about these features. We will also look at alternatives to task manager for monitoring the load on computer components — from simple performance widgets to large-scale resource monitoring tools. Windows 11 did not receive any changes in terms of system resource monitoring tools, everything was inherited from Windows 10 as it is. Because what we will consider — both system and third-party tools — equally apply to both Windows 10 and Windows 11.
The first place they usually turn to when system brakes or specifically monitor the load on computer components is the system task manager. It can be called up with the Shift + Ctrl + Esc keys, or in the menu using the Win + X keys, the same menu is called up by right-clicking on the Start button in Windows 10 and 11. right in the main tab of the task manager. At the top of the table, we are given the total percentage of load on the processor, RAM, hard drives (for a total of all drives), as well as on the network. In the table itself, we can see the details of which system and third-party processes consume how much of which resource. For the processor, this will be the same percentage of load, for RAM — the amount consumed, for the disk — the processing speed, for the network — the speed of data transfer over the network.
We can see the details on the load on computer resources in the «Performance» tab. Here we are offered graphs of the flow of loads. For the processor, we can see its characteristics, the current frequency of cores, the number of active processes and threads, information about enabling virtualization. For many, information about the time the computer has been running since it was turned on may be useful.
For RAM, we are shown its total volume, the effective frequency at which the bars operate, used and available, i.e. free volume. The amount used is displayed in different categories — cached memory, reserved by hardware, paged and nonpaged pool.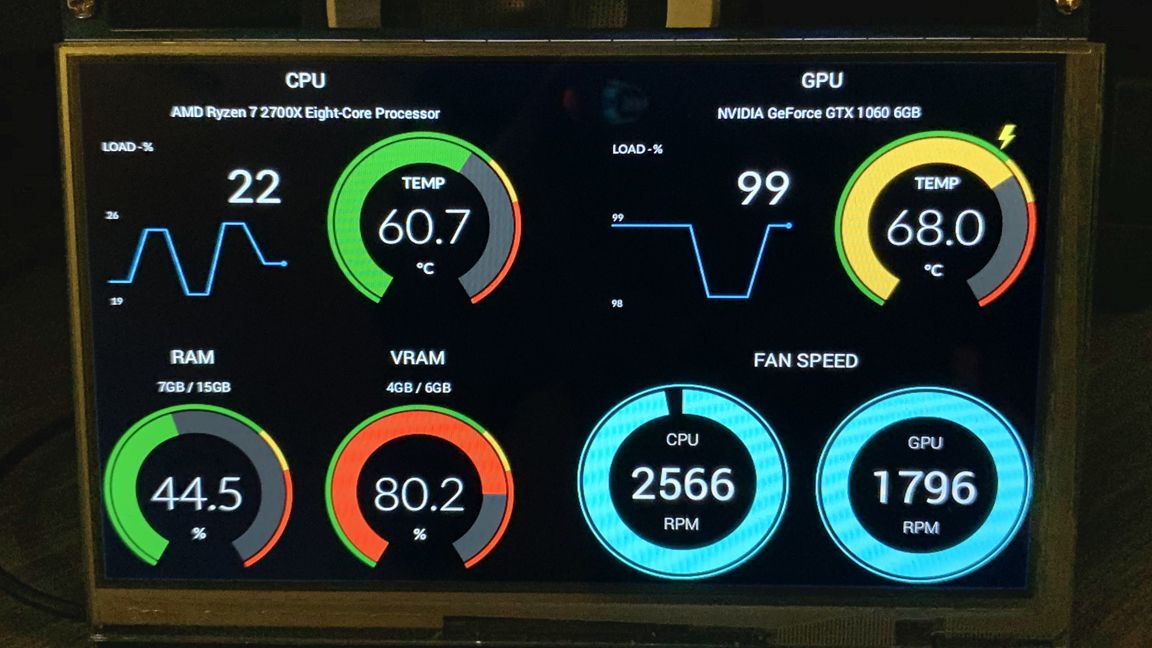
Friends, the Windows Task Manager is not the best hard drive diagnostic tool, but it can be used to track the actual speed of data read and write operations in addition to load monitoring. This is exactly the speed with which we are aware when working with a computer, as opposed to synthetic tests for measuring disk performance, where, as a rule, only SSDs can develop the maximum speeds that their manufacturers promise us. Launch the task manager on the performance tab of the disk under test and load the latter with tasks — reading data, copying, downloading, launching a resource-intensive program. And you will see the speeds that your SSD can really develop.
For a video card, we are offered load flow graphs that involve its different areas of work. In addition, data on the use of video card memory is offered.
System Resource Load Monitoring is part of the Game Bar in Windows 10 and 11. This bar provides a small performance monitoring widget in a simplified format. The widget is tailored to the gameplay so that gamers can track how the computer copes with certain gaming tasks. It displays the total load on the processor, video card, and separately on the graphics processor and separately on the video memory. Displays the load on RAM and FPS (frames per second). To launch the game panel, press the Win + G keys, look for the performance widget, if it is not there, enable it on the menu bar at the top. We can customize the widget itself by setting the desired values for transparency, color finish, display of system components, placement of the widget itself on the screen.
The game bar with all active widgets appears when we press the Win+G keys and then disappears as soon as we switch to another task. But the widgets we need, including the performance widget, we can pin for constant activity.
And then the productivity widget will be constantly displayed on the screen on top of other windows.
A minimalistic widget for monitoring the load on the system resources of the computer can be obtained on the desktop using the free Rainmeter program. It implements Windows desktop skins with various widgets, among which by default are date and time, a monitor of the total load on the processor, RAM and swap file, a display of computer disks with their workload.
In the program settings, you can add other widgets — network load monitor, system recycle bin, Google search, etc.
An even more minimalistic resource load widget is offered by the freeware Wise System Monitor. It implements a small strip on the desktop displaying the load on the processor, RAM and network.
When you hover in the widget on one or another computer resource, we will see the details of the processes consuming this resource. For the processor and the network in detail, graphs of the flow of loads will be displayed. For RAM — a ring diagram of occupied and free volume.
Directly, the Wise System Monitor program itself can offer us some information about the operating system, in particular, the installation date and time.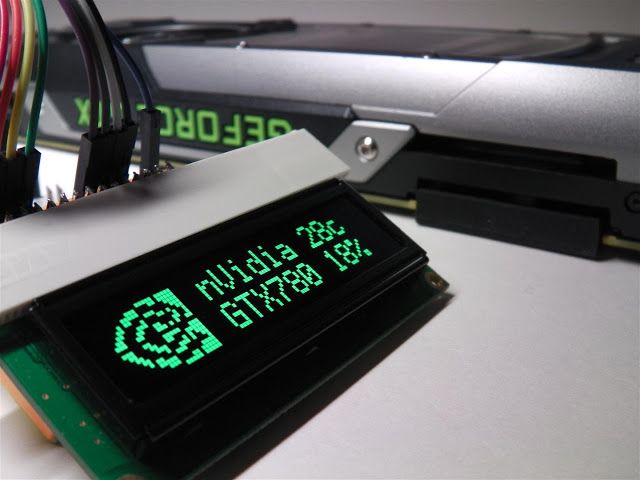 As well as information about the hardware components of our computer. Well, the main feature of Wise System Monitor is the implementation of an alternative to the Windows system task manager. The program has its own format. With the ability to monitor each of the processes, the load on the processor, RAM, network. With the ability to track the speed of reading and writing data by processes.
Now, friends, let’s look at more powerful tools for monitoring computer resources. You don’t need to go far for such a tool, it is in Windows 10 and 11 among the standard functionality, it is a system resource monitor. It is launched by sending below from the «Performance» section of the device manager, or separately, for which you need to enter in the «Run» cmdlet or system search:
resmon.exe
Or you can enter «Resource Monitor» in the system search. The System Resource Monitor is an extension of the information displayed in the System Task Manager. It shows the total and detailed resource load in percentages and metrics. For each active process we can find out:
- how many threads it consumes and the percentage of CPU utilization,
- the speed of reading and writing data by the process, the files it operates on the disk,
- the speed of data sent and received over the network,
- the amount of RAM used — current, completed, total.
We are also offered graphs for the flow of loads on computer resources.
In separate tabs of the processor, memory, disk and network, we can see additional information about the use of these resources.
And finally, friends, let me introduce you to a program that is the most powerful tool for monitoring the operation of computer hardware components — free OCCT. This is a program for testing computer components, and there is an entire section devoted to tracking their current state. Here we will not have, as in the Windows resource monitor, detailing on system processes, OCCT is sharpened specifically for the hardware. We are offered to distribute the load in percentage terms on the cores and threads of the processor, on the individual components of the video card, on the RAM. We can also see the voltage, frequencies and other metrics of individual components of the processor, motherboard and video card. We can see the speed of network devices, the speed of the cooler. There are load flow charts.
Here, friends, there are tools for monitoring the consumption of system resources for Windows 10 and 11.
 Supports CoffeLake and higher processors
 Libre Hardware Monitor is a project based on the abandoned Open (Hardware MonitorOHM). Libre Hardware Monitor adds everything that was added to OHM to send data to the serial port, the only difference is that Libre supports more hardware (new Ryzens and Threadrippers, as well as NVME ssd).
• New firmware from DeltaDesignRus
Changes
PCdisplay_v.1.4.4_DDR_cut is based on PCdisplay_v.1.4 version.
- Removed all plotters (charts).
- Added the ability to select one of two processor temperature sensors (at the very beginning of the sketch, look for CPU_TEMP_SENSOR and read the comment on the right), which are sent via the serial port by the Libre Hardware Monitor SerialPort edition program.
- Scales have been updated to display values 5 times more accurately by adding intermediate states.

- Minor improvements
DESCRIPTION
Electronics block for cool modding of your PC, features:
- Display of the main hardware parameters on an external LCD display
- Temperature: CPU, GPU, motherboard, hottest HDD
- : CPU, GPU, RAM, video memory
- Graphs of the above parameters over time
- Temperature from external sensors (DS18B20)
- Current level of external fans speed
- Control of a large number of 12 volt 2, 3, 4 wire fans
- Automatic speed control proportional to temperature
- Manual speed control from software interface
- RGB LED strip control
- Color control proportional to temperature yellow — red)
- Manual color control from the software interface
- Brightness control
COMPONENTS
Tools, useful
AliExpress links directories on this site:
- Everything for soldering: soldering irons, accessories
- Arduino boards, modules and sensors
- Modules and sensors for smart home
- Cheap protection tools
- chargers
- Multimeters
- Power supplies, converters
Pieces of iron from the scheme
I try to leave links only to proven large stores, from which I order myself. Also, the first links lead, if possible, to the minimum number of stores in order to pay the minimum for delivery. If some links do not work, you can look for a similar piece of hardware in the Arduino modules catalog. You can also try to assemble the project from the components of my GyverKIT kit.
-
Arduino Nano buy in Russia, aliexpress, aliexpress, search
- 100 Ohm https://www.chipdip.ru/product0/47324
- 10 kOhm https://www.chipdip.ru/product0/41486
- Screw terminal block https://www.chipdip.ru/product/ 306-021-12
- Button https://www.chipdip.ru/product/tyco-2-1825910-7-fsm14jh
- Version with pins: project on EasyEDA, download gerber
- Version with terminal blocks: project on EasyEDA, download gerber
- Mini version with terminals: project on EasyEDA, download gerber
FIRMWARE
ATTENTION!
The most detailed guide on getting started with the board and downloading the firmware for the project is HERE.
