Silitha | Darksiders Wiki | Fandom
Silitha
| Also Known As: The Brood Mother |
Silitha on the ceiling.
Race
Abyssal Creature
Gender
Female
Size
Giant
Eyes
Red
Means of Travel
By Foot
Affiliation
Hell
Occupation
The Chosen
Relatives(s)
Broodling (Offspring)
Main Weapon
Claws
Armor
Heavy
Type of Attack
Melee
Skills
Teleport
Enemies
War,
Samael
Actor Name (s)
Lani Minella
| “ | My children will dance to the music of your screams! — Silitha to War before battle |
” |
Silitha is a giant spider creature found in Silitha’s Loom in the Iron Canopy. She is the final of the Chosen that War kills for Samael. She is one of the four tertiary antagonists of Darksiders (the other three being Tiamat, The Griever, and The Stygian).
Contents
- 1 Overview
- 2 Strategy
- 3 Trivia/Notes
- 4 Gallery
Overview[]
| “ | The Broodmother is a collector of sorts. Most who enter her Realm, she feeds to her young. The ones she takes an interest in… ah, those are the unlucky ones. Those she keeps alive. And they can live a long time… long enough to tell her things. You could say she collects stories. Information. — Samael on Silitha |
” |
Samael told the Horseman that she «collected» interesting people for stories. When War arrived at the edge of the Iron Canopy, her children surrounded the Horseman and he awoke cocooned in a massive web.
After advancing through the dungeon War finally faced Silitha and she revealed to War that the Chosen didn’t need to be killed to enter the Spire, and that Samael wanted their hearts to regain his power. War dismissed her and they joined in battle while Silitha taunted him about trusting Samael. The fight ended with the floor breaking, dropping them down several floors and impaling Silitha on black spikes at the bottom.
Strategy[]
At the start of the fight, use the Abyssal Chain gained earlier to pull yourself into her face and hack away with your sword while she is still, continue this every time she is still from then on. Dash away when ever she teleports above War or she will land on top of him (it’s best to dash to Silitha’s side as she is longer than she is wide and you will rarely avoid her attack if you dash along her length). Sometimes, Silitha will start teleporting while War hacks at her face and if War continues to hold the button the Abyssal Chain is assigned to, he can continue to hack at her while she teleports — this may be a way to glitch her (however this only works until Silitha teleports onto a wall). If Silitha teleports near War and attempts a melee attack, there is time to dash to the side and get a few swipes in with a weapon.
After a few more uses of War’s trusty Abyssal Chain and the weapon of your choice, she will say «You’ll never take my Heart» and throw out orange/red orbs. Theses orb slowly move down then stop for a brief second, at this second you use your Abyssal Chain to grapple up to them. Then quickly grapple Silitha and hack away, finishing the battle. This battle can be difficult because of the seeming lack of major attack patterns that bosses like Straga or Tiamat have.
A way to speed up this fight is to throw the gurneys and wheelchairs in the room at Silitha when she’s stationary with the Ravager enhancement equipped on any weapon (it provides a passive damage bonus to environmental weapons). As well as using War’s Glory which is found in the Iron Canopy. Chaos Form is very useful in this fight as War’s Glory makes the Chaos gauge fill up faster and it is possible to do damage to Silitha at any time — there is no time she is invulnerable like other bosses.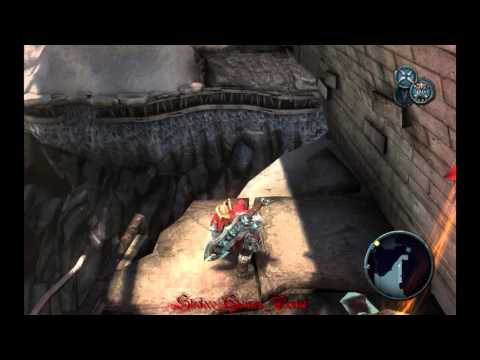
It is also recomended to use the scythe as secondary weapon, most preciselly the Death’s razor (hold right button while on air), as it deals massive, multiple damage in quick succession all around War, and due Silitha’s size and shape encopassing War up close, the Scythe will basically hit all around, dealing great damage.
To list her key actions/attacks:
- Teleport above you to land on top of you.
- Teleport away from you (other side of the room) and then become stationary for a short amount of time.
- Teleport onto a wall.
- A close combat crush attack if you get too near her.
Trivia/Notes[]
- The «Vilemaw» from League of Legends bares an uncanny resemblence to both Silitha and Achidna. Avery Coleman who designed the Vilemaw also did concept art for Darksiders II.
- Due to her leaving some of her captives alive for information, Silitha might be the most intelligent and wisest of the Chosen.
- Silitha, like Achidna, may have once been an inhabitant of the Shadow Realm, Ysilik, mentioned by the Chancellor in Darksiders 2, though this has not been confirmed.

Gallery[]
The Iron Canopy — Campaign — Walkthrough | Darksiders
The Ash Lands
Now that we have arrived in the Ash Lands once more, we can explore a little bit due to the presence of our buddy Ruin and his ability to cross the sand without being eaten by Ash Worms.
Subscribe to Premium to Remove Ads
After exiting the tunnel, first head to the East to find a small stone area housing a Blue Soul Chest . Return to the entrance area and make your way around the various pieces of walls, ruins and rocks to the north eastern section of the map.
Look out for a blue crystal beneath the walkways that led to the entrance to the arena. Blow this up and head inside for a chest with a Wrath Shard . From here look a little further to the south to see a raised platform with a shadow flight geyser in front of it, use this and climb the demon growth at the top to find an Artefact: Soldier.
Subscribe to Premium to Remove Ads
View Full-size
Explore the Ash Lands on horseback and destroy the blue crystals (left) for a Wrath Shard. Use the shadowflight geyser nearby to reach a platform with an Artefact (right).
that you should return here later once we have the Abyssal Chain (from the next dungeon) and use the grappling points near the end of this platform to access the top of the first building you found in the Ashlands. Here you will find the final piece of the Abyssal Armour Set.
Subscribe to Premium to Remove Ads
Now that we are finished looting, look at your map. We need to go to the rocky area that resembles the number “2” climb this and float across to the next area. At the end of the long rock platform here you will find the soul bridge . Jump on Ruin and enter the portal between the glowing pillars to activate the bridge to reach the other side of the chasm.
Follow the passage along here until you see a scene.
Subscribe to Premium to Remove Ads
View Full-size
Follow this rocky platform (left) to the end and use the Soul Bridge (right).
Iron Canopy
When you regain control, you will be in a completely different area and tied up in a spider web. Follow the on-screen button prompt to break out and drop to the floor.
Subscribe to Premium to Remove Ads
Exit the room here and follow the wall around to the left until you find a Blue Soul Chest . Cross the small bridge nearby and dispatch the Spiders on the opposite side. Press the use button on the spider web here to enter the next room.
Turn left and destroy the crystal, drag the block as far as possible towards the entrance to position it below the rope, then kill the smaller Spiders – just hit one and the rest will come running.
Subscribe to Premium to Remove Ads
View Full-size
Cross the web bridge (left) and enter the first door. Move the block in here below the rope (right).
Jump up on the block and if you try to cross the rope the Giant Spider in the middle of the room will object. Before you do decide to cross, toss your cross-blade at the chronosphere on the left of the room. Jump up onto the rope and use the dash button to cross the rope before the timer wears off.
Subscribe to Premium to Remove Ads
Drop down the hole at the end. Exit into the street here and follow it around the corner and up the hill. Cross the narrow bridge here.
After it collapses, continue south along the road, killing the Phantom Angels. Look for a destructible wooden wall along the left side of the area, and knock it down to find a chest behind it containing a Wrath Shard . Run to the end and use the web on the left to enter the next area.
Subscribe to Premium to Remove Ads
View Full-size
Hit the chronosphere and dash along the rope beneath the spider (left). After the next web bridge smash the wooden wall to the left for a Wrath Shard (right).
Look to the right for two horizontal girders sticking into the room, we need to jump from the second one down to the platform below with the blue crystal. Destroy the two egg sacs here (one next to the crystal and one hanging from a beam above the area) and kill any baby Spiders that emerge. Check out the nearby alcove for a Blue Soul Chest , then bust open the crystal to reveal a switch.
Subscribe to Premium to Remove Ads
Activate the switch to raise a chronosphere from below. Do a quick 180 degree turn and find the hand holds on a support column to climb back up to where we jumped down from. Straight ahead is a second support column with handholds on it, so scale that one too. Turn right and destroy all the Spiders and egg sacs in the area.
Move to where you can target the chronosphere with your cross-blade, hit it and then jump across to the dangling platform supported by a strand of web. Quickly run to the other side and jump off into the alcove to open the chest for the Dungeon Map .
Subscribe to Premium to Remove Ads
View Full-size
Destroy the blue crystal for a switch to activate a chronosphere (left). Manipulate the tilt on the hanging beams and the chronosphere (right) to access the chests on the far side of the room.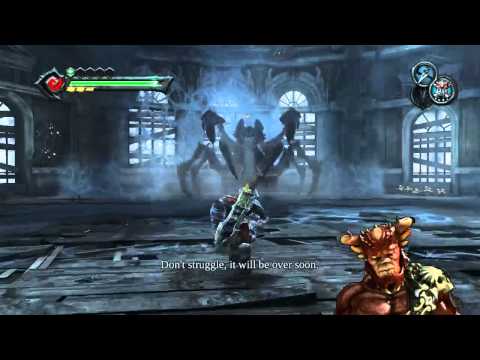
Return to where we threw the cross-blade at the chromosphere and again jump down to the beam suspended by the web and stand on the side closest to you. Wait until the opposite end rises sufficiently to reach the alcove above the chest that contained the map. At this point hit the chronosphere to slow down time, run up and jump into the alcove before the time lapses. Open the chest here for the Beholder’s Key . Backtrack to the entrance and exit the area.
Subscribe to Premium to Remove Ads
When outside, return to where the bridge collapsed and look to the wall on the left to see a demon growth, follow it round the corner to find the locked door that our Beholder’s Key fits. Enter the room here.
The majority of the room is made up of a strong spider web making up the floor, if you step on this a Giant Spider underneath the floor will come to track you down, so try not to stay in the one spot for long. To the right as you enter you should see a block.
Subscribe to Premium to Remove Ads
This is a great place to earn the ‘Devastator’ achievement/trophy for killing 10 enemies with a single attack. To do this easily, jump onto the block and throw cross-blades at each of the groups of small Spiders around the room to make them aggressive. When they all gather together around the base of the block, jump down next to them and use the Blade Geyser attack.
Devastator
Kill 10 enemies with one Blade Geyser wrath attack
10
Subscribe to Premium to Remove Ads
View Full-size
Gather the baby spiders at the base of the block (left) before using Blade Geyser for an achievement/trophy. Use the Demon Plant and the block to access the raised area with a Wrath Shard (right).
Move the block under the demonic plant and grab the edge as it is lifted up. Jump to the right side of the room for a chest containing a Wrath Shard .
Subscribe to Premium to Remove Ads
Return to the platform below and drop down the gap in the corner to reach a ledge just above the lower level. You will need to use the hand hold to make your way right so you can jump across to the other raised platform here. The problem is the Giant Spider is in your way. Climb back up to the top layer and hit the plant holding the block with your cross-blade. This will cause it to drop the stone block it is holding and the impact will knock the Giant Spider down to the ground. Quickly return down the hole and shimmy across the ledge before the Spider recovers.
Jump over to the platform and climb the stairs here till you exit into the street.
Subscribe to Premium to Remove Ads
Cruise onward until you see a quick scene introducing a new green variety of Demonic Soldiers, dispatch the lot of them that appear and any Spiders who get involved. Once the room is clear of hostiles, head up the steps at the back of the area.
At the highest point you can reach (the stairs are broken) look slightly to the right to see an artefact on top of a small building below. Double jump and glide over here to pick up Artefact: Soldier . Return to the ground and open the web nearby to move on.
Subscribe to Premium to Remove Ads
View Full-size
Climb the stairs at the end of the street (left) and float down to an Artefact (right).
In the next room, drop down the gap in front of you and drag the bomb carrying block onto the elevator to the left of the entrance. Use the demonic growth to exit the pit and return to the start to activate the switch. Move the bomb block off the lift and punch it across the gap. Move it onto the elevator here next to the demonic growth wall. If you haven’t already, use bombs from the block to destroy the bomb growths on the demonic growth wall and any Spiders still lurking around the area.
Subscribe to Premium to Remove Ads
Climb the wall, being careful to swing your sword when in range of the demon arms that pop out. At the top pull the switch to bring the block with the bombs up to you. Use the bomb on the red crystal nearby and use the spider web that is revealed to enter the next area.
View Full-size
Punch the bomb block across the gap (left). When it reaches the top, use the bomb to blow up the red crystals (right).
Subscribe to Premium to Remove Ads
Upon entry, the doors will seal and an iron giant will appear along with several green Demonic Soldiers when they are dead, a Fire Golem will jump down and attack you. Kill it and then look in the door to the left of the entrance for a Blue Soul Chest before heading through the main portal across the room.
Cruise through this next room, killing the Spiders if you wish before exiting the other side and climbing the demon growth to the left. Exit to the road.
Subscribe to Premium to Remove Ads
To your right you will see the locked boss door, we will be coming back here later! But for now, jump down to the left and grab the Green Soul Chest if you need a health boost and then make your way up the narrow web bridge. Open the door at the top.
As you enter you will be greeted by a locked door. As such move to your right and down the hallway. About halfway through it will collapse and dump you in a room filled with aggressive small Spiders, finish them off and exit to the main room. Go down the stairs and into the room on the left, destroy the Demonic Chest in here to unlock a new item — Abyssal Chain (like a hook shot from Zelda!).
Subscribe to Premium to Remove Ads
Reach Out And Touch Somebody
Collect the Abyssal Chain
10
View Full-size
Open the chest (left) for the Abyssal Chain. Use the chain to remove the large spider’s armour (right).
Subscribe to Premium to Remove Ads
Following a short scene, you will be attacked by the Giant Spider on the roof. Use the abyssal chain on the spider to remove its shell and then attack it like a normal enemy. When it is dead, you will see the seal to the boss chamber briefly giving you a clue as to how to open it — that’s right, we need to backtrack through the dungeon and kill the rest of the Giant Spiders!
On the north side of this room, on the right is a small room containing a Yellow Soul Chest , use this if required along with the Green Soul Chest in the previous room. Look up and use the blue grappling hook to swing up to the higher level. Use the demonic grow to climb up and jump up to the ledge above.
Subscribe to Premium to Remove Ads
Follow it around and jump down into the room below. You should see two Demonic Plants on the roof to the right of the room. Look to the wall opposite this to find demonic growth. Climb here and swing across the gap to find a chronosphere. Before touching it, look up and to the left to find a red grapple point, head up here and open the chest for the seventh piece of the Abyssal Armour Set [7/10].
View Full-size
Hit the chronosphere and glide past the demonic Plants (left) for the Beholder’s Key (right).
Subscribe to Premium to Remove Ads
Drop back down and activate the chronosphere, then swing across the gap and then cross the room into the alcove behind the Demon Plants before time speeds up again. Here you will find the Beholder’s Key and a Green Soul Chest that you can nab if required. Return to the main room and use the key on the door.
Turn left and jump and glide across the gap – use the abyssal chain towards the end to hit the grapple point. Drop down and open the Blue Soul Chest . Drop down the gap and retrace your steps back through the now unlocked door and through the spider web to exit the area.
Subscribe to Premium to Remove Ads
Use the grapple points to cross the chasm and enter the door next to the boss seal. Drop down the pit here and into the next room. As you enter the second Giant Spider will drop from the roof and attack you, this one is heavily defended by a seemingly unlimited number of small Spiders so you will need to lock him on in order to use the abyssal chain on him. If possible use chaos form once the Giant Spider’s shell is off to finish him and his pets off in a hurry.
View Full-size
Grapple across the gap (left) and re-enter the previous area to fight another giant spider (right).
Subscribe to Premium to Remove Ads
When he is down for the count, exit through the door.
Proceed through the small tunnel and destroy all the little Spiders in the next room and through the left door here you’ll find a Blue Soul Chest (if you didn’t collect it earlier). Look up above this and use the grapple point here to access a ledge containing Artefact: Champion . Drop down here and use the elevator to head back down to the lower floor, exit through the spider web on the opposite side of the gap.
Subscribe to Premium to Remove Ads
Upon exiting the room fend off the Spiders, then climb the metal staircase nearby. At the top, turn around to face the building and look up to find a grapple point, use this to access a platform with a Green Soul Chest , a Blue Soul Chest and Hoard Seeker (lets you see all the chests on your map).
View Full-size
The grapple point above this chest (left) leads to an Artefact. Outside, climb the stairs and grapple to the balcony (right) for the Horde Seeker Trinket.
Subscribe to Premium to Remove Ads
Return to the road and continue past the web we used to enter and turn left into the stairs a little further down the road.
Inside you will see the third Giant Spider on the roof. Hit it with your abyssal chain to bring it down to the floor. Remove its shell with the abyssal chain. As you do this a group of green Demonic Soldiers will appear to help the Spider out.
Subscribe to Premium to Remove Ads
Once defeated, head through the door down the bottom here for a shortcut back to the top of the room. Exit the door here. Use the red grapple points here to cross the gap and enter the webbed door to the right.
As you enter, defend yourself against all the aggressive baby Spiders before pulling the big boy down with the abyssal chain, he will fall through the floor into another room below. Drop down to join him. Kill him. Grab the Green Soul Chest nearby and head on into the large circular chamber next door.
Subscribe to Premium to Remove Ads
Boss: Giant Crystal Spider
This boss will stay in the centre of the circular room here and will rotate around to keep you in her line of sight. She has a few nasty moves:
| Attack/s | Description |
|---|---|
| Charge | After taking damage she will charge at you, dash to the side when you see her coming to avoid taking damage. |
| Ground Pound | The crystal spider will jump in the air and slam into the ground doing some nasty damage if you have your feet on the floor. To avoid copping a hit to your health bar, double jump as she lands. |
| Inhale | The boss will face in War’s direction and attempt to suck him into its moutn. |
Subscribe to Premium to Remove Ads
Combat Strategy:
During various points of the fight, the spider will rear back and appear to be sucking in the air in front of her. When she does this, you will need to target one of the cocooned bodies littering the roof of the room with your abyssal chain to grab it and then throw it at the spider. She will then be distracted for a few seconds.
Subscribe to Premium to Remove Ads
View Full-size
Double jump to avoid the spider’s ground pound attack (left). Attack the weak spot on its back (right) when it is distracted.
The first time this happens, run around behind her and use the tremor gauntlet to destroy the blue crystal on her back. This will reveal her weak spot. Now simply avoid all of her attacks and toss a body at her when she breaths in to have a few free whacks. When she has taken enough, use a finisher to end the fight.
Subscribe to Premium to Remove Ads
After the scene showing the beats demise, the final seal on the Silitha’s chamber will be removed, clearing the path to the final confrontation in this area.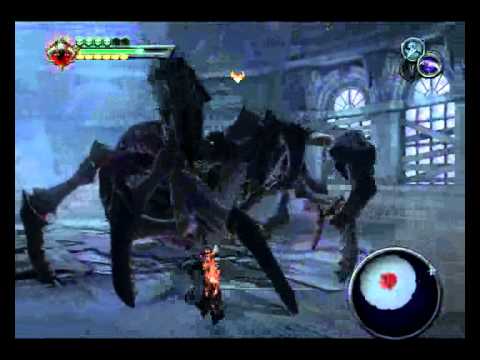
Exit through the door provided and drop down to the tunnel below, follow it up to the next room until you see a Shadowcaster appear and race off. Open the Green Soul Chest to the left if you are keen for a bit of vitality before following the monster up the tunnel.
Subscribe to Premium to Remove Ads
In the next room, we’ll need to do a bit of fighting. First you’ll need to kill the Shadowcaster, once he dies a squad of Demonic Soldiers with a Shadowcaster will show up and finally a pair of Greater Dragons. When everything is dead continue onward, vault up to the passage above.
View Full-size
When you reach the large pit (left). Use the first shadowflight geyser to reach a platform above (right) for a Legendary Enhancement.
Subscribe to Premium to Remove Ads
When you reach the cliff, use the shadow flight geyser to lift you up, but instead of moving forwards, instead hold back on your controls to pilot War to a secret area above the tunnel you were just in for a chest containing a Legendary Enhancement – War’s Glory (increases combat prowess).
From here double jump towards the cliff and chain the first grapple point, swing off to the next, then take a couple of swings to get enough height to double jump onto the shadow flight geyser. At the top of the geyser, grapple the next point and then just continue to grapple all the way across to the demon growth on the far wall. Drop down and continue up the tunnel into the next room.
Subscribe to Premium to Remove Ads
Here the doors will be sealed and you will have to fight 2 Iron Giants, some Phantom Guard Angels and a large number of baby Spiders. Once all of those are dealt with, a Fire Golem will drop in to pay you a visit. Defeat them all to continue.
View Full-size
Fight your way back outside (left) and then enter the now unlocked boss door (right).
Subscribe to Premium to Remove Ads
Exit the door and use the grapple points to head across the gap here, follow the ledge around and open the door to the boss’s lair.
Make your way down the left hand passageway and jump to the demon growth when able. Drop off the roof and grapple across the two points to the demonic growth on the far wall, climb to the top and open the Green Soul Chest for a quick health top up before heading through the nearby door to confront Silitha.
Subscribe to Premium to Remove Ads
Boss: Silitha
Similarly to the Crystal Spider mini-boss we fought earlier, Silitha will spend most of her time in the centre of the area, she does however have a few different moves to be aware of:
| Attack/s | Description |
|---|---|
| Teleport Charge | Silitha will teleport quickly around the room before appearing to charge you. If she hits you she can link it into a melee combo which will cause huge amounts of damage. Try to monitor her position in the room at all times to prevent being ambushed.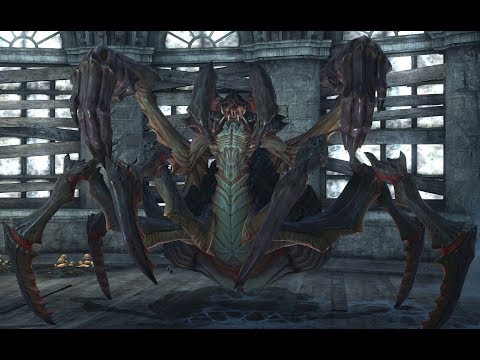 |
| Body Drop | After taking a bit of damage, she can leap into the air and drop on you, dash out of the way to avoid this. |
Subscribe to Premium to Remove Ads
Combat Strategy:
Silitha is a very easy boss and will spend the fight teleporting around the room and trying to catch you off guard with a charge or melee attack. Use your dash to keep out of her way. Monitor her position and when she stops moving for a second or two, hit her with the abyssal chain. You will be drawn to her, so perform an aerial combo attack.
Subscribe to Premium to Remove Ads
View Full-size
You’ll need to keep dashing to avoid Silitha’s charge and ground slam attacks (left). After she has taken enough damage grapple up to her at the top of the room (right).
Repeat the process until she collapses, at this point get physical with her and dish out as much damage as you can. When she recovers perform the same process. When she has taken enough damage, she will retreat to the roof. Several grapple points will appear around her. Use one of these to fly up to the roof of the room, then grapple onto Silitha herself to finish the fight.
Subscribe to Premium to Remove Ads
You will receive the final Heart of the Chosen for Samael and a Life Stone .
One Mean Mother
Defeat Silitha
40
Subscribe to Premium to Remove Ads
Activate the floating crystal nearby using the cross-blade, then switch to your abyssal chain and grapple the point on the bottom of it, you can ride the platform back up to the boss chamber. Jump into the hole in the ground and land on the next level down to find a Blue Soul Chest , head around to the opposite side of this area to find Artefact: Soldier hidden behind some rocks.
View Full-size
Use the lift (left) to return above the boss area. Look behind some rocks for an Artefact (right).
Subscribe to Premium to Remove Ads
Return to the bottom floor and exit through the door.
Grapple across the pit here and jump back on Ruin, ride all the way back to the Soul Bridge and ride back to the Ash Lands. Return to the nearest Vulgrim Location and use the Serpent Hole to travel to the Scalding Gallow.
Subscribe to Premium to Remove Ads
Return to Samael. After a quick scene, he will open a portal for you. Open it and make your way to the other side to reach The Black Throne.
Wrath of War, a description of the complete walkthrough of the game with all the secrets of
Darksiders: Wrath of War will be of interest to fans of open-world adventure games and captivating action. The story tells about one of the Horsemen of the Apocalypse, accused of breaking the balance, which led to the death of civilization. Many years later, having heard the Call, he is released. His name is War and he will try to get rid of the lies that covered his name.
General information on the game Darksiders: Wrath of War
A multi-platform game from the Vigil Games studio made in a bright fantasy and comic style. The graphics and gameplay are at the highest level, and the overall rating of Igromania is 8 out of 10. There is an option in Russian.
The hero, armed with a huge sword, will pave the way to the goal, fighting demons and other supernatural creatures. Solving riddles, flashbacks to the past will make the passage of the game Darksiders 1 unforgettable and exciting.
Passing levels
There are seven main bosses in the game, each player meets at the end of the level. Each new opponent is stronger than the previous one, so the difficulty of the battle is constantly increasing.
When playing Darksiders with the first boss, the hero will have to meet already at the beginning, during the Slaughter.
The Charred Council
At the Charred Council, War learns that he heard the Call prematurely, causing him to descend to earth too soon, thus provoking a war between demons and angels. The Council punishes the Horseman, sends him back to earth, putting a Shadow on him. Now the hero needs to correct his mistake. He takes the Chaos Eater blade and returns to earth.
Further along the story, he ends up at the Serafim Hotel. Here on the upper floors you have to fight zombies, and on the very last floor with a big monster. To defeat him, you must activate the Underground Blades. On the third floor there is a chest with a supply of vitality.
After the hotel at the Crossroads, War will meet with the demon Vulgrim. He has lived on his own ever since he renounced Chaos. The Demon instructs the Rider to collect 500 souls. Turning immediately reveals one of the chests.
Important! Not far from the hotel there is another chest that is visible on the map, but in reality it is not. To make it appear, you will have to disable 6 fire hydrants.
Next, you need to take the collected souls to the demon. In return, he gives the hero the Howler Horn and gives a new assignment — to find Samael. To use the horn, you need to install it in your inventory and run it. This improvement will greatly facilitate the passage in Darksiders.
Now the hero must go inside through the secret door hidden behind the golem. He goes to the Library. Two chests are available here at once — green and blue. After jumping down and swimming through the tunnel, the hero will find a piece from the stone of life and another green chest.
Tips on secret places and artifacts
During the passage of the Darksiders game, not all artifacts and boxes can be obtained at the beginning. They will be visible, but you won’t be able to interact with them yet. You will first need to get special devices and develop the necessary abilities. But there are some secrets in the game. So, while searching for 500 souls for Vulgrim, near the chest located in the northwestern side of the map, there is a ladder, going down which you can find one of the artifacts — the «soldier».
Meeting with Vulgrim
To make Darksiders: Wrath of War more interesting and encourage players to search for additional souls, in addition to those needed in the story, the developers have provided for the exchange of them for various equipment. Vulgrim can buy a Scythe for 1000 souls, thanks to which the player will be able to change the course of the battle in his favor.
Pay attention to everything, carefully study ceilings and walls. Look for passages that may be hidden behind fallen logs or under water. The cache can be hidden anywhere. In water, the Rider breathes the same way as on the surface.
Please note! Small crawling or flying demons can replenish health if crushed.
Passage of bosses
In Darksiders 1, almost at the beginning of the passage after training, during which the hero will fight with demons, angels and other monsters, he will hear a rumble. The war, despite the loss of half of the health and abilities, will continue on its way.
Demon General
After passing the hotel and collecting souls for Vulgrim, you need to return to the golem and enter the secret door. The Horseman will now go up the stairs. Again you have to fight zombies. The war will come out from the other side of the building and a new location will open up for players — Burning gallows. Here the Demon General is waiting for him, in whose captivity is Samael. It is not difficult to deal with him: you need to beat and dodge blows. You will also have to defeat the servants of the General. When the job is done, you need to go to the center of the gargoyle arena. Samael is free, he gives the Wings to the hero and gives a new assignment.
Important! After going to the cliff behind one of the gargoyles, you can use the Wings and go down under the arena to the ledge. Here in the chest is part of the armor.
This ends the first part of the game.
Tiamat
The entire second part is devoted to the search for and fight against the demon Tiamat. You will have to get to it through the Suffocating Lot, fly the Griffin and fight the Jailer.
Further passage of the plot «Darksiders» requires the extraction of the heart of Tiamat. To do this, you have to go to the Twilight Cathedral.
Battle with Tiamat
You can defeat the flying demon with a blinding bomb, after hooking the fire. It is necessary to beat the creature first on the head, and then with the sword until one blow remains. Now you can get the heart and go to Vulgrim to find out about the Serpent Paths.
Weeper
War gives Tiamat’s heart to Samael, is rewarded with the ability — Chaotic Form. A new task is to get the heart of the Weeper. Next, the player enters the location of the Flooded Path. The rider will reach the arena, where he will fight magical creatures to open the enchanted gate. In the voids, a battle with a new demon begins. In one of the corridors lies a glove that can break ice. With its help, you need to break all the ice and not fall under the laser beam. Here it is supposed to knock down the boss with an empty wagon. You need to repeat the action several times until the Weeper falls and cannot be finished off.
Another heart recovered.
Stygian
The player will meet this boss in the last part of «Darkseid», the passage of the plot involves crossing the Ashlands, teeming with terrible worms.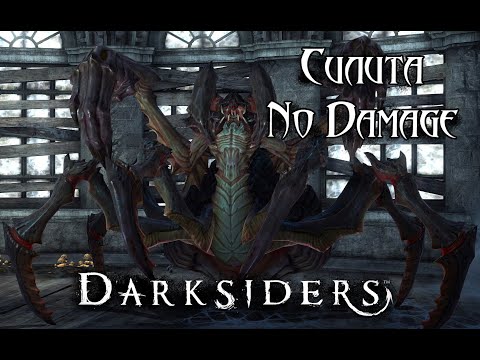 To fight them, Samael grants the Horseman the ability to control the ancient Chronospheres and the «Bridge of Souls».
Further into the Darksiders in the location of the Ashlands, the passage begins with the Drywind Road and the abyss, which the Rider jumps over using a new ability.
After going through the Desert, Dungeon and Arena, War will fight with the Sandworm, defeating which he will meet with the Stygian. First you need to knock off his helmet, and then, when the percentage of the enemy’s health decreases significantly, finish off, fighting off small guardian worms.
Sandworm
Silita
After retrieving the heart of the Stygian, War goes to Samael in the Burning Gallows to get a commission for Silita. On the way to the goal, he meets the Ice Spider. You can defeat him with a glove.
To fight this boss, it is advisable to use the chain to strike the enemy’s snout. In this case, you will have to constantly dodge bombs. It is better to kill Silita with his own bomb. We must act quickly.
The last heart is mined, now the passage in Darksiders is coming to an end.
After the hero gives up the last heart, he will receive the task to free the demon Azrael, which will bring him closer to the Black Throne.
Straga
The weak point of this boss is his back. The easiest way to defeat Straga is with the help of portals. They need to be placed on his weapon and on the floor. When an opponent raises his hand, War will jump into a portal that transports him onto the giant’s back. Here the hero attacks him.
After the destruction of Straga and the release of Azrael, a portal to Eden will open. There the Horseman goes further.
The Destroyer
First, the Destroyer, also known as Abaddon, will appear in the form of a dragon. He will attack with jerks, run in circles. Here you will often have to dodge and hit when the enemy approaches the edge. Then he will attack from the air. After falling down, the War will fight with the Destroyer, who has taken the form of an angel.