Uncharted 4: Chapter 12 At Sea — walkthrough
This page of the Uncharted 4 guide has a walkthrough for chapter 12 – At Sea (archipelago, pirates’ hideout, steering wheel and spheres puzzle).
Last update: Thursday, January 27, 2022
This page of the Uncharted 4: A Thief’s End guide has a walkthrough for chapter 12 — At Sea. You will learn, e.g. how to discover all treasures and secrets of the archipelago, how to follow the arrows, where to find the pirates’ hideout, and how to solve the steering wheel and spheres puzzle.
- Chapter 12 information
- Exploration of the archipelago
- Find traces of pirate presence
- Follow the arrows
- Find pirate hideout
- Explore the pirate hideout
- The puzzle with steering wheel and spheres (the second trial)
- Reach Avery’s statue
Chapter 12 information
The twelfth chapter takes place on an archipelago that you can explore without worrying about any enemies. At first, you are granted a lot of freedom when it comes to exploration and it is a good idea to seize this opportunity to obtain treasures and other collectibles. The rest of the chapter is linear and the path leads you to the pirate hideout. Towards the end of the mission on the archipelago, you additionally will be required to solve a puzzle. There are quite a few collectibles to obtain in this chapter — 13 treasures, 6 journal entries, two notes and two optional conversations.
Exploration of the archipelago
The archipelago is predominantly made up of two main isles marked in the above screenshot- 1 (the larger one) and 2 (the smaller one). The rest of the isles are not that important. The only exception is the islet where there is a ship wreck, to the left of isle 1 (to learn more, see the rest of the text). You are granted a wide freedom, as to whether you want to go to the pirate hideout straight away, or explore the archipelago thoroughly in the first place. If you opt for variant 1, see Find traces of pirate presence. Otherwise, remain in this part of the walkthrough.
Head towards Isle 1. Steer around the projecting fragment of the beach and head towards the main isle in a straight line. Your destination is the small beach fragment shown in the above screenshot. Leave your boat here and start exploration of this part of the isle. On the left, there is a grave whose examining provides you with the first journal entry. Go right then and take a look into a small cavity where there is the first note. Return to the boat and start walking around the isle in the clockwise direction. You will get out on a bigger beach. Just like earlier, walk onto the ground and take a look around. Here, you find the first Treasure (Combination Lock Tobacco Box), by a destroyed crate.
Now, turn your attention towards the islet mentioned above. It is to the left of isle 1 — it has been shown in the above screenshot. What you mainly find here is a ship wreck. Jump into the water near the sunken ship, thanks to which you obtain a trophy — Marco Polo Returns!. You can now explore the area. Near the crates on the beach, there is the second note. After you obtain it, come close to the wrecked ship and press Triangle button to obtain the second journal entry. Finally, jump into the water, swim closer to the ship and dive (pres Circle). Swim into the ship across the large hole. Thanks to this, you will find the second Treasure (Brass Pocketed Sundial).
Return to your boat and steer towards isle 2. You have to reach the grassland in the center of the isle, near the tower on the hill (you will explore it a bit later). After you get there, take a look around to find the skeleton shown in the above screenshot. After you examine it, you will get the third journal entry. Right by the rocks, there is the third Treasure (Silver and Wood Tankard).
After you find the treasure, go to the nearby beach because there is a larger cave there, which is where you find the fourth Treasure (Persian and Silver Pen Box). That is not it, yet. Use the boat to steer around isle 2 on the right side and keep an eye out for a very small beach fragment shown in the above screenshot, Explore that area to find the fifth Treasure (Panamanian Pendant).
There is just one more «loose» collectible to be found. Return to your boat and steer it towards the back of isle 1. Keep going within close distance of the isle and keep an eye out for the interactive ledges shown in the above screenshot. Stop the boat there and climb onto the roof to reach them. Climb up and you will get a ledge with the sixth Treasure (Persian Leather Notebook Case).
Find traces of pirate presence
You can try and find pirate hideout right at the beginning of this chapter, or you can wait until you have sufficiently explored the entire archipelago and collected some of the treasures. You have to reach isle 2, i.e. the smaller one on the right. Leave the boat and reach a big grassland. Take interest in the tower shown in the above screenshot. Your objective now is to reach it and to do this, take the stairs that Sam can help you find.
Use the grappling hook to reach the top of the tower
Follow the linear path, up to the tower. Enter and start climbing here to get to the top of the tower. Use ladders and jump towards ledges. Soon, you will have to jump across a window. Shimmy to the left over the ledge and use the grappling hook on the grappling point above. Pull up to reach the balcony above. Approach the arrow that you can see on the wall. Examine it to see a cutscene.
Follow the arrows
From now on, you will have to find big arrows that resemble compass needles and follow them. The first arrow is on the beach shown in the above screenshot. Before you reach there, you have to come down from the tower . To do this, use the zipline to come down. After you reach the arrow. Get on the board of your board and steer towards the shore of isle 1, where there is another arrow. You do not have to leave the boat. Instead, you can follow the arrow and take right turn at an angle of around 90 degrees.
Reach the islet surrounded by 4 boulders and after you check out the next arrow, go left a little. The next arrows are underwater, which is why you have to start moving slower in order not to miss them. The arrows lead to the cave shown in the above screenshot on isle 1.
Find pirate hideout
Climb in the cave
Find interactive ledges in the left part of the cave, stop the boat there, climb onto its roof and start climbing up the rock. Jump towards ledges above to get to the area where Nate can use the grapple. Take a swing on the rope, jump towards the ledges and move left to get to a stable one. Take several steps forward and note the ruins in the distance. Before you go there, examine the area on the right, because there is another Treasure (Deccani Bronze Spouted Bowl) there.
Climb over the snapped bridge
The main ruins entrance is covered with rubble, so you have to check the area on the left and, after you climb onto the ledge above, ask Sam to help you remove the planks covering the passage. Climb up and walk over the wooden beam. In the next area, approach the inaccessible ladder and press Triangle to give Sam a boost up. He will run over the bridge that collapses under his weight. As a result, you will have to split for the time being. Use the snapped bridge as a ladder and reach the ledge above. After you get there, jump over to the neighboring ledge and check out the dim area on the right, where there is another Treasure (Mughal Elephant Carving).
Climb onto the wooden ledge and jump towards planks projecting from the wall. Then, grab on to the neighboring ledge. Finish your climb towards the left ledge, thanks to which you will rejoin Sam. Follow him into the nearby viewpoint and wait for the icon signaling optional conversation appears above Sam’s head. After the conversation, find the grappling point at the tree, shown in the above screenshot, Use grappling hook on it and jump down into the chasm.
The next step is a bit problematic. You have to use the rope to reach the ledges shown in the above screenshot.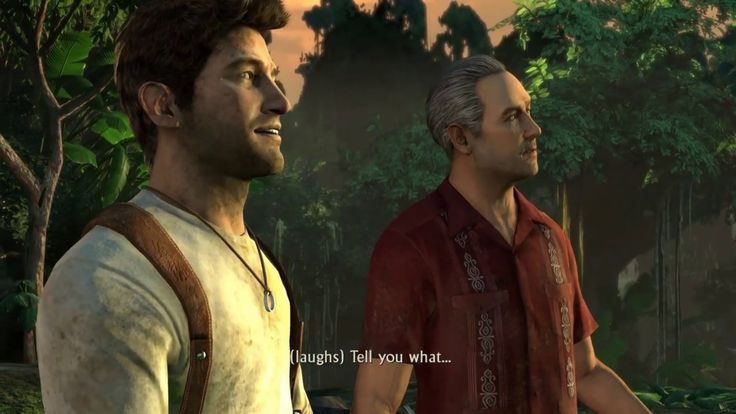 They project directly under the rocks that Sam is standing on. Use the interactive ledges to reach a new grappling point and, after you attach the grappling hook to it, swing towards the ledges in the distance. Once there, climb up and then lean back to jump towards the ledge behind Nate’s back. Again, use the grapple. Do not jump to any ledge, though. Instead, Start running along the side of the rock, left and right. You have to make Nate jump towards the ledges on the right.
You will have to take another climb. As a result, you will get near a small ruined tower. Start by entering inside and taking a look around in the ground-level room. Thanks to this, you will find a Treasure (Ottoman Helmet). You now have to climb up to the top of the tower, which is not too complicated — make it over to its upper floor, jump across the window and finish your climb. Stand on the wooden beam projecting from the tower and use the grappling hook on the nearby grappling point. IT IS IMPORTANT that you do not swing too hard because you have to land on the nearby ledge right in front of a steep escarpment. After you do this, turn left and make it over onto the small ledge shown in the above screenshot, where there is a Treasure (Deccani Bronze Vase).
Only after that, slide down the muddy surface. After that, do not go straight ahead and go left instead. Take the path between the rocks. Climb over the ledges on the left. Your aim is to get to the area shown in the above screenshot. You have to jump towards the ledge in the distance and press L1 in mid-air, thanks to which you use the grapple. If you have done everything properly, you will reach the location of a Treasure (Strange Relic). After you collect it, return to the area where you have ended up after the mud slide. Walk to the left a little and you will find the pirate hideout.
Explore the pirate hideout
Approach the ruins with the statues. Jump down onto the ledge on the right below, approach the edge and unlock the fourth journal entry after the icon appears. Note that you can use the grappling hook on the spear that one of the statues is holding. After you do that, turn left on the rope and head for the next spear. Jump towards it and use grappling hook again. Pull up and reach the small ledge shown in the above screenshot (you have to take a swing first), because there is a Treasure (Hamsa Mythical Goose) there. After you obtain that item, use the grappling hook again and lower yourself to reach the lower part in the ruins.
Examine the model and the rest of the items in the hideout.
Do not yet cross the passage with the large statue that you can see in the distance. Instead, examine side rooms in the ruins. In one of them, there is a model and examining it grants you the fifth journal entry. After examining the model, examine the rest of the objects also -examine the statuette on the table with the model, two sketches and three paintings on the walls (the ones with captions under them). After you have done all of that, go to the flooded corridor and swim over to the neighboring chamber. Examine the table there and wait until the option to have the second optional conversation with Sam appears.
Remain in the chamber where there optional conversation took place and go into the corridor that you have not yet explored. While following the corridor, make it over onto the small ledge on the right, where there is the last Treasure (Pique Tortoise Shell Box). After you have explored the ruing thoroughly, walk into the passage shown in the above screenshot. In the next chamber, stand on the pressure plate and walk around the locked gate. This way, you will enter a larger room with another legitimate puzzle in it.
The puzzle with steering wheel and spheres (the second trial)
There are three parts to this puzzle. The first two are very similar to each other and the third one introduces an impediment. The aim of the puzzle is to place three appropriate symbols on the spheres (there can be several different symbols on each of the spheres), in the spots where light falls on the wall. You do this by moving the spheres to the left and to the right (by leaning the analog stick) and by rotating them. It is possible to rotate the spheres only after the sphere in question is on the pressure plate similar to the one that has been shown in the above screenshot. Only then can you rotate the sphere by pressing the Square button, which lets you pick the required symbol.
Note — you should rotate the spheres in turns, i.e. make sure that at any given moment, there is only one sphere on a pressure plate, thanks to which only this one is rotated for the correct symbol.
While trying to complete the first part of the puzzle, focus on the bottom row only (the two above will be inactive). Find the black sphere and move it to the spot where you can rotate it. Manipulate it to make its left half only to be shaded. The symbol that you need on that sphere has been shown in the above screenshot. Then, focus on the second sphere and start rotating it (rotate that sphere only, sphere 1 must not rotate) and find the W symbol on it.
After you do this, move both spheres into the lighted spots (the above screenshot). Thanks to this, you will have completed the first part of the puzzle.
In the second part of the puzzle, you have to manipulate the spheres in the middle row. Check the position of the lighted points to make sure where you want the spheres with three and one lines. Rotate them in appropriate way and move them into the spots of light. The solution has been shown in the above screenshot.
The third part of the puzzle introduces a major impediment, because symbols change not only while the spheres are rotated using the Square button, but also when they are moved left or right. Therefore, try to follow this walkthrough while taking successive steps. Thanks to this, you will not lose too much time trying to figure out the solution.
1) Look at the symbol with the masculine symbol (arrow) and move it to the pressure plate 1 shown in the above screenshot, to the left of the spot of light with the feminine symbol (the cross). Rotate the sphere with the masculine symbol four times.
2) Focus on the feminine symbol now (the cross) and move it to pressure plate 2 shown in the above screenshot, to the right with the light spot with the feminine symbol (the cross). Rotate the feminine symbol sphere twice.
If you have taken all of the steps correctly, Sam should speak (otherwise, reload the last checkpoint and try again). The last thing to do now is place both of the spheres in the spots of light (the above screenshot). After you watch the short cutscene, pull the lever to return to the surface.
Reach Avery’s statue
You have to climb onto the back of Avery’s statue
Avery’s statue appeared on isle 2. Do not try to get there by jumping down into the water from the height. Instead, find the interactive statues and use them to reach the spot where you can zip down the line. After a while, you will return into the cave with the boat. Use it to reach isle 2 and go to the hill where Avery’s statue is. Press Triangle after the examination icon appears, because this will unlock the sixth journal entry. Reach the back of the statue. You have to climb onto it and look through the scope. After a while, you will watch cutscenes that end this chapter.
At Sea — Chapter 12 — Walkthrough | Uncharted 4: A Thief’s End
This chapter is heavy with optional stuff to explore at the start of the chapter, so let’s go over all the collectibles first.
Subscribe to Premium to Remove Ads
Head straight for the larger island, circling around a section of beach, until you reach the shore of the large island and then exit the boat. At the back of the area you can find a cave with a Journal Note and nearby is a grave that you can example for a Journal Entry .
View Full-size
Head for the beach on the south end of the island for some journal additions.
Head back to the boat and follow the coastline right, facing away from the beach, until you find a cove with another beach. Check the back of the area to find the Combination Lock Tobacco Box near the remains of a crate and then head back to the boat and sail straight out from the cove.
Subscribe to Premium to Remove Ads
There is a section of beach with a sunken ship nearby and near the supplies is another Journal Note that you can grab. Head toward the sunken ship and make sure to stop for a moment so Nate can add a Journal Entry and then dive into the water. The Brass Pocket Sundial is located in the hole at the bow of the ship, on the top floor.
View Full-size
Check the supplies on the beach for a note (left) and then search the hold of the sunken ship for a treasure (right).
Also while in the water you should take a moment to swim around and play Marco Polo with your brother before getting back on board.
Subscribe to Premium to Remove Ads
Play in the ocean near the sunken ship
Uncharted 4 — Marco Polo Returns! Trophy (Chapter 12)
Marco Polo Returns! (Bronze) — Play in the ocean near the sunken ship
At the beginning of Chapter 12, you will be in control of a boat. To the left of the big island ahead of you at the start, there will be a smaller island with a wrecked ship. You’ll know it’s the correct one when Sam makes a remark about it. There are two inlets of water on this smaller island, both of which will work for this trophy. Simply go into the water in either inlet and Nathan will shout «Marco!», with Sam replying and the trophy popping soon after that.
Check out the full guide: http://www.gamerguides.com/uncharted-4-a-thiefs-end/information
=-=-=-=-=-=-=-=-=-=-=-=-=-=-=-=-=-=-=-=-=-=-=-=-=-=-=-=-=-=-=-=-=-=-=-=
Official Site: https://www.gamerguides.com/
iTunes App: https://itunes.apple.com/us/app/gamer-guides/id599410871
Twitter: https://www.twitter.com/gamerguides
Facebook: https://www.facebook.com/gamerguides
=-=-=-=-=-=-=-=-=-=-=-=-=-=-=-=-=-=-=-=-=-=-=-=-=-=-=-=-=-=-=-=-=-=-=-=
Head back toward the large island and then follow the coast left until you reach the part of the island that juts out and creates two arches that you can sail under.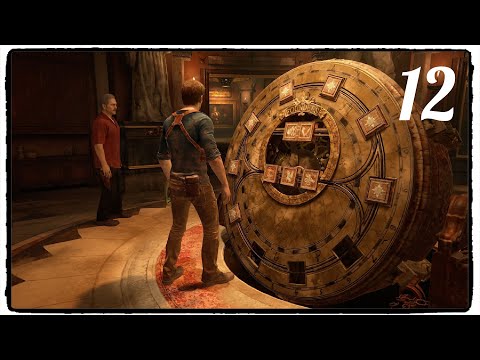 Just past this is a ledge on the side of the island that you can only reach by parking the boat right next to it and climbing on the hood, but at the top you’ll find the Persian Leather Notebook Case .
Subscribe to Premium to Remove Ads
View Full-size
This ledge (left) will lead to a well hidden treasure above (right).
On the north side of islands you can drive the boat near dolphins to get them to follow the boat. These are hard to spot, but if you manage to get three of them to follow the boat you’ll gain the Trophy: On Porpoise .
Get three dolphins to follow the boat
Subscribe to Premium to Remove Ads
Uncharted 4 — On Porpoise Trophy (Chapter 12)
On Porpoise (Bronze) — Get three dolphins to follow the boat
During Chapter 12, shortly after getting the Marco Polo Returns! trophy (it’s in the same area), there will be three dolphins that you can get to follow you in your boat. One will be close to the island with the wrecked, while the second will be in between that previously mentioned island and a set of three rocks on the one side of the big island (view video above for a location). You’ll know it’s the right spots when Sam makes a remark about the dolphins.
The annoying part about this trophy is that sometimes the dolphin doesn’t follow you, plus Sam and Nathan will have some banter about their adventures that will prevent Sam from commenting on the dolphins (such as in the video). Your best bet is to keep trying if you don’t succeed on your first attempt.
Check out the full guide: http://www.gamerguides.com/uncharted-4-a-thiefs-end/information
=-=-=-=-=-=-=-=-=-=-=-=-=-=-=-=-=-=-=-=-=-=-=-=-=-=-=-=-=-=-=-=-=-=-=-=
Official Site: https://www.gamerguides.com/
iTunes App: https://itunes.apple.com/us/app/gamer-guides/id599410871
Twitter: https://www.twitter.com/gamerguides
Facebook: https://www.facebook.com/gamerguides
=-=-=-=-=-=-=-=-=-=-=-=-=-=-=-=-=-=-=-=-=-=-=-=-=-=-=-=-=-=-=-=-=-=-=-=
With the main island explored, head to the north side of the other island to a very small section of beach that has the Panamanian Pendant and then continue around to a larger beach.
On the far left side of the beach is a cave with the Persian Silver Pen Box and further inland is a skeleton tied to a large pole. You can examine the gruesome scene for a Journal Entry and under the large rock nearby you’ll find the Silver and Wood Tankard . Time to make your way up to the tower!
Subscribe to Premium to Remove Ads
View Full-size
Check the far side of the smaller items for some treasure and a journal entry.
Head up the stairs and examine the vines to the right to discover a hidden chamber that you’ll learn more about later and then continue to the tower. Climbing the tower is pretty straight forward and at the top you’ll get a small scene.
You can now rappel down the side of the tower and head to the beach with the chevron, where Sam should meet you with the boat.
Subscribe to Premium to Remove Ads
Your destination is a cave on the side of the large island, near the ledge you climbed to reach a treasure. Inside, park the boat next to the pillar so that you can climb it and then swing across to the opposite wall. Follow the path to the riverbed and turn right to find the Deccani Bronze Spouted Bowl on the ground of the tunnel.
View Full-size
Find the cave beneath the mountain and climb the pillar inside (left). Now follow the path to a treasure on the right (right).
The front door of the temple is caved in, as per the norm, so use the ledges nearby to find a tunnel leading to a beam. On the other side, jump across the gap and shimmy right to climb up and then cross the tree trunk.
Subscribe to Premium to Remove Ads
Boost Sam up the ladder and when he breaks the bridge use it as a ladder to climb up instead of “hanging tight”. Turn left and jump across the gap, checking the dead end to the right for the Mughal Elephant Carving , and then climb the wooden supports to reach a platform.
From here you can jump to the beams sticking out of the wall, swing to the far wall, shimmy left, and drop down to meet up with Sam.
View Full-size
Grab the treasure in the side tunnel before you climb up and swing over to Sam.
Subscribe to Premium to Remove Ads
Walk to the edge of the cliff and speak with Sam for an Optional Conversation and then latch your grappling hook to the nearby tree. If you’re facing the tree you want to fall off the right side and then swing to the ledges on the pillar. Shimmy left and grapple another tree branch to swing to the rock formation and then climb the ledges up and back jump.
Grapple another branch and wall run right to some ledges and then climb up and head right to the base of a tower. Make sure to check the first floor of the tower for the Ottoman Helmet and then climb up to the top.
View Full-size
Wall run to reach the ledges that lead to a tower with the treasure at its base.
Subscribe to Premium to Remove Ads
When you grapple across the gap make sure that you swing short and land on the ground, instead of ending up in the mud slide. Doing this will allow you to shimmy along the ledge to the left to find the Deccani Bronze Vase .
You can now slide down the mud and turn left to find an area with yellow flowers. Walk to the edge of the cliff and climb the ledges on the left until you reach the top and then look for the water basin on the left. While it might seem like there is no way across, a leap of faith will reveal a grappling location that will allow you to swing across and pick up the Strange Relic from Jak and Daxter.
View Full-size
The Strange Relic is across a wide ravine and requires a leap of faith.
Subscribe to Premium to Remove Ads
Carefully make your way back to the mud slide and hop over the rocks on the left side, near one of the stone pillars, and at the bottom look across the cistern for a Journal Entry .
Grapple to the spear of one of the statues across the way and then again to a statue lower down, but don’t rappel down just yet. Instead, pull yourself up the rope and hop to the ledge with the statue to find the Hamsa Mythical Goose .
View Full-size
Take a moment at the top of the cistern to add a journal entry (left) and then collect the treasure at the base of the treasure (right).
Subscribe to Premium to Remove Ads
At the base of the cistern there are two doors and a large archway. Locate the supply room to examine the outdated tools and food and then head through the broken wall and swim through the water to find the Pinque Tortoise Shell Box .
Jump into the water nearby and swim left to find Avery’s planning room and make sure to check every item in the area to unlock a Journal Entry and Optional Conversation with Sam.
You can now head to the large archway and step on the floor mechanism, but like most things it’s broken and you’ll need to help Sam raise the gate.
Subscribe to Premium to Remove Ads
View Full-size
Examine everything in the planning room to trigger a conversation with Sam.
The next puzzle is a circular chamber with multiple orbs a tracks that rotates around the whole room. You’ll need to work your way up each track, matching the symbol on the stone orbs with the beams of light projected on the wall. To change the symbols on each orb it must be unlocked by placing it over one of the gears that looks like a star and then you can rotate it with Square.
The first tier is pretty easy, simply move each of the orbs over the position to unlock it and then rotate them so that one is half black and half white and the other is a W.
Subscribe to Premium to Remove Ads
On the second tier you’ll have to watch out for the fact that most of the unlocking mechanisms are exactly two apart, meaning you’ll turn both gears at once. Find the location where they are spaced apart enough that you can turn one without the other and turn the left orb with the mechanism on the left and the right orb with the mechanism on the right.
View Full-size
The first two tiers of the puzzle are pretty straight forward to solve.
On the final tier the symbols will roll as you move them along the track, so you need to rotate them to where they are going to be right when they reach their final locations and not on the unlocking mechanism.
Subscribe to Premium to Remove Ads
To do this, move the female (the cross with the circle) symbol onto the unlocking mechanism on the right and rotate it twice and then move the male one onto the unlocking mechanism to its right and rotate it four times. This will cause the symbols to align when you move the into their designated location and reveal an elevator.
View Full-size
Rotate the panels into these locations and then move them into the light.
Uncharted 4 — Rotating Lights Puzzle (Ch. 12)
In Chapter 12, you will come across a large room, with a wheel in the middle of it. This wheel has two functions, with the outer part letting you rotate the rings situated on the wall above the room, and the inner wheel making the stone spheres above you rotate. You will also see some lights with various symbols along the rings.
The goal of this puzzle is to rotate the spheres to match the symbols in the lights, then move them so they line up with them. The catch is that the spheres don’t rotate unless they are on certain spots, which are easily distinguishable because of the designs and the locks moving away from the sphere. This will work for the first two rings, but the spheres on the third ring will actually move as you rotate the ring. So, you’re going to need to think a little bit so that when you move the spheres onto the light, that the symbols on them will match.
Check out the full guide: http://www.gamerguides.com/uncharted-4-a-thiefs-end/information
=-=-=-=-=-=-=-=-=-=-=-=-=-=-=-=-=-=-=-=-=-=-=-=-=-=-=-=-=-=-=-=-=-=-=-=
Official Site: https://www.gamerguides.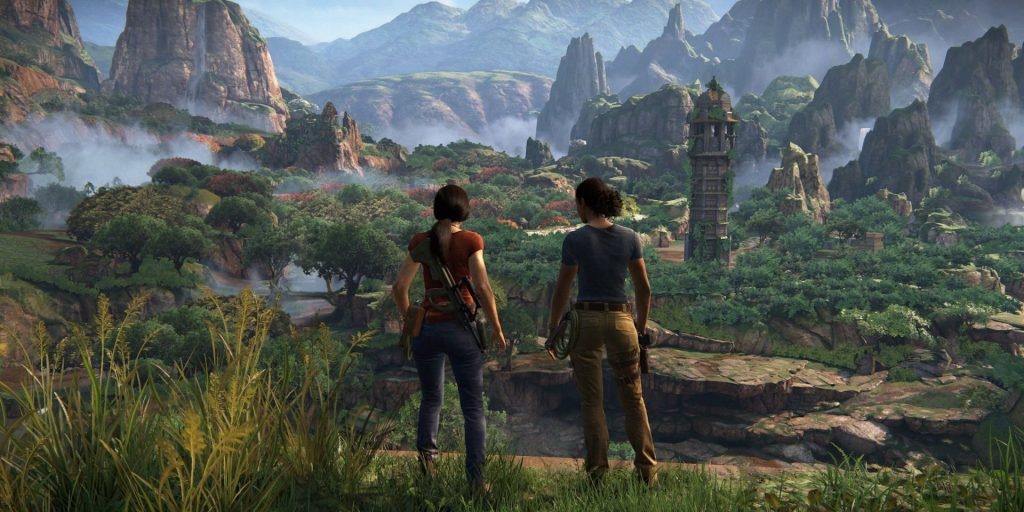 com/
com/
iTunes App: https://itunes.apple.com/us/app/gamer-guides/id599410871
Twitter: https://www.twitter.com/gamerguides
Facebook: https://www.facebook.com/gamerguides
=-=-=-=-=-=-=-=-=-=-=-=-=-=-=-=-=-=-=-=-=-=-=-=-=-=-=-=-=-=-=-=-=-=-=-=
Subscribe to Premium to Remove Ads
As you reach the top of the elevator the statue of Avery will rise from that door you examined on the island with the tower, but in order to get there you’ll need to return to the boat. Climb across the hand holds and jump to the ledge with the zipline and then turn left to find yourself back near the boat.
Sail over to the smaller island and make your way to Avery’s statue for a Journal Entry and then climb the back to see your new destination.
Uncharted 4 — All Collectibles (Ch. 12)
These are all of the collectibles (Treasures, Journal Entries, Journal Notes, Optional Conversations) that you can find in Chapter 12. There are no collectibles in the Prologue, Ch. 1, Ch. 4, Ch. 5 and Ch. 7.
0:05 — Journal Entry #9
1:14 — Journal Note #5
1:46 — Treasure #53 (Combination Lock Tobacco Box)
2:58 — Journal Entry #10
3:56 — Treasure #54 (Brass Pocket Sundial)
4:24 — Journal Note #6
5:28 — Journal Entry #11
6:14 — Treasure #55 (Silver and Wood Tankard)
6:29 — Treasure #56 (Persian Silver Pen Box)
6:59 — Treasure #57 (Panamanian Pendant)
8:08 — Treasure #58 (Persian Leather Notebook Case)
9:24 — Treasure #59 (Deccani Bronze Spouted Bowl)
9:55 — Treasure #60 (Mughal Elephant Carving)
10:28 — Optional Conversation #12
11:16 — Treasure #61 (Ottoman Helmet)
11:40 — Treasure #62 (Deccani Bronze Vase)
12:09 — Treasure #63 (Strange Relic)
12:52 — Journal Entry #12
13:19 — Treasure #64 (Hamsa Mythical Goose)
13:55 — Journal Entry #13
14:25 — Optional Conversation #13
16:29 — Treasure #65 (Pique Tortoise Shell Box)
17:03 — Journal Entry #14
Check out the full guide: http://www.gamerguides.com/uncharted-4-a-thiefs-end/information
=-=-=-=-=-=-=-=-=-=-=-=-=-=-=-=-=-=-=-=-=-=-=-=-=-=-=-=-=-=-=-=-=-=-=-=
Official Site: https://www. gamerguides.com/
iTunes App: https://itunes.apple.com/us/app/gamer-guides/id599410871
Twitter: https://www.twitter.com/gamerguides
Facebook: https://www.facebook.com/gamerguides
=-=-=-=-=-=-=-=-=-=-=-=-=-=-=-=-=-=-=-=-=-=-=-=-=-=-=-=-=-=-=-=-=-=-=-=
Subscribe to Premium to Remove Ads
Synonym for the word unknown
- Main
-
Linked words
- Synonym for unknown
- All synonyms for the word unknown
- 6 letters
- 9 letters
- 10 letters
- 11 letters
- 12 letters
- 13 letters
- 15 letters
- 18 letters
- 19 letters
- 33 letters
All synonyms for the word «unknown»
| # | Synonym | Number of letters | Synonym type |
|---|---|---|---|
| 1 | unknown | 12 letters | Word |
| 2 | not previously tested | 19 letters | Phrase |
| 3 | not experienced firsthand | 33 letters | Phrase |
| 4 | previously unexperienced | 18 letters | Phrase |
| 5 | unknown | 10 letters | Word |
| 6 | unknown | 9 letters | Word |
| 7 | unknown | 10 letters | Word |
| 8 | unknown | 11 letters | Word |
| 9 | untested | 15 letters | Word |
| 10 | untested | 12 letters | Word |
| 11 | unexplored | 15 letters | Word |
| 12 | unbeaten | 13 letters | Word |
| 13 | dark | 6 letters | Word |
| 14 | uncharted | 12 letters | Word |
Synonyms for the word «unexplored» — 6 letters.
| # | Synonym | Number of letters | Synonym type |
|---|---|---|---|
| 15 | dark | 6 letters | Word |
Synonyms for the word «unexplored» — 9 letters.
| # | Synonym | Number of letters | Synonym type |
|---|---|---|---|
| 16 | unknown | 9 letters | Word |
Synonyms for the word «unexplored» — 10 letters.
| # | Synonym | Number of letters | Synonym type |
|---|---|---|---|
| 17 | unknown | 10 letters | Word |
| 18 | unknown | 10 letters | Word |
Synonyms for the word «unexplored» — 11 letters.
| # | Synonym | Number of letters | Synonym type |
|---|---|---|---|
| 19 | unknown | 11 letters | Word |
Synonyms for the word «unexplored» — 12 letters.
| # | Synonym | Number of letters | Synonym type |
|---|---|---|---|
| 20 | unknown | 12 letters | Word |
| 21 | untested | 12 letters | Word |
| 22 | uncharted | 12 letters | Word |
Synonyms for the word «unexplored» — 13 letters.
| # | Synonym | Number of letters | Synonym type |
|---|---|---|---|
| 23 | unbeaten | 13 letters | Word |
Synonyms for the word «unexplored» — 15 letters.
| # | Synonym | Number of letters | Synonym type |
|---|---|---|---|
| 24 | untried | 15 letters | Word |
| 25 | unexplored | 15 letters | Word |
Synonyms for the word «unexplored» — 18 letters.
| # | Synonym | Number of letters | Synonym type |
|---|---|---|---|
| 26 | not previously experienced | 18 letters | Phrase |
Synonyms for the word «unexplored» — 19 letters.
| # | Synonym | Number of letters | Synonym type |
|---|---|---|---|
| 27 | not previously tested | 19 letters | Phrase |
Synonyms for the word «unexplored» — 33 letters.
| # | Synonym | Number of letters | Synonym type |
|---|---|---|---|
| 28 | not experienced firsthand | 33 letters | Phrase |
3
Synonyms for the word unknown — these are words close in meaning to the word unknown, which easily replace it in texts and in conversation. In total, synonyms were found for the word unknown — 29 pcs. They can include both words and phrases. Of the found synonyms, words — 22 pieces, and synonymous phrases — 6 pieces. Very often, especially when solving crossword puzzles, there is a question: «A synonym for the word unknown», therefore, our dictionary also presents the number of letters that make up one or another synonym. The smallest synonym for the word unknown consists of 6 letters, and the longest one consists of 33 letters. You can find the desired synonym word by the number of letters using the table above, and specifically the number of letters column.
About synonyms
Without the words of synonyms in texts of various nature, whether it be narration, reasoning, motivation, one cannot do in overcoming the unjustified repetition of the same word. Also, the use of synonymous words instead of unknown is used in the literature as a way to link adjacent sentences in the text. In the style of Russian literature, when a text is written, the repetition of the same words is identified as a tautology and is a gross lexical error. Thus, when presenting the text at the initial stage, one of the keywords of the synonym is used, and further along the text, synonyms that are suitable in meaning are already used, revealing and reinforcing the theme of the text for a broader presentation.
For example, the original word “unexplored”, further, depending on the necessary applicability, is replaced by the unknown, not experienced before, not experienced from one’s own experience, not experienced before, unknown, unknown, unfamiliar, unknown, untried, untested, unexplored, unbeaten , dark, unknown.
Do not forget that in terms of their qualities, synonyms can be applied using the prefix “not” to antonyms, words that are opposite in meaning. At the same time, the lexical meaning of the formed word of the antonym with the prefix is not also characterized as a synonym.
The word is characterized by a synonym and polysemantic words that form a complex phrase of words in their polysemy according to the lexical meaning of one of the words of the proposed synonym in the context.
In conclusion, I would like to emphasize what an important role synonyms play in people’s speech. The use of synonymous words and the ability to use additional resources in the form of dictionaries makes it possible not only to express one’s thoughts in the most accurate and diverse way, but also leads to the enrichment and saturation of our native Russian language.
Add a synonym for the word unknown
Add a synonym for the word:
Start typing a word, a drop-down list will appear here.
If you did not find a synonym in the list above, but you know it, then you can help us make our site better, enter a word in the appropriate field and click add, after moderation your synonym will be added.
Search for synonyms
Search for a synonym for a word:
Start typing a word, a drop-down list will appear here.
Popular words
Synonyms for authority
Synonyms for role
Synonyms for influence
Synonyms for power
Synonyms for breath
Synonyms for action
Synonyms for act
Synonyms for agitation
Synonyms for inspiration
Synonyms for authority
See all words
Return to list
Unexplored Karelia for schoolchildren: results of the summer stage of the competition :: Petrozavodsk State University the organizers of which are the teachers of the Department of Foreign Languages of the Humanities T.
M. Tatarina, O. V. Vikulina, O. M. Sherekhova and L. N. Yusupova.
Summer is the most beautiful time in Karelia! Thousands of tourists come to our region to admire the endless forests, numerous lakes and rivers and take a break from the daily bustle of big cities. Schoolchildren of Karelia, as a rule, dedicate their works to little-known corners of their small homeland, which are still hidden from the eyes of tourists. It is the beauty and grandeur of the Karelian nature with its bright colors and rich colors that are reflected in the videos of the summer season. Also, the history of our republic with its crafts and national cuisine is becoming more and more relevant. Viewers will be able to see all this in the new works of school students!
The following participants became the winners of the summer season of the “Unexplored Karelia” project:
In the nomination “Unexplored Karelia”:
1st place: Bogdanova Ekaterina and Kustolainen Vlada — students of 11 B class of the Municipal Educational Institution «University Lyceum» Petrozavodsk “Amazing place Matkachi beach” (video blog genre), teacher — Gavrilova Victoria Andreevna
In the nomination “ National cuisine of the peoples of Karelia”:
1st place: Akhmatova Maria, student of class 5 A of the Municipal Educational Institution «University Lyceum», Petrozavodsk with the video «Sulchiny is a forgotten past . .. / Sulchiny is a forgotten past …» (video blog genre), teacher — Mineeva Svetlana Yakovlevna.
2nd place: Vashchuk Ksenia, Polina Veronika, Borodina Anastasia, students of the 11th grade of the University Lyceum in Petrozavodsk with the video «Karelian cuisine / Cuisine of Karelia» (video blog genre), teacher — Mineeva Svetlana Yakovlevna.
In the nomination “Forgotten crafts”:
2nd place: Anna Kolynina, student of the 8b grade of the Municipal Educational Institution “University Lyceum”, Petrozavodsk with the video “Endless opportunities of creativity / Endless opportunities for creativity” (social video opportunities for creativity) ), teacher Mineeva Svetlana Yakovlevna.
The organizers of the project thank all the participants and their leaders for the wonderful videos and wish them further creative success!
We also remind students of the city and the republic that the project operates all year round, the autumn period of the project is already open, in which you can take part from September 1 to November 30, 2022. This year two more nominations appeared: “Karelia as a tourist destination” and “Peoples of Karelia” within the framework of the Year of Cultural Heritage of the Peoples of Russia.
#SPROMNIVERTET, #PR1_ Education, #spr4_finoralsky world, #PR, #block1_ Education, #block6_ Regional environment
News
Read the new issue of the newspaper «Petrozavodsk University»
Rector of PetrSU A.V. Voronin congratulates readers on the People’s Day
Nov 03 16:22
Educational and methodological support of educational programs
November 2 at the Faculty of Advanced Training and Professional …
November 03 15:39
The ethno camp continues its work
On the second day of the ethno camp «Meeting of the young on the Karelian land» .
