XCOM 2: War of the Chosen guide and tips you need to know before starting the huge expansion
XCOM 2: War of the Chosen represents a significant expansion to the base XCOM 2 game, adding a number of new mechanics and systems, soldier classes, enemies, game play decisions, and much more.
All of this is woven throughout the XCOM 2 campaign and, as Chris Bratt concluded in his review, it all points to the fact that Firaxis really knows how to handle an expansion.
With so much new content on offer, from formidable new antagonists and powerful heroes to meaningful mission variables and a bondmate relationship system, here’s what you need to know in order to successfully take the fight to Advent and its alien overlords once more.
Welcome back, Commander.
XCOM 2 Tips: Top 5 Tips to Dominate Mission Combat (How to Guide for Tactics)
XCOM 2 War of the Chosen guides
The headline additions of the expansion see you face off against powerful new enemies and recruit new unit types as part of playing a new campaign of XCOM 2.
New friendly factions, new units and rooms:
- XCOM 2 Reaper faction abilities, skill tree, Elena Dragunova and how to recruit
- XCOM 2 Skirmisher faction abilities, skill tree, Pratel Mox and how to recruit
- XCOM 2 Templar faction abilities, skill tree and how to recruit
- XCOM 2 Resistance Ring, Infirmary and Training Centre explained
New enemy units:
- XCOM 2 The Chosen — How to beat the Assassin, Warlock and Hunter
- XCOM 2 — The Lost, Spectre, Advent Purifier, Priest strategies and autopsy results
- XCOM 2 Avenger Defence mission: How to survive
New systems:
- XCOM 2 Ability Points explained — How to reliably earn AP
- XCOM 2 Fatigue system — How to deal with tired soldiers
- XCOM 2 Bonds explained — How to increase Cohesion and level up
- XCOM 2 Challenge Mode — How to storm the leaderboards
Also, if you are new to XCOM 2 in general — or need a refresher — our XCOM 2 guide can clue you in on the base game, including details on how to choose the best soldier abilities, build the best base, unlock Hero characters, and when you’re up to the task, take on Ironman mode.
What’s new in XCOM 2 War of the Chosen?
As well as the above, there are many new features that change the way you fight on the battlefield, approach missions and handle your troops.
Target preview
For all of its flashy new aliens, tech, systems and scenarios, this is one quality of life improvement that new and existing XCOM commanders will benefit from the most.
Selecting a soldier out in the field, putting the cursor anywhere within their movement range and holding Left-Alt on your PC keyboard will inform you of what known enemy threats you’ll be able to see once you move there.
No more whiffed flanking manoeuvres or line-of-sight-fails as you try to eliminate that final Sectoid before it mind controls your final soldier on the final turn of a timed mission. Forewarned is forearmed and getting a heads-up on what you’ll see from a new position before you’ve moved there is huge.
There are some limitations, such as static objectives like workstations and terminals not being shown by the target preview. Nor will previously unrevealed enemy groups show up before you move, but the benefits of this one small addition are nonetheless great indeed.
SITREPs
Throughout your XCOM 2 campaign you’re now going to see Situation Reports for many of your missions. These SITREPs are variables that impact your experience on the ground and can affect things for better or for worse.
For example, it may be that intel points to local resistance fighters in the area who can be contacted to provide support, or a higher concentration of robotic enemies than might usually be found.
Some are straightforward, such as the one-off ability to manually enter concealment during the mission, or the presence of the new enemy type The Lost, in addition to regular enemies. Others, though, are more challenging, such as the situation that leads to your higher-ranking soldiers being blacklisted by ADVENT and requiring use of a squad of Sergeant-level or lower troops.
Most of the time, the SITREPs provide an additional factor to consider whilst prepping the mission, perhaps forcing a slightly different approach or pushing you outside of your comfort zone. They are randomly generated and while there’s little you can do to pre-empt them, your best course of action is to pay close attention to the pre-mission briefing and select soldiers based on the info you’re provided.
In the case of savage enemy mutons, take powerful ranged units; where there’s a positive SITREP consider taking a lesser used soldier to give them some valuable experience, and in the case of The Lost be sure to check out our guide page on new enemies and how to fight them.
Tech breakthroughs and research inspiration
Dr Tygan and his science crew are a hardworking bunch, and so it’s good to see that he — and you — will be rewarded for diligent research. Random tech breakthroughs and scientific inspiration can occur at the end of any given research project, making it beneficial to pursue specific future projects right away.
For breakthroughs, this might mean the chance to research a new project that could increase the damage of current weapons, or make the construction of certain facilities cheaper. Inspiration, on the other hand, will speed along the progress of one of your outstanding research projects, saving you valuable time.
The catch is that such breakthroughs and inspired projects must be pursued immediately to take advantage of the science crews discoveries. Choosing to research something other than the breakthrough or the inspired project will result in that bonus or expedited research opportunity being lost.
Still, not every boosted project is going to suit your current progress plan and so the trick is to weigh the benefits of each randomly generated Eureka moment with your overall goals. Most of the time it’s worth taking the time out to pursue the new project, and this is especially true of the breakthroughs more so than the inspiration opportunities. Take a moment to reflect before you set Dr Tygan to work once more.
XCOM 2: War of the Chosen tips
With a bunch of new systems and mechanics to get your head around, soldiers and aliens to manage, and objectives and priorities to pursue, XCOM 2: War of the Chosen can seem overwhelming at times.
Stay calm, commander, and digest these need to know tips before you take the battle to the to the Chosen for the first time, or to the Elders (again).
- You don’t need to try all the new stuff as soon as it’s available: Attempting every new mission type, taking on every new enemy, and building every new room as soon as you can is tempting but unnecessary. Keep a cool head, follow your existing XCOM knowledge and check out the best options for building rooms, creating bonds, earning Ability Points and battling the Chosen.
- Recruit the new factions as early as possible: That said, contact with the Reapers will happen naturally and quickly. Recruiting the Skirmishers and, later, the Templars requires more effort and building the Resistance Ring. You should make that an early priority.
- The Lost will target enemy troops as well as your own: When undertaking a mission that features only The Lost, you should avoid use of explosives and take The Lost out quickly and efficiently.
 However, on missions where both regular enemies and The Lost appear you can use them to your advantage. The Lost will typically target the closest body, be it your soldiers, ADVENT troops or exotic alien enemies.
Canny positioning, and use of explosives to actually attract more Lost, can help keep your more powerful enemies occupied while you thin their numbers. What’s more, The Lost always take their turn after the Alien Activity phase, and so have a good chance to trigger Overwatch shots that they aliens have set-up.
- Don’t use the Templar’s Rend melee ability on ADVENT Purifiers, Mutons or Berserkers: The latter are immune to melee attacks and have a chance to counter-attack, while Purifiers might explode when killed. As such, you shouldn’t send the Templar (or Ranger for that matter) to melee attack a Purifier. You should also be careful about shooting a Purifier if you have allied troops nearby.
- Rotate your soldiers to avoid tiredness: Even if they’re not getting injured, soldiers will eventually get tired, and so an reliance on the same core group of soldiers will see them taken out of action in one way or another.
 Our own fatigue page explains this in better detail.
 -
Hunt down the Chosen: When they gatecrash regular missions, you can take out a Chosen to earn a handful of valuable AP. Longer term, you’re going to want to work with the new resistance factions — Reapers, Skirmishers, and Templars — to track down each of the three members of the Chosen, locate their base and take them out for good.
Failure to do so will result in them being a persistent thorn in your side, potentially ending your game with an assault on the Avenger, and showing up in your final mission to make your life much harder. Our Chosen Assassin, Warlock and Hunter page explains how to avoid this in closer detail.
Phoenix Point guide — 20 tips for new players and XCOM veterans alike
Phoenix Point has arrived at last! From Julian Gollop, creator of the original X-COM, comes a new turn-based tactics game which tasks players with reviving the defunct Phoenix Project to save humanity after the emergence of a deadly alien virus that mutates human and animal alike to wipe out all of humankind.
Gripping stuff, and also very challenging — which should come as no surprise to veterans of the XCOM series. But never fear! I’ve been playing the game for a grand old while now, and I’ve put together the below Phoenix Point guide, filled with my 20 top tips covering every aspect of this ambitious strategy title, from combat to diplomacy and much, much more!
To see this content please enable targeting cookies.
Phoenix Point guide contents:
- Phoenix Point guide — 20 tips and tricks
- Phoenix Point Combat tips (1-5)
- Phoenix Point Geoscape tips (6-10)
- Phoenix Point Diplomacy tips (11-15)
- Phoenix Point strategy tips (16-20)
- Phoenix Point guide series links
Phoenix Point guide — 20 tips and tricks
Phoenix Point is a tough old game that takes a great many cues from its spiritual predecessor, X-Com (and, by extension, the revived XCOM series of recent years), but then goes several steps further in a great many ways. If you’re a veteran of XCOM, you’ll find many familiar touchstones but also a surprising number of innovations which may sweep the rug out from under your feet at first.
The below tips are designed to prepare new Phoenix Point players for these central tenets of the game. I’ve split the tips into groups of five, each of which covers a different major aspect of Phoenix Point: combat, the Geoscape, diplomacy, and general strategy. So let’s get started!
Phoenix Point tips for Combat
Combat is, predictably, an enormously important part of Phoenix Point, and there’s a lot of complexity and layering of systems going on with every single encounter. But stick to the below five tips, and you won’t go too far wrong.
1) Vehicles are extremely powerful and versatile resources
- I’d urge you to build a Scarab vehicle as quickly as possible once you have access to the Geoscape, because although it takes up a lot of space in your aircraft, it more than makes up for it with powerful long-range weaponry and far more durability than any soldier.
 The other fantastic thing about vehicles such as the Scarab is that you can order your soldiers to enter the vehicle, protecting them from harm. Be sure to check out our Phoenix Point vehicles & aircraft guide for more info!
2) Use the high ground!
- If you’ve played the tutorial missions of Phoenix Point, you’ll know that you can use the mouse wheel to scroll between different floor levels — and it’s very important to do so, because high ground is extremely important. Whenever I start a mission, I always look for the nearest highest ground, and send my soldier with the highest perception up to the top in order to spot enemies as quickly as possible. Information on enemy whereabouts is what decides the outcome of a battle, and high ground is your greatest ally in this regard.
3) Understand how damage and injuries work
- Each unit has an overall health value, but they’re also made up of different body parts, each of which have their own independent health value.
 You can view the status of a unit’s body parts in the human(oid) icon next to them; orange means a body part is damaged, while red means a body part is disabled. The thing to know is this: using a medkit in battle will recover overall hitpoints, but won’t do anything about damaged or disabled body parts. And on the flipside of this, the moment you finish a mission, all body parts of all your units will be instantly healed, but your overall hitpoints will be unchanged unless you rest at a base with a Medical Bay.
4) Even a regular enemy can ruin your day if underestimated
- The lowliest, most meagre Triton or Arthron, if left to their own devices, can often kill one of your soldiers outright. And soldiers are an extremely valuable resource in Phoenix Point, so you’ll need to exercise caution even with the weakest of enemies. Treat all regular units in Phoenix Point, both friendly and enemy, as a glass cannon. Not too difficult to kill, but more than capable of killing others.

5) Learn the intricacies of free-aiming and the overwatch system
- If your unit has enough action points, you can set them to overwatch in a cone in front of them, and during the enemy turn they’ll automatically fire at the first enemy they see passing through that cone. You can hold CTRL and use the mouse wheel to adjust the width of this cone, and there’s nothing stopping you from widening the cone to 180 degrees and overwatching half the map with a single unit — though of course, this may mean you end up firing at the wrong enemy if there is more than one of them about.
- While aiming a shot in Phoenix Point, two circles will appear, one inside the other. 100% of your shots are guaranteed to fall inside the outer circle, while 50% of your shots can be expected to fall inside the inner circle. You can use free-aim to target exactly where you want to target, to maximise your chances of hitting an enemy, or to pinpoint a specific body part that you want to disable.
 Read all about the intricacies of this system in our Phoenix Point Free Aim & Part Damage guide.
Phoenix Point tips for the Geoscape
The next handful of tips concerns the Geoscape, which is the global view you’re presented with between tactical missions. This is where the bulk of the work gets done in Phoenix Point, and it’s important to know what’s what.
6) Control the pace of the game how you want
- Use the tools on the right side of your screen to adjust game speed how you want — or to pause the game so you have a chance to think. At default speed, one hour passes every second. At the slowest speed, 5 minutes pass every second. At the highest speed, 5 hours pass every second.
7) Use Trade and Missions to balance your resources
- On my first campaign, I found that my main bottleneck was Materials (the orange resource at the top of your screen). It became clear that it’s very important to balance your three main resources (Tech, Materials, and Food) if you want to continue expanding and building the strength of the Phoenix Project.
 Missions and events will give you various resources to help you with this, but after researching the Haven Trade Protocols technology you’ll also be able to trade resources with different faction havens, which can really help to reduce bottlenecks.
8) Medical Bays and Training Facilities are absolutely essential
- I always build at least one Medical Bay and one Training Facility in each of my Phoenix Bases. It’s so important to have a nearby base that you can return your units to in order for them to heal up and get back into the fight all the sooner. And Training Facilities ensure that even if a unit is just sitting idly in one of your bases, they’ll be earning experience and levelling up — making them enormously more useful when the time comes to use them in battle. Check out our Phoenix Point bases guide for more tips and tricks on base management.
9) Be efficient with your Area Scans
- Area Scans are how you explore your surroundings and find new points of interest across the Geoscape.
 You can only have as many Area Scans running at once as you have Satellite Uplinks in your bases. Each scan radiates outwards slowly from its starting point — you can see every patch of land you’ve scanned by clicking on the radar icon at the bottom of your screen. Try to be as efficient as possible with your area scans — always have at least one scan running, and try to make sure the scans overlap as little as possible.
10) Always be doing something
- This is true of many strategy games, and it’s certainly true of Phoenix Point: try to always be doing something. Always be researching something, always be manufacturing something, always be building something in your bases. If you don’t have the resources, then make more of an effort to explore new points of interest to gather resources and trade with havens so that you build up a good enough economy to sustain your «always be doing something» rule. This is the golden rule of the Geoscape in Phoenix Point.

Phoenix Point tips for Diplomacy
Your relations and interactions with the three primary factions and many independent Havens of Phoenix Point can have a marked impact on your ability to combat the Pandoravirus threat. So much so that we’ve dedicated a whole Phoenix Point Factions & Diplomacy guide to talking about it in detail — but for now, have a read of the below five tips regarding diplomacy in Phoenix Point.
11) Learn the unique features of each faction and what they can offer you
- It’s not only in ideologies and policies that the three primary factions of humanity differ. Each one also has many unique technologies and assets to offer the Phoenix Project, from unique weapons and vehicles and aircraft to entirely new specialist soldier classes that you won’t be able to find anywhere else. New Jericho, Synedrion, and the Disciples of Anu all have something different to offer you. The best place to learn about all this is our guide, so give that above link a click!
12) It’s okay to be a dick to factions
- Diplomacy doesn’t always mean diplomacy.
 At many of the faction havens you come across, you’ll have the opportunity to send a squad on a Raid mission in order to steal something from that haven and that faction. This could be a certain technology, or resources such as materials and food — or even an aircraft. These raids are often very challenging as the havens can be well-guarded — but succeed, and the rewards can be well worth it — particularly if you get a whole aircraft out of it!
13) Allying yourself with a single faction can be worth the effort
- You can view your relations with the factions (and their relations with each other) from the Diplomacy tab of the Geoscape. At various positive thresholds (25, 50, 75) your relationship with a faction will reach the next phase, and each phase brings new benefits, from revealing every one of that faction’s havens to revealing new unique technologies to research.
14) You won’t be able to respond to every call for help
- As time goes on, the Pandoravirus will spread, things will become more dangerous for everyone, and the mid-game will begin.
 One important thing to realise about the mid-game: you’re almost certainly not going to be able to respond to every single plea for aid from every faction — or even from one faction. There’s just too much to do, and that’s just the way it is. So don’t be stressed out by that call for help at that haven which is whole continents away from your nearest response team. It’s just the way of things, don’t sweat it.
15) War is inevitable
- You may think that a humanity-ending alien plague would be a great impetus for humanity to unite and face the threat of extinction together — but in Phoenix Point (quite realistically, I’d say), things aren’t that simple. Factions will almost certainly declare war on one another over the course of your campaign, and you can play as large or as little a part as you’d like in these wars. Just don’t forget that the Pandorans are the ultimate enemy here.
Phoenix Point general tips and strategies
Finally, let’s finish with my top tips in terms of general strategies to adopt and maintain throughout the Phoenix Point campaign.
16) Get your first vehicle and second aircraft up and running ASAP
- As I’ve mentioned earlier, vehicles are extremely important and powerful tools, and you’ll want to get your first vehicle up almost as soon as possible so you can start to deal with the more challenging missions. The other priority is to either manufacture or steal a new aircraft as quickly as you can, because this will double your agency in the world — you’ll be able to do twice as much as before, respond to threats sooner, complete more missions in a shorter space of time.
17) You’re in a race against time — don’t neglect the main story missions!
- I’ve found it’s important not to lose track of the main story missions in Phoenix Point. If you’re too intent on performing scans on every inch of the globe and exploring every single point of interest, then you may find that you’re too far behind the curve by the time you go back to the main missions, and the Pandorans have become too powerful.
 Always keep in mind your primary objectives and work towards fulfilling them in a timely manner.
18) Multi-classing your soldiers makes them much more versatile
- At level 4, you’ll have the option to multi-class a soldier, which will give them access to weapon proficiencies and abilities they otherwise wouldn’t have. Each class has certain staple abilities (Dash and Return Fire for Assault, Extreme Focus and Quick Aim for Snipers, etc), and combining them can lead to some extremely powerful and versatile units.
- I’ll also use this moment to say: don’t underestimate pistols. Multi-classing just to give your unit proficiency with pistols is extremely useful, because you’ll be able to equip a second weapon the only requires one hand (in case one of your arms is disabled) — and what’s more, single-shot weapons such as pistols are ideal against those bastard Mindfraggers that cling to your soldiers’ heads and take control of them until they’re destroyed.

19) Explore as much as possible and prioritise finding other Phoenix bases
- As I’ve mentioned, using Area Scans efficiently and explore as much as you can while you work towards fulfilling your primary story objectives, because you’ll be rewarded with new resources, new havens, new allies, and much more. Most importantly, you may find new Phoenix Bases which you can bring back online, dramatically extending the reach and power of the Phoenix Project.
20) Don’t neglect research, or you’ll find yourself too far behind the curve
- Going back to the «always be doing something» rule: try to always be researching something. If you reach a situation where you’ve got nothing to research, or all of the technologies on offer are locked until you fulfil certain criteria (such as capturing live Pandorans — see our guide on How to capture enemies in Phoenix Point for more details!), then you’re in a bad spot.
 If you don’t stay on top of research and don’t take advantage of what the factions can offer you, then you’ll find yourself unable to do anything against the Pandorans’ mightiest warriors.
Phoenix Point guide series
Hopefully the above 20 tips give you a strong enough foundation to get started on the long road of rescuing humanity — but that’s not all we’ve got on Phoenix Point, not by any means! We’re hard at work creating an entire series of top-tier guides on every aspect of this new turn-based tactics game, so be sure to check out the links below for more tips and strategies to get you started!
- Phoenix Point guide & top tips — Read our 20 top tips for new players and XCOM veterans alike when starting their journey in Phoenix Point!
- Phoenix Point Classes — All soldier classes and skills explained (including faction specialists), as well as the best options for multi-classing troops!
- Phoenix Point Vehicles & Aircraft — Every faction’s vehicles and aircraft explained, with full stats and our opinions on the very best vehicles to use!
- Phoenix Point enemies — Learn how to deal with Sirens, Chirons, Terror Sentinels, Scyllas, and Mindfraggers with our in-depth enemies guide!
- Phoenix Point Factions & Diplomacy — Learn about the three main factions of Phoenix Point, along with independent havens, diplomacy options, and much more!
- How to capture enemies in Phoenix Point — This quick guide will walk you through the tricky process of capturing live Pandorans for research purposes!
- How to recruit new soldiers in Phoenix Point — Here we’ll talk about how to recruit more soldiers, find elite specialists, and expand your army!
- Phoenix Point Base Management — Learn which buildings are the most useful to construct in your Phoenix bases, and how to give your bases the best chance of success!
- Phoenix Point Free Aim & Part Damage — Brush up on the intricacies of Phoenix Point’s unique Free Aim and Body Part Damage systems!
- Phoenix Point DLC Roadmap — Learn about the first three major planned DLCs for Phoenix Point: Blood and Titanium, Legacy of the Ancients, and Festering Skies!
Steam Community::XCOM: Enemy Unknown
Gravity in MISS on rowing near France
by Two Colors
DIFFERENCE:
Restart the game and turn ON SUBTITLES in settings, then start the save. Gra maє pratsyuvati correctly ….
Installing the Long War mod (Long War)
by GETTY
In this video guide you will find comprehensive information on how to install the Long War mod.
https://www.youtube.com/watch?v=m_0WWkRi1Ws…
Fast and easy way to get Continental Fellow achievement and 100% of the game with it.
by DonKramaros
Short guide on how to get A Continental Fellow achievement quick and easy and what achievements I recomend to complete during each walkthrough. A Continental Fellow is achievement where you have to complete game from every 5 starting locations and will pro…
WIP Guide for each dificulty
by TobyPSG_TTV
This is a guide for each difficulty (WIP). Hi I am Toby, I am an XCOM Nerd, I am currently attempting to 100% the game, so I know a decent amount, so if you need info, this guide should help….
Console command Guide
by Onyx
This is a tutorial on how to implement your own custom commands into the game.
Please read the ENTIRE guide as to not miss critical information (such as what key to hold to make your commands work)…
XCOM: Enemy Unknown «La Guia del Buen Comandante» (en construcción)
by El Revived
por turnos, en esta guia vamos a hablar sobre los conceptos básicos del juego, no me considero una eminenc…
Guide to CRAZY difficulty level
by Vanya Shagaa
A multi-point guide to help you through the game on insane difficulty. Items were tested on the original XCOM: Enemy Unknown, but will be useful for Enemy Within as well.
Guide for the second part (original, not WoTC): https://steamcommunity….
Hero characters
by Matuzz
Guide for you to unlock these super characters….
XCOM Long War: Starting Country Selection
by wortkarg
Starting Country and Continent Guidelines…
A Fast and Dirty Xcom Guide for a terrible commander
by Roverandom
I’m a terrible XCOM player who adores this game. I hammered my head against these damn aliens for a good 100 hours before I finally got a toe-hold and managed to complete the game. If you also suck at XCOM and, despite your pathetic grasp of strategy and z…
XCOM Enemy Unknown: 10 Survival Tips
Can’t get through
missions without loss of squad members? Not
enough resources for development?
Try
follow these survival tips
XCOM: Enemy Unknown.
XCOM:
Enemy Unknown consists of two parts −
base strategic planning and
tactical control of the battle.
XCOM: Enemy Unknown — Building
bases.
Careful database management has
paramount, perhaps even
more than combat tactics in missions.
Follow the tips for managing your
base and bring your victory closer.
1. Satellites, satellites and more
times satellites.
Satellites are the most important part of XCOM.
More satellites in the sky above the Earth —
more income and less panic on Earth.
If all countries on one of the continents
will be under satellites you will receive a reward.
Try to place satellites in the wrong place
where they give a big reward, and where
high level of panic, otherwise you can
lose this country.
Satellite placement reduces
panic level and remember next to
satellite must be placed
interceptors. If the UFO’s going out of bounds
your reach, then the level of panic
will start growing again.
2. The best form of defense is
Defense.
The selection of the current study may
be difficult, but remember one rule:
« Start with the defense of .»
New laser rifles of course
cool, but so far your fighters are weak and bad
shoot it is worth taking care of their protection.
Carapace armor — first serious
armor you can research
try to do it the best you can
earlier. For research you will need
5 « Weapon Fragments «, for later
upgrades needed « Extraterrestrial
with plav » and « Elerium «.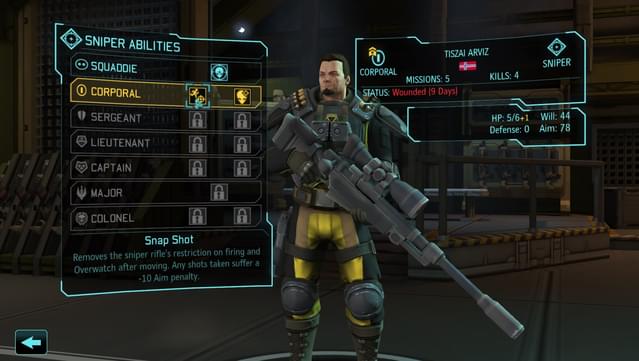
3. Engineers are more important than scientists
While research is very
important and you are in indecision,
who else to take «scientists» or «engineers»?
We recommend taking the latter.
More engineers — cheaper production,
more affordable weapons and armor and more
easy access to satellites. Increase
the number of scientists will reduce
time for research, but for serious
impact on research speed
need a significant increase
the number of scientists.
If you can develop both
department, « Laboratory » and
« Engineering Department «, then passing
games will not be a big problem for you.
4. Build the School of Officers
Try to build School of Officers
as soon as possible, upgrades purchased
(with more satellites and
low panic it shouldn’t
make trouble) in this building
will make your missions easier.
The most significant improvement in early
stage of the game will increase the number
fighters in the squad, first to five, and then
and up to six.
The next important improvement will be
reduction in treatment time
after injury. Then you need to take
increase in experience gained in missions,
this will speed up the training of fighters.
Note : on
easy and normal level you start
game with the built «School of officers»,
however, its impact on the game is not
decreases.
5. Be careful when
construction
Building planning
base is an extremely important point. Correct
positioning of generators and modules
satellite communications can provide additional
power or allow control
more satellites.
Try to plan
location of buildings prior to construction
to avoid unnecessary expenses for removal
buildings. Try to plan
buildings down to the lower levels.
And don’t forget to follow
for energy consumption. With every new
elevators consume more and more
energy.
XCOM: Enemy Unknown — Missions
Whether it’s good or
unsuccessfully you complete the mission depends
level of panic in the world and in turn
this will influence the council’s opinion.
The following tips will help you
completing missions.
1. Use
«Combat readiness»
Combat readiness
allows you to shoot at
an enemy who makes a move in the field
view of your fighter, after completion
move. In the «combat readiness» mode, accuracy
shot is reduced. At attack aircraft with
shotguns if not expected to spawn
the enemy is close, for a while «combat readiness»
better to pick a gun. Quantity
damage dealt will decrease but increase
accuracy at medium range and better
to hurt the enemy than to shoot past him.
Ready
recommended for tactical use
with short moves. If after
moving all soldiers the enemy is not detected,
turn on «combat readiness». This tactic
good for meetings with
mutons.
Never
use «combat readiness» at the beginning
move, otherwise you may end up in a situation
when a soldier walking in the vanguard stumbles
on the enemy group, and those who could
help already completed the move.
2. Know your squad
It is important to know what everyone is capable of
member of your squad. For example Heavy
infantry using rockets and large-caliber
weapons capable of inflicting heavy
damage to a strong opponent or
using the skill « Suppression »
reduce enemy accuracy. Stormtrooper
with the skill « Running Shooting » can
shoot after making « Dash «,
a fighter with a shotgun and capable
travel more distance
dangerous enemy for aliens. Fighter
« Support »
with perk « Smoke Grenade » able
help out other fighters of the squad in a difficult
minute. A « Sniper »
— this is a separate case and we will discuss it
by later.
Most likely you have your own preferences
on the composition of the detachment, but with the addition of a fifth
and the sixth squad slot makes sense
consider joining the team
additional sniper (for
increased damage dealt by the unit)
or support fighter ,
caring for the healing of fighters during
missions.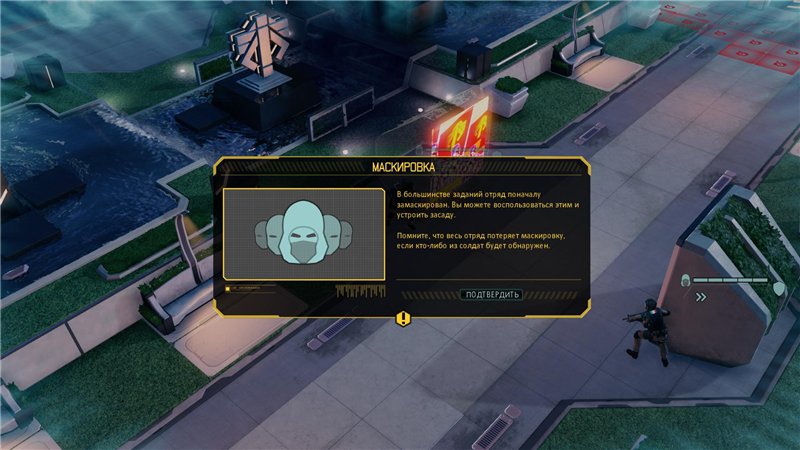
3. Pump
sniper
Beginner Sniper
pretty mediocre fighter, but
reaching the level « Corporal »
you will see its potential, with skill
« General view of »
he becomes one of the important fighters
in your squad.
Becoming Captain
and having received the skill « Adaptor »
the sniper will have no accuracy penalty in
«combat readiness». Your enemies will
destroyed as soon as they appear in the field
the detachment’s vision and in the absence of obstacles
in the trajectory of a sniper shot.
Try to have
sniper as high as possible with skill
« Safe Position »
he will receive bonuses to hit and defense,
if the enemy is below the fighter.
4. Walk around
from the flanks, but be careful
It’s a good trick
but your soldiers will be on
considerable distance from each other
and when meeting with a new detachment of the enemy, they can
be in a quandary
or they themselves will be outflanked.
