Tomb Raider Legend Walkthrough and Game Guide: Level 6: ENGLAND
In the cut scene, Lara meets Zip
and Alister, who are waiting in the van. Zip asks Alister if he is sure about
the map. Alister says that he is, although there were some nonsense about the
discovery of the King Arthur’s real tomb, but soon discreted, and another roadside
attraction was born (meaning Professor Worth’s King Arthur Museum, where they
met). Lara says what they can see from this. She climbs up a pipe and enters
a place that was used as King Arthur’s attraction.
(Bug warning: A possible bug can be activated later in the level, when you fight with the boss. You are advised to save your game during the level.)
The map on the knight’s shiled that Lara found in Kazakhstan leads to a place that seems to have King Arthur’s grave. If this place meant something to a knight one thousands years ago, it probably means something to Lara as well. So, you need to find out if the ruins of this place contain a sword fragment.
[Checkpoint] Lara is looking at a shimmering grating above that
hides an opening. Use the Grapple and throw it down. There is a sword stuck
in a stone in the nearby room, but Lara cannot pull it out. She says that she
sprobably needs to turn on the power first. So, you have to turn on the power in order to enter the museum exhibit rooms that are located behind the door.
Enter the room beneath the opening
that was hidden from the grating and pull the movable crate beneath the opening. Climb on the crate, then through the opening. Alister tells
Lara that this place was owned by a Professor Worth, who had once students.
Shoot the crate and pick up the Bronze Cross (1/9).
Use the Grapple to remove the grating on the right and fall through the opening. [Checkpoint]
Small courtyard — Go to the other side and jump to
grab the third sill above the window. Jump to grab the ledge above and traverse
to the left past the gate. Drop down and use the lever to turn on the power. Climb up the pipe at the end
of the alley and jump to grab the ledge on the right. Traverse to the right and
grab the sill below. Do not drop to the ground, because the water is harmful
from the wires. Jump to grab the next two sills
and then jump to the part of the ground, where there is no water.
Room with destroyed floor — Open the door to the
building and go to the room with the sword. [Checkpoint] Pull
it to open the nearby door. Enter the next room with the destroyed floor. [Checkpoint] If
you accidentally fall down, you will find some narrow ledges to climb back up. Go
to the right (if the entrance is to your back) and jump to grab the small window.
Get into the small room and shoot the crate to get a Bronze
Cross (2/9). Climb back to the small window, hang from the edge and
jump back to the floor.
Notice the horizontal pole close to the small window.
Jump to grab it, swing and jump to grab the second pole.
It will rotate 90 degrees, but it will go back to its initial position after a
few seconds. Before it does so, jump to grab the third
pole behind you. Swing and jump to grab the pole of the door ahead*. Lara’s weight will lower the door, so quickly jump back to
grab the previous pole. The door will fully open, but it will start closing.
So, quickly swing and jump through the doorway.
(*Note: Most of the times, Lara grabs the pole of the door with one hand. In this case, an icon appears that prompts you press the Interact button and make Lara grab the pole with both hands before she loses her grip. This icon depends on the version of the game. For example, it is a Triangle icon for PS2 and a yellow hand icon for PC.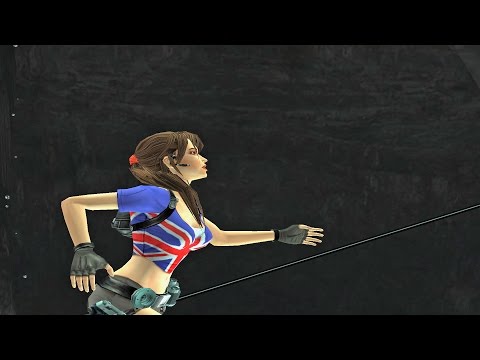 )
)
Second room with destroyed floor — You reach a second
room with destroyed floor. Again, if you accidetally fall down, there are narrow
ledges that you can use and climb back up. Use the Accurate Aim to shoot and break the ring that holds the boat.
Jump on the boat and jump to the opposite side. Go around to the right and crouch
through the duct to a small room. Shoot the crate and pick up the Bronze
Cross (3/9). Return back and pull the sword.
This will cause some planks to fall, revealing a mechanism.
Back up a bit and use the Grapple to pull the mechanism and open the nearby door. Release and
go through the door before it closes. [Checkpoint]
Warehouse — You enter a warehouse with some crates
an a forklift. There is also a grating in the back right corner that hides an opening which leads to the
next Cross.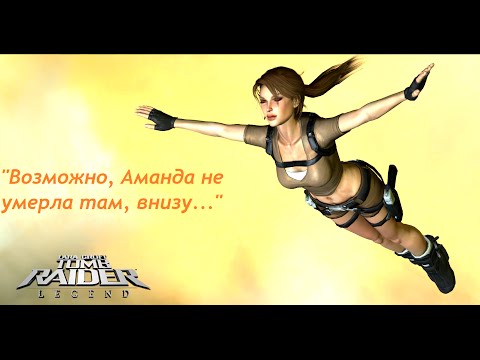 So, use the Grapple to throw it down. Use the forklift and position a crate beneath the opening. Take a second crate with the forklift and approach the either left or right side of the first one. Raise the second crate, so its bottom touches the top of the first one (as shown in this screenshot). Climb on the crates, then through the
opening. This is professor’s office. Lara reads some papers that say that King
Arthur’s tomb — where his museum was built over — is a fake. Pick up the Silver
Cross (1/5) and return back to the warehouse.
Get the forklift and drive down the ramp behind the crates. Lara says that this is definitely
not King Arthur’s tomb. She has seen so many tombs and she can know. She also
says that this place is hiding something. So, you need to find access to the hidden ruins. Drive the forklift opposite the entrance
to break the tomb. Pick up the Silver Cross (2/5) and drive the forklift to the crates on the left to smash the wall and find the access to the hidden ruins. Go through the opening. [Checkpoint] Stay on
the forklift and drive through the two sets of spikes.
Use the forklift to open the gate. Position the forks beneath the gate (as shown here) and raise it. Drive through the next
spikes and crash the wall ahead. In the brief cut scene, press the appropriate
button (as the game shows) to save Lara from falling into the deep pit.
(Note: Save your game here. Check the Important note below!!)
Going down the pit — [Checkpoint] As you can see, it is a long
drop down, so be careful. First, take a look on the right to spot the Bronze Cross (4/9) in the alcove. Use the Grapple to catch it.
Go down the broken steps and use the Grapple again to catch the Bronze
Cross (5/9) from the alcove on the other side. Jump to grab the sill on the
left and then jump to grab the ledge on the right. Quickly traverse to the right and
drop down. The stairs are about to collapse, so go down them and jump to the
stairs below. Again, the stairs will collapse, so jump to grab the pole.
Swing and jump to land in the alcove ahead.
Hang from the edge and jump to grab the narrow ledge on the right. It is ready
to collapse, so quickly traverse to the right. [Checkpoint] Pull into the opening, follow
the passage to the left and pick up the Bronze Cross (6/9).
Return back and drop down.
(Important note: The game creates a checkpoint whilst you are hanging from the edge of the opening that leads to the Bronze Cross. If you fail to the next part and kill Lara, the game will load, but Lara will be standing on the stairs beneath the opening without the Bronze Cross in her backpack. So, be careful, because you will not be able to reach the opening.)
Jump to grab the rope and swing diagonally to the right to land on the stairs that are ready to collapse.
Quickly jump to the stairs ahead. Go down them and jump to grab the small opening
on the left. Traverse around the corner and drop down. Hang from the edge and
drop to the ground.
Ground — There is an arched
pushable stone with the III sign on it. If
you push it, it will return back. This and two more of this kind open a stone door
here that leads to a Cross (the Gold one if you mind), so leave it for now.
Go up the stairs on the other side. [Checkpoint] Follow the hallway around to the left and jump over the lava
pool. Continue to the right to reach a fire trap.
Use the Grapple to pull the metal box close to you.
Position the box on the first grating (you can push\ pull it). Climb on
it and notice the fire that comes from the second grating beyond. When it comes on, jump there. Until you land, the fire will have gone off. Jump over the last fire. Pull the box close to you and use it for the next
fire trap. When you pass it, bring the box close to you. Push it next
to the stone door and climb on the box. Climb on the door and drop down to the other
side. [Checkpoint] Use the lever to open the door.
Area with rotating blades — Bring the box inside
[Checkpoint] and push it to stop the blades on the left (if the
entrance is to your back). You do not have to push it in the room; just push
it beneath the blades to stop them. Enter and pick up the Silver Cross
(3/5). Exit and pull the box back. Push it beneath the blades on the opposite side (to the right if the entrance is to your back) and bring
the second metal box outside. Push one of the two
boxes beneath the third blades (opposite the entrance) . Take the other
box and push it to the room behind the third blades.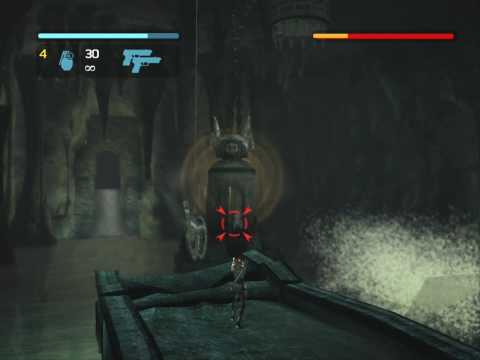
If you want the Gold Cross, you have to push the box to both
left and right sides of the room and push the two arched stones,
which along with the other one you saw before will open the secret room. First,
go to the left ledge and push the arched stone with the I sign. Then go to the right ledge for the stone with the II sign. You will use the last stone when you return back later.
Bring both boxes into the big room (behind the third blades). Push the one
to stop the fourth blades on the other side and push the second
behind them. Position the box above the fire. Now push the first box behind
the second one and keep pushing it until both boxes are on the fire (as shown in this screenshot). That way you will make a path, which will be long enough to jump over the fire. Climb on
the boxes and jump over the fire. Continue through the hallway and pull the lever to open the door.
Area with pool and coffin — Go through it and follow
the hallway that will get you to a pressure plate.
[Checkpoint] If you step on it, the gate on the other side will open. If you step off, the
door will close. So, you need something to put on the plate. Jump into the pool
and swim to the other side. Climb out of the water and use the Grapple to move
the chandelier above the water. It will break some
bars and a coffin will be revealed. Use the Grapple to throw it in the water.
Now move the other chandelier to break the bars
on the side. Use the Grapple to get the Bronze Cross (7/9).
Climb on the coffin and use the Grapple to catch the light that is close to the entrance. Move
the coffin (and you) close to it. Then catch the light above the pressure
plate and move the coffin on the ground. Then position it on the plate. Go down
the stairs and through the gate.
Channels with water — Follow the hallway to reach
a channel with water. [Checkpoint] (This diagram shows the channels.) Jump into the water and swim through the opening beneath
the entrance. Get the Bronze Cross (8/9) and exit. Pull the lever to open the nearby gate. The current will push
both you and the coffin through the gate. Quickly climb on the coffin and turn having the way you came from on your right. There is an opening in the wall halfway through
the channel, so jump into it. If you miss it, climb on the coffin and use the Grapple to catch a light on the
wall. Pull the coffin (and you) close to the light and as the coffin returns
back (beause of the current) jump into the opening.
Jump into the water and swim forwad (notice the Cross in the alcove on the
right). Swim through the channel on the left and turn left. Use the lever to open the nearby gate and allow the coffin enter the channel. Climb on the
coffin and use the Grapple to catch the lights on the walls and move the coffin
close to the alcove with the Silver Cross (4/5).
Jump to the opening and claim the secret. Jump into the water and climb on the
coffin. There is an opening exactly opposite the alcove where you just got the Cross. Move the coffin there
and jump into. Drop to the water, which will push you to a huge pool.
Area with huge pool and Temple — Lara cannot dive
into the water here, so swim to the other side and climb out of the water. Lara
is amazed by the Temple. The door is closed, so you need to find another way
to enter. Notice the two hanging fire pots. Go to the right one first. Use the
Grapple to rotate and make it face the pool (the pot must be to the pool’s direction).
Go the left fire pot and turn it to face the left wall (if the pool is to your
back).
(Note: You cannot turn the pots in
any other direction, apart from the correct ones.)
Climb up the narrow ledges on the left to reach the top ledge. [Checkpoint] Jump to grab the pole, swing
and jump to the slope. As you slide down, jump to grab the pole
of the fire pot. It will rotate, so swing, jump and use the Grapple to
catch a fire pot above. Swing and jump to grab the other pole with the fire pot. It will rotate, so
swing and jump to grab the rock ahead. Pull up and climb on the second rock.
Then jump to grab the ledge. Jump to grab the sill above, then the one on the
right. Jump to grab the chain and climb up it. Jump to the Temple’s roof [Checkpoint], go to
the other side and pick up the Silver Cross (5/5).
Return back almost to the middle and jump to grab the chain. Slide down to enter the Temple.
In the cut scene, Lara enters the
Temple. Alister asks what she is looking at and she replies
a myth, except it is real. As she passes in front of the tombs, she says that
they are all here — the court of Kamelot. Alister asks if she is sure and
Lara says that has no doubt about the authenticity of this tomb. She approaches
a statue which is surrounded by a lighted shield. Lara says that there was not
only one Excalibur or one Merlin. They keep seeing swords and dais in all over
the world, simply because they are everywhere. In their case, their Merlin was
killed and their sword was left in pieces.
You have to now find King Arthur’s sarcophagus. Go to the left side of the Temple (if the main entrance is to your back) and
locate Bedwyr’s tomb.
In the cut scene, Lara reads that Bedivere returned a fragment of Excalibur to Arthur after the other pieces were carried off by the knights. This fragment was left with Arthur to help him leave this mausoleum when the time came.
Pull the tomb and position it next
to the broken pillar on the other side. Notice the bell and the hanging stone.
If you grab the chain of the stone, it will lower and the bell will go higher.
So, use the Grapple to catch the chandelier. Back up as much as you can (close to the statue) and pull the chandelier. Release
it and it will start swinging. Quickly climb on the broken tomb, then on the
pillar and jump to grab the chain where the stone is hanging from. If the chandelier
is still swinging, it will hit the bell.
The cut scene shows
the shield of the statue exploding. Lara approaches the statue and takes from Arthur Pendragon’s statue a sword
segment of Excalibur. Lara would not take it if she did not need it so. Zip talks to Lara and says that something is going on there.
They start shouting while Lara asks to know what’s happening. She does not get
a reply.
You just got the sword fragment, but Alister and Zip’s voices worried Lara. You need to get back to surface and save Zip and Alister. [Checkpoint] Exit the Temple.
The cut scene shows a huge snake monster appearing
from the water.
Fighting the snake monster — You cannot kill the snake monster directly (by shooting at it) so do not
waste your time and ammo. Do not let its size scare you! There are four
tanks in the water with a lever each. You
have to approach each tank and shoot it (that’s why the target appears). The
monster will hear the sound of the tank, be hypnotized and turn its head towards the cage that
is hanging. You then have to quickly use the Grapple, catch the lever and pull
it to lower the cage and hit the monster. You can understand that you made it
correctly, when a brief cut scene will show the monster destroying the tank. Since
there are four tanks, you need to repeat the same procedure three more times.
The monster not only attacks with its head, but it also spit toxic
liquid. This takes some of your health, but also tosses Lara up. If you
are close to the lake, you will fall into. The moster will then get you and
throw you to the ground, which makes you lose more health. So, stay away from the
lake as much as you can (not too far away though and make your job harder).
In case you lower the cage without a succesful hit, do not stay to the spot
and do not shoot the tank. The monster will not hear the noise while the cage
goes up. You better go for another tank.
[Bug note: Many people have encountered a bug with the two front cages (those in the middle of the pool), where they do not lower when the the levers are pulled. So, start with the front tanks first in case you will not be able to lower the cages after spending time with the back ones. If you are a console player and after trying a couple of times the bug still occurs, you need to load a previous saved game. Otherwise, you will have to start the game from the beginning (we have not found a solution for this bug until now). If you are a PC player, you can download a saved game.]
When you make it, the cut scene will
show the moster dying. Half of its body remains on the surface.
Jump into the water and climb on the ledge close to the monster. Vault onto
the monster’s back and walk on it. Climb up the ledges and go through the opening.
Follow the hallway to reach a deep pit. [Checkpoint] Jump off the ledge and press Jump in midair to use the Grapple and catch the hanging pot above. Swing and jump to the opposite side. Jump to grab the pole and jump to land on a slide. Jump over the gap.
Eh? Another one? Quickly press the appropriate buttons (as the game shows) to save Lara and seal the
snake monster behind the gate.
Turn around and enable the Accurate Aim. Shoot the
ring at the top of the gate to release the rope. Grab the shield on the gate and jump to grab the
top of the gate. Jump to grab the rope, swing and
release to drop down. Pick up the Bronze Cross (9/9). Climb up the gate as before and jump to grab
the rope. Turn around, swing and jump to the ledge. [Checkpoint] Pull the lever to open the gate and slide down the slope. You are back close to the fire traps.
Going back — Draw weapons, because you are not alone
this time. Two guards are waiting in the hallway,
so kill them. Keep your weapons drawn. They have company. Two
more guards will attack at the end of the hallway, so kill them too.
Then pick up the items you need. One of them was shooting from a ledge, so you
need to climb there for the pick-ups.
(Note: Make sure you have pushed
the two arched stones in this room for the Gold
Cross).
Use one of the boxes to stop the blades. Pass them and continue ahead towards
the fire trap. [Checkpoint] A guard will shoot from behind the bars and another one from the other side of the fire trap, so kill them. You can shoot and kill the one behind the bars and throw a grenade to the other one who is standing beyond the fire trap. Jump over the two fire traps
and pick up any item you need from the guards (you may want to pick up the SMG
gun they dropped, because this is what the rest use). Go back the hallway and
kill one more guard on the other side of the lava
pool. Jump over it and go down the steps. [Checkpoint]Kill yet
another guard.
Push the arched stone with the III sign.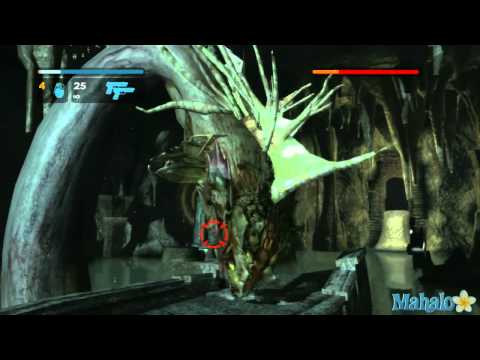 This along
with other two will open the stone door here. Go through it and pick up the Gold
Cross (1/1).
These guys came down using an automatic metal ledge that you can see in the
middle of the room. Climb on it and push the button to go up. A guard will start shooting from the
top, so kill him. Use the Grapple to catch the shimmering
bars. Pull to start swingning. Jump to grab the sill above the bars and
jump to the stairs on the left (or jump from the ledge directly to the stairs).
A dog and two guards will attack, so kill them. A third guard with his dog are waiting behind a crate beyond, so take
care of them too. [Checkpoint] When you reach the circular room, two
more guards will attack. They carry a buckler, so a Grenade will be better.
Return back to the warehouse and kill yet two more guards.
Once you kill them, a cut scene plays.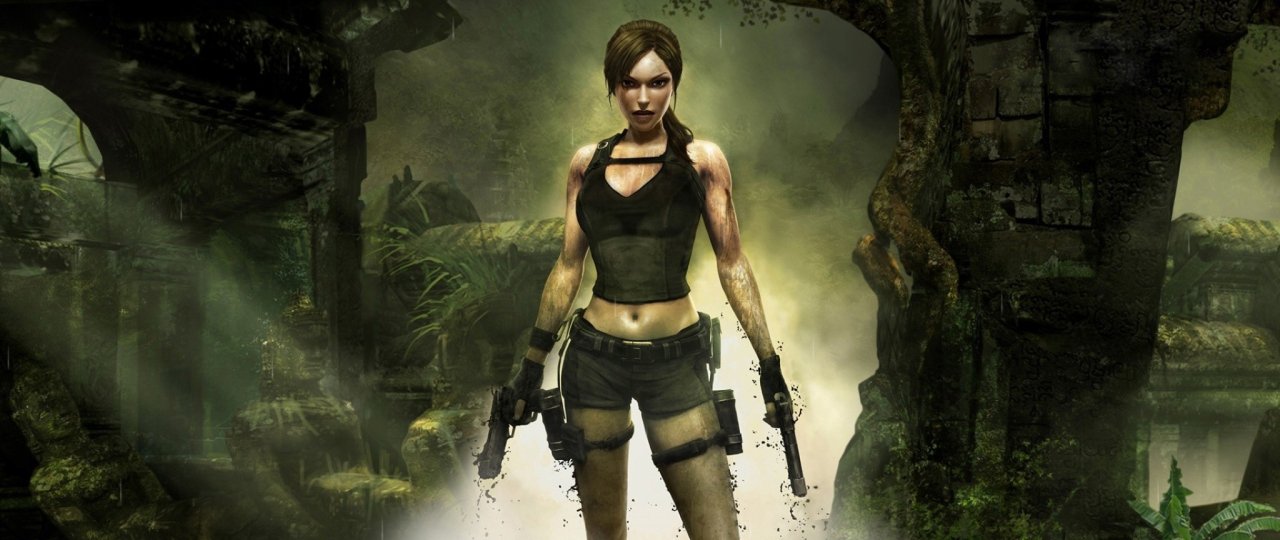
The cut scene, shows Lara hearing
a man calling the last pair of guards you killed. We then see this man (who
is a gurad) holding a gun and pointing Zip and Alister. The guard does not get
a reply, so he tries to check. When the gate to the warehouse opens, no one
is inside. The gurad enters and the camera shows Zip and Alister. We suddenly
see the guard dropping down. Lara appears and asks if everything is ok. The
two men says yes, so Lara says they should better go home.
Back to Croft Manor, the cut scene shows Lara, Winston, Zip and Alister looking at the sword. Alister is amazed
that King Arthur, the Knights and the Round Table were real. Lara says that
the Excalibur was for King Arthur an afrtifact that predated him by the milenia.
Zip reminds them that it is still in pieces and Lara asks him if he found anything
about the Ghalali Key.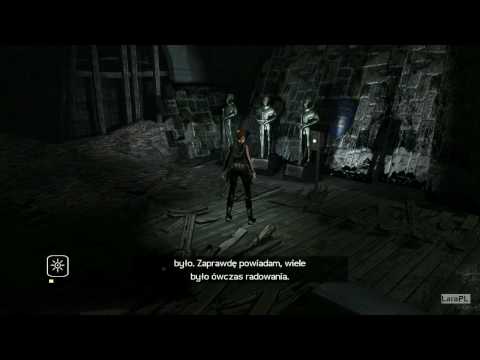 Winston says that it was not in
her father’s collection, but Lara says that it was not in Ghana either.
Lara puts two pieces together and she sees a familiar symbol. She then takes
a look at the painiting above the fireplace. This is a painting with her parents,
and Lara can see that her mother has a pendant on the lapel of her coat, representing
this symbol. Winston says that it was a gift by her father, but he (Winston) never knew
where it came from… until now. Alister asks where this pendant is now and
Lara says in the Himalayas, because her mother had it with her (when the plane
crashed. Do you remember the first cut scene of the game, where Lara’s mother unpinned a pendant from the lapel of her coat and
put it on the seat?). She informes Zip and Alister that she is going to Nepal and asks them
to make the usual arrangements. As Lara goes up the stairs, Winston asks her
not to try to use the sword after what happened to her mother. Lara says that
her mother was killed by removing the sword, so she does not intent to do the
same.
England | Lara Croft Wiki
in:
Countries, United Kingdom, English Locations,
and
14 more
English
England
Government
Constitutional monarchy
Language
English
Inhabitants
Lara Croft, Winston, Sophia Leigh, Bob, The Damned, English
Located
Western Europe
Locations within
Croft Manor
London
Surrey
Cornwall
England is a country that is part of the United Kingdom in Western Europe.
England is one of the many places visited in the Tomb Raider series. England is the most recurring loacation within the Tomb Raider series, appearing in all timelines, to varying degrees.
Contents
- 1 History
- 1.
 1 Original Timeline
 - 1.2 Legend Timeline
- 1.3 Survivor Timeline
- 1.4 Movie Timeline
- 1.
- 2 Appearances
- 2.1 Original Timeline
- 2.1.1 Tomb Raider
- 2.1.2 Tomb Raider II
- 2.1.3 Tomb Raider III: Adventures of Lara Croft
- 2.1.4 Tomb Raider III: The Lost Artifact
- 2.1.5 Tomb Raider: The Times Exclusive Bonus Level
- 2.1.6 Tomb Raider: Chronicles
- 2.2 Legend Timeline
- 2.2.1 Tomb Raider: Legend
- 2.2.2 Tomb Raider: Anniversary
- 2.2.3 Tomb Raider: Underworld
- 2.2.4 Tomb Raider: Underworld: Beneath the Ashes
- 2.3 Tomb Raider: Underworld: Lara’s Shadow
- 2.4 Survivor Timeline
- 2.4.1 Rise of the Tomb Raider
- 2.4.2 Shadow of the Tomb Raider
- 2.1 Original Timeline
- 3 Gallery
History[]
Original Timeline[]
To be added
Legend Timeline[]
To be added
Survivor Timeline[]
To be added
Movie Timeline[]
To be added
Appearances[]
Original Timeline[]
Tomb Raider[]
- Surrey
- Lara’s Home
Tomb Raider II[]
- Surrey
- Lara’s Home
- Home Sweet Home
Tomb Raider III: Adventures of Lara Croft[]
- Surrey
- Lara’s Home
- London
- Thames Wharf
- Aldwych
- Lud’s Gate
- City
- All Hallows
Tomb Raider III: The Lost Artifact[]
- Surrey
- Lara’s Home
Tomb Raider: The Times Exclusive Bonus Level[]
- London
- Office cutscene only
Tomb Raider: Chronicles[]
- Surrey
- Main Menu background includes the Croft Manor, in England
- Most FMV sequences are set in the Croft Manor
Legend Timeline[]
Tomb Raider: Legend[]
- Surrey
- Croft Manor
- Cornwall
- England — King Arthur’s Tomb?
Tomb Raider: Anniversary[]
- Surrey
- Croft Manor
Tomb Raider: Underworld[]
- Surrey
- Prologue
- Protected by the Dead
Tomb Raider: Underworld: Beneath the Ashes[]
- Surrey
- Father’s Secret Study
Tomb Raider: Underworld: Lara’s Shadow[]
- Yggdrasil Remains
Survivor Timeline[]
Rise of the Tomb Raider[]
- London
- Lara’s Apartment (cutscenes)
- Surrey
- Croft Manor (cutscenes)
- Blood Ties
- Lara’s Nightmare
- Croft Manor (cutscenes)
Shadow of the Tomb Raider[]
- Surrey
- Croft Manor (flashback/cutscenes)
Gallery[]
TR I Lara’s Home
TR II Lara’s Home
TR III Lara’s Home
London
Deutsch
Français
Community content is available under CC-BY-SA unless otherwise noted.
| Tomb Raider:Legend | |||
|---|---|---|---|
|
Tomb Raider:Legend CD cover |
|||
| Developers | Crystal Dynamics Nixxes Buzz Monkey Human Soft Fathammer |
||
| Publisher | Eidos Interactive | ||
| Designers | Toby Guard Doug Church Riley Cooper Troels Bran Folmann |
||
| Production dates | April 11, 2006 April 7, 2006 |
||
| Platforms | Windows, Mobile, PlayStation 2, PlayStation Portable, Nintendo GameCube, Game Boy Advance, Nintendo DS, Xbox 360, | Genre | TPS, Action adventure |
| Game mode | Single player | ||
| Media | DVD (1), (from English Lara Croft Tomb Raider: Legend ) is the seventh game in the Tomb Raider series.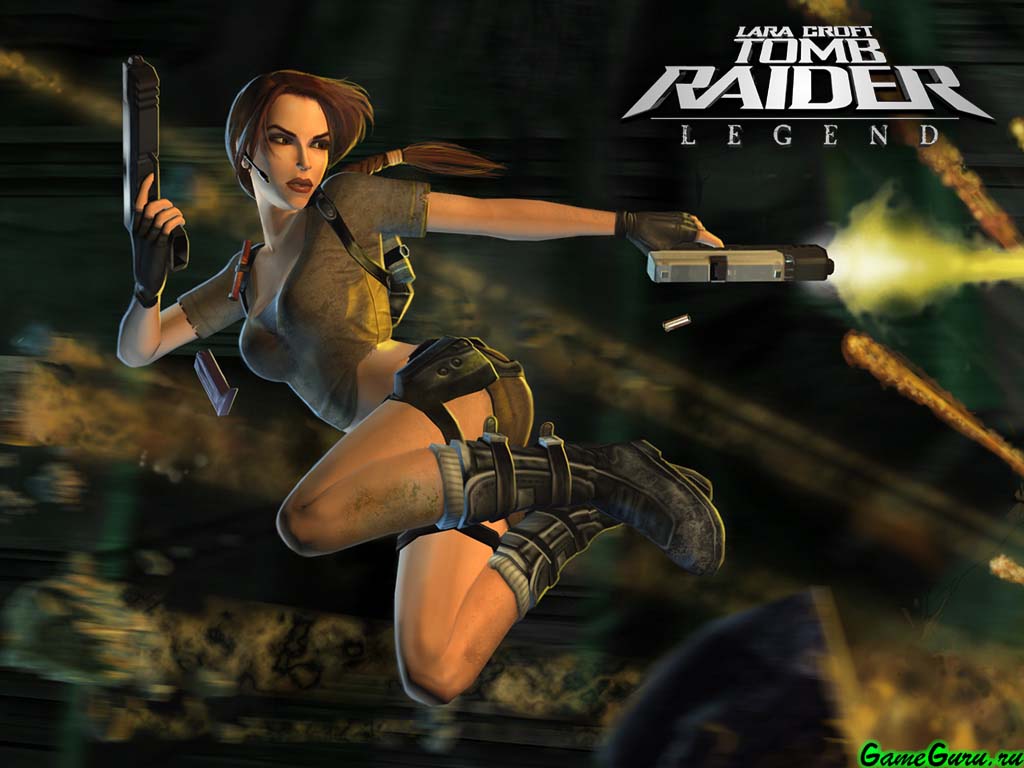 Published by Eidos Interactive in 2006 for the following platforms: PC, PSP, Xbox 360, Playstation 2, Gameboy Advance and Nintendo DS The game is a continuation of the famous Tomb Raider series. «Legend» was created by the American studio Crystal Dynamics and the events in it are not at all connected with the chronology of the previous six games created by Core Design. On the territory of the former CIS, except for the Baltic countries, the game is published by the Novy Disc company. Published by Eidos Interactive in 2006 for the following platforms: PC, PSP, Xbox 360, Playstation 2, Gameboy Advance and Nintendo DS The game is a continuation of the famous Tomb Raider series. «Legend» was created by the American studio Crystal Dynamics and the events in it are not at all connected with the chronology of the previous six games created by Core Design. On the territory of the former CIS, except for the Baltic countries, the game is published by the Novy Disc company.
About the game Tomb Raider: Legend was received positively by fans and gaming publications. The game revived the series after the unsuccessful Tomb Raider: Angel of darkness (Angel of darkness), the reason for which was the change of developers to Crystal Dynamics. The game was localized both in English and in Russian. The controls have been completely changed (because in Angel of darkness the players were uncomfortable with the new controls and the whole gameplay), a completely new engine on which the game was created makes the locations and characters very beautiful, real. Lara’s abilities have completely changed. Incredible tricks in her performance are simply fantastic, which is what Zip (known to us from Tomb Raider: Chronicles) will say from the earpiece. And now he will always hear, and see, and comment on Lara and everything around her. Dangerous jungles, ancient tombs, snow-covered ruins, raging waterfalls and the boiling city of Tokyo — we are waiting for a journey through the most exotic places on the planet. And spectacular battles, cut scenes, and new enemies will add adrenaline and new admiration for the game and the heroine. Game plotWhen Lara Croft was 9 years old, she and her mother flew on a plane that crashed in the Himalayas, and they were the only survivors and soon found refuge in the ruins of an ancient temple, near which Lara found an elevated platform with a sword in stone. Inadvertently activating this ancient exhibit, Lara watched as her mother, trying to protect her, disappeared into the portal that opened right in front of her eyes. Not far from this platform, Lara left a small pink book with drawings and instructions on how to open the portal again. Years later, Lara, with the help of Zip and Alistair, travels to the ancient civilization of Tiwanaku in Bolivia following the advice of her university friend Anai Imanu. Lara is trying to find an elevated platform like the one she found in Nepal years ago. She soon runs into James Rutland and his mercenaries near Lake Titicaca, where the platform is located. Rutland suddenly spoke of her dead friend Amanda Evert, hinting that she might still be alive. Lara meets her friend Anaia in Peru and, after a battle with Rutland’s mercenaries, they travel to the tomb in Paraiso where Lara and her friends had a tragedy many years ago. While still a student, she went to archaeological excavations. Suddenly, the whole team was attacked by a mysterious demon, he killed everyone except Lara and Amanda. Amanda, determined to stop the demon, removed a flaming red stone from the wall. The demon disappeared, but a collapse began, and the cave began to fill with water. Lara managed to swim out, but Amanda was buried under falling boulders. In the present, Lara realizes that her friend managed to escape. Lara travels to Japan to meet her longtime friend, media mogul Nishimura, who is helping her find Takamoto so she can negotiate with him. To meet, Lara goes to a party hosted by Nishimura, but soon Takamoto arrives with his men and the party ends. He refuses to negotiate with Lara after she recalls an embarrassing incident years ago when Takamoto begged her for his life. In anger, he leaves, and Lara has to fight with a group of his mercenaries, after which Nishimura comes out. Lara travels to Ghana to look for Rutland, who is in possession of another sword fragment. Under a huge stunning waterfall, she finds an ancient temple and discovers that her father was already here — she finds his pendant. When she eventually meets Rutland, he tells her about a certain Galali key, which apparently was found in this temple. Lara has no idea what he’s talking about, and an angry Rutland attacks her with part of the sword in his hands. Having taken it away, Lara soon receives a message from Zip and Alistair’s assistants: while Lara was in Ghana, Amanda (!) was looking for the Galali key in the Croft estate. Fortunately, no one was hurt. Amanda releases the demon Lara arrives at a military base in Kazakhstan, but is beaten by Rutland’s men, who have already killed several soldiers and are now in full control of the surrounding area. In a Soviet laboratory, Lara found a piece of a shield with a map that, oddly enough, leads her home to England. In Cornwall, under an abandoned tourist entertainment center, she finds the real tomb of King Arthur and the fourth and final fragment of the sword. Lara realizes that Arthur and his knights hid fragments of the sword in different parts of the world, one way or another affecting the fate of several civilizations, Camelot really existed. Lara with a sword Lara has to remember the past. In Nepal, she finds a crashed plane and retrieves Galali’s key before the plane falls off a cliff. Lara returns to the temple where her mother disappeared and collects the sword. Now she is serious about returning to Bolivia to the platform she found there. Lara returns to the stone platform in Bolivia, where Amanda, Rutland and his men have long been waiting for her to retrieve the sword. With the help of the amazing power of the sword, Lara kills Rutland’s mercenaries and inadvertently himself. Amanda rushes to him, but unfortunately he dies. Sympathetic, Lara suggests that Amanda use the sword together, but Amanda releases the demon again. Following the directions in her pink book, which Lara found when she first came to Bolivia, she reopens the portal and inserts her sword into the hole in the platform. She sees what is happening to her mother before she draws her sword. A portal is something like a mirror that spans space and time. The mother asks the adult Lara (who she does not recognize) not to touch her daughter, as she did not want to do anything wrong. At this time, Amanda wakes up and screams to draw her sword, otherwise the platform will explode. As Lara’s mother hears this, she draws her sword — which she did years ago — and the platform explodes. Lara realizes that Amanda is the one who «killed» her mother. Enraged Lara threatens Amanda with a gun, demanding an explanation. Amanda reveals that Lara’s mother didn’t die, but ended up on Avalon, where Amanda wanted to go. Afterwards, she states that Lara will never understand her anyway and that she is wasting her breath. Levels0. Croft Mansion (training, optional, 1. Bolivia, 2. Peru, 3. Japan, Tokyo, 4. Ghana (Africa), 5. Kazakhstan, 6. England, King Arthur’s Tomb, 7. Nepal, 8. Bolivia — redux LocationsPlaces in game order:
Characters
EquipmentAs always, Lara is armed with ‘s favorite pair of pistols. In addition, she can carry one more weapon in her arsenal: a rifle / machine gun / shotgun / grenade launcher. Also, the number of first-aid kits is now limited: only three. However, after loading from the checkpoint, Lara’s health reaches its maximum. Plays a big role magnetic cat , which helps Lara get artifacts from hard-to-reach places or overcome large gaps. Flashlight with self-charging battery. Binoculars are a very useful item in Lara’s arsenal. In addition to the normal mode, which allows you to zoom in on the image, it has a special mode that characterizes objects and can tell what type they are: Mechanism, fragile (what Lara can destroy, or what threatens her life) and other types. PDA — shows level statistics. Target, artifacts, terrain features, etc. Gaming press ratings
Links
Wikimedia Foundation. Games ⚽ Need an essay?
Useful
|
||
 This was the right decision, because after the release of the game, Lara Croft received the title of Most Popular Video Game Heroine in the Guinness Book of Records.
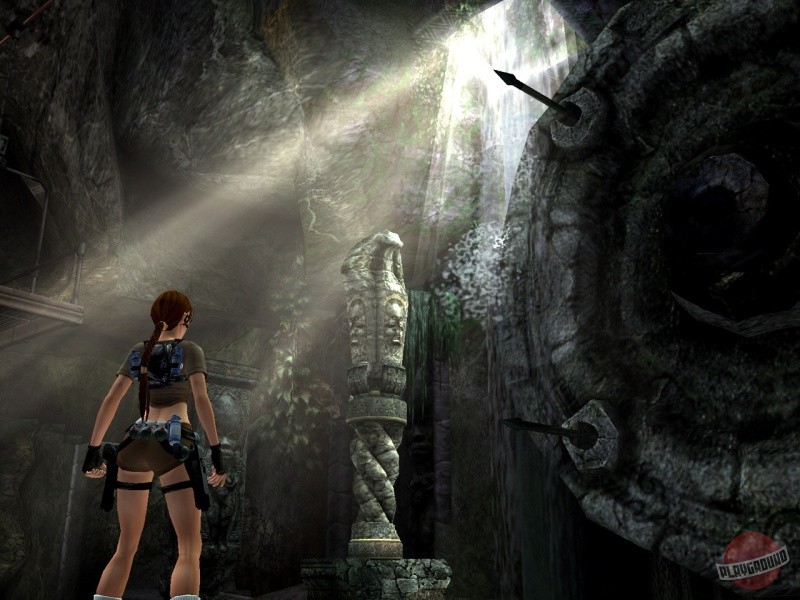
 After an intense battle, he and most of his mercenaries escape by helicopter, after which Lara investigates the stone structure and discovers that it is exactly the same as the one in Nepal. To open the portal again, you need to insert the sword into the slot of the elevation. Horrified by the realization of what happened to her mother, Lara decides to find the sword.
 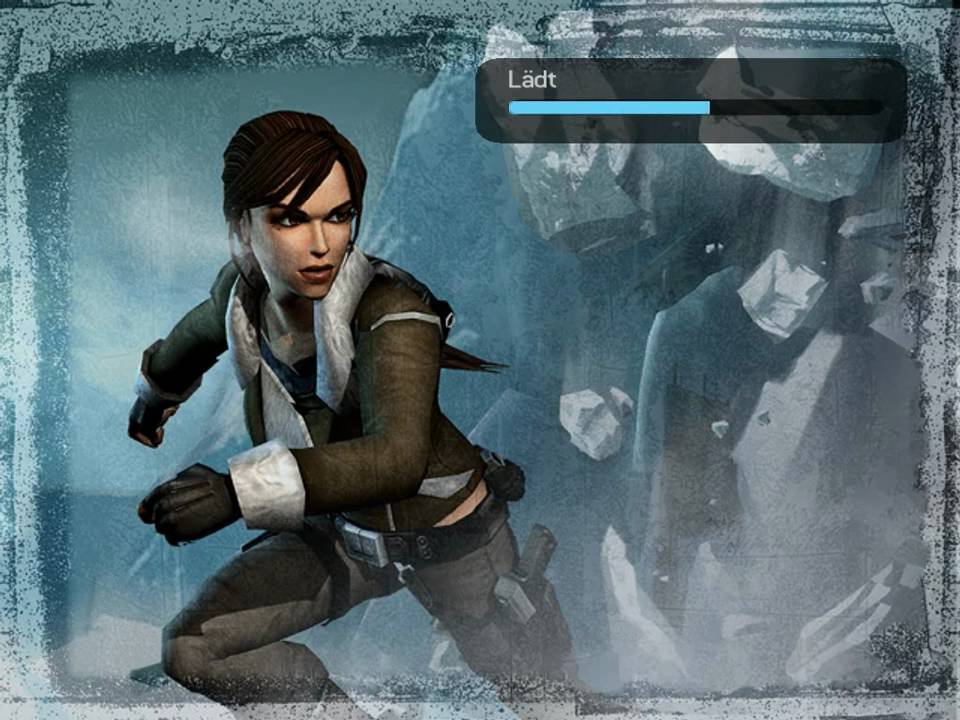 She learns the legend of the Tiwanaku Queen. The queen came to power after she met a shaman with a magic staff. After winning the final battle for power, the Queen was transported to heaven by the Lady of the Lake. Lara realizes that the tomb of the Tiwanaku Queen is connected to Bolivia, an incident in Nepal when she was a child, and perhaps even the legend of King Arthur. She later learns of a piece of a sword (presumably Excalibur) that she has been doggedly searching for. To her surprise, it had already been found and was at Waseda University in Japan, but it was stolen by yakuza boss Shogo Takamoto.
  He says that the only way to get to Takamoto’s apartment is through the rooftops. Ultimately, Lara ends up meeting Takamoto on the roof of his penthouse. Shogo demonstrates the terrifying power of the sword fragment. However, Lara defeats Takamoto and takes the fragment. Together with Nishimura, she flies away in a helicopter.
  From there, Lara on a motorcycle (later jumping onto the roof of the train) goes to the Soviet laboratory, where experiments were carried out on a fragment of the sword fifty years ago, which led to its closure. In the lab, Amanda is experimenting on part of the sword. She is still very angry at Lara for that incident in Paraiso. Lara is horrified to see that Amanda has gone mad and now, with the help of a red stone around her neck, controls the demon that killed their friends many years ago, and also wants to take possession of the sword. Lara slays the demon and removes the third sword fragment from the Soviet machine, the laboratory starts to collapse, but Lara escapes, Amanda escapes.
  After battling a huge sea serpent that apparently guarded the grave, Lara returns to the manor to figure out how to put the sword fragments together. She realizes that Galali’s mysterious key is a pendant given by her father to her mother. He was with her when she and Lara flew on a plane that crashed in the Himalayas.
  Lara’s sword defeats this creature once and for all, Amanda falls unconscious.
 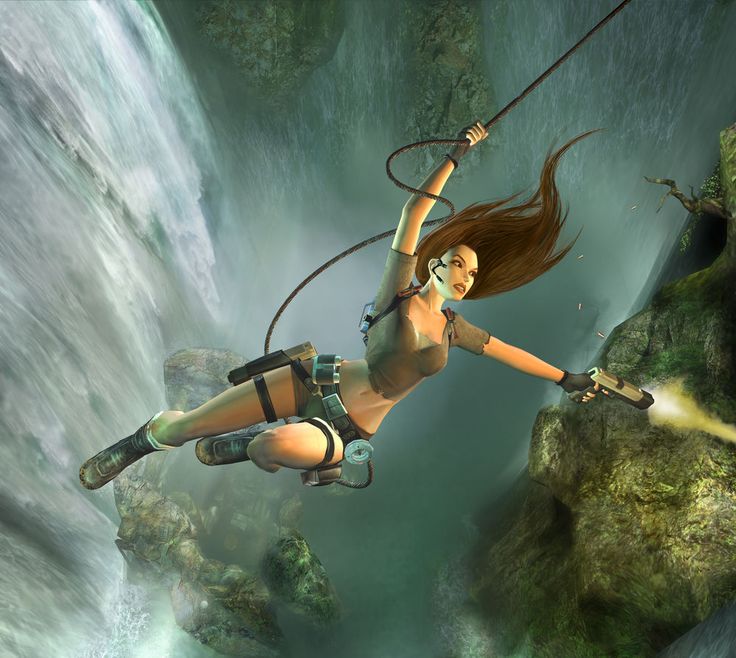 Lara hits Amanda and says, «From now on, every breath you take is a gift from me!» Lara now believes that her father really wanted to find Avalon in order to save her mother.
 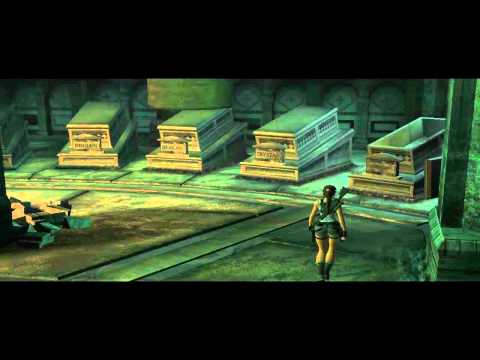 On the rooftops, Lara gets to his house to select the fragment.
 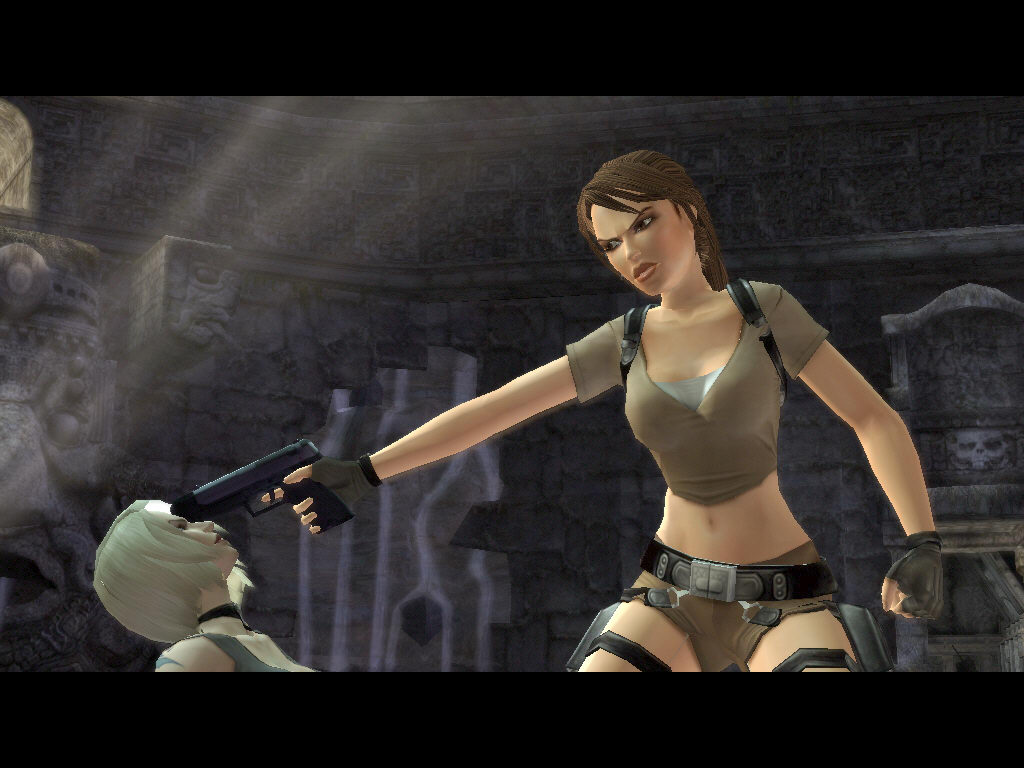 It can be completed at any time depending on the player’s desire, however, in order to open the doors of the estate, you need to complete the first level. The main hall of the design corresponds to what was in the first film.
  It was believed that she died in Paraiso, but the power of the demon brought her back to life. Lara meets her in Kazakhstan, the final showdown takes place in Bolivia.
 5, 8.5, 8.0
 Legend, the adventures of Larv Croft with all the secrets
Tomb Raider: Legend is the seventh part of the series, which is similar in style to its predecessors. There are versions for both personal computers and many consoles, including portable ones. The game combines elements of different genres. Here is a place for both shootouts and for searches with the solution of riddles.
Tomb Rider: Legend — basic information
The game is published by the English company Eidos Interactive, which in 2006 released the next part of the sensational franchise. The development of «Legend» was taken up by the guys from Crystal Dynamics, who brought some innovations to the game.
Game splash screen
Minimum system requirements:
- OS: Microsoft Windows 2000, XP;
- processor: Pentium 3;
- RAM: 256 MB;
- free disk space — 9.9 GB.
Complete passage of this part will take at least 15-20 hours. Exploring all the secret locations and studying them in detail will also take some time.
Lara Croft: The Legend 100% story progression
Lara Croft, the heroine of the game, embarks on a new adventure. Her parents instilled in the girl a passion for archeology, which intensified even more after the death of her parents. The passage of the game «Lara Croft: Legend» will allow the player to visit different parts of the world.
Prologue
The game begins with an introductory cutscene in which Lara herself and her mother are seen flying on a plane that crashes in an unknown location.
Chapter 1. Temple of Tiwanaku in Bolivia
Many years have passed since the past events. Only Lara survived the plane crash. And the first thing a gamer will see is how a girl climbs a slope at a great height without equipment and at the same time joking over audio. After jumping over the abyss, the game begins.
Mountains in Bolivia
Lara makes her way along the mountain paths forward, jumping over gaps and applying miracles of acrobatics. In addition, it removes boulders from the road that prevent you from passing. On one of the ledges, a girl kills a soldier. As you keep moving, you may encounter new enemies. At the very temple, the heroine sees a jeep drive up. It is necessary to pass near it, eliminating the enemy along the way.
In the temple itself, Lara jumps over the abyss with the help of a magnetic harpoon, climbs up the system of chains, swims under water.
Important! It is important to keep an eye on the supply of air, otherwise Lara will suffocate.
To overcome moving blocks, the heroine needs to use a box so that she does not get crushed as she moves. In the hall with buttons, you need to put boxes on them, then the door will open.
At the end of the journey, Lara finds a strange altar near which her mother disappeared when she was a child. Now she understands the reason why the girl is obsessed with them. Immediately she meets a stranger who is also interested in these artifacts.
Chapter 2. Peru. Return to Paraiso
Returning to the manor, Lara learns about the man she met. Now her path lies in Paraiso, where in the market the girl meets her friend Anaa. Mercenaries interfere with the conversation, so they will have to be killed, then move on. Breaking through the opponents, Lara will find a motorcycle and sit on it. Next up is a hot race.
Motorcycle ride
After the ride, the heroine arrives at the abandoned camp. In it, Lara recalls what happened here last time. Waking up from her memories, she heads to the same place where the descent was before. Now everything is flooded with water, so it is important not to forget to emerge and take in air. Next, you need to get to the hall, in which you need to pull the luminous spheres from the statues.
Along the way, Lara finds an artifact fragment. After that, having dealt with the enemies, it is necessary to protect Anaya and get out of there.
Chapter 3. Japan. Meeting with Takamoto
Lara goes to a social party. She interacts with guests. Then the yakuza appears, which means that you have to get pistols and shoot again. Then the heroine gets out onto the roof of the building and moves along it. The path further lies on the roofs and not only. You need to get to another skyscraper.
Lara on skyscraper
There Lara shoots both people and animals. Going inside and running through the corridors, you must continue to overcome the abyss, use the crossbars. When you get to Takamoto, you need to kill him and pick up another fragment of the artifact.
Chapter 4. Ghana. Pursuit of James Rutland
In this part of the game «Tomb Raider: Legend» walkthrough begins with the fact that from Japan, Lara goes to West Africa. There, the adventurer is interested in an ancient temple, to which she goes. And again the «old song»: the next halls with traps, shooting animals, jumping over the abyss, climbing up the blocks. On the way, Lara needs to have time to escape from the boulder that rolled on her.
Tip! It is better not to run around obstacles, but to use forward rolls.
Overcoming obstacles, the heroine meets James Rutland. This is the second meeting with him, the first was in Bolivia. He loses to Lara Croft in a confrontation and gives the third artifact fragment. This concludes the heroine’s journey in Africa.
Chapter 5. Kazakhstan. Project Carbonek
In this part of the game, Lara’s research target is a base where time seems to be frozen in the 50s of the 20th century.
With the help of a parachute jump, the heroine finds herself at the base. Making her way along it, Lara simultaneously kills everything that moves and breathes. The goal is to get to the motorcycle. Thanks to him, she pursues the departed train. And again racing on motorcycles. Having caught up with the train, the heroine jumps onto the roof of the train. But the train catches fire and breaks into the research center, and the girl miraculously survives.
Now you need to fully explore the research center, so you need to get to the most secret nooks and crannies. In the main hall, you need to meet with Amanda.
Tip! Don’t head-attack an animal next to a woman. You need to use the switches and activate the gun.
While fighting, Lara swings 4 single spheres and launches a protective field, after which she takes another fragment and leaves from there.
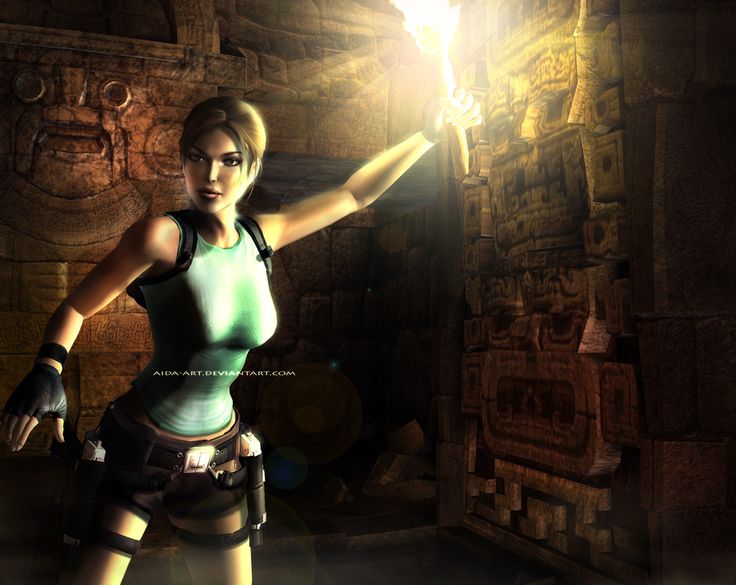
Chapter 6. England. King Arthur’s Tomb
The passage of this chapter of Tomb Raider: Legend takes Lara to England. She had already met references to King Arthur on her journey when she was in Paraiso. Here, in their native lands, it is necessary to explore an abandoned museum.
Abandoned Museum
When moving, you will have to use all the same familiar tricks: harpoon, jumps, crossbars, acrobatics.
Please note! During the exploration, you need to find a loader that makes it great to move forward.
Having descended into the tomb, the heroine needs to have time to jump out of the transport before it flies into the abyss, and then start descending on her own. Then Lara gets to the temple, where King Arthur and the Knights of the Round Table are buried.
The girl needs to hang the bell so that it hits the chandelier. Thanks to this, she will be able to take another piece of the artifact. But in order to get out of here, you need to defeat the basilisk, which was attracted by a loud sound.
Please note! You can distract the monster by shooting at the statues, then it will be easier to run away from him.
At home, Lara finds out that all the pieces have been collected.
Chapter 7. Nepal. Key Galali
Passage of the game «Tomb Rider: Legend» continues in Nepal. Lara has not the most pleasant memories of this place. After all, this is where the plane crashed when she was 9years. The adventurer begins her journey near the crash site.
Landing in Nepal, not far from the plane crash.
The goal of the whole journey in this place is to completely restore the sword. Lady Croft gives herself completely to this task.
Important! Traveling in the Himalayas, you should be careful. The ground underfoot is very unreliable, constantly striving to collapse.
Chapter 8. Bolivia. Magnifying glass
In Bolivia in the game Tomb Raider: Legend, the passage begins with the fact that Lara, having made her way to the circle, kills enemies along the way. Her main opponent will be Amanda, who turns into an already well-known monster. To win, you need to shoot with a bow, and then run up and perform an action. And so 4 times. After that, Lara activates the portal and goes to look for her mother.
Secrets of the Croft Manor
In the family estate you can practice before passing the next chapter. Friends for Lara came up with a lot of tasks, so you won’t be bored.
As she travels, Lara will find secrets that are divided into three types: gold, silver, bronze. Possible reward for finding them includes additional videos, outfits, wallpapers. What will she be? It depends on the number of secrets found. In addition, do not despair if you did not manage to collect them right away.
