Tiamat | Darksiders Wiki | Fandom
in:
Darksiders Characters, The Chosen, Bosses,
and
3 more
Tiamat
| Also Known As: Dusk Queen, Bat Queen |
Race
Abyssal Creature
Gender
Female
Size
Giant
Eyes
Yellow
Means of Travel
Flight
Affiliation
Hell
Occupation
The Chosen
Relatives(s)
Bheithir (Presumed)
Main Weapon
Claws
Armor
Heavy
Type of Attack
Melee, Range
Skills
Fireballs
Enemies
War
Actor Name (s)
Lani Minella
| “ | Has the Council reduced the Horsemen to common assassins? Or has Samael bought your loyalty? — Tiamat |
” |
Tiamat the Dusk Queen is a giant monstrous creature resembling a bat that haunts an area known as the Twilight Cathedral, acting as a Boss and the first of the Chosen that War must defeat and obtain the heart of the Chosen for Samael. She is one of the four tertiary antagonists of Darksiders (the other three being The Griever, The Stygian, and Silitha) and is the fourth boss of the game.
Contents
- 1 Overview
- 2 Battle
- 2.1 Phase 1 (Apocalyptic Difficulty)
- 2.2 Phase 2 (Apocalyptic Difficulty)
- 2.3 Phase 2 Strategy (Glaive Thrower)
- 3 Quotes
- 4 Trivia
- 5 Gallery
Overview[]
War arrived at Twilight Cathedral mounted on an Angelic Beast, but was then intercepted by Tiamat, who continued fighting with the beast while the horseman made his way into her lair. At the time War arrived, the Dusk Queen had already killed the angelic beast, and offered War a bargain, which the horseman refused. When defeated, Tiamat offered anything War desired in exchange for her life, but broke down and started laughing when War dryly asked her if she could restore the balance, dying as War ripped out her still-beating heart.
Battle[]
Despite being one of the early bosses in Darksiders, many fans considered Tiamat as one of the hardest bosses in the game, mainly due to her attacks being able to defeat the player in a few hits as well as being hard to avoid, so because of this, this is a strategy for this boss.
Phase 1 (Apocalyptic Difficulty)[]
During first phase of the fight, Tiamat will hover around the outskirts of the tower, never giving War a chance to attack her with Chaoseater. She attacks from a far by spitting fireballs from her mouth, that can do a hefty amount of damage to War, especially if he has only one Lifestone.
Her fireballs have quite a large range, so that War must use his dash ability to avoid them. They cannot be blocked. War should be careful if the fireball lands near any bomb growth, as it will ignite it, causing a second explosion that could catch him by surprise.
Since War’s Chaoseater cannot reach the Bat Queen, and his Crossblade is ineffective against her, he must use other methods to defeat her. Luckily for him, there are numerous bomb growths around the area. However, the bombs are dormant, and so will not explode on their own. War will need to trigger them somehow. This can be done in two ways.
The first is to throw the bomb growth at her. Once it is stuck, he can target the nearby torches, and then the bomb growth with the Crossblade, so that as the Crossblade flies from the fire to the bomb growth, it carries the spark, which is enough to ignite the bomb.
However, War must be fairly close to Tiamat to target the bomb growth that is stuck to her, leaving him open for a fireball attack. Sometimes Tiamat will suddenly fly out of range, leaving her safe from the Crossblade. This technique is difficult, but more reliable than the second.
The second way to ignite the bomb growth is through timing. If it is thrown at Tiamat’s face just as she spits her fireball, it can ignite and explode.
After either method, the result is the same. The force of the explosion will send Tiamut down to the tower floor with a bang. This is War’s chance to let loose with the Chaoseater, and deal some heavy combos while he can. Tiamat only stays on the ground for so long, however, and soon wakes up, angry and ready for round two.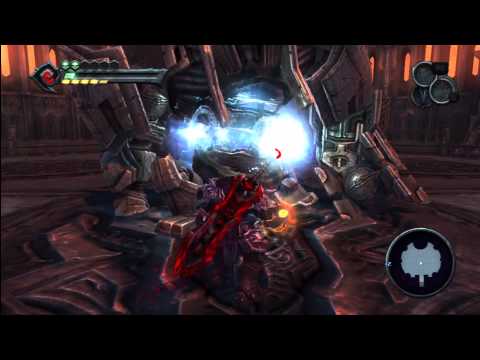
Tiamat returns to the outskirts of the Tower, but this time refrains from her fireballs. Giving War no time to use the bomb growth tactic again, she will soar into the air and swoop down at War with her claws. She swoops so low that they grind along the ground, so War can only avoid them by dashing to the side. It’s best to Dash just as her talons touch the tower, for if he dashes while she is still in the air, she will alter her course.
Tiamat will shriek and swoop a few times, but will soon calm down and revert to spitting fireballs. War should use his bomb growth tactics to ground her again, leaving her open to more attacks from the Chaoseater. After War damages her enough through explosions and his sword, she will fall a final time, and be grounded for good.
Phase 2 (Apocalyptic Difficulty)[]
While War may feel relieved at having grounded the Bat for good, soon you’ll see that you liked her better when she wasn’t up close. Tiamat is perfectly happy to tackle War on the ground, with a variety of techniques to make him another one of her victims.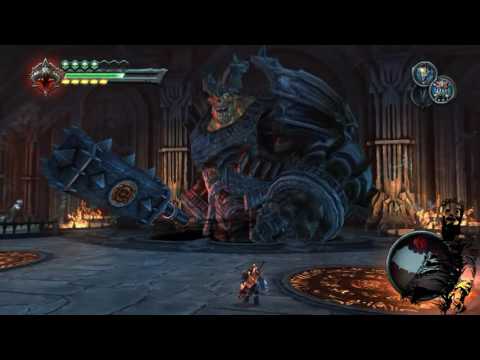
The one thing to keep in mind is that Tiamat has no sure-fire way to damage War from a distance, so it is best for War to dash in, attack with Chaoseater, and dash out before she can retaliate in kind. The Bat Queen has a variety of tough close-ranged moves, but a weak ranged arsenal, so play against her weaknesses and you’ll soon find the reaction button hovering above her head.
- Fireball Attack — If War strays too far from Tiamat’s claws, she will again spew fireballs at him. These are smaller than the ones that came before. They are also significantly slower and can easily be dodged away from by using dash or simply moving to your side as she begins to shoot.
- Slam Attack — She will occasionally rise to the air, curl up her wings and slam into the ground, causing a shockwave to ripple outwards to deal decent damage and knock War off his feet.
- Claw Swipe — If Tiamat is within range, she will attack you with her deadly, unblockable claws.
 These attacks deal high damage, but are slow; Tiamat rears back when she does this attack, giving War plenty of time to avoid it.
 - Tail Swipe — If War thinks he can catch her unawares by dashing behind her to attack her blindside, Tiamat will attack him with her tail.
- Ram Charge — Sometimes Tiamat will ram at War, but by continually pressing each console’s respective reaction button War can push her back, then jump and punch the Bat Queen across the tower, briefly stunning her and leaving her open to feel the sting of the Chaoseater. Should War fail to block the charge, Tiamat will drag War up in the sky and slam him down with a fireball attack. Oddly enough, if War is in critical health, the attack will not kill him, even if he has almost no health left.
Phase 2 Strategy (Glaive Thrower)[]
Since Tiamat has very little in the way of attack distance, the Glaive Thrower strategy is perhaps the most safest but perhaps the longest, way to defeat Tiamat. With Tiamat locked on, War should continuously throw an overcharged Glaive attack at the boss whilst continously circling her around the arena so as to avoid her melee attacks. Since Tiamat only has a single Fireball attack which can be dodge easily by simply moving sideways as she fires, and her Slam attack cannot reach War if he a good distance away, there is very little the boss can do to harm War except perhaps her Ram Charge. Since the Glaive dosen’t have much damage potential, this strategy will take some time.
Quotes[]
- Tiamat and War, before battle:
- Tiamat: Has the council reduced the Horsemen to common assassins? (drops dead Ortho) or… has Samael bought your loyalty? Because…if you are for sale, Rider, then perhaps we can strike a…DEAL?
- War: You wouldn’t like my terms…
- Tiamat and War, during battle:
- Tiamat: You should have considered my offer. Such a pity…
- Tiamat: This will not end well for you, Horseman!
- Tiamat and War, after ripping off her wings.

- Tiamat: (dying) Horseman….!
- The Watcher : Do it! Tear out her heart while she still lives! I want to hear her scream!
- Tiamat: I am…one of the Chosen. I can grant…your every…wish!»
- War: Can you restore the balance!?
- (Then while Tiamat laughs at War. Enraged, he stabs her with Chaoseater and rips her heart out.)
Trivia[]
- Tiamat is a primordial goddess of chaos, rage and the sea in Babylonian mythology, a people who once enslaved the ancient Hebrews who wrote the Old Testament. The Hebrew term for the great flood depicted in the Old Testament comes from the word Tiamat.
- The boss fight against Tiamat is very similar to the boss fight against Metal Ridley in Metroid Prime, seeing as both are battles against a large creature with demon wings. Both bosses can swipe at the player with their claws, both battles takes place in a circle-like arena and both bosses start off in the air in the first phase, but then fight the player on the ground in the second phase.

Gallery[]
-
Concept art.
Community content is available under CC-BY-SA unless otherwise noted.
Tiamat | Darksiders Wiki | Fandom
in:
Darksiders Characters, The Chosen, Bosses,
and
3 more
Tiamat
| Also Known As: Dusk Queen, Bat Queen |
Race
Abyssal Creature
Gender
Female
Size
Giant
Eyes
Yellow
Means of Travel
Flight
Affiliation
Hell
Occupation
The Chosen
Relatives(s)
Bheithir (Presumed)
Main Weapon
Claws
Armor
Heavy
Type of Attack
Melee, Range
Skills
Fireballs
Enemies
War
Actor Name (s)
Lani Minella
| “ | Has the Council reduced the Horsemen to common assassins? Or has Samael bought your loyalty? — Tiamat |
” |
Tiamat the Dusk Queen is a giant monstrous creature resembling a bat that haunts an area known as the Twilight Cathedral, acting as a Boss and the first of the Chosen that War must defeat and obtain the heart of the Chosen for Samael. She is one of the four tertiary antagonists of Darksiders (the other three being The Griever, The Stygian, and Silitha) and is the fourth boss of the game.
Contents
- 1 Overview
- 2 Battle
- 2.1 Phase 1 (Apocalyptic Difficulty)
- 2.2 Phase 2 (Apocalyptic Difficulty)
- 2.3 Phase 2 Strategy (Glaive Thrower)
- 3 Quotes
- 4 Trivia
- 5 Gallery
Overview[]
War arrived at Twilight Cathedral mounted on an Angelic Beast, but was then intercepted by Tiamat, who continued fighting with the beast while the horseman made his way into her lair. At the time War arrived, the Dusk Queen had already killed the angelic beast, and offered War a bargain, which the horseman refused. When defeated, Tiamat offered anything War desired in exchange for her life, but broke down and started laughing when War dryly asked her if she could restore the balance, dying as War ripped out her still-beating heart.
Battle[]
Despite being one of the early bosses in Darksiders, many fans considered Tiamat as one of the hardest bosses in the game, mainly due to her attacks being able to defeat the player in a few hits as well as being hard to avoid, so because of this, this is a strategy for this boss.
Phase 1 (Apocalyptic Difficulty)[]
During first phase of the fight, Tiamat will hover around the outskirts of the tower, never giving War a chance to attack her with Chaoseater. She attacks from a far by spitting fireballs from her mouth, that can do a hefty amount of damage to War, especially if he has only one Lifestone.
Her fireballs have quite a large range, so that War must use his dash ability to avoid them. They cannot be blocked. War should be careful if the fireball lands near any bomb growth, as it will ignite it, causing a second explosion that could catch him by surprise.
Since War’s Chaoseater cannot reach the Bat Queen, and his Crossblade is ineffective against her, he must use other methods to defeat her. Luckily for him, there are numerous bomb growths around the area. However, the bombs are dormant, and so will not explode on their own. War will need to trigger them somehow. This can be done in two ways.
The first is to throw the bomb growth at her. Once it is stuck, he can target the nearby torches, and then the bomb growth with the Crossblade, so that as the Crossblade flies from the fire to the bomb growth, it carries the spark, which is enough to ignite the bomb.
However, War must be fairly close to Tiamat to target the bomb growth that is stuck to her, leaving him open for a fireball attack. Sometimes Tiamat will suddenly fly out of range, leaving her safe from the Crossblade. This technique is difficult, but more reliable than the second.
The second way to ignite the bomb growth is through timing. If it is thrown at Tiamat’s face just as she spits her fireball, it can ignite and explode.
After either method, the result is the same. The force of the explosion will send Tiamut down to the tower floor with a bang. This is War’s chance to let loose with the Chaoseater, and deal some heavy combos while he can. Tiamat only stays on the ground for so long, however, and soon wakes up, angry and ready for round two.
Tiamat returns to the outskirts of the Tower, but this time refrains from her fireballs. Giving War no time to use the bomb growth tactic again, she will soar into the air and swoop down at War with her claws. She swoops so low that they grind along the ground, so War can only avoid them by dashing to the side. It’s best to Dash just as her talons touch the tower, for if he dashes while she is still in the air, she will alter her course.
Tiamat will shriek and swoop a few times, but will soon calm down and revert to spitting fireballs. War should use his bomb growth tactics to ground her again, leaving her open to more attacks from the Chaoseater. After War damages her enough through explosions and his sword, she will fall a final time, and be grounded for good.
Phase 2 (Apocalyptic Difficulty)[]
While War may feel relieved at having grounded the Bat for good, soon you’ll see that you liked her better when she wasn’t up close. Tiamat is perfectly happy to tackle War on the ground, with a variety of techniques to make him another one of her victims.
The one thing to keep in mind is that Tiamat has no sure-fire way to damage War from a distance, so it is best for War to dash in, attack with Chaoseater, and dash out before she can retaliate in kind. The Bat Queen has a variety of tough close-ranged moves, but a weak ranged arsenal, so play against her weaknesses and you’ll soon find the reaction button hovering above her head.
- Fireball Attack — If War strays too far from Tiamat’s claws, she will again spew fireballs at him. These are smaller than the ones that came before. They are also significantly slower and can easily be dodged away from by using dash or simply moving to your side as she begins to shoot.
- Slam Attack — She will occasionally rise to the air, curl up her wings and slam into the ground, causing a shockwave to ripple outwards to deal decent damage and knock War off his feet.
- Claw Swipe — If Tiamat is within range, she will attack you with her deadly, unblockable claws.
 These attacks deal high damage, but are slow; Tiamat rears back when she does this attack, giving War plenty of time to avoid it.
 - Tail Swipe — If War thinks he can catch her unawares by dashing behind her to attack her blindside, Tiamat will attack him with her tail.
- Ram Charge — Sometimes Tiamat will ram at War, but by continually pressing each console’s respective reaction button War can push her back, then jump and punch the Bat Queen across the tower, briefly stunning her and leaving her open to feel the sting of the Chaoseater. Should War fail to block the charge, Tiamat will drag War up in the sky and slam him down with a fireball attack. Oddly enough, if War is in critical health, the attack will not kill him, even if he has almost no health left.
Phase 2 Strategy (Glaive Thrower)[]
Since Tiamat has very little in the way of attack distance, the Glaive Thrower strategy is perhaps the most safest but perhaps the longest, way to defeat Tiamat.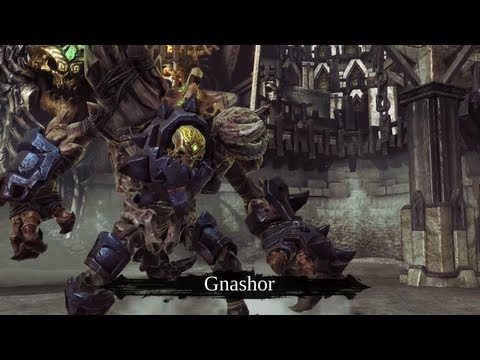 With Tiamat locked on, War should continuously throw an overcharged Glaive attack at the boss whilst continously circling her around the arena so as to avoid her melee attacks. Since Tiamat only has a single Fireball attack which can be dodge easily by simply moving sideways as she fires, and her Slam attack cannot reach War if he a good distance away, there is very little the boss can do to harm War except perhaps her Ram Charge. Since the Glaive dosen’t have much damage potential, this strategy will take some time.
Quotes[]
- Tiamat and War, before battle:
- Tiamat: Has the council reduced the Horsemen to common assassins? (drops dead Ortho) or… has Samael bought your loyalty? Because…if you are for sale, Rider, then perhaps we can strike a…DEAL?
- War: You wouldn’t like my terms…
- Tiamat and War, during battle:
- Tiamat: You should have considered my offer. Such a pity…
- Tiamat: This will not end well for you, Horseman!
- Tiamat and War, after ripping off her wings.

- Tiamat: (dying) Horseman….!
- The Watcher : Do it! Tear out her heart while she still lives! I want to hear her scream!
- Tiamat: I am…one of the Chosen. I can grant…your every…wish!»
- War: Can you restore the balance!?
- (Then while Tiamat laughs at War. Enraged, he stabs her with Chaoseater and rips her heart out.)
Trivia[]
- Tiamat is a primordial goddess of chaos, rage and the sea in Babylonian mythology, a people who once enslaved the ancient Hebrews who wrote the Old Testament. The Hebrew term for the great flood depicted in the Old Testament comes from the word Tiamat.
- The boss fight against Tiamat is very similar to the boss fight against Metal Ridley in Metroid Prime, seeing as both are battles against a large creature with demon wings. Both bosses can swipe at the player with their claws, both battles takes place in a circle-like arena and both bosses start off in the air in the first phase, but then fight the player on the ground in the second phase.

Gallery[]
-
Concept art.
Community content is available under CC-BY-SA unless otherwise noted.
wrath of war — Playing Together
If you’re having trouble playing Darksiders, you can always use our tips and actionable information. We detail the steps you need to follow in order to fully complete the Darksiders game.
In the most difficult places, we add pictures that can help you. Read the passage of Darksiders on our website.
Beginning of the end
At the end of the video, we begin the passage of the Darsiders game as a rider of the Apocalypse — War (if you encounter difficulties in passing, you can use the Darksiders game trainer). After a short combat training, we run along the street until we reach a building with a collapsed wall, through which we will get to the roof.
After passing through the roofs of several buildings inside one we find enemies, having exterminated them we go down and go out into the street. This time we will learn how to throw cars into the filth. Having finished with the trifle, we face the first boss.
To kill the golem we need the recently learned skill of throwing cars. Dodging his fist and jumping when he makes the earth shake, we wait for the moment when he throws a car at us, after which we pick it up and return it to the villain.
Having received the machine, the golem puts its face under our sword, which we immediately use. We continue to beat the boss until the cut-scene.
After the defeat and return to reality, we begin to look for Volgrim. We begin to get out into the underground parking, showing the wonders of acrobatics.
Having reached the elevator shaft, we climb into it and go up to the floor above. We continue to explore the building and on one of the floors we have a view of the world . . we learn that a century has passed since the Apocalypse.
At the same time, we notice Volgrim nearby, but for “thank you, he won’t help us, we start looking for the requested souls, they fall out of enemies and chests.
Search for Tiamat
Having finished with the collection, we return to Volgrim and get advice to look for Samael, as well as a forge as a gift. We blow the horn near the gate behind Volgrim and get into the library, bypassing several doors we get out and collide with a detachment of opponents, after their defeat we encounter the commander of the previously destroyed detachment.
Having dealt with him, we move the gargoyle statues and thus summon Samael. He gives us the task of finding Tiamat and, in addition, gives us wings. Returning to the bridge, we see a source of energy, the wings are charging near it, after which we take off into the cave next to the source.
Inside, using a similar method, we cross the lava river and find ourselves on the churchyard. After passing through the stone arch, we run into the gate, blow into the horn, but the guard will ask you to clear 4 portals. In the first, we kill 40 enemies for a while.
The second one has 5 enemies, but this can only be done in the air. In the third, we kill 50 enemies, but the healing energy does not fall from them. In the latter, you can only kill opponents through finishing moves. Having finished with the tests, we get into the «Broken Stairs».
Crossing the destroyed bridge using the newly acquired wings. At the end of the path along the bridge we meet a demon, having dealt with it, we descend to the ground. We make our way into the building and go out onto its roof, where we find the “Key of the Eye”.
Having opened the door with it, we watch a video, after which we begin to run away from the angels.
We run away from the angels on our faithful horse. On the way we shoot at the angels. Thus we continue on our way to the cathedral, where we are overtaken and knocked over to the ground. Now you need to get to the cathedral where Tiamat is hiding.
We pay attention to the sword at one statue, we take it out and put it in another statue. This will open a passage.
Passing several corridors, we find a spinning blade, with which it is convenient to kill flying enemies.
To open the way to the tower of Tiamat, you need to find three blades. Behind one of the doors is a mechanism that turns the bridge.
To rotate it properly, the gear must be released. To do this, use a sleeping bomb located nearby. Turning the bridge we move to its other end. Now you need to lay a path of sleeping bombs to the scarlet crystal.
Having freed a passage for ourselves, turn the bridge towards it, take the sword and insert it into the statue.
Behind the next door we shoot down the loads hanging on the cable, we get to the statues, jumping on the pedestals. We begin to hit the statues with our sword, because of which they will come to life and begin to resist.
Having finished with three statues, we will find a pedestal with bombs, with the help of which we will open a further passage. Having dealt with the next portion of the statues, we pick up the sword and return to install it, after which we return to the original location.
Jailer
To get the third sword, go to the opened door and inside the room take the key of the eye, go back and use it on the locked door. Next, we are waiting for the fight with the Jailer. To defeat him, you need to hit the yellow abscesses.
When he is stunned at close range, we begin to crush the enemy with a faithful sword. At the end of the battle, we go down the elevator down to press the switch, then we return upstairs.
We press the next switch and pedestals will appear from the lava. On them we get to the next room, where we pick up the sword.
Tiamat
Tactics with this boss is the following — Throw sleeping bombs at the villain, and then explode them. As soon as the creature falls, we crush it with our blade, repeat until the execution icons appear, as a result we will see a cut-scene in which we will tear the heart out of the reptile’s chest.
After talking with Vulgrim nearby, we go out to the indicated snake paths and get to Samael. Having given the heart, we get a new ability and a task — to find an ancient named Ultain, who will help in the search for the Weeper.
Search for the Weeper
Once in the «Flooded Path» location, start the fan and jump onto the airflow created by it to climb up. After passing through the mine, we find ourselves at the gate, we blow the bugle. We get the next task — to clear four arenas.
First, defend our target for four minutes. On the second, we will need to defeat thirty enemies in a chaotic form.
The third arena — here we will need to defeat five enemies through a counterattack. On the last one, you need to defeat fifteen enemies with the help of environmental items.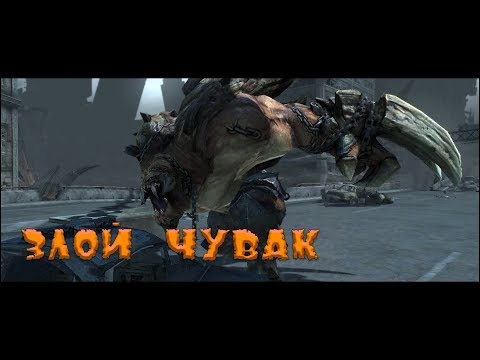
After passing through the gate, we find ourselves in the Blacksmith’s Ford, where we find Ultein. During the conversation, Avalon’s companion will appear. Ultein himself will help us in the battle with her, after which we follow him, kill the angels along the way, it is necessary to exterminate more birds than the ancient one.
After that, he will open the way to the caves of the Weeper.
Weeper’s Heart
As soon as we enter the station, a demon will appear inside, we shoot at him until he escapes. After passing through several passages and corridors, we find a glove in one of the rooms, with which you can break the ice or make an earthquake.
In the room with lifts, push the engine to the extreme platform. After we move the device to the first platform, raise it, move it to the second, jump to the third and lower it a little.
Then we move the unit onto it and raise the platform.
After we drain the water at the station, we get the opportunity to change the train with platforms in places. Next, we perform the following procedure:
As a result, the car ends up in the tunnel. Jumping on it on the mucus, we get out.
Having reached one of the depots, we begin the battle with the Weeper. We break the ice with a glove, after hitting the she-devil with a platform a couple of times. When she falls, we hit the block on her chest with a glove, we will have to repeat 3-4 times.
After the victory, we will receive a pistol from Ultain. We bring the Heart of the Weeper to Samael.
Heart of the Stygian
In order for us to get the heart of the King of Worms, Samael gives us chronospheres. We go to the location — «Dry Road».
Break through the ice and enter the tunnel. Using the chronosphere, we rise on the lift and run to the gate.
We find a pipe behind them, on which we climb along the piles, climbing up the pipe we climb into the tunnel, after shooting the jaws we climb onto the ledge.
Grabbing the box, we rise with it and the jaws. We get to the bombs and with their help we free the path from the crystal. Further along the pile we climb onto the pipe and run along the wall. At the end of the path we see a rope with three jaws, which we shoot.
After we note the processes, shooting which you can get through the mucus to the pipe.
Ashlands
We find the chronosphere next to the sand. After activating it, we run to the cliff.
The next chronosphere will have to be lowered first. To do this, climbing into the tower we find a mechanism that will lower our sphere. Use it to get to the next tower.
Inside it we find a working mechanism and another chronosphere. Using the sphere, we activate the mechanism and run to the platform on the other side of the tower.
Next, we see two towers, having finished with the enemies near them, we run into the first one, activate the chronosphere and grab the bomb. After jumping down, we open access to the drilling rig, undermining the crystals.
Having lowered the chronosphere into the opened passage, activate it and quickly run to the second tower, where we activate the second sphere. Now we run to the slime and rise to the first level.
After the mucus, we move to another platform, from where we climb up. At the top we turn off the drill, after which we jump into the opened passage.
Having sailed to the shore, we find ourselves in a tunnel, breaking the ice, we pull the jaws on the box, climbing onto the box and jumping off to the left, we move to the chronosphere.
After activating the sphere, we run into the passage on the right. Having slowed down time in the room, we grab the bomb and return to get rid of the lump in the ceiling.
Having finished with the evil spirits that have appeared, we head along the opened path. Having dived under the water, we swim to the wall covered with mucus, climbing along it we find ourselves in a small arena.
After repelling the attack of enemies, we go to the corridors.
We reach a large sandy field, under which a worm crawls. After waiting for him to be as far from us as possible, we saddle the horse and head to the tower. Once in the tunnel, we deal with the monster, in whose paws the gun is taken and we take it for ourselves.
We cut our way further through the tunnel until we get to the arena that Samael was talking about. We destroy the enemies until the equestrian appears, defeating the rider and saddling the trophy horse.
We return to the field with the worm. It’s time to kill him, we wait until the bastard comes out, we start jumping from him, it is desirable that there is a rear view of him.
As soon as he starts throwing, shoot with a pistol and accelerate, repeat this tactic until it becomes possible to execute the crawler. We leave for the opened passage.
We dive into the water, swim under the stone and find ourselves on the other side of the cave, after which we head to the exit. Now we saddle the horse and go to the third guard of the tower.
Kill the demons until the Stygian escapes. We knock down the muzzle of the guard, after which we break his shackles from different sides.
Having finished with him, we start to run away and shoot white worms along the way, until the Stygian attacks us personally. Having finished with him, we take his heart to Samael.
Heart of Silita
We go to the spider’s nest, on the other side of the gorge. We set off along the snake paths to the Ashlands, after which we jump to the bridge of souls.
We reach the bridge on foot, after which we saddle our horse and watch a long video of the trip across the bridge. We were grabbed by spiders and carried to their lair, getting out of the cocoon we move to the opposite side of the street.
We move through the courtyards and meet a small spider, after finishing with it we tear the web and meet a large spider. Having dealt with the monster, we break the ice, move the box under the rope, along it we get to the chronosphere, activating which we begin to climb in the other direction.
After jumping into the hole, we find ourselves outside and run to the bridge, as soon as we cross it, it will collapse. After passing along the alley we get to the collapsed building, inside of which we find the key.
We are surrounded by many small spiders, having dealt with them, we break the ice and find the chronosphere, activating it, we rise to the topmost platform, under the ceiling. We wait until the edge of the platform rises, after which we jump from it and take the key.
Then we go out into the alley and go to the locked door. Having opened the door, we shoot at the jaw, when the box falls and turns over, we jump into the opened passage and then along the wall along the beams we go to the room, which is under the ceiling of the second level.
We face in a group of opponents, after the victory we raise the box up, using the elevator. On it we climb higher, after using bombs we clear the path from the crystals.
We find ourselves in a room with a door behind four seals. We go along the bridge from the web, run to the right of the door and fall down. We find a harpoon, after which we encounter a spider, which we turn over using a harpoon, after its death one seal will fall.
After the key, we crawl through the slime into an open room. Having climbed with the help of a harpoon, we fly to the box. Having taken the key, we open the door and see a broken bridge, look for workarounds and kill the remaining spiders along the way, than we break the seals, then we return to the door.
Behind it we encounter a large spider, to kill it we throw cocoons to it, and at this time we hit the red part until it dies. The path to Silita is now open.
Silita
After talking with the demon, we get valuable information, when we run up to the old woman, she will start teleporting to get it, use a gaprun, a couple of hits and dodge, repeat until she climbs onto the ceiling. Now she will start throwing bombs, you need to be attracted to them with a harpoon while they are yellow, you need to repeat it twice.
As a result, having defeated the creature, we take its heart and go to Samael. It turns out that he simply used us, but at the same time he keeps his word and opens the promised portal to the Dark Tower.
Dark Tower
Once inside we head to Azrael. To tear it away from the source of souls, the help of the angel of death is needed. We go along the corridor to the open door. To go further, you need to make the right combination of switches and open yourself access to the second level.
After a short run and a fight, another riddle awaits us, it is necessary to place the platforms so that the hooks are directed downwards, for this: press the right one, then the left one, then the one on the platform and again the right one. Having broken the shackles, we get «Walking through the void.»
Teleport out of the pit and move forward. Having seen the yellow windows, we shoot at them, thus we get to the next level. We go to the window on the left.
After charging the portal, open it and return to the open window. We turn around, see another window, open the portal and jump down into the window.
We find ourselves on the floor, nearby is a large button, by pressing it the lift will start working, which goes to the window from which we jumped. We run further and find bombs near one of the windows.
A little further we see crystals. Now we throw a bomb into the portal and jump after it. Following the corridors we get to the robot guarding the exit.
We need two portals, jumping into one, we fly out of the other, we need to get on the head of the enemy. We press the button, we jump, we beat, we run back and all over again, we repeat until we defeat the villain.
After we redirect the beam using teleports. Having brought this beam to Azrael, we get rid of one of the shards.
We follow the second beam and at its end we will meet a similar robot, after defeating which we lead the beam to the prisoner. The third ray is found in a similar way.
After being released, Azrael will open the way to Straga.
Straga
The enemy squints one eye, using this we wait for the moment when he swings the club and create a portal in it, jumping out of it, chop the enemy and continue until complete victory. As a result, Azrael will be able to leave the tower.
Eden
You need to get to the Tree of Knowledge, but before that, having received and wearing a mask of shadows, you need to defeat your dark self. We go to the tree, at the bridge we use the mask. After we turn right and run along the cliff and climb to the Tree.
As a result, we get the task — to collect seven fragments to forge the sword. The fragments can be found by wearing a mask, as soon as we find the fragments in all previous locations, we turn to Ultain, he will reforge them into a sword.
Destroyer
In the first fight, just jump around the giant and hit with the sword until it falls. Repeat until the execution icon appears. After a fight with Avadon. Fight without frills, just spam the attack button when the blades are crossed and when we just hit him. After we look at the screensaver.
This completes the Darksiders walkthrough.
Similar games …
-
Passage Overlord
-
Passage Call of Duty: Black OPS
-
Passage and a walkthrough of «Darksiders» — Igromania
And when he took off
the second seal, I heard the second animal say: come and see. And went out
another horse, red; and it was given to him that sat on it to take peace from the earth, and that they should kill
each other; and a great sword was given to him.Revelation of John
Theologian, 6: 3-4The end of the world came suddenly. On the morning of that day, the forecasters
did not warn of a meteor shower and a hail of bloodthirsty demons due
destroy the human kingdom. Unsuspecting people continued to practice
with their own affairs. Someone was in a hurry to work, someone was late for the airport,
someone was loitering around the metropolis…Suddenly, a young reporter appeared on all screens and
chattered incoherently about unidentified objects flying towards Earth on a huge
speed. But he did not have time to finish — everything happened too quickly.Within five minutes the huge city looked like Pompeii in
the time of the eruption of Vesuvius: everything burned and smoked, people screamed in horror, rushed about
through the streets, not yet realizing that this is the end. What kind of creatures are running around the park?
“Why is it eating my neighbor?!”, “What a sword, what wings! Is it an angel? Good
I wish I could get an autograph!”, “We need to quickly chase the camera and post everything on YouTube!”…Beginning of the end
Here it is, the Apocalypse, with demons and moving mountains.

Horseman of the Apocalypse War knew exactly what had happened — he
I have been preparing for this battle for a long time. Hell attacked people at the most inopportune moment, not
saved even high technology and Steven Seagal. Paradise came to the defense, but in the end
there was such a massacre that there was no one to save. People were killed, torn apart and
devoured, and the survivors turned into stupid zombies. But this is not so bad — earthlings, in
in principle, they were ready for the fact that sooner or later they would start to stink, shuffle
feet and hunt for everything you can dine. It is being treated, checked.But there was also a vile conspiracy in the center of which
felt war. It turns out that no Apocalypse came and the Horsemen did not
had the right to interfere. Well, yes, the angels and demons messed up, well, yes, they broke
six seals, but the seventh was not touched! So, any extra movement
cast a shadow over the high council set up millennia ago to oversee
an agreement between the winged and the horned. Only in case of disobedience the highest
the authority had to unleash its faithful dogs — Death, Discord,
Rage and War. And during this epic brawl, the first three didn’t even
stirred, but the youngest and quick-tempered still responded to the call.A good dog is a half-hearted dog.
Unfortunately for myself. In an instant, he died before his eyes
the supreme angel Abaddon, a gigantic creature the size of a dinosaur broke out of the ground,
and he himself lost his abilities and became an easy target for anyone who wanted to.
There were quite a few of them, and now Voina listens to everything that thinks about him.
advice. The choice is small — go back and find the culprits or …
go back and find the culprits. I didn’t even have to flip a coin.The only condition is an accompanying demon called
monitor the actions and obedience of the Rider. His loyalty was under
a big question, and the translucent creature was not limited in means: in any
moment she could tighten the collar so that the «pet» fell to the floor and yelled from
pain. A caustic ghost with the manners of a sadist — just such a companion to the War and
not enough…Apocalypse yesterday
These two can’t be friends. It’s a pity, it would make a good duet.
The sword in the teeth, the overseer’s armpit — The earth is waiting. But
no one meets with bread and salt — there is no one. A few minutes in Purgatory
stretched out for a hundred human years. The streets are empty, the skyscrapers are lopsided,
houses gradually collapsed, cars rusted, trees sprouted right out of
asphalt, and a fiery abyss formed in the center of the city. The only
signs of life were given by the unfortunate zombies, who became puppets in the hands of demons.
A century was enough for the infernal creatures to take over the
their paws. They have been waiting in the wings for so long that now they have filled the quarters and
only occasionally engaged in battle with the angels. Two-headed dogs and overgrown satyrs
walking dead and armored bags of bones, poisonous bats and
harpies, nagas, ghost ladies with blades and demons, demons, demons — everything
declared the Earth a new home, furnished it in their own way and stayed here to live!Even demons cry. And this one is totally out of the blue.
Of course, Voina did not even try to establish contact with them.
He immediately rushed into battle, and soon the whole world knew what the wrath of the Horseman was.
Apocalypse. Its huge blade easily pierces armor, cuts off limbs
and blows heads off. The lucky ones sometimes got a relatively easy and fast
death, but rarely. In terms of tormenting the enemy, War is amazingly inventive — then he
nails the demon’s paw to the ground in order to beat him and cut off the horns, then pulls out
wings to a careless angel and impales him on a steel blade. From him
will climb on someone’s back, ride a little, and then
finish off. Or cut off the legs and watch the victim try to escape without success,
stick a sword in the stomach and turn it twice there or simply crush the skull. AT
it’s not just the blade, but any available means — cars, furniture,
wreckage of buildings.Cutting off the enemy’s hands with his own weapon is one of the favorite activities of the War.
Don’t worry, Samael is just saying hello.
Wrath of War
Stripped of most abilities and skills, sooner or later
late The Horseman would have failed his crusade. Angels and demons are not shy
attack in crowds of twenty to thirty fighters and call for help
bloodthirsty creatures. The main thing that helped the War to stay on horseback is … a horse.
The real hell stallion.Cathedral, cemetery, skeletons, crows… Romance!
At the snap of the fingers of the fire-crow, the Ruin appears as if from
from nowhere to help the owner with a difficult task, whether it be a fight or a jump
across the abyss. Mounted fights are noticeably different from ordinary ones, and shooting from the saddle
much more convenient.Surprisingly, a biblical character with a firearm
quite friendly. Pistol War carries with him constantly, but if desired
you can find a machine gun and a rocket launcher with sticky shells. 22nd century
stepped even in Hell, so don’t be surprised if you meet real robots or
having acquired a portable teleporter — a whole level is devoted to puzzles in the spirit of Portal.
A few threats and the Imp Trader Vulgrim backpedaled,
sold for five hundred souls (local currency, knocked out of enemies), and let in
your store. The assortment includes new weapons and attacks, abilities and talents,
vials of healing liquid and a stable reward for found
artifacts.Yes, don’t you think this eye is really frightened.
Acquaintance with the cruel cynic Samael also bore fruit —
wings behind your back, the ability to turn into a huge fire demon and
a tip on the five minions of the organizer of Armageddon. And, of course,
precious minutes of communication with an interesting interlocutor.Talkative characters in a ruined world are actually not like that
too much. The most talkative of them is, of course, Vulgrim, who, for a good
he will sell his own price to his mother, if he has one. The rest go to the dialogue
not so willingly, but each of them is charming in his own way, differs in his own
manner of communication, habits and concealment of his true role in what happened. There is
here is a red-bearded troll named Black Hammer, with a chic Scottish
accent. And the angel girl Uriel, who vomits and thrashes, wanting to find the killer
Abaddon, and the angel of death Azrael, who calmly trusts the War with his fate and
personally takes him to Eden.Vulgrim, as usual, greedily rubs his paws — he knows that the War cannot survive without him.
The Garden of Eden is amazingly beautiful — it is literally located
on the edge of the world. Mountain rivers flow into the unknown, creations of celestials
amaze with subtlety and purity, and the tree of life majestically rises above
the world. In the south and east — a fallen city, in the west — flooded park
massifs, a greenhouse, a subway and a lair of spiders — skyscrapers wrapped in cobwebs. On the
in the north stretches a desert of ashes, inhabited by underground worms, wild
tribes and riders.
And everywhere — hordes of enemies and an abundance of collectibles,
like broken into ten pieces of armor and runes that improve weapons. Behind them
you have to race properly in order to survive the fight with the most terrible
enemies — the huge Chosen, assigned to guard the passage to the Destroyer.
The same one that turned the world into an abandoned nuclear test site.
tests.But before you get to them, you have to overcome a whole
panopticon of smaller caliber monsters. However, is it really less … When you are in
the last time we met an overgrown praying mantis, easily crushing whole
wagons? And a spider the size of a two-story house? Black dragon, perhaps not so
exotic, but also impressive. Like a worm as long as a New York
underground. Each of the bosses will have to find their own approach, and far from
it will always be obvious.The forces here, to put it mildly, are not equal.
 Is it possible to bite a monster on the heel? ..
 Steal the griffin from the angels? Easily!
Apocalypse Tomorrow
War campaign is filled with special effects and enchanting moments,
which are instantly etched into memory. Flying on a griffin over seething lava,
fight with the archangel, numerous explosions, destruction and absolutely crazy
fights in arenas, where there are many times more demons than anywhere else.A scythe, a sword and a boomerang strike three unfortunates. They would like to run away, but nowhere.
The only thing missing is… battles. No, blood, cruelty and
there are more than enough acrobatics here, even the Persian prince will bashfully lower his
sight. But the action is generously diluted with puzzles, which are still much more
more than necessary.
