How to upgrade your PS4 hard drive
Turbo-charge your console and upgrade your PS4 hard drive
Want to upgrade your PS4 hard drive? It’s something worth looking into if you find yourself constantly deleting games to make space. Thankfully, upgrading your PS4, PS4 Slim, or PS4 Pro hard drive isn’t as tricky as it sounds. And our step-by-step guide has been written to make the process as stress-free as possible.
You can certainly check out the best PS4 deals available right now for a replacement console at a great price. But you can also save a lot of cash by simply upgrading your PS4 hard drive. This’ll let you extend the life of your machine and make it feel brand new once more.
A key benefit of upgrading your hard drive, of course, adding extra storage space to your PS4. There’s only 500GB of space on the standard PS4 and PS4 Slim and a larger 1TB on PS4 Pro. On base hardware, it’ll only take a few big games to completely fill up your hard drive. Games like Call of Duty: Warzone and Marvel’s Avengers need over 100GB of hard drive space, so space just disappears.
Going beyond the extra space a hard drive provides, if you slot a super-fast SSD into your console, you’ll also see a significant speed improvement. Although you’ll want to read up on the pros and cons of using an SSD before you do that.
There’s two ways to expand your hard drive capacity on PS4: replace the internal drive or attach one of the best external hard drives. These are both good options, but fitting a new internal drive is undeniably a cleaner option. Especially if you don’t have much space in your gaming area. However, if you’ve got a shiny new PS5, you can only upgrade internally with an SSD, but PS4 games will run off an external HDD.
This guide will show you how to upgrade your PS4 hard drive, including instructions for the PS4 Slim and PS4 Pro and a video to walk you through everything. Oh, and don’t worry, no matter what drive you’re slotting inside your machine, it won’t void your warranty.
How to upgrade your PS4 hard drive
Why you can trust TechRadar
Our expert reviewers spend hours testing and comparing products and services so you can choose the best for you. Find out more about how we test.
Best hard drive upgrades for PS4
Before taking your PS4, PS4 Slim or PS4 Pro apart you need to have a replacement drive ready – which means doing a bit of research. We’ve done the numbers to find out which drive is the best option, whether you’re looking for an all-round option, a budget product or a super-fast SSD.
Best hard drive for PS4
(Image credit: Seagate)
Seagate FireCuda Gaming SSHD 2TB
If you want to upgrade your PS4 hard drive and are looking for the best hard drive option right now, then you should seek out an SSHD. These drives combine platter-based storage with smaller, faster portions of flash memory, and they learn which files you use frequently and move them to the faster flash storage – so they can be loaded faster.
If you play the same games frequently, you’ll see a performance improvement. The 2TB capacity means that you’ll get loads of extra space even if the games you install don’t benefit from the flash memory portion of the drive, and it’ll certainly never be slower than the PS4’s internal drives.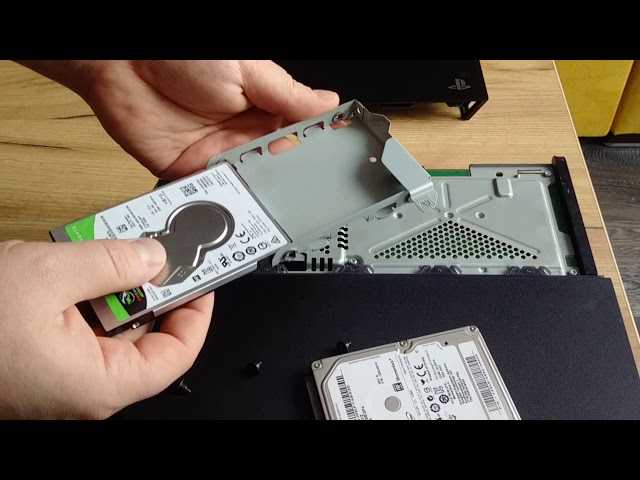 It’s not particularly expensive, either.
Today’s best Seagate FireCuda 2.5″ 2TB SSHD deals
4 Amazon customer reviews
☆☆☆☆☆
Reduced Price
$81.90
$73.71
View
$199.89
View
$219.99
View
Show More Deals
Best budget hard drive for PS4
(Image credit: Seagate)
Seagate Barracuda 2TB
If you’re on a tighter budget then you can ditch the hybrid portion of the hard disk and opt for a conventional drive. This won’t deliver much of a performance boost over the PS4’s normal hard disks, but Seagate’s drives are certainly no slower.
They’re available in loads of capacities, but 2TB is as high as you can go before the drives become too thick to fit inside Sony’s consoles. The prices on offer are tempting: a 1TB model costs just $50, and the 2TB model is the best-value option thanks to a price of $77.
Today’s best Seagate Barracuda 2TB deals
7 Amazon customer reviews
☆☆☆☆☆
$51.99
View
$64.99
View
$67. 99
99
View
Show More Deals
Best SSD for PS4
(Image credit: Future)
Samsung 870 QVO
Samsung is the king of consumer SSDs, so it’s no surprise that the firm’s solid-state products are the best options for slotting inside your PS4. The 870 QVO offers great performance levels that are several times faster than the PS4’s hard disks, and you’ll see noticeable upgrades to loading times and performance in the PS4 and PS4 Slim, plus speed improvements in the PS4 Pro, which has a better storage interface.
Samsung’s drives offer great speed and reliability, and their consistent 7mm form factor means you can choose a drive with 1TB and 8TB capacity, depending on your needs – SSDs don’t have the same physical size restrictions are hard disks. As ever, SSDs are more expensive than hard disks – the 1TB and 2TB models cost $110 and $224 respectively, and the 4TB and 8TB drives sit at hefty prices of $450 and $899.
Today’s best Samsung 870 QVO deals
No price information
Check Amazon
Best budget SSD for PS4
(Image credit: Crucial)
Crucial BX500
Crucial’s drives don’t quite have the performance levels of Samsung’s drives, but in the PS4 that is less important thanks to their older storage connectivity systems. Drives like the Crucial BX500 still deliver a good performance boost over the PS4’s internal drives, and they’re just as reliable as Samsung’s products.
The BX500 is a little cheaper, too. It’s possible to get a 480GB drive for $49 if you’d like to give your PS4 a speed boost without any extra space – handy if you often play the same selection of games. Its 1TB and 2TB models come in at $100 and $199 respectively.
Today’s best Crucial BX500 SSD (480GB) deals
57 Amazon customer reviews
☆☆☆☆☆
$33.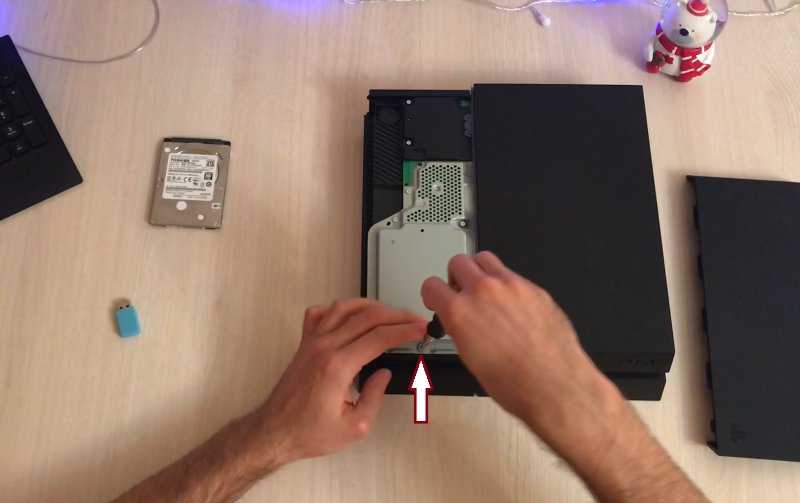 50
50
View
Reduced Price
$44.99
$36.99
View
Reduced Price
$67.45
$47.99
View
Show More Deals
What you need
- 1x PS4
- 1x Phillips screwdriver
- 1x 2.5-inch SATA HDD or SSD
- 1x USB stick or 1x FAT32 USB HDD or SSD
- 1x laptop or PC with internet
- 1x PS4 controller
- 1x microUSB cable
Step one: find the right replacement
(Image credit: Shutterstock)
When it comes to wanting to upgrade your PS4 hard drive, the first thing to do is to buy your replacement hard drive or SSD.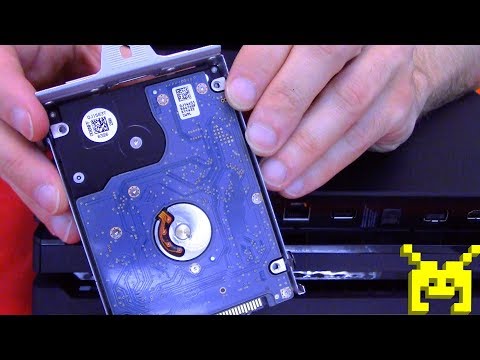 The PS4 uses a 2.5-inch SATA format for hard disks and SSDs, and it’s quite an archaic design now – it’s generally only used for more affordable drives.
Any drive you install into your PS4 needs to be under 9.5mm tall thanks to the size of the caddy that lives inside the PS4, which protects the drive and keeps it in place. This is no problem for SSDs, but it does prove to be a little limiting as many 4TB hard drives are a shade too chunky.
When looking for a new hard disk or SSD there are plenty of things to bear in mind – click here to read our guide on the pros and cons of hard disks, SSDs and solid-state hybrid drives.
There are a few rules of thumb if you’re in a rush. Hard disks are the more affordable options but even 7,200rpm drives won’t have great performance – at best you’ll get a slight speed boost over the console’s existing drive, at worst you’ll just equal it while improving capacity. A 1TB or 2TB hard disk will cost you around $60 (around £50, AU$80) or less than $80 (around £100, AU$160).
An SSD will deliver a more significant improvement to loading times and game performance, especially on a PS4 Pro console, but SSDs are more expensive – 1TB and 2TB models tend to cost around twice as much.
Step two: Back up your PS4
(Image credit: Shutterstock / charnsitr)
Got the hard drive? The next step is to backup anything you definitely don’t want to lose on your PS4. The bad news is that you can’t backup game installs. Your home internet will just have to take a beating to reinstall the lot.
You should start by syncing your Trophies first since they won’t be included in the backup data. Simply press the ‘OPTIONS’ button on your controller and select ‘Sync Trophies with PSN’. Your Trophies will now be safe and sound.
PlayStation Plus subscribers don’t need to worry too much about game saves either, as they will automatically be saved to the cloud. However, if you want to be extra-safe, you can back them up to a USB stick or external hard drive.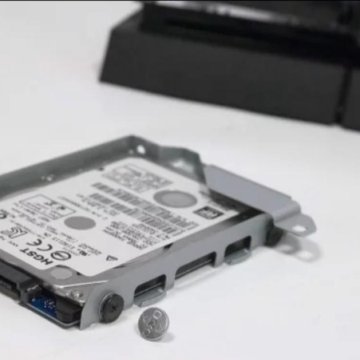
Just insert the drive, then in the PS4 menu go to settings > application saved data management > saved data in system storage. Here you’ll see an option to copy your saves to a USB drive. You need to select the files game-by-game so you might want to leave out any titles you’re never going to play again.
To back up everything on your console outside of its trophies, head to the system menu and then into the backup option. You’ll be able to select what you want to preserve, choose a USB drive to use and see how much space you’ll have left over on the drive afterward. Confirm the process, and the PS4 will restart before making the backup.
Step three: uncovering the hard drive
(Image credit: TechRadar)
Once you’re happy you’re not about to wipe out your gaming history, make sure there’s no disc in the drive and turn the PS4 off completely (not standby). If your PS4 heads to standby as standard, hold down on the PS button until the power menu pops up, then select turn off PS4. Next, unplug all the PS4’s cables (that’s the HDMI lead and power cable most likely).
Set the PS4 on a steady surface, put a hand on the shiny top plate and move it to the side a little. This is actually a simple plastic drive cover that’s not held in place with screws but a basic clip.
Once it’s free of its moorings, you’ll be able to lift the cover off to reveal part of the PS4’s metal skeleton. There’s not much damage you can do here, though, as it’s just the hard drive on show.
To uncover the hard drive within the PS4 Slim, unclip the plastic cover by hand. This clip can be found on the left-hand corner of the PS4 Slim at the rear of the console. With the plastic clip removed you’ll see the hard drive caddy of the PS4 Slim secured with a single screw.
To uncover your PS4 Pro’s hard drive, simply place the system upside down on a flat surface and locate the small plastic panel on its rear. Use the little tab beside the Ethernet port to pop the panel off.
With this cover removed you’ll see the hard drive caddy and the single screw holding it in place.
Step four: freeing up the caddy
On the regular PS4 you’ll notice the hard drive is not yet in full view. There’s one screw we need to unscrew to release the frame that holds the hard drive, using a Phillips screwdriver.
It’s the largest one on the metal surface you’ll see, and is inlaid with the classic PlayStation button icons.
Once the screw is removed, you can just pull the drive caddy out horizontally from the PS4’s body.
To replace the hard drive in the PS4 Slim and PS4 Pro, you’ll just need to unscrew the single screw that holds the caddy in place.
You will then be able to slide out the hard drive caddy.
Step five: releasing the hard drive
There are four more screws that hold the hard drive to its metal frame. These sit on its sides, and can be released using the same Phillips screwdriver you used to free the HDD frame.
It’s just the screws we need to take off, though. You’ll also notice some rubbery bits the screws rest against to absorb any shocks to the drive: leave those there.
This is pretty much the same process for replacing the hard drive of the PS4 Slim and PS4 Pro.
Step six: Swap the hard drives and replace
Once you’ve freed up the original hard drive, it’s simply a case of putting your new hard disk or SSD inside, then reversing the process you’ve just performed. So put those four screws in the sides, get the caddy back in the PS4, fasten it in place with the large screw and put the shiny plastic HDD cover back on the PS4.
If you have the PS4 Slim or PS4 Pro, the process will be the same. Place the hard drive or SSD into the caddy, secure, then slot it back into the Slim or Pro console, screw it in, and replace the plastic cover.
If the hard drive or SSD doesn’t fit, are you sure you checked it was a 9.5mm-tall or less 2.5-inch SATA drive before buying?
Should the process go as swimmingly as it went with us, you should be done within 15 minutes.
Step seven: download the PS4 software
(Image credit: Sony)
Now you have a PS4 with a completely blank memory. The console’s OS is stored on the hard drive you just removed, and the drive inside your console is completely blank. You need to download the software in standalone form, using another computer. You’ll find it over at the PlayStation website , and it takes up around a gigabyte at present.
You’ll need a USB drive or external hard drive or SSD with enough space to hold the download, and it must be formatted using the FAT32 file system and installed into the correct folder – full instructions are available on the PlayStation website. Press and hold the PS4’s power button for seven seconds – or until you hear two beeps – to boot the PS4 into safe mode.
You can then connect your controller with a USB cable and select option seven to reinstall your system software. Then, once that’s done, you can restore your backup file and your PS4 should be back to normal, albeit with a newer, better hard disk or SSD.
Conclusion
Is upgrading your PS4 hard drive worth doing? Absolutely. It’s easy, takes less than half an hour — if you’re quick — and can even be relatively inexpensive: around the price of a brand-new game if you’re using a hard disk. And, if you spend more on an SSD, you can get a solid speed boost for your machine, too. It doesn’t even invalidate your warranty — it’s as though Sony is willing you to do it!
The key question as of the arrival of the 4.50 firmware is whether to opt to upgrade the internal hard drive or go external. The other big question is whether to opt for a more affordable hard disk or a pricier, quicker SSD.
If you’re tempted to stick with an external, USB-connected product instead of an internal upgrade, then bear in mind that you’ll need to find space alongside your console for a new product – and remember to take it with you whenever you move your console.
Upgrading your PS4 hard disk does take a little bit of research, and it can be daunting to open your console – even if the process is pleasingly simple.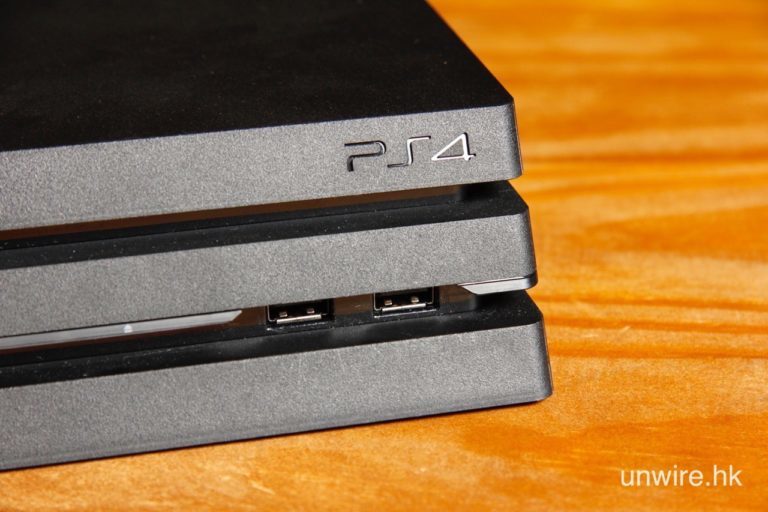 However, whichever decision you make, you’ll be happy with the expanded space.
For enthusiast gamers, you’ll no longer have to delete games to make space for the new additions to your library. Just think about it: the biggest games can top 100GB these days, and the PS4’s original 500GB and 1TB drives just can’t store that many games.
And, if you’re able to use an SSD, then you can get a great speed boost as well as lashings of extra capacity. Whether you go for a hard disk or an SSD, it’s a no-brainer.
- Own a PS5? Check out our recommendations for the best PS5 external hard drives
Andrew is a freelance journalist and has been writing and editing for some of the UK’s top tech and lifestyle publications including TrustedReviews, Stuff, T3, TechRadar, Lifehacker and others.
How to upgrade your PS4 hard drive
Turbo-charge your console and upgrade your PS4 hard drive
Want to upgrade your PS4 hard drive? It’s something worth looking into if you find yourself constantly deleting games to make space. Thankfully, upgrading your PS4, PS4 Slim, or PS4 Pro hard drive isn’t as tricky as it sounds. And our step-by-step guide has been written to make the process as stress-free as possible.
You can certainly check out the best PS4 deals available right now for a replacement console at a great price. But you can also save a lot of cash by simply upgrading your PS4 hard drive. This’ll let you extend the life of your machine and make it feel brand new once more.
A key benefit of upgrading your hard drive, of course, adding extra storage space to your PS4. There’s only 500GB of space on the standard PS4 and PS4 Slim and a larger 1TB on PS4 Pro. On base hardware, it’ll only take a few big games to completely fill up your hard drive. Games like Call of Duty: Warzone and Marvel’s Avengers need over 100GB of hard drive space, so space just disappears.
Going beyond the extra space a hard drive provides, if you slot a super-fast SSD into your console, you’ll also see a significant speed improvement. Although you’ll want to read up on the pros and cons of using an SSD before you do that.
There’s two ways to expand your hard drive capacity on PS4: replace the internal drive or attach one of the best external hard drives. These are both good options, but fitting a new internal drive is undeniably a cleaner option. Especially if you don’t have much space in your gaming area. However, if you’ve got a shiny new PS5, you can only upgrade internally with an SSD, but PS4 games will run off an external HDD.
This guide will show you how to upgrade your PS4 hard drive, including instructions for the PS4 Slim and PS4 Pro and a video to walk you through everything. Oh, and don’t worry, no matter what drive you’re slotting inside your machine, it won’t void your warranty.
How to upgrade your PS4 hard drive
Why you can trust TechRadar
Our expert reviewers spend hours testing and comparing products and services so you can choose the best for you. Find out more about how we test.
Best hard drive upgrades for PS4
Before taking your PS4, PS4 Slim or PS4 Pro apart you need to have a replacement drive ready – which means doing a bit of research. We’ve done the numbers to find out which drive is the best option, whether you’re looking for an all-round option, a budget product or a super-fast SSD.
Best hard drive for PS4
(Image credit: Seagate)
Seagate FireCuda Gaming SSHD 2TB
If you want to upgrade your PS4 hard drive and are looking for the best hard drive option right now, then you should seek out an SSHD. These drives combine platter-based storage with smaller, faster portions of flash memory, and they learn which files you use frequently and move them to the faster flash storage – so they can be loaded faster.
If you play the same games frequently, you’ll see a performance improvement. The 2TB capacity means that you’ll get loads of extra space even if the games you install don’t benefit from the flash memory portion of the drive, and it’ll certainly never be slower than the PS4’s internal drives. It’s not particularly expensive, either.
Today’s best Seagate FireCuda 2.5″ 2TB SSHD deals
4 Amazon customer reviews
☆☆☆☆☆
Reduced Price
$81.90
$73.71
View
$199.89
View
$219.99
View
Show More Deals
Best budget hard drive for PS4
(Image credit: Seagate)
Seagate Barracuda 2TB
If you’re on a tighter budget then you can ditch the hybrid portion of the hard disk and opt for a conventional drive. This won’t deliver much of a performance boost over the PS4’s normal hard disks, but Seagate’s drives are certainly no slower.
They’re available in loads of capacities, but 2TB is as high as you can go before the drives become too thick to fit inside Sony’s consoles. The prices on offer are tempting: a 1TB model costs just $50, and the 2TB model is the best-value option thanks to a price of $77.
Today’s best Seagate Barracuda 2TB deals
7 Amazon customer reviews
☆☆☆☆☆
$51.99
View
$64.99
View
$66.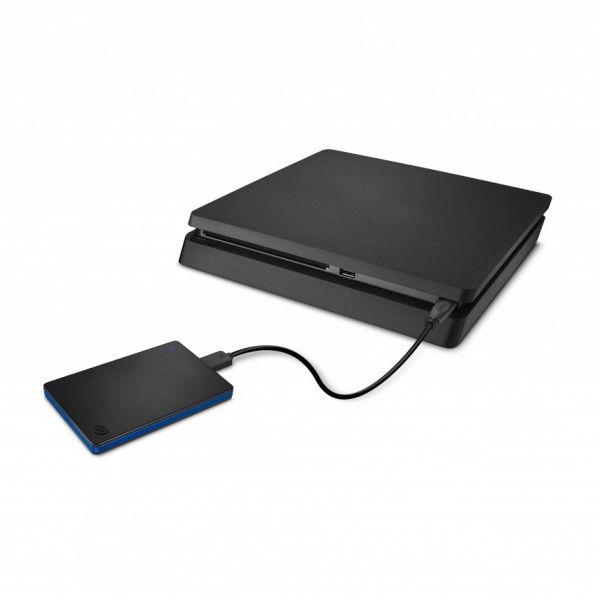 16
16
View
Show More Deals
Best SSD for PS4
(Image credit: Future)
Samsung 870 QVO
Samsung is the king of consumer SSDs, so it’s no surprise that the firm’s solid-state products are the best options for slotting inside your PS4. The 870 QVO offers great performance levels that are several times faster than the PS4’s hard disks, and you’ll see noticeable upgrades to loading times and performance in the PS4 and PS4 Slim, plus speed improvements in the PS4 Pro, which has a better storage interface.
Samsung’s drives offer great speed and reliability, and their consistent 7mm form factor means you can choose a drive with 1TB and 8TB capacity, depending on your needs – SSDs don’t have the same physical size restrictions are hard disks. As ever, SSDs are more expensive than hard disks – the 1TB and 2TB models cost $110 and $224 respectively, and the 4TB and 8TB drives sit at hefty prices of $450 and $899.
Today’s best Samsung 870 QVO deals
Reduced Price
$429.99
$319.99
View
Reduced Price
$2,249.97
View
Best budget SSD for PS4
(Image credit: Crucial)
Crucial BX500
Crucial’s drives don’t quite have the performance levels of Samsung’s drives, but in the PS4 that is less important thanks to their older storage connectivity systems. Drives like the Crucial BX500 still deliver a good performance boost over the PS4’s internal drives, and they’re just as reliable as Samsung’s products.
The BX500 is a little cheaper, too. It’s possible to get a 480GB drive for $49 if you’d like to give your PS4 a speed boost without any extra space – handy if you often play the same selection of games. Its 1TB and 2TB models come in at $100 and $199 respectively.
Today’s best Crucial BX500 SSD (480GB) deals
57 Amazon customer reviews
☆☆☆☆☆
$33.50
View
Reduced Price
$44.99
$33.99
View
Reduced Price
$67.45
$47.99
View
Show More Deals
What you need
- 1x PS4
- 1x Phillips screwdriver
- 1x 2.
 5-inch SATA HDD or SSD
 - 1x USB stick or 1x FAT32 USB HDD or SSD
- 1x laptop or PC with internet
- 1x PS4 controller
- 1x microUSB cable
Step one: find the right replacement
(Image credit: Shutterstock)
When it comes to wanting to upgrade your PS4 hard drive, the first thing to do is to buy your replacement hard drive or SSD. The PS4 uses a 2.5-inch SATA format for hard disks and SSDs, and it’s quite an archaic design now – it’s generally only used for more affordable drives.
Any drive you install into your PS4 needs to be under 9.5mm tall thanks to the size of the caddy that lives inside the PS4, which protects the drive and keeps it in place. This is no problem for SSDs, but it does prove to be a little limiting as many 4TB hard drives are a shade too chunky.
When looking for a new hard disk or SSD there are plenty of things to bear in mind – click here to read our guide on the pros and cons of hard disks, SSDs and solid-state hybrid drives.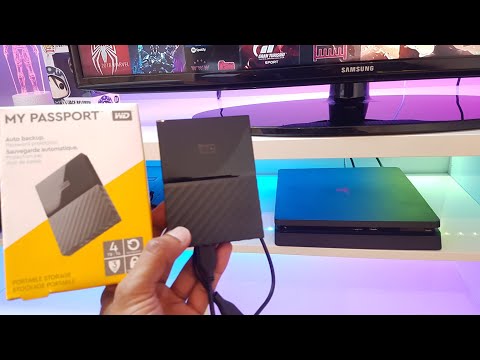
There are a few rules of thumb if you’re in a rush. Hard disks are the more affordable options but even 7,200rpm drives won’t have great performance – at best you’ll get a slight speed boost over the console’s existing drive, at worst you’ll just equal it while improving capacity. A 1TB or 2TB hard disk will cost you around $60 (around £50, AU$80) or less than $80 (around £100, AU$160).
An SSD will deliver a more significant improvement to loading times and game performance, especially on a PS4 Pro console, but SSDs are more expensive – 1TB and 2TB models tend to cost around twice as much.
Step two: Back up your PS4
(Image credit: Shutterstock / charnsitr)
Got the hard drive? The next step is to backup anything you definitely don’t want to lose on your PS4. The bad news is that you can’t backup game installs. Your home internet will just have to take a beating to reinstall the lot.
You should start by syncing your Trophies first since they won’t be included in the backup data. Simply press the ‘OPTIONS’ button on your controller and select ‘Sync Trophies with PSN’. Your Trophies will now be safe and sound.
PlayStation Plus subscribers don’t need to worry too much about game saves either, as they will automatically be saved to the cloud. However, if you want to be extra-safe, you can back them up to a USB stick or external hard drive.
Just insert the drive, then in the PS4 menu go to settings > application saved data management > saved data in system storage. Here you’ll see an option to copy your saves to a USB drive. You need to select the files game-by-game so you might want to leave out any titles you’re never going to play again.
To back up everything on your console outside of its trophies, head to the system menu and then into the backup option. You’ll be able to select what you want to preserve, choose a USB drive to use and see how much space you’ll have left over on the drive afterward. Confirm the process, and the PS4 will restart before making the backup.
Step three: uncovering the hard drive
(Image credit: TechRadar)
Once you’re happy you’re not about to wipe out your gaming history, make sure there’s no disc in the drive and turn the PS4 off completely (not standby). If your PS4 heads to standby as standard, hold down on the PS button until the power menu pops up, then select turn off PS4. Next, unplug all the PS4’s cables (that’s the HDMI lead and power cable most likely).
Set the PS4 on a steady surface, put a hand on the shiny top plate and move it to the side a little. This is actually a simple plastic drive cover that’s not held in place with screws but a basic clip.
Once it’s free of its moorings, you’ll be able to lift the cover off to reveal part of the PS4’s metal skeleton. There’s not much damage you can do here, though, as it’s just the hard drive on show.
To uncover the hard drive within the PS4 Slim, unclip the plastic cover by hand. This clip can be found on the left-hand corner of the PS4 Slim at the rear of the console. With the plastic clip removed you’ll see the hard drive caddy of the PS4 Slim secured with a single screw.
To uncover your PS4 Pro’s hard drive, simply place the system upside down on a flat surface and locate the small plastic panel on its rear. Use the little tab beside the Ethernet port to pop the panel off.
With this cover removed you’ll see the hard drive caddy and the single screw holding it in place.
Step four: freeing up the caddy
On the regular PS4 you’ll notice the hard drive is not yet in full view. There’s one screw we need to unscrew to release the frame that holds the hard drive, using a Phillips screwdriver.
It’s the largest one on the metal surface you’ll see, and is inlaid with the classic PlayStation button icons.
Once the screw is removed, you can just pull the drive caddy out horizontally from the PS4’s body.
To replace the hard drive in the PS4 Slim and PS4 Pro, you’ll just need to unscrew the single screw that holds the caddy in place.
You will then be able to slide out the hard drive caddy.
Step five: releasing the hard drive
There are four more screws that hold the hard drive to its metal frame. These sit on its sides, and can be released using the same Phillips screwdriver you used to free the HDD frame.
It’s just the screws we need to take off, though. You’ll also notice some rubbery bits the screws rest against to absorb any shocks to the drive: leave those there.
This is pretty much the same process for replacing the hard drive of the PS4 Slim and PS4 Pro.
Step six: Swap the hard drives and replace
Once you’ve freed up the original hard drive, it’s simply a case of putting your new hard disk or SSD inside, then reversing the process you’ve just performed. So put those four screws in the sides, get the caddy back in the PS4, fasten it in place with the large screw and put the shiny plastic HDD cover back on the PS4.
If you have the PS4 Slim or PS4 Pro, the process will be the same. Place the hard drive or SSD into the caddy, secure, then slot it back into the Slim or Pro console, screw it in, and replace the plastic cover.
If the hard drive or SSD doesn’t fit, are you sure you checked it was a 9.5mm-tall or less 2.5-inch SATA drive before buying?
Should the process go as swimmingly as it went with us, you should be done within 15 minutes.
Step seven: download the PS4 software
(Image credit: Sony)
Now you have a PS4 with a completely blank memory. The console’s OS is stored on the hard drive you just removed, and the drive inside your console is completely blank. You need to download the software in standalone form, using another computer. You’ll find it over at the PlayStation website , and it takes up around a gigabyte at present.
You’ll need a USB drive or external hard drive or SSD with enough space to hold the download, and it must be formatted using the FAT32 file system and installed into the correct folder – full instructions are available on the PlayStation website. Press and hold the PS4’s power button for seven seconds – or until you hear two beeps – to boot the PS4 into safe mode.
You can then connect your controller with a USB cable and select option seven to reinstall your system software. Then, once that’s done, you can restore your backup file and your PS4 should be back to normal, albeit with a newer, better hard disk or SSD.
Conclusion
Is upgrading your PS4 hard drive worth doing? Absolutely. It’s easy, takes less than half an hour — if you’re quick — and can even be relatively inexpensive: around the price of a brand-new game if you’re using a hard disk. And, if you spend more on an SSD, you can get a solid speed boost for your machine, too. It doesn’t even invalidate your warranty — it’s as though Sony is willing you to do it!
The key question as of the arrival of the 4.50 firmware is whether to opt to upgrade the internal hard drive or go external. The other big question is whether to opt for a more affordable hard disk or a pricier, quicker SSD.
If you’re tempted to stick with an external, USB-connected product instead of an internal upgrade, then bear in mind that you’ll need to find space alongside your console for a new product – and remember to take it with you whenever you move your console.
Upgrading your PS4 hard disk does take a little bit of research, and it can be daunting to open your console – even if the process is pleasingly simple. However, whichever decision you make, you’ll be happy with the expanded space.
For enthusiast gamers, you’ll no longer have to delete games to make space for the new additions to your library. Just think about it: the biggest games can top 100GB these days, and the PS4’s original 500GB and 1TB drives just can’t store that many games.
And, if you’re able to use an SSD, then you can get a great speed boost as well as lashings of extra capacity. Whether you go for a hard disk or an SSD, it’s a no-brainer.
- Own a PS5? Check out our recommendations for the best PS5 external hard drives
Andrew is a freelance journalist and has been writing and editing for some of the UK’s top tech and lifestyle publications including TrustedReviews, Stuff, T3, TechRadar, Lifehacker and others.
The Best PS4 External Hard Drives and How to Install Them
The PlayStation 4 Approaches Gradually coming to the end of its life cycle as the PlayStation 5 looms, but it’s still a platform. Very popular until 2019, with many High Quality Exclusives coming soon, including titles like Death Stranding, Ghost of Tsushima, and The Last of Us Part II.
But the devices are definitely showing signs of aging and the problem that many of us face is limited storage space. These days, when AAA games can easily take up over 40GB of space, they can easily fill up 500GB and even 1TB hard drives, especially if you still have a lot of media files, whether it’s videos of your own gameplay or Movies, music, and show.
Thankfully, the PS4’s support for external storage means you can expand that storage without much hassle.
We’ve rounded up the best External Hard Drives for PS4 devices below. Whether you’re looking for an affordable option or the largest storage available, you’ll find what you need. We’ll also show you how to get started with external storage.
1. Best external drive for PS4 overall:
WD Elements 2TB
Buy now on AMAZON $54.99
If you’re looking for a decent amount of extra storage for your PS4 at a good price, the WD 2TB Elements Drive is a great choice. It is compatible with USB 3.0, so it can meet the requirements of PS4 games. Its slim profile of just 4.35 x 3.23 inches means it can fit comfortably on your PS4.
2 TB is enough for many games, so it will take some time before you need to update again. Those with a lot of data in their system should consider increasing the storage, but this is an affordable option for most gamers.
2. Best PS4 External Drive for Maximum Storage:
Seagate Expansion Desktop 8TB
Buy Now on AMAZON $139.99
Need massive storage space for your games? PS4 supports external drives up to 8TB, so the Seagate Expansion Desktop 8TB gives you the most storage space possible. It’s a desktop drive, so it’s not as portable as the WD Elements option.
The size of this disk is 6.93 x 4.75 inches It’s almost three times as deep. Because it doesn’t work over USB, you’ll need to plug in a dedicated power cable. 8 TB is a lot of space, so only those who download dozens of games should choose this drive.
3. Best PS4 External Drive with Modest Storage:
Seagate Portable 1TB
Buy Now on AMAZON $49.99
Not everyone needs a lot of extra storage. If you have a more modest collection of games, consider the Seagate Portable 1TB for additional storage. Early PS4s had 500GB of internal space; Newer models have a 1TB internal drive. This means that 1 TB will be double or more than what was on your system.
Like the WD drive, this option is portable so there is no separate power cable. measure 4.6 x 3.15 inches . You can see the PS4 version of this drive being sold as an «Officially Licensed Product».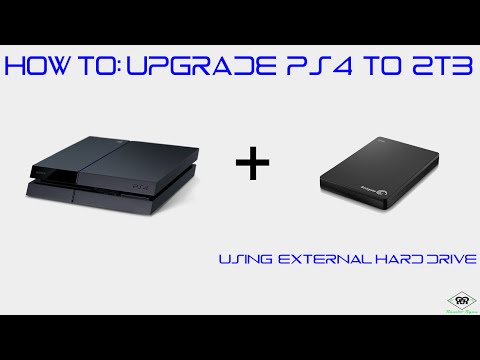 We recommend avoiding this as it costs more than the above, but it’s basically the same product. You will benefit greatly if you completely forego the use of official storage space.
4. Best external drive for PS4 at the lowest price:
KESU 500GB Ultra-thin
Buy now on AMAZON $ 36.99
250GB is the minimum storage size for an external drive supported by PS4. However, 250 GB is not enough for gaming, and buying an external hard drive of this size is not very cost-effective. Therefore, we recommend that you purchase at least a 500 GB drive. Most 500GB external hard drives are available from lesser-known companies today, so you might want to take a chance on buying them.
But if you need extra storage at the lowest possible price, KESU 500GB Ultra Slim is a good deal. Its physical size is the same as other flash drives we’ve reviewed. A 500GB drive won’t give you much room to play games, but it’s the cheapest option and worth looking into.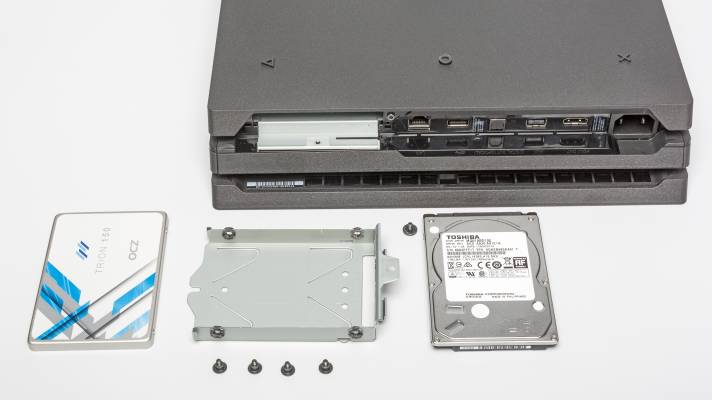
If you can up your budget a bit, we definitely recommend getting a 1TB drive from a reputable manufacturer like WD or Toshiba. You get more storage and better reliability for just a little more money. Also, keep in mind that you can only connect one external drive to your PS4 at a time. It’s smart to buy storage big enough for your needs the first time to avoid transferring data every time.
5. Best External Hard Drive for PS4:
Silicon Power 4TB Rugged
Buy Now at AMAZON $97.99
If you travel a lot with your PS4, you don’t want to give up gaming. The Silicon Power 4TB Rugged is a travel option that offers plenty of storage space. This drive is slightly larger at the limit of 7.3 x 6.1 inches However, it has some powerful features worth looking into. Silicon Power is shockproof and waterproof, so you don’t have to worry about bumps or liquid splashes.
It has an anti-slip rubber coating and an anti-scratch surface. The storage unit also includes a slot for easy cable connection while traveling. Keep in mind that these reliability specs mean it costs a bit more than other 4TB drives. It’s also available in a 1TB variant if you don’t need a lot of storage space.
6. Best External SSD for PS4:
SanDisk 500GB Extreme Portable External SSD
Buy now at AMAZON $89.99
If you’re looking for the fastest possible boot times, an external solid state drive (SSD) is the way to go. SSDs are more expensive than HDDs, but provide much better performance. We recommend SanDisk’s 500GB portable external SSD, although it is available in sizes from 250GB to 2TB.
In this case, 500 GB is a good balance in terms of cost and size. It is also a powerful hard drive that is resistant to water, dust and shock. It measures 3.8 x 1.9 in. . We offer this device to people who do not have many games installed, but who want to play them quickly.
500 GB is not much space, but games that can be played from an external SSD drive will improve a lot. Keep in mind that this will not speed up the PS4 operating system as it is still installed on the internal hard drive.
Other PS4 Compatible External Hard Drives
We’ve rounded up the best external hard drives for PS4, but maybe you’re interested in something else or want to use the one you already have. Fortunately, the PS4 compatible external hard drive requirements are simple.
Any external drive that uses USB 3.0 or later and has between 250GB and 8TB of storage will work with the PS4. Make sure it’s using a USB-A connection and not the newer USB-C standard which is not compatible with PS4.
How to set up an external hard drive on PS4
If you have a PS4 external hard drive, it’s easy to set it up. PS4 requires system software version 4.50 (released early 2017) or later to use external storage.
Connect the external drive to PS4 first. Sony says it should be connected directly to the system, so avoid using any USB hubs. Once connected, you will need to format it (unless you have purchased a disc pre-formatted for PS4).
To do this, turn on your system and go to Settings -> Devices -> USB drives . Select your device and select Format as extended storage . click on the «» button of option on the console to display this option if it is not automatically displayed. game updates on the external drive
However, saved data, themes and footage will always be saved on the internal drive.The system will use the new volume automatically, but you can also make some changes according to your preferences.0003
Disconnect drive safely
It is important to properly disconnect an external drive when you want to remove it. Disconnecting while in use may corrupt your data. The system assumes the drive is connected even when your PS4 is turned off until you tell it to turn off by following these steps.
keep pressing PlayStation button on the remote control to open the quick menu, then Visit Sound / Devices . Find Stop using extended storage here and click Ok To confirm. Now you can safely disconnect the external drive.
Choosing where to install games
If you wish, you can choose where to install games by default. You can’t change this when downloading games, so it’s wise to set this up as soon as you plug in your drive.
Go to Settings -> Storage and click « option » in the console to display the new menu. Select the option Application Install Location Here and set it to Extended Storage . This will set up the external drive as the default save location.
Move games between drives
To move a game between drives, go to Settings -> Storage And select the disc with the game you want to transfer. Select Applications data types.
Now press Options (Options) on the remote control and select Move to extended storage (or Move to system storage ).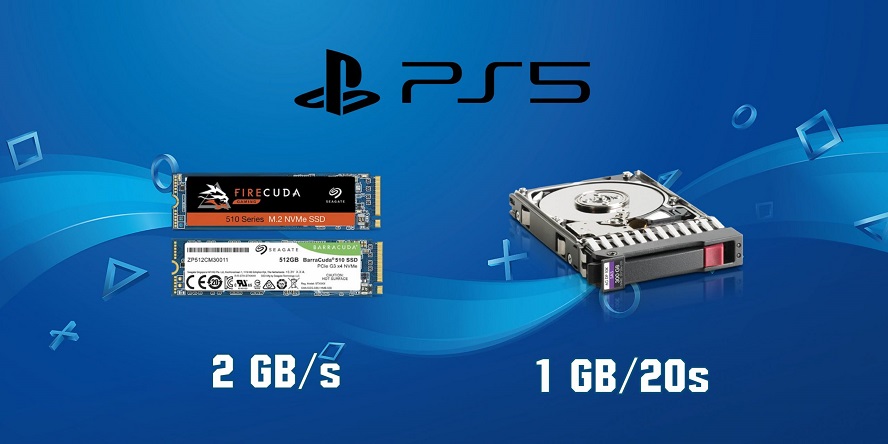 Add all the games you want to transfer, then click Moving on and confirm.
Best PS4 External Drives
Now you have a large selection of PS4 external drives to choose from and you know how to set up additional storage. External drives are a great way to expand your storage without too much hassle, which is very useful for those who have a large collection of games.
You may want to consider replacing the PS4’s internal hard drive as well. It’s not difficult and can give you more storage space. Consider using a modest internal SSD with a large external HHD drive for the best of both worlds.
Source
【How to upgrade PS4, PS4 Slim and PS4 Pro hard drive】 — Greatech
What’s in the article:
- 1 Best PS4 hard drive upgrades
- 2 Best all-round PS4 hard drive upgrade
It doesn’t matter if you have a PS4 , PS4 Slim or PS4 Pro , the method is very similar and it won’t take too long. This means you can expand your hard drive up to 2TB with relative ease.
Alternatively, without spending a fortune, you can purchase an external hard drive. The cost of such devices is usually lower than that of high-capacity 2.5-inch hard drives.
If that option sounds appealing to you, you can check out our selection of the best external hard drives. Just remember to make sure it’s USB 3.0!
If you prefer SSD drives, we will walk you through the process step by step to replace your PS4 hard drive at home. Set aside 40 minutes and you can easily double or quadruple your console storage!
Along with this step-by-step guide, we’ve also released a video that will show you everything you need to know about upgrading your PS4’s hard drive.
Make sure you have already browsed our list of the best internal desktop and portable hard drives to find a good hard drive for your PlayStation 4 . You will need a 2.5″ laptop hard drive, so make sure you choose one of these!