Bleak Falls Barrow Puzzle Solution
By
John Higgs
Bleak Falls Barrow is one of the first dungeons players are likely to encounter in Skyrim, but its puzzles can still be tricky.
The Elder Scrolls 5: Skyrim Anniversary Edition has arrived, celebrating the 10th birthday of Bethesda’s legendary RPG. The latest edition of Skyrim has given old fans and new players alike a chance to dive into the world of Tamriel with a fresh campaign. There are many adventures to be found across the sprawling map, from lofty peaks to haunted ruins.
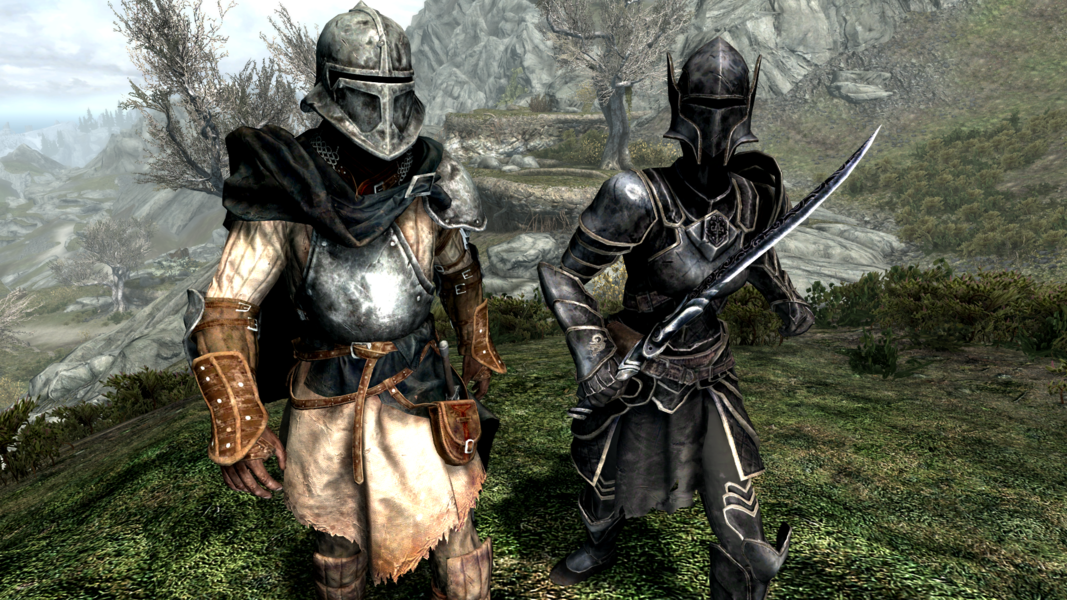
Bleak Falls Barrow is often the first Nordic ruin that players will encounter in their Skyrim adventure. This is due to its position above the village of Helgen, and two early quests that direct players toward it, one of which is critical to the main story. As an introduction to Skyrim‘s Nordic ruins, Bleak Falls Barrow contains a couple of puzzles that may cause a problem for newcomers.
RELATED: Skyrim: How to Get Bone Wolf Pet
The Bleak Falls Barrow Pillars Puzzle in Skyrim
The first kind of Skyrim puzzle that players will encounter in Bleak Falls Barrow involves rotating pillars, which will remain a staple of Nordic ruins throughout the rest of the game. Fortunately, this first example is meant as an introduction, and simply requires players to rotate the pillars on the left to match the three symbols above the gate. Pulling the lever with an incorrect answer will cause the gate to fire poison darts, dealing minor damage.
Players will immediately notice that one of the ancient Nordic symbols above the gate has fallen down, but has helpfully landed so that it can still be recognized. For those who’d rather skip straight to the solution, the order from left to right should be Snake, Snake, and Whale. Once players have entered the correct solution, all they need to do is pull the lever to open the gate.
The Bleak Falls Barrow Golden Claw Puzzle in Skyrim
Via: Multicursal.blog
The second Bleak Falls Barrow requires players to have recovered the Golden Dragon Claw from the thief Arvel the Swift. It’s impossible to miss Arvel while progressing through the long Skyrim dungeon, as he’s trapped in a spider web blocking the main path. Once players have recovered the Golden Claw from Arvel’s body, they should continue through the Barrow until they reach the large door marked with the claw symbol.
The door has three sliding discs, which must be aligned correctly before the Golden Claw can be used to open it. The solution to the puzzle is actually engraved on the Claw itself, so players will need to inspect and rotate it in their inventory to find the answer.
There are many Dragon Claws in Skyrim, but the solution on the Golden Claw is, from top to bottom, Bear, Moth, and Owl. After entering the correct solution, all players need to do is interact with the door to use the Golden Claw to open it.
The Elder Scrolls 5: Skyrim Anniversary Edition is available for PC, PlayStation 4 and 5, and Xbox One and Series X|S.
MORE: Skyrim: How to Get a Goblin Follower
Ansilvund Pillar Puzzle Guide & Solution
By
Ethan Webb
Updated
The pillar puzzle in Ansilvund is one of the more difficult puzzles in Skyrim to solve, but finding the solution is much easier than one might think.
Quick Links
- Skyrim: Ansilvund Puzzle Solution
- Ansilvund’s Stone of Barenziah Location
The Elder Scrolls V: Skyrim has no shortage of puzzles scattered through its many dungeons and crypts, and although the majority are quite simple to solve, some solutions are more obscure, such as the pillar puzzle within Ansilvund Excavation. Ansilvund is an ancient Nordic tomb that sits far to the north of the city of Riften. While it’s not included in the main questline, the Dragonborn will eventually travel there as its dungeon is correlated with many Radiant Quests like «Family Heirloom» or «Protecting the Bloodline.» Additionally, Skyrim‘s Ansilvund is one of the locations where a Stone of Barenziah can be found.
Being an excavation site, players will find several ore veins within Ansilvund’s winding tunnels. However, keep in mind that the crypt is well-guarded with level-scaled necromancers, rogue mages, and plenty of Draugr. Yet, those roleplaying as the famous and beloved «stealth archer» build in Skyrim shouldn’t have too much difficulty progressing through, as Ansilvund features plenty of cracks and crevices to hide while sniping unsuspecting enemies.
In addition to the hostile mobs, be wary when traversing the environment in Ansilvund, as several pressure plates and tripwire traps are set up along the cave’s passageways.
Related: Skyrim: Saints And Seducers — Bandit Camp Location Guide
Skyrim: Ansilvund Puzzle Solution
Approximately halfway through Skyrim’s Ansilvund Excavation, players will encounter a puzzle with spinning pillars connected to a locked door across a small stone overpass. What makes this puzzle so perplexing is that, unlike typical pillar puzzles in Skyrim, no apparent solutions are lying about the area or in nearby rooms. Yet, what players may not realize is that the answer to the Ansilvund puzzle is much closer than it seems.
There are two possible ways to solve Skyrim’s pillar puzzle in Ansilvund. The first way is by checking one of the books on a table across from the mechanism’s lever. Next to a journal sits a book commonly found in multiple locations across Skyrim called Of Fjori and Holgeir. It tells a short love story between Fjori and Holgeir, but the main point players should be looking for the order of keywords within the written lines. More specifically, the names of the animals engraved on the pillars can also be found in this Elder Scrolls book. According to the order of the story, the solution to Ansilvund’s puzzle in Skyrim is as follows:
- «As the Eagle (1) finds.