Resident Evil 2 Claire walkthrough: NEST — E-02 East Area
Enter Resident Evil 2’s NEST Lobby and grab the Green Herb on the reception desk and the Gunpowder on the desk behind. There’s also a Typewriter and an Item Box here. If you have Flame Rounds, equip them.
The room to the south is locked. Enter the door to the Presentation Room.
OBJECTIVE: UPGRADE YOUR ID WRISTBAND
Presentation Room
You can interact with the corpse on the other side of the glass to see the upgrade you’re looking for. Now you just have to get to it.
Follow the path around, picking up the High-Grade Gunpowder (White) on a tray in the next room. Use Flame Rounds to kill the plant-like enemy, which is called an Ivy.
If you don’t have Flame Rounds, you’ll need to destroy the yellow-orange nodules on its body to take it down. But after a few minutes, they’ll grow back, and the Ivy will get back up.
Fire is the only way to kill them dead. They’ll do a satisfying little “I’m dying!” dance when they’re, well, dying. If you don’t see that, they’re coming back.
Two well-placed Flame Rounds will burn Ivy to a black char and prevent it from getting up ever again. (Though we’ve successfully knocked them down with a fully charged Spark Shot shot and then burned them to a crisp with a Flame Round, which is a nice way to conserve some ammo, sort of.)
There are three more Ivy monsters in a room not far from here (the Greenhouse), so keep that in mind (and use your ammo wisely).
This Ivy is down but not dead. You can tell because it’s still got green tendrils. Shoot it with fire. Capcom via Polygon
Greenhouse Control Room
Grab the Flash Grenade directly in front of you. Interact with the Facility Control Terminal, and you’ll see that you need a code. Interact with the Solution Sprinkler System, and you’ll receive the Dispersal Cartridge.
Greenhouse
Inside the Greenhouse, head straight and kill the Ivy with fire. Collect the Blue Herb. Turn left and note the pattern on the box that you can interact with.
Greenhouse Control Room
Capcom via Polygon
Now head back to the Greenhouse Control Room, enter the pattern and return here to open the hatch and get access to the ladder. The code looks a bit like this: F II L7 F.
Greenhouse
Return to the Greenhouse, and take the path left, picking up the Red Herb along the way. Hug the left wall to enter a new room.
Drug Testing Lab
Read the Herbicide Synthesis note on the counter next to the sink.
OBJECTIVE: DESTROY PLANT 43
There’s a machine locked with a cage here. You can see the L7 code clearly, but the rest are obscured.
There’s a Hand Grenade in the northwest corner of the room, sitting next to a corpse wearing a yellow hazard suit. There’s also Gunpowder (Large) on the east side of the central desks.
You’re relatively close to your Item Box, so feel free to make a few trips back and forth to free up your inventory and store any items that you can’t pick up. Just watch out for the Ivy enemies, who are super great at respawning.
Descend the ladder you unlocked, and search the dead end for Gunpowder (Large) and the Research Lab East Area Map. Open the door to the next hallway.
Lounge
The hallway leads to several rooms, some of which are locked. Continue into the Lounge, and pick up:
- Flame Rounds x3 on a bench (which you can totally use on the Ivi back in the Greenhouse)
- A Green Herb on the southern wall
- The Trophy on a table, and Examine it in your inventory, and you’ll see a code on the bottom: L7, a thin I, a lowercase i, and a thick capital I.
 That’s the next code you need to enter n the Greenhouse Control Room.
There’s also a Circuit Breaker (labeled MURF) in the corner near the vending machines. You can’t do anything with that quite yet.
See all of those corpses playing dead around the Lounge? As you head away from the Lounge, the three corpses will spring to life. Take care of them before they awaken. One headshot each with your powerful handgun and ammo will turn them into non-issues.
As you head down the hallway away from where you entered, Lickers will appear in the hallway leading to the Low-Temp Testing Lab (which is locked). A direct hit on each with a Flame Round will kill them, but feel free to use whatever powerful ammo you have.
Take the only unlocked door (it’s west), and head toward the stairs.
Lounge Staircase B2 to B1
Watch for the zombie on your right as soon as you enter. Also the one who falls as you’re ascending the staircase.
In the room at the top of the stairs, kill another zombie. Collect:
- High-Grade Gunpowder (White) near the door where you came in
- Handgun Ammo x15 in a locker just up the wall from that door
- Signal Modulator along the wall
- Somebody’s Note on a chair near the Signal Modulator.
Unlock the door to return to the Lobby, where you can offload some equipment and save.
Greenhouse Control Room
Capcom via Polygon
Return to the Greenhouse Control Room, and enter the code from the Trophy. That’s one of ours above, but yours may be different.
Drug Testing Lab
Go to the Drug Testing Lab, and interact with the machine you’ve given yourself access to — the Solution Dispenser. It’s not nearly as difficult as it seems, but you can refer back to the note if you need help.
Place an empty cartridge into the Solution Dispenser
Add the required amount of UMB No.21
Cool immediately
Or you can just keep rotating and filling until the liquid on the left is the same level as the red ring round one of the tubes. It won’t take more than a minute. The moment it happens, you’ll receive the Dispersal Cartridge (Solution).
If you head back to the Greenhouse Control Room again and put the cartridge back where you got it, you’ll receive this message:
ERROR: Solution temperature is outside acceptable range.
So you’ve got to cool it downstairs.
But first!
Nap Room
Capcom via Polygon
Return to the Nap Room, back by where you came in. Use your Signal Modulator there to dial in the code MUF. Then rotate the waveforms until they overlap. Once that’s done, insert it into the Circuit Breaker. The lights will come on. A zombie will rise (so kill it), and check the beds for a Mr. Raccoon toy, your final Hip Pouch upgrade, and Wayne Li’s Note.
Now head back to the Lounge (so through the center again, and down the staircase where that one zombie probably fell on your head).
Lounge
Head back downstairs, watch out for a new zombie down in the Lounge (though not if you shot it while it was playing dead earlier), and stand in front of the Circuit Breaker.
Capcom via Polygon
Open your Signal Modulator in your inventory, and tab through until it says MURF. Adjust the dials until the two waveforms are overlapping. Now place the modulator into the breaker.
That’ll restore power to the basement.
Server Room
Head here to collect some High-Grade Gunpowder (White), a Combat Knife, and Flame Rounds x3. There’s also a Typewriter and an Item Box. Feel free to scour the area for things you didn’t collect and do some inventory swapping.
Low-Temp Testing Lab
There’s an enemy playing dead sitting on the floor. It will take an unreasonable number of headshots to knock it down.
Interact with the computer to read Wayne Li’s Inbox.
Enter the lab, and pick up the Gunpowder on the table near the window. Interact with the Cooling System to lower the temperature of your Dispersal Cartridge (Solution). It will return to your inventory as Dispersal Cartridge (Herbicide).
Greenhouse Control Room
Make your way back to the Control Room, and interact with the Solution Sprinkler System to unleash the herbicide.
OBJECTIVE: UPGRADE YOUR ID WRISTBAND
Enter the adjacent room, and pick up the Electronic Chip. Hit the (sigh) new Ivy with everything you’ve got as you make your way back to the laptop in the Presentation Room.
OBJECTIVE: GET THE ANTIVIRAL AGENT IN THE WEST AREA
Presentation Room
Interact with the Senior Staff PC to read Byron Cartwright’s Inbox.
Main Shaft
Head back to the Main Shaft, and interact with the terminal there to reach the next area.
Resident Evil 2 Remake: All safe codes, locks & puzzle solutions
❘ Published: 2022-05-24T11:52:43
❘ Updated: 2022-05-24T13:14:27
The Resident Evil 2 Remake is full of fiendish puzzles, but we’ve gathered all the safe codes and puzzle solutions in one place to make your zombie-slaying adventure a little easier.
Some solutions to puzzles and safe codes in the Resident Evil 2 Remake can be easily solved in the game, but some are well hidden, making the player wait a long time to find them. They also may need to backtrack once they’ve found the solution, putting them at additional risk of becoming zombie food or being detected by Mr X.
Knowing the solution to a puzzle, or code to a locker early can remove this risk, and give the player an early advantage. Imagine getting extra ammo at the start of the game or a gun upgrade several hours earlier than you’re supposed to have it? This can be incredibly helpful and means the player can focus on the other aspects of survival.
Article continues after ad
Below we’ve compiled a list of all the safe codes, combinations, and lock solutions in the Resident Evil 2 remake.
Contents
- What are codes used for in Resident Evil 2 Remake?
- Locker, safe codes, & puzzle solutions
Capcom
Locker codes in the Resident Evil 2 Remake can be used before the solution is found in-game.
What are safe codes & solutions used for in Resident Evil 2 Remake?
The Resident Evil 2 Remake features a variety of lockers and safes that require a simple code to unlock, but the game is also home to various puzzles that require a specific solution to unlock or solve. This also has a habit of changing during your second run, or if you’re playing as another character.
- Read More: What Resident Evil 9 needs to get right
Therefore, we’ve broken all our Resident Evil 2 Remake solutions down by location, type, code, and reward. We’ve also included the second run solution and what changes when you play as the opposing character.
Article continues after ad
Capcom
Some puzzle codes appear more complicated, but boil down to just four numbers.
All Resident Evil 2 Locker, safe codes & puzzle solutions
Here’s a full list of all the lock/safe codes, and puzzle solutions in the Resident Evil 2 Remake:
Subscribe to our newsletter for the latest updates on Esports, Gaming and more.
So, there you have it – that’s everything you need to know about all lock solutions in the Resident Evil 2 Remake.
For more codes, solutions, and tips, make sure to check out some of our other guides:
Dead by Daylight codes | AFK Arena codes | Roblox promo codes | Pet Simulator X codes | Muscle Legends codes | Bee Swarm Simulator codes | Blox Fruits codes | King Legacy codes | Anime Fighters Simulator codes | Slayers Unleashed codes | Anime Dimensions codes | YBA codes | All Star Tower Defense codes | How to get free V-Bucks in Fortnite | Mania codes | Mobile Legends: Bang Bang codes | Ro Ghoul codes | Jail Break codes
Article continues after ad
Resident Evil 2 Remake: Claire Walkthrough Scenario B
After completing the game as Leon (if you chose him as the first character), you will unlock the second playthrough mode in which you will control Claire. It will be an alternate story that runs parallel to the first mission, but with some key differences: different puzzle solutions will be required, items and enemies are in different locations. But the most important thing is that the second playthrough will allow you to see the true ending of the game. nine0003
However, there will be similar routes and other gameplay aspects regardless of whether you played the game for the first time as Leon or Claire.
Resident Evil 2 is assigned a certain rating depending on the time spent on the passage. Therefore, in order not to slow down much, we will not indicate the location of each individual item in the walkthrough. If you’re interested in additional secrets, weapons, upgrades, and inventory upgrades, check out the Tips and Tactics section for detailed guides. nine0003
Beginning
After the cutscene about Leon meeting Claire at the gas station, you will gain control of a new character. This time the game will start in a graveyard outside the police station. Walk forward past the graves and down the stairs. Move past the door with the chain on the right hand and climb the other steps. On the left side lies red grass , a little further to the right — blue . There is a grate with a fire escape around the corner, and you were on the other side. nine0003
Go to the gate and take the cutting tool from the barrel on the left side . A cut-scene will start, and zombies will appear on the location (about four or five pieces). Run past them in the opposite direction, go down the stairs and use the cutting tool on the chain that holds the door on the left hand. This is the first safe room in the second playthrough of the game. Collect ammo and other supplies, including a quick-loading revolver (if you play as Leon for the second time, he will find a pistol). nine0003
Cutting tool.
Yard key that you need is hanging on the hook of the locker to the right of the entrance. Keep in mind that during this time, the zombies you successfully bypassed were constantly moving, so be prepared for them to block the path back to the gate. Having dealt with everything, leave the room and go back up the stairs to the place where you found the cutting tool. Open the gate with the key and collect ammo from the table and board on the side, on the right hand. nine0003
After that, you can throw away the key to the yard from inventory. Open the door on the left side, then turn right and enter the office. Watch your step as the cop who was hacked up during the first playthrough has now turned into a zombie and is crawling on the floor. Go through the shutters, pull out a combat knife from the wall (on your right hand) and move along the corridor.
At the end of it turn left and left again: go through the door and find yourself in the rest room. Another safe room that can be used while at the police station. If you wish, save, pick up supplies and set up your inventory. In the room with the bunk bed, which is connected to the recreation room, there is a 9 on a chair.0014 fuse . Pick it up and keep it ready, because the item will come in handy soon.
Pass the hacked-up cop, exit into the corridor with the rest of the zombies lying on the ground, and turn right. Use the cutting tool on the door with the chain directly in front of you. This will take you to the east office. Inside, kill two zombies and collect a lot of supplies. Be sure to pick up valve from the side room in the office.
Go to the far end of the hall and move the chair blocking the door. Go through it and on the right side you will find a pantry with cartridges and boards. However, to continue the plot, follow the left. Use the fuse from inventory on the wall panel to raise the shutter, then go to the main hall. nine0003
The main hall is now an unsafe place unlike the first playthrough, so deal with the attacking zombie and then collect hip pouch from the reception desk. If you watch the video on the computer with the red monitor on your right hand, you will see a cut-scene with the Tyrant. As you can guess, during the second playthrough, the Tyrant will be more aggressive and persistent. Go deep into the main hall, to the statue of the goddess, and find an old friend Marvin. Grab the notepad from the couch where the cop was lying and you will realize that this time the solution to the statue puzzles is not so easy. nine0003
However, we can help you save time by providing the correct answers to these puzzles right away. Climb the stairs in the main hall and go to the lion statue. Make sure you get rid of the zombies on the right. Enter the following code from right to left: crown, flame, bird. This will give you Lion Medallion . Turn around and return to the first floor of the main hall. The reception is located on the southwest side of the hall. Go to it and turn right to the west wing. nine0003
The answer to the riddle in the statue of a lion.
You will see Slimer outside the window. Walk along the corridor until you reach the officer lying in the corner. Turn right, but stop and point the lantern at the ceiling. Above you is a Lizun, which must either be carefully bypassed or killed. To sneak past, just move under it. Ignore the zombies outside the window, keep walking silently.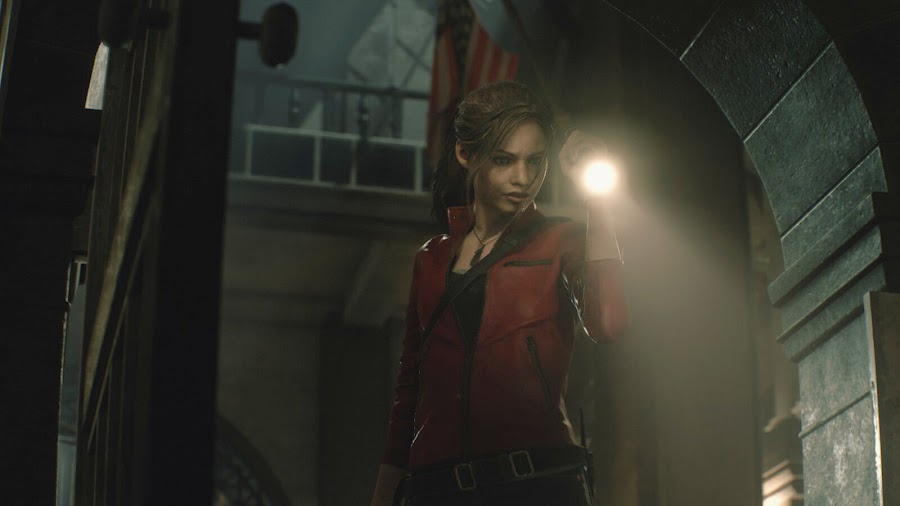
To kill him, focus on headshots to stun the target, then use your combat knife to save ammo. Repeat the procedure until completely destroyed. In any case, go down the corridor, turn right at the very end, then get to the operations department. Take the ammo from the left side and remove map of the first floor , which was also there during the first playthrough of the game. Use the cutting tool on the door with the chain, after which you can throw it out of inventory.
Inside the new room you will find a detonator without a battery, which you will need for the maiden statue. Open the lock to your left and exit into a new corridor. There is a fat zombie on the right side, so take it out before moving on. We suggest killing him right now, otherwise the enemy will interfere with your movement in the future. Head to the storage room on the left. Use the keypad in front of you to open lockers #106 and #109. Be aware that a zombie has woken up behind you and will immediately try to enter the room.
Locker #106 contains a film that, when developed, will give you a hint on how to open the weapon stash at the back of the room. In number 109 are the necessary cartridges. Leave the storage room and turn left. Kill the zombie that breaks through the window, then be sure to board it up. You will be here quite often, and zombies will climb through the window almost every time. Another zombie will wake up to your right. nine0003
Then go to the photo lab, pick up the supplies and develop the film if you want. Leave this place, climb the stairs near and on the second floor, pick up cartridges from the floor. Turn right, kill the zombies, then move along the corridor until you find yourself in the men’s shower. Inside you will see steam blocking the path. First, clean out all the cabinets. In the one that is closer to the couple, a zombie is hiding.
Code to unlock the locker with combination lock — CAP. In the right corner from the entrance, where the first pass was a portable safe, you will find jewel box . In case you forgot, there is a STARS token hidden inside. Before moving on, use the vent from inventory (found in the east office) on the pipe to the left of the steam passage. You will get rid of the barrier. However, do not rush to go forward, but return to the stairs and go up to the third floor. At the top, turn to the right side and pick up the cartridges lying on the side.
You will find a shadow on the wall, which the developers are trying to scare you with for the second time. But now, danger is really waiting for you around the corner — zombies. Kill him and take him off the table blue key . The code for the locker located outside the room is DCM. Return to the darkroom to drop the casket into the chest and any extra ammo for the weapon that isn’t there yet. Now is a good time to visit the west office on the ground floor. Head back down and follow the corridor to the door opposite the storage room with the grenade launcher.
Blue key.
Go inside and deal with the opponents. One zombie is sitting on a chair while the other one is hiding in a side room. There is also a safe that can be opened by rotating the dial nine times to the left, fifteen to the right, and seven more to the left. Hidden inside hip bag . Go to the far end of the room where Leon’s desk with two locks is located. The employees played a joke on the young specialist and hung up the locks, giving a hint to find a solution. One way or another, the left one opens with the NED code, and the right one with MRG. Inside you will find pistol upgrade .
Now go back to the photo lab and sort out the inventory. Go to the second floor to the shower room and go to the back. On the other side, take the gunpowder from the locker, and then go through the door. Pick up incendiary cartridges from the sofa on the left side, then move forward along the corridor. The first door on the left leads to the STARS office. Enter there and in the side room on the left, take 9 from the table0014 battery . Combine it in inventory with the previously found detonator. You will receive working detonator .
Now search the entire office for useful items, then go out into the corridor and turn left. Almost immediately, an old friend, the Tyrant, will appear on your way. If you haven’t already, shoot the hat on his head to unlock the trophy. Then turn around and run away from him through the shower room. Climb down the stairs and enter the safe room, the photo lab. Hide unused supplies in the chest, be sure to take the detonator and battery if they are not there, and combine them in inventory. nine0003
Now run through the west office to the main hall, opening the door with the blue key along the way. Turn left and run upstairs. Turn left again to find another door for a blue key. After opening it, you will find yourself in the library. Go inside and take red book from the table on the left. Then run through the room to another door on the left, by the stairs, to find yourself in a small room with a unicorn statue. In addition, there is a map of the second floor 9 on a stand nearby.0015 . Install the following images on the statue from left to right: a boy with a girl, scales, a snake. Collect Unicorn Medallion .
The answer to the riddle in the unicorn statue.
Grab the yellow box from the side table to find a clue to the lion statue puzzle inside. Although we have already decided it. The door leading to the corridor with the STARS office is closed on the other side, so go back to the library. Once you’re in the main hall, stay on the second floor and go through the door leading to the waiting room in the east wing. Inside is another safe, behind the counter. To open it, turn the dial six times to the left, two to the right, and eleven to the left. Go through the door using the blue key to enter the corridor from where you can get to the gallery. Now you can throw away the blue key. nine0003
On the small table in front is access card for the weapon crate in the storage room. Thanks to it, you will open the locker and pick up the grenade launcher at the back of the room. On the right side is a statue of the king. Take the hand from the statue from the table to the right of and combine it in inventory with the red book. Place the hand with the book on the statue to get scepter in exchange. Be prepared for Lizun to fall from the ceiling. After dealing with it, open inventory and inspect the scepter. Click on the button on its base to get red stone . Head back to the photo lab through the main hall and the west office.
Once you’re there, take the box of stones from the chest and combine it with the red stone in your inventory. As a result, you will find STARS token . Go around the corner to the storage room and use the access card on the reader by the locker in the back. Thanks to this, you will be able to pick up a grenade launcher with incendiary rounds. Now return to the stairs near the photo lab, go up to the second floor and go through the shower room to the corridor and the STARS office. Inside the office, open inventory and examine the STARS token. On the back, find the button and press it to open the flash drive. nine0003
Use the flash key on the computer on the left side of the STARS office, then click on the monitor nearby to open access to the arsenal with the MQ11 submachine gun. Don’t forget to take the STARS token from the computer to use it later. Return to the photo lab and collect the lion and unicorn medallions. Also don’t forget to take a detonator. Climb the stairs to the third floor to go to the west storage room. To do this, turn left from the corridor.
Go to the back of the pantry to find boarded up boards with explosives. Use a detonator with a battery on it, then move around the corner and wait for the explosion. After the explosion, take the new path to the room with the statue of the maiden, then set the following images from left to right: ram, harp, bird. You will receive medallion of the virgin .
The answer to the riddle in the statue of a woman.
Act quickly as the explosion will most likely draw the Tyrant’s attention. With all three medallions in hand, turn around and walk in the opposite direction. If the Tyrant suddenly appears in the western pantry, then simply go around the pillar in the center of the room to escape from it. By the way, here on the table there will be hip bag . Go past the photo lab, through the west office to the main hall. Approach the statue of the goddess and use all three medallions on it. This will open a secret passage to the next part of the game world. nine0003
1
2
3
four
Support Stopgame!
4.5
1,223 ratings
Top comments
News
Almost 20 developers of The Callisto Protocol did not appear in the credits of the game
Alexander Kudryavtsev
sixteen
Stream cutting
MORE CONTENT | Highlights (KEK!)
1
Review
Blacktail: Overview of
Kirill Voloshin
17
News
Avatar Generations — turn-based mobile RPG based on The Legend of Aang
Ruslan Prisekin
6
News
Dataminer found traces of Gun Game and Gunfight modes in Modern Warfare II files
Alexander Kudryavtsev
0
Series stories
History of The Elder Scrolls series. Issue 2. Approaching the shadow of death
Ivan Loev
20
Front page
Eight positive events in 2022
Alexey Likhachev
25
News
Game Pass in January: Monster Hunter Rise and two Persona
Andrey Makoveev
five
Resident Evil 2 — tips for passing, without plot spoilers — Guides for DTF
If you run in circles for too long, you may be doing something wrong.
50 503
views
The remake of Resident Evil 2 is not a cakewalk. Even at an average difficulty level, it can be confusing — both in combat scenarios and in puzzles. This material does not claim to be the laurels of step-by-step guides that tell you what and where to find. It’s more of a spoiler-free collection of tips that will help cut down on the number of situations where you’ll be running around in circles without noticing a detail. nine0004
Learn to use the card as early as possible
Locations in Resident Evil 2 are not big at all. Even in a heaped up police station, you will surely quickly memorize all the moves by heart. However, the map in the game is still one of the most important tools. It helps you save time, plan your actions and, most importantly, solve puzzles.
When the main character comes close to some interactive object (and it is highlighted by the interface), the corresponding marker immediately appears on the map. This means that if you do not have room in your inventory, you can then return to this point to pick up a first-aid kit, a grenade, or a quest item. nine0004
In addition, all locked doors and the types of keys they require are marked on the map. This means that after finding a new key, you will already know exactly where to go next.
If you see that some location on the map is red, it means that it needs additional attention. When you hit a dead end with a puzzle, the best strategy is to go through the red zones again.
Don’t forget to spin items in inventory and read logs
This mechanic is also found in other games in the series, but it is often forgotten. Items in the RE2 inventory can and should be inspected from all sides. This is especially true for boxes and caskets. By themselves, they are useless, but their contents can give you access to powerful weapons or even advance the story.
Of course, in this game you need to read the logs. Some of them reveal the lore a bit, and some give clues. Key points in the text are usually highlighted in green, so it is difficult to miss them. nine0004
Have pen and paper ready
Resident Evil 2 Remake is an old-fashioned game where you can use pen, paper and your phone’s camera.
For example, there are mini-safes for which you need to guess the correct sequence of eight buttons without markers. You can, of course, do this from memory, but if you write down your successful moves, things will go much faster.
And yes, keep your smartphone handy. Some combinations in the game are saved in the main character’s log, and some are not, and they are the easiest to photograph and keep at hand. nine0004
Solve side puzzles and develop films to make your life easier
RE2 truly rewards generously those who deviate from the main storyline. By solving secondary puzzles — by opening combination locks and safes, you can greatly improve your weapon or increase the size of your bag.
And even such a desirable and necessary for survival shotgun is an optional item, not a story item.
If you find a film on the map, you should definitely develop it in the shelter on the first floor of the police station. They either hints or specific codes. nine0004
Storage is your best friend, especially at first
Feel free to load into storage everything you don’t need for momentary survival. Herbs that are useless on their own, ammo for a weapon you don’t have yet, or vice versa, weapons without ammo.
It’s always better to go back to the vault once more than to be away from it without free slots in your inventory.
Inventory management itself is especially tough in the early game. You will beat each slot with sweat and blood — often sacrificing something. nine0004
Feel free to dispose of items with a red tick
Keys, wire cutters and other items that open doors are used several times in the game. Luckily, RE2 will let you know when to drop them — a corresponding red check mark will appear on the icon in your inventory.
If there is no checkmark, this means that the item may be needed sometime later — it is better to leave it in storage. When the time comes, you’ll understand why.
Headshots are important, but not always
Yes, RE2 encourages headshots. 2-3 successful shots, and the zombie is already on the ground — at least for some time it will definitely not interfere.
The problem is that there are situations in the game when you don’t have time to aim the head of a wobbling ghoul.
If you are running away from someone quickly, the zombie can be shot in the leg or arm. The first will slow him down or even drop him to the ground, and the second will prevent him from opening doors. Still, the main task here is to survive, and not to shoot everything that moves — and there will not be enough cartridges for this. nine0004
Equip live grenades only in boss battles
In RE2, grenades and knives are considered melee weapons. They can be used in two ways — active and passive.
Active is to swing a blade or throw a grenade at an enemy. Passive is to fight off the zombie that grabbed you with the help of QTE. The QTE element is optional here, but usually you press the button out of fear without thinking.
And if the knife that you stuck in the dead man’s neck can be pulled out and used again, then you can’t return the grenade — it will explode in the opponent’s mouth. nine0004
Therefore, if you only have a live grenade, it’s better to make it inactive and not spend it on simple zombies, but leave it for bosses or especially difficult situations.
But stun grenades, on the contrary, should be alerted. This is a great way to bring down the tail.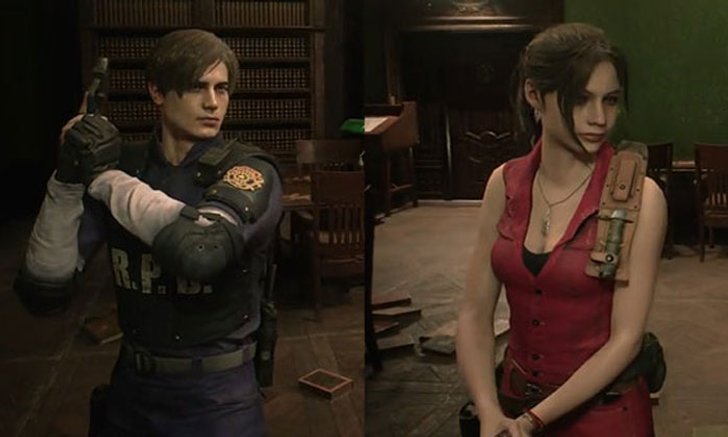
Finish off zombies with a knife
If a zombie in RE2 doesn’t explode its head, it means it will almost certainly get up again. To make sure this doesn’t happen, take out the knife and slash the dead man a few times — this way you can finish him off, saving 2-3 bullets. nine0004
Yes, in this case the knife also wears out and breaks, but the bullets are still more valuable. One single bullet can be «critical» and immediately blow up the head of a zombie, which cannot be said about a knife.
Board up windows
At first, when you have a very modest inventory, it will be difficult to carry boards with you, but it’s worth it. By boarding up a window, you make it safe forever. This means that zombies knocking outside will never get inside and will not interfere with you. nine0004
Board up the windows as soon as possible. This will save you a lot of bullets and health.
Mix Herbs Wisely
There are two ways to heal in the game — balloons, which are very rare and restore all health, and herbs, which are lying on every corner. There are three types of herbs in the game.
- Green — restores some health.
- Blue — removes the effect of «poisoning».
nine0299 Red — increases the effect of another herb when mixed, but is useless on its own.
To restore your full health, you will need to mix as many as three portions of green grass — this is an outright waste. Therefore, try to mix one serving of green and one red — this will give the same effect.
If you mix one blue herb with one red one, you will remove the toxins that slow down the hero, and at the same time give him temporary protection from further infection. nine0004
But the best options are triples. Two green ones and a red one not only restore all health, but give a temporary damage reduction. The same applies to the combination of green, red, blue — only here the infection is also removed.
Triple mixes are best saved for boss fights. In other cases, damage resistance is almost not needed.
Run away and keep playing even if you have no bullets left
Since RE2 is a survival horror, it’s normal that sometimes you’ll run out of ammo. There are 20-minute segments in the game in which you will not have a single bullet, but this does not mean that it is time to load the save. nine0004
Often, solving the next puzzle will provide the necessary resources. The main thing is to get to it. And here you need to think about your health as another resource. You can let the zombies bite you a couple of times and run away from the slime, but still run to the desired point.
These desperate runs on the verge of a foul are one of the best aspects of RE2.
Don’t waste ammo on the Tyrant, and don’t waste it at all when it’s not vital
Tyrant is the main irritant in RE2. And no matter how much you shoot him, it will only slow him down a little. Therefore, if he heard you and disturbing music began to play, then it is better to either hide from him at the save point (not counting the one in the main hall) and wait, or run away to the other end of the site, taking him away, and then return to the desired your place and go about your business. nine0004
The whole Outlast series is essentially based on this mechanic. You have been noticed — you run away — shed your tail — you come back in a roundabout way. Repeat.
However, this does not mean that the Tyrant in the game is fearless. He has a lot of surprises up his sleeve for you.
The same advice, by the way, applies to regular zombies and slimes. If you can run away, then there is no need to shoot at them. However, you still have to finish off the dead in narrow corridors — you have no room for maneuver there, and they will constantly make the main character bite. nine0004
Don’t put all your saves in one slot
As in any other game of the genre, in RE2 it is better to keep at least five recent saves. There are times when you want to roll back your progress by 20-30 minutes in order to try to complete a section more efficiently.
Luckily, at least RE2 doesn’t leave you running out of resources in the face of sudden boss encounters.
