Reddit — Dive into anything
Edit: Cyberpunk 2077 pictures added
Edit2: Youtube video added
Here is my homemade DLSS formula that I’m using with my 5700XT:
First, download Reshade. You need 2 things: a) Gaussian Blur b) AMD Fidelity FX Sharpen.
I have an 1440p screen and that may be too much for some games at ultra settings. So, I sometimes play at 1080p or 1260p (middle of 1080p and 1440p).
Instructions:
-
Never use in game scalars. They use their own scaling filters and their quality varies. AMD already has the upper hand when it comes to resolution scaling. So, enable VSR and GPU scaling.
-
If you need, use «this method» to add more resolutions. I noticed, width of the resolutions are incremented by 320px, like 1080p-to-1440p-to-1800p etc.. Insert middle values that are different by 160px horizontally, like 2240×1260 or 2880×1620. It’ll allow you to better tune your performance/resolution ratio. More options, basically.
(this part explain what DLSS, TAA are and how to mimic DLSS. Feel free to skip to the TL;DR section if you are not interested in too many technical details)
Now, the TAA/DLSS part. Let’s first talk what DLSS 2. is. It is basically a clever TAA with highest quality textures. See, TAA has its own variations. A TAA algorithm has a threshold value and according to that value, a new pixel color value is either accepted (displayed) or rejected (not displayed) based on the neighboring and previous values. This threshold is decided by the game developers and there is no golden value. If you keep rejection value high, less flickering and errors occurs but it has more blur (Skyrim, RDR 2, Metro Exodus). If the opposite way is chosen, more flickering with sharper graphics (Shadow of the Tomb Raider, Horizon Zero Dawn) occur. Using higher quality and higher resolution textures makes things harder because in a game scene, things may be at different distances and may come in different geometric angles. A big house that is closer to the camera can benefit nicely from a high rejecting and blurry TAA (it is a blocky build after all) but the distant trees with lots of small branches and leaves will lose lots of detail. These lost details will be displayed as errors/artifacts/aliasing when looked carefully.
DLSS 2. takes this rejection algorithm a step further. A TAA of a game has only one algorithm. DLSS’s machine learning takes over and says there is no single algorithm for the entire game. It can «make» different rejection/acceptance threshold values for each pixel based on what it learnt for that particular game by the trainers. So, for each pixel of each object, the best type of TAA decision is made and applied.
TAA itself is equivalent of 8x SSAA, nowadays. That means it can render a static 1920×1080 scene at 5431×3055 resolution and then downscale it (mind that, «8x» means not by axis, but the area count of pixels. Modern games use axis scaling, which is the square-root of pixel area count. 8x is roughly equal to 283% in modern game option menus).
Anyway, DLSS does 2 things. First, It always uses the highest quality textures. Because most games switches to lower quality textures to help with the performance, when the user lowers the resolution. This, we can not solve. The choice belongs to the developers. Second, it makes sure of the best selected TAA threshold for each pixel individually. With it enabled, even when the rendering resolution is 4 times lower, (frame scaling = 50%), TAA can still reach to a resolution that is higher than the screen resolution.
Example:
Imagine having a screen of 1000x1000px. TAA merges the past 8 frames and makes a picture of 2828×2828. Even DLSS reduces the rendering resolution 4 times, it becomes 1414×1414. This is still nearly 2x higher than 1000×1000. Plus, it uses the best quality textures regardless of the resolution. (BTW, 4x lower rendering resolution is roughly equal to «DLSS performance» option, which is the fastest option).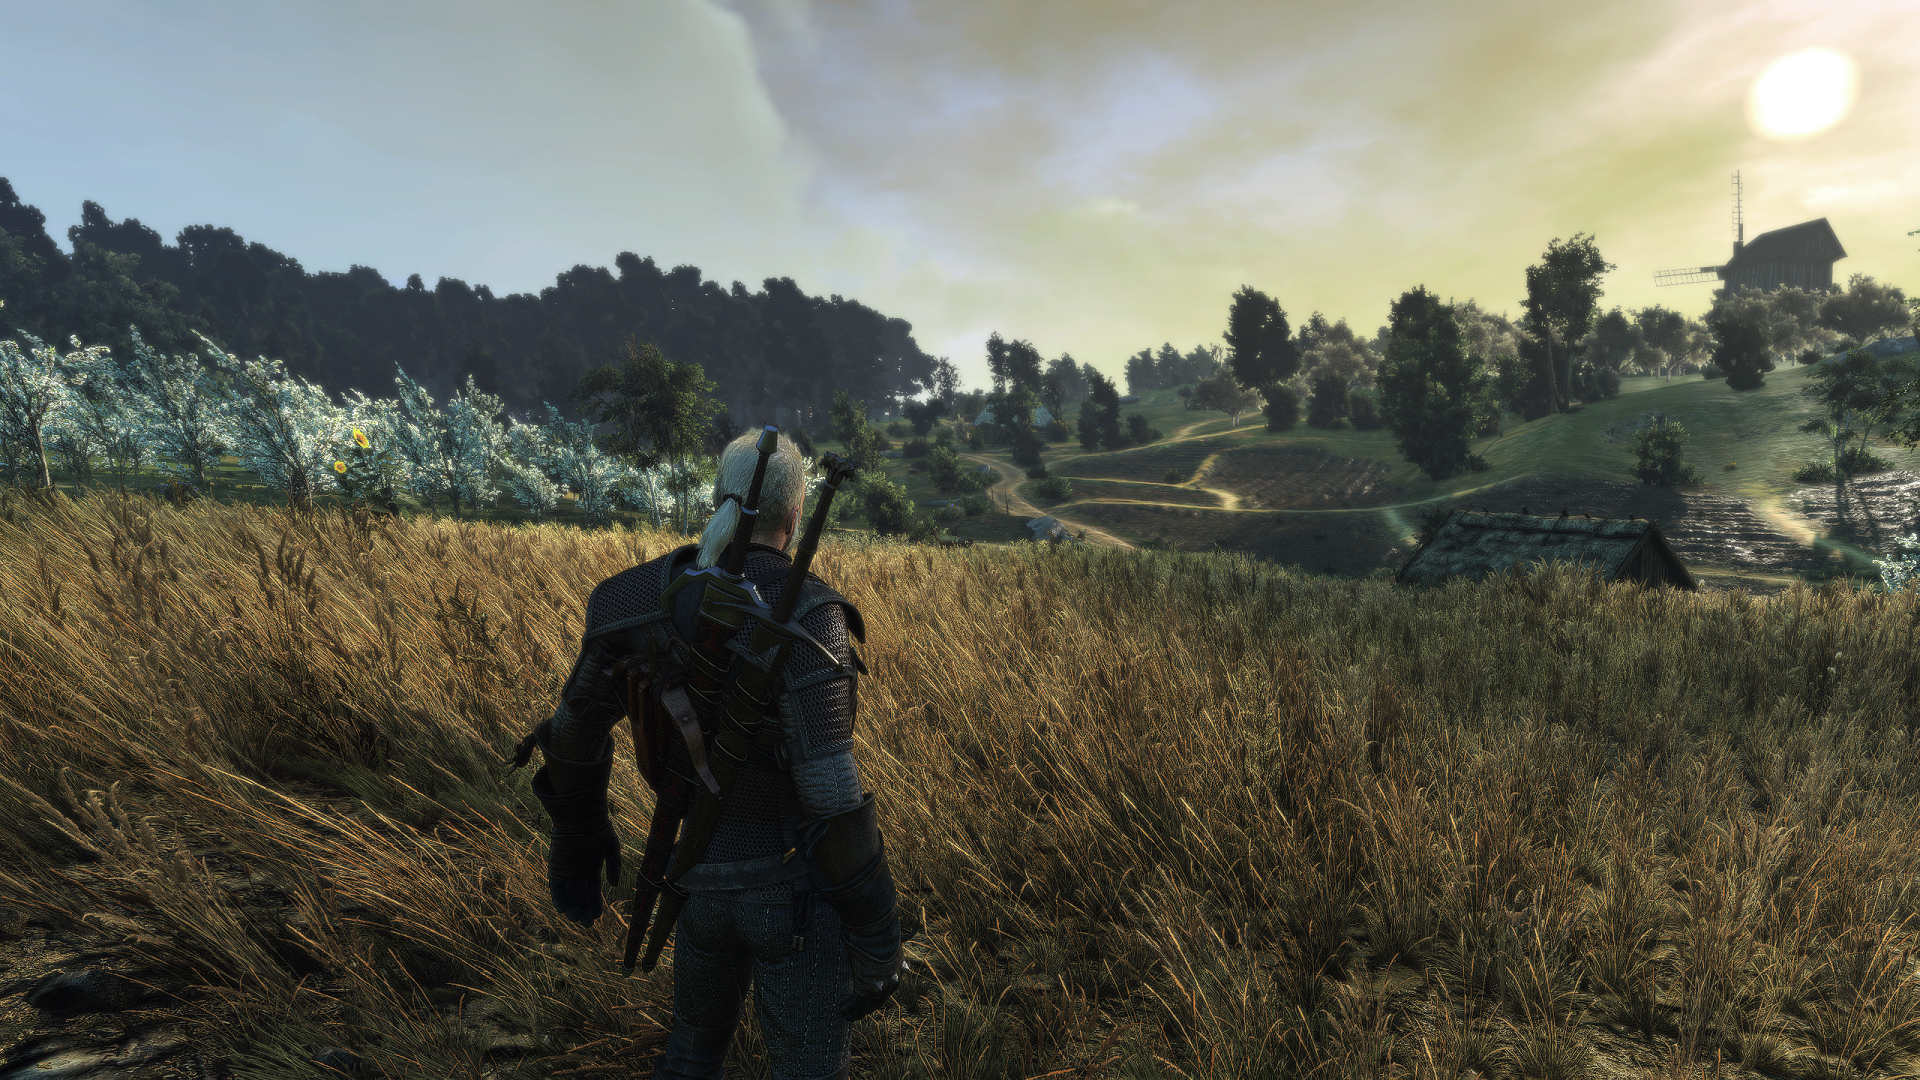
Classic TAA has Gaussian filtering applied to cover for single threshold for every pixel. This filter checks for the 3×3 box neighbors and makes a guess about whether the current value of a pixel belongs to that area. (It is a filmic approach, where the overall contrast is kept under control to hide CGI artifacts).
Basically, Gaussian Blur increases the intensity of TAA and removes errors more aggressively. The downside is, any tiny detail that is the size of a single pixel is also removed. Detail removing is similar to lowering resolution.
This is why AMD first came up with Fidelity FX Sharpening 2 years ago. Sharpening is an organic filter. It doesn’t «make up» details out of nowhere. It uses the original details by looking at the contrast and brightness differences. If an area has similar information in a scene, it has less detail, therefore it gets less sharpening. However, if an area has more complex colors and brightness differences, they are «enhanced» even further.
If removing details is equal to lowering the resolution, then sharpening the details should be equal to increasing resolution!
In a cheaper approach, of course. Because, just like regular TAA can not know where to accept or reject a pixel, regular sharpening can not know what is actual data and what is an artifact/aliasing. This is why a regular sharpening helps with increasing the details on the screen but it also makes the image very coarse. I can not stand 1280x720p + high sharpening on my 2560x1440p screen. Sharpening makes every artifact more visible, to the point one would pick an unsharpened image over the sharpened.
TL; DR:
This is where Reshade comes in. Plain sharpening is too harsh for lower resolutions. But a nicely applied Gaussian Blur can spread the data more evenly in the image. A sharpening that is applied after Gaussian Blur can look softer. Because sharpening makes its decisions based on contrast of pixels. Less pixels mean less accurately created image data. Less accurate image means, high contrast errors here and there. Gaussian Blur eases these errors and slightly blends them with the correct data. And then, an after sharpening effect bring the resolution up.
This is not as «clever» and effective as DLSS, naturally. This is why I can’t recommend lowering the resolution as low as 4 times (down to 50%). But if my eyes are healthy, I believe I can lower the total pixel count to half and retain the quality.
I’m speaking for AMD GPU scaling, BTW. I don’t have an NVidia card but I know that they are using a 13-tap Gaussian filter to scale. That’s is bit lower quality than AMD’s Bicubic scaling filter.
Here is how I do it:
-
Install Reshade and place Gaussian Blur before AMD Sharpening.
-
Pick a resolution lower than your screen resolution. I have a 1440p screen and a 4K TV. I have chosen 1080p and 1800p respectively.
-
calculate: (rendering Resolution) / (Screen resolution) for one axis.
 For example: 1080/1440 = 0.75. This is your Gaussian Blur Offset.
Gaussian Blur Strength = 1.125 — (Gaussian Blur Offset). For 0,75; it is equal to 0,375.
Now, to AMD Fidelity FX Sharpening values. This one is mostly up to your screen and tastes. But a minimum value to make up for Gaussian Blur should be:
[(screen resolution) / (rendering resolution)] 2-1
For example: for my 1440p screen with 1080 in game resolution:
AMD Fidelity FX «minimum» value = [ (1440)/(1080)]2 -1 = 0,778. This is «minimum» to compensate for Gaussian Blur. If your game is already blurry, you can go higher. Or, you can go for another contrast based sharpening shader with Reshade. It is up to your preference.
Here is comparison between a 4K Vanilla shot and a 1620p with Reshade one. They are from Horizon Zero Dawn. FPS numbers are on the top right corner. The performance gain is roughly 55%.
Here some more pictures from Cyberpunk 2077 (that game is awesome!) with 75% increase in performance. This time I used Smart Sharp With a higher value, instead of AMD CAS, just for a change. And added a high quality FXAA. You can notice the FXAA’s impact on the windows blinds on the left (I assume they are still called blinds in the future 🙂 )
Here is the Youtube video link:
https://www.youtube.com/watch?v=hagjh2ZSXL8&feature=youtu.be
What do you think? Please share your comments with me.
Nvidia Freestyle vs. Radeon Image Sharpening vs. Reshade
After testing AMD’s new Radeon Image Sharpening feature, we’ve gone back for even more testing. The first article is definitely worth a read if you missed it, as we were mainly interested in seeing how Radeon Image Sharpening (RIS) looked compared to a native presentation, and how effective it was at post-processing an upscaled image to look near-native. The big focus of the test was how RIS compared to Nvidia’s DLSS, and whether the two technologies could effectively do the same thing, even though they are different in how they work.
The conclusion we came to was that RIS is superior to DLSS in terms of image quality and very effective at post processing say, a game rendered at 1800p to look very close to its native 4K presentation. With a negligible performance impact on Navi GPUs, it makes for a pretty compelling feature.
But we didn’t cover every angle possible in that article. Namely, Radeon Image Sharpening is not the only way to post process sharpen a game. Reshade is a very popular tool that can be used for all sorts of post processing including sharpening through several techniques. Nvidia has their own sharpening option included with their Freestyle game customization tools as well.
Nvidia Freestyle is marketed quite differently to Radeon Image Sharpening and unlike AMD, Nvidia doesn’t suggest that sharpening could be used with resolution downsampling for performance benefits. Mostly because they have DLSS for that. But we’ll have a look at how it stacks up in this article.
The other big new development is that AMD’s Content Adaptive Sharpening (CAS) filter used in RIS has been ported to Reshade. This has been possible because CAS is included in AMD’s open source FidelityFX toolkit, and it seems that porting that to a Reshade effect was quite easy. So now, we can see how CAS works on other GPUs, and whether AMD restricting RIS to their new Navi GPUs actually makes sense.
Image Quality
For this new test, we want to compare Radeon Image Sharpening and AMD’s CAS algorithm with several other sharpening options that are available today including Nvidia Freestyle and two popular filters available in Reshade: lumasharpen and adaptivesharpen.
In addition to the image quality shots offered here you can check out Hardware Unboxed’s video (embedded below) using YouTube’s 4K quality for the best possible representation of the game’s graphics. For all screenshots, you can click on them to see a larger 4K version of the same image.
We’ll get started with Metro Exodus because it provides a good combination of 3D elements, textures and text. What’s immediately apparent looking closely at these images is that each sharpening filter has a distinct style and each manipulates the image in a different way. In some respects the end result is similar for all filters, and in others there are differences.
Reshade’s lumasharpen in its default configuration is the most subtle of all the filters. It slightly sharpens the image, clears it up a bit, and doesn’t introduce many artifacts. If Metro Exodus used a sharper temporal anti-aliasing method, the game with lumasharpen is probably how I’d expect it to look.
Radeon Image Sharpening is a clear improvement on lumasharpen. In some ways, RIS is just as subtle as lumasharpen, for example in the fibers on the sweater on the right. Both look similar. Then for the ‘New Game’ texture, RIS is a slight improvement without the introduction of much haloing or artifacts. But then for the map in the upper corner, basically that entire texture is clearer with RIS compared to lumasharpen and it’s in areas like that were AMD’s algorithm has a clear edge.
Then we get to Reshade’s adaptive sharpen, which in its default configuration is much sharper than Radeon Image Sharpening. However it also has many more artifacts. Take the continue text on the CRT screen. This is supposed to be a bit blurry as you might expect from this type of display in the game’s world. But adaptivesharpen doesn’t know, and tries to sharpen it, which just leaves this weird blocky artifacting. This crops up across the image with a lot of oversharpening, plus you get haloing.
Nvidia Freestyle to me looks most similar to Reshade’s adaptive sharpen. Setting Freestyle to 50% sharpening, and many of the same issues crop up as with adaptive sharpen. The text in particular looks oversharpened with slight haloing present. Meanwhile, the map is sharp but not as sharp as Radeon Image Sharpening.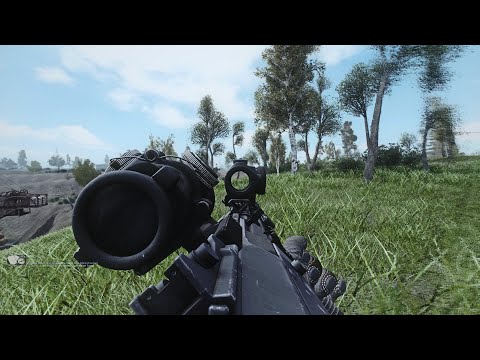
Now, Freestyle does have a sharpening strength slider, so I tuned that down to 25% but it’s just not as good as RIS. It’s basically a less sharp, toned down version of 50% that actually loses it’s «sharpness» edge overall to RIS, while still looking a bit overprocessed in some areas.
At least in this game, running at a native 4K resolution, in our opinion Radeon Image Sharpening has the best presentation: sharper than lumasharpen with similar artifact handling. This is just my opinion though, you can look at the images yourself and come to your own conclusion about which looks best.
We also wanted to see how each of these filters would handle resolution downsampling, and for that we have The Division 2 running at 4K with a 75% resolution scale. This game only requires a subtle post processing sharpen, so lumasharpen is really well suited here. Adaptive sharpen is once again too sharp in my opinion, while the battle between Radeon Image Sharpening and Freestyle is interesting.
In some areas, RIS is superior. For example here it handles the ‘United States’ text on the crashed airplane better and with fewer artifacts. But Freestyle handles some distant fine objects better with a smoother presentation that’s less jagged. RIS handles the UI elements better. So we guess as expected no filter is really the perfect solution.
Next up we have Resident Evil 2, the blurriest game of the bunch, and one that you can’t use Freestyle in, more on that in a moment. Again, much the same issues that we’ve already discussed: adaptive sharpen is too sharp, lumasharpen is a bit soft, Radeon Image Sharpening sits right in the middle. We did play around with a higher setting for lumasharpen, and while this improved detail to perform closer to RIS, it also didn’t handle the grain in this game as well as RIS. Not that this is overly visible in this footage thanks to compression.
Finally we also wanted to show some examples from Hitman 2.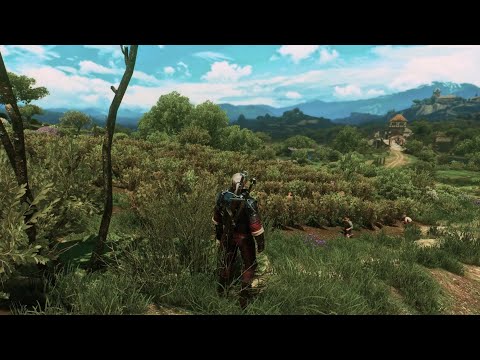 In this game there is a lot of glow and bloom elements, which Reshade’s adaptive sharpen doesn’t handle nearly as well as RIS or lumasharpen. RIS is sharper overall, but as we increase lumasharpen to a level around that of RIS, it isn’t as good at rejecting these elements. So we think RIS overall is still the best filter here.
Performance Impact
Testing with Resident Evil 2 using the Graphics Priority preset at 4K on a Radeon RX 5700 XT, you can see that RIS has barely any performance impact: no difference to average frame rates and a negligible drop for 1% lows.
Reshade’s Lumasharpen filter had a minor performance hit of around two percent. The sharpest filter, Adaptive sharpen does see a larger performance loss. Average frame rates dropped around 5 fps or a 9 percent reduction, with a similar drop to 1% lows. Not great for a filter I personally didn’t like that much.
What about Nvidia Freestyle? We can’t use Resident Evil 2 for a performance comparison since it’s not supported by Freestyle, so let’s switch over to The Division 2.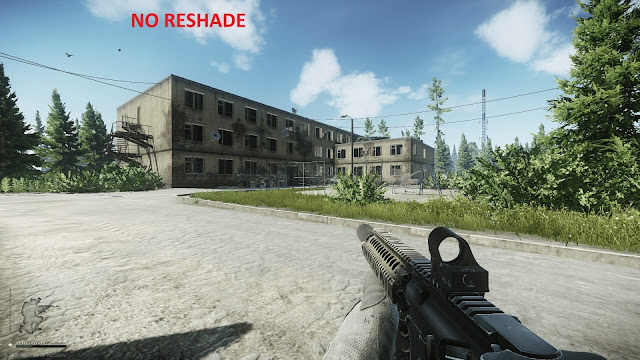 Here, we see a similar story for the Reshade filters on the RTX 2070: Lumasharpen is about a 3% drop, while Adaptive sharpen is around that 10% mark. Freestyle is also performance intensive, dropping the frame rate by 4 fps or so, which is a 12 percent reduction.
Radeon Image Sharpening in The Division 2 once again shows a negligible performance difference at 4K, within the margin of error. The RX 5700 XT does an OK job handling Reshade’s adaptive sharpen here with a 7% performance drop but there’s no reason why you would favor that over RIS which is basically free.
The next question is concerning the Reshade port of Radeon Image Sharpening, otherwise called Content Adaptive Sharpening or CAS. This works as easily as any other Reshade filter after you download and install it, and in my testing I found a setting between 0.5 and 1.0 to be representative of the strength AMD is using for their filter. It’s interesting that with Reshade you can adjust the strength, whereas with RIS there is no adjustability of any sort. However I was pleased to discover that it seems this Reshade port of CAS is essentially the same as RIS from a visual perspective.
AMD wasn’t lying when they said RIS uses Navi optimizations to achieve basically no performance hit on their latest GPUs. Testing Reshade CAS with a Vega 64 card, and the performance drop sits between lumasharpen and adaptive sharpen. It was about a 3% drop in Resident Evil 2, and a smaller 2% drop in The Division 2. Not outrageous, but a drop is a drop.
Similar story for using Reshade CAS on a GeForce RTX 2070, because of course you can use Reshade filters with any GPU. About a 4% performance drop using the effect in Resident Evil 2, and the same in The Division 2.
Closing Remarks
In terms of image quality, of all the filters I looked at and played around with, to me Radeon Image Sharpening or CAS delivered the best presentation. Lumasharpen’s default settings are a bit weak, and turning them up introduces artifacts that are better managed by RIS.
Meanwhile, both Nvidia Freestyle and Reshade adaptive sharpening are too strong, and tweaking these filters doesn’t provide the same balance of sharpness and artifact reduction as CAS.
This is just a subjective analysis though, so you can go through and see which technique you prefer. For many people everything might look pretty similar, in which case it really doesn’t matter which filter you use for sharpening.
What’s not subjective is the performance part. It’s clear that Radeon Image Sharpening on Navi GPUs comes at essentially no expense. Lumasharpen was also light on performance, while surprisingly Nvidia Freestyle and Reshade’s adaptive sharpen had a relatively small but consistent performance loss.
Beyond image quality and performance comparisons, each sharpening technique has its own range of constraints and usability issues. This is important to considering in the overall picture…
Radeon Image Sharpening has been made exclusive to AMD Navi GPUs and only works in DirectX 9, 12 and Vulkan titles. Based on what we saw with the port of CAS to Reshade, there is no reason why this restriction should exist. The filter should work in DirectX 11 games, and it also works just fine on older GPUs like Vega. We believe RIS should be available to all AMD GPU owners in all games. I hope this becomes a reality.
For now, we have tricks like using the Reshade port. But this is far less usable than Radeon Image Sharpening, which is a simple driver toggle that just works. Reshade requires installation per game, for us enthusiasts it’s a fairly straightforward process, but for casual users it’s not as simple as hitting a button. You also have to hope that Reshade plays nicely with the game in question, just during my testing I had difficulty getting it to work with Hitman 2, for example, where there were no issues with RIS.
Thus the benefit to Reshade is compatibility with a wider range of GPUs and games right now, and the ability to modify the amount of sharpening being applied.
Nvidia Freestyle has a separate set of issues.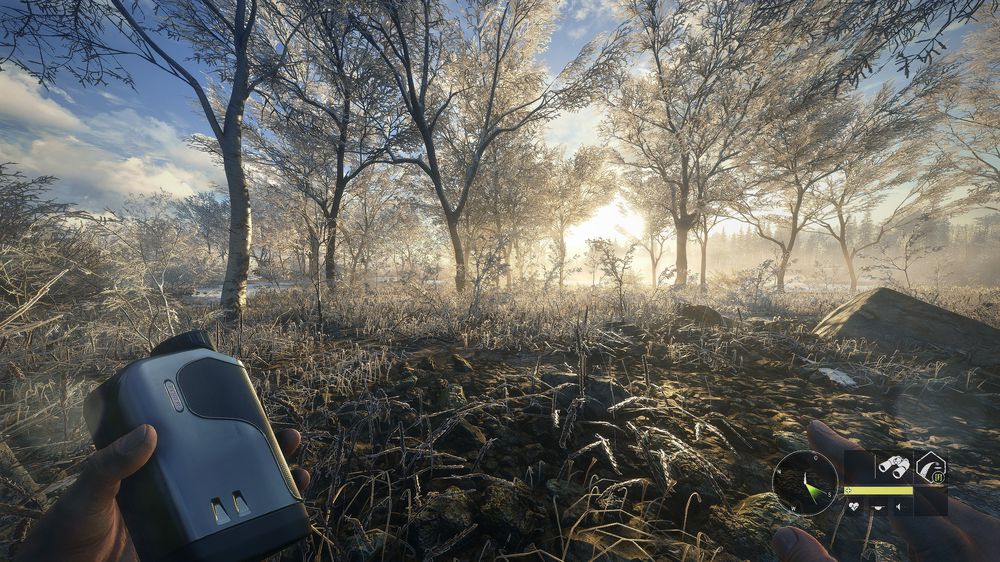 It works with Nvidia GPUs and when it does work, it works well. But there is a whitelist of games that it works with, so titles like Hitman 2 and Resident Evil 2 aren’t supported, for example. Nvidia needs to open this up to work with all games and not lock it down to what is admittedly a decent, but clearly not comprehensive list. Nvidia does have the edge of Freestyle working with DX11 games, but it also comes with a performance hit for only modest visual quality compared to CAS.
After testing Freestyle, it’s clear why Nvidia went down the path of DLSS for resolution downsampling. Nvidia’s Freestyle sharpening filter is not free in terms of performance, so DLSS ends up being better from a performance vs image quality perspective. Meanwhile, RIS on Navi is essentially free and better quality.
However, while this whole ecosystem is a bit of a mess right now, I think there is a good future for this kind of technology. If we can get AMD and Nvidia offering a driver-level CAS feature in all games on all GPUs with a minimal performance impact — which seems to be possible — it will open up the doors to usable resolution downsampling, sharper post-process anti-aliasing, and just a better gaming experience overall.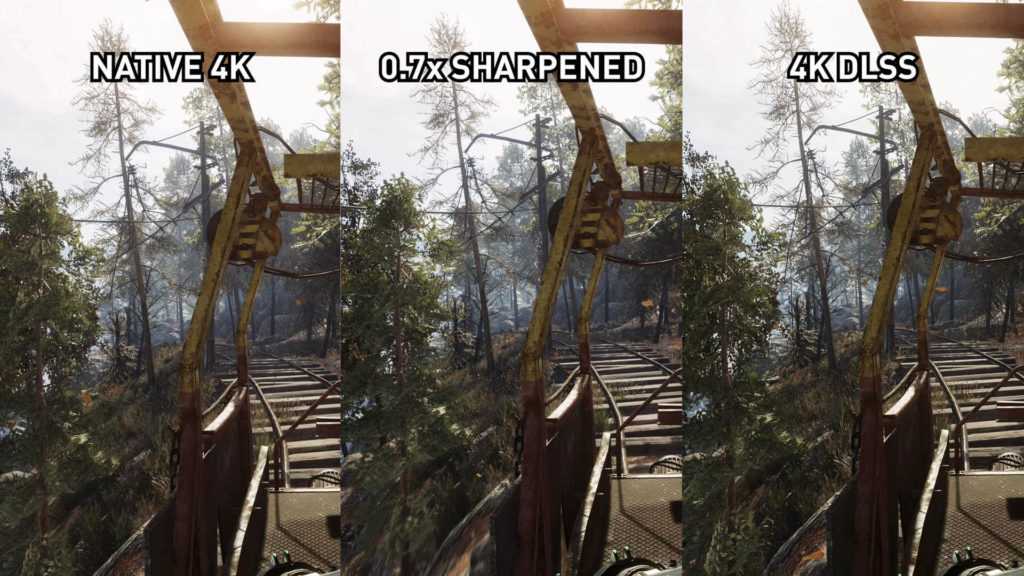
Shopping Shortcuts:
- AMD Radeon RX 5700 XT on Amazon, Google Express
- AMD Radeon RX 5700 on Amazon, Google Express
- GeForce RTX 2070 Super on Amazon, Google Express
- GeForce RTX 2060 Super on Amazon, Google Express
- GeForce RTX 2080 Ti on Amazon, Google Express
- AMD Ryzen 9 3900X on Amazon, Google Express
- AMD Ryzen 5 3600 on Amazon, Google Express
- AMD Ryzen 5 2600X on Amazon, Google Express
Replace color on photo online
Support
For any questions, write to the developer in Telegram:
t.me/ivashka8
Please wait: photo editor is loading…
{{tooltip.text}}
Font
{{font}}
⇑ Filters ⇑
⇓ Filters ⇓
File
Auto Enhance
Text
Image Overlay
Sharpness
Saturation
Styling
Effects
Turn
Dimensions
Cut
Blutters
Persons Tone
Noise
Noise Reduction
Black & White
Halftone
Mirror
Invert
Mosaic
Gradient
Frame
Demotivator
Cycle
Ink
Vignetting
Edge
Compression
9000 9000
{{progress}}
{{progressFN}}
Move images here
or select files
Select files. ..
..
The number of files is not limited
Image size is not limited
{{status.uploadProgress}}
Preview ({{dimensions}}):
Add the necessary filters to get started.
The list of filters is shown at the bottom of the screen.
Human faces
Type
BlurMosaicPaint with color
Type
Square Hexagon
Size
Halftone
Black and White
Size
Compression
Radius
Bulge
Radius
Auto Enhance
Color Correction
Red
Green
Posterization
Qty
Stamping
Mixing
Brightness
Blur
Type
Classic Zoom LensMotion
Brightness
Sharpness
Radius
Change background
Algorithm: v1 v2 v3 (Neural Network: People)
Quality
Color / Transparency
Edge blur
Brightness
Solarization
This filter does not have any options
Contrast
Saturation
Change of tone
Turn
Save the proportions to cut excess
Color / Transparency
Particles
9000 Type 9000 9000 9000: Gallery from a file of file 9000
Select Image…
File downloaded
particles
Snezhinkakruga
number
Size (from)
size (to)
Transparency (from)
Transparency (to)
angle (from)
Corner (BC)
noise noise
Qty
Noise reduction
Edging
Radius
Black and white
Type
Grayscale Monochrome Posterized
Qty
Mirroring
Horizontal
Vertical
Size
Style transfer
Type: Gallery From file
Select Image…
File downloaded
Color / Transparency
Size
Overlay picture
Select Image…
File downloaded
Position
Center Top Left Top Top Right Left Left Right Bottom Left Bottom Bottom Right
Front Background
Size
Transparency
X Offset (px)
Y Offset (px)
Dimensions
Crop Background
Position
Center Top Left Top Top Right Left Right Bottom Left Bottom Bottom Right
Width
px%cmin
Height
px%cmin
You can specify only one size — the second one will be calculated automatically
DPI (PPI)
Trim
Type
AreaEdgeBackground
Position
Center Top Left Top Top Right Left Right Bottom Left Bottom Bottom Right
Width
Height
Top
Right
3
Pattern:
Radius
Vignetting
Size
Qty
Ink
Text
Fill
Single ColorGradient (Vertical)Gradient (Horizontal)
Color 1
Color 2
Rotate
Round corners
Color / Transparency
Radius
Change Color
Type : Replace Correction
Source Color / Transparency
Fill Color / Transparency
Red
Green
Transparency
Effects
{{type}}
Watermark
Type: Text Image
Select Image…
File downloaded
Pave
Position
Center Top Left Top Top Right Left Right Bottom Left Bottom Bottom Right
Size
%
Transparency
%
Indent
px%
Lines
Indent
Size
Color / Transparency
Share a link to the preset:
Replacing a color in an image — Useful Developers Tools
UseDevTools:/image/color_replacement
- Tool
- Comments
Select a file, drag it, or paste an image from the clipboard
Tolerance:
0 %1 %2 %4 %6 %8 %12 %16 %24 %32 %48 %64 %82 %100 %
Scale:
6400 %3200 %1600 %800 %400 %300 %200 %100 %50 %25 %12 %6 %3 %1 %
Purpose
The «color replacement in the image» tool will allow you to
replace a specific color in an image without affecting other colors.
Replacement of shades of color will be made depending on the selected tolerance percentage.
Use
In order to replace a certain color in an image, you need to select an image. The picture may
be loaded from your file , it can be copied from clipboard (Ctrl-V)
or drag and drop from a folder or another browser window (if the content is not protected by the policy
security) to the workspace.
Next, you need to select replacement color , the color for which the previously selected
will be replaced by and click on the button «Operation: Replace Color» .
For change image scale , You can use the tool « Scale »
or just scroll with the mouse wheel while holding down the «Ctrl» button on the keyboard.
By choosing the tolerance value , you can control the quality of the replacement .
If the result does not suit you, press the button » Undo the last operation » (Ctrl-Z),
change the tolerance and repeat the operation.
If the shades of the replaced color in the picture are very different from each other, the best effect can be achieved without
an increase in the tolerance value, but a consistent replacement of shades.
When replacing colors, HSV color model is used, in connection with which this tool
it is not possible to replace any shades of gray (including black and white) with another color, or vice versa.
The highest quality replacement will be when the replaced colors are bright and saturated.
In the course of work, you can operate with two colors — primary and secondary. Change color in
image is made from the first to the second. Switch colors (Main to secondary
and vice versa), you can click on the arrows in the upper right corner on the color picker.
The following two tools will help you change a specific color in an image to a transparent one.
First — « Operation: Replace color with transparency elements «can be used,
if the picture subsequently has to be superimposed on some kind of uniform background.
In this case, select an auxiliary color that matches the color of the future background.
If you just need transparency — use the tool «
Operation: Make color transparent
«.
You can also do partial transparency , for this in the color selection window,
You must select a transparency level for the secondary color.
Color change example
As an example, let’s make a blue one from a red poppy.
Take an image of a poppy:
Apply the color replacement tool to it:
Or make it yellow:
Now let’s try to change the background color to transparent.
