no-Kami | Nioh 2 Wiki
Yatsu-no-Kami is a Boss and Enemy in Nioh 2. Yatsu-no-Kami is a powerful snake-like Yokai that attacks with poison and aggressive charges.
Enemy Description
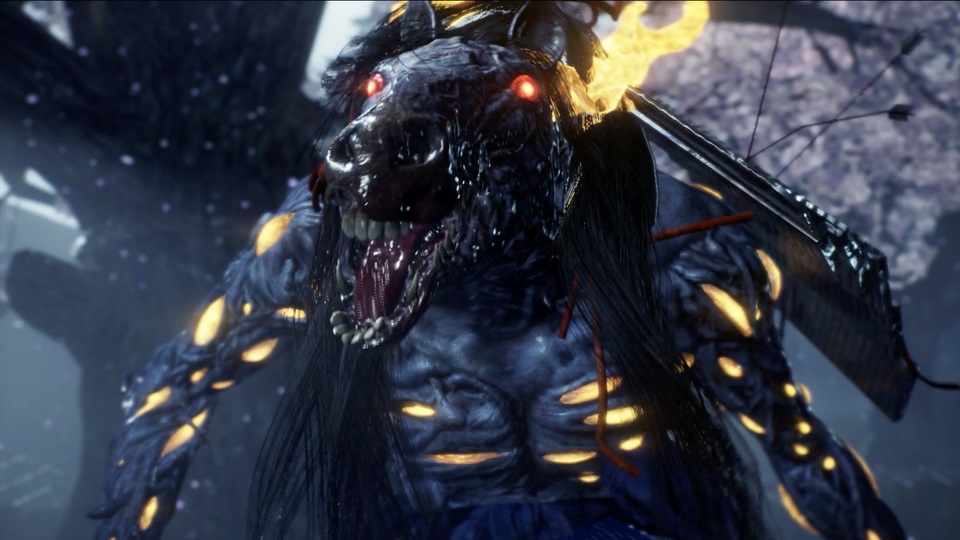
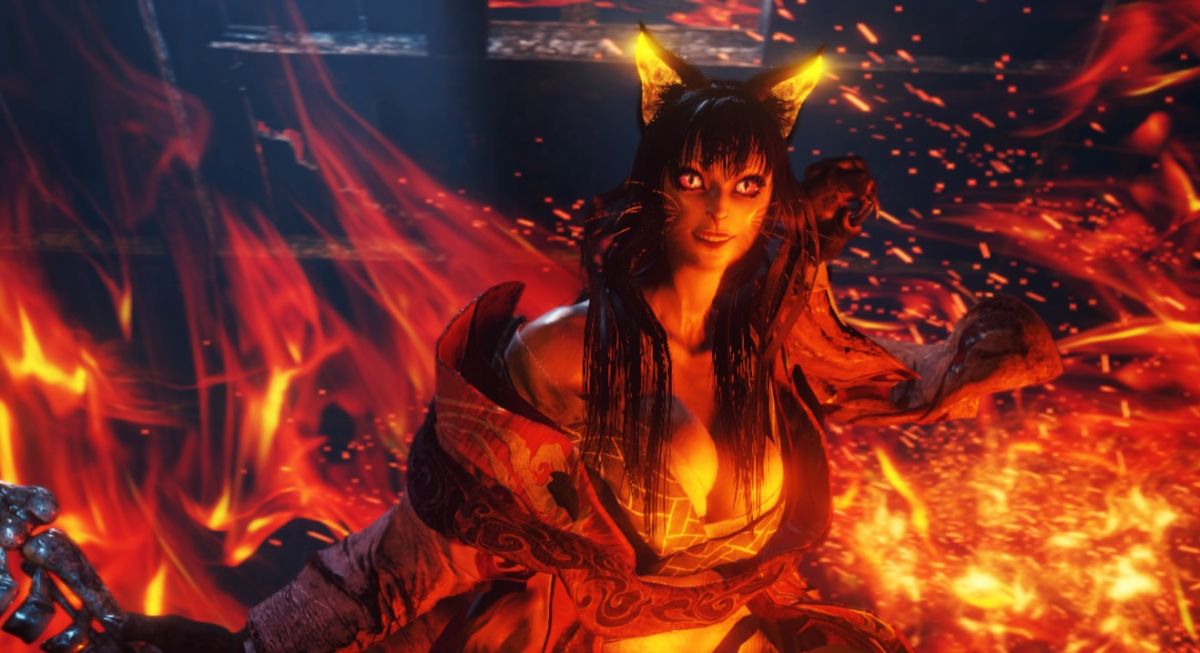
- Pronounced «YAHT-soo-no-kah-mee.» Yatsu-no-kami is a serpent god with a horn made of countless blades protruding from its forehead. These blades can be shot like arrows at the yokai’snn foes. Under the influence of the Dark Realm, its snakelike arms gain sentience and spring forth from its body to join the fight. Take heed when its white body turns black, for this is a sign that it is about to call forth the Dark Realm
- While it is now called a god, Yatsu-no-kami was originally a guardian deity to humans who were in pursuit of certain goals. It is said that many Yatsu-no-kami once thrived in the wetlands, until a man named Matachi of the Yahazu clan attempted to cultivate their land. The yokai stood in his way, and were driven from those lands as a result.
Matachi planted a stake in the ground and declared it a border between the realm of the humans and the yokai. He then built a shrine so as to appease the yokai and avoid their wrath.
- The Yatsu-n-kami is worshipped at Shirahebi Shrine is a great white serpent, and its cast-off skin is kept as a sacred object in a cave at the heart of the shrine. While it was once a gentle deity that protected the mountains and swamps, Saito Yoshitatus’s use of Spirit Stones transformed it into a raging being known as an aratama. It spews corruption from its body, creating poisonous swamps wherever its vile fluids land. Those who aim to defeat it must be prepared with measures to counter its noxious poison.
Yatsu-no-Kami Locations & Drops
- Found in Main Mission:
- The Viper’s Sanctum
- The Golden Castle
- Found in Online Mission: Calamity’s Pulse
- Found in Side Mission: In Search of the Elixir (The First Samurai)
- Found in Twilight Mission: The Bewitching Tower
- Drops Yatsu-no-Kami Soul Core
- Drops Bladed Horn
- Drops Smithing Text: Shrine Maiden
- Drops Smithing Text: Rotten Rope Cutter has a chance to also drop in mission «point of no return»
- Drops Smithing Text: Shrine Maiden’s Clothes
How to Beat Yatsu-no-Kami
Yatsu-no-Kami Boss Guide:
It’s good to have a long reaching weapon for this fight, preferably one that has an overhead vertical attack of some kind so that you can strike the head and arms easily.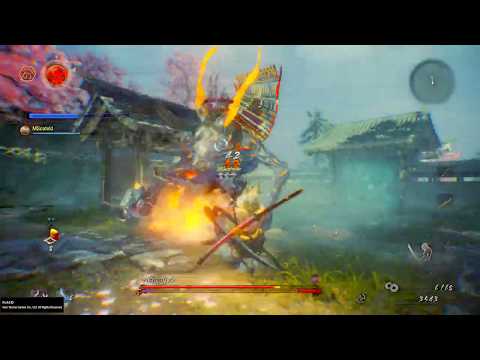 Blocking is a very good option against this boss, as many of the attack don’t use much ki to block, and are mainly slow single hitting attacks, so they don’t carry much risk if you do get your guard broken. The only thing to watch out for is the grapple attack.
When the fight starts the snake will charge you immediately, step to the side and try to sever one arm with a vertical attack or two, and then the other arm if you can. It’s hard to get both arms, but you can usually get one at least. Getting rid of just one of the arms litmits the amount of attacks they can use, and any you kill prevents them from spawning during the dark realm. As you encounter this boss later in the game, the arms gain more health, making it less worth it to go for both of them.
Next you want to try to bait his burst attacks so you can get some free hits, making sure to Block if he tail swipes and dodge if he grabs. There are few openings where you can attack safely and still have Ki to Block, so stay patient and look for the openings.
When you go to the Dark Realm you’ll want to dodge him as much as you can, and avoid the small snakes if you didn’t sever both arms. You don’t need to focus on them and they rarely do anything noteworthy, so try to stick to the Boss and avoid getting killed. Yatsu-No-Kami doesn’t gain any new attacks during this phase, so there isn’t anything specific you need to worry about outside of the smaller snakes you didn’t kill.
When you return to normal mode, it’s business as usual, but he will summon new arms shortly afterwards. Again try to sever these when you get openings, but don’t be too aggressive. Rinse and repeat, Blocking all attacks but the grab, and punishing the openings made by the burst attacks.
Attacking their head while it’s glowing will stun them out of whatever attack they are doing and do a moderate amount of permanent ki damage.
Attacks & Counters
| Attack | Counter |
| Universal Attacks | |
Impaling Doom: They will charge at you blade first. If they touch a wall, they turn around and try to attack you again. This is a burst attack until Dream of the Demon. If they touch a wall, they turn around and try to attack you again. This is a burst attack until Dream of the Demon. |
Aside from burst countering on lower playthroughs, you can block this attack safely. |
| If you get too close to the boss, it will perform a 360 tail sweep on the ground. | Easily and safely block able. |
| Yatsu-no-Kami will slams its whole body on the ground. Burst attack until dream of the Demon | If you dodge this attack, you have a couple of seconds to attack. |
| Creates a line of paralyzing needles that shoots forward. | Dodge into the needles. Yatsu keeps their head low during this attack, providing easy access to the Amrita patch on it. |
| Grapple: Yatsu-no-kami raises their head and rushes forward. If they touch you, will will get stabbed for a large amount of damage, potentially immediately killing you. | Go into High Stance and roll horizontally. You cannot block this attack You cannot block this attack |
| Occasionally they will spit a large Poison terrain effect on to the ground | Levitation Scroll allows you to stand in it without issue. A resistance talismon and Anti-Toxin Pills will also completely negate the attack, as the terrain effect itself does no damage. |
| Dream of the Demon and above Universal attacks | |
| Burst Needle Attack: Similar to the normal attack, except the needles follow a S pattern | Burst Counter this attack |
| An attack where Yatsu no kami creates a C Clamp with their tail and slams in front of them. | There is a dead zone right next to them where it will not hit you. |
| Attacks that use both arms. (Cutting one of the arms prevents these from being used | |
One of its main attacks is where it digs its arms in the ground and springs them out from the ground to grab you. There are two different timings, you can tell which one by how long the animation is before they plant their arms into the ground. There are two different timings, you can tell which one by how long the animation is before they plant their arms into the ground. |
Just continuously walking in one direction will prevent you from getting hit. Just walk toward them in one direction and it leaves them open for a while. |
| Yatsu reaches forward with both arms and attempts to pull you toward them | This attack cannot be blocked. Dodge horizontally |
| Dark Realm | |
| The snake arms will separate and fight as two separate enemies that will spit poison at you | take out the smaller snakes and then focus on the main boss. These snake enemies do reappear after some time, but it gives you some time to focus on the main boss. |
Notes & Trivia
- Carrying Antidote is a good idea for this fight since you can become Poisoned easily. You can farm some from enemies outside this Boss fight.
 Breaking the small arms or killing the snakes will also always drop an antidote for you.
 - Be sure to use a weapon that has an attack that can reach his head. Many weapons have High Stance attacks that can do this with ease.
- Memories — “I am grateful to you for ridding the world of my corrupt being. Now I will lend you the power of the very earth.”
Nioh 2 Bosses Ranked From Easiest To Most Difficult
Developer Team Ninja, the company behind Ninja Gaiden, deserves credit for the second installment of its Nioh franchise. This time around, Nioh 2 received fine-tuned balancing changes to make co-op more difficult. Nioh 2 can now be played with up to three other players, although some headstrong players will still prefer to take the game on alone.
RELATED: Ranking The Best Nioh 2 Weapon Combos
A solo run requires the mastery of skills, but perhaps most importantly, the exploitation of bosses’ weaknesses. This Souls-like game has surpassed our expectations, largely due to its dynamic boss fights, which provide both challenge and enjoyment in equal measures. Some of the game’s bosses are a little bit trickier than others, however.
Updated July 3, 2021 by Tom Bowen: There was a time not too long ago when developers seemed to be bending over backward to make their games easier for players. Whether through simplifying core mechanics or implementing adaptive difficulty settings to make their games as accessible as possible, many felt that games were becoming too easy. Nioh 2 makes no such allowances, however. The game instead boasts some of the hardest boss fights to have graced a home console since the late eighties and early nineties, forcing players to either get good or give up. Some might seem impossible, but with the right strategy and a good understanding of how they operate, they can be beaten.
10/10 Tatarimokke
| Enemy Type: | Yokai |
|---|---|
| Weaknesses: | Fire & Purity |
| Resistances: | Corruption, Poison & Paralysis |
| Immunities: | None |
| Special Drop: |
|
| Difficulty: | ★ ★ ★ ★ |
This owl is challenging because it requires you to multitask during the battle. You’ll have to slash red orbs to cleanse Dark Realms as a giant bird attacks you from behind. This Yokai boss is weak against fire and purity, so be sure to stock up on the appropriate talismans and amulets.
According to Tatarimokke’s enemy description, «A Tatarimokke is formed when a large number of resentful spirits coalesce to form a giant owl.» It definitely has the wisdom one would expect to find from an owl, but can be a lot more deadly if given the chance to get into its stride.
9/10 Lady Osakabe
| Enemy Type: | Yokai |
|---|---|
| Weaknesses: | Purity |
| Resistances: | Fire, Water, Lightning, Corruption, Poison & Paralysis |
| Immunities: | None |
| Special Drop: |
|
| Difficulty: | ★ ★ ★ ★ ★ |
We never could’ve guessed that a mission requires fighting a Yokai that has taken control of a massive castle. It’s a difficult battle for people who don’t look at a guide prior to fighting her. This encounter with Lady Osakabe is a fail-hard moment in Nioh 2.
RELATED: Nioh 2 Co-Op: Ways To Improve Your Game
To defeat this boss, you must attack Lady Osakabe’s white limbs when they near the edge of your platform. She has many resistances, so elemental damage is not recommended. Use a purity spell, and be sure to shoot projectiles at her central eye.
8/10 Kasha
| Enemy Type: | Yokai |
|---|---|
| Weaknesses: | Water & Poison |
| Resistances: | Fire, Corruption & Paralysis |
| Immunities: | None |
| Special Drop: |
|
| Difficulty: | ★ ★ ★ ★ ★ |
Kasha can be one of the most intimidating bosses in Nioh 2 because of her immense size and lightning-fast speed. She is like the combination of two Wheelmonks, only with more speed and far more damage potential.
Kasha’s flaming wheels might deter some players from going in for a head-on attack, but you’ll have to ignore every instinct and attack her wheels. Her wheels are her Achilles’ heel, so you’ll need to dig deep and summon the courage necessary.
7/10 Kamaitachi
| Enemy Type: | Yokai |
|---|---|
| Weaknesses: | Purity |
| Resistances: | Lightning, Corruption & Poison |
| Immunities: | None |
| Special Drop: |
|
| Difficulty: | ★ ★ ★ ★ ★ ★ |
According to Kamaitachi’s enemy description, «A Kamaitachi is said to ride the wind, slashing at its victims with biting gales. Folktales about a yokai shrouded in wind are rife throughout Japan, with some regions using the word «Kamaitachi» to refer to whirlwinds themselves.»
Kamaitachi is a weasel Yokai who is difficult because of his speed and precise attacks. You can use the trees as cover from his attacks, but other than that, it’s a challenging fight requiring patience and precision.
6/10 Otakemaru (Final Boss)
| Enemy Type: | Yokai |
|---|---|
| Weaknesses: | Purity |
| Resistances: | Fire, Water, Lightning, Corruption, Confusion, Poison & Paralysis |
| Immunities: | None |
| Special Drop: |
|
| Difficulty: | ★ ★ ★ ★ ★ ★ |
The final boss of Nioh 2 can be difficult or easy, depending on your level when you face him. If you’ve managed to master Nioh 2’s skills, stats, and have been offering items to the Kodamas, your level will be higher than the recommended. For those who have been rushing through, however, this can be an arduous battle.
Otakemaru changes forms throughout the battle as he becomes Feral, Brute, or Phantom. He also shifts into a Yokai and summons four floating swords, which can deal a decent amount of damage in a relatively short amount of time.
5/10 Saika Magoichi
| Enemy Type: | Human |
|---|---|
| Weaknesses: | Paralysis |
| Resistances: | None |
| Immunities: | None |
| Special Drop: |
|
| Difficulty: | ★ ★ ★ ★ ★ ★ ★ |
Did you forget that Saika Magoichi was a boss in the first Nioh game? He might be one of the coolest bosses in the history of Nioh, but oh boy, does he put up a painstaking fight. You’ll need to be at the very top of your game to emerge from it unscathed.
RELATED: Ranked: The Hardest Bosses in Nioh
Saika Magoichi can fly and attack vehemently. The room isn’t engulfed in flames like it was in the first Nioh, so you can’t use them to your advantage. Watch out for his rifle too. It’s a fairly confined space to fight Saika Magoichi, adding to its difficulty.
4/10 Magara Naotaka
| Enemy Type: | Yokai |
|---|---|
| Weaknesses: | Fire |
| Resistances: | None |
| Immunities: | None |
| Special Drop: |
|
| Difficulty: | ★ ★ ★ ★ ★ ★ ★ |
In some cases, the recommended levels for Nioh 2 missions can be a little misleading.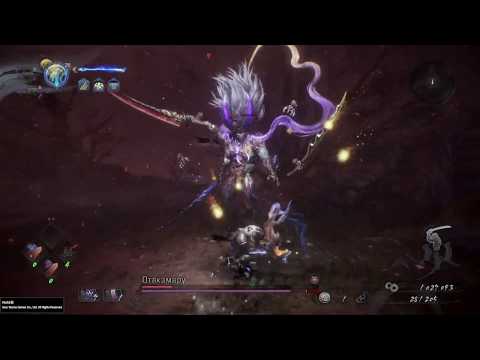 Magara Naotaka is one of several outliers found throughout the game, largely because of his devastating sweeping ice attacks and ice explosions.
To make things easier, there is plenty of room for you to maneuver around his attacks. To attack him, however, getting up close and personal is easier said than done. Watch out for his large bar of health. Magara Naotaka might not look it at first glance, but he’s incredibly tough to beat.
3/10 Enenra
| Enemy Type: | Yokai |
|---|---|
| Weaknesses: | Water |
| Resistances: | Fire, Corruption & Poison |
| Immunities: | None |
| Special Drop: |
|
| Difficulty: | ★ ★ ★ ★ ★ ★ ★ ★ |
You see this boss multiple times throughout the game, but the first time you encounter Enenra is generally considered to be the most difficult. Even going back to the mission while levels ahead of the game, you will still have a tough time overcoming the powerful Yokai.
RELATED: Nioh 2: The Best & Worst Things About The Sequel
As a boss who is «composed of smoke and darkness,» Enenra’s obvious weakness is water. His most devastating move is his Tornado Attack, which can be Burst Countered, but is a tough attack to deal with nonetheless. Mastering the timing is going to take practice and probably a fair few deaths.
2/10 Yatsu-No-Kami
| Enemy Type: | Yokai |
|---|---|
| Weaknesses: | Lightning |
| Resistances: | Water, Corruption & Poison |
| Immunities: | Paralysis |
| Special Drop: |
|
| Difficulty: | ★ ★ ★ ★ ★ ★ ★ ★ ★ |
The third main mission is a time when players are still learning how to play the game. Developer Team Ninja then decides to throw this colossal snake boss at you, ignoring everything we know about learning curves. Talk about being thrown in at the deep end.
Yatsu-no-Kami is considered one of the hardest bosses in Nioh 2 because of his impending sweeping attacks and poison pools. If you haven’t equipped antidotes, you probably won’t pass this mission, so be sure to stock up on resources beforehand.
1/10 Magara Naotaka + Revenant (2nd Encounter)
| Enemy Type: | Yokai |
|---|---|
| Weaknesses: | Fire |
| Resistances: | None |
| Immunities: | None |
| Special Drop: |
|
| Difficulty: | ★ ★ ★ ★ ★ ★ ★ ★ ★ |
The second time you encounter Magara Naotaka is considered to be the hardest boss fight in the game.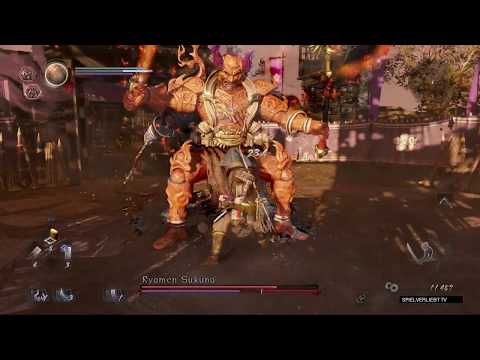 First, you have to combat a mob of enemies who can lower your health. Then, as you are fighting the mob, Magara Naotaka finally makes an appearance.
It’s essentially the same boss as the one you’ve previously fought, but a Revenant will also spawn in midway through the encounter. Like before, he has a ton of health points. Magara Naotaka is a high-damage dealing boss, who wields a gigantic ice sword.
NEXT: Nioh 2: Things That Make No Sense In The Game
Nioh 2: Walkthrough of all bosses
How to defeat Mezuki
This horse-headed monster attacks with a huge sword, which can hit you from a long distance. Up close, he sometimes tries to grab the hero, and at a great distance he shoots skulls. The key to victory is depleting the ki (stamina) highlighted in purple. After that, the enemy will be stunned, and you will have a few seconds to carry out your own attacks.
Mezuki.
First, study his movements, keeping your distance and not thinking about the attack.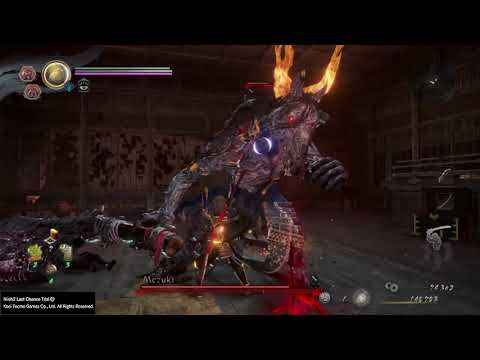 Take 2-3 minutes for this until you have all the combos memorized so that you know the sequence of strikes and movements. In particular, after a series of three hits, you can attack his head. For example, you can hit him twice with a spear from a high stance (square, that is, a light attack), and then run away. Over time, you will get a feel for how far he can reach with his giant sword. Try to stand on the edge of his range to force him to attack, then jump back to avoid damage. When he finishes the combo, land 1-2 high stance hits again and then back away.
Another important point is charged attacks with red energy. Every time the boss is about to perform a move like this, counter by pressing R2 and circle at the same time. Timings are important here, and you need to press the buttons just before the enemy hits. Such a move will use up some of your anima, but will cause more damage to the boss. Thus, this technique should be used whenever you see a red glow.
When you see that the boss’s ki is almost depleted, use one of the youkai abilities assigned to the guardian spirit — R2 + «triangle» or R2 + «square». One of these attacks will be enough to disable the boss for a while. When this happens, be ready to attack the enemy using the top stance. To regenerate Ki between attacks, press R1 to use Ripple.
The boss’s ki depletion moment is dangerous because you don’t see the enemy’s second hidden stamina bar. And if you do not have time to deplete it, then he summons the realm of youkai, turning into a more aggressive demon. With all the ensuing consequences. In this world, you get slower ki regeneration. Just wait for the boss to use his red attack and counter. When the boss’s ki is depleted in the yokai realm, in most cases you won’t even need to break the hidden stamina bar. The realm will disappear and the boss will drop to his knee and be temporarily immobilized.
A very important point is that attacking bosses from behind allows them to deal increased damage! That is why attack the kneeling enemy from behind. Proceed as usual, using counters in response to red attacks.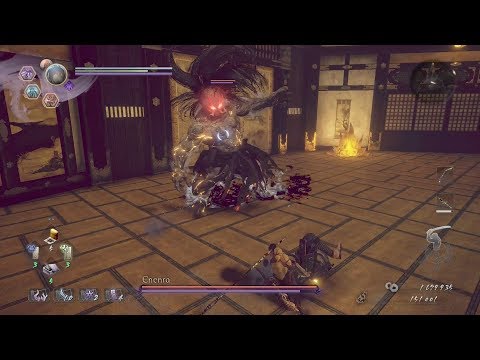 At certain moments, deliver single blows from the top stance.
How to defeat Enenra
Before going into battle, be sure to use the hot spring located behind the wall on the first floor of the burning building. In addition to healing, this source will temporarily strengthen Hide. In a fight against Enenra, it is enough to use one technique — a heavy blow (triangle) from the top stance with a spear, an ax and almost any other type of weapon. Always run to the left. Keep running around Enenra in a clockwise direction. He will attack you, but all the blows will go into milk. As long as you keep running to the left. By the time he completes his combo (usually 2 to 4 hits), you will be behind the opponent and be able to perform one heavy “triangle” strike from a high stance. Such a hit will give +200% bonus damage. In addition, a high stance implies maximum damage in one hit. Multiply this by the back attack bonus. Incredible! Repeat tactics throughout the battle.
Enenra.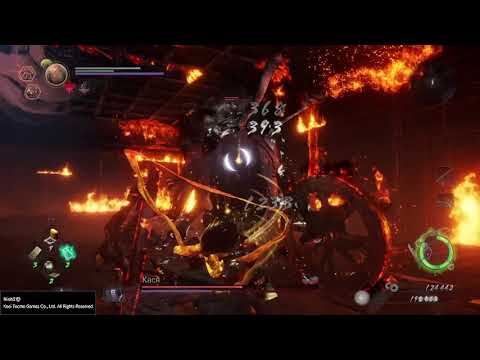
Avoid burning explosives that spawn periodically on the floor. Continue to act according to the tactics learned: run to the left, wait for a miss and attack 1 time from behind. You can also use the minimum window after exploding fire projectiles scattered across the floor, or landing on the floor after Enenra’s jump, to attack with a normal strike (square). But remember that in this case, the pause is minimal, which means your attack is more risky.
Also wait for the boss to prepare red attacks. Especially when he tries to use his «Tornado» move. Each time in these situations, press R2 + «circle». Dodging or blocking a tornado is difficult, so it must be counterattacked with a yokai splash instead. Such a move will also allow you to deal increased damage to the opponent’s ki. After that, if using a spear, press «square», «square», «triangle» to activate the combo.
After depleting ki, the enemy will be somewhat stunned, but be careful, after a few seconds it will transform and activate the yokai world.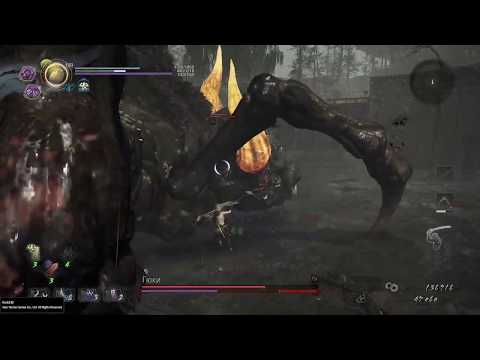 During the transition, he turns into a tornado. Even though your ki regenerates slower in the yokai world, it’s enough to use the same tactics when moving around the monster.
How to Defeat Yatsunokami
This is a slow snake-like creature with a set of predictable moves. Basic attacks that you can use with ease:
1. When the boss drives two small snakes on the sides of the main head into the ground so that they break out of the ground under your feet. The boss is completely defenseless.
2. Red charged attack when an enemy crawls forward. Run sideways, causing Yatsunokami to simply miss.
Yatsunokami.
You can use his lunges by moving towards the boss at a 45 degree angle. He will miss and become defenseless for a while. But be aware that near the Yatsunokami, it may try to grab you or attack you with its long tail.
When ki is depleted, the enemy will release two snakes that will attack you as separate enemies. It’s obviously easier to fight against one enemy, so focus on taking out those two snakes first. Even if the boss activates the yokai world, but one of the snakes is alive, keep chasing it until you kill it. Yatsunokami’s movements are the same in every stage.
Use only one spear attack — square, triangle, triangle from the top stance. This combo has a large range and increased hitbox, making it easier to hit the boss. Difficulties may arise when using other weapons. In the sense that the range of defeat for the same katana is much lower. In this case, you will need to stick to more powerful strikes on the triangle.
How to beat Imagawa Yoshimoto
Imagawa Yoshimoto.
This is the first human boss in Nioh 2. Already here you will understand that the fight against such an enemy is much easier due to predictable movements, limited range of damage, the ability to land finishing blows and the absence of a phase with the yokai world (in most cases).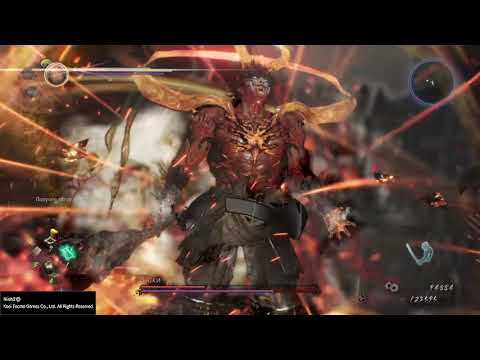 You can fight the Imagawa as if you were facing a normal opponent. The location is spacious, so you can run clockwise around the enemy or dodge backwards. When he misses, throw your punches. To make the fight easier, you can attack once with a heavy blow from the top stance. Imagawa’s life is limited, and he can’t deal much damage. Unless you have to run away as far as possible in those moments when Imagawa calls on his guardian spirit, attacking with lightning. And lightning is known to slow you down.
How to defeat Kamaitachi
This is a very fast, panther-like monster that constantly jumps and climbs trees. On the other hand, he has low health and comparatively weak hits. There is a hot spring on the way from the first altar in the level to the boss. Use it to increase the power of the hero. During the battle, use the middle or upper stance. Using a spear in the middle stance, attack a combo of three clicks on the «triangle». Always move towards the boss to the left, at a 45 degree angle. Most of his attacks will go into milk.
Kamaitachi.
The boss uses a combo of three hits, with the last one being a tail spin. It must be blocked, as it is difficult to dodge. Also be careful as he can use a red charged attack up close. Use R2 and circle for a counter.
When an enemy is climbing a tree, hold down the lock button. From a tree, he always launches a few projectiles, but you can easily block them, and with minimal ki loss. The second technique from a tree is a flight with rotation in your direction. If it’s a «red» move, just move left to avoid it. If you can’t see the red energy, you can easily block the attack. After such a technique, you will have time to attack the monster. Always try to attack him from the left. Instead of dodging, it’s safe to move to the left at a 45 degree angle and block various attacks, since they take a minimum of ki. Attack from the side each time you complete an enemy combo.
How to defeat Saito Yoshitatsu
Another human boss that can use guardian spirits of all three types (strength, wildness and ghost).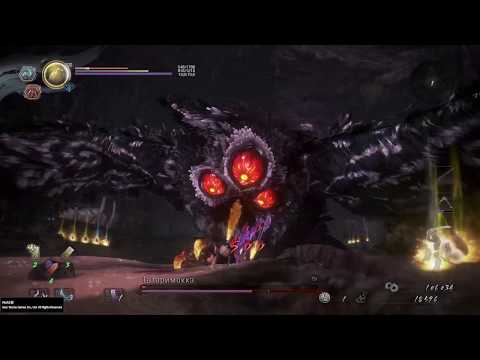 While he is in human form, you need to use only one move — a spear strike from a high stance with the help of a «square». You can then buy the Spear Flourish skill, which will allow you to attack your opponent’s ki by pressing R1. Repeat both moves to decrease the opponent’s ki pool. Thus, you need to repeat pressing «square» and R1 from a high stance when using a spear. Thanks to this, you will constantly stun the enemy and drive him into a corner. The only thing he can oppose is capture. When you see a white haze appear on his hand, dodge, then repeat the familiar combo.
Saito Yoshitatsu.
Twice per battle, he will assume a random Guardian Spirit form. If it’s an electric spirit, you’ll still be able to use a normal strike combo and R1 with a spear. If he uses fire form, just dodge so he misses his combo and then land 1-2 hits and repeat. If he uses a purple spirit, then just run away from Saito until he returns to human form. In about a minute. Then repeat the steps. This tactic will work against most human bosses.
How to defeat Tatarimokke
You have to fight with a huge owl. Throughout the fight, run to the left, especially when the enemy is on the ground. And while the enemy is on the ground, don’t worry about anything else. The only move you have to use is when the owl flies into the air. At this point, he will shoot gray skulls at you every time. Run forward at a 45 degree angle to avoid being hit, then block the released knives, then another fog and knives, and then a charged red attack will go. You can either counterattack the owl during the red attack or just run to the left. The latter is enough for the owl to miss every time. While in the air, the owl always repeats this exact sequence of actions. When she misses, attack her from behind. Wait until the owl takes off into the sky again, and then repeat the steps. Attack only after this sequence. You will be completely safe, and no risk!
Tatarimokke.
Twice per battle, the owl will summon a dark yokai world where a red orb also spawns.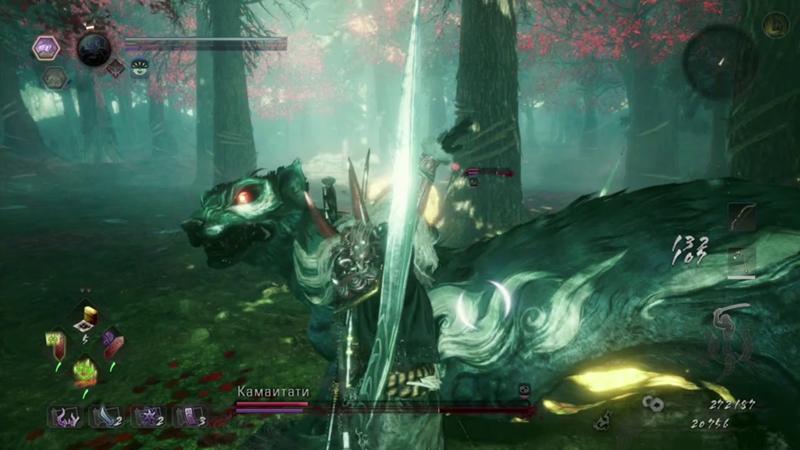 You can either run away and wait for the dark world to disappear on its own (after about a minute), or destroy the red orb. Be careful, because while you are focused on the sphere, you will most likely be attacked by an owl. Attack the sphere only after the owl performs the above combo with a red attack at the end. Make it so that the owl falls somewhere away from the red sphere, and not next to it. Also keep an eye on your ki. You must have enough stamina to unload a powerful combo on the red orb and destroy it instantly. If you don’t want to suffer, then just run away and wait for the yokai world to disappear on its own. Then run left around the owl and attack after a charged lunge.
How to defeat Magara Naotaka
In front of you is a huge ice giant. At the moment, this enemy has the largest amount of health among all the bosses encountered. Individual attacks of the boss cause minimal damage, but he has many combos, any of which can instantly kill Hide. Luckily, you can easily avoid all of Magar’s attacks. And for this again, continue to move to the left, around the boss. Having light armor (under 30% overall gear weight) will help increase your Ki regeneration rate, allowing you to run non-stop.
Magara Naotaka.
Choose a distance from which he will try to attack you, but at the same time he will not be able to reach you. Run clockwise around Magar, and when he finishes his combo, you will be behind him or next to him, so you can land 1-2 hits from the middle stance (remember that attacking from behind deals increased damage). Again, a spear will be useful, which is associated with a large range of damage. Just press 1-2 times on the «triangle» from the middle rack. In this battle, you will have to dodge a lot and stick to the middle stance, which has higher defense and minimal ki consumption for dodging. Avoid the high stance that consumes too much ki when dodging! And in general, dodges are slower.
Don’t try to attack the enemy with long combos. He will simply strike back at you. Be careful, attack one hit at a time. Get ready for a long fight. As long as you stick to the one-hit-maximum-two-hit rule, you’ll be relatively safe. If you wear heavy armor, you will run into problems with ki regeneration. Therefore, change it to light armor so that the equipment weight is below 30%.
There is a hot spring in front of the boss. Behind a hidden wall to the left of the enemy, where there are 3 samurai. Upon activating the yokai world, the boss starts using 2 new moves at once. He deals especially many blows with a charged, red attack. The last hit will have a large hitting range. The last hit is difficult to dodge, so it will often have to be blocked. And if you’re good with timings, you can counter. The enemy will also begin to scatter ice spikes on the ground, but they are easy to dodge if you keep running to the left around the enemy.
1
2
3
Support Stopgame!
3.8
40 ratings
Top comments
Series stories
History of The Elder Scrolls series.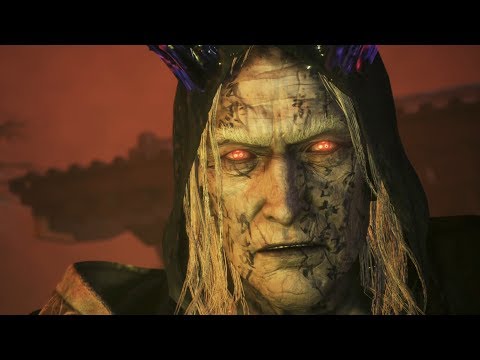 Issue 1. Dawn over Tamriel
Ivan Loev
60
Front page
The most interesting releases of November
Stepan Peskov
16
News
A new map, specialist and tank will appear in Battlefield 2042 with the start of the third season on November 22
Andrey Korolev
3
News
Wh50K First Gameplay: Rogue Trader and More Trailers from PC Gaming Show 2023
Andrey Korolev
5
Video review
Call of Duty: Modern Warfare 2 (2022): Nostalgia Torture
Maxim Orlov
98
News
World of Warcraft, Overwatch 2 and other online Blizzard games will stop working in China
Lina Skorich
36
News
Resolution and frame rate of Crisis Core -Final Fantasy VII- Reunion on consoles
Ruslan Prisekin
3
News
Detailed damage to enemies and a «vacuum» for loot — video about Atomic Heart
Andrey Makoveev
7
All boss fights in Nioh 2. Tips and tactics for every boss fight » SIMHOST
Nioh 2 boss fights is one of the key parts of the game.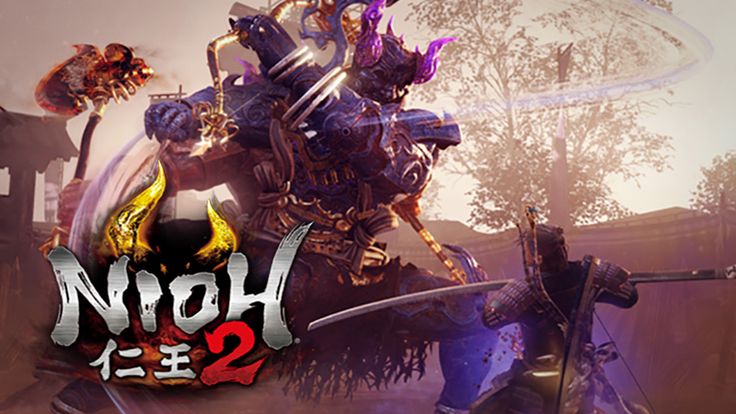 That’s why we’ve put together this Nioh 2 Boss Guide, and prepared the best tactics and tips for you to defeat all the bosses in the game. They are listed in chronological order below. Some bosses will meet you during the passage more than once in different variants and locations, all of their encounters are listed here in our walkthrough guide.
Boss #1 — Mezuki
Mezuki is a horse-like monster that attacks with a long sword that allows it to strike very far. Sometimes he uses grapples at close range or shoots skulls that see you from afar. The key to winning this fight is to break Ki Mezuki’s bar (the purple «stamina» bar at the bottom of the screen), this will stun him.
We told you more about the tactics of fighting this boss in a separate guide, we advise you to read it in more detail.
Boss #2 — Enenra
Be sure to sit next to a hot spring before going into battle. You will find him behind an enemy wall on the first floor of a burning building.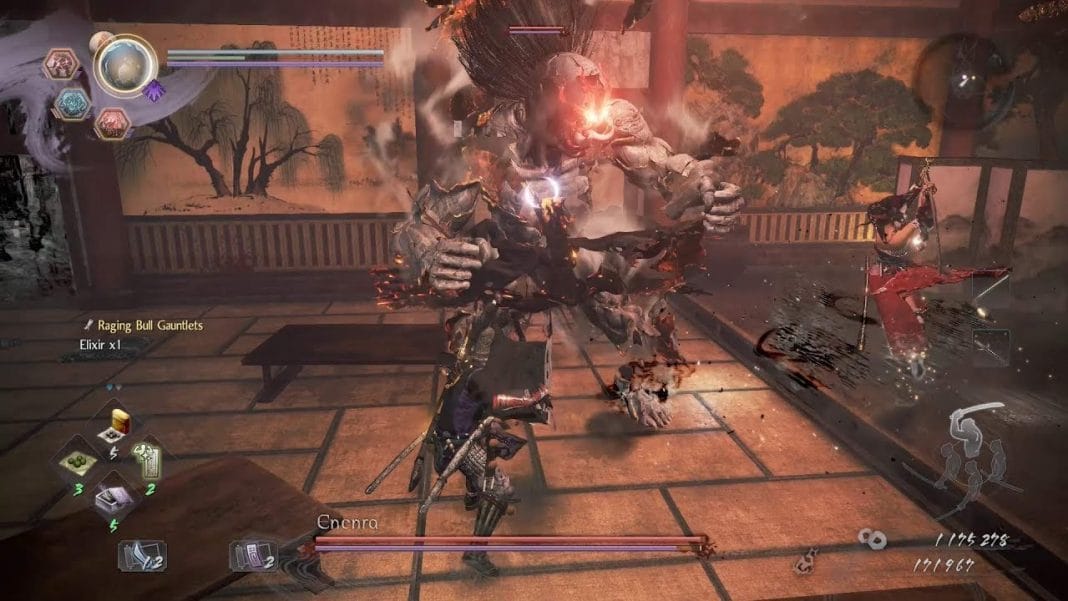 It will constantly heal you and give you a strength boost for a while.
You only need one move for this boss: a High-Stance heavy hit with a spear (the same should work with most other weapons, but a spear is perfect here).
Always run to the left. Keep running in a circle around Enenra, he will miss all hits and hits while you run to the left. By the time he completes the combo (usually 2-4 attacks), you will be behind him and can perform one attack. Attack from behind deals +200% bonus damage. High stance heavy attacks also do the most damage/damage to Ki in a single hit, and it’s multiplied by an attack from behind. Repeat this tactic throughout the fight.
When you see explosives on the floor, dodge and let them explode. Just focus on using his melee attacks (run to the left so he misses, do 1 heavy hit from behind, repeat). For everything else, just dodge back. As you get more comfortable with his movement pattern, you can also try to squash with a high stance after he detonates the explosives on the floor or hits the body. This is more risky as it has less downtime between these steps.
Be on the lookout for his red charged attacks! Especially his tornado move, ALWAYS counter it with :R2:+ :circle:(Explosion Counter). It is rarely possible to dodge or block a tornado, so you will have to blow it up instead. This also deals massive damage to Ki Enenre, after which you can proceed with Piercing Rain for massive damage. When his Ki is depleted, he will be hit during the attack, but be careful, he will always transform a few seconds after his Ki is depleted. 10 seconds after his Ki is depleted, you’ll want to dodge because he’ll wrap himself in a tornado when he transitions into Yokai Realm form. While in Yokai Realm form, your Ki regenerates more slowly, but the same tactic of running to the left and landing single heavy hits still works. The most dangerous are his charged grab and his charged tornado (both indicated by a red glow and can be canceled with the blast counter).
Again, don’t forget to collect all the kodamas in this level before the boss so you start with more elixirs when you respawn!
Boss #3 — Gozuki
This side mission is like an arena where you fight waves of enemies. Gozuki is the boss at the end. You have already encountered him at the beginning of the first main mission. It is set to the first boss of the Mezuka as a very similar move, but is easier to kill.
You just need to run / dodge, try to get behind him. Remember from behind you deal more damage. If you can’t avoid an attack, just block it. While blocking depletes your Ki bar, it is the safest option and the boss will usually make single one-hit attacks that take him time to recover from.
If you saved your elixirs during previous enemies, it won’t be so bad. Remember, the more Kodama you find, the more elixirs you will spawn. So if you’re having trouble, collect all the Kodama first, level it up a bit more, and come back later.
Boss #4 — Yatsu no Kami
Yatsu no Kami is a slow snake boss with a predictable set of attacks. The main attacks that you can easily use are: 1) when he slows his two snake arms in the ground so that they appear through the ground, this leaves him completely defenseless for a long combo; 2) his red charged attack when he slides forward runs sideways so he misses and combos while sliding past you.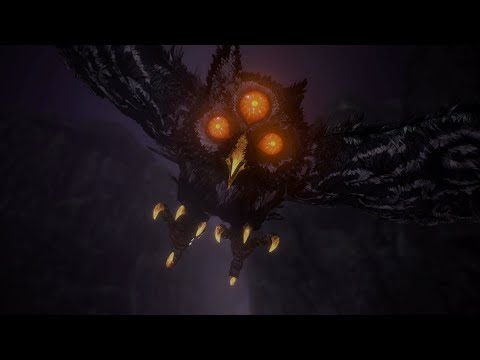 When it rolls back, repeat the same.
You can also try to use his throws by moving at a 45° angle towards him, he will miss you and be defenseless for a short time, but beware, he may take some kind of grappling or melee move right after that , so it’s more risky.
When his Ki is depleted, he will throw two snake arms and they will attack you too. Obviously, fighting only 1 vs 3 enemies is easier. So your priority should be to take out his two snake arms before his Ki depletes, then it’s easy to pick as it’s only a boss on its own. Just attack his snake arms from the side and they will fall. If one of them is still intact when entering Yokai Realm Mode, focus on the small snake first before attacking the boss. His moves remain the same throughout all phases of the fight, so just repeat above.
Only use one attack: High-Stance Spear with Spearfall unlocked (requires Spear Mastery) — This move has long reach and a large hitbox to easily hit the snake’s hands.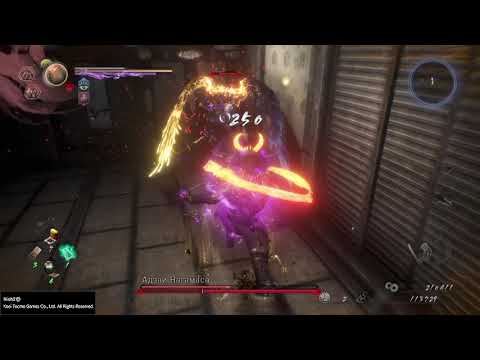 With other weapons, it can be difficult to hit with snake weapons due to limited reach, but if you’re using other weapons, stick with powerful heavy hits for maximum damage per hit.
Boss #5 — Imagawa Yoshimoto
Imagawa Yoshimoto is the first human boss in the game. You’ll find that human bosses tend to be much lighter than monsters due to their limited reach, more predictable move sets, ability to deal fatal blows to them, and they don’t usually use Dark Realm phases.
You can approach him as if you were a normal non-boss enemy. You have enough space so just run to the left around him or dodge backwards. When he misses an attack combo, you can attack. To keep things simple, do single heavy attacks and take out his health one hit at a time. He has low health and doesn’t deal much damage. Only when he summons his spirit animal, you will have to run to the side so that you are not hit by the lightning element.
Read more about the fight with this boss in our separate guide.
Boss #6 — Imagawa Yoshimoto (2nd Encounter) «Imagawa Diehard»
Immediately after beating this boss in the last main mission, you will be able to fight him again immediately in the next side mission. It’s the same as before, so use the same tactic.
Boss #7 — Kamaitachi
Kamaitachi is a big cat monster. He is relatively fast, climbs trees and jumps a lot, but doesn’t do much damage and doesn’t have much health.
Make sure you interact with the 1st Temple, in case you need to respawn, it’s the closest one. There is a hot spring on the way from the 1st Temple to the boss, which you also have to use to get continuous healing for a while.
For more information about the fight with this boss, read our separate guide.
Boss #8 — Tsukahara Bokuden
Tsukahara is a very simple human boss, not unlike the normal samurai you encounter all the time. The main difference is that it uses the Ki-Burst movement. With a spear, it is very easy to break his defense.
Just keep poking him with mid-stance spear attacks until his Ki is depleted. Just run away from him, and when he runs towards you, poke him with your spear. It can’t run and attack at the same time, and the AI has issues with spear defense.
Boss #9 — Saito Yoshitatsu
Saito Yoshitatsu is a human boss and he can transform into all 3 types of Guardian Spirit (Brute, Feral, Ghost). While he’s in human form, you only need one turn — high stance spear, attack once followed by Spear Flourish (purchased from the Spear Skill list, just press R1 to do a Ki Burst).
Repeat these two movements to negate his health and ki. Thus, all you press is repeat hits. It will constantly overwhelm and corner him. The only thing he can do is grab you. When you see his hand throw a white mist, dodge, then repeat the Strike + Spear Flourish combo.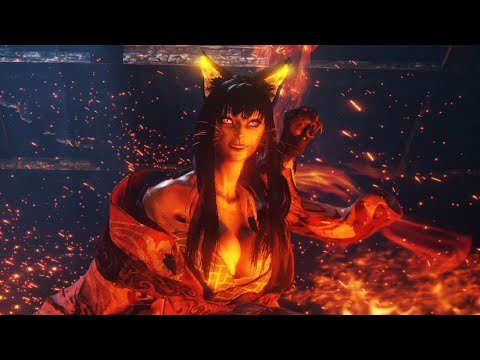
Twice during combat, he switches to a random Guardian Spirit form. If he uses electric, you can still hit him with Strike + Spear Flourish. If he uses a fire type, just let him skip the combo, then land 1-2 hits on him and repeat. If he uses a purple ranged type, it’s too risky, so just run away from him until he returns to human form in a minute. When he returns to human form, you will be able to use the Spear-Prosperity skill again. This skill is quite strong against human bosses as it blocks them for the entire fight and they won’t be able to move or attack. This works against most human bosses.
Boss #10 — Hachisuka Koroku
If you start recruiting Shibata to your team at the start of the Shift Judgment of Wisdom side mission, you will be able to fight Hachisuka at the end (and vice versa).
The fight is very easy, because you will have an artificial ally who cannot die (he can be knocked out, but you can revive him an unlimited number of times).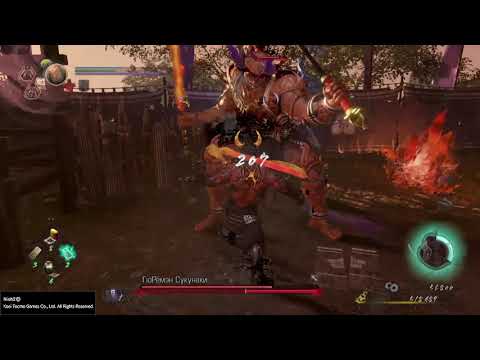 Just let your AI ally take attacks while you stay and hit from behind. On the way to the boss, you can also use the hot spring. Since the AI has infinite health and does all the work for you, it’s a free win for you.
Boss #11 — Shibata Katsuya (Human Form)
If you start recruiting Hachisuka to your team at the start of the Shift Judgment of Wisdom side mission, you will be able to fight Shibata at the end (and vice versa).
The fight is very easy, because you will have an artificial ally who cannot die (he can be knocked out, but you can revive him an unlimited number of times). Just let your AI ally take attacks while you stay and hit from behind. On the way to the boss, you can also use the hot spring. Since the AI has infinite health and does all the work for you, it’s a free win for you.
Boss #12 — Tatarimokke
The boss Tatarimokke is a big owl, always run to the left throughout the fight, especially when he is on the ground. Don’t worry about it while he’s on the ground. One move you’ll want to use is when he gets airborne. Then he will always shoot you at the fog skulls (run at a 45* angle forward so they don’t hit), then knives follow (block them), fog skulls and knives again, ending with a red charged dive attack. The red charged dive you can do is how to dodge time if you feel good or you can just run to the left and it will miss 100% of the time.
An owl always does this exact sequence of movements while in the air. After he missed the attack, you can attack from behind. Wait until it crashes again and repeat. Only attack after this flight/dive sequence and you will be safe.
Twice during the battle, he summons the Dark Realm with a red orb. You can either run away and wait for the Dark Realm to disappear on its own (after about a minute) or destroy the red orb. Be careful, the owl will attack you as long as you focus on the orb. Attack the orb only after the owl has performed its aforementioned combo (flies-skulls-knives-skulls-knives-dive). Make sure he dives away from the red ball and not towards it (stand in the opposite direction to lure him). Also make sure your Ki bar is full enough so that you can unload a strong combo on the red orb to destroy it in one go. If this gives you trouble, just wait and let the Dark Realm go on its own. So remember, just run left around the owl and use one flying dive to move against it.
Boss #13 — Obsidian Samurai
Obsidian Samurai is a human boss, which means a return to basic spear tactics in the middle position. Throughout the fight, run to the right side. Let him skip the combo, then poke him once in the spear in the middle of the position.
Repeat until he dies. When you see him using his spirit animal, move as far away as possible and quickly run to the right — he can attack you, and running to the side is the best option to avoid getting hit. His other moves are basic ax/sword combinations.
Boss #14 — Magara Naotaka
Magara Naotaka is the boss of the ice giant.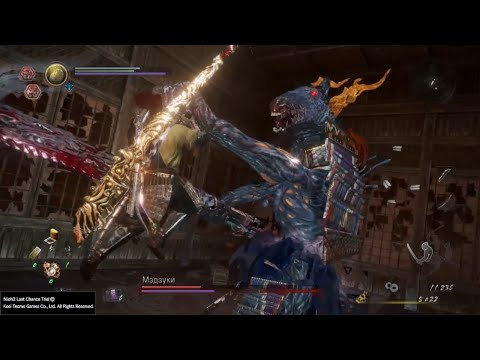 As long as he has the most health. His individual hits don’t do too much damage, but he does a lot of combos, any of which can kill you if you’re not careful.
Fortunately, all attacks are easy to avoid — just keep running to the left at any time! Having light armor (less than 30% gear weight) helps increase your Ki (stamina) recovery rate so you can keep running. Find a spot where you’re close enough for him to attack, but far enough away so he can’t hit you. Run in a circle around him to the left and by the time he finishes his combo you will be behind him or next to him and can land 1-2 hits in mid stance (if you manage to attack from behind, you do double damage!) .
Again, the spear comes in handy because of its long reach — just use one or two: triangle: spear pokes in mid position. You have to dodge a lot in this fight, so it’s best to stick to a middle position that has good defense and doesn’t use a lot of Ki on dodges. Don’t use high stance, it consumes too much Ki and dodges are too slow for this boss.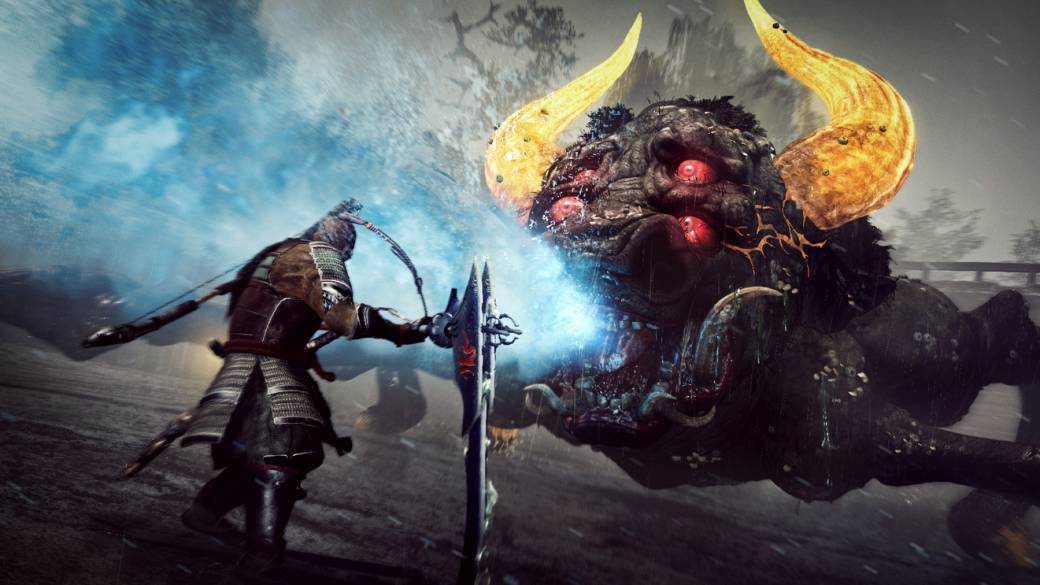
Don’t try to land long combos on him, he’ll just hit you. Be careful and cut his health down one hit at a time. The fight takes some time, but as long as you stick to the 1 hit rule (max 2), you’ll be relatively safe. If you are wearing heavy armor, you may have problems with your Ki recovery rate, so switch it to light armor to keep your gear weight below 30%.
In addition, there is a hot spring in front of the boss. It is behind a hidden wall to the left of the boss where 3 samurai enemies are standing. If health is an issue for you, jump into a hot spring before a fight to restore health for a while. Also find all Kodama in the region (7 in the first main mission and 8 here). Every 5 Kodama in the region gives +1 free elixir slot on respawn (8 + 7 Kodama in the region so far = 15. This means you will start with 6 instead of 3 elixirs!). This gives you more starting elixirs when you return = more healing during the boss. Also use Rejuvenation Talisman (Onmyo Magic skill), it heals you continuously over time. That being said, you should have a lot of extra health.
Remember that this boss will learn new moves the first time he enters Dark Realm mode. Especially his red charged combo has a lot of hits and the last hit has a very long range. Outrunning the last hit of a combo often fails, so you should instead block the last hit (but not the hits before it) or, even better, try to counter it if you feel like your time is right. He also starts throwing ice spikes from the ground later in the fight, but they can be easily avoided if you always stick to the rule of always running to the left.
Boss #15 — Honda Tadakatsu
Honda was already in the first Nioh game. He uses a spear and an electric animal spirit. Just as with most human bosses, the same tactics apply.
Run close to him so he misses all his attacks (he usually hits with his spears which are really easy to kill), when he finishes he becomes vulnerable and you can get a few hits. Repetition. Stick to a mid stance or a high stance for optimal damage output. You will also receive his spirit animal «Shin-Roku» as a reward.
Boss #16 — Azai Nagamasa
Azai Nagamasa is another human boss, which means the standard tactic is running to the side, allowing him to miss a combo and then counterattack. Throughout the fight, always run or walk on the right side. Start running when he attacks, let him skip, then counter with a few hits. Mid stance attacks with a spear work very well as they have a good punch to hit him from a distance. Repeat the tactic for the entire fight.
Luckily, this boss does the least damage out of all the bosses so far. You can also block his strikes, they don’t drain much of your Ki at all, making him a good alternative to running sideways and dodging. If you’re running but notice you’re within range of his next strike, just hold L1 to block him and you’ll be fine.
Boss #17 — Onryoki
Onryoki was the second boss in the original Nioh game. If you have played it, you are already quite familiar with this boss. Luckily, this time you will encounter him much later in the game, when you are already stronger and have more skills to choose from, so he is lighter than in the original.
At the first stage, it will rotate around two large steel balls. This does a lot of damage. Take it slow here — land only high-stance single hits every time he finishes a whirlwind or when he finishes a strike with the steel balls in front of him. Always try to attack him from behind to increase his damage by 200%. Only do single hits and no combos, he spins too fast and just hits you.
So, remember only strong hits, this way you decrease his health one hit at a time between his attacks. At about 66% health, he will release steel balls. He then only attacks with his arms — meaning he has much less reach than before. Now you can get 2-3 combinations of hits. Always keep moving to the side to get behind him. By the time he finishes the combo, you will already be standing behind him and will be able to strike quickly. Step back and repeat.
Boss #18 — Saito Yoshitatsu (2nd Encounter)
See our tips just above — Boss #9 «Saito Yoshitatsu». This is exactly the same boss with exactly the same set of moves. The same strategy works as before. This time it’s even easier!
Use the ramp at the yellow crystals, lower the top of the ramp and let him fall after you. While he is falling, he is completely defenseless and you can hit him in the air. Just run up the ramp again and repeat, you can land free hits on him until he dies (especially useful while he is transforming). Thanks to this feat, he will never be able to hit you, making it one of the easiest fights in the game.
Boss #19 — Oda Nobunaga
One of the easiest bosses in the game with Spear High-Stance «Spear Flourish». This is one of the Spear’s starting skills and only requires 1 skill point to unlock, allowing you to stun the boss for an entire fight without even getting hit by him.
All you do is press R1 and repeat (High-Stance, Spear only). The R1 trigger spears thrive skills that knock back this boss (and almost all other human bosses) during Ki Burst. You then land one hit and repeat this cycle until the boss is dead. When he is cornered, there is nothing he can do.
Make sure you time your ki packs correctly to recharge as much ki as possible (look for the red ki bar under your health, when the white bar after your attack is full you press R1 to recharge your ki used for the attack). So you can keep going forever. Also wear light armor so your Ki regenerates faster (equipment weight is less than 30%), or use it without any armor. This tactic turns a strong boss into a joke.
Boss #20 — Magara Naotaka (2nd Encounter) + Revenant
Even if this side mission becomes available sooner, it is highly recommended to wait at least until you reach area 4 and get better gear/higher level . This is the hardest boss so far.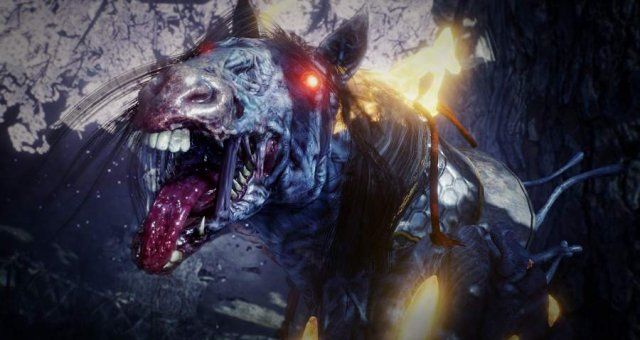
You must fight weaker enemies first before Magara Naotaka (giant ice boss) reappears. For the first half of the fight, this is identical to the previous fight (see Boss #14). But then he will spawn a powerful Revenant to help him. DO NOT focus on the revenger, don’t even try to attack him. If you do, it’s easy to lose track of the main boss, who will just bombard you with attacks you can’t see.
So keep the ice boss locked up with R3 and focus only on him. The same tactics used during the first half of the fight are still used for the most part. You’ll want to stay in middle position because you have to dodge a lot (more effective than high stance slips). The only attack you’ll want to use is when he slams the ground to shoot ice/projectile at you in a straight line. When he does, move towards him at a 45° angle. The projectile will miss you 100% of the time, and you will be close to the boss and able to land 1-3 hits (only with a spear): triangle: middle attack position, but other weapons will work too). The spear is great due to its long reach. How many hit points you can get depends on how close the character is. Magara can’t do anything for a few seconds after using his projectile/ice projectile attack, so when you attack him from behind (double rear damage), watch what the Revenant does. If you see it launching an attack, dodge!
Make sure you’re wearing light armor with less than 30% gear weight. You must be very agile during this fight. Always run in a big circle around the boss and the avenger. Just run away, never attack until he makes a throwing attack. This is the only time you want to attack to stay safe. After the Magara has gone out, you still need to defeat the Revenant. Have him run towards you and then land single hits. He cannot attack or defend while he is running, so these are free ground strikes. Take only one hit, keep walking back, take another hit and repeat until he dies. Sometimes you will see him perform a charged attack, which will be a spear thrust.