The Book of Unwritten Tales 2: Alle Rätsel geknackt
lassische Adventures stecken voller klassischer Rätsel, die ihr auf klassische Weise lösen müsst. Das ist nicht immer ganz so einfach, weshalb wir euch mit unserer Lösung aushelfen.
Kapitel 1
Nate
Zeitrahmen: 10 Minuten
Schwierigkeitsgrad: leicht
Haltet euch am Felsen zu eurer Linken fest und steigt ihn empor. Betrachtet den Steg, klettert ihn entlang und anschließend das Seil hinauf. Nehmt die Lampe oben links und redet mit Benny. Nachdem er sich versteckt hat, schnappt ihr euch den flatternden Teppich. Es folgen das Intro und ein Tutorial, bei dem ihr einfach den Angaben des Erzählers folgt.
Ivo
Zeitrahmen: 45 Minuten
Schwierigkeitsgrad: schwer
Sobald ihr Ivo steuert, schaut ihr euch gründlich um und betrachtet vor allem die von ihr gemalten Bilder. Versucht anschließend das Schmuckkästchen zu eurer Linken zu öffnen und den Spiegel zu nehmen, was jedoch Tschiep-Tschiep zu verhindern weiß. Geht zur Veranda, betrachtet die Sonnenblumen und nehmt ein paar Sonnenblumenkerne. Kehrt zurück in euer Zimmer und legt die Kerne in den Aschenbecher. Daraufhin könnt ihr euch den Spiegel schnappen.
Schaut euch die Spieluhr unten rechts in der Ecke an und öffnet sie. Lehnt anschließend den Spiegel an die Statue, die rechts daneben steht. Benutzt die Spieluhr erneut, um Tschiep-Tschiep einzusperren. Marschiert abermals zur Veranda und klettert über das Geländer hinab in den Garten. Durchsucht das Blumenbeet zu eurer Linken und redet mit Arbor. Danach könnt ihr den Stein anschauen und mitnehmen, vor dem er stand. Widmet euch dem Teich zu eurer Rechten und klickt die Pflanzen an, um ein Schilfrohr zu erhalten.
Geht nach rechts in die Bibliothek und schaut euch die Bücherregale an. Ihr könnt aus dem linken ein Buch zum Thema Holzverarbeitung nehmen und im rechten ein Buch über Pflanzenkunde lesen. Schaut euch in letzterem Falle vor allem den Eintrag unten links an, der die Liebeslilien behandelt. Klickt als Nächstes das kleine Bücherschränkchen ganz vorne an, aus dem Ivo ein sprechendes Medizinbuch hervorkramt. Redet mit dem Buch und ihr erfahrt alles über den Trank, den ihr brauen sollt.
Schaut euch die Blumen unten rechts in der Ecke mehrfach an, bis Ivo einen Blütenkelch einpackt. Danach geht ihr durch den Ausgang zu eurer Linken zurück in euer Schlafzimmer. Schaut euch die Blume auf dem Tisch an, die Ivo nach dem Lesen des Buchs über Pflanzenkunde nun nimmt. Holt euch zudem noch einmal ein paar Sonnenblumenkerne von der Veranda und kehrt zurück zu Arbor.
Zeigt ihm die Blume und wartet ab, was passiert. Redet erneut mit Arbor, sobald er auf der Bank sitzt, und befragt ihn über die Zutaten des Tranks. Ihr erhaltet im Laufe des Gesprächs eine Angel. Zapft danach etwas Honig ab, indem ihr das Schilfrohr mit dem Bienenstock über der Sitzbank kombiniert. Benutzt anschließend den Blütenkelch mit dem Metus-Strauch, den euch Arbor gezeigt hat. Die roten Früchte werden daraufhin grün, woraufhin ihr eine davon pflücken könnt.
Geht zum Blumenbeet, wo ihr Arbor angetroffen habt, und nehmt ein paar Regenwürmer, die sich in der Erde tummeln. Begebt euch zum Teich zu eurer Rechten und benutzt die Angel. Werft sie so lange aus, bis ihr einen roten Hering gefangen habt. Wann das passiert, hängt vom Zufall ab.
Begebt euch wieder in euer Schlafzimmer, nehmt die Karaffe mit dem Wasser vom Tisch und schüttet es in die Schale. Gebt nacheinander den Hering, die Frucht und den Honig hinzu. Zerstampft alles mit dem Stein, um die Medizin zu erhalten. Lauft zurück in die Bibliothek und berichtet dem Medizinbuch von eurem Erfolg.
Redet nach der Zwischensequenz mit Tschiep-Tschiep und geht alle Themen durch. Sprecht abermals mit Arbor und klickt im Anschluss den magischen Spiegel zu eurer Rechten dreimal an. Begebt euch schlussendlich ganz nach rechts und geht hinter dem Teich in den Thronsaal. Schaut euch die drei Symbole auf den Steinsäulen an und redet sowohl mit eurem Vater als auch mit eurer Mutter. Letztere verrät euch die Bedeutung der Symbole.
Besorgt die Karaffe, die in eurem Zimmer steht, und geht damit zu eurer Mutter. Bittet um etwas Mondwasser und sagt, dass ihr einen Schönheitstrank brauen wollt. Begebt euch zum magischen Spiegel und schüttet das Wasser hinein. Sprecht noch mal mit Arbor, bittet ihn um Wasser aus der Erde und kippt es ebenfalls in den Spiegel. Geht zu guter Letzt zum Teich und füllt die Karaffe mit dem Wasser aus dem Wasserfall. Schüttet auch dieses über dem Spiegel aus, geht wie gewohnt alle Gesprächsthemen durch und fragt zu guter Letzt nach dem Lösungswort.
Schaut euch die glückliche Trauerweide hinter dem Teich an und lest ihr eine Passage aus dem Buch über Holzverarbeitung vor. Die Weide lässt ihre Blätter hängen und macht somit Platz für einen Regenbogen. Lauft zu Arbor und nehmt den Spaten, der vor ihm im Boden steckt. Schaut euch das untere Ende des Regenbogens an und benutzt dort den Spaten, um einen Kessel Gold auszugraben.
Redet mit Tschiep-Tschiep, der immer noch in der Bibliothek hockt, über das Gold. Fragt anschließend euren Vater im Thronsaal um Rat, wie Tschiep-Tschiep den schweren Kessel heben könnte. Er bittet euch um ein paar Sonnenblumenkerne, die ihr ihm sogleich überreicht. Solltet ihr keine mehr haben, dann müsst ihr wieder auf die Veranda gehen und welche holen.
Gebt Tschiep-Tschiep die verzauberten Kerne und den Kessel voller Gold. Begebt euch zum Garten und wartet, bis Tschiep-Tschiep eine Kiste herbeischleppt. Klettert auf die Veranda und öffnet die Kiste. Setzt euch anschließend auf den Hippogreif, um nach Seefels zu gelangen.
The Book of Unwritten Tales 2
The Mary — Deck (as Nate)
- Look at the wooden plank
- Interact with the planks to get a heavy wooden plank
- Exit the ship
Elfburrow — Garden (as Nate)
- Look at the reeds in the pond
- Interact with the reeds to get thin reed
- Look at the ball of string near where Arbor used to be
- Interact with ball of string to get strong string
- Enter the library
Elfburrow — Library (as Nate)
- Enter Ivo’s room
Elfburrow — Ivo’s Room (as Nate)
- You will automatically return to the library
Elfburrow — Library (as Nate)
- Go to the throne room
Elfburrow — Throne Room (as Nate)
- Talk to the sleeping king
- Bob: Exhaust all dialogue
- Return to the garden
Elfburrow — Garden (as Nate)
- Interact with the vines around Critter
- Enter the ship
The Mary — Deck (as Nate)
- Go to the Captain’s Cabin
The Mary — Captain’s Cabin (as Nate)
- Look at the mealbox
- Take the empty tin cans
- In your inventory, combine the empty tin cans with the strong string to get home-made telephone
- Look at the chest
- Interact with the chest to get the note book
- In your inventory, use the note book
- Look at the script
- Exit the view of the note book
- Return to the library in Elfburrow
Elfburrow — Library (as Nate)
- Look at the right bookshelf
- Select the translations in order: gem, desert, foot, three, mountain
- Return to the Captain’s Cabin
The Mary — Captain’s Cabin (as Nate)
- Look at the writing desk
- Look at the maps
- Interact with the maps (it will say «Set a course»)
- Look at the Umzu Desert
- You will get the map (this will allow you to fast travel to each of the locations during this section)
- Look at the three mountains
- Select to fly to Lorem Ipsum
Lorem Ipsum — Digsite (as Nate)
- Look at the half buried flagstone
- Interact with the flagstone to get flagstone with script
- Look at the stone pedestal
- Look at depression below the stone pedestal
- Look at the stone pedestal again
- Look at the depression again
- Look at the mummy
- Talk to the mummy
- Mummy: ask about the flagstone, ask about the depression, ask about the wooden pegs, ask about the ugly superbronze, say it is for the good of lorem ipsum, exit the conversation
- You will get the solid metal tube
- Use the solid metal tube on the pedestal
- Swith to Critter
Lorem Ipsum — Digsite (as Critter)
- Go to the ship
The Mary — Deck (as Critter)
- Look at the rope
- Interact with the rope
- Use the rope on the ship exit
- Switch to Nate
Lorem Ipsum — Digsite (as Nate)
- Interact with the rope
- Use the rope on the obelisks
- Use the thin reed on the sundial below the pedestal
- Look at the sundial to read the time
- Interact with the pyramid stone indicated by the shadow
- Try to enter the pyramid
- Mummy: Select the last option
Lorem Ipsum — Inside the Pyramid (as Nate)
- Look at the grave goods on the floor
- Interact with the grave goods to get ancient mirror
- Look at the grave goods further to the right
- Interact with the grave goods to get shrivelled seeds
- In your inventory, use the map to fly to Tugator
The Mary — Deck (as Nate)
- Exit the ship
Tugator — Town (as Nate)
- Look at the brightly coloured cloths
- Interact with the brightly coloured cloths to get a neckerchief
- Look at the hammer on the table
- Take the studded wooden hammer
- Look at the flower on the right
- Take the huge bloom
- Talk to Lady Van Buren
- Van Buren: Introduce yourself as an insurance agent named Wayne Schlegel, then select the last option each time
- Enter the palace
Tugator — Red Pirate’s Palace (as Nate)
- Red Pirate: Select the last option each time
- Exit back to the town
Tugator — Town (as Nate)
- Look at the little girl
- Talk to the little girl
- Chantal: Ask about the tea party, ask about the guests, ask about the mad hatter, ask about the white rabbit, exit the conversation
- Go to the observatory
Tugator — Inside the Observatory (as Nate)
- Oracle: Select the last option each time
- You will get the magical receiver mirror
- Look at the mirror with the happy children
- Use the map to fly to Elfburrow
The Mary — Deck (as Nate)
- Exit the ship
Elfburrow — Garden (as Nate)
- Go to the library
Elfburrow — Library (as Nate)
- Look at the top hat
- Take the top hat
- Enter Ivo’s room
Elfburrow — Ivo’s Room (as Nate)
- Look at the mirror
- Take Ivo’s mirror
- Return to the pyramid in Lorem Ipsum
Lorem Ipsum — Inside the Pyramid (as Nate)
- Look at the oil press
- Use the huge bloom on the oil press to get scented oil
- Fly to Elfburrow
The Mary — Deck (as Nate)
- Enter the Captain’s Cabin
The Mary — Captain’s Cabin (as Nate)
- Look at the wardrobe
- Interact with the wardrobe to get the small bunny costume
- Look at the dressing table
- Interact with the table to get white powder
- Interact with the table to get empty atomizer
- Return to the garden
Elfburrow — Garden (as Nate)
- Use the empty atomizer on the pool to get atomizer filled with water (it is also possible to combine the empty atomizer with the scented oil first to get atomizer filled with fragrance instead in which case that must be used in the pool instead to get the sweet perfume)
- In your inventory, combine the atomizer filled with water with scented oil to get the sweet perfume
- Fly to Tugator
The Mary — Deck (as Nate)
- In your inventory, use the top hat
- In your inventory, use the neckerchief
- Use the small bunny costume on Critter
Tugator — Town (as Nate)
- Talk to the little girl
- Chantal: Tell her about the speaking telegraph (you will get the transformed telephone), then exit the conversation
- Enter the palace
Tugator — Red Pirate’s Palace (as Nate)
- Use the transformed telephone on the statue on the left
- Exit the palace
Tugator — Town (as Nate)
- Use the shrivelled seeds on the parrot
- You will get the imprisoned pirate’s parrot
- Use the imprisoned pirate’s parrot on Chantal
- Look at the pile of treats
- Interact with the pile of treats to get handful of treats
- Enter the palace
Tugator — Red Pirate’s Palace (as Nate)
- Talk to the Red Pirate
Tugator — Town (as Nate)
- Return to the Mary
The Mary — Deck (as Nate)
- Use the handful of treats on the hippogriff
- Talk to the hippogriff
- Return to the town
Tugator — Town (as Nate)
- Look at the hippogriff
- Look at the dung heap
- Take two handfuls of hippo dung
- Go to the observatory
Tugator — Inside the Observatory (as Nate)
- Use Ivo’s mirror on the mirror of the happy children
- Return to Ivo’s room in Ellfburrow
Elfburrow — Ivo’s Room (as Nate)
- Use the magical receiver mirror on the queen
Elfburrow — Ivo’s Room (as Ivo)
- Feodora: Select the last option each time
The Mary — Deck (as Nate)
- Ivo will return with the mighty spark of life
- Fly to Lorem Ipsum
The Mary — Deck (as Nate)
- Exit the ship
Lorem Ipsum — Digsite (as Nate)
- Enter the pyramid
Lorem Ipsum — Inside the Pyramid (as Nate)
- Look at the hole in the wall
- Interact with the hole in the wall
- Switch to Critter
Lorem Ipsum — Inside the Pyramid (as Critter)
- The only item in Critter’s inventory is the bunny costume
- Interact with the door
Lorem Ipsum — Machine Room (as Critter)
- Look at the lever
- Interact with the lever
- Look at the chisel
- Take the sharp chisel
- Look at the big wheel
- Exit the room
Lorem Ipsum — Inside the Pyramid (as Critter)
- Switch to Nate
Lorem Ipsum — Inside the Pyramid (as Nate)
- Let go of the hole (either interact with something in the room or pull back on the left stick)
- Switch to Critter
Lorem Ipsum — Inside the Pyramid (as Critter)
- Use the sharp chisel on Nate
- Interact with the wall next to the pitfall in the middle (it should say something about moving along the wall)
- Switch to Nate
Lorem Ipsum — Inside the Pyramid (as Nate)
- Look at the part of the wall that popped out while playing as Critter
- Use the sharp chisel on the part of the wall
- Use the two handfuls of hippo dung on the boulder
- Use the heavy wooden plank on the pitfall
- Interact with the hole in the wall
- Switch to Critter
Lorem Ipsum — Inside the Pyramid (as Critter)
- Enter the machine room
Lorem Ipsum — Machine Room (as Critter)
- Interact with the big wheel
- Switch to Nate
Lorem Ipsum — Inside the Pyramid (as Nate)
- Interact with the room on the right
- Look at the board on the wall
- Look at the wheel
- Take the ancient hand wheel
- Interact with the lever
- Leave the room (you may have to look at the door in the middle area to cause Nate to walk out if you can’t leave the room otherwise)
- Interact with the hole in the wall to open the first room again
- Switch to Critter
Lorem Ipsum — Machine Room (as Critter)
- Leave the room (you may have to try and do this twice in case the first action just removes Critter from the wheel)
Lorem Ipsum — Inside the Pyramid (as Critter)
- Switch to Nate
Lorem Ipsum — Inside the Pyramid (as Nate)
- Use the ancient hand wheel on Critter
- Interact with the hole in the wall
- Switch to Critter
Lorem Ipsum — Inside the Pyramid (as Critter)
- Enter the room
Lorem Ipsum — Machine Room (as Critter)
- Use the ancient hand wheel on the hole in the wall near the entrance
- Switch to Nate
Lorem Ipsum — Inside the Pyramid (as Nate)
- Enter the room through the fully opened door
Lorem Ipsum — Machine Room (as Nate)
- Look at the chest
- Interact with the chest to get the practical time-turner
- Use the practical time-turner on Critter
- Use the practical time-turner on Critter again
- Switch to Critter
Lorem Ipsum — Machine Room (as Critter)
- Use the practical-time turner on the marbles
- Interact with the lever
- Switch to Ivo
Lorem Ipsum — Inside the Pyramid (as Ivo)
- The only items in Ivo’s inventory are the mighty spark of life and pirate outfit (if obtained during the Cloud City section)
- Go to the room on the right
- Interact with the lever
- Switch to Nate
Lorem Ipsum — Machine Room (as Nate)
- Exit the room
Lorem Ipsum — Inside the Pyramid (as Nate)
- Interact with stone disk on the stone gate that used to be blocked by a boulder
- Enter the tomb
Lorem Ipsum — Tut-Tut’s Tomb (as Nate)
- Mummy: Select the last option
- Look at the tunnels
- Interact with the tunnels
Lorem Ipsum — Digsite (as Nate)
- Enter the pyramid (through the original entrance)
Lorem Ipsum — Inside the Pyramid (as Nate)
- Go to the room on the right
- Interact with the board on the wall
- Solve the correct path to complete the game (you will get the Exotic Dancer Outfit and the Eyecatcher trophy)
The Mary — Captain’s Cabin (as Nate)
- Return to Tut-Tut’s tomb (use the shortcut to the right of the original pyramid entrance)
Lorem Ipsum — Tut-Tut’s Tomb (as Nate)
- Look at the board with marbles
- Look at the big Pharaoh Tut-Tut
- Talk to Pharaoh Tut-Tut
- Tut Tut: Say you need the book, ask about the board with the balls
- Beat Tut-Tut at the game without cheating to get the King of Games trophy — the next steps will tell you how to do so
- Tut-Tut: Have Tut-Tut start the game
- Select the following marbles: Take the first marble (only one on the top row), then click the checkmark
- Select the following marbles: All three on the second row (2nd, 3rd, and 4th if you count the marbles from the top down)
- Select the following marbles: The third marble on the last row (12th)
- Select the following marbles: The fourth marble on the last row (13th)
- Select the following marbles: The fifth marble on the last row (14th)
- Select the following marbles: The last two marbles on the last row (15th and 16th)
- Interact with the «Book of the Dead» to get the The Book of the Dead
- Switch to Critter
Lorem Ipsum — Tut Tut’s Tomb (as Critter)
- Use the practical time-turner on Nate
- Switch to Nate
Lorem Ipsum — Tut Tut’s Tomb (as Nate)
- Fly to Tugator
The Mary — Deck (as Nate)
- Exit the ship
Tugator — Town (as Nate)
- Use the practical time-turner on the monkey guard
- Interact with the key to get shiny door key
- Enter the palace
Tugator — Red Pirate’s Palace (as Nate)
- Look at the statue on the left
- Use the practical time-turner on the Red Pirate
- Interact with the left statue
- Use the practical time-turner on the Red Pirate
- Interact with the left statue
- Use the practical time-turner on the Red Pirate
- Interact with the left statue
- Red Pirate: Tell him they demand you be given the compass
- Interact with the compass to get the spirit compass
90,000 PERADE OF PRODUCTIONS — Book of unwritten stories 2 / Book of Unwritten Tales 2, The
The passage is written for English Steam — version of Rusifier 9000
9000 9000 9000 9000 9000
just click on the place on the screen where we want to move the character. If you click on an item with the left mouse button, the character will perform an action determined by the context. If you click on the item with the right mouse button, then the character will inspect the item. Sometimes the game provides for several actions on one item. For example, first we consider an object, and then we perform an action with it. The items that we collect in the game world go into the inventory, indicated by the backpack icon in the lower right corner of the screen. To open or close the inventory, simply click on the image of the backpack with the left mouse button. To use an item from the inventory, left-click on it, and then click on the item you want to apply it to. We can inspect the items in the inventory more carefully, for this we need to right-click on this item. Sometimes, several items can appear in the inventory from one item. For example, we inspect the box and take out several tools from it. Items in the inventory can be combined with each other. We click first on the first item, and then, when the first item is on our cursor, we click the left mouse button on the second item.
 When you press the «Space» (Spase), all interesting (active) objects are indicated on the screen. There are 51 achievements in the STEAM version of the game. The opening of all achievements is described in this walkthrough.
Main menu
The main menu is called up with the « ESC » key. The main menu consists of such commands as: continue game, new game, load game, titles and settings:
game — start the game from any previously saved progress
Titles — a list of people who took part in the development, testing, etc.
Settings — controls the game settings, which include: graphics quality, screen resolution, full-screen on / off, speech volume, sound volume, music volume, character voice language and subtitle language.
saves (saves) are located at:
C:\Users\yourname\Documents\bout2\savegames
Introduction
The war swept across Aventasia. The union of humans, elves and dwarves fought against the dark Army of Shadows.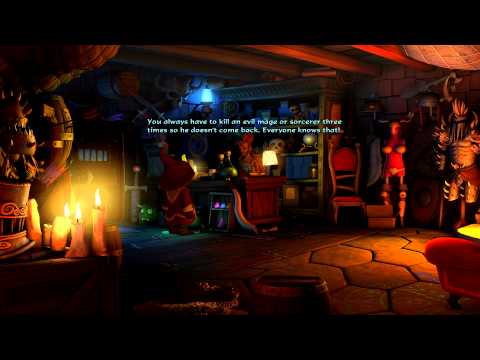 The war ravaged the country year after year, but no one was ever able to gain an advantage in battle. In these times of deep despair, the Archaeologist discovered the location of the Artifact of Divine Destiny. This Artifact grants a wish that could decide the outcome of the war in one of the parties. The Shadows, led by the sorcerer Munkus, hunted for the Artifact and would have found it first if not for a group of heroes opposing them. The group included: the young dwarf Wilbur, the elven princess Ivo, the human Nate Bonnet and his faithful furry companion from the server — the Beast.
Episode I. Nate
Sky
We are floating in the air, or rather, falling down, and it would be nice to catch something before we land. We fly up to a huge rock on the left and, by clicking on it again, we climb up the rock. Nate automatically moves to the broken pier. We examine the pier, and then we go along it to the right to the rope. Click on the rope and climb it up. When the rope ends, then Nate jumps onto the log on his own. An oil lamp hovers in the upper left corner of the screen — take it. Having called the genie Benny from the lamp, we talk with him on all topics and try to persuade the genie to help us. Benny, after a previous unsuccessful attempt, is very afraid to cast spells again, and when Nate yells at him, then the genie generally hides in his lamp. From the log, Nate moves to the second part of the broken pier, to the right side of which the carpet is nailed. We take the carpet, call the genie Benny again and persuade him to turn an ordinary carpet into a flying carpet. At the very last second, the genie completes the task, and Nate remains alive. Arriving on a carpet to the city, we get hit on the head — this is our companion, the Beast, hits us on the head with a board.
Achievement STEAM : Surviving the fall unlocks «Stop the drop» achievement .
Next, the game’s gameplay tutorial starts.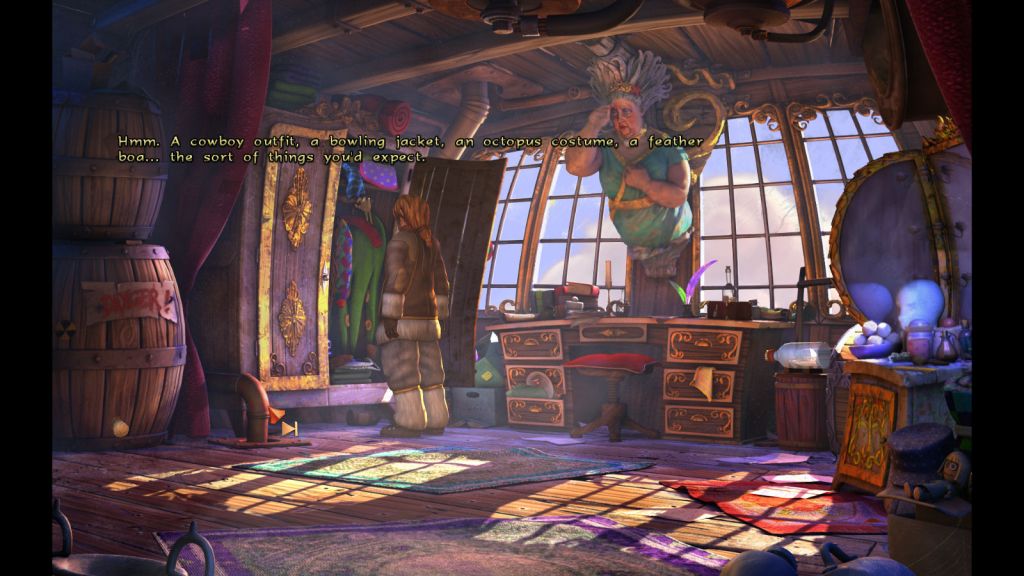
Learning to Control
Welcome Tutorial, Game Guardian and Interpreter of Control. First, he explains some action, and then asks him to perform. The first task will be to move the character — we click in any part of the location and see how the tutorial robot moves. Then we press the big lever on the right — counted! Next, click on the lever with the right mouse button, as a result — inspect it. Click on the hatch to the left of the lever with the left mouse button and inspect it. Again we click on the hatch with the left mouse button and this time we repair the mechanism hiding under the hatch. Once again, click on the lever with the left mouse button. Having moved to another location, we inspect the car and see how two gears fly out of it. We select large and small gears. Open the inventory by clicking on the backpack icon in the lower right corner of the screen with the left mouse button. We take one of the gears and click it on the broken car. In a similar way, we return the second gear to the broken car. Now that all the parts of the machine are in place, they need to be lubricated. We take out the crumpled oil can from the inventory and apply it to the car. Close the inventory by clicking on the backpack with the left mouse button. To the right of the car is a lever, pull it and thereby start the car. The robot moves to a new location and ends up next to the car in the form of a lock. We select the damaged figure from the car. We examine the old toolbox, and then take it. We open the inventory, click on the damaged figure with the left mouse button and see that it appears on our cursor. Next, click on a very adhesive tape and get the corrected figure. We take the corrected figure and use it on the castle, as a result — we place the figure on the balcony of the castle. We move to the left side of the screen, pull the lever and start the car. This is where the training ends.
Achievement STEAM : After completing the tutorial, unlock «Master Mechanic» achievement .
Princess Ivo
Ivo’s bedroom
We communicate with our mother — the Queen. Mom is unhappy that we are chubby and seize our frustrations. It turns out that my mother has already arranged our wedding and Prince Lalilos is coming next week. The queen gives us a portrait of the prince, and she herself leaves, having previously locked us in the room. We communicate with the Chip-Chip parrot on all the proposed topics. It turns out that the princess is unwell, and she decides to go to the library to study a treatise on medicine. Open inventory and right-click on the portrait of Prince Lalilos. We look around in our room. We click on the portrait of the Beast and indulge in memories. Then Ivo will independently look at a couple more pictures and leave comments on them. On the bed we note and double-examine Wilbur’s gift for our birthday — a knitted hat, which he knitted with his crooked hands. We click on the jug on the table to the right and the bowl next to it. We glance at the flower on the table, and after that we look closely at the music box in the lower right corner of the location. Open the music box and listen to the melody being played. To the right of the box, note the figure and inspect it. Examine the bed twice on the left. We head to the mirror, in front of which the parrot flaunts. We study the mirror and try to take it, but Chip-Chip does not allow us to do this, so we decide to get rid of the bird. We glance at the parrot, and then at the box of jewelry. Chip-Chip uses the box as his podium in front of the mirror. We follow to the right and we leave to the balcony. Double look sunflower and take sunflower seeds. We make a couple of steps to the left and look through the telescope three times. We return to the bedroom. Pour out the sunflower seeds on the bowl on the table and invite the parrot to feast on it. We look into the jewelry box, and then we take away mirror . The parrot flies on a box of jewels and, finding the absence of a mirror, flies away to his perch.
 We return to the music box, lean the mirror against the figure behind it and see how Chip-Chip sits on the music box and again admires his image. Open the box, put the parrot in it and close the box. That’s how we temporarily got rid of my mother’s spy. We go out to the balcony and take a few more sunflower seeds. We pass to the right side of the balcony and by clicking on lower right corner of the screen, exit to the garden.
Elven Garden
We go two steps to the right and examine water plants twice — we get a reed and a reed head. Check out the pond and waterfall. To the left of the waterfall we note a happy willow and examine the tree twice. We pass a little more to the right and examine the entrance to the throne room. We take a couple of steps to the left and stop under the balcony, under which we notice the bird pool and look into it. To the left of the bird pool we find bansai tree, and click on it. The tree turned out not to be a tree at all, but a gardener named Arbor. We exhaust the dialogue with the gardener and go with him to look at the withered flower. We examine the wilted flower, and then we cast a cursory glance at the bee’s nest on the tree and the bench under it. Next, we examine the flat bowl to the right of the tree and find out that when the bowl is filled with water, mom uses it as a mirror. We examine a large bush on the right and find out that our grandmother gave the name to most plants more than a thousand years ago. We return to the pot on which the gardener originally sat. Inspect and then pick up stone and go right under the balcony, from where we head to the library.
Elven Library
First, inspect all active items. In the center of the library, note the swords and examine them twice. After inspection, turn the swords and study them. Next, we look twice at the cubes floating in the air near the bookshelves. In the left corner we note the stuffed monster and examine it. Above the effigy of the monster, we examine the head of the dragon, under which there is an entrance to our bedroom. At bookshelf at the bottom of the screen we find and take a treatise on elven medicine. The book is speaking. We start a conversation with her and exhaust all topics of dialogue. To correctly determine the diagnosis, you need to mix the potion and drink it. To prepare the potion, you need to mix the green fruit of the metus, a spoonful of honey and smoked herring, and then dilute it all in water to a viscous solution. We pass to the right and in the lower right corner we find and examine flower . We examine the flower twice and take it to ourselves. We go out into the garden.
Elven Garden
Head left towards the Arbor and start a conversation with him. From the gardener we learn that the large bush with red fruits, next to which we are standing, is the metus shrub. Only for the preparation of the potion we need a green metus fruit, and in front of us is a bush with red fruits. It turns out that the bush changes the color of the fruit to green on its own if it feels danger — such is the protective mechanism. When extracting honey, Arbor advises us to wear a beekeeper’s suit so that the bees do not bite us, and use smoke that has a calming effect on the bees. We ask the gardener for a fishing rod and get it. Coming to to the metus bush and use the flower from inventory on it. Having frightened the bush, we see how the red fruits turn green, and we pick one green metus fruit. We found one ingredient for the potion, it remains to find two more. We go to the right to the pond and, having examined it several times, we throw a fishing rod into the pond. At the top of the screen appears the level of our skill, which at this stage is zero. We use the fishing rod on the pond again and see how the skill level has risen to one. We go to the library.
Elven Library
We head to the bookshelf closest to us on the left and find the manual « Fishing for Dummies «. After reading the book a little, we come to the conclusion that we have too little fishing skill and the advice from the book is not clear to us yet. We return to the garden.
Elven Garden
We step to the left to Arbor’s pot, inspect it and extract several worms from the pot. Now that the worms have appeared in the inventory, Ivo will independently string the bait on the hook before each throw of the fishing rod. Three more times we throw a fishing rod, thereby increasing our skills to the fourth level. Maybe now the fishing guide will become more understandable for us? We head to the library.
Elven Library
Take out the fishing book again and read it. As soon as the manual is read, the skill automatically rises to level 14. Let’s go to the pond.
Elven Garden
We throw the line into the pond a few more times and finally fish out the red herring. The second ingredient for the potion is in our backpack. As we remember from the previous conversation with Arbor, the smoke has a calming effect on the bees. We can get smoke from Arbor’s cigarette, only he will smoke it only when he has cured the big red flower. We head to the library.
Elven Library
We examine the bookshelf closest to us and find a book about plants on it. We open the book and see the image of a flower from the garden — it is located in the lower left corner of the page and is called love lily. We click on the image of the lyubolilia and read the description. It turns out that at a very early stage in life, the love lily enters into a long-term relationship with another plant, which can often last a lifetime. If the partner plant dies, then the love lily usually does not survive the gap. Close the book by clicking on the area to the right of it. We rise to the bedroom along the stairs to the left of the blue stuffed monster.
Ivo’s bedroom
We approach the round table, inspect the vase and take the vase with lyubolilia. We go down to the garden.
Elven Garden
Use the flower from the bedroom on the drooping flower near the Arbor.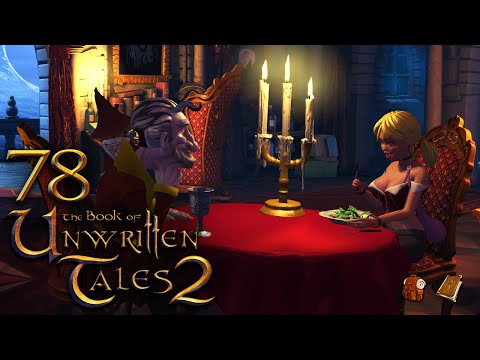 We watch how the flowers recognize each other and hug, and Ivo, looking at them, even burst into tears. Satisfied, Arbor sits down on a bench and lights a cigarette, while the smoke rises to the hive and soothes the bees. We examine the nest of bees and use the reed from inventory on it. We get a green leaf with sweet honey. We share honey with the gardener, and after that we inspect and pick it up spade . We go up to the bedroom.
Ivo’s bedroom
Again we come to the round table, on which there used to be a vase with love. We put the ingredients in an empty bowl on the table: green metus fruit, red herring and a leaf with honey. Next, we take a jug of water, standing next to the bowl, and pour water from it into the bowl. We take out from the inventory a stone the size of a fist, and grind it with all the ingredients in the bowl. Ivo pours the finished potion into a glass and places it in his backpack. We go down to the library.
The Book of Unwritten Tales 2: the fairy tale continues
Large, large-scale projects in the peaceful and once glorious genre of adventure games seem to be a distant past. The last few years, thanks to the activation of indie developers and the development of crowdfunding, have brought many interesting novelties to fans of classic quests. However, as a rule, the originality and fascination of the plot is balanced in indie games by the austerity of graphics and short duration. The remakes of imperishable classics adorn this picture a little, also becoming fashionable — and stubbornly trying to enter the same river for the second time. Fortunately, there are exceptions to this rule — such as The Book of Unwritten Stories.
Genre Adventure
Platforms Windows / Mac OS X / SteamOS + Linux
Developer KING Art
Publisher Nordic Games
Website /
Colorful 3D picture, mild humor, classic gameplay
Not the most convenient inventory management
Juicy, large-scale, beautiful adventure game – and it’s not even a remake!
It’s been a few years since the first ever dwarf wizard Wilbur Darkstorm, the elven princess Evie and «Captain» (and to be honest, just an adventurer) Nathaniel Bonnet, along with his indispensable alien companion, nicknamed «Wonder», as it should be for any self-respecting heroes, they saved the fabulous world of Aventasia from a Very Terrible Evil.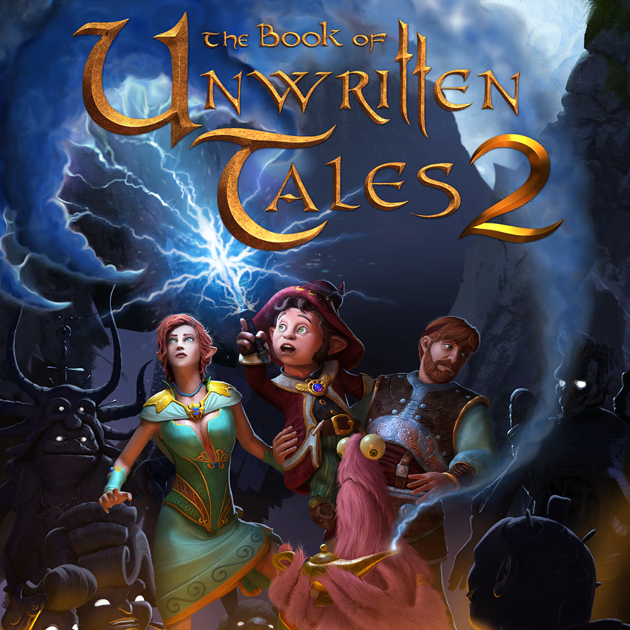 Their paths parted again: Evie (more precisely, Ivodor Eleanor Clarissa, as a person of such noble blood should be called) returned to her forest kingdom, and after her affair with Nate ended in a sudden break, she is mainly engaged in refusing everyone profitable suitors who are found for her by an overly caring mother. Nathaniel (aka Nate), out of grief from parting with the beautiful elf, quickly spent all the prize money received from the victory over the evil witch, and left penniless, he decided to get involved in another adventure — to steal another treasure from his old opponent the Red Pirate. As for Wilbur, he was appointed professor at the University of Wizardry, which reopened in the capital city of Nascalia after the end of the war, and now he is trying to somehow cope with the mountain of new teaching duties that have fallen on him. But is there any doubt that soon another, no less dangerous threat will hang over the world — and the paths of the heroes will definitely cross again .
 ..
..
The title of the adventure flaunts the number «2», but in fact the new issue of the series «The Book of Unwritten Tales» is the third in a row. The original game with this name appeared in German back in 2009, but reached the majority of players only with the release of the English version at the end of 2011 (and the official Russian localization with full voice acting is already dated 2012). In between the two Books, The Critter Chronicles also appeared, a slightly shorter and less entertaining, but still noteworthy prequel that tells how «Captain» Nate Bonnet got his talking airship and even more an unusual companion in a pink fur coat. In addition, King Art, by the way, managed to release the excellent detective adventure The Raven and even tried its hand at the wargame genre — but Unwritten Stories remained the most significant project in the portfolio of the Bremen studio. This was proved by the Kickstarter campaign, which brought in 171 thousand dollars instead of the 65 thousand requested by the developers.
Strange as it sounds to people familiar with the principles of Kickstarter, the game was released almost without delay — in February of this year, having spent more than five months in «early access» on Steam before that: the authors released their work to the public parts. However, it would be unfair to call this process “paid testing” — the mutual benefit is obvious: fans of the world of Aventasia could get the continuation they expected for a smaller amount and, albeit in small doses, but much earlier than the promised time, but the developers, accordingly, managed to fix it for it’s time hundreds of bugs and add dozens of improvements.
From the outside, «The Book of Unwritten Tales 2» looks just fine: if the original was distinguished by «2.5D graphics», with three-dimensional characters on pre-rendered backgrounds, then the sequel flaunts a full and luxurious three-dimensional picture, equally convincingly conveying the golden autumn of the lush and colorful elven forest, and the dark alleys of the snowy city of Naskalia.![]() The only thing that can cause bewilderment is the appearance of many familiar characters that has changed a lot during the transition to new technology. Yes, over the past five years of real time, they have all matured somewhat — Wilbur, having become a professor, tried to give his physiognomy at least a little solidity, Nate grew a beard, and Evie underwent some unexpected transformations that were reflected in her appearance. But they have changed almost beyond recognition.
The only thing that can cause bewilderment is the appearance of many familiar characters that has changed a lot during the transition to new technology. Yes, over the past five years of real time, they have all matured somewhat — Wilbur, having become a professor, tried to give his physiognomy at least a little solidity, Nate grew a beard, and Evie underwent some unexpected transformations that were reflected in her appearance. But they have changed almost beyond recognition.
And you have to recognize them: like any plot continuation, The Book of Unwritten Stories No. 2 is recommended to go through after getting to know the original — although this is not necessary, it is highly desirable so that familiar places and most of the characters you meet bring back pleasant memories. By the way, there are enough characters here — the authors talk about more than 60 voiced roles. The preliminary passage of The Critter Chronicles is not so necessary, and the adventures of Nate and the Miracle take a minimum of time in the second «book», which is quite logical, since the two of them had already been given a whole separate game before. So most of the time we will be watching the personal problems of Evie and Wilbur, which gradually develop into global problems. As before, all the storylines associated with the main characters unfold in parallel, but are closely intertwined in the middle of the game, when it becomes possible to switch between several characters to solve the next puzzle.
Despite the division of the general plot into the stories of the three main characters, it turns out to be interesting to play: unexpected turns and situations, as well as the most diverse, complex and original puzzles are guaranteed. What can you do for the next salvation of the world: the heroes are waiting for a logical game of stones with the mummy of an ancient pharaoh, and the hunt for the ghostly «headless horseman», and helping a family of good zombies who have adopted a small robot, and communicating with both heads of the local ogre — the owner taverns that are completely opposite to each other in their temperament — and much more, which I do not want to mention, so as not to spoil anyone’s pleasure from the future passage of the game. What particularly distinguishes The Book of Unwritten Stories among its peers is the abundance of soft humor, in which that heavy and rude German accent is not heard at all, which does not always favorably distinguish the works of compatriots from Daedalic Entertainment. Moreover, the fabulous fantasy world of Aventasia turns out to be full of parodies of World of Warcraft, Harry Potter, The Lord of the Rings and other blockbusters of our time: for example, Wilbur’s thoughtful reasoning about the design of women’s armor 9Level 0 is clearly designed for gamers of the widest cultural profile.
The gameplay at the same time strictly corresponds to the classics of the genre — numerous dialogues (according to the assurances of the developers, the game has at least 150 thousand words and more than 30 hours of German and English voice acting) are interspersed with classic quest puzzles for combining and using objects. Active points on the screen, if desired, are highlighted by pressing the spacebar — and disappear after consideration or use, as well as topics already touched upon in conversations with characters. Among the conveniences of the interface is a map that allows you to quickly transfer to already visited places — however, it is available only in some particularly confusing locations and only for Wilbur. However, this is quite a reasonable decision, since in those places where Evie and Nate have to act, it would be difficult to get lost.
At the same time, the principle of the inventory has changed somewhat — and this is perhaps the only more or less serious drawback that can be blamed on The Book of Unwritten Tales 2. To store all the useful items collected and acquired by overwork, a small backpack is allocated, whose symbol — like the «book» that takes us to the main menu — constantly flaunts in the lower left corner of the screen. To see the contents of the bottomless pockets of a hero or heroine, you have to click on this icon every time. Based on the feedback from early access pioneers, the ability to open and close the inventory by pressing the middle mouse button was added — but this does not eliminate the need to move the mouse to inspect the item or make it active, and the contents of the inventory are displayed in rather small icons with no way to increase them.
