RE2 | Leon Part A / B Walkthrough List | Resident Evil 2 Remake
Check out all story walkthrough for Leon in Resident Evil 2 (RE2). Read on to find all Leon Side A and B Missions, Leon Side’s traits, & difference between Claire’s story.
Leon / Claire Story Walkthrough
Check Out All Story Walkthrough List
Table of Contents
- Leon Story Guide & Walkthrough
- Features of Leon Side
- Difference Between Claire Side
Leon Story Guide & Walkthrough
Leon Side A Walkthrough
Leon Side B Walkthrough
*After completing the 1st playthrough with Claire (Side A), player will be able to start new playthrough in Leon (Side B).
Features of Leon Side
NOTE: Following guide may contain spoilers.
Follow Leon S. Kennedy’s Adventure
When playing the Leon’s story, you will be fighting for your survival as the rookie cop newly assigned to Racoon City Police Department.
Work Alongside Mysterious Ada Wong
Leon will encounter a mysterious woman named Ada Wong where she will assist you on your journey. During certain parts of the story, player will get a chance to play as Ada Wong, along with unique EMF Visualizer to hack certain systems.
Leon Will Have Exclusive Weapons Such As Shotgun & Magnum
During his battle for survival, Leon will come across multiple powerful weapons he could add to his arsenal. These include the highly customizable Matilda pistol, W870 shotgun and powerful Chemical Flamethrowers. These weapon will be exclusive for Leon to use.
Check Out the All Weapons List & Locations
Leon’s Unique Weapons
Difference Between Claire Side
Claire’s Story Events Differ From Leon’s
When playing as Claire Redfield, an university student in search for her missing brother, will have different story events compared that to Leon.
Sherry Berkins as Partner Character
When playing as Claire, you will be partnered with Sherry Berkins, a girl trapped in the zombie outbreak and with ties with Umbrella operations. You will also have a chance to play as Sherry, but as a child, she will not have any way of protecting herself, and will need to rely on her stealth to survive.
Claire Will Have Different Weapons Such As Grenade Launcher
From her starting pistol to signature grenade launcher, Claire will have access to entirely different set of weapons compared to Leon. The location where these weapons spawn will be similar to that of Leon, but will have different weapons in its place.
Claire’s Unique Weapons
Resident Evil 2 (RE2) Related Article
Story Mission Walkthrough
Game Mode
Check Out How to Unlock Infinite Ammo Weapons
Game Database
(C)CAPCOM CO.,LTD. All Rights Reserved.
All trademarks, character and/or image used in this article are the copyrighted property of their respective owners.
▶Resident Evil 2 Official Website
RE2 | Leon B Walkthrough Pt.1: Opening ~ RPD | Resident Evil 2 Remake
Check out this guide for a full walkthrough of the Leon B Walkthrough (Opening ~ RPD) from Resident Evil 2, including gameplay tips, guides, and more!
Story Progression & Walkthrough
Check Out The All Story Walkthrough Here
Table of Contents
- Get Inside The RPD
- Investigate The RPD
- Collect The Medallions
- Getting Special Weapons
Get Inside The RPD
Get Inside The RPD — Walkthrough Chart
No.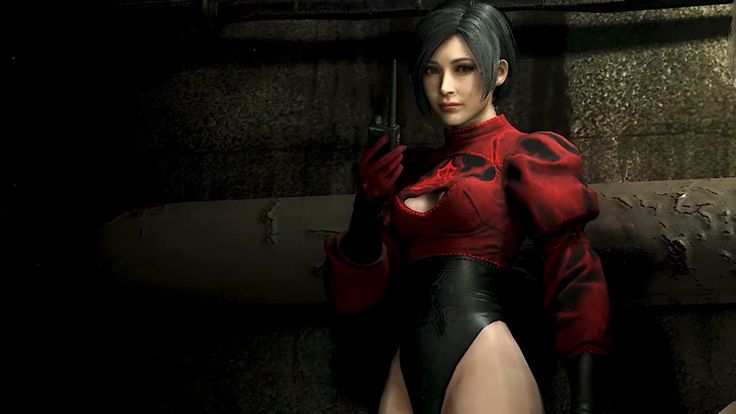 |
Procedure |
|---|---|
| 1 | From your starting area, head to the East side of the RPD front area |
| 2 | Go to the blue wheelbarrow to get the Cutting Tool. This will trigger a cutscene. Additional tips below. |
| 3 | After the cutscene ends, head down the stairs at under the entrance, and enter the Guardroom. Additional tips below. |
| 4 | Get the Courtyard Key to the RPD, M19, and ammo from the Guardroom. You also change into your RPD uniform, and get a grenade here. Additional tips below. |
| 5 | Head back to the East side of the map, and open the gate. Additional tips below. |
| 6 | Get inside the RPD via the door to your left |
2. Get The Cutting Tool — Hints & Tips
Cutting Tool Location
The Cutting Tool is on the top left corner on the East Side of the Entrance to the RPD. It will be on a blue wheelbarrow.
3. Heading To The Guardroom — Hints & Tips
No Need To Combat Enemies
Once the cutscene ends, Zombies will reanimate around you. Since the Zombies are slow, you will be able to outrun without combat, and avoid damage. If a Zombie gets too close, shoot them in the head to stagger them.
4. Getting Your Items From The Guardroom — Hints & Tips
Courtyard Key, & M19 Location
You will be able to obtain the Courtyard Key and M19 Handgun from the Guardroom. It is at the center of your starting area. You will need the Cutting Tool to get into this room.
Check Out How to Get the M19 Handgun Here
5. Opening The Gate — Hints & Tips
Discard The Courtyard Key After Use
After opening the gate, discard your Courtyard Key. It is of no value to you anymore, and will only take up inventory space.
Investigate The RPD
Investigate The RPD — Walkthrough Chart
| No. | Procedure |
|---|---|
| 1 | After entering the RPD, head for the Watchman’s Room to your right |
| 2 | Continue following the path and make a left just before the Stairs |
| 3 | Enter the Break Room to save your game, and manage your inventory |
| 4 | Explore the Break Room to find an Electrical Part. Additional tips below. Additional tips below. |
| 5 | Head back to the Watchman’s Room and into the main Hall |
| 6 | Use the Cutting Tool to gain access to the East Office, and get the Round Handle. Additional tips below. |
| 7 | Remove the barricade blocking the door in the East Office |
| 8 | Use the Electrical Part on the Circuit to gain access to the Main Hall. Additional tips below. |
| 9 | Check the computer in the Main Hall to trigger a cutscene |
4. Explore The Break Room — Hints & Tips
Electrical Part Location
The Electrical Part is found on a chair. It is in the smaller room connected to the Break Room.
6. Getting The Round Handle — Hints & Tips
Round Handle Location
The Round Handle is located in the smaller room within the East Office. It is sitting on the desk.
8. Checking The Computer — Hints & Tips
Hip Pouch Is Beside The Computer
The Hip Pouch can be found near the Computer in the Main Hall. Don’t forget to take it to increase your inventory space by 2 slots.
Collect The Medallions
Collect The Medallions — Walkthrough Chart
| No. | Procedure |
|---|---|
| 1 | Head up the stairs into the second floor of the Main Hall |
| 2 | Solve the Lion Statue Puzzle, and attach it to the Main Hall Statue. Additional tips below. |
| 3 | Go to the Reception on the West side of the Main Hall 1F |
| 4 | Continue following the path to get into the Operations Room. Additional tips below. |
| 5 | Use the Cutting Tool to open the locked door, and get the Electronic Gadget. Additional tips below. |
| 6 | Exit the room and head inside the West Office |
| 7 | Unlock the safe to get a Hip Pouch. Additional tips below. |
| 8 | Unlock your desk to get a High-Capacity Mag for Matilda. Additional tips below. |
| 9 | After exiting the West Office, take a right, and head up the Stairs to the second floor |
| 10 | Go to the Locker Room and get the Box. Additional tips below. Additional tips below. |
| 11 | Use the Round Handle on the Pipe to stop the steam |
| 12 | Continue following the path to get to the STARS Office |
| 13 | Obtain the Battery from the STARS Office. Additional tips below. |
| 14 | After exiting the STARS Office, head for the 3rd Floor via the Stairs. Additional tips below. |
| 15 | Get the Spade Key on the Desk, and head for the West Storage Room. Additional tips below. |
| 16 | Solve the Maiden Statue Puzzle to get the Maiden Medallion. Additional tips below. |
| 17 | Move the fallen bookshelf by the door to gain access to the Library, and get the Red Book |
| 18 | Head to the Lounge and solve the Unicorn Statue Puzzle. Additional tips below. |
| 19 | Unlock the door with the Spade Key to get back to the Main Hall |
| 20 | Place the Medallions into the Main Hall Statue |
2.
 Solving The Lion Statue — Hints & Tips
Lion Statue Combination
The solution to the Lion Statue is Crown, Fire, and Bird. Solve the Lion Statue Puzzle to get the Medallion.
4. Heading To The Operations Room
Licker Will Appear
When heading to the Operations Room. A Licker will be along the hallway. Make sure to move slowly and keep quiet to avoid being spotted by the Licker.
Find The Map On The Board
You will be able to get the map to the RPD inside the Operations Room. The map will help you keep track of your location at all times. It is on the board.
5. Getting The Electronic Gadget — Hints & Tips
Electronic Gadget Location
The Electronic Gadget is found behind the locked door in the Operations Room. You will need to use the Cutting Tool to open the door.
Discard The Cutting Tool After Use
The Cutting Tool will be of no use to you anymore after opening this door. Discard it to free up some inventory space.
7. Unlocking The Safe — Hints & Tips
Hip Pouch Location
The Hip Pouch can be found in the small office inside the West Office.
Safe Combination
The Safe Combination to get the Hip Pouch is 9counterclockwise-15clockwise-7counterclockwise.
8. Unlocking Your Desk — Hints & Tips
High Capacity Mag Location
The High Capacity Mag can be obtained in the West Office. You will need to unlock two padlocks to get to it.
Left Padlock Combination
The left Padlock will unlock if you enter the combination N-E-D.
Right Padlock Combination
The right Padlock will unlock if you enter the combination M-R-G.
10. Getting The Jeweled Box — Hints & Tips
Box Location
The Jeweled Box is found on the tower rack in the Shower Room at the 3rd floor. You will need this to acquire the Lightning Hawk Handgun later on.
13. Obtaining The Battery — Hints & Tips
Battery Location
The Battery can be found in the small office within the STARS Office. It will be sitting on a desk.
14.Exiting The STARS Office — Hints & Tips
The Tyrant Will Appear
After exiting the STARS Office, the Tyrant will appear, and follow you around the map. Do not fight the Tyrant, and outrun it instead. It is impervious to your bullets.
Here’s How To Deal With and Defeat Tyrant!
15. Getting The Spade Key — Hints & Tips
Spade Key Location
The Spade Key can be found on the third floor. It is on a desk inside the room with a broken wall that you can enter.
16. Solving The Maiden Statue Puzzle
Maiden Statue Puzzle Solution
The Maiden Statue combination is Ram-Harp-Bird. It will be a bit difficult to see due to the rust. Unlock the Maiden Statue to get the Maiden Medallion.
18. Solving The Unicorn Statue Puzzle
Unicorn Statue Solution
The Unicorn Statue Combination is Twins-Scale-Snake (Small). Unlock the Unicorn Statue to get the Unicorn Medallion.
Getting Special Weapons
Getting Special Weapons — Walkthrough Chart
| No. | Procedure |
|---|---|
| 1 | Head to the Library to get the Red Book. Additional tips below. |
| 2 | Go the Art Room on the 2F East Side of the Main Hall and get the Electronic Key Card. Additional tips below. |
| 3 | Solve the Emperor Puzzle Statue to get the Scepter item. Additional tips below. |
| 4 | Examine the Scepter to get the Jewel item |
| 5 | Combine the Jewel with the Box to get the Police Badge item |
| 6 | Examine the Police Badge to get the Dongle item |
| 7 | Head to the STARS Office to get the Lightning Hawk Handgun. Additional tips below. |
| 8 | Go to the Safety Deposit Room to get the W-870 Shotgun. Additional tips below. |
1. Getting The Red Book — Hints & Tips
Red Book Location
The Red Book is found in the library. It is on a table by the door with the Spade logo.
2. Getting The Key Card — Hints & Tips
Key Card Location
The Key Card can be found in the Art Room on the second floor, East side of the Main Hall. You need the Key Card to get the Shotgun later on.
3. Solve The Emperor Statue Puzzle — Hints & Tips
Use The Red Book With The Left Arm
The Emperor Statue will have a left arm part next to it. Combine this part with the Red Book and use it on the Emperor Statue to get the Scepter from the Emperor Statue.
7. Getting The Lightning Hawk — Hints & Tips
Lightning Hawk Location
The Lightning Hawk can be found in the STARS Office behind a locked door. You will need to unlock the door by using the Dongle on the PC.
Check Out How To Get Magnum Here!
8. Getting the W-870 Shotgun — Hints & Tips
Shotgun Location
The Shotgun can be found at the back of the Safety Deposit Room. You will need to use the Key Card on the terminal to access the cabinet.
Story Progression & Walkthrough
Check Out The All Story Walkthrough Here
Resident Evil 2 (RE2) Related Article
Story Mission Walkthrough
Game Mode
Check Out How to Unlock Infinite Ammo Weapons
Game Database
(C)CAPCOM CO.,LTD. All Rights Reserved.
All trademarks, character and/or image used in this article are the copyrighted property of their respective owners.
▶Resident Evil 2 Official Website
The performer of the role of Leon Kennedy in the movie «Resident Evil: Raccoon City» could not stand the fan hatred | Page #2
Platforms:
Categories:
Interesting
situations
Cinema
Tags:
Resident Evil
Leona Kennedy
resident evil news
leon kennedy
Evan Jogia
Resident Evil: Welcome to Raccoon City
Resident Evil: Raccoon City
Film Resident Evil
Film adaptation of Resident Evil
Resident Evil: Rukkun City
Source
Games in material
- Comments
- Forum
The choice of some actors for the main roles for the new feature-length film adaptation of Resident Evil was negatively received by fans from the very beginning due to strong discrepancies between cinematic images and game appearances.
One of the most talked about was Evan Jogia, who tried on the police uniform of Leon Kennedy. After the recent premiere of « Resident Evil: Raccoon City «, the dissatisfaction of the army of Resident Evil fans has increased, because in the case of Leon, not only the image, but also the character of the movie character did not match the game one. The dissatisfied directed their anger directly to the actor’s social networks.
Evan Jogia was not ready for this — his Instagram page was completely deleted after a wave of offensive fan comments. The performer of the role of Leon Kennedy decided to leave the social network.
However, the actor’s Twitter account is still active.
According to observers, the actress who played Jill also suffered a lot, but she has not left Instagram yet — she limited herself to turning off comments.
Our review of the movie «Resident Evil: Raccoon City» read here .
Also read0024 .
Subscribe to our Telegram channel, where we publish what does not fall into the news feed, and follow us online:
Telegram channel
Google News
Yandex
News
Yandex Zen
Latest news
-
02/14/2023
Media: Ubisoft has no plans to develop The Division 3 -
02/14/2023
The developers of Wild Hearts called the system requirements and the exact release time -
02/14/2023
Insider: Metroid Prime 2 and Metroid Prime 3 will also be released on Nintendo Switch -
02/14/2023
Europe: PlayStation 5 Leads January with 202% Sales Growth, Xbox Series X|S Takes Third -
02/14/2023
Hideo Kojima shared a photo with Leia Seydoux and Elle Fanning — the main characters of Death Stranding 2 -
02/14/2023
Call of Duty: Modern Warfare II and Warzone 2. 0 season 2 launch trailer unveiled
Resident Evil 2 — the names of the models who gave their appearance to Leon and Claire in the remake of
became known
Platforms:
PS4
ONE
PC
Categories:
Interesting
Industry
Tags:
Capcom
Resident Evil 2
Leon
Claire
Source
Games in material
- Comments
- Forum
Since the debut screening of Resident Evil 2 Remake at E3 2018 , many have been actively discussing the appearance of the main characters — Leona and Claire . Some took positively new looks, and some were dissatisfied.
The models presented their images to the heroes — Eduard Badaluta and Jordan Mesuen . As Mesuen herself wrote yesterday on Instagram , the filming took place two years ago in Osaka .
Eduard Badaluta (Leon).
Jordan Meswen (Claire).
Resident Evil 2 will release on January 25, 2019 on PC , PS4 and Xbox One .
Read also: Rumor: Hitman 2 — new details.
Subscribe to our Telegram channel, where we publish what does not fall into the news feed, and follow us online:
Telegram channel
Google News
Yandex
News
Yandex Zen
Latest news
-
02/14/2023
Media: Ubisoft has no plans to develop The Division 3 -
02/14/2023
The developers of Wild Hearts called the system requirements and the exact release time -
02/14/2023
Insider: Metroid Prime 2 and Metroid Prime 3 will also be released on Nintendo Switch -
02/14/2023
Europe: PlayStation 5 Leads January with 202% Sales Growth, Xbox Series X|S Takes Third -
02/14/2023
Hideo Kojima shared a photo with Leia Seydoux and Elle Fanning — the main characters of Death Stranding 2 -
02/14/2023
Call of Duty: Modern Warfare II and Warzone 2.
