Wie installiere ich eine Festplatte in einem Laptop oder einem Notebook?
Die meisten Laptops sind so konzipiert, dass sie dem Eigentümer die Möglichkeit geben, die interne Festplatte zu ersetzen. Suchen Sie auf der Website des Computerherstellers nach Informationen wie z. B. das Lokalisieren und der Zugang zur Festplatte, die Garantiebedingungen und die Spezifikationen der unterstützten Festplatten.
Das ist alles, was Sie zur grundlegenden Installation einer neuen Festplatte in einen Notebook-Computer wissen müssen. Diese Schritte können für alle internen Festplatten angewendet werden, egal ob M.2, SATA, SSD oder HDD.
Hinweise:
- 2,5-Zoll-Festplatten weisen verschiedene Bauhöhen auf
- 7 mm, 9,5 mm sowie 15 mm
- Wenn die ursprüngliche Festplatte größer als die einzusetzende Ersatzfestplatte ist, müssen Sie eventuell Abstandshalter verwenden
- Eine 15-mm-Festplatte ist zu groß für einen 7-mm- oder 9,5-mm-Laufwerksschacht
- 2,5-Zoll-Festplatten weisen verschiedene Baulängen auf
- 2230, 2242, 2260, 2280 und 22110
- Vergewissern Sie sich, dass die M.
2-Festplatte mit dem System kompatibel ist
- M.2-Festplatten können unterschiedliche Passformen haben
- Die neue Festplatte wird ohne Betriebssystem (z. B. macOS, Windows usw.) und unformatiert geliefert
- Halten Sie Betriebssystem-Installationsmedien und/oder Computer-Wiederherstellungsmedien bereit
- Das Migrieren vorhandener Daten erfordert eine spezielle Software zum Klonen oder Sichern des Originallaufwerks. Weitere Informationen finden Sie auf der DiscWizard-Supportseite.
Elektrostatische Entladungen:
Dies stellt ein Risiko für elektronische Komponenten dar. Um elektrostatische Entladungen zu vermeiden, sind die folgenden Vorsichtsmaßnahmen zu beachten:
- Legen Sie ein Erdungsarmband an, bevor Sie eine Komponente berühren.
- Verwenden Sie antistatische Polster auf allen Arbeitsflächen.
- Meiden Sie statisch aufladbare Teppichflächen.
- Bewahren Sie die Festplatte in ihrer statisch abgeschirmten Verpackung auf, bis Sie bereit sind, die Installation abzuschließen.
 Bringen Sie keine Kabel an der Festplatte an, solange sie sich in ihrer statisch abgeschirmten Verpackung befindet.
 - Fassen Sie die Festplatte nur an den Rändern des Rahmens an.
- Berühren Sie nicht die Pole am E/A-Anschluss oder die Leiterplatte.
So tauschen Sie die ursprüngliche Festplatte aus:
- Fahren Sie den Computer herunter
- Trennen Sie das Netzteil und den Akku von der Stromversorgung
- Beachten Sie die Vorsichtsmaßnahmen und Verfahren im Computerhandbuch
- Leiten Sie sämtliche Restmengen elektrischer Ladung ab
- Bei den meisten Laptops reicht es aus, dafür den Ein-/Aus-Schalter 15 Sekunden lang gedrückt zu halten, dennoch sollten Sie sicherheitshalber das Handbuch konsultieren.
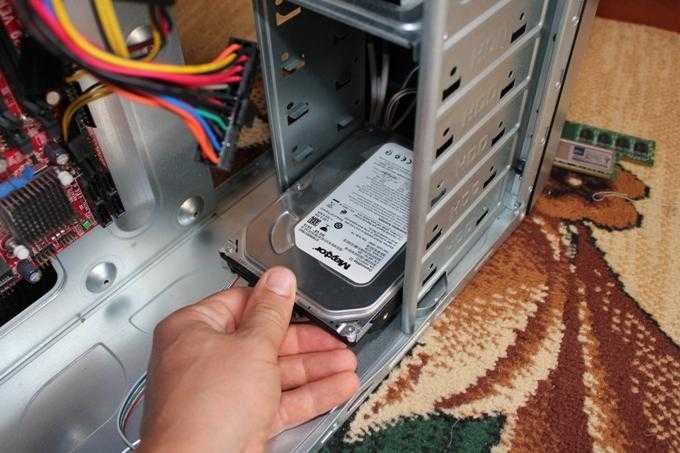
- Lokalisieren Sie die Einbauposition der vorhandenen Festplatte oder des vorhandenen Speichers
- Nehmen Sie die vorhandene Festplatte vorsichtig heraus
- Falls erforderlich, entfernen Sie sämtliche Hardware von der ursprünglichen Festplatte
- Schließen Sie die neue Festplatte vorsichtig an das System an
- Setzen Sie den Computer wieder zusammen
- Schließen Sie den Akku des Computers erneut an
- Schalten Sie den Computer ein
- Installieren Sie das Betriebssystem neu oder stellen Sie die Sicherung wieder her
- Wenn die ursprüngliche Festplatte auf die neue Festplatte geklont wurde, sollte das System normal hochfahren
Kann man eine laptop festplatte in einen Desktop pc einbauen? (Windows, Prozessor, RAM)
Letzte Aktivität: 05.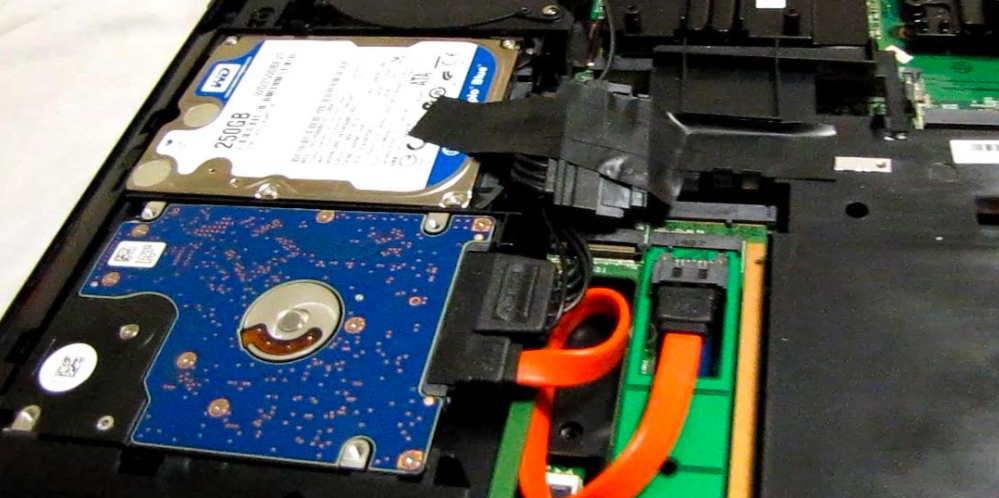 11.2022, 22:54
Details anzeigen
Ich baue gerade einen Pc für einen freund, er sollte nicht so teuer werden deswegen hat er mich gefragt ob man auch eine Laptop HDD in einen Pc einbauen kann
Vom Fragesteller als hilfreich ausgezeichnet
Invert801
06. 07.2016, 15:09
klar geht das. du musst nur auf die einbau grösse achtern. die meisten gehäuse haben heute 2,5 und 3,5 zoll schächte. wenns ne 1,8 zoll platte ist brauchst du eventuell einen adapter das die platte in den einbauschacht passt und die kosten nicht viel.
Duponi
Topnutzer
im Thema Windows
06.07.2016, 15:10
die kleineren Festplatten sind im Vergleich teurer als dir grösseren. Wenn es also ums Geld sparen geht, musst du eher ide grössere nehmen.
Und ja, man kann sie einbauen, braucht aber einen Adapter dafür
06. 07.2016, 15:10
Klar kannst du das. Ich vermute hier mal einen SATA-Anschluss. In den heutigen Gehäusen hat man auch 2,5″-Slots, ansonsten ein 3,5″ Gehäuse für die HDD.
Reindeuen
06.07.2016, 15:09
Job bei mir hat funktioniert. Brauchte keine Adapter oder sonst was. Von Samsung Laptop auf Medion Rechner.
Jensen1970
06.07.2016, 15:25
Kein problem das geht natürlich.
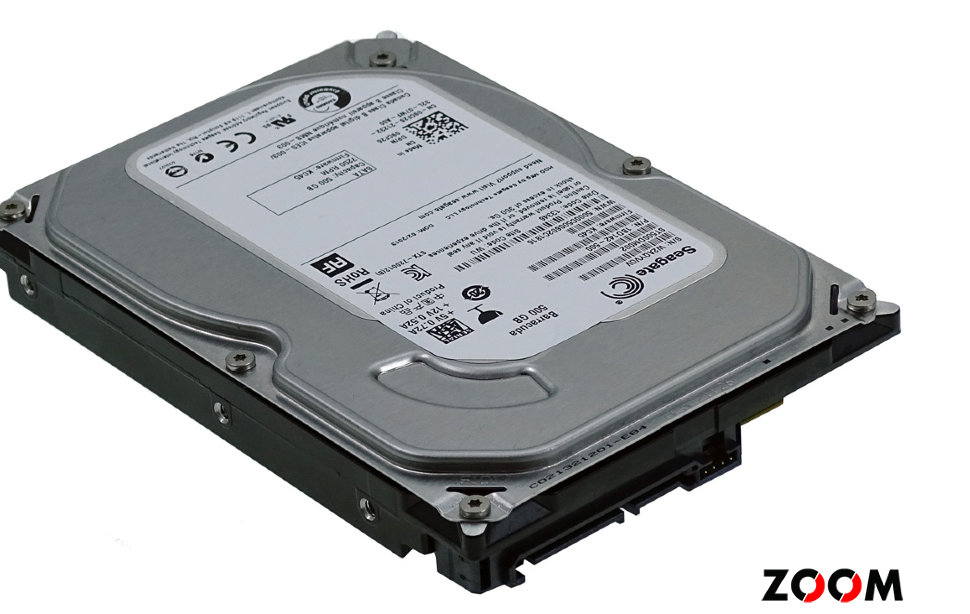
Hard disk replacement, installation and connection of HDD in computer and laptop
HDD has received a strong competitor in the form of SSD in recent years. But the most rational approach to building a computer is to use a combination of these devices.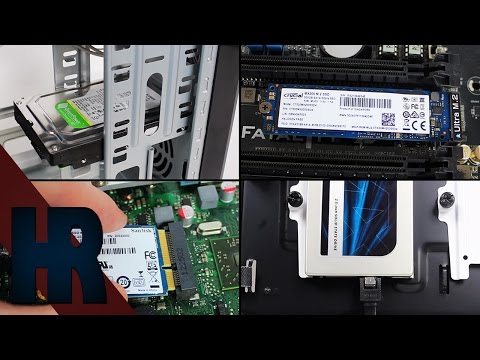 SSD — for programs, systems and games, and HDD — for storing large amounts of data. Thus, you do not need to overpay for large amounts of SSD and at the same time the system will work very quickly.
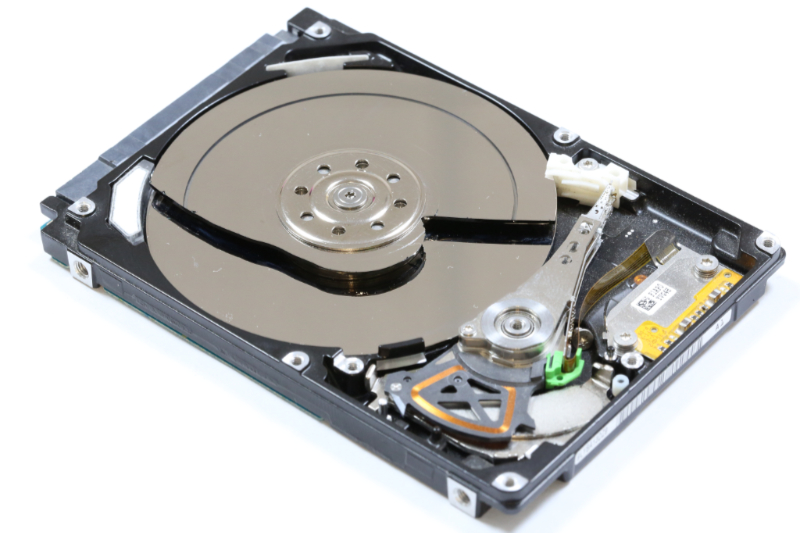
HDD — hard disk drive, a hard «magnetic» disk uses a thin disk of hard material to record data. This is a prime example of a non-volatile carrier. If an apocalypse happens, then information from it can be read in 100 and 200 years. At the moment, it is cheaper than SSD, in terms of gigabytes by 2-3 times.
SSD — solid-state drive, a drive that uses memory chips for recording. They need energy to remember data. A normal SSD keeps information for half a year or a year, a good one — for years, a bad one — maybe only 3 months (time is limited by the capacity of capacitors or a battery that supports the stored information).
How to choose HDD
Please check the compatibility of your selected hard disk and system before installation. This is not about hardware compatibility, but about speed so that it does not become the reason why a good assembly cannot overclock and will constantly wait for data to be loaded.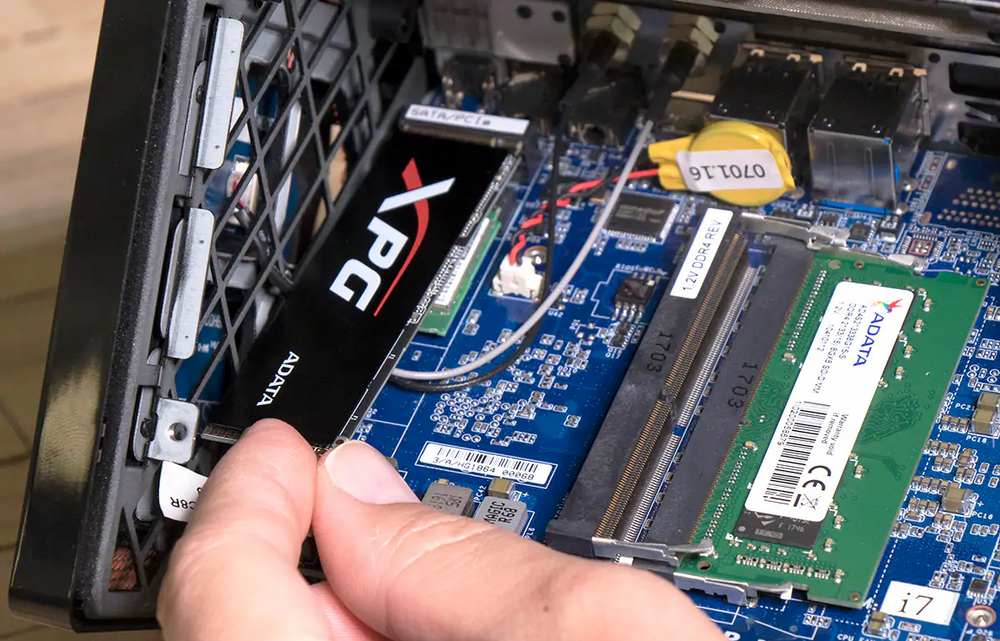
Manufacturer
There are actually a lot of manufacturers, but the leading positions are occupied by Western Digital, Hitachi, Samsung and Seagate.
WD products are divided into groups according to purpose:
- Blue. This series is for those who want to store large amounts of data passively, i.e. without constant overwriting.
- Green. Designed to minimize energy consumption, they belong to the budget segment and operate quite quietly. Typically, the rotation speed does not exceed 5400 rpm.
- Black. For users who constantly work with large amounts of data. There is a built-in dual-core chip controller, which significantly speeds up writing and reading data.
- Red. The series was developed for use as a remote NAS. A set of technologies allows them to work under load 24/7. They are not very suitable for use in desktop PCs, as they have an automatic device that turns off the power if the disk is not used for a long time.
- Purple.
 This is a HDD for video surveillance systems, they can write up to 64 data streams simultaneously and work all year round without downtime. Low noise and power consumption completes the picture of an ideal recorder. Again, it is not suitable for desktop solutions: there are many degrees of protection, it can work in extreme conditions — this is quite expensive, but it is completely useless in a regular PC.
 - Gold. Premium server HDDs, maximum durability, multi-request capability. Use advanced dual drive system for fast and accurate positioning of the laser head.
- Re (RAID edition). A special series for RAID arrays, support hot swapping, are resistant to increased vibrations, both external and internal. Protection is provided by RAFF and STABLETRAC technologies. As the name suggests, these drives are best suited for back-up storage, have better heat tolerance and incredible durability.
- Se. These discs are a simplified version of the Re series. They are designed for RAID arrays up to 12 drives in size.
 Despite the fact that these are cheaper models, they use TLER error correction technology.
As you can see, there are a lot of subspecies, they are described here so that you understand that when choosing, you need to build on your needs. At the moment, Western Digital is losing ground in the segment of home computers, leading according to Seagate reviews. It is Seagate drives that are used in gaming computers from HYPERPC.
Seagate has a smaller variety of product lines, but their products are more focused on gaming PCs:
- BarraCuda. The visiting card of the company, with which it entered the markets of Europe and the CIS many years ago. Universal drives with high reliability and capacity. There are versions of 2.5” and 3.5” with different thicknesses for any case. Models with the Pro prefix are suitable for professional-grade creative stations and gaming computers.
- FireCuda. SSHD hybrid drives, which combine SSD and HDD in the same enclosure, are suitable for small cases or for budget savings.
 In such disks, the most frequently used data is cached in fast Flash memory, and the main array of files is stored on the disk side.
 - IronWolf. An excellent choice for NAS storage systems for SMBs. Vibration sensors are present, which allows them to be used on large server racks with a large number of drives. Software from the manufacturer has functionality for monitoring and controlling the state.
- SkyHawk. Hard drives for video surveillance, reliable, allow you to record a video stream from multiple sources, consume a minimum of energy, and are ready to work 24/7. The AI series is designed for AI surveillance systems.
Interface
All modern hard drives are connected via SATA, the difference is only in the version and, accordingly, in bandwidth:
- SATA I — 1.5 Gb / s, in fact 150 Mb / s
- SATA II — 3Gb/s, 300Mb/s actual
- SATA III — 6 Gb / s, in fact 600 Mb / s
They are backward compatible, that is, the older version of the HDD will work on the younger version of SATA.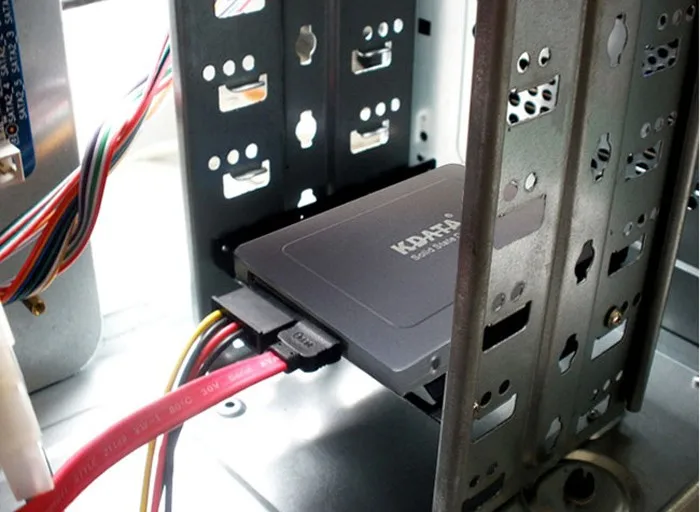 That is, if you have a SATA 3 HDD or SSD, then they will work on both SATA 1 and SATA 2. But vice versa, no. That is, HDDs of the younger version of SATA will not work on the older version of the connector. There are exceptions to this rule, check them in the technical documentation before buying.
Form factor
Drives are divided into two types — 2.5” and 3.5”. The former are more compact and are used in laptops, while 3.5” is a solution for stationary systems. But you can put any hard drive in your computer, they have the same connectors. Moreover, due to the widespread use of SSD mounts for 2.5 ”devices are in any modern case. And almost all of them are made in this form factor.
But keep in mind that 2.5” HDDs are designed for laptops. There are many limitations associated with this, for example, they have lower power consumption, which is a plus, but also lower spindle speed, which slows down the operation of such a device. In a word, if you have the opportunity to install a full-sized hard drive, then it is better to stop at it.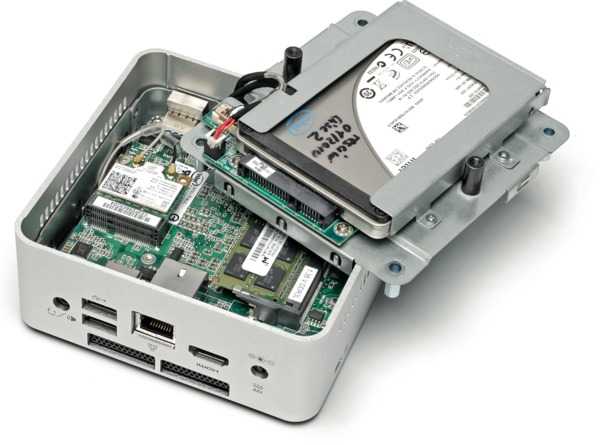
Capacity
This is the most individual parameter and may differ from user to user. For some, 120 Gb is enough for a browser and an office suite of programs, while someone likes to play games, and his library can hardly fit on a 6 Tb disk. To talk about something specific, look at how much space popular games need.
- Dark Souls Remastered — 7 GB
- Forza Horizon 4 — 90 GB
- Assassins Creed Valhalla — 74 GB
- No Man’s Sky — 10 GB
- Mount & Blade 2 Bannerlord — 60 GB
- Crysis Remastered — 21GB
- Iron Harvest — 30GB
- Civilization 6 – 7 GB
- Watch Dogs Legion — 92 GB
- Far Cry Primal — 20 GB
- ARK Survival Evolved — 250 GB
- Black Desert — 55 GB
- Playerunknown’s Battlegrounds (PUBG) — 30 GB
- For Honor — 40 GB
- Total War Three Kingdoms — 36 GB
- Red Dead Redemption 2 — 150 GB
- Cyberpunk 2077 — 70GB
- Outriders — 70GB
Some modern games still do not require large volumes for damage, but such as ARK or the same sensational Red Dead Redemption 2 take 250 and 150 GB, respectively. In addition, in order to operate with such a volume of data without freezing, you need speed, it is advisable to choose hard drives with a high read / write speed (although it is better to use an SSD for games and programs).
If we talk about general recommendations for choosing the size of a hard drive, then we can formulate them as follows:
- 250 GB SSD + 500 GB HDD — the minimum option for games and work, suitable for entry-level computers.
- 250 GB SSD + 1 TB HDD — the best option, but far from comfortable, too small SSD, and the HDD is enough for a fairly large collection of games.
- 500 GB SSD + 1 TB HDD is a great option for any average PC whether it’s for work or gaming. A good amount of memory and the ability to accelerate all the programs you use due to a fast solid state drive.
- 1 TB SSD + 2 TB HDD — very high memory capacity, which allows you to store a large amount of data on the HDD and a large collection of games on the SSD.
 Good for streamers and gaming bloggers.
 - 2 TB SSD + 6 TB HDD is one of the best options and can be expanded with a second SSD to speed up some programs that need temporary cache files. In this case, an additional SSD drive acts as a storage for cached files. A huge supply of HDD space will allow you to store very large amounts of data.
The
The
Why does the hard drive have less memory than advertised?
Ruthless marketing is to blame. When the manufacturer specifies the number of gigabytes on the disk, he divides the number of megabytes by 1000, supposedly it’s easier for the user. But we know that there are 1024 megabytes in one gigabyte. Our computer also owns this information and shows us the correct amount of memory.
The second point is the Windows system files and the hard drive itself. All this can eat up several hundred of your megabytes.
This is normal, this is how all HDD manufacturers work. Just keep that in mind when choosing a drive.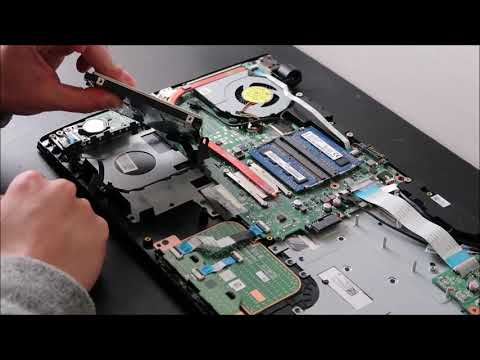
Spindle speed
Basically, this is the speed at which the disc will be able to substitute the right place under the laser head. The global standard now is 7200 rpm for full size hard drives and 5400 rpm for laptop models.
There are models with rotation speeds up to 15000 rpm, but for a typical desktop PC this is a clear overkill. Firstly, they are very expensive, 2-3 times more expensive than conventional ones with a speed of 7200 rpm. Secondly, due to the high speed of rotation of the spindle, the disk wears out faster (although in domestic conditions it will not be possible to load it that much).
Cache size
Another indicator that affects the speed is the cache memory. This is a block of high-speed volatile memory that allows you to accumulate information. For example, when you write a file to a hard drive, it can be written immediately to temporary memory and release the computer from this action, and later write it to the disk itself.
But in order not to delve into the subtleties, just remember — the more cache in your HDD, the better.
Replacement HDD
The hard drive is connected to the computer with two SATA wires, one of them goes to the motherboard, and the other from the power supply supplies power to your HDD. Remember that if you change the only HDD, then you need to copy the necessary data to the new device. Read below for how to do this.
How to remove the hard drive
Turn off the power first, unplug the cord from the outlet or from the power supply. This is important, because even when the computer is turned off, there is a chance that you will be electrocuted. Although only 12V is used in the case and this can not bring any harm to your health, it can be unpleasant.
Next, you need to remove the housing cover, it is attached with two screws at the back and slides out to the left after you unscrew them. Please note that there are rivets near the screws on the case, sometimes they are replaced with bolts, in which case they do not need to be unscrewed.
If you have a case with a tempered glass cover, it is usually secured with four screws with rubber caps.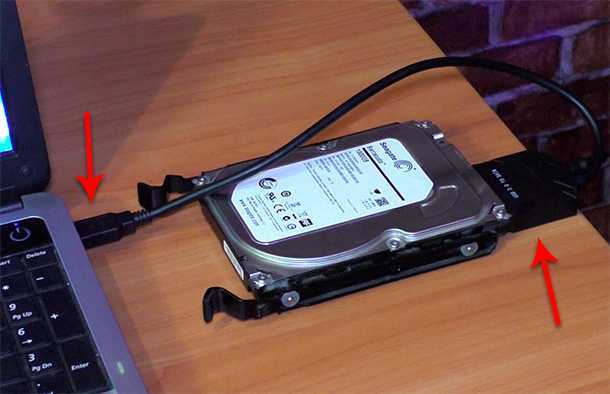 You need to pry off the plug and unscrew the screw.
A big plus of the cases is that you don’t have to take anything out of the computer to get to the hard drive.
Disconnect the two wires that go to it. Please note: the smaller wire usually has a latch. It is located on top, so that it is clearly visible. To get this wire out of your HDD, bend it up before pulling out the wire.
Next, you need to remove the HDD itself from the rack. To do this, unscrew the two screws at the front and back. If you don’t have a tool to get in there, you’ll have to remove the back cover too.
In some cases, the rack is located with exits to the user and it is much easier to remove the HDD. The best option is a quick-release connection on an eccentric clamp. A huge plus is that cases that use such clips do not require a screwdriver to completely disassemble.
How to install and connect a hard drive
To install a new HDD, you need to repeat the instructions above from the last to the first step.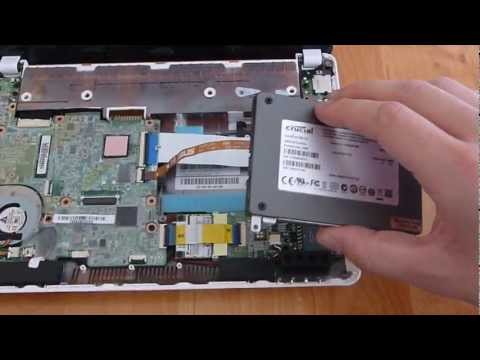 Install the new drive in the rack first, and then connect the SATA wires to it.
What jumpers should I put on the hard drive?
In the old days, you could find jumpers on a hard drive that allowed you to set a place in the device hierarchy. This helped to avoid conflicts with access to other devices in the system. Such jumpers were only on HDDs that were connected via a loop, but now there is no such disgrace, and we can only use SATA and set the hierarchy programmatically.
If you have an ancient computer, and you install a hard drive on a cable, then you need to set the “Master” position on the main disk, and “Slave” on all other devices. Usually the «Master» is connected to the end of the loop, and the «Slave» device is placed in the middle.
Such jumpers are also found on modern drives, but most often they are not used, because if you do not short the output pins, the system will automatically select the role for your drive.
How to install a second HDD
To install a second drive on a computer (it doesn’t matter if it’s an SSD or HDD), you need to have a second SATA cable and a free power supply plug for the same connector. The photo shows the cable that connects the hard drive to the motherboard.
Turn off the computer, remove the cover, and attach the second drive to the rack. Then it needs to be connected, one wire to the motherboard, the second — from the power supply.
Once you’ve done this, you can start installing Windows (if it’s a new master drive), or you can just start your computer and use it. This space will already be waiting for you in the system.
Please note when installing on the version of the SATA connector: the photo shows the outputs on the motherboard with signatures. 1.5 GB / s — SATA 1, 3 GB / s — SATA 2 and 6 GB / s — SATA 3. It is desirable that the capabilities of your HDD match the capabilities of the connector. To find out what SATA you have on your HDD, just look at the technical documentation, you can also search the case for the words «SATA» and see what version is written next to it.
Vertical and horizontal hard drive mounting in USB 3.0 docking station
Fixed
Mobile
There are hard drive adapters that allow you to use them as a flash drive.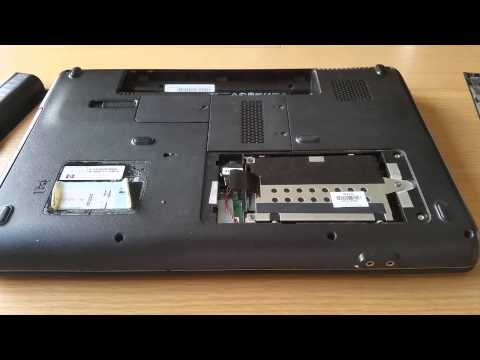
Connection in such devices is as simple as possible. The main criterion is the absence of vibration and shock on the body of the hard drive. That is, during transportation and in operation, it must be rigidly fixed in the housing.
The second important nuance is the transmission speed. It is hardly possible to consider an external hard drive as a full-fledged one due to rather strong speed limits. To mitigate this problem a bit, you need to choose an adapter that supports USB 3.0 or higher.
Can the HDD be installed upside down?
The position of the hard disk does not matter, it can be located in space at any angle. The main criterion is rigid fastening, that is, it should not hang out, but how you fix it does not matter in terms of reliability and performance parameters.
How to install a hard drive in a sled
A sled is a slang term for any hard drive adapter. Consider an adapter that allows you to install 2.5” devices in a 3.5” bay.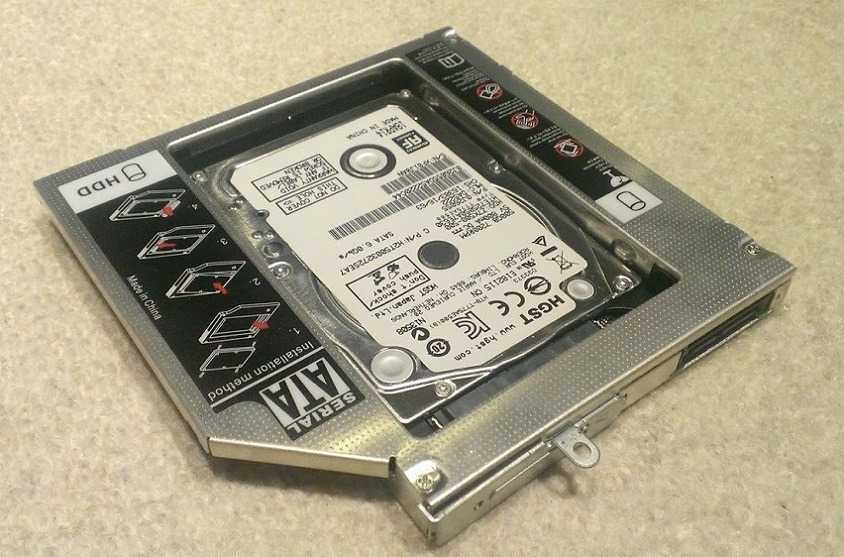 Also, a sled can mean an adapter for a laptop, which makes it possible to install a second hard drive instead of an unnecessary DVD drive, be it an HDD or SSD in a 2.5 ”form factor.
How do I install a hard drive into a 2.5” to 3.5” adapter?
The photo shows an adapter that can hold 2 drives. They are fastened with screws on the right and left, only 4 screws per drive. It is desirable to rigidly fix HDD drives, while SSD does not need to be rigidly fixed. The fact is that the hard drive has a moving part that can vibrate during operation, a rigid grip on the case helps to minimize these vibrations.
If the disk is loose during operation, then all the vibrations will destroy the gradually moving parts, that is, the spindle and the drive of the laser head, and they may fail. Not to mention that with constant vibrations, you have an increased risk of encountering errors when writing and reading data.
How to install a hard drive in a laptop sled?
As you can see in the photo, you need to use an HDD or SSD with a full size SATA connector.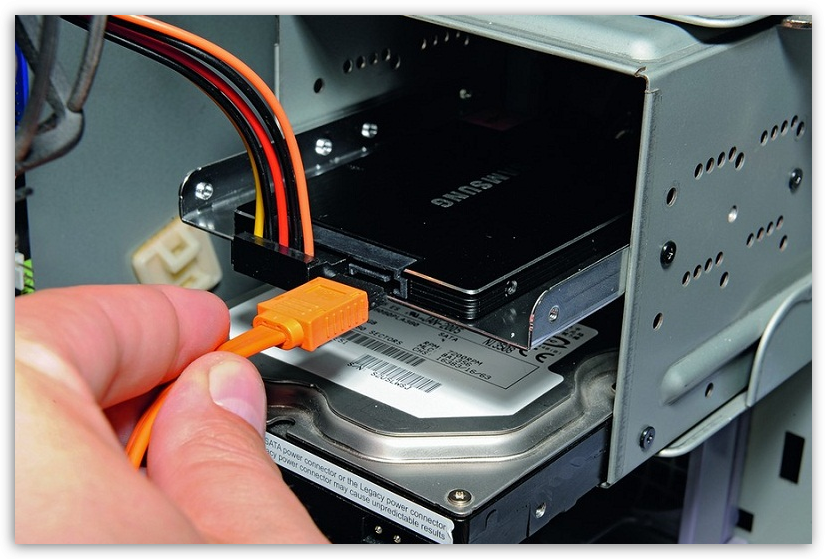 At the same time, the platform itself is connected in place of the optical drive, which has a miniSATA connector.
Once you’ve unpacked the sled, you’re ready to install the disk. First, remove the special screwdriver from its body and unscrew the built-in screws.
You don’t need to unscrew them completely, just move them a little inside so that the hard drive itself crawls into the hole. Please note that there is a small switch next to the HDD slot. It changes the adapter’s operating modes, and if you experience lags, read / write errors on a new disk, then switch it to another position, this can correct the situation. Install the hard drive and press it firmly against the connector. Now you need to fix it with the bolts that you unscrewed at the beginning.
Next, you need to get some elements from the old drive. The photo shows the screw that secures the drive. Usually it has special symbols that will help you figure it out. After you have unscrewed it, you need to pull out the drive itself and unscrew some parts from it, primarily the mount.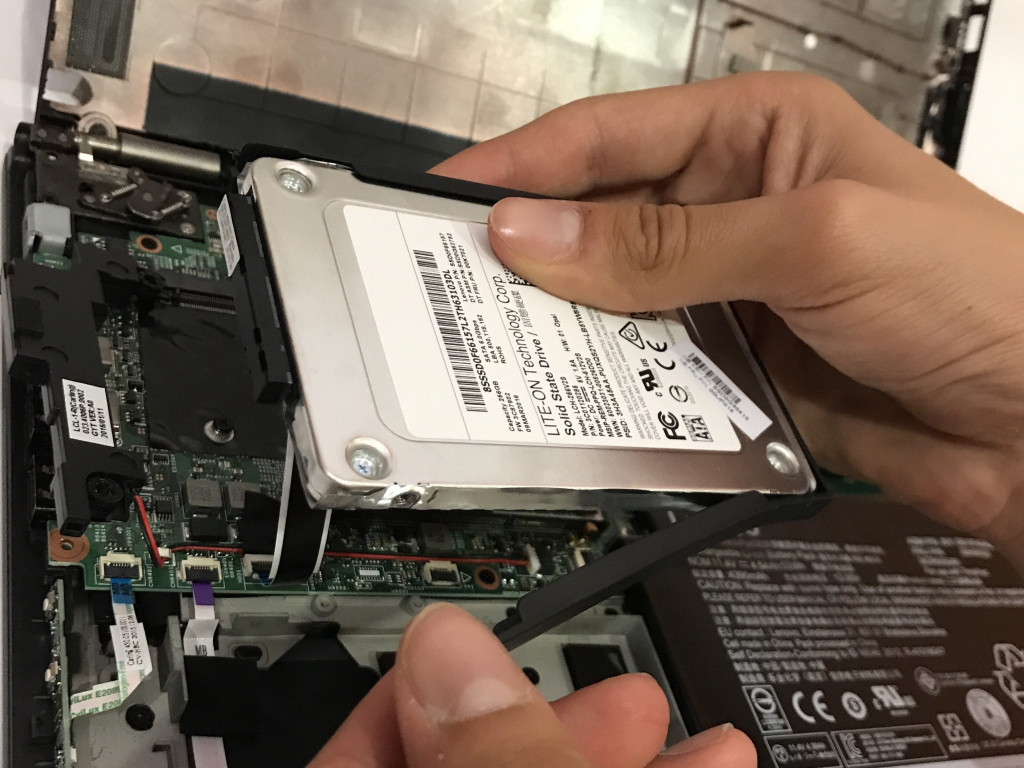 You also need to remove the plastic cap, each laptop has a unique one, and to make it all look beautiful, you need to remove it and rearrange it on a sled.
Screw the drive mount to the sled and slide it all into the laptop, then screw the adapter onto the bottom of the case.
How to install a second HDD on a laptop
Exactly the same instructions as described above. Manufacturers very rarely provide space for a second drive, so this method is universal for most laptop models.
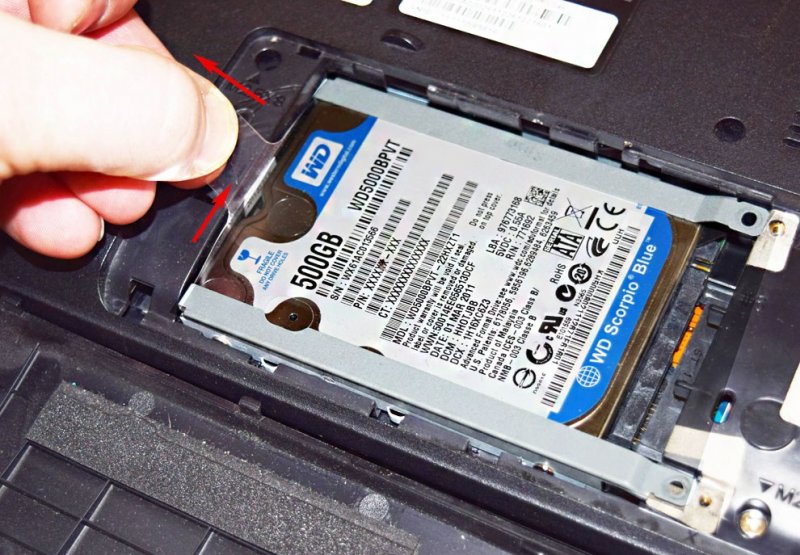
Replacing the HDD on a laptop
First, do not forget to copy the data, how to do this, read on. To replace a drive in a laptop, you need to unplug it and remove the battery. Remove the HDD quick access cover as shown in the photo. If your laptop model does not provide for this, then you will have to remove the entire back cover. There can be no general recommendations here, each model is disassembled differently, and you can find detailed instructions on the manufacturer’s website or on the Internet in the video.
Pull the old drive out of the case and unplug it. Sometimes hard drives are mounted on bolts, they need to be unscrewed. The hard drive itself in a laptop, as a rule, is located in an aluminum case or at least has remote mounts. They need to be removed and put on a new HDD. Then attach the new device in place of the old one and screw it in the same way.
Then close the shortcut cover and you can continue using your notebook. But if this is your only drive in the system, then you will have to install Windows on it.
How to back up data before replacing the hard drive
Data transfer in most cases will be very long, especially if we are talking about large volumes or a huge number of small files. Each method has its limitations, disadvantages and advantages.
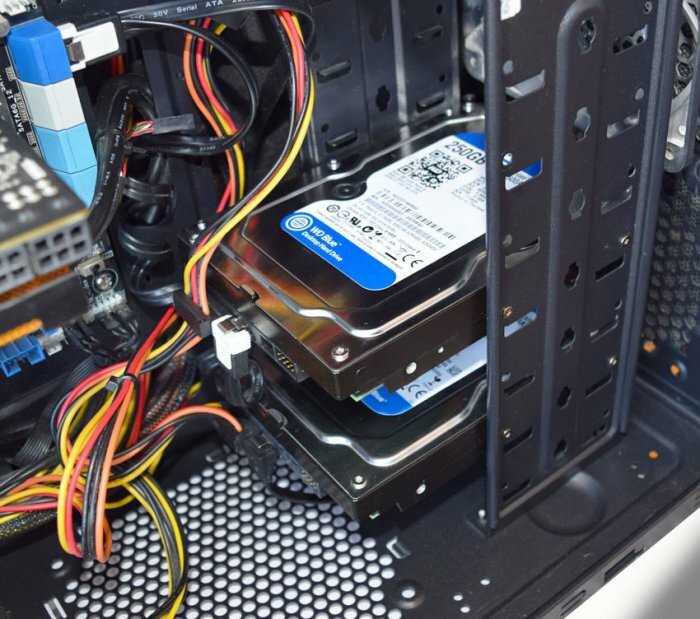
Two HDDs
If we are talking about a full-sized desktop PC, the easiest way is to install a new HDD with a second hard drive and transfer all the data to it, and then get rid of the old device. This is the best option, which requires the least effort and cost from you — SATA wiring costs less than $ 1, and is included in some hard drives.
- Advantages: fast, simple and not expensive.
- Disadvantages: Cannot be used in laptops, all-in-ones or mini PCs.
HDD USB adapter
Buy a USB adapter for your hard drive, connect a new drive to your computer and dump information on it, or use the old one to access the files stored on it, albeit at a slower speed. If your computer supports USB 3.0, then it is better to buy an adapter with the same version of the connector.
- Advantages: universal option for any computer.
- Disadvantages: low speed and the need to buy the adapter itself, although it is not expensive.
USB Flash
If you don’t have many files and have a flash drive at hand, you can write everything you need to it before replacing the drive.
- Advantages: a universal option and does not require additional costs, everyone has a flash drive.

- Disadvantages: little space, it will be difficult to transfer large amounts of data. Rather low data transfer speed, you will wait several hours, especially if you are transferring a lot of small files.
Cloud storage
Top-of-the-line option for small amounts of data. It is enough to have a high-speed Internet connection and reset data from a computer, laptop, phone, tablet, and so on.
- Advantages: the most versatile option, after the transfer you can use this data on any device.
- Weaknesses: Very slow transfer rate, lower than USB 2.0. To store large amounts of data, you need to rent space in the cloud, which can be expensive.
DVD drive
Recording the necessary information on discs is the last century, it is very long and even expensive, because discs are not free. In addition, your drive will be loaded for a very long time. But if there are absolutely no other possibilities, then you can write the data to disk.
- Pros: You can feel the nostalgia for bygone years, when discs were still relevant.
- Disadvantages: it takes a long time to burn a disc, it takes a long time to dump data from it, discs are expensive, you need to first archive the data and split it into parts to fit on one DVD.
And, of course, you can always contact the UPGRADE CENTER HYPERPC — our masters will carry out all the work necessary for the flawless performance of your machine.
HOW TO CONNECT AN ADDITIONAL HARD DISK
Some people buy a dozen flash drives, others take a premium rate on cloud storage. And the smartest ones keep precious gigabytes with them. They know how to install another hard drive to store all the information you need without compromise. Let’s get into the details of this process!
Why connect another hard drive
Information accumulates whether we like it or not. And if earlier, for example, the same family album could be recorded on a 700 MB disc, now a 2-minute 4K video takes up so much space.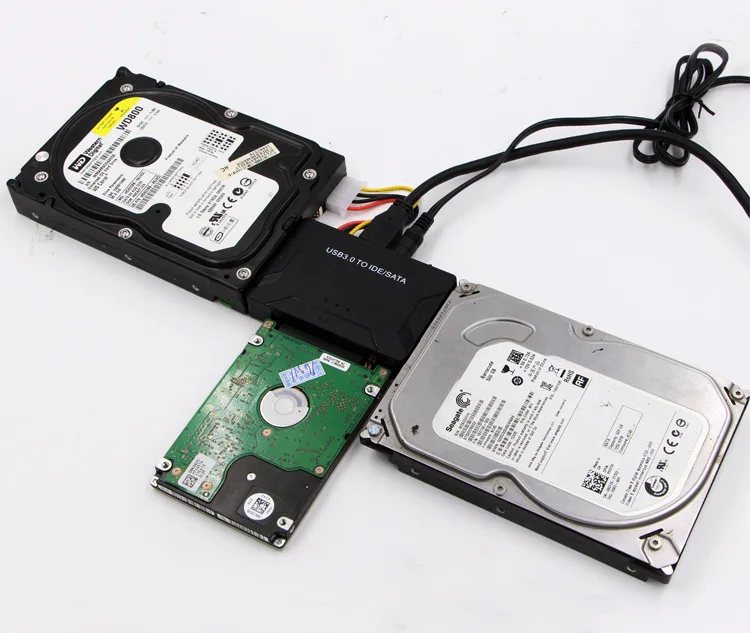 To keep everything you need safe and sound, it’s easier to connect an additional hard drive that will act as a file storage.
It can also be used as a «sandbox» for installing programs and games from little-known sources. Even if the application somehow affects the file system in a particular local drive, the rest of the system will remain unscathed.
Useful article: Video call software — top 5 in functionality
How to add another hard drive
In most computers and some laptops, the user can add a spare hard drive. If only a number of conditions are met.
- The connection type of the motherboard and hard drive must match. There are 2 types in total: the ancient IDE (found in computers over 15 years old, you can understand what it is from a thick loop of many cables) and modern SATA (connects via 2 thin wires).
- Availability of free connectors of the required type for connection to the motherboard.
- The presence of vacant ports in the power supply — if the PSU cannot power the disk, it will not start.
On a laptop
Not every laptop can accommodate an additional hard drive as it requires free space. It’s pretty easy to legalize a hard drive where there is a drive. Here you will need to «sacrifice» the DVD drive — then there is a place for the HDD or SSD. It’s done like this:
- You must purchase a hard drive to drive adapter.
- Carefully remove the drive by removing the screw in the middle of the bottom of the laptop.
- Install the screw in the adapter.
- Insert the adapter in place of the laptop drive.
- Format the hard drive and start working.
Many manufacturers sell laptops without a floppy drive, and some offer a hybrid approach with a primary SSD and an HDD in a «vacant space». Then the user can easily expand the laptop’s memory by replacing the bundled hard drive with a third-party one.
If the manufacturer hasn’t saved up a «vacant place» in place of the drive, you will have to be content with external media. Specialists will not take on such a risky business, because in order to add a hard drive, they will have to remove some of the parts.
An interesting article: What is hibernation in a laptop or computer: 4 pros and cons This is done in six steps.
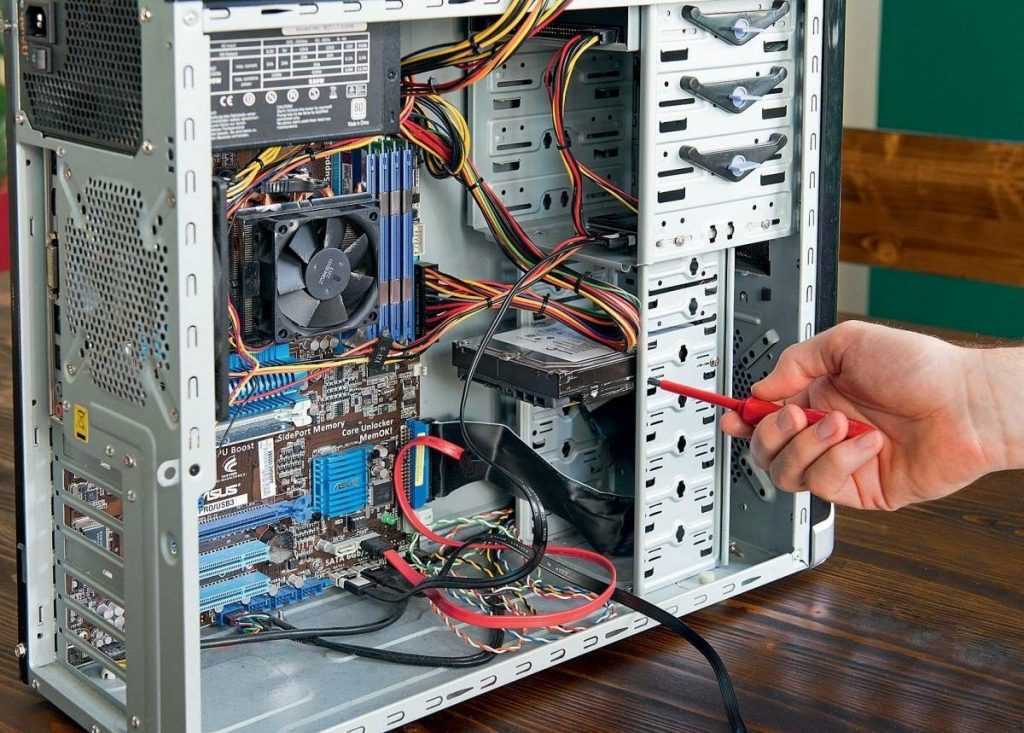
- Turn off the PC and remove both case covers.
- There will be several “pockets” on the front where hard drives can be placed, and on the left, access to the “motherboard”.
- Install the hard drive in the compartment, fix it with bolts.
- Connect an additional hard drive to both the motherboard and the PSU.
- Turn on the computer and format the second media.
- Click on its icon with the right mouse button (RMB) and select «Create a new volume».
Spare hard is ready to go. Now you can upload any content there and install the necessary applications. The new media will be written to the system as «Local Disk».
Topic: Creating a bootable flash drive: 7 ways to success
Windows 7
Installing a hard drive is only half the battle. It still needs to be configured. Below is the algorithm for working in Windows 7.
Initializing the hard disk
First of all, you need to initialize the media — then the OS will fully see it.
If the Start panel is sorted into categories, to find the desired program, go to the following path: Start → Control Panel → System and Security → Administrative Tools → Computer Management.
If the panel is not sorted, the System and Security item will be missing. The rest of the path will remain the same.
Having entered the desired menu, you need to make a choice of markup. Thanks to this, the system will finally see the required disk. In addition, this way you can “split” 1 physical disk into several small local ones. Let’s say a huge 6 GB HDD can be virtually divided into 3 volumes: 2 pcs. 1 TB and one 4 TB.
And if a software failure occurs in some part of the media, deleting files from there, it will not affect the rest of the local drives. There will be 2 types of markup to choose from: MBR and GPT. And depending on the specific situation, the choice will be as follows:
- MBR — if the volume is less than 2 TB;
- GPT — for local drives larger than 2 TB.
Good advice: How not to kill your laptop battery and extend its life: 8 valuable tips
Creating a new volume
After successful initialization, the disc will appear in the menu. True, it cannot be used yet, since the system volume has not been created. It is configured in the following way:
- Click on «Disk Management» in the menu on the left.
- Find the added drive (marked «unallocated») and right-click on it.
- In the drop-down menu, select «Create a simple volume».
- Next, the «Wizard» will open, where you need to select a drive letter and format the media in NTFS (then files larger than 4 GB will be placed on it).
- Select «Quick Format».
After the system does this, the drive is ready to use.
Windows 8/10
Media preparation in these systems is almost the same as the already familiar process with Windows 7. The difference is in the little things. Let’s focus on them.
Hard disk initialization
Enter the initialization menu in the following way.
- Right-click on the Start panel.
- Go to «Disk Management».
- Click on a new disk, if necessary split it into several local disks.
- Select a suitable disk layout.
- Repeat the same procedure as with Win7.
Note: How to make a Gif animation in 5 minutes: online services, Photoshop, phone applications0003
- Go to Disk Management.
- Find a new drive (marked «not allocated») and right-click on it.
- In the drop-down menu, select «Create a simple volume».
- Next, the «Wizard» will open, select a letter for the local drive and format it in NTFS.
- Tap «Quick Format».
HDD or SSD
This choice is one of the most difficult when buying a new hard drive, because HDD and SSD differ in performance and price.
