How To Get the Most Out of Your Card
Performing an Nvidia GTX 1060 overclock is a great way to unlock the card’s full potential. With the right steps, you can take the core clock speed from 1506 MHz to 1736 MHz, the boost clock from 1709 MHz to 1939 MHz, and the memory from 2 to up to 2.25 GHz. But because of the GPU Boost 3 Technology, the GTX 1060 is usually stable at 2.1 GHz.
Here’s what you need to know about the overclocking settings so that you can also get the same or similar overclocking values.
Contents
- How To Perform a GTX 1060 Overclock
- – Know Before You Start
- – Overclocking the GeForce GTX 1060
- What Are the Best Overclock Settings for the GTX 1060?
- – Gigabyte GTX 1060 6GB Overclock Settings
- – Zotac GTX 1060 6GB Overclock Settings
- – Overclock Settings for GTX 1060 3GB
- FAQ
- – How Much Performance Boost Can You Get From a GTX 1060 Overclock?
- Conclusion
How To Perform a GTX 1060 Overclock
To overclock the GTX 1060, start by increasing the VRAM and GPU by a small amount, like 50 MHz, and do a stress test using software like Furmark.
If it stays stable for around 10 minutes, increase the clock by 10-25 MHz and run the tests again.
– Know Before You Start
Generally, you can increase the VRAM clocks more than you can increase the core, but a significant increase in the latter can also cause the system to crash instantly.
But overclocking the card is not that simple, and to better understand how you can do it, let’s get a few things out of the way first.
Since the introduction of Pascal (the GPU architecture that powers the 1060), it has become really hard to burn your Nvidia graphics card when performing basic overclocking.
With Maxwell, you couldn’t adjust the core voltage of the GPU, and with Pascal, it’s almost impossible to provide too much voltage to the core.
If you really want to increase the temperature, you will have to physically modify your card.
Pascal also introduced the GPU Boost 3, which, if you really consider it, also overclocks the GPU. And as long as the GPU is not limited by power or heat, it will continue to boost the clock.
Let’s understand this with an example.
The Asus GTX1080Ti (also a Pascal card) lists a boost clock of 1683 MHz and 1780 MHz in its OC Mode.
Without turning on the OC Mode, the card can easily go up to 1700 MHz, which is more than the listed boost clock rate.
And if you turn the OC Mode on and only raise the power to the maximum limit (120% in this case), the boost clock rate will go up to 1890 MHz.
Now, if you also set the fan to 100%, the card will hit as high as 1910 MHz. Note that no direct clock offset has been made yet.
If you now increase the clock rate by 150 MHz, it will reach 2020 MHz, but because of thermal limits, it will come back down to 1950 MHz. The same is the case if you try a 200 MHz offset.
So, the bottom line is that you’re limited by power and thermal limits.
– Overclocking the GeForce GTX 1060
Just like the 1080Ti discussed above, the Nvidia GeForce GTX 1060 is also a pascal card, and the way to overclock it is also quite similar.
Start by increasing the power to the maximum that your graphics card software (like Afterburner) will allow you to.
While doing so, keep an eye on your clock and how much it boosts. At the same time, don’t forget to monitor the temperature.
If your card hasn’t reached the thermal limit, go ahead and boost the core clock in small increments of 50 MHz.
Continue doing so until you get artifacts (flashes or pops on the screen that definitely shouldn’t be there) or your card reaches the thermal limit.
Also, make sure that you continue to perform some stress tests in between the changes using software like 3D Mark. Once you start getting artifacts, reduce the core offset back to the most stable value. This will give you a value where you can run your card comfortably without worrying about crashes or glitches.
Generally, you can get a 100-150 MHz boost for the GPU core and a 200-250 MHz boost for the VRAM while staying within a stable operating temperature.
Keep in mind that if you overclock too much, your screen will go black, and your GPU’s clock will fall down to a very low frequency to prevent damage.
In the case of the latter, you’ll have to restart the card to get the full speed again.
Once you get a good, stable overclock, stress-test the GPU again with Furmark for a couple of hours. If it doesn’t fail or crashes, you’ve successfully done a GTX 1060 overclock.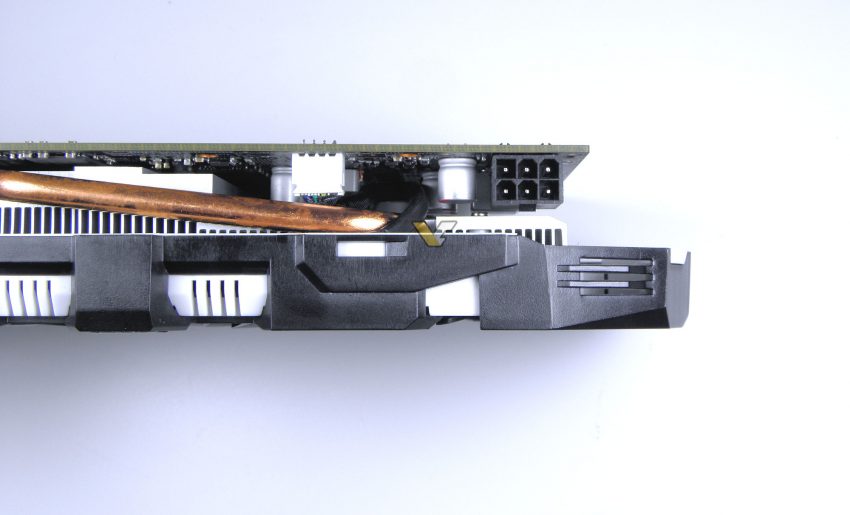
Keep in mind that your card’s frequency is never fixed because of the boost clock’s dynamic nature. Things like voltage, power, load, and limiters will alter the maximum clock state.
This is why in most cases, the card reaches a maximum of 2 or 2.1 GHz and stays stable thanks to the GTX 1060 boost feature.
What Are the Best Overclock Settings for the GTX 1060?
There’s no one best overclock settings for GTX 1060; you have to experiment with the values a bit to determine the right values while monitoring the system temperature and keeping stability in mind.
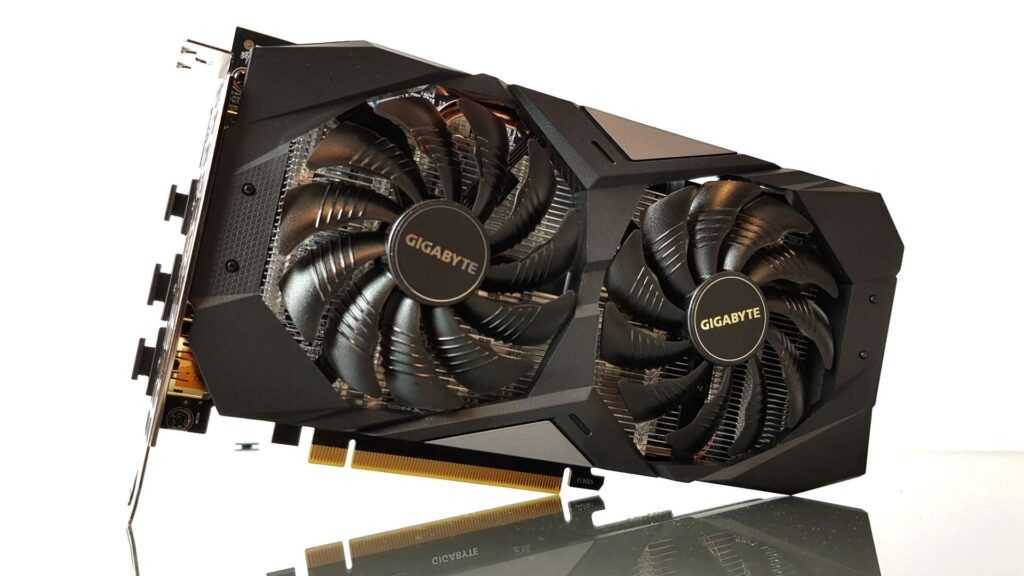
– Gigabyte GTX 1060 6GB Overclock Settings
But to get you started, here are the recommended overclock settings for a few different variants of the GTX 1060.
Using MSI Afterburner, here are the most stable overclock settings for this card:
- Power limit: 85%
- Core clock: +125
- Mem clock: +800
These values also prove to be good GTX 1060 overclock mining settings since they provide a maximum hash rate of 24.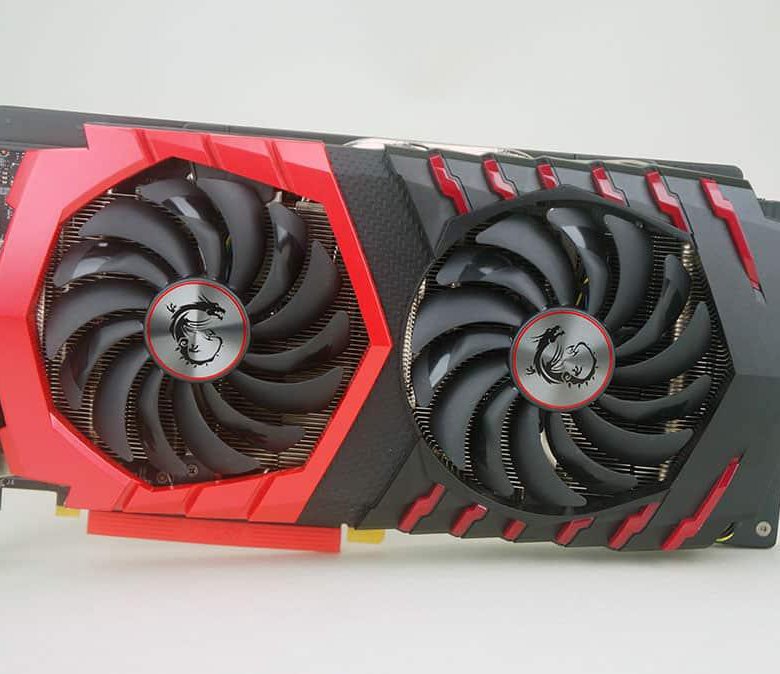 71.
71.
– Zotac GTX 1060 6GB Overclock Settings
Now let’s check Zotac GTX 1060 settings listed below:
- Power: 98W
- Fan: 100
- Core: 240
- Mem: 1995
- PL: 100
– Overclock Settings for GTX 1060 3GB
With the following GTX 1060 3GB overclock settings, you can take the core clock from 1570 MHz to up to 1769 MHz, the maximum boost clock from 1784 MHz to nearly 2164 MHz, and the memory clock from 8000 MHz to 9102 MHz.
- Core voltage: N/A
- Core clock: +200
- Memory clock: +550 MHz (to bring the effective rate up to 9.1 GHz)
- Temp limit: 92C
- Power limit: 108%
FAQ
– How Much Performance Boost Can You Get From a GTX 1060 Overclock?
Generally, you can expect a 7% boost across different games at 1080p. You might also be able to increase the memory clock by 15.7% and the observed boost clock by 6.9%, leading to about a 7% performance increase.
You might not find these percentages to be too much, but overclocking can help you get 60 fps in a game, which is almost impossible with the stock values.
Conclusion
A GTX 1060 overclock can help you get the maximum benefit from your card, especially when it comes to mining or playing GPU-intensive gaming.
Here’s a quick run-down of all that we’ve talked about in this article:
- Overclocking can increase the memory clock, the core clock speed, and the boost clock. But since each card is different, there’s no one fixed value that you can overclock to; you’ll have to experiment and push your card till you find the last stable settings.
- The card’s GPU Boost 3 technology is essentially a form of overclocking and can allow you to run your card at 2 to 2.1 GHz.
- You will know that you’ve gone too far with overclocking when you get GPU artifacts (flashes or pops on the screen) or the blue screen of death, or if your system keeps crashing constantly.
- Once you overclock the card, you’ll be able to enjoy a 7% boost on games in 1080p and a little less than that on games in 1440p. Plus, you might be able to play the games in 60 fps, too!
Overclocking is a little complicated, especially if this is your first time. But if you just stick to increasing the clock values in small increments, you’ll be good to go.
Plus, Nvidia has made it really difficult to burn the card with its new architecture, so you don’t have to worry about damaging your setup.
GTX 1060 6GB Mining Settings
GTX 1060 6GB Mining Settings for all the popular and most profitable Cryptocurrencies to mine, you’re one-stop page for everything related to your GPU
Last updated:
N/A
Overview
Settings
6
Offers
1
Live Price
$274. 99
99
Daily Profit
soon…
ROI
soon…
GTX 1060 6GB Specs
Vendor
NVIDIA
Series
GeForce 10
Release Date
19 Jul 2016
Memory
6GB GDDR5
Chip
GP106-400
Interface
PCI-E 3.0 X16
TDP
120W
MSRP
$249
⚠️DISCLAIMER⚠️
The GTX 1060 6GB Mining Settings will generally work for all models, but most of the time you will have some tweaking to do due to your GPU Silicon. Never mine with Stock settings as they will overheat your GPU! You can learn more in our Overclocking For Miners Guide.
GTX 1060 6GB Mining Overclocks
Absolute Values are most commonly used in Linux-based Mining OS and they usually give more effeciency, while Offset is more common for Windows. N/A or 0 = leave blank.
ETChash
21 MH/s, 70 Watts
Autolykos2
64.5 Sol/s, 75 Watts
ZelHash
22. 5 Sol/s, 85 Watts
KawPow
8.6 MH/s, 75 Watts
FiroPow
8.6 MH/s, 75 Watts
Octopus
4.95 MH/s, 75 Watts
GTX 1060 6GB ETChash Mining Overclocks
Expected Results
21 MH/s, 70 Watts
Core Voltage (VDD)
N/A
Power Limit
Watts: 75 or Percentage: 60%
Core Clock (CClock)
Absolute: 0 or Offset: ++150
Memory Clock (MClock)
Absolute: 1400 or Offset: +700
Memory Voltage
N/A
Fan Speed (%)
70% ± based on your temps
Provided by @Mining Chamber
Frequently Asked Questions
How to overclock my GPU for mining?
Overclocking for mining can be tedious, a lot of trial and error. You can use our mining settings as a base and if they crash then you can start slowly decrementing Clock values and slowly increment your Power Limit/Watt Limit until your GPU is stable.
Is mining harmful to my GPU?
Yes and No. The number one reason for Hardware failure is heat. If you can maintain good temperatures and take care of your GPU properly then your GPU will live with you longer than you can ask for. Your fans might break on you but that is always an easy fix.
How to reduce my GPU Temperature for mining?
There are a few things you can do to maintain healthy GPU Temps such as regularly dusting (Recommended Duster) and replacing Thermal Paste throughout the year, but what really stands out for me is using Heatsink Mods. It works especially well for the 3000 Series by bringing down temperatures by up to 20 degrees!
How much power does my GPU use while mining?
Your GPU power draw varies based on the algorithm you are mining, The best way to accurately know is through measuring your Rig/PC off the wall using Power Meters.
Where To Buy
Subscribe to our Miners Newsletter!
Hot headlines
•
PoW Cryptocurrencies
•
Mining Chamber Updates
They say if you sign up, your rig will never crash 🤷🏽♂️
GeForce GTX 1060 — Dull overclocking and wild undervolting.
This material was written by a site visitor and has been rewarded.
Good day, dear readers!
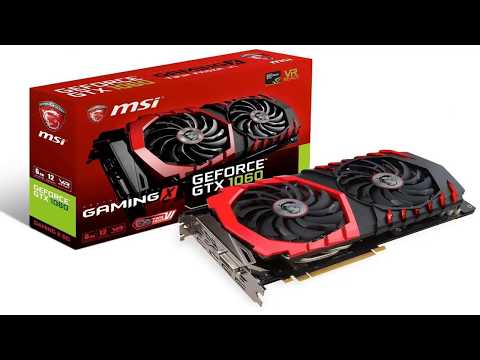
Many people consider the 1060 line of video cards to be cold, not requiring an undervolt, but this is true only for models with serious CO (abbr. Cooling System), such as ASUS ROG Strix GeForce GTX 1060 or GIGABYTE GeForce GTX 1060 XTREME GAMING, MSI GeForce GTX 1060 GAMING X 6G etc.
There will indeed be 60-65 degrees in silence.
But most 1060s are content with COs with one or two heatpipes or none at all.
As a result, in order to keep temperatures up to 80C, we get a fan roaring at almost 2000 rpm and a vrm zone heated to 90-100C
If we add to this the reduced chip area compared to the previous generation, which causes problems with heat dissipation, in general, the 1060 series of cards can hardly be called cold.
MSI GAMING X cold undervolt causes.

A couple of weeks ago I got an MSI GeForce GTX 1060 GAMING X 6G. Before that, I puzzled for a long time what to take — RX 480 or GTX 1060?
But, the unstable ruble, the traditional increase in prices for the «Computer for Study» period and the absence of non-reference RX 480 models on sale have simplified the choice.
Works quietly, does not heat up, it seems that you can calm down and calmly play The Witcher 3, as one small “But” appeared.
I love silence, there are only three low-speed fans 140 mm in size, 600-750 rpm in the case.
And after installing a fairly large video card, the air flow in the case changed, a large and hot (about 65 degrees) backplate increased the temperature of the nearby HDDs by 3-4 degrees. The processor also added 5-7 degrees.
It seems to be a trifle, but when you get used to silence and cold iron, it’s annoying.
The previous, rather hot GTX 760, was easily made quiet and cold with the help of undervolting, and not only by lowering the voltage, but also forcing it to work in overclocking. 1280 MHz at 1.075 V gave a TDP of about 120 watts and a temperature of about 60 degrees in silence.
Today I will try to do this with the GTX 1060, besides, nvidia left us little maneuver in this line for overclocking, squeezing out all the juices due to a very efficient boost technology, but I wonder how the card is already “squeezed out” in terms of heat dissipation.
I won’t forget overclocking either, we’re on overclockers.ru)
It’s also interesting to see what kind of gain will be gained by overclocking video memory at 1080p resolution on my already not very fast system, where a more powerful processor would allow this video card to give out more FPS.
At the same time, let’s look at the contribution of memory overclocking to heating and power consumption.
So let’s get started.
Test stand:
Processor: Intel Core i5-4670
Cooler: Zalman 10X Performa
Motherboard: ASUS H87-PLUS
RAM: Kingston DDR3 16 Gb 1600MHz (4x4Gb)
Video card: MSI GTX 1060 Gaming X 6G
VERTEX3 120 GB + bunch of HDD
Chassis: Fractal Design Define R4, 700 rpm fans.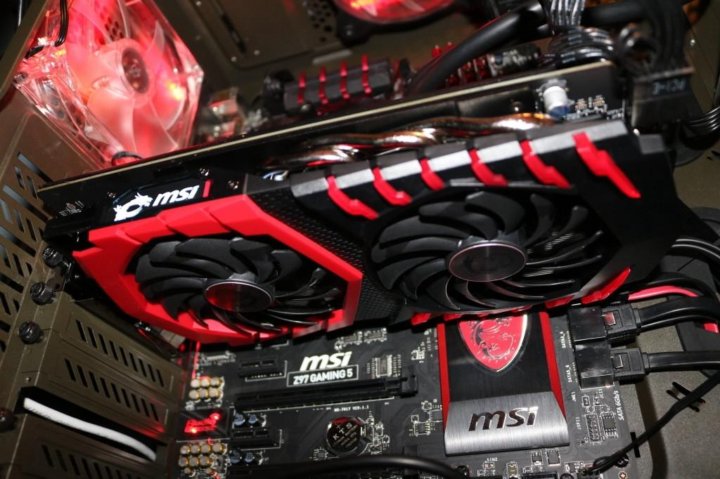 The side cover is closed.
PSU: Chieftec CFT-700-14CS, 600 rpm fan.
Monitor: 27″ Iiyama ProLite XB2783HSU
Operating system: Windows 7 x64.
Video driver:
368.95 , not the first freshness, but 372.54 had problems with high
GPU frequency when watching youtube, and I won’t install the latest one yet, I’ll wait until the shoals come out.
Main tool for voltage management —
MSI Afterburner 4.3.0 Beta 14 .
Older versions do not allow you to control the voltage at 1060. And EVGA PrecisionX 16 is terribly inconvenient, so I’ll risk installing the beta version.
For monitoring
HWiNFO64 5.34 , which measures the consumption of video cards quite accurately and can display readings together with MSI AB on the screen in the OSD.
It’s a pity there is no wattmeter, but even the most skeptical readers about software measurements will see a decrease in the heat pack simply by the temperature of the GPU.
To begin with, let’s fix the fan speed for the acceleration time for
constant 55% rpm (1370 rpm) , this will allow you to evaluate the effect of voltage reduction on temperature and avoid overheating of the power supply and memory system during overclocking.
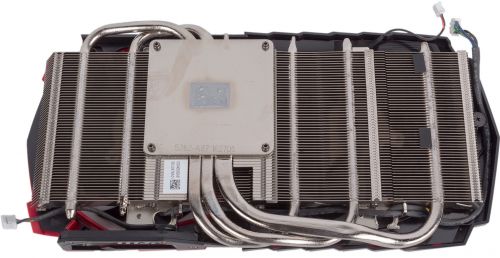
Power and memory on this model are cooled by a common aluminum plate and, although according to the measurements of the members of the forum, the temperatures are quite tolerable, it’s better to play it safe.
For constant operation, the rpm will be about 700-1000 rpm but, in the case of 1060, you need to remember that the chip is very sensitive to temperature fluctuations in frequency. And the results of overclocking and undervolting should be rechecked in different temperature conditions.
I also recommend setting the Zero Frozr function using MSI AB to operate at lower temperatures than set in the BIOS, my video card fans start at 45C.
Zero Frozr is definitely good in terms of reducing noise, reducing fan wear and dusting of the graphics card, but in terms of heating, there are two points of view, one is to reduce the temperature difference between idle and warm state.
Another — focusing only on chip heating causes short-term overheating of the vrm zone and memory when the fans stop.
We will load the video card using
The Witcher 3 , which is very good at revealing GPU overclocking instability,
Rise of the Tomb Raider , one of the few games so far that easily eats up more than 6 gigs of video memory (to check it in overclocking) and
3DMark Fire Strike to evaluate the gain from overclocking in synthetics.
Part 1. Memory overclocking.
Why do I start with memory? Because its overclocking will limit the subsequent overclocking of the GPU, which you will see below. Many 1060s have pretty tight power limits.
In my case, the 1060 GAMING X has a large headroom, but the memory impact on overclocking is still there.
The overclocking process itself is extremely simple, we increase the memory frequency in MSI AB, while looking for artifacts in games. Rise of the Tomb Raider at maximum settings proved to be a very good test for this, in The Witcher 3 everything is stable up to
+ 820 MHz in memory, but here artifacts appeared already on
+ 790 MHz .
Rolling back to
+760 MHz just in case and we get the frequency in
9528 MHz . A solid increase from the factory 8000 MHz, the throughput has increased
from 192.2 GB/s to 228.7 GB/s .
For example, the GTX 1060’s main rival, the RX 480, has 256 GB/s. They almost caught up, at the same time they overtook the veterans — the competitors of the GTX 970 and GTX 980.
Now let’s see how memory overclocking will affect games without GPU overclocking.
Rise of the Tomb Raider increased from 33 to 36 fps,
+9% .
In The Witcher 3 from 47 to 50 fps,
+6% .
Just as you can see from the screenshots, power consumption and temperature are growing by a couple of degrees.
The measurement was carried out in a static picture, in the game, without moving the mouse, the memory profiles were switched from overclocking to default.
So, there is an increase, but is it worth the candle? When we get to GPU overclocking, we’ll see
how much memory overclocking will limit it.
Part 2. Undervolting, or reduce the operating voltage of the video card.
Most of the non-reference GTX 1060 models almost constantly keep the frequency in
heavy games between 1900 and 2000 MHz, at a voltage of 1050 mV — 1063 mV.
You can even call it the real default frequency.
Attention! A more accurate and stable tuning of the frequency / voltage curve is described in the supplement at the end of the article!
Our task is to lower the voltage as much as possible while keeping the frequency in this range. Open the MSI AB window and press Ctrl + F. The «Frequency/Voltage Curve Editor» window opens.
It turned out to be more convenient for me to choose the voltage, and then look at what frequencies the video card can work on it.
For the conditional “default frequency”, this turned out to be a voltage of only
875 mv!
That is, the video card was able to operate at a voltage 18% lower than the nominal voltage in its normal mode .
Let’s see how this affects temperatures and power consumption in one of the heaviest games — The Witcher 3.
As you can see,
consumption dropped from 113-120 watts to 77-80 watts ! The temperature dropped from 58 degrees to 50.
Frequency even higher than default boost —
1987 MHz vs 1936 MHz!
Amazing result, I’ve been doing undervolting for a long time, but I’ve never been able to achieve such a decrease in supply voltage without loss of performance.
I foresee that many will laugh at such enthusiasm, because the video card is already cold from the very beginning, but, let me remind you, it is in a quiet PC, which can now be made almost silent.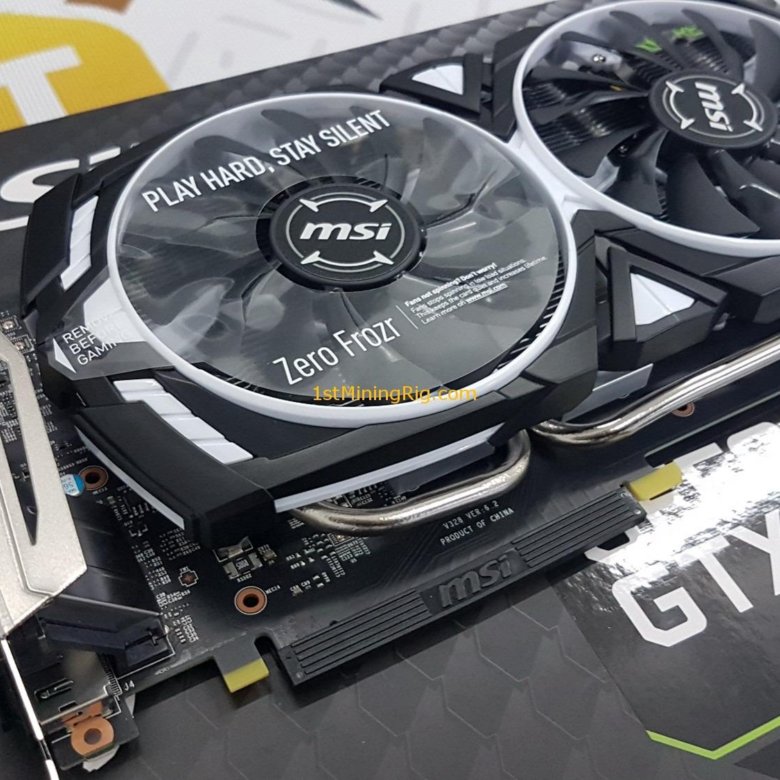 Even caught up in TDP with my 2nd video card, «plug», R7 250X.
And the performance of the GTX 980 level with a consumption of 80 watts of a video card was only achieved with the release of a new generation of volta.
Let’s continue to «underestimate». We translate an additional slider
power limit in — 50% . Now our goal is to get the coldest possible card.
Below
875 mV there are only 3 voltage steps, the initial
800 mv , for the convenience of editing the curve, I took
813 mv .
At the same fan speeds (let me remind you, they are fixed for all tests) at this voltage, we managed to achieve stability at
1848 MHz , total consumption
62 watts temperature
46 degrees .
In principle, with this TDP, you can already try to completely turn the PC into passive, which I do by first opening the side cover and stopping the case and processor fans (i5 4670 under Performa tolerates this quite calmly).
I’m not a fan of passive cooling, but for the sake of completeness of the experiment, it’s worth a try.
The temperature begins to rise, having stabilized at
68 degrees , while the frequency gradually drops to
1569 MHz .
Impressively, The Witcher 3 plays at fairly good performance on an almost passive computer. There was only a fan in the PSU at 600 rpm.
FPS dropped from 45-55 to 40, but these are ultra settings.
For me personally, 68 degrees is already a lot, so I did not test this mode for a long time. I note that lowering the memory frequency will help to throw off another 3-5 degrees.
By the way, with default fans, this model worked in passive mode in many games where the load was below 80%.
Even in GTA 5, where my percent could not load it above 85%.
But I do not recommend this mode, especially in summer. The temperatures of memory and batteries will be much higher than those of the GPU — memory chip failure is not uncommon.
Part 3. Overclocking to «permanent» and the impact of the memory frequency on the GPU frequency.
As it turned out later, with a rough adjustment of the frequency / voltage curve, overclocking turns out to be “corn”, that is, at a frequency of 2200 MHz, the performance is lower than at the correct setting and a frequency of 2100 MHz.
Read about the correct curve setting in the appendices at the end of the article!
Let’s move on to the most boring part. Why boring?
For two reasons, firstly, the performance gain of the 1060 from overclocking is quite small, which has already been sorted out in a bunch of tests on the Internet.
Secondly, again, judging by the reviews and tests of the owners, 2200 MHz is the ceiling even for good specimens. So there’s not much to hope for, at a low price
, the “default” voltage is already almost 2 GHz, and an increase of 100-150 MHz will not do the trick.
Therefore, in order not to strain the video card and nerves too much, I will try to make a “standard” for 1060 overclocking at 2100-2150 MHz and combine it with memory overclocking. Since, IMHO, this is the bottleneck of the 1060.
I increase the power limit to a maximum of 108%, I select a safe voltage (
1031 mv ) and start searching for a stable frequency.
I have not written before, but this search when the voltage changes does not always end with a game or driver crash, in 50% of cases the computer freezes, with a crackling sound familiar to all overclockers, or reboots.
Therefore, before all these experiments, I made an image of the system disk and disconnected unnecessary HDDs.
I’ve had cases of file system breakage in such cases.
After 5 sorties and 3 hang-ups, I find a stable frequency in
2139 MHz at 1030 mV.
First without memory overclocking.
Now we try to overclock the memory and immediately get crashes and instability.
For complete stability, you have to roll back to
2114 MHz .
Let’s see what we got in terms of temperatures and power consumption —
116 watts
on 2114/9528 MHz and 101 watts on 2139/8000 . The temperatures are the same.
The performance, in the case of memory overclocking, is higher than that of a simply overclocked chip, which was to be expected.
In The Witcher 3, the increase is only 2 fps, compared to the mode without memory overclocking, but with a slightly higher gpu frequency, or 4% of 50, but, often in reviews, such a meager difference is used to award victory to one or another video card.
In terms of energy consumption and temperature, we remained within the normal default boost at 1936 MHz. So this is a “free” overclocking that does not affect either the heating, or the resource of the video card, or the increase in power consumption.
In terms of growth compared to default, Rise of the Tomb Raider is also not a miracle
happened and the fps counter is still spinning around 35 fps.
Part 4. Practical benefits.
This experiment showed that the GTX 1060 has a very large potential for voltage reduction in normal boost mode, in the range of 1900-2000 MHz. And, since the increase from overclocking is small, it makes sense to spend this potential on lowering the GPU voltage, and not on “corn” overclocking to 2200 MHz.
Of course, each card will give its own result, which can only be verified in practice, since we cannot see the chip quality (asic quality) in GPU-Z now.
But, assuming an average TDP drop of 30-50 watts, this makes sense for those who love silence. Or in the summer heat, on models with simple cooling, especially turbine.
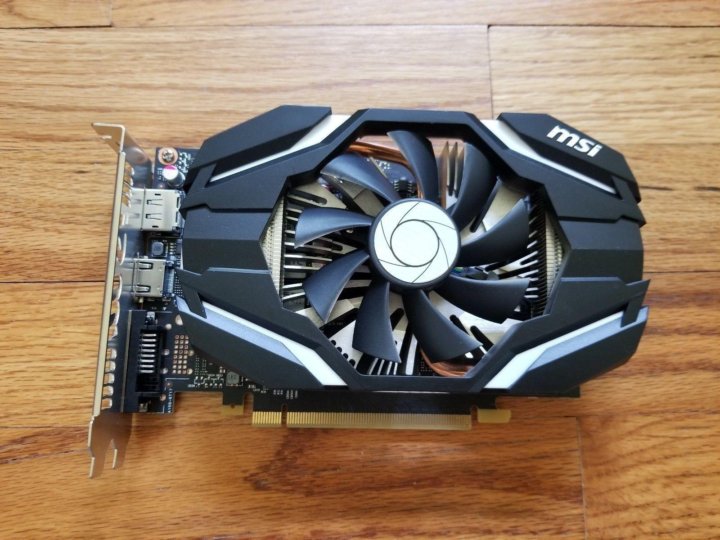
Owners of the «Mini» 1060 models with simple aluminum cooling without heatpipes will benefit the most.
As I wrote above, and showed on the screenshots of work in passive mode with a temperature of 68 degrees, even temperatures below 70 already cause a sharp drop in boost frequencies.
Therefore, for such models, especially in Mini-ITX cases, undervolting is what the doctor ordered.
And even a Chinese 400-watt noname PSU should pull the card in this mode.
Don’t forget that reducing the overall consumption of the PC also offloads the power supply. Which will also give more silence and less heating of the PSU.
And most importantly, with the money saved from paying electricity bills, you can buy a couple of bottles of beer a year)
Thank you for spending time on my debut opus on Personal Pages, good overclocking and cold maps to all!
Update as of September 16, 2016
More precise tuning of the voltage/frequency curve
without loss of performance .
Thanks for the tip
Bumbr and
Olegdjus .
Important! If we adjust the curve with a sharp rise in points, as in the screenshots in the article, we lose about 5% of productivity.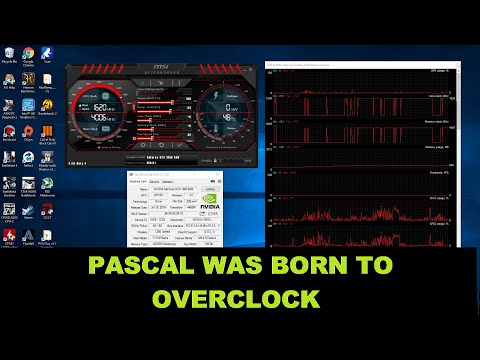
Frequencies are obtained «corn», not corresponding to reality.
Firstly, when adjusting the curve, you need to keep the temperature of the card in the gaming area, the test from GPU-Z is suitable for this. We press the sign «?» in the GPU-Z window and a small test opens, which warms up the card and at the same time allows you to accurately see the frequency in the boost. Or you can run it in the heaven benchmark window.
But the best way for me was to run The Witcher 3 as a very heavy and loading game even minimized, without vsync and frame caps.
And the process turns out like this — launch the Witcher, load the save and minimize it. We adjust the curve, deploy the Witcher again and leave it to check the stability, while looking at the msi ab monitoring.
All this is required due to the fact that the curve can «float» with too large a temperature difference, if it is configured when the video card is idle and not warmed up.
Secondly, the manipulations are carried out using the frequency slider on the main window of MSI AB!
For example, I need to make a video card work at a frequency of 2050 MHz with a voltage of 1000 mV. I open MSI AB, reset the settings with the «reset» button at the bottom of the main window.
Open the frequency/voltage editor by pressing «Ctrl+F»
Now, having selected with the mouse a point on the curve corresponding to a voltage of 1000 mV, use the frequency slider in the main window of MSI AB to set the frequency to 2050 MHz (see the frequency in the curve editor window)
After that, as described above, all voltage points above 1000 mV are carefully set to a frequency of 2050 MHz, and the point at which the video card never goes (1075 mV) is set higher in frequency.
Now one more nuance, voltage points up to 1000 mV can be lowered in frequencies lower, for stability.
Otherwise, you may encounter bsod and driver crashes at low temperatures and loading the video card in 2D, while watching a movie or YouTube. But there is a chance for even a small change in the curve to the left of the maximum operating point to get a small loss in performance. In principle, it is no longer critical and not noticeable to the eye.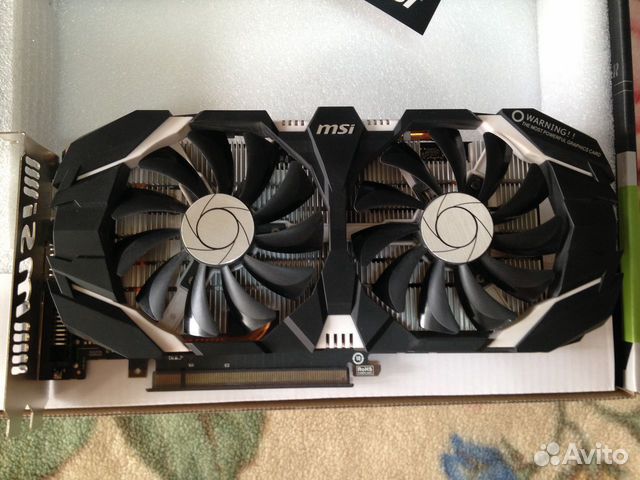
Recently, having carefully tested the video card in certain undervolt modes, I stopped omitting the dots on the left.
As a result of checking the setting, I get 10423 points in 3D Mark Fire Strike at 2050 MHz and 1000 mV and 10403 points at 2050 MHz and standard voltage.
Curve setup example for 2050 MHz operation at 1000 mV.
This material was written by a site visitor and has been rewarded.
Overclocking Nvidia GeForce GTX 1060
Hello everyone! As you can understand from the title of the article, today I will continue the topic of overclocking (overclocking) of hardware and this time we will overclock the video card (if you are not familiar with my last article on overclocking the processor, then I strongly recommend that you read it.
I would like to make a reservation right away that at the request of the admin, this article is written in great detail, especially for ordinary users, those who want to get the most out of their electronic friend. The information in the article is completely safe and the topic of extreme overclocking, which is associated with an increase in voltage and an upgrade in cooling on the video card , I have not considered it yet.I will only tell you about the simplest and most elementary overclocking, minimum effort — maximum result!0004
So, first, as usual, a little introduction regarding overclocking. As I wrote earlier, overclocking is a forced increase in the characteristics of equipment to increase its efficiency. In the case of a video card, its power directly depends on two parameters: the clock frequency of the GPU and the clock frequency of the video memory . It is them that we will try to disperse today.
I would like to say a separate word about power and power supply. The video card is the most voracious component of the PC in terms of power consumption. If in the case of overclocking the processor, its power consumption remains virtually at the same level, then with the video card the situation is exactly the opposite, power consumption, although not by much, increases (it is difficult to name specific numbers, it all depends on the model and overclocking potential of your video card). Hence the conclusion follows that the power supply is needed somewhat more powerful than stated in the recommendation for the vidyuhi. For example, for my card (name in the header), the recommended power supply is 400 watts. After overclocking, I need a 450 or even 500 watt unit.
I am often asked: Can a video card burn out during overclocking?
Answer: No, unless you increase the voltage applied to the GPU. In the event of a failure, the card will simply reset all frequencies to base values and continue to work.
Another question that I think needs to be cleared up before starting: why do video cards from different manufacturers operate at different frequencies and cost differently, since they are all from Nvidia? The overall picture here is as follows. One of the directions of Nvidia is the development and creation of graphics processors. Other companies such as MSI, Asus, Gigabyte, Zotac, Palit, etc., usually buy a ready-made video card developed by Nvidia and modify it at their discretion. Someone lowers the core clock frequency, someone, on the contrary, overclocks, someone changes the connectors for connecting an output device (monitor), someone makes other modifications. As a result, we get that the same video card model can cost differently and work at different base frequencies. This leads to the conclusion that overclocking is a purely individual matter and depends specifically on your modification.
In my case, Nvidia GeForce GTX 1060 3GB from MSI and runs at base frequencies of 1544 MHz.
Characteristics of the Nvidia GeForce GTX 1060 video card in the GPU-Z program, as we can see the default frequency of the graphics chip is 1544 MHz.
I immediately warn you that your actions in your particular case may differ from mine, but in general, the general principles that will be discussed further are the same, regardless of the circumstances.
Now that we have dealt with all the issues, we can get down to business and for this, we need 3 programs: GPU-Z — a program for monitoring all indicators of a video card, MSI Afterburner — a program for overclocking a video card and any benchmark. Benchmarks — a category of programs for testing PC performance under stress. In my case it will be Furmark.
Download links.
1. https://www.techpowerup.com/gpuz
2. https://ru.msi.com/page/afterburner
3. http://furmark.ru/
Download and install all programs.
First of all, open MSI Afterburner and change its design to the old one (in my opinion, more convenient and visual).
Go to Settings.
Go to Interface > UI Skin Properties and select Default MSI Afterburner v3 skin.
After the performed operations, the program window will look like this.
As I wrote above, we will overclock two parameters: the clock frequency of the graphics chip and the clock frequency of the video memory. Moreover, it is worth doing this separately, in order to understand in the event of a failure what the actual reason is. Oh yes, before overclocking, be sure to increase the power of the video card. Move the «Power Limit» slider to the maximum and click «Apply», in my case up to the mark of 114%.
Now the most important thing. Video core frequency. Overclocking itself is divided into 3 parts: increasing the frequency, checking the system in a stress test and checking stability directly in the game.
Let’s go in order. Increasing the frequency should be done slowly and carefully, I recommend adding 40-50 Mhz to the “Core Clock” parameter initially. So, add 50 and accept the changes.
Next, the second stage: run the FurMark program that we downloaded earlier, set the monitor resolution and run the stress test.
Go!
I recommend running a stress test for at least 10-15 minutes to allow the graphics card to warm up. At this stage, no matter how strange it may sound, our goal is to ensure that the graphics driver stops working, do not worry, nothing will happen to the video card, in this case it will simply reset the frequency to the base one and continue to work correctly. Now I will explain. For example, you added 50Mhz to your base frequency, ran a stress test, everything is stable. Then they added 50 again, again a stress test, again stable. Another 50 and the graphics driver refused to work correctly, or artifacts appeared on the screen.
But that’s what we wanted. And they achieved it because it is a kind of starting point in the opposite direction. The fact is that the video card thus signals us that it cannot cope with such a high frequency and that it needs to be lowered. We return to the frequency at which the chip gave out stable operation, and we add not 50, but 20 Mhz. Run the stress test again. If there are no problems, add a little more, test again. That is, the whole point is to catch the exact, maximum possible frequency value at which the system will work stably and correctly under load. After you «caught» this value, and the video card works without interruptions even under stressful conditions, I recommend running it in the game as well, because the test does not always reflect the real state of affairs regarding overclocking. Moreover, the game should be chosen one that will load your video chip on 90-100% and warm very well. Play for an hour or two. After running in a video game, two options are possible again, either everything is stable or not. As you may have guessed in the first case, the frequency should be increased further, in the second, lowered. You need to continue these dances with a tambourine until you find the very “golden threshold” of the frequency.
After you have found the threshold value for the frequency of the graphics chip, we do the same with the frequency of the video memory (Memory Clock).
In my case, I raised the memory frequency by 300Mhz, and the frequency of the GPU core (GPU Clock) by 150Mhz. We go into GPU_Z and see what happened in the end:
The initial frequency of the GPU core (Default Clock) was 1544MHz and became (GPU Clock) 1694MHz, that is, increased by 150MHz.
Video card memory frequency (Memory) increased from 2002MHz to 2152MHz and under load even up to 2300 MHz.