Abolitionists | Fallout Wiki | Fandom
Fallout 3 faction
Abolitionists
Hannibal Hamlin, the leader of the Abolitionists
-
Overview
-
Technical
Leaders
Hannibal Hamlin
Members
Caleb Smith
Simone Cameron
Bill Seward
Alejandra Torres
HQ
Temple of the Union
Lincoln Memorial (optional)
Related
The Railroad
Appearances
Fallout 3
The Abolitionists[Non-game 1] are a faction dedicated to help free and house escaped slaves in the Capital Wasteland of 2277. They are a very fragile faction, with few combative capabilities. It owes its survival mainly to the remote location of its headquarters.
Contents
- 1 Background
- 2 Organization
- 3 Interactions with the player character
- 4 Appearances
- 5 Behind the scenes
- 6 References
Background
The Abolitionists are a small group of former slaves, loosely organized under Hannibal Hamlin. Taking their name from the historic Abolitionist Movement, they revere Abraham Lincoln for his role in ending formal slavery in the southern United States through the Emancipation Proclamation and subsequent victory in the American Civil War, which paved the way for the 13th Amendment to the Constitution, abolishing slavery across the United States. Their goal is to resurrect Lincoln’s ideals and bring his vision, of all men being free and equal, to the wasteland. Unfortunately, a lot of their knowledge is of dubious quality, warped by centuries of mistranslation and poor record keeping.[1]
Hannibal organized the group about six years prior, around 2271, after escaping slavery himself. In 2277, it is based in the Temple of the Union, a ruined office building containing the head of the statue from Lincoln Memorial that Hannibal discovered while on the run. The Abolitionists use the building as a safe haven for runaway slaves, providing them with food and supplies, then helping them on their way to freedom. [2] However, the Temple is at capacity and lacks food, water, and shelter space to house runaway slaves. Hannibal wants to relocate to the Lincoln Memorial in downtown D.C., but requires aid to scout the area out and remove any threats, particularly super mutants. Relocating there would also help Hannibal create a proper shining beacon of hope for all slaves across the Capital Wasteland.[3]
Hamlin hopes that rebasing to the Memorial together with a restored Gettysburg Address will eventually spread stories of a safe haven for slaves, inspiring them to flee their slaving masters or even rise up against them in revolt. His followers agree with him, as the Abolitionists are the only ones making a stand against Paradise Falls and slavery in the Capital Wasteland: Neither Rivet City nor Owyn Lyons’ Brotherhood chapter bother with helping slaves.[4] Apart from sheltering freedmen at the Temple, small groups of Abolitionists are known to take on bounties against known slavers in the area. [5]
[5]
Organization
This faction consists mainly of a small settlement, centered around the severed head of Abraham Lincoln, a portion of the statue from the Lincoln Memorial, and a random block from the memorial’s inscription. The Temple’s residents revere the head as a symbol of the Abolitionist movement. The entire compound is a haven for freed slaves and anti-slavery activists.[Non-game 2]
Interactions with the player character
- Head of State: The Lone Wanderer has the option to help Hannibal Hamlin and his followers secure and settle the Lincoln Memorial or side with Leroy Walker and sell out the slaves, causing an attack on the Temple of the Union by the slavers. If the Lone Wanderer decides to assist Hamlin, they will have to eliminate Leroy and the slavers camped at the memorial. They will also have to bring Caleb Smith a picture of the location in order to restore the statue of Abraham Lincoln. When both of these tasks are complete, Hamlin’s group will take over the memorial and turn it into their home.
 They also restore the statue and the plaque atop it. The Wanderer can also decide to sell the artifacts of Lincoln, found inside the Museum of History, to the Abolitionists. They will pay high prices for the items’ symbolic meaning.
- Initially, the members of the Temple treat the Lone Wanderer with suspicion, not knowing whether or not they are a spy for the slavers. However, since the Lone Wanderer can express interest in scouting the Lincoln Memorial for Hannibal Hamlin and finding a picture of the Lincoln Memorial for Caleb Smith, they will befriend the Lone Wanderer and accept them inside the Temple.
- Alternatively, the Lone Wanderer can side with the slavers and kill the slaves at the Temple of the Union. The Lone Wanderer can also double-cross the slavers by killing them after selling out the slaves. Once the slavers are dead, one can continue on the original quest, helping the slaves get to the Lincoln Memorial.
- There are various random encounters that involve fugitive slaves.

Appearances
The Abolitionists appear only in Fallout 3.
Behind the scenes
The names of its members, along with the slaver Leroy Walker, are allusions to historical figures of the American Civil War.
References
- ↑ Hannibal Hamlin: «Let me tell you the story of Abraham Lincoln. He was born a Tucky Tearsman. The truth of this mysterious title has been lost, but we know it was a great honor. As a child he could not bear to see any animal chained or imprisoned. He was even known to set free the family Brahmin on occasion. As a youth, Abraham Lincoln fought Raiders in the war of the black hawks. When the war ended, he settled down to rule the Linoy, a small tribe of free men. He grew so famous that one day he was made President. He ruled over all the land. When he declared that all slaves must be freed, the slavers rebelled against his rule. They fought a great war, which Lincoln won. When he came to free the slaves, an assassin of the slavers struck him down.
 In the confusion, a few of the slavers escaped. Lincoln’s generals hunted them, but could not find them. The bombs ended the era of Lincoln, but we will resurrect his voice. We will restore the greatness of his vision where all men are created equal, and all men can live free!«
(Hannibal Hamlin’s dialogue) - ↑ Lone Wanderer: «What are a bunch of escaped slaves doing holed up here?«
Hannibal Hamlin: «We are trying to make a safe haven for all runaway slaves. We give food and supplies to any that find us, and help them on their way.«
(Hannibal Hamlin’s dialogue) - ↑ Hannibal Hamlin: «I want to move all my people to the Memorial site for the great Abraham Lincoln, but I need to know if it’s safe. I’ve heard rumors of Super Mutants infesting that area though. We need to send someone to check that out first.«
Lone Wanderer: «Why don’t you let them stay here?«
Hannibal Hamlin: «We don’t have enough room. There’s not enough water or food here.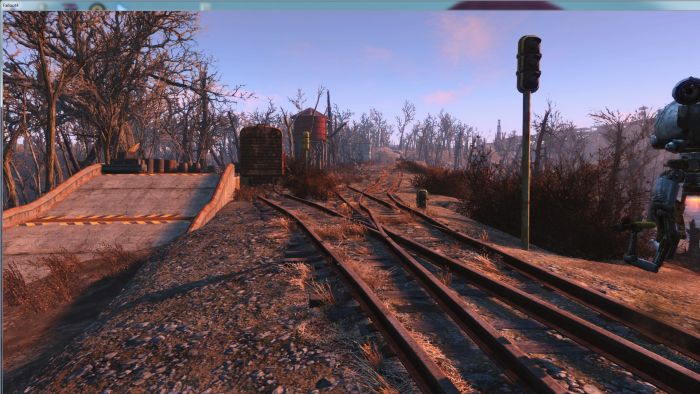 But I have a plan. A plan to take over a place that will be a shining beacon of hope for all slaves.«
(Hannibal Hamlin’s dialogue) - ↑ Lone Wanderer: «Why do you stay here? Why not keep running?«
Caleb Smith: «We are the only hope for runaway slaves everywhere. Rivet City, and the Citadel can’t be bothered with helping slaves. They turn a blind eye. We are the only ones willing to stand against Paradise Falls and slavery.«
(Caleb Smith’s dialogue) - ↑ Appearance of hitmen with the contract killing note starts if the player decides to become a slaver and delivers them to Grouse.
Non-game
- ↑ Fallout 3 Official Game Guide Game of the Year Edition p.43: «Slaves (Abolitionists)
Slaves are not so much a faction as a collections of victims. No one is safe from slavery in the Wasteland. If you are weak or venerable, you may be taken as a slave.
There is a band of abolitionist slaves deep in the Wasteland. They are all escaped slaves, seeking to end slavery for all time. You can learn more about them in Miscellaneous Quest: Head of State.»
(Fallout 3 Official Game Guide faction profiles) - ↑ Fallout 3 Official Game Guide Game of the Year Edition p.333: «3.10: TEMPLE OF THE UNION (LAT 13/LONG 15)
GENERAL NOTES
This small settlement literally sprung up around the severed head of Lincoln, a portion of the statue from the Lincoln Memorial, and a random block from the memorial’s inscription. How it arrived in this remote spot is anyone’s guess, but the Temple’s residents now revere the head as a symbol of the Abolitionist movement. The Temple is a reasonably fortified ruined building; you’re been greeted by Simone Cameron, a no-nonsense sentry wanting to know what you’re doing here. Remain polite to enter the premises. She gives you a Key once she deems you trustworthy. Or you can unlock the front gate yourself. This usually leads to violence.
You’re told to meet with Hannibal before the Abolitionists will begin to speak freely with you. To remain on friendly terms, swear to protect the Temple of the Union. You are given the Temple of the Union Key as a symbol of their trust. You can now freely talk to all the Temple’s inhabitants and explore their base. All the Abolitionists have Temple of the Union Keys to get in and out of the place. Caleb and Hannibal are also carrying a Storeroom Key. Conclude Miscellaneous Quest: Head of State favorably with the Abolitionists, and you receive Dart Gun Schematics.»
(Fallout 3 Game of the Year Edition Tour of the Capital Wasteland)
Desdemona | Fallout Wiki | Fandom
Fallout 4 / Fallout Shelter Online character
Desdemona
-
Bio
-
Info
-
Stats
-
Technical
Race
Human
Gender
Female
Affiliation
The Railroad
Role
Leader
Location
Railroad HQ
Appearances
Fallout 4
Fallout Shelter Online
Quests
Road to Freedom
Tradecraft
The Molecular Level
Boston After Dark
Memory Interrupted
Operation Ticonderoga
Underground Undercover
The Battle of Bunker Hill
Precipice of War
Rockets’ Red Glare
The Nuclear Option
Burning Cover
Tactical Thinking
End of the Line
To the Mattresses
Dialogue
Desdemona. txt
txt
SPECIAL
0 ST, 0 PE, 0 EN, 0 CH, 0 IN, 5 AG, 0 LK
Actual
0 ST, 0 PE, 0 EN, 0 CH, 0 IN, 6 AG, 0 LK
Level
8 → 94
Misc stats
| Hit Points: | 120→1300 |
| Action Points: | 50→50 |
Voice actor
Claudia Christian
Form ID
00045AD1
Ref ID
000508ED
Editor ID
Desdemona
Faction
RailroadFaction
CrimeRailroadHQ
Class
raiderClass
Combat style
csGunnerRanged
Aggression
Aggressive
Confidence
Brave
Assistance
Helps and Allies
Eye color
Hazel
Hair color
Red
Hairstyle
Evening out
“I have a question. The only question that matters. Would you risk your life for your fellow man? Even if that man is a synth?”— Desdemona on where the Sole Survivor’s loyalties lie.
Desdemona, also known as Dez, is the leader of the Railroad in the Commonwealth in 2287.
Contents
- 1 Background
- 1.1 Early Life
- 2 Interactions with the player character
- 2.1 Interactions overview
- 2.2 Other interactions
- 3 Inventory
- 4 Notes
- 5 Appearances
- 6 Behind the scenes
- 7 Bugs
- 8 Gallery
- 9 References
- 9.1 Non-game
Background
Desdemona is the leader of the secretive organization known as the Railroad. Previous security breaches have lead to Desdemona being wary of those who manage to follow the Freedom Trail and enter the passcode to access the Railroad HQ.[1][2] Despite this, those who can prove themselves to her will, in time, earn her respect,[3] often to the ire of her second-in-command, Dr. Carrington.[4] As the leader of the Railroad, Desdemona is in charge of day-to-day operations and maintaining contact with the widespread network of safehouses. [2]
[2]
Early Life
Desdemona first signed up with and joined the Railroad sometime before September 2276, serving under Pinky Thompson.[5] Desdemona was voted into the Alpha position following the resignation of Thompson around December 2277. During her tenure, she, along with the assistance of Dr. Carrington and Deacon, made major changes concerning the organization’s operational security, leading to a drastic increase in the number of synths successfully rescued. During her time as the Railroad leader, she devised a system of railsigns and improvements to the dead drops used for communication, and added Tinker Tom, Glory, and Tommy Whispers as members to Railroad HQ. P.A.M. was also discovered at some point during Desdemona’s time as the leader.[2]
Interactions with the player character
Interactions overview
| Interactions | ||
|---|---|---|
This character is involved in quests.
|
|
|
Other interactions
- The Sole Survivor must seek her aid after dealing with the courser and getting his chip, as she and her people are the only ones who can decode it.
- If the Sole Survivor does not speak to Desdemona prior to entering the Institute and accepting a mission, she shuns them and the Railroad questline ends.
- If one is a Railroad agent but is banished from the Institute then this also ends the Railroad questline as the Sole Survivor remaining undercover was vital to the plan. Desdemona encourages the player character to stop the Institute with the Commonwealth Minutemen as she sees it as the best remaining option for protecting the synths.

Inventory
| Apparel | Weapon | Other items |
|---|---|---|
| Fatigues | Pipe gun, .44 pistol or 10mm pistol Railway rifle (during Tactical Thinking and End of the Line) |
Railroad HQ key |
Notes
- When failing the Railroad questline and destroying the Institute with the Minutemen, Desdemona may not offer dialogue outside of quests, instead remaining completely silent.
- At some point in her life, Desdemona knew someone named Sam, as her last words when killed are, «Sam… I’m coming home.»[6]
Appearances
Desdemona appears in Fallout 4 and Fallout Shelter Online.
Behind the scenes
- Desdemona is a character in William Shakespeare’s play Othello.[Non-game 1]
- The name «Desdemona» is derived from the ancient Greek δυσδαιμον («dysdaimon») which literally means «bad-fate.
 » It is generally translated to mean «ill-fated» or «unlucky.»[Non-game 2]
Bugs
- PC Playstation 4 Xbox One After completing the main questline with the support of the Commonwealth Minutemen, if on good terms with the Railroad and the Sole Survivor returns to their hideout, Desdemona will speak of Glory as if she had died even though Glory can be seen walking about. If trying to interact with Glory she will stay silent and not say any dialogue.[verified]
- PC Playstation 4 Xbox One In her speech to Railroad HQ informing them of the Sole Survivor’s successful infiltration of the Institute, she may incorrectly refer to them as «Wanderer» even if they chose a different code name when joining the Railroad.[verified]
- PC Playstation 4 Xbox One While receiving the first To the Mattresses quest following The Nuclear Option, the dialogue option to tell Desdemona that the player misses Glory will be available even if the main story was finished with the Minutemen and Glory is alive, possibly even standing right next to Desdemona at that moment.
 It is useful for gaining a large approval boost for several companions including Deacon and Curie.[verified]
Gallery
Desdemona’s hero card in Fallout Shelter Online
Desdemona’s maxed hero card in Fallout Shelter Online
References
- ↑ The Sole Survivor: «I need to build a Signal Interceptor to get into the Institute.»
Desdemona: «Even if one of my own agents told me that, I’d be skeptical. And from a stranger…»
(Desdemona’s dialogue) - ↑ 2.02.12.2Railroad HQ terminal entries; PAM mainframe terminal, Desdemona (77-)
- ↑ Desdemona: «Without you those synths would’ve surely been lost. Hell, we wouldn’t even have had the chance to defend them.»
(Desdemona’s dialogue) - ↑ Desdemona: «I don’t want to talk about Blackbird. Carrington is sure to give me an earful about it.»
(Desdemona’s dilalogue) - ↑ Railroad HQ terminal entries; Pinky (73-77)
- ↑ Desdemona: » Sam.
 .. I’m coming home.»
(Desdemona’s dialogue)
Non-game
- ↑ (Wikipedia’s entry on Desdemona)
- ↑ (Desdemona definition)
Subway quests in Fallout 4
Locations Subway HQ
Institute
Cambridge Polymer Laboratories » Achievement points 10 Award type Bronze
Technical information
editor id
RR201
base id
000b2d48
|
Previous quest |
Next quest |
|---|---|
| Agency work Molecular level |
on the verge of war End of pretense (if the mission is to fail) |
RR201 000b2D48. » 10 Bronze
0021
 tunnel
Detailed walkthrough
After completing the main quest «Molecular Level», the Underground will want to contact an anonymous informant from the Institute — Patriot, who is helping the synths escape. Technician Tom will give an encrypted holodisk with a message to the Patriot, which must be activated in any Institute terminal in the hope that the Patriot will see the message and get in touch.
After downloading the message, a response will come from the Patriot, where he asks the Survivor to meet in the pantry. The patriot turns out to be Liam Binet, a scientist at the Institute and the son of Alan Binet, head of the robotics department. Liam is surprised that someone was able to decipher his message, which he sent with every synth he rescued, so they could contact him, and is thrilled at the prospect of working with the Underground.
Z1-14
He introduces the Survivor to the Z1-14 synth, which helps Liam free those in need. They discuss the number of synths ready to escape and come up with a plan to free all 13 comers at once. In order to carry out the plan, Liam needs to bypass the security system and open several doors, but he cannot break it on his own, breaking it requires a pre-war password from the surface. Liam advises turning to the Underground for help in finding the password.
Returning to Desdemona at the Railroad HQ, the Survivor is instructed to file a report at the PAM terminal. PAM analyzes the data and concludes that the login information refers to Wilfred Bergman and can be found at the Cambridge Polymer Laboratory. Desdemona instructs the Survivor to find the password while HQ reviews Liam’s plan.
The password is located in the laboratory section of the building on the second floor. However, regardless of the order in which you complete it, the Cambridge Polymer Lab quest must be completed before you can leave the building.
Considering the release plan, Desdemona comes to the conclusion that if successful, Liam will no longer be able to help the synths, as the Institute will go on alert after such a security failure. She suggests using this opportunity to free all the synths in the Institute. To do this, every synth must rise up and fight for their freedom, instead of operating in the shadows. Desdemona fears that Liam will not support such a plan, so after handing over the password, she advises to limit contact with the Patriot and coordinate with Z1-14.
Back at the Institute, the Survivor gives the password to Liam, then meets with Z1-14 to discuss Desdemona’s proposal. He agrees to the plan and asks for 24 hours to make a final decision. After talking to the other synths and making sure that many want to escape, Z1-14 asks the Survivor to kill some guards so that a few synths can set up a construction accident and go underground where they can prepare the necessary weapons. Optionally, the Survivor can offer Z1-14 an additional weapon for the rebellion, which will need to be collected in the pantry.
The guards are in the maintenance tunnel between the Robotic Control and Robotics departments. After eliminating them, the synth workers will blow up the tunnel when the Survivor leaves the location. In a conversation with Z1-14, he will express his gratitude and warn that it will take some time to prepare. It is necessary to continue to cooperate with the Father up to a certain point. At this point, the quest is interrupted until the «Launch» quest is completed.
After meeting with the Directorate, the envoy will run to the meeting room with a message from Z1-14. Arriving at the rendezvous point and talking to Z1-14, the Survivor learns of an impending attack on the Railroad headquarters by the Brotherhood of Steel. It is necessary to warn Desdemona as soon as possible.
Notes
- You don’t have to build the Signal Interceptor along with the Underground to get this quest. After completing the Molecular Level, talk to Desdemona and accept her offer to work with the Underground. After that, the quest will begin.
- The quest cannot be completed if the Survivor becomes hostile to the Institute.
- If you fail the quest, it will be impossible to continue the main storyline with the Underground.
- While working with the Father, the Mass Fusion quest must be completed, which makes the Survivor hostile to the Brotherhood of Steel. Further completion of story quests for this faction will become impossible.

- The «Give Weapons to the Rebels» side mission will end when the required amount of weapons is placed in the indicated locker. A stack of weapons will count as one when moving, so it’s best to place them one at a time. The weapon crate is located opposite the back room where the Survivor meets with Liam Binet, nicknamed the Patriot.
- If all guards are not killed quickly enough when the Survivor is discovered, the Institute may become hostile.
- The final encounter with Z1-14 (after completing the Launch quest) will result in the failure of Operation Ticonderoga. The player can ignore the emergency meeting with Z1-14, complete the quest, and then talk to Z1-14.
- X6-88 hates almost every Survivor’s progress on this quest. He will turn hostile if you attack the guards and fail Mass Fusion.
| The rest | In sheep’s clothing • Your order is accepted • Pull the cork • Take a bow • Monsters can be found here • Cambridge Polymer Laboratories • Boy in the fridge • Beer churning • Pickman’s gift • Last flight « Constitution» • Mysterious Meat | |
| Quests of partners | It is long time • Far road • Beneficial intervention • Unproductive behavior | |
 » General Atomics Galleria Shopping Center • Clear Warehouses in Goodneighbor • Clear Training Ground • Fallen hero • Transport Tour 81 • Kill Zeller and save the surviving merchants • Find the treasures “Jamake-Plain” • Treasure hunts • To ask the death of Samuel
9029
• Safe Path • Great Hunt • Winds of Change • Data Recovery • Heretic • Life on the Edge • Forbidden Knowledge • Ideals of Acadia • Trial of Brother Devin • Blood Wave • Search and Destroy • Impregnable Walls • Ablution • Stop the Fog • Witch Hunt • Hunter Hunt • Arrival • The Rupture • Rupture 2 • Rupture 3 • Initiation Ritual • Brain Death • Brain Death Part 2 • The Atom Wants It • Mist Visions • The Cost of Memory
TRAPRA attack • Dangerous catch • Problem with capacitors • SuperMutant in fog
Attack of the Brotherhood of Steel • It was a secret, it will be revealed • Conquest of the Commonwealth • Minutemen • Guarding the goods • Must be thrown away garbage • Under the collar • Settlement: extortion • Settlement: capture • Settlement: clean up • Settlement: subdue the settlement • Once and for all • Strict discipline
Bring the meat of the Khoilles to Maddox
| Out of water • 20 lee • Control • Keep |
9003 Main tasks
Prologue
War … War never changes .
Your «New Game» begins with a black-and-white video showing a fusion-powered world. But, as often happens, not everything went well…
After the cutscene ends, the game allows you to choose your character’s gender and customize your appearance. After playing enough with the editor, go inspect the house. To the left of the bathroom will be your child’s nursery — Sean. Here you can play with him. To the right is the living room and kitchen.
In the kitchen, you will be greeted by a friendly robot butler named Codsworth . After a while, you will hear the doorbell ring, Codsworth is busy, so you will have to open the door. An employee of the Vault-Tec company will be on the threshold. According to him you got your pass at «Vault 111» (choose the answers in the dialogue at your discretion, they will not change anything significantly).
After accepting the agent’s offer, you will be asked to complete a registration form. This time, you will be prompted to choose a name for your character, as well as allocate points to S.P.E.C.I.A.L .
After completing the questionnaire, go to the nursery and calm the child. After talking with your significant other, Codesword will announce the breaking news on TV. After interrupting the broadcast, run out through the front door and run along the street. There will be soldiers on the street who will show the way to the shelter.
Introduce yourself to the soldier at the entrance fence, he will let you through. Stand on the lifting platform, it will lower you into the shelter just before the explosion on the horizon. When the lift stops, go along with the survivors to the registration point, take the jumpsuit there. Next, follow the doctor down the corridor. He will take you to the cryopod. Go into it.
The prologue is over.
Time is running out
You were frozen in a cryocapsule, after some time you wake up and see how your child is taken away, and your husband/wife is killed. After this dramatic scene, you are frozen again.
Leave the shelter
You will wake up from the alarm in the shelter, now your task is to get out of it. To do this, leave the room with the capsules and go to the end of the corridor. The door to the exit will be blocked and you will have to go around. Focus on the mini-radar located at the bottom of the screen. Follow the indicated point, you will get into a room with generators ( Warning: passing close to them is life threatening! ). Along the way, deal with radioactive cockroaches and open the door.
In the next room, take pistol and stimpacks (they restore 30% of health), also take the ammo in the box. The next door is also closed, to open it, use the terminal on the table, find the command to open the door in it. When you enter the hallway, the game will prompt you to kill the cockroaches with the V.A.T.S.
After passing the corridor, you will find yourself in the room where you were registered at the time of the disaster. Near the ski lift you will find «Pip Boy» , use it to activate the panel. Go to the elevator and rise to the surface.
Return home
A marker will appear on the surface in your mini-radar. Head to him, he will lead you to your house, where Codsworth will be waiting for you.
Talking to him will tell you what happened to the rest of the people and how many years have passed. After that, explore the area with Codsworth. After entering a couple of houses, you will have to fight flying cockroaches. Be careful, each of their hits irradiates you. Get rid of it will help antiradin . After searching the houses, Codsworth will assume that your son can be found in Concord.
Explore Concord
Head east across the bridge. You will be taken to the location «Red Rocket» , where you will be met by a friendly dog. This is a pretty useful companion that you can give orders to. But if you think that the dog will interfere, you can send it to « Sanctuary» .
After defeating the mole rats, move towards the marker. Concord will be under attack by riders, having defeated a few at the entrance to the city, go to the museum, where there are still civilians.
Commonwealth Jewel
Getting to Diamond City
The way to the big city will pass through many dangers, such as ghouls at Lexinton and Corvega workshop where the riders settled. So, before you go further in the story, take the time to level up your character, additional missions abound for this.
In front of the gates to the city you will meet a local journalist — Piper. With it, you will pass through the gates to the city. Outside the gate, the mayor of the city will come out to you. If you have enough charisma , you can get the necessary information about Sean from him. If you forgot about this skill when you upgraded the hero, then after entering the city, talk to the locals to find out where to start looking.
Get to Valentine’s Agency
You have been advised to contact the local detective. Follow the marker on the mini-radar and enter the agency.
In place of the detective himself will not be. According to his secretary, he disappeared. Your task is to find him.
Freedom Call
After entering the building, deal with the enemies on the second floor, turn left and go up the stairs, making your way towards the civilians. Talk to Preston Garvey, he will ask you to deal with the raiders on the streets, using power armor. To activate it, find the generator, it is located in the center of the first floor behind a locked door (it is better to take it immediately so as not to return later). After inserting the generator into the suit, rip off the minigun and jump down, falling in power armor from any height does not cause damage. With this suit, it will not be difficult to kill all the raiders.
But the raiders will only be a warm-up act for a monster called the Deathclaw. During the fight, do not let him close to you and shoot him from a safe distance. After defeating all enemies, return to Preston Garvey. In a conversation with him, you will learn that the search for Sean should begin at Diamond City. To complete the quest, talk to Preston at Sanctuary.
Valentine’s Day
After completing the quest «Jewel of the Commonwealth» , your next goal is to find the detective — Nick Valentine .
Find Valentine
After talking to the secretary, exit Diamond City and head east to Boston Common. There, find the entrance to the underground metro. The way there is very dangerous. You may encounter ghouls and super mutants, so prepare well for this. At the entrance to the metro, a large mutant will come out to you — Swan .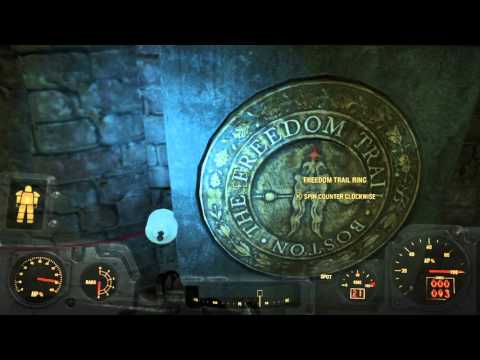
It is difficult to overcome him. He has a lot of health and he has strong blows, but he is very slow. Keeping him at a safe distance, shoot him with your weapon. Killing him will give you Furious Power Brass Knuckles. It will be easier to defeat him with a found launcher.
Release Nick Valentine
The old subway will be full of Gangsters , they will be armed with machine guns, which makes them difficult enemies. Entering each new room, carefully look around and evaluate the situation.
After going through a long tunnel you will see a door to Vault 114 , open it with your Pip-Boy. Inside you are waiting for several rooms with gangsters. In the last room on the second floor, you will hear Dino and Nick talking, you can take advantage of this and silently kill the guard. Then open the door to Nick using the terminal.
After talking to Valentine, take Bobblehead (gives the Speech Upgrade) and get to the surface.
Get out of the hideout
Follow Nick to the exit of the hideout, he can break open some doors, so the path will be much shorter. But at the exit from the shelter, the leader of the gangsters will be waiting for you.
The following scenarios:
- If you have enough charisma, you can try to defuse the situation. Then the gangsters will count to 10 and during this time you can run away or prepare for a fight
- You can immediately choose the path of violence, but for this it is better to prepare a grenade or Molotov cocktails. They will give you a temporary advantage and a chance to hide behind cover. The best solution would be a mine cover, without getting involved in the conversation, we throw it at the feet of the gangsters, run back to a safe distance, after which we attack and solve all the problems at once.
Once you get to the surface, return with Nick to Diamond City.
Revelation
Tell all
Arriving at the agency, take Ellie’s reward for finding the detective. Then sit down on the chair and talk to Nick.
In the conversation, you need to tell the details of Sean’s disappearance. After telling everything, Valentine will point to Kellogg, a local thug.
Kellogg’s House
Together with Nick, go to the Kellogg’s house, unfortunately, the house will be locked with a key that can be obtained from the mayor.
Go to the platform indicated by the detective, go up to the mayor’s office on it. You can steal the key, it lies in the safe near the terminal, but for this you need to hack the computer (level: easy). The easiest way to get the key is to ask the mayor for it. After you have received the key, return to the detective.
Search for clues
After entering the house, look around and find the button under the table.
Enter the secret room and find the Kellogg cigar. Give it to Psina, she will take the trail.
Reunion
Trail
Dog will lead you on the trail, but periodically he needs new clues. You must find the following clues:
- «San Francisco Lights» cigar — will lie by the lake.
- bloody rags — after passing the railway tracks and finding a passage, they will hang on the railing
- double is a mannequin in the basement where the dog will take you
- broken Stormtrooper — talk to him, Dog will take the trail
After reaching Fort Hagen , you need to get inside. To do this, turn left from the walled passage and go to the underground parking, find the right doors there.
Tip: take Nick as your partner, he can be useful in battle, and can also hack terminals (this is very useful here).
Fort Hagen
The fort is filled with synths , there is at least one in each room, grenades will help to deal with them, you can also use the narrow passages between the rooms and kill them one by one. Climb to the third floor and find the elevator, go down on it. There will be a turret and two synths right along the corridor, watch out for your teammates so that they do not start the fight ahead of time.
Tip: carefully inspect the premises, you can find a lot of useful things in them, and with the help of Nick, find rare things.
As a result, you will find Kellogg and some synths helping him. It will not be possible to reduce the conversation to a peaceful solution, get ready for a battle that will be much more difficult than most ordinary skirmishes with enemies. Before entering the room, it is better to fully restore health, take Psycho, Med-X and Berry Mentats (improve the visibility of enemies using stealth combat) and save. In the battle, you can use the «Fat Man», which is locked in one of the rooms next to the dining room, in this case it is better not to start a conversation with Kellogg, but immediately attack him from a distance. Having dealt with the enemies, inspect the terminal in the room, from it you will receive additional information about Sean’s whereabouts, in it open the doors to the elevator.
Talk to Nick in Diamond City
Dangerous Thoughts
«House of Memories»
In the detective agency you will meet Piper and Nick, after talking with them, you will learn about a place called «Memories» can view old memories. It is there that they will help you extract information from Kellogg’s brain.
If you took Nick on the mission «Reunion» , then you need to talk to Piper in the office of the «Social Events» company. The conversation will lead to the same outcome.
Once you’ve chosen your partner, head to Goodneighbor , this small town is near Boston Common where you rescued Nick . In the city, a local bandit will attach to you with threats, but the local mayor will settle the conflict. After this scene, go down the narrow alleyway and enter Dr. Amari’s office. At the entrance you will be met by Irma — the secretary and Nick, provided that you have taken Piper or Dogmeat as partners. Go down to the doctor and sit in the memory capsule.
Kellogg’s Past
At this point in the quest, you only need to listen to the mercenary’s memory fragments. You will start with his difficult childhood and at the end you will find the fragment you need regarding the Institute.
When you’ve finished examining your memories, exit them using the TV in the last fragment. Now your task will be to find the escaped scientist — Virgil in the Glowing Sea location. From the words of Dr. Amari, this location is very radioactive and you can’t do without power armor there. But you can do without it, for this stock up «Antiradinom» and «Rad-X» .
Glowing Sea
Finding Vergil
First, head southwest of Diamond City, almost to the very end of the map.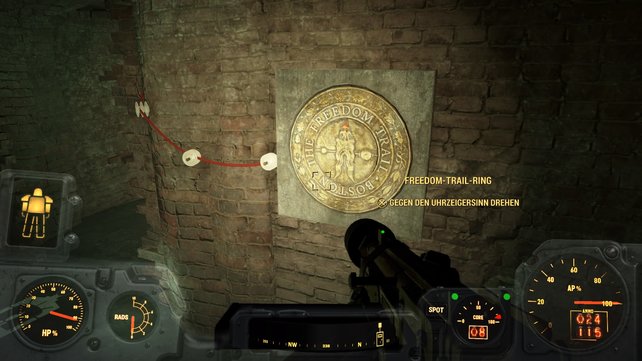 This area is inhabited by dangerous monsters such as: Deathclaw and Radscorpion. Try to avoid skirmishes with them, especially if you don’t have power armor.
When you reach the specified point, focus on the marker that is displayed on your mini-radar. Whatever you choose: go in power armor or with a supply of medicines, you will need to run very quickly, since periodically radiation can range from 1 RAD to 9GLAD.
The marker will lead you to a small settlement — Atom Crater . Peaceful fanatics live here, you should not start a fight with them. In one of the houses you will see Isolde , after talking with her you will find out the whereabouts of Virgil, but on the condition that you do not threaten her. You can also just kill her, and on her body you can find a letter pointing to Rocky Cave .
Runaway Scientist
You will eventually reach the right cave. But be careful, not far from the entrance lives the Death Claw. Going inside, you will see turrets and a robot. If you don’t attack them, they won’t touch you. At first, Virgil will be hostile, as he believes that the Institute sent you, but after some persuasion, he will agree to help you in exchange for a serum he has developed.
Hunter/Prey
Institute Ruins
Advice: It is better to take Nick Valentine as a partner for this task, it will be very useful in hacking terminals, of which there will be a lot.
Fast travel back to Diamond City, from there follow the marker to «Institute Ruins» . Upon arrival, go to the «Pip-Boy» [TAB] menu, then go to the «RADIO» tab and select the desired signal. Focusing on the sound of the signal, you need to find its source, it will be building «Greentech Genetics»
Hunter
Entering the building you will be met by mercenaries who also came for the hunter. So first you will need to clear 3 floors. The entire building is teeming with mines and other traps, and open rooms and corridors are shot through by turrets. Grenades and hacking terminals will be useful here, with which you can disable the turrets.
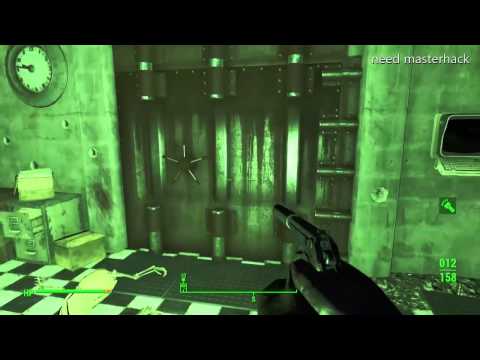
A hunter is waiting for you at the very top, he won’t say anything sensible. In combat, the hunter can become invisible, which makes him difficult to kill. Try to deal with him as quickly as possible. How to deal with him, take the chip from him. There is a synth girl in this room. According to her, she is not a member of the Institute. To free her, you need to know the password from the terminal (located in the red box) or ask Nick to hack it.
Tip: There is an easier way to deal with a hunter. If you learned the future from Mother Murphy, you will know the deactivation code for the hunter. Select the desired line in the dialog and the hunter will turn off.
Molecular level
Analysis chip
The chip you took from the hunter’s body must be shown to Dr. Amari, go to Goodneighbor. Unfortunately, she won’t be able to decipher it, but she will tell about an organization called «The Underground». They can help you, but they are not easy to find. To do this, go to Boston Common . Find the robot by the lake, talk to him, he will give an indication of three buildings: Paul Revere’s house, the Old North Church, the Old Capitol and Bunker Hill.
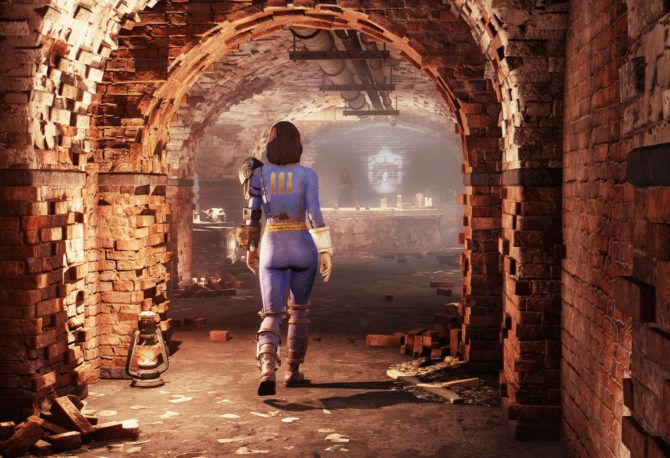
You need to go to Old Church . A couple of ghouls live near it. After dealing with them, go into the building. Ghouls are also waiting for you there, carefully inspect the church and find a white drawing, follow it down. In the catacombs, go to the end until you see a circle with inscriptions on the wall.
Rotate the circle to enter the correct password — RAILROAD . To do this, point to the desired letter and click on the button in the center. Outside the door you will be met by representatives of the «Underground». After talking with them, give the chip to decrypt the files.
Teleport
Return to Virgil with the data using fast travel. The scientist will give you the blueprints for the teleporter. In order to build it you need to find an assistant . You can go to any of the organizations, but in order to get their help you need to complete task 0421 . The easiest way is to go to the minutes. Travel to Sanctuary and speak with Preston Garvey, he will direct you to Sturges. It will help decipher the blueprints. After that, in the construction mode, the «Special» tab will appear with all the necessary details.
To build you need:
- Reflector Platform — 0 aluminum, 3 wires, 5 steel and electricity
- Emitter — 2 rubber, 10 steel, 5 copper, 3 wires and 1 military wiring diagram
- Console — 2 rubber, 3 copper, 5 steel and 1 biometric scanner
- Repeater Antenna — 3 Copper, 3 Steel, 6 Textile and 3 Gold
Where to find the missing components you will be shown on the map, connect the electricity generators to the buildings.
