Dark Souls Remastered full walkthrough guide
(Image credit: FromSoftware)
A Dark Souls Remastered walkthrough is an incredibly helpful thing to have for players new and old — this is a famously hard game, and one that’s also not always so easy to decipher even when Basilisks aren’t turning you to stone. A good Dark Souls walkthrough won’t just help you survive, but even thrive in the cutthroat realm of Lordran, with info on bosses, dungeons, weapons and more. We’ll lay out everything you need to know about Dark Souls Remastered below — good luck, undead…
- Dark Souls Remastered explained: best class, combat tips, humanity and summoning
- Dark Souls Remastered tips for farming Souls and Humanity
- Dark Souls Remastered Boss guide
- Dark Souls Remastered Covenant guide
Dark Souls Remastered: UNDEAD ASYLUM
Grab the Dungeon Cell Key from the corpse in front of you and use it to escape your cell. Make sure to read all the orange messages as you continue on, for they are left by the game itself and serve as mini tutorials. Don’t worry about the undead at the moment, for they won’t attack unless attacked.
Proceed (you can’t get lost) until you’re outside. Light the nearby bonfire, then rest at it. Resting at a bonfire will always heal you, replenish your flasks, refill you spells, and respawn all minor enemies. You can also level up and do other things, though not at the moment. Enter the large wooden double doors and be ready for an ambush.
Run past the Asylum Demon and through the small doorway along the left wall, which will close behind you. Or, just be a badass and Chuck Norris the monster right now…
OPTIONAL BOSS: ASYLUM DEMON
Above: Defeating the Asylum Demon during your first encounter (fists and fire methods)
You can defeat the Asylum Demon here and now, without a decent weapon or Estus Flasks, for a bonus reward: the Demon’s Great Hammer. Switch to your fists (which swing faster than the sword hilt and cost less stamina), lock on to him, and circle strafe around him to his left. If you stay close and behind him, you’ll be safe. Two of his four attacks only hit in front, so if you keep at his rear, they’ll whiff. When he raises his hammer to swipe it horizontally to his left, roll towards his right side in order to stay behind him. When he jumps into the air, back away to avoid the ensuing slam attack. Attack when you can and you will eventually defeat him. Just make sure not to get backed into the corner like we did.
Also, if you chose Black Firebomb instead of Master Key as you gift, you can make quick work of the demon.
Just after reaching the second bonfire, you’ll find yourself at the start of a long corridor. Aside from the Asylum Demon you just ran into, this is the first time you can be hurt by an enemy: be wary of the archer at the end of the corridor.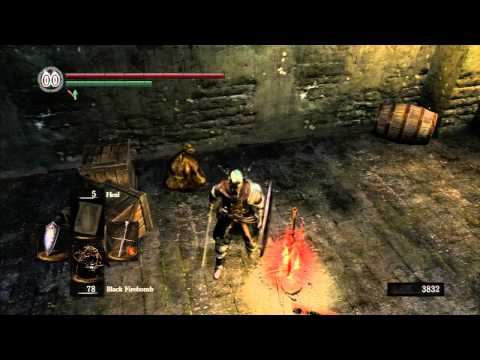 Quickly run forward and into the room to your left. Grab your shield from the corpse, put it in your left hand using the equipment menu, and then press left on the d-pad once you’ve exited the menu to equip it.
You can now block with RB. Hold this button down and advance on the archer. He’ll turn tail and run; you can sprint after him and take him down quickly, or catch up with him later. Don’t forget to check the corpse on the ground near the archer’s initial position for your class’s primary weapon (a Hand Axe for Pyromancers). Continue on and traverse the white light (which we’ll refer to as “fog doors” from now on).
Head right and move slowly up the stairs. An undead will push a boulder down at you once you pass a certain height, so be ready to roll off (tap B) to the right. The boulder will have busted through the wall at the bottom of the stairs. Enter this room and speak to the wounded knight. Hear him out. He’ll give you precious Estus Flasks (your main source of healing) and the Undead Asylum F2 Key.
Ascend the stairs again. There will be a lone undead wielding a sword. Kill him and pass through the gate. Grab the Pyromancy Flame from the corpse on your right and equip it in the secondary slot of either hand (we prefer the right). You can now cast Fireball 8 times before resting at a bonfire, however, save it for the boss.
Around the corner to the left there will three undead: two with swords and one with a bow. Catch their attention and retreat so you can defeat the melee fighters without worrying about the archer, then return to easily dispatch the bow-wielder.
Now that you’re better-equipped, you should enter the fog door to fight the Asylum Demon. You can proceed past the fog and take on an undead soldiers, but unless you want the souls and parrying practice, there’s no point to defeating him as the door he guards cannot yet be accessed.
BOSS: ASYLUM DEMON
With your weapon and Pyromancy Flame, this battle is extremely easy. You can adhere to the above strategy from the “optional” section, but you really need only get close, wait for any attack, roll away, then throw a fireball while the demon is in his recovery state. Don’t forget to equip your axe and press RB just after falling from the initial ledge to do a plunging attack. This puts you at a huge advantage right out of the gate. Killing the demon garners you one Humanity, 2000 souls, and the Big Pilgrim’s Key. Use the key on the large blue door nearby and run forward to the edge of the cliff.
Jump to Section
- Firelink Shrine
- Undead Burg part 1
- Undead Burg part 2
- Undead Parish part 1
- Undead Parish part 2 (First Bell)
- (OP) Grinding for Souls & Finding Goodies in Darkroot Garden
- Lower Undead Burg
- (OP) Returning to the Undead Asylum
- The Depths
- Blighttown
- (OP) Exploring Blighttown’s Swamp
- (OP) Undead Dragon & Valley of the Drakes
- Quelaag’s Domain (Second Bell)
- (OP) Moonlight Butterfly & the Divine Ember
- (OP) Darkroot Basin, the Hydra, and Dusk
- Sen’s Fortress part 1
- Sen’s Fortress part 2
- Anor Londo part 1
- (OP) Painted World of Ariamis part 1
- (OP) Painted World of Ariamis part 2
- Anor Londo part 2
- Return to Firelink Shrine & Placing the Lordvessel
- Sif and the Darkroot Garden
- New Londo Ruins
- The Catacombs
- Tomb of the Giants part 1
- Tomb of the Giants part 2
- (OP) Dark Sun Gwyndolin & the Blade of the Darkmoon Covenant
- Duke’s Archives
- Crystal Cave
- Demon Ruins part 1
- Demon Ruins part 2
- (OP) Great Hollow & Ash Lake
- Lost Izalith
- (OP) Sanctuary Garden (New Content)
- (OP) Oolacile Sanctuary & Royal Wood (New Content)
- (OP) Oolacile Township (New Content)
- (OP) Chasm of the Abyss (New Content)
- (OP) Black Dragon Kalameet (New Content)
- Kiln of the First Flame & Gwyn, Lord of Cinder
- 1
Current page:
Dark Souls Remastered full walkthrough guide
Next Page Dark Souls: Firelink Shrine
I’m currently GamesRadar’s Senior Guides Co-ordinator, which means I’ve had a hand in producing or writing all of the guide and tips content on the site.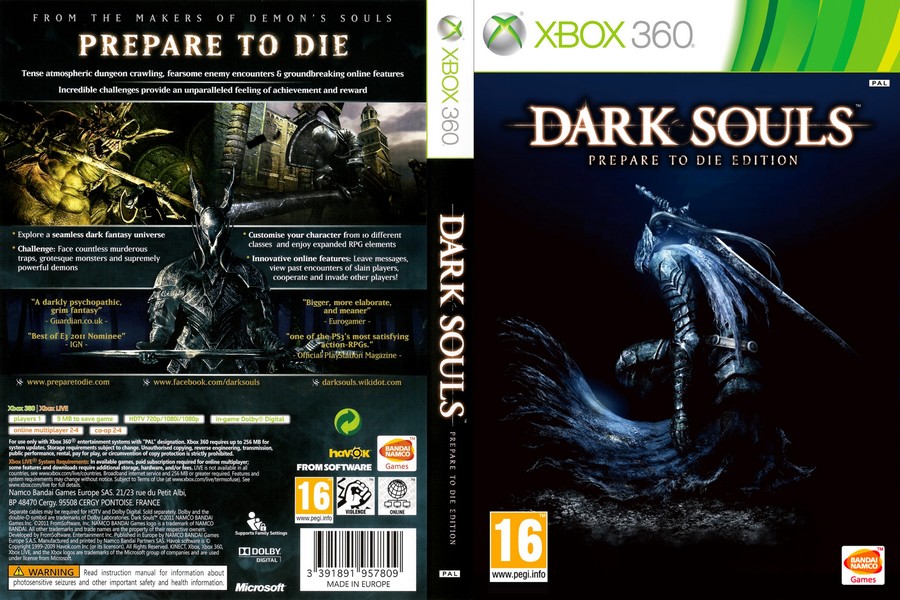 I also write reviews, previews and features, and do video. Previously I worked for Kotaku, and the Official PlayStation Magazine and website. I’m a big fan of open world games, horror, and narrative adventures.
Dark Souls — Komplettlösung mit allen Bosskämpfen
Hier findet ihr die Komplettlösung zu Dark Souls 2.
Update: Das Epos nähert sich der Vollendung. Endlich, nach 60 Seiten, ist ein Licht am Ende des Tunnels zu sehen. Heute fanden die Wege durch Sens Festung und Anor Londo endlich ihren Weg in die Lösung. Auch die Archive des Herzogs und der Kampf gegen Seath, den Schuppenlosen wurden erfasst und wer so weit ist, hat nicht mehr so viel vor sich. Bis morgen Abend sind dann auf jeden Fall auch noch das elende Grabmal der Riesen und natürlich die Ruinen von Neu Londo drin. Und ich kann endlich mal wieder etwas anderes machen.
Eine Lösung für Dark Souls? Das braucht doch keiner. Nur weil ich auf meinen Notizen so Dinge wie «F. .. THIS STUPID DRAGON!!!» ungefähr zehnmal wiederholte und es erst nach langen, endlosen Schlachten löschen und durch etwas Sinnvolleres ersetzen konnte. Aber Spaß beiseite, dieses Spiel ist wirklich hammerhart und vor allem die Bosse können einen schon mal ganz schön den Feierabend ruinieren.
Wenn ihr eine einzige Grundregel sucht, die eine, die in faste jeder Situation gilt und mit der man sich am besten zu behelfen weiß, dann wäre es wohl diese: Bleibt einfach ganz entspannt, geht ruhig und methodisch vor und rennt nicht einfach blind voraus. Wer ohne viel nachzudenken vorstürmt, findet sich nicht nur sehr schnell am nächsten Lagerfeuer wieder, sondern hat auch echte Probleme dabei, die sterblichen Überreste des letzten Lebens anschließend wieder einzusammeln.
Ein zweiter Rat wäre, alles zu erkunden und auszuprobieren. Selbst nach weit über 100 Stunden finde ich noch neue Sachen, Ecken und Tricks. Dieses Spiel steckt so voll von allem, was man nur spielen kann, dass es für alle und noch mehr reicht.
Werden wir nun etwas konkreter. Vor jedem Start bei einem der Lagerfeuer solltet ihr euch klarmachen, was ihr wollt, dann seid ihr nicht enttäuscht, wenn ihr mal sterben solltet. War alles so geplant, könnt ihr euch dann sagen. Im Grunde gibt es drei Arten von einem «Run». Die erste Variante ist die Erkundung. Ihr seid neu an einem Feuer oder wisst, dass es irgendwo einen Gang gibt, den ihr mal näher angucken wollt, aber ihr kennt das Gebiet noch nicht wirklich. Dann seid langsam, methodisch, vorsichtig, weicht im Zweifel immer zurück und schaut in jede Ecke, um ja nichts zu verpassen, sei es Gegner oder Extra. Die zweite Art ist der Seelen-Run. Ihr wollt einfach nur Seelen farmen. Dafür such ihr euch ein Gebiet aus, das ihr wie die Westentasche kennt und wisst, wo jedes Monster steht. Später ist die Phalanx in der gemalten Welt so eine Ecke. Geht hin, killt alles, sammelt die Seelen, zurück zum Lagerfeuer, wieder los. Der dritte Run ist der Härteste, denn die Wahrscheinlichkeit zu sterben ist am höchsten und wenn es passiert habt ihr nicht viel vorzuweisen, außer ein wenig mehr Erfahrung — der Boss-Run. Kundschaftet die kürzeste Route vom Lagerfeuer zu einem Boss aus. Schaut, an welchen Gegnern ihr vorbeirennen könnt und wie ihr am besten keine Energie verliert. Seht vorher zu, dass ihr alle Abkürzungen geöffnet habt. Dann geht es so direkt wie möglich zur weißen Wand und auf ihn mit Gebrüll. Ihr habt fast keine Seelen auf dem Weg gesammelt, wenn ihr sterbt, tut es also nicht so weh. Aber tretet dieses Weg nie mit einem vollen Paket an Seelen in der Tasche an. Das kann schnell frustrieren.
Also wie gesagt, macht euch klar, was euer Plan ist, seid methodisch und berechnend. Wenn ihr in Dark Souls die Nerven verliert und in Panik geratet, dann seid ihr fast schon tot. Das gilt auch für die Bosse: Es ist nicht verkehrt zu einem Boss zu gehen, nur um zu sehen, wie ein bestimmter Schlag wirkt, aber keine Gegenstände zu benutzen, weil man die besser für die richtige Runde aufhebt. Dann, wenn man die Schläge trainiert hat und so bereit ist, wie man nur sein kann. Dann kann euch auch nichts mehr überraschen.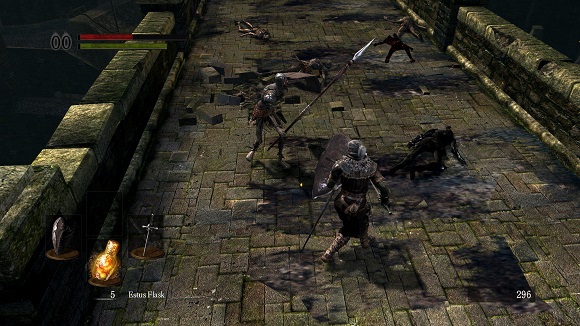 «Prepare to Die» ist nicht nur ein Spruch, es ist das Motto des Gameplays und der beste Rat, den das Spiel euch anbieten kann.
Ihr seid also verflucht, wollt menschlich sein oder habt Fragen zu den normalen Gegnern? Dann schaut in die Dark Souls — Tipps, Tricks, Gegenstände, Händler, Karten und Gegner .
Da dieser Guide inzwischen etwas umfangreicher wurde, ist er eigentlich fast genauso essentiell, wie die Lösung selbst. Schaut hier in den entsprechenden Kapiteln direkt nach:
- 1. Dark Souls Allgemeines: Klassen, Verflucht, Sachen verkaufen, Levels, Seelen sammeln (und das schnell)
- 2. Dark Souls Händler: Wer verkauft was?
- 3. Dark Souls Allgemeine Kampftipps (repariert, wird jetzt angezeigt)
- 4. Dark Souls Magie: Magische Klassen & Alle Zauber
- 5. Dark Souls Gegner-Guide
- 6. Dark Souls Wächter-Guide
- 7.
 Dark Souls Koop & PvP
 - 8. Dark Souls Zu-findende-Seelen-Guide
- 9. Dark Souls Schmiede-Guide: Titanit & Glut
- 10. Dark Souls Alle Schlüssel — Wo sie sind, was sie öffnen
- 11. Dark Souls Konvente, Orden und Fraktionen
So, seid ihr aber nicht nur für allgemeinen guten Rat hier, sondern kamt für handfeste Lösungen, dann will ich euch nicht enttäuschen:
Asyl der Untoten
- 1.1 Komplettlösung Dark Souls — Asyl der Untoten / Undead Asylum
- 1.2 Komplettlösung Dark Souls — Untoten Asyl Boss: Asyldämon / Asylum Demon
Feuerband-Schrein
- 2.1 Komplettlösung Dark Souls — Feuerband-Schrein
Stadt der Untoten — Obere Bereiche
- 3.1 Komplettlösung Dark Souls — Stadt der Untoten — Obere Bereiche 1
- 3.2 Komplettlösung Dark Souls — Stadt der Untoten — Obere Bereiche 2
- 3.
 3 Komplettlösung Dark Souls — Boss: Stadt der Untoten: Taurus-Dämon / Taurus Demon
Bezirk der Untoten — Obere Bereiche / Kirche der Untoten
- 4.1 Komplettlösung Dark Souls — Bezirk der Untoten
- 4.2 Komplettlösung Dark Souls — Bezirk der Untoten Miniboss: Panzer-Eber / Armored Tusk
- 4.3 Komplettlösung Dark Souls — Bezirk der Untoten / Kirche der Untoten — Zugang
- 4.4 Komplettlösung Dark Souls — Kirche der Untoten Miniboss: Kirchenmagier / Channeler
- 4.5 Komplettlösung Dark Souls — Boss Kirche der Untoten: Glocken-Gargoyle / Belltower Gargoyle
- 4.6 Komplettlösung Dark Souls — Boss Bezirk der Untoten: Höllenschwinge-Drache / Hellkite Dragon
Stadt der Untoten — Untere Bereiche
- 5.1 Komplettlösung Dark Souls — Stadt der Untoten — Untere Bereiche
- 5.2 Komplettlösung Dark Souls — Stadt der Untoten — Untere Bereiche 2
- 5.3 Komplettlösung Dark Souls — Boss Stadt der Untoten — Untere Bereiche: Ziegen-Dämon / Capra Demon
Untiefen
- 6.
 1 Komplettlösung Dark Souls — Untiefen 1 / Miniboss Schlächter
 - 6.2 Komplettlösung Dark Souls — Untiefen 2 / Miniboss Riesenratte
- 6.3 Komplettlösung Dark Souls — Untiefen 3 — Basilisken / Frösche / Verflucht
- 6.4 Komplettlösung Dark Souls — Boss der Untiefen: Klaffdrache / Gaping Dragon
Finsterwurz-Garten
- 7.1 Komplettlösung Dark Souls — Finsterwurz Garten 1 — Miniboss Skorpion / Prowling Demon
- 7.2 Komplettlösung Dark Souls — Finsterwurz Garten 2 — Stein-Golems
- 7.3 Komplettlösung Dark Souls — Boss Finsterwurz Garten : Mondlicht-Schmetterling / Moonlight Butterfly
- 7.4 Komplettlösung Dark Souls — Boss Finsterwurz Garten : Großer Grauer Wolf Sif / Sif, The Great Grey Wolf
Katakomben
- 8.1 Komplettlösung Dark Souls — Katakomben 1 — Kapuzen-Skelette / «Unsterbliche» Skelette
- 8.2 Komplettlösung Dark Souls — Katakomben 2 — Explodierende Totenköpfe
- 8.
 3 Komplettlösung Dark Souls — Katakomben 3 — Mehr Kapuzenskelette, mehr «unsterbliche» Skelette
 - 8.4 Komplettlösung Dark Souls — Katakomben 4 — Miniboss Skorpion / Prowling Demon
- 8.5 Komplettlösung Dark Souls — Katakomben 5 — Räder-Skelette / Rad-Skelette
- 8.6 Komplettlösung Dark Souls — Katakomben Boss: Feuerrad / Pinwheel
Grabmal der Riesen
- 9.1 Komplettlösung Dark Souls — Grabmal der Riesen
- 9.2 Komplettlösung Dark Souls — Grabmal der Riesen — Boss: Grabesfürst Nito
Finsterwurz-Becken
- 10.1 Komplettlösung Dark Souls — Finsterwurz-Becken — Kristall-Golems
- 10.2 Komplettlösung Dark Souls — Finsterwurz-Becken Boss: Hydra
Drachental
- 11.1 Komplettlösung Dark Souls — Tal der Drachen
- 11.2 Komplettlösung Dark Souls — Untoter Drache, Boss: Tal der Drachen
Schandstadt
- 12.1 Komplettlösung Dark Souls — Schandstadt 1 Obere Level
- 12.
 2 Komplettlösung Dark Souls — Schandstadt 2 Sumpf
Quelaags Sphäre
- 13.1 Komplettlösung Dark Souls — Boss Schandstadt / Quelaags Sphäre — Quelaag (Spinnenfrau)
Asyl der Untoten(erneut besucht)
- 14.1 Komplettlösung Dark Souls — Asyl der Untoten erneut besucht
- 14.2 Komplettlösung Dark Souls — Boss Asyl der Untoten (erneut): Verirrter Dämon / Stray Demon
Sens Festung
- 15.1 Komplettlösung Dark Souls — Sens Festung (Rollende Steine)
- 15.2 Komplettlösung Dark Souls — Sens Festung (Das Lagerfeuer in Sens Festung)
- 15.3 Komplettlösung Dark Souls — Boss Sens Festung: Eisengolem — Iron Golem
Anor Londo
- 16.1 Komplettlösung Dark Souls — Anor Londo 1 (Gargoyles)
- 16.2 Komplettlösung Dark Souls — Anor Londo 2 (Riesenritter als Bogenschützen)
- 16.3 Komplettlösung Dark Souls — Anor Londo 3 (Mehr Ritter und die Seele der Feuerband-Schrein-Hüterin zurückholen)
- 16.
 4 Komplettlösung Dark Souls — Boss Anor Londo: Drachentöter Ornstein & Henker Smough / Dragon Slayer Ornstein & Executioner Smough
 - 16.5 Komplettlösung Dark Souls — Boss Anor Londo: Finstersonne Wendelin / Dark Sun Gwyndolin
Gemalte Welt von Ariamis (optional für Hauptstory)
- 17.1 Komplettlösung Dark Souls — Gemalte Welt von Ariamis 1 (Krähendämonen)
- 17.2 Komplettlösung Dark Souls — Gemalte Welt von Ariamis 2 (Arena & Phalanx)
- 17.3 Komplettlösung Dark Souls — Boss Gemalte Welt von Ariamis: Untoter Drache
- 17.4 Komplettlösung Dark Souls — Boss Gemalte Welt von Ariamis: Mischwesen Priscilla / Priscilla, the Crossbreed
Archiv des Herzogs
- 18.1 Komplettlösung Dark Souls — Archiv des Herzogs
Kristallhöhle
- 19.1 Komplettlösung Dark Souls — Boss Kristallhöhle / Archiv des Herzogs: Seath der Schuppenlose / Seath The Scaleless
Dämonenruinen
- 20.
 1 Komplettlösung Dark Souls — Dämonenruinen: Lavastrom-Dämon / Ceaseless Discharge
Ruinen von Neu-Londo / Der Abgrund
- 21.1 Komplettlösung Dark Souls — Boss Der Abgrund: Die Vier Könige / The Four Kings
Das Verlorene Izalith
- 22.1 Boss Verlorenes Izalith — Chaoswesen von Izalith / Bed of Chaos
Ofen der Ersten Flamme
- 23.1 Dark Souls Boss Ofen der Ersten Flamme — Aschefürst Gwyn
Die Große Leere (optional für Hauptstory)
- 23.1 Komplettlösung Dark Souls — Die große Leere (optional für Hauptstory)
Aschesee (optional für Hauptstory)
- 24.1 Komplettlösung Dark Souls — Aschesee (optional für Hauptstory)
404 Page not found
-
About the university
- University structure
- Charter
- License with applications
- Additional education
- Trade union of workers
- Video gallery
- Photo gallery
- Graduates
- Library
- Pool
- Botanical Garden
- Information about the educational organization
-
Applicant
- Admission Committee
- News of the admission committee
- Admission 2023.
 Undergraduate. Specialist
 - Admission 2023. Master
- Admission 2023. PhD
- Admission 2022. Residency
- Programs of entrance examinations
- Information on the progress of filing documents
- Rating lists
- Targeted training
- Preparatory courses
- Schedule and results of entrance examinations
- Enrollment Information
- Information for foreign citizens
- Dormitories
-
student
- Schedule
- Tuition fees
- Teaching materials
- Trade union committee of students
- Extracurricular activities
- International activities
- International students
- Vaccination
- United Student Council
-
The science
- Scientific life
- Main areas of research
- Grants
- Internships
- Conferences
- Conference informer
- Competitions
- Olympics
- Scientific works of KSU
- Journal «Bulletin of Kaluga University»
- Journal «Bulletin of Kaluga University.
 Series 1. Psychological Sciences. Pedagogical Sciences»
 - Journal «Bulletin of Kaluga University. Series 2. Research in Philology»
- NPO Support Center
- Graduates
-
Contacts
- Contacts
- Frequently Asked Questions
SOULS OF LIGHT THAT (dushi sveta , kotorye) in English Translation
Finally, those souls of Light who came just for this occasion are preparing to replace those who will be displaced.
At last those souls of Light who came for this very occasion, are moving into positions ready to replace those who will be removed.
This will release many souls of Light who will at least be able to
safely move forward, and we will be behind them to ensure their protection.
It will release many souls of Light who can at last safely come forward,
and we shall be behind them to ensure their protection.
In the future there will be only those souls of Light who will represent you and take care of your interests.
In the future there will only be souls of Light that will represent you and look after your interests.
You are souls of Light, who went through the system of everything that the dark ones could use against you
, but you still retain your dignity and sovereignty.
You are souls of Light that have run the gauntlet of all the dark Ones
could use against you, but have still retained your dignity and sovereignty.
Originally you were full souls of Light who knew that you could experience darkness and
eventually find your way back.
Originally you were fully fledged souls of Light who knew you could experience the darkness
and eventually still find your way back.
People also translate
dear souls who
souls of people who are
souls who came
lightworkers who are
parts of the world who are
of the world who are
This also increases the chance of soon appearing the first City Light . These dear souls who have participated are true Lightworkers who have
responded to the call to unite and bring the message of Ascension to more people than ever before.
It also increases the chance of the first City of Light emerging very shortly. Those dear souls who were involved are true Lightworkers
who answered the call to join arms, and bring Ascension to the notice of more people than before.
Dear souls of Light … You who took full advantage of your selflessness and gave yourself completely,
to see «through» what you came here to fulfill.
Dearest souls of Light … You that have benefited the whole by your selflessness
and your giving of so much of yourselves in order to‘see through’ that which you came to accomplish.
In the parable from our Lord Jesus Christ «About the Terrible
Judgment» (Matt., XXV: 31-46) tells about the end of the light and what awaits all souls that live on Earth.
In the parable of Our Lord Jesus Christ»About the Doomsday»(Mt., XXV:31-46)
it is told about the end of the world and about all things, which will happen with souls, who live on the Earth.
Such souls that are in the network of darkness always have the opportunity to return back to the network of Light if they want.
Such souls, who are in the network of the darkness, always have the opportunity to return to the network of Light if they wish so.
They may not deserve sympathy, but look at them as souls that deviated far in their path and almost lost the spark of Light . It will take a lot of Light to lift them up again
, but it is doable.
They may not deserve much sympathy, but see them as souls who have gone badly astray and almost lost their spark of Light . It will take a lot of Light to raise them up again
but it can be done.
light that have
inner soul through which
souls who are
all souls who are
There is no dishonor to those souls who are still in the early stages of development, and there is no lack of assistance to help them return to the path of Light. Souls who have no need for incarnations in low vibrations will
awaken and experience a great understanding of the truth.
There is no disgrace attached to those souls who are still in the earlier stages of evolution and no lack of help to assist them back on to the path of Light. For souls who are at the end of their need for further incarnations in the lower vibrations,
an awakening will be experienced and a greater understanding of the truth.
The same dear souls who waver between Light and darkness,
wake up, and soon they will have to make a decision as to whether they will develop along the path of Light.
Those dear souls that hover between the Light and dark are awakening,
and soon they will have to make a decision as to whether they will evolve into the Light.
Nevertheless, actions against others are expected due to the low vibrational level of your dimension,
and this is due to the absence of Light in some souls who have fallen so low .
Acts against others are necessarily to be expected due to the low vibrational level of your dimension,
and it happens because of the lack of Light in some souls that have fallen so low.
The same dear souls who waver between Light and darkness,
wake up, and soon they will have to make a decision as to whether they will develop along the path of Light. Of course, questions arise in their minds, and, as we have already noted, there is a reluctance to go beyond the usual.
Those dear souls that hover between the Light and dark are awakening,
and soon they will have to make a decision as to whether they will evolve into the Light. Certainly the questions are arising in their minds, and as we have noted previously there is a reluctance to move out of their comfort zone.
Each soul that intended to experience duality — from Light and those that fell, just needs Love and Light, like every soul.
Every single soul that set out to experience duality is of the Light , and those that have fallen are just as much
in need of the Love and Light as any other soul.
Because you demanded from our Supreme Leader , whom you traditionally call God, to add a certain number of absolute units of Light to the souls of those who in most cases do not deserve it at all —
moreover, a reward for such you are already striving to receive generosity, in the form of those very conditional financial units.
Because you demanded from our Supreme Commander, whom you traditionally call as the God, to add a certain amount of absolute points of Light to these souls, which in most cases don’t deserve that at all-
and you seek to get a reward for similar generosity by yourself in the form of those conventional financial points.
The result was an increase in the number of souls who reached conscious levels, which allowed them to answer Light with the understanding of Ascension.
It has resulted in more souls reaching consciousness levels, which have enabled them to respond to the Light with an understanding of Ascension.
By divine grace the souls of these low frequency places are given an extraordinary opportunity to receive light so that they can incarnate in civilizations with the appropriate level of light that each soul can receive. Souls located on a tiny celestial body will be energetically moved to places with an equivalent density of , which act as spirit worlds for low density civilizations.
Through divine grace, souls in those low placements are being given extraordinary opportunities to absorb light so they can embody in civilizations in consonance with the degree of light each soul accepts. Souls in the tiny orb will be energetically transferred to equally dense placements that serve as spirit worlds to low density civilizations.
These dear 9The 0131 souls that have participated are true Lightworkers who have responded to the
call to unite and bring the message of Ascension to more people than ever before.
Those dear souls who were involved are true Lightworkers who answered the call to join arms,
and bring Ascension to the notice of more people than before.
Lightworkers, souls who do not think of themselves as such, but who they are, have generously contributed
the ascension process in these difficult times.
Lightworkers, including the souls who don’t think of themselves as such but indeed they are by living in godly ways,
managed nobly during the extremely difficult ascension decades.
The Archangels created the next host of angelic beings, and using the energy of the Creator, they
revealed to the world souls, which , like themselves, consisted only of the energy and awareness of light and love.
The archangels thought to make the next realm of angelic beings,
and using Creator’s energy, they produced souls who , like themselves, were of only love-light energy and awareness.
They see the expression of the Light in your presence, dear souls who have found their true selves despite the many hardships you endured as you emerged from darkness and gloom .
They see an expression of the Light through the presence of you dear souls who have found your true selves, in spite of the tremendous difficulties you have experienced stepping out of the darkness.
When he dies and his body ceases to function,
he perceives life at the level of the soul and the light of this soul, which we cannot observe.
When a person dies and his body ceases to function,
he experiences life on the level of the soul and the light of the soul, which we cannot observe.
They lose control of every soul that turns to the Light , and they know
that they cannot achieve their goals of complete domination of the world and its people.
For every soul that turns to the Light they are losing their control,
and know that they cannot achieve their aims for total domination of the world and its population.
Instead of a sword, better ask her to bring the light that will enlighten the souls , minds, and hearts of these individuals.
Rather than a sword, ask her to carry a light that enlightens the souls , minds, and hearts of these individuals.
How can the soul, which is pure Light become a prisoner of these lower vibrations?
How could the soul, which is pure Light , ever be a prisoner of those lower vibrations?
Each soul that has found Light, is a focus for these energies, and will influence
those around them, as they are in the sphere of its influence.
Each soul that has found the Light is a focal point for these energies,
and will influence others as they go about their business.
They may not deserve sympathy, but look at them as souls who have deviated far in their path and almost lost their spark Sveta .
They may not deserve much sympathy, but see them as souls who have gone badly astray and almost lost their spark of Light .
Often this is due to the fact that you came from the same
Star civilization itself and serve in one of the Galactic Federations or Brotherhoods of Light .