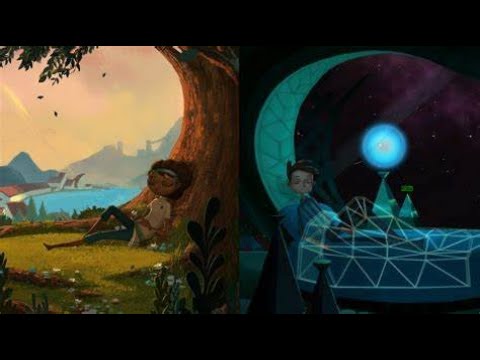
Guide for Broken Age — Story walkthrough
Unlike the last two acts where we you did each character’s part of the game separately, this section requires players to switch between the two characters on multiple occasions.
After the cutscene has ended, you’ll see the two ships stuck together as they each block the other’s programmed path. Click on the ship on the right as we need to take control of Vella first. Leave the Real Control Room and head along the Left Corridor. Underneath the debris that was blocking the hole in between the Real Control Room and the Kitchen is Vella’s Hexipal friend, now broken. Pick up the Hexipal.
Hide ads
Enter the Fake Control Room. Use the Detonator on the other ship that we can see through the window. You’ll see a cutscene where Alex panics about the ship overheating and turns off the power to the Death Ray. Leave this room and walk back into the Real Control Room. Open your inventory and switch to Shay.
Shay
You will get a cutscene where Alex is trying to calm down Vella’s panicked family. Once that is finished, talk to Alex. Shay will try to insist that Vella is using the Death Ray for a reason and it will unlock the following trophy:
She Must have a Reason
Stand up for someone even though you haven’t met her
1 guide
Now it is Shay’s turn. Open your inventory and use Grabbin’ Gary’s Remote. This time you will see a cutscene where Shay’s Mom switches the Boom Arms from manual to automatic so that the ship lets go of the other one. Open your inventory and switch back to Vella.
Vella
Talk to Shay’s Mom:
- «My friend, Alex, is flying that other ship. It came from Shellmound!»
- «Why don’t you want our ship grabbing the other ship?»
- «SHAY was in Shellmound when I saw him!»
- «But what if it’s Shay who’s controlling the arms?» **
- «Can’t you go around them?»
- «Do you think the other ship has the same navigation problem?»
- «Can’t we just push them out of the way?»
- «Maybe you should get off the ship.
 It’s me they want.»
That dialogue will unlock the following trophy:
He Must have a Reason
Stand up for someone even though you haven’t met him
1 guide
Leave the Real Control Room, enter Shay’s Room and go down the Vent into Marek’s Hub. Pick up the piece of Wire that is sitting on Marek’s computer. This will trigger a conversation with the Boss. Exhaust all of the conversation options to receive the following trophy:
We Talked That Fight Right Out of You
Talk to the boss
1 guide
Open your inventory and combine the Wire and the Hexipal. Pay special attention to the burn pattern when you look at its back, because this pattern shows you how to rewire the Hexipal. This layout varies in every playthrough, so the pattern is likely to be different for you. This was the image from my playthrough.
You’ll notice that three of the terminals have large burn patterns. These are the starting terminals for each of the three wires. The burn patterns also indicate in which direction the wire travels from that terminal. Finally, the burns have a slight colour to them, indicating which was the blue terminal, which was the yellow and which was the red. Starting with the blue and finishing with the red, wire up the Hexipal. This is how mine looked once I had finished.
If you have the correct pattern, the Hexipal will start waving its flashlight again. Make a note of this pattern as you will need it for Shay in a little while. Meanwhile, go back the way that you came and make your way into the fake Control Room. Go through the red door into the Star Weaver’s Room. There is nothing more that we can do for now, so we’ll switch back to Shay.
Shay
Go through the door behind Alex and have a quick chat with Shay’s Dad. In this room, you will see an open book in the bottom left corner of the screen that you need to read. It will show you the coding pattern to enable a Hexipal to play the harp. Make a note of this as you will need it for later.
Click on the door on the left and you will see four mysterious shadows come out of the wall and run away. Ignore them for now; go through the door on the right into the Music Room. Pick up the Broken Radio that is sitting near the bottom of the screen.
Leave the Music Room and climb back up the ladder to the Control Room. Show the Broken Radio to the Hexipal that is dancing with Rocky. The Hexipal will fix the radio and accompany Shay. Give the Radio to Alex. Go back through the door behind Alex and climb down the ladder. This time, head through the door on the left and your path will be blocked by a group of four rogue Hexipals. Show the Hexipal to the group, who will now follow you.
Head back into the Music Room and walk up to the harp so that all of the rogue Hexipals can fit in the room too. Use the Hexipal with the harp. While this isn’t the correct solution for the puzzle, it will cause the rogue Hexipals to start dancing and unlock this trophy:
The Next Most Logical Course of Action
Start a group dance party
1 guide
Shay will automatically pick the Hexipal up again. Inspect the back of the Hexipal and rewire it so that the wires match the following combination:
If you get the pattern right, the Hexipal will perform Raz’s victory dance from Psychonauts and will unlock the following trophy:
«Eh, eh-eh. Eh eh, eh-eh!»
Make someone strut their stuff
1 guide
Now, let’s solve the puzzle. Rewire the Hexipal again so that its wires match the pattern that makes it play the harp:
Use the Hexipal with the harp. This will distract the rogue Hexipals so that Shay can get past them. Leave the Music Room and go through the left door again. Inspect the switch on the wall. Instead of a switch, Shay will find an old Mallet. Follow the path past the switch and around to the other side where Shay will find the proper power switch. Click on it to turn it back on. However, if we don’t find a way to distract Alex, as soon as Vella uses the Death Ray again, Alex will shut down the power once more.
Go back to the Music Room. Retrieve the Hexipal from the harp. We need to rewire him once more. Do you remember the pattern that was needed to repair Vella’s Hexipal? That is the pattern that you now need to use for Shay’s Hexipal. Once you have finished rewiring it, use the Hexipal with the large drum and it will start tapping the drum. We need to make a louder noise. In your inventory, combine the Hexipal with the Mallet. Then use the Hexipal with the drum again. Cue a Hexipal percussion party and a cutscene as Alex wrestles the Hexipal for possession of the mallet.
Now is time to make your exit. Leave the room and climb back up to the Control Room. There is little more that we can do with Shay right now, so switch back to Vella.
Vella
Just as Shay has distracted Alex, Vella needs to distract Shay’s Mom too. Climb down the ladder that is next to the Star Weaver. Rewire the Hexipal so that it is playing the harp and then use the Hexipal on the Star Weaver’s tapestry. This makes the Star Weaver laugh uncontrollably. Leave the room through the door. As you do so, you nearly collide with Shay’s Mom, who has come to investigate the Star Weaver’s strange behaviour.
Quickly hurry to the Real Control Room. Use the Ship’s Controls to set the Boom Arms back to manual control.
Walk back out to the Fake Control Room so that you can see the other ship again. Use the Detonator and watch the following cutscene. Switch back to Shay.
Shay
Use the Grabbin’ Gary Remote. This will trigger the end cutscene. I won’t spoil the ending of the game, but I will tell you that you’ll get the trophy for completing the game:
Unbroken
Complete Broken Age
All that is left now is to complete the game with a save file that totals less than one hour. If you want to get the trophy for the speedrun, and the coveted Platinum trophy, head over to the next page.
8. Speedrun Walkthrough
6. Story walkthrough — Act 2: Vella
Find anything you think is wrong with this walkthrough? Help us fix it by posting in its Walkthrough Thread.
This walkthrough is the property of TrueTrophies.com. This walkthrough and any content included may not be reproduced without written permission. TrueTrophies.com and its users have no affiliation with any of this game’s creators or copyright holders and any trademarks used herein belong to their respective owners.
Complete Walkthrough for Shay and Vella – AppUnwrapper
- Post published:May 7, 2015
- Post category:Adventure / iPad Game / iPhone game / point-and-click / Puzzle / Room Escape / Walkthrough
Broken Age Γäó
By: Double Fine Productions, Inc.
This is a complete step-by-step walkthrough for Broken Age Act 2 by Double Fine Productions. Since Shay and Vella’s stories are intertwined in Act 2, I’m not separating them completely. I’m starting with Shay Volta and going as far as he can go on his own, then switching to Vella Tartine and going as far as she can go. The final chapter of my walkthrough involves switching back and forth between the two characters. When I say “exhaust all options,” I’m referring to the dialogue. I like to hear everything the characters say, and I recommend doing the same. If the game requires a specific response for a puzzle, I will tell you that. If you follow this walkthrough, you should get all the cutscenes at the right moments and minimize backtracking. Feel free to ask for extra help in the comments section.
See my Broken Age review here.
See my other Broken Age guides here.
Skip straight to Vella’s walkthrough.
Skip to the final chapter with both Shay and Vella.
Walkthrough:
Shay’s Story:
1. We will start with Shay. Tap anywhere on the screen to wake him. Dad (Ray) will start talking to Shay. It doesn’t matter what you answer — he’ll get himself out of the sand. You’re in Shellmound. Head left and pick up the broken Hexipal.
You can also watch my video for this part of the walkthrough:
2. Head up the stairs to the right to the pyramid. Talk to Alex and find out how you can help him fix the ship. Exhaust all options so you get the schematics for a Superconductive Gyroscopic Hypercam. You’ll need to get him one of those, an electrical genius, help your your dad patch the hull of the ship, find a radiation suit for Alex, and find a Heavy Duty Anti-Gravity Thrust Unit.
3. Leave the pyramid and head back to the beach. The ship is really gone! Ignore the choking Marshall Dune for now. We’ll help him later. Go over and talk to Shay’s dad, Ray. He tells you he needs more calcium carbonate to get the pH balance of his Hull Patch mixture to exactly seven. He used every last seashell, so you’re going to have to find something else.
You can also watch my video for this part of the walkthrough:
4. Talk to Carol (AKA Car’l) and exhaust all options. She has wire, which you need, but she wants a hook in exchange for it. She doesn’t believe the hook you have will catch any fish, so you’ll have to find a way to convince her later. Head left and continue to the talking tree. Exhaust all options, then continue left to the front of Curtis the woodworker’s house.
5. Continue left to the snake. Let him hug you and, instead of blowing on the trumpet, just stand there with him squeezing you until he gets tired and falls to the ground.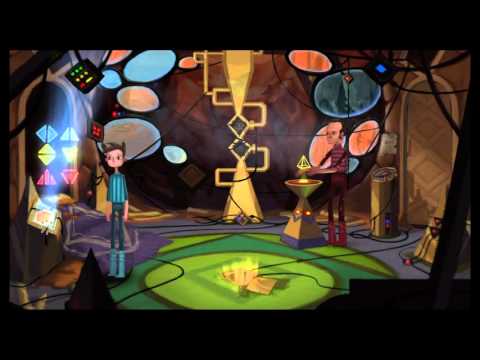 Pick him up. Notice Shay calls the snake MR. HUGGY. We’ll need that info later.
6. Go to the mailbox in front of Curtis’ home and take the flyer about Vella missing.
7. Go in and talk to Curtis. He now works with metal instead of wood. Exhaust all options, then head up the ladder to Meriloft.
8. Talk to F’ther. He isn’t brave enough to climb up the ladder and rescue Harm’ny Lightbeard, so you have to. Have Shay climb the ladder and talk to Harm’ny. Exhaust all options. Then talk to F’ther and have him try to untie the bow in Harm’ny’s cloud. Ask him what the knot looks like and he’ll show you. Mine looks like an elephant the first time. Don’t tell him what to do to the knot yet, or you’ll end up with a different knot.
You can also watch my video walkthrough for this section:
9. Go back to Shellmound. We have a few things to do here now. First, give the snake to the choking Marshall Dune so it can do the Heimlich maneuver on him.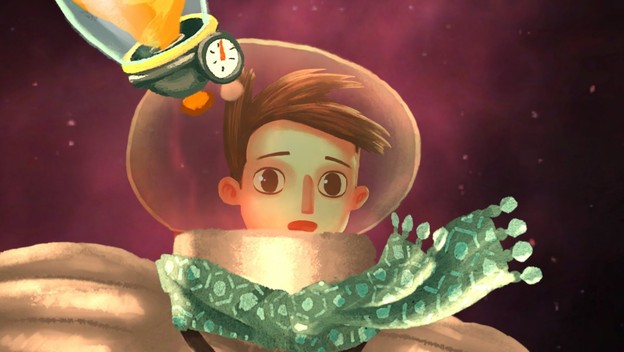 He’ll cough up the pitch pipe and you can take it.
10. Talk to Marshall Dune and exhaust all options. Then give him the schematics for a Superconductive Gyroscopic Hypercam and have him make you one out of sand.
Click on the little numbers below to continue to the next page of the walkthrough.
Pages: 1 2 3 4 5 6 7 8 9
Tags: android, Broken Age, Double Fine, guide, help, hints, iOS, iPad, iPhone, iPod, tips, tricks, walkthrough
6 GAMES LIKE BROKEN SWORD: SHADOW OF THE TEMPLERS PS4
Broken Sword: Shadow of the Templars is a Single-player, Puzzle and Adventure video game from Revolution Software. The game takes place in Paris, where the player can take on the role of an American tourist named George Stubbart. The game offers a third-person view with a point-and-click interface for exploring the environment and guiding the game world. To advance the game, the player is allowed to solve many mysteries, collect items with each other and communicate with non-player characters, use dialogue trees. After the game is done, it automatically unlocks more places to explore, which makes the game more interesting and enjoyable. Broken Sword: Shadow of the Templar includes core features such as various storylines, point saving, a massive inventory system, and more. The game offers a rich storyline, simple point and click controls, and beautiful visual details.
1. Broken age
Android iOS Paul to win Linux biography PS4
Broken Age, Point and Click, Puzzle and Single -Player, designed and published and published published and published and published published and published published and published published and published published and published published and published issued The game offers an addictive gameplay and the story of the game revolves around two characters named Vella Tartin who is a young woman and Shay Volta who is a man. The game puts you on an epic adventure and lets you explore different cases, collect clues and solve difficult challenges. ..
..
Web site
2. Grim Fandango
pairs win Macintosh biography PS4
Grim Fandango-adventure, dot and click, open and single-user video players developed and published, and published lumps. . In this game, the player can take on the role of a unique character and the ultimate task of the player is to solve puzzles to progress. The game takes place in the Land of the Dead where the player can perform a number of activities such as…
Video web site
3. This war in the mine
Android iOS Win Macintosh Linux one PS4
This “War of Mines” is the game “Adventures, platform, point and click” , Survival, Strategy, Craft, Single and Multiplayer created and published by 11-bit studios. Gameplay is inspired by the Siege of Sarajevo during the Bosnian War with an excellent military theme. The game allows the player to take control of several civilians in the fictional town of Pogoran. Player’s Ultimate Challenge …
Video Website
4. Day of the Tentacle
Steam Win Mac Linux PS4
Day of the Tentacle is an addictive game that offers a combination of individual scores, puzzles and puzzles. The game revolves around the protagonist and his attempt to stop Dr. Fred, who has mutated into a purple tentacle, to take over the world. The game lets you take on the role of a Trio and your main goal is to explore different periods of history, collect clues and…
video Website
5. Grim Fandango Remastered
Steam Win mac biography PS4
Grim Fandango Remastered developed and published by Double Fine Production. This video is Graphics, Point and Click, Exploration and Single Player. The story of the game follows Mexican folklore and suits the player as the protagonist, named Manny Calavera, who works in the Department of the Dead and tries to erase his wrongdoings in order to receive the ultimate reward. Manny starts at…
video Website
6. Bloody Blood
PS4
Corpse Party BloodCovered is an Adventure-based, Role-playing and Single-player video game developed by GrisGris and published by XSEED Games. In this game, the player can take on the role of a student of Kisaragi Academy named Mayu Suzumoto who is trapped in the school with his friends after a deadly earthquake. Mayu’s ultimate task is to explore her school’s vast environment, find her missing friends, and return…
video Website
12 GAMES LIKE A BROKEN SWORD: SHADOW OF THE TEMPLERS FOR LINUX
Broken Sword: Shadow of the Templars is a Single-player, Puzzle and Adventure video game by Revolution Software. The game takes place in Paris, where the player can take on the role of an American tourist named George Stubbart. The game offers a third-person view with a point-and-click interface for exploring the environment and guiding the game world. To advance the game, the player is allowed to solve many mysteries, collect items with each other and communicate with non-player characters, use dialogue trees. After the game is done, it automatically unlocks more places to explore, which makes the game more interesting and enjoyable. Broken Sword: Shadow of the Templar includes core features such as various storylines, point saving, a massive inventory system, and more. The game offers a rich storyline, simple point and click controls, and beautiful visual details.
1. Broken age
Android iOS Paul to win Linux biography PS4
Broken Age, Point and Click, Puzzle and Single -Player, designed and published and published published and published and published published and published published and published published and published published and published published and published issued The game offers an addictive gameplay and the story of the game revolves around two characters named Vella Tartin who is a young woman and Shay Volta who is a man. The game puts you on an epic adventure and lets you explore different cases, collect clues and solve difficult challenges…
Web site
2. Gemini
Android steam win Macintosh Linux
Gemini Rue-2D adventure and click, puzzle, science fiction and single-sex video games. The game takes place in a futuristic world where the player can take on the role of a protagonist who can explore the entire game world, interact with objects and characters, and solve various puzzles. The game also features a weapon control system where the player controls their character to shoot from behind. Game…
video Website
3. Kentucky Route Zero
Steam Win Mac Linux
Kentucky Route by Single Cardplayer, Clickboard and Adventure, Zero Point is a . The gameplay of the game is inspired by the famous game in adventure games like King’s Quests and Monkey Island. Kentucky Route Zero is a magical adventure game that allows the player to solve various mysteries. During gameplay, the player can explore another location, interact with …
Video Web site
4. Depot
pairs win the macintosh Linux
deposits — adventure, hidden puzzle, point and click, science fiction and single -user video play developed and published by Daedalic Enga. The game is a place of tasks in a fictional world full of huge garbage. This is a brilliant game that allows the player to immerse themselves in a brilliant game world. The game allows the player to help the player solve many puzzles to advance…
Video Website
5. Leisure Suit Larry Reloaded
Android IOS Steam Win Mac Linux
Leisure Suit Larry Reloaded, Click-Fusion and Single-player Adventure, Click and Interactive Video and published by Replay Games. This is a fantastic puzzle game in which the player can solve many problems using items, interact with NPCs and find hidden object numbers. The game offers five buildings where the player can explore and solve mysteries that the player can move…
Video Website
6. Outfit
Steam Win Mac Linux
Undertale is a Funny, Adventure, Role-playing, Puzzle and Single-player game developed and published by Tobyfox. The plot revolves around a human child who has fallen deep into the Underground, a massive region below the Earth’s surface that is separated by a magical wall. The game allows you to take on the role of a child and encounter monsters during challenging tasks. Explore the game world as you go through…
video Website
7. Luna
Steam Win Mac Linux
For Luna is an adventure game designed for those players who love to play Puzzle and RPG games. The game combines elements of Horror, Top-down and supports single player mode. It is developed and published by Freebird Games. According to this story, Sigmund Corp created the device and can be used to create artificial memories. The company offers this technology to other nations to fulfill their desires. These artificial … 9Cat Lady Man» and «Single-player Video Game» developed by Harvester Games and published by Screen 7. In this game, the player can take on the role of a 40-year-old older woman named Susan Ashworth. Susan Ashworth has no friends, no family and no hope for a better future, she also hates flowers and her only friends are stray cats. One night…
Video Website
9. This Mine War
Android IOS Steam Win Mac Linux One PS4
This «Survival, Point» Adventure, platform, is «The War of Mine» , Strategy, Craft, Single and Multiplayer created and published by 11-bit studios. Gameplay is inspired by the Siege of Sarajevo during the Bosnian War with an excellent military theme. The game allows the player to take control of several civilians in the fictional town of Pogoran. Player’s Ultimate Challenge …
video Website
10. The Dig
Steam Win Mac Linux
The Dig is an adventure-based Point and Click game, single-player, third-person video game, and Sci-Fi created and published by LucasArts. In this competition, the player can take on the role of Commander Boston Low which is an asteroid and the game allows the player to go into space exploring different locations, discover new technologies and solve puzzle problems to advance. Gameplay of the game …
video Website
11. Day of the Tentacle
Steam Win Mac Linux PS4
Day of the Tentacle is an addictive game that offers a combination of scores and time, adventure and puzzles. The game revolves around the protagonist and his attempt to stop Dr.