S4 League | GamesIndustry.biz
If you click on a link and make a purchase we may receive a small commission. Read our editorial policy.
— authorized for immediate publication —
a
Munich, June 3rd 2008
As announced by Burda:ic today, the subsidiary company of Hubert
Burda Media has signed an Europe-wide license agreement for the
game „S4 League“ with Neowiz Games, one of the leading
publishers in the Korean game industry. This game will be another
highlight, expanding the range of games offered on
„alaplaya“, Burda:ic’s European portal for
free-to-play multiplayer online games. During the Games Convention
2008 “S4 League” will be introduced to the general
public.
”S4 League” is a sporty, manga-styled action game,
offering fantastic graphics and an outmost stylish design. The game
is excelling due to the innovative special skills offered for the
players, letting them experience a whole new dimension of gaming
fun. Ingo Griebl, Burda:ic Managing Director: “We are glad we
were able to obtain yet another blockbuster for alaplaya for the
whole of Europe. We are positive about the quality of the game, as
well as of our partner Neowiz Games.”
The multiplayer games portal alaplaya, which was launched in
July 2007 is offering a variety of internationally thriving games:
“Audition”, “Fantasy Tennis” and the racing
game “Come on Baby”. The number of registered users has
reached 300,000 already and is continuing to grow dynamically.
“With the 3rd person action shooter S4 League we are serving
yet another genre and will break the mark of half a million users
on alaplaya by the end of 2008”, said Achim Kaspers, Managing
Director of Burda:ic.
Kwanho Choi, CEO of Neowiz Games said, ‘Publishing deal of
S4 League with Burda will be an important milestone for Neowiz
Games as we are growing as a global company.’ And he added
‘We will put in our best support for S4 League to be a
successful game in European market’
The portal is serving six different languages, the games are
running throughout Europe, including Russia and Turkey under
www. alaplaya.eu.
Background:
Burda:ic GmbH is an online games expert, marketing and
distributing so-called Massively Multiplayer Online Games (MMOG),
such as “Ragnarok Online”, “Florensia” or
“Hello Kitty Online” throughout Europe. Furthermore
Burda:ic is establishing interactive gamer communities like
alaplaya.eu or sanriotown.com. Hubert Burda Media considers the
gaming industry a key medium for targeting the younger audience.
www.burda-ic.com
Background:
Neowiz Games is one of the leading companies in the Korean
gaming industry with a clear expertise in developing games which
will be refinanced by selling virtual goods. Cooperating with other
leading enterprises throughout the world, such as EA Games, the
company quickly became a global publisher. Neowiz Games is
maintaining a vast pres-ence in the Asia-Pacific region and is
planning to further expand to other countries. The company is
targeting a huge fan base and understands their users’ online
behaviour.
Press Contact:
Christine Raufer
Senior PR-Manager
Dirk Gärtner Public Relations
Landsberger Str. 191
D-80687 München
Tel.: +49 89-22844581
Mobil: +49 177-4288482
E-Mail:
[email protected]
S4 league Download and Reviews (2022)
S4 League is a great free MMO game that perfectly blends nonstop shooter action with inspired anime visuals. It’s a stylish third person shooter with a fantastic and colorful anime attitude that is both terrific to look at and play. The neo Tokyo anime style features great poses and elegance in actions such as running, jumping, shooting and even flying in the detailed and resourceful maps. Best of all, the graphics aren’t very hardware consuming, so most computers will be able to run this awesome shooter.
You’re free to customize your character with hundreds of pieces of equipment, weapons and clothing, showing your futuristic style in this virtual show game. Then it’s time to choose the game mode between Deathmatch, Touchdown or the Chaser. An additional arcade mode let’s you just walk and show your skills while you eliminate tons of enemies.
S4 League is an acclaimed game with a huge playerbase of every level for you to battle. Besides being a fast paced action shooter, it’s also extremely fun to play, featuring a ranking system that will put you to the test.
Tags: Client Game, 3D Graphics, MMO, Anime, Fighting, Martial Arts, Sci-Fi, Shooter, MMOTPS, Third Person View, PvP, Action.
Disclosure: MMOBomb works closely with publishers and developers to offer a free and rewarding experience. In order to keep everything free to use we may sometimes earn a small commission from some partners. Find more info in our FAQ page.
Additional Information
Title
S4 league
Developer
GameOn Studio (Previously known as Pentavision)
Publisher
Aeria Games
Release Date
September 22, 2008
Genre
Shooter
Platform
Windows (Client)
Please note this free-to-play game may or may not offer optional in-game purchases.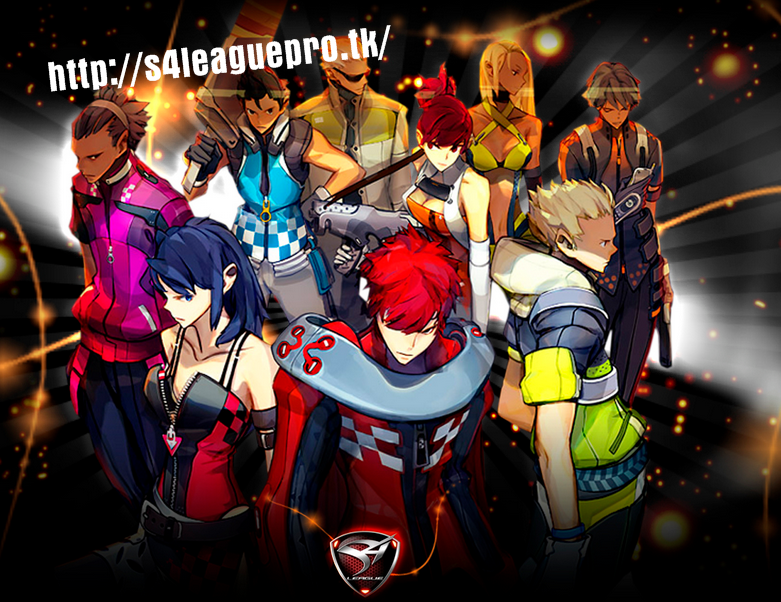
Read All
Latest Updates
Minimum System Requirements (Windows)
OS
XP / Vista / 7 / 8
Memory
512 MB for XP or 1 GB for Vista / 7 / 8
Storage
3 GB
Processor
Intel Celeron 1 GHz
Graphics
GeForce 4 MX series
Additional Notes
Specifications may change during development
All material on this page is copyrighted by ©Aeria Games and their respective licensors. All other trademarks are the property of their respective owners.
See All
Games like S4 league
Loading…
FREE
Warface
Loading…
FREE
Splitgate: Arena Warfare
Loading. ..
..
FREE
Star Conflict
Sqirlz morphing guide. How to style your face
I promised a long time ago that I would make a tutorial on how to use Sqirlz Morph. This program is used for morphing, for those who do not know what this means, I leave the following definition of morphing:
El Morphing This is a method by which the transformation of an image into another occurs after some match or control points. The number of these control points, as well as their successful placement, will largely determine the quality of the final transformation.
Now that you know what morphing is, if you want to know what Sqirlz Morph is capable of, you can watch the video. ZapaJoker is made with this program.
In Sqirlz Morph, you can make multiple transitions between multiple images, this is not limited to the source image and the final image, but you can add more intermediate images to make your transformations more fun. You can save the result as an AVI video file, as a GIF graphic, or as a Macromedia Flash SWF. You can also save images one by one in JPEG or BMP (bitmap or bitmap) format. Also, Sqirlz Morph is compatible with all windows from 95 to Vista and is free , without restrictions and trial periods, we will really do face morphing (by face).
Well, if the video and the features of the program convinced you, let’s see how to install Sqirlz Morph.
— Installing Sqirlz Morph —
Download the program from Softonic or visit Sqirlz Morph official page. It is now version 1.4 and this tutorial is based on it.
Subscribe to our Youtube channel
CWhen you have the file on your hard drive, unzip it as it comes in ZIP format. Then double click on the executable and run the following sequence:
«Next>» >> «Next>» >> «Next>» >> «Install» >> «Finish»
You have installed the program, now we are going to see a general overview of the Sqirlz Morph workspace.
— Sqirlz Morph Workspace —
P To open the program, go to the following path:
«Start» >> «All Programs» >> «Sqirlz Morph» >> «Sqirlz Morph»
S and the following screen will appear:
In this window, we can select five zones. The first, as we can see in the image above, is the work area, which occupies the central part of the screen.
Then we have the menu bar at the top.
Just below the menu bar is the general toolbar (Toolbar (General)).
To the left of the window is the Toolbar (Checkpoint).
The status bar will appear at the bottom.
And finally, just above the status bar is the Toolbar (Frame Selection).
We already have an overview of our workspace, now we will see how Sqirlz Morph is used.
— How does Sqirlz Morph work? —
E This program is quite easy to use and now you will see it. To make a transformation, for example, from one face to another, we need the following:
- Two images : we are looking for two photos, since in this example we will make a transformation from one face to another, we need to find two images of faces.
 It is desirable that the photographs have some similarity in color and position of faces. Let me explain, if two photos have the same background colors, the transition from one face to another will be more harmonious, on the other hand, if we take two photos, one with the character in profile and the other with the other character from the front, the transformation will not be so smooth . That’s why it’s a good idea to use two photos that show the characters in a similar frame, although it’s not required.
 - Place breakpoints : When we do the transformation, we will have a source image and a destination image. You can also use multiple images or then reverse the transformation direction, the source image is the target image and vice versa, but for now we’re going to stick with the simplest option which is the source image and the target image. What we need to do is place control points on the original image that mark the different parts of the character’s face that need to be transformed.
 The more points we place, the more difficult our morphing will be.
 - Moving target image breakpoints : When we place breakpoints on the source image, these breakpoints appear in the final image, but they rarely appear in the right place, so we have to move them to match the parts of the face that marked the breakpoints original image. Now let’s see in more detail that this is not difficult.
— Using Sqirlz Morph. The initial setting is
So now that we know what we need, let’s start with the conversion by following the steps listed above:
1st) We are looking for two photos that we are going to morph with, for this you can take a picture that you took with your camera or use Google images. I’m going to do a simple transformation between Kofi Annan y Morgan Freeman and I chose these two photos to make a morph.
Now we are going to import two photos into the program. Open Sqirlz Morph and click «File» in the menu bar. Then click «Open», find the two images on your hard drive and select them. Finally, click «Open». The two selected images will appear in the program window one above the other. Drag the target image to the right and leave the work area as follows:
The image that appears in the center of the two faces is the Preview window, where you can see what the transformation will look like when the control points are added.
Before we continue, we’re going to save what we’ve done in the project, to do this, click File and then Project and Save As. The «Save As» window will open, in which you will need to give your project a name. Choose a name and click Save. From now on, whenever you make significant progress in your work, you should save them so that you do not lose your changes in the event of a power failure or simply when you want to stop working to continue later.
2nd) If you saved the project and closed the program, in order to continue learning, we must open the project. Click «File» in the menu bar, then «Project» and «Open.» The «Open» window will open, in which you should find the saved project. Once you’ve selected it, click «Open» and we can pick up where we left off.
3rd) The transformation between two faces can be done in both directions, since I want to do it with the photo on the left as the transformation source, I will have to set up the program for this. To do this, click Image in the menu bar, and then click Animation Order, the Animation Image Order window will pop up.
The image that appears first in the list will be the original transform image, in which case the Freeman image will appear and we will not make any changes. If we had to change the order, we would only have to select the Kofi image and click the buttons on the left side of the window to download it.
4th) For the conversion to be successful, the two images must be the same size. To do this, we can adjust the size of the images from the same program, we just have to select one of the two photos by clicking on one of them, and then click «Image» in the menu bar, in the menu that opens, click Click «Align dimensions» and a window will open, which will ask you in English if you are sure you want to resize the other images to match the size of the selected image. Click Yes and all images in the project will be the same size.
5th) Now we are going to change another value of the program which is set to «20» by default and that is the number of frames that make up the transformation. To change it, click «Morph» in the menu bar and then «Period». The «Animation Period» window will open, in which we will set the value to 50. Thus, the transformation will have 48 intermediate frames between the source and destination images.
After setting the value to 50, click «OK» and look at the toolbar for selecting a frame, its value has changed from 20 to 50.
The larger the number of frames, the slower the conversion. A value of 20 will result in an overly fast transformation which will cause the transformation between faces to be poorly evaluated, although depending on the circumstances you may be interested in lowering this value.
— Using Sqirlz Morph. Starting Transformation —
So with the previous settings set up, let’s dive right into the process of transforming two faces.
1st) First of all, select the tool for adding control points («Add Control Points»), which is located on the control points toolbar and is indicated by a green cross. Once we have it selected, we will go to the original image (in this case, the Freeman image) and start adding control points to control areas such as eyes, nose, mouth, ears, etc.0003
Notice how the control points are placed on both the ears and the eyes, chin, mouth, nose, hairline, and forehead. Now look at the points labeled 1, 2, and 3, and you’ll see how a dot appeared in the Kofi image for each control point added to the Freeman image, but those points in the target image don’t exactly line up with the marked areas in the source image.
2nd) We have to map each of the control points in the source image to the same areas in the target image, i.e. if the control point marks the center of the pupil in the Freeman photo, what we have to do is move the point corresponding in the Kofi photo. . To do this, we’ll select the Move Control Points tool, which is just below the green cross and has a slanted black arrow as its icon. With the tool selected, we will move to the target image and move the points one by one until they are in the desired area. To see if you’re moving the right point, note that each time you select a point in the final image, the point will appear surrounded by a circle in the source image.
Move all the points on the target image until the image looks like this:
As you can see, we made the points of the eyes match so that they mark the pupils and the corner of the eye, the other points were also moved until they matched the original points. It should also be noted that as more control points are added and properly placed, the image in the Preview window changes, giving you an idea of how the morphing will take place.
3rd) Add as many control points as you want, and when you want to see the result, click the «Morph / Warp» button located on the common toolbar. The icon for this button is a yellow arrow pointing to the right. After clicking on the button, you will see in the «Preview» window how the morphing occurs.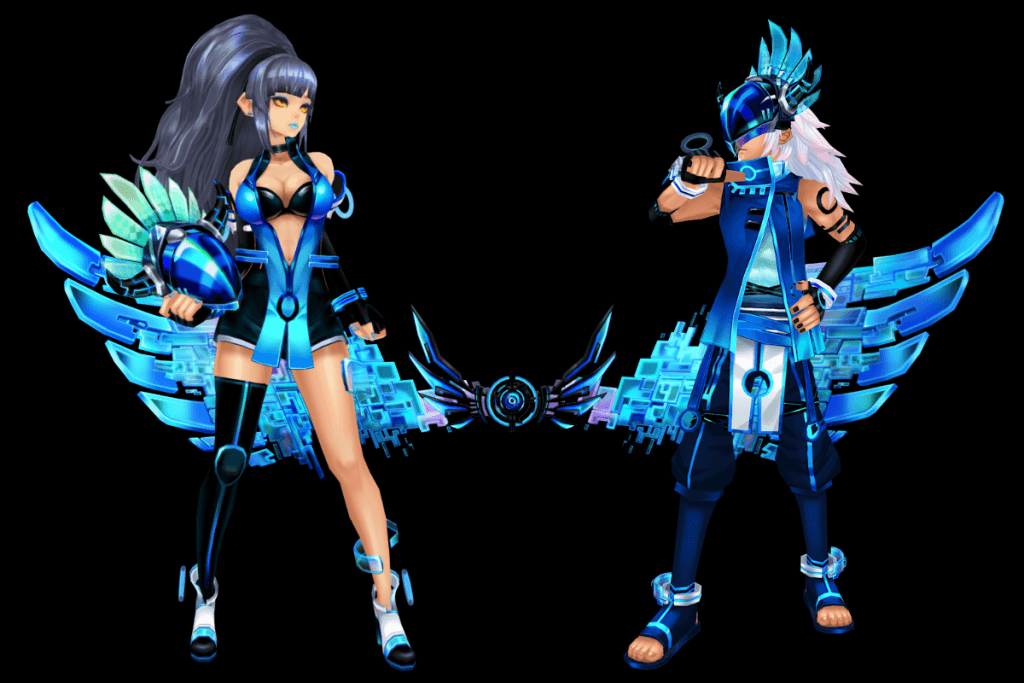 If you want to see what the transformation between Freeman and Kofi looks like, click here.
4th) When you are satisfied with your work, you must decide in which format you want to save the conversion. You can save it as an animated GIF, Flash movie or video with .avi extension. When you decide, click the appropriate icon on the general toolbar.
Let’s see how the animation creation process depends on the selected output format.
-
Save as flash : Click on the appropriate icon and the Save As window will open, asking you to give your animation a name. When you have installed it, click «Save» and the file will be saved with a flash «.swf» extension, but first a window called «Flash Movie Options» will open, in which you must select a «Frame Rate» between 1 and 100, leave 15 and remember that the higher this value, the faster the conversion will be. For example, in our morph 50 frames, if we choose a frame rate of 25, the transformation will happen in 2 seconds.
 Leave the «Automatic background color» checkbox so that it will automatically generate the background color if needed, and finally, in the bar below, you can choose the final quality of the images by moving the bar from right to left (higher to lower quality). The default value (60) offers an acceptable result and a light file (it takes up a few megabytes). When you’re all set, click «OK» and the animation will begin to be created.
 -
Save as avi : To save as an .avi movie, you just need to click the corresponding icon. The «Save As» window will open, in which you must enter a name and then click «Save». Then the «AVI Frame Rate» window will appear, in which you must select the number of images per second, leaving it at 15, because in flash format, the higher this number, the faster the conversion is performed. Finally, click OK and the Video Compression window will open. Here you will need to select the video compressor you want to use and it will depend on the codecs you have installed on your computer.

