Chapter 11 — Final Fantasy XIII Wiki Guide
Final Fantasy XIII Wiki Guide
By Stephanie Lee, Hector Madrigal, Precocious Turtle, +3.0k more
updated
When you start off, head to the first event marker.
Grab the Partisan from the chest along the way.
advertisement
Boss: Alexander
Paradigm configuration
- Synergist / Medic / Sentinel
- Ravager / Medic / Sentinel
- Ravager / Ravager / Commando
Start in configuration one so you can buff and stay healed while doing so. If the party’s health gets too low, switch to number two. When the opportunity presents itself, switch to three and deal as much damage as quickly as possible before switching back to configuration two in order to heal.
Loading
Once the battle is over, head to the story marker in the Archylte Steppe.
advertisement
At this point you are not powerful enough to continue on in the story. If you follow the main story mission mark, you will not be able to continue. Follow the steps below to level up with a minimum amount of grinding.
Time to get powerful:.
Some enemies in this area will kill you in one hit. Just get used to it. Check out the enemy list to learn which ones will to avoid.
Accept Mission 1.
Proceed due north find the chest with the Rod of Thorns in it.
Head west and fight Mission 1 monster. Follow the star on your map.
Accept Mission 2. It’s statue is located by the Mission 1 target.
advertisement
Head southwest and grab the Zephyr Ring. It’s surrounded by Rangda.
Defeat Mission 2 and Accept Mission 3.
Head back to the Chapter 11 starting point down the path by the first Archylte Steppe save point.
Continue down the path past the save point.
Get the Rune Bracelet near the waterfall.
advertisement
Go in the the Yaschas Massif.
Continue until the path opens up.
Head north to defeat Mission 3.
Head a little bit west from there and accept Mission 4.
Head north from the mission marker and run down the tree.
Once at the bottom of the tree, turn the camera 180 degrees. You’ll see a treasure chest.
advertisement
Fight through the enemies to grab it.
Run past the fallen tree and go up the path until you get to a save point.
Jump down and walk out on the edge to the right. Grab the Rune Bracelet.
Hug the path to the left until you get to a treasure chest with 1827 Gil in it.
Continue down the path past the save point.
Continue on towards Mission 4 and complete it.
Grab the treasure the Mission 4 monsters were defending.
advertisement
Run back to where the 1827 Gil treasure chest was.
Get Mission 5, which is located directly below the chest.
Head back towards the Archylte Steppe.
Run up the tree at the event marker.
Look at your map and run to the event marker.
Grab the chest near the marker.
advertisement
Watch the cutscene at the event marker.
Go to the nearest save point and head east.
At the fork in the road, head left and grab the treasure chest containing a Watchman’s Amulet.
Go down the other fork and head south to defeat Mission 5—get Kelgers Cup Trophy / Achievement.
Grab the treasure that was guarded by the Mission 5 monsters.
Go back to the opening and head east to the save point.
From the save point, continue down the path until you get to the Glass Orb.
advertisement
Look at your map, head towards the event marker.
Get to the event marker, watch the cutscene and grab the hunt marker. Accept Mission 6.
Check your map and find the star indicating Mission 6’s location. Go fight the Mission 6 monster.
Grab the Mythryl Bangle near the Mission 6 monster location.
Head a back to where you accepted Mission 6.
Walk past the mission marker and grab the Rhodochrosite in the treasure chest.
Walk up the stairs, grab two treasure chests, and accept Mission 7.
advertisement
Run downstairs and fight the Mission 7 monster.
The cutscene after Mission 7 will activate missions on the Archylte Steppe.
Note…After Mission 7 you may be able to get Hermes Sandals, a powerful accessory that will cast Critical: Haste. We say «maybe» because it doesn’t always work for all gamers.
- After you’ve taken down the Mission 7 enemy you might have obtained a Tetradic Tiara or a Tetradic Crown.
- Upgrade the tetra accessory to star level.
- Deconstruct the starred Tetra accessory
If you had a Tetradic Crown you will get Hermes Sandles, but if you were lucky enough to have a Tetradic Tiara you will get Sprint Shoes which bestow Auto-Haste.
Walk to event marker—watch the cutscene with the flying snake thing.
Head back to Vallis Media.
advertisement
Go and hit up the Mission 8 maker by the Chapter 11 starting point.
Run back towards the Yaschas Massif, you’ll find the Mission 8 monster near the waterfall with the treasure chest. Take it out.
Head to the Archylte Steppe starting point.
Hit up the Mission 9 marker west of the starting point.
Up Next: Chapter 11 Part 2
Previous
Chapter 10
Next
Chapter 11 Part 2
Was this guide helpful?
In This Wiki Guide
Final Fantasy XIII
Square Enix
Rating
ESRB: Teen
Platforms
PCXbox 360PlayStation 3
Evil West — Official Gameplay Overview Trailer
In this latest trailer for Evil West, get to know the vampire hunter you play, Jesse Rentier, and learn more about the story of this upcoming third-person action-adventure game. Additionally, meet your partner Edgar Gravenor and take a peek at the various locations you’ll explore like infested mines and more. The trailer also showcases a variety of weapons and tools in action like your revolver, rifle, the Rentier boomstick, the Rentier gauntlet, weapons and tools skill trees, gameplay, and frightful foes. Evil West will be available on PlayStation 5, PlayStation 4, Xbox Series X/S, Xbox One, and PC on November 22, 2022.
The Little Mermaid — Official Teaser Trailer
Check out the teaser trailer for The Little Mermaid, the upcoming live-action reimagining of the animated musical classic. The film stars Halle Bailey as Ariel, Daveed Diggs as the voice of Sebastian, Jacob Tremblay as the voice of Flounder, Awkwafina as the voice of Scuttle, Jonah Hauer-King as Prince Eric, Art Malik as Sir Grimsby, Noma Dumezweni as Queen Selina, Javier Bardem as King Triton, and Melissa McCarthy as Ursula. The Little Mermaid is the beloved story of Ariel, a beautiful and spirited young mermaid with a thirst for adventure. The youngest of King Triton’s daughters, and the most defiant, Ariel longs to find out more about the world beyond the sea, and while visiting the surface, falls for the dashing Prince Eric. While mermaids are forbidden to interact with humans, Ariel must follow her heart.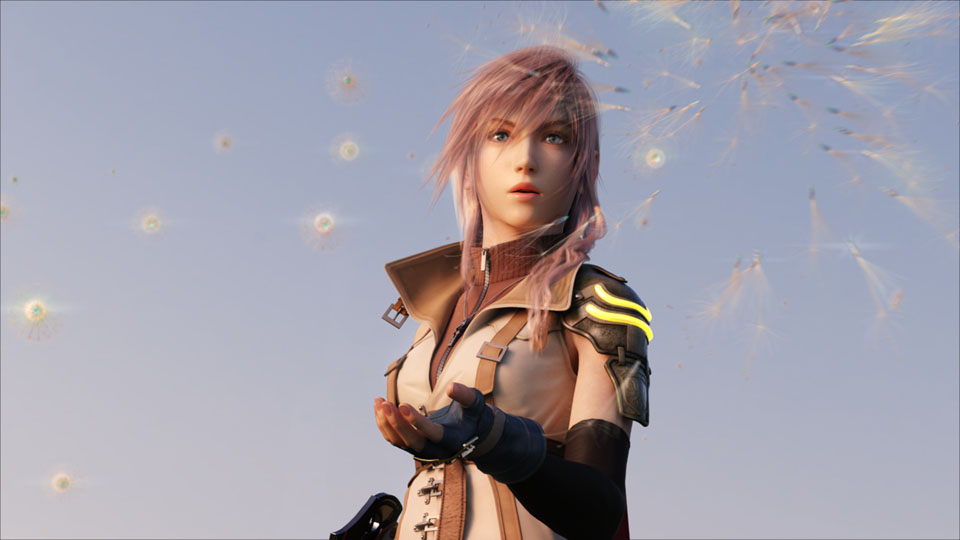 She makes a deal with the evil sea witch, Ursula, which gives her a chance to experience life on land, but ultimately places her life – and her father’s crown – in jeopardy. The Little Mermaid, directed by Rob Marshall, opens in theaters nationwide on May 26, 2023.
Ant-Man and the Wasp: Quantumania Trailer
Super-Hero partners Scott Lang (Paul Rudd) and Hope Van Dyne (Evangeline Lilly) return to continue their adventures as Ant-Man and the Wasp. Together, with Hope’s parents Hank Pym (Michael Douglas) and Janet Van Dyne (Michelle Pfeiffer), the family finds themselves exploring the Quantum Realm, interacting with strange new creatures and embarking on an adventure that will push them beyond the limits of what they thought was possible. Jonathan Majors joins the adventure as Kang. The movie is produced by Kevin Feige and Stephen Broussard. Marvel Studios’ Ant-Man and the Wasp: Quantumania, directed by Peyton Reed, opens in theaters on February 17, 2023.
Chapter 13 — Final Fantasy XIII Wiki Guide
Head up the stairs into the main chamber.
advertisement
Watch the cutscene and save your game.
Clear the path to the next event marker and watch the cutscene.
You now have a choice: the gate to your left will warp you to the Edenhall.
The gate to your right will warp you back to The Vallis Media from Chapter 11. Take this chance to go on additional hunts and optional quests. This will be your last chance to do so before the final boss.
Once you’ve played around enough, go to the next platform and save point.
Save your game, but don’t go to the event marker just yet. Instead, hop up on the path that extends on the side opposite the event marker. Run down the path and fight off the Aquila Velocycle to get access to a Librascope.
Hop up on the series of platforms by the scope. Take on the Megrim Thresher in order to get access to a Cherub’s Crown and Millerite.
advertisement
Grab the items and head to the event marker.
Interact with the white statue.
Hop on the platform that was to the left of where the statue was.
Get off the platform and take a right at the first intersection.
Continue onto the path above until you find the Supercharger.
advertisement
Run down to the path below. Continue past the platform that brought you here.
Stick to the right and hop onto the platforms below. Continue on until you find the Perfect Conductor treasure chest.
Pull a 180 and go down the ramp to find the Turboprop.
Go back up the ramp and hop onto the top platform. Run across and pop up to the platforms on the opposite side.
Fight the Megrim Thresher and grab the treasure near it.
Run back to the floating platform and ride it back to where the statue was.
Run onto the opposite floating platform and ride it. You should see a chest with twenty Seaking’s Beards. Grab it and proceed to the next event marker.
advertisement
Along the way you should see a ramp to your left that leads up. Take it.
Grab the Aegisol to the right.
Head to the forked path in the opposite direction and grab the Tear of Woe and Zephyr Ring from the chests there.
Descend down the ramp and head to the event marker. Pick up the Shamanic Spear along the way.
Save your game and activate the statue.
Go forward and hop on the platform to the right.
Continue past the first patch of enemies you encounter. The path they guard leads back to the first white statue you encountered in this chapter.
advertisement
Continue on going straight and hop onto the path to your left. From that path keep on going north until you find the chest with the Tetradic Crown.
Follow the next event marker and ride the platform down to the next save point.
Don’t jump to the next platform. Instead continue on, hugging the right, and grab the six Starblossom Seeds.
Make your way to the next event marker. Be sure to grab the Black Mycelium and Rhodochrosite, along the way.
Activate the statue.
Boss: Bandersnatch and Jabberwocky
advertisement
Party: Fang / Vanille / Hope
- Sentinel / Medic / Synergist
- Sentinel / Saboteur / Medic
- Saboteur / Ravager / Ravager
- Commando / Ravager / Ravager
- Commando / Medic / Ravager
- Sentinel / Medic / Medic
Jabberwocky will constantly heal Bandersnatch until you take him out, so make him priority number one. He’s weak to elemental magic, so you’re going to need Ravagers to take him down. After buffing your party in configuration one, use configurations three and four to boost his chain gauge. If you find yourself in trouble, return to configurations one or six to heal and re-buff. After you’ve taken out Jabberwocky , turn your attention to Bandersnatch. He’s far more resistant to all damage types, but if you stick with configuration four, you should be able to take him down eventually.
Watch the cutscene and save your game, and make your way to the next event marker.
Instead of heading to the next event marker, head straight and take on the the Immortal. If you’re having trouble, use Sneaking Smoke to get the jump on him. Once you’ve taken care of him, warp through the gate he was guarding.
Grab the Weirding Glyph and Adamant Bangle, then warp through the next gate.
Grab the Scarletite and Elixer, then warp through the gate.
advertisement
Head towards the event marker.
Save your game and activate the black statue.
Fight the Wladislaus.
Save your game. Run to the event marker. Watch the cutscene and run towards the next marker.
Pick up the chests filled with 3000 and 5000 Gil respectively along the way.
advertisement
At the top of the ramps you’ll encounter Bandersnatch and Jabberwocky; use the same battle strategy on them that you did earlier.
Continue towards the event marker until you get to the three Sanctum Templar. Take them down and proceed to the next statue.
Boss: Tiamat Eliminator
Party: Fang / Lightning / Hope
- Sentinel / Medic / Synergist
- Sentinel / Commando / Medic
- Sentinel / Ravager / Ravager
- Commando / Ravager / Ravager
- Commando / Medic / Ravager
- Sentinel / Medic / Medic
This boss switches between different forms, and uses different attacks in each. While he is in his flying mode, you can’t do much other than buff yourself to the max and wait. Use configuration one for that. When he comes down to the ground to fight, you’ll be prepared to dish out damage quickly in Paradigm configurations three, four and five. If you start taking a lot of damage while the boss is on the ground, use configurations two in order to heal while maintaining the chain gauge. If you find yourself in real trouble, switch to configurations six.
Go to the event marker.
Activate the warp gate.
advertisement
Save and prepare for the Final Battle.
Boss: Barthandelus
Party: Fang / Vanille / Hope
- Sentinel / Medic / Synergist
- Sentinel / Saboteur / Medic
- Saboteur / Ravager / Ravager
- Commando / Ravager / Ravager
- Commando / Medic / Ravager
- Sentinel / Medic / Medic
Watch out for the boss’s Ultima attack. As soon as you see that name flash on the screen, switch to configuration six- you’re going to need it. Other than that, Barthandelus is basically the same as he was in Chapter 9. Use the same strategies to take him down this time.
Boss: Orphan — First Form
Buffs and status effects are the name of the game here. It’s nearly impossible to take Orphan down unless you abuse them. Start off by buffing yourself in configuration one and jamming the enemy up in configuration two. Every now and then the boss will slam down on the party, reducing HP to one. As soon as you see the attack coming, switch to configuration six to prepare and stay in that formation until healed.
advertisement
Orphan’s other special attack will cast a variety of status effects on your party. Here too, it is best to use configuration six. In between buffing and healing, use configurations four and five to damage the enemy. If you’re not in too much danger, use configuration three to keep your status effects fresh.
Orphan — Second Form
A final boss battle with a time limit? Square-Enix must really hate us. On top of the the death counter, this form of Orphan is immune to all damage unless broken. Start the battle by casting Dispel, and then focus on staggering the boss with configuration four. The damage he deals out is not too threatening, so if you need to heal use configuration five. Once broken, keep the assault up. Rinse and repeat.
Up Next: Mission Guide
Previous
Chapter 12
Next
Mission Guide
Was this guide helpful?
In This Wiki Guide
Final Fantasy XIII
Square Enix
Rating
ESRB: Teen
Platforms
PCXbox 360PlayStation 3
Marvel and EA Sign Three-Game Deal, Starting With Iron Man
Evil West — Official Gameplay Overview Trailer
In this latest trailer for Evil West, get to know the vampire hunter you play, Jesse Rentier, and learn more about the story of this upcoming third-person action-adventure game. Additionally, meet your partner Edgar Gravenor and take a peek at the various locations you’ll explore like infested mines and more. The trailer also showcases a variety of weapons and tools in action like your revolver, rifle, the Rentier boomstick, the Rentier gauntlet, weapons and tools skill trees, gameplay, and frightful foes.Evil West will be available on PlayStation 5, PlayStation 4, Xbox Series X/S, Xbox One, and PC on November 22, 2022.
Black Panther: Wakanda Forever Trailer
Watch the exciting new teaser trailer for Black Panther: Wakanda Forever, ahead of its release in cinemas next month. Get a peek at what’s to come in the upcoming MCU movie starring Letitia Wright, Angela Bassett, Tenoch Huerta, Danai Gurira, Dominique Thorne, Lupita Nyong’o, Winston Duke, Florence Kasumba, Martin Freeman, and more.Marvel Studios’ Black Panther: Wakanda Forever arrives in theaters on November 11, 2022.
Final Fantasy XIII — 100% Walkthrough — Articles — Final Fantasy XIII — Square Faction
Let’s take a look at a small game trailer that demonstrates the main elements of the game. If you like it, then the full walkthrough of the game is located below.
Video
Walkthroughs:
Walkthrough 100%. Part 1. Beginning
Stunning CG videos, animation, graphics, unique characters with unique personalities (within the same game), the female version of Cloud — all this makes you play it again and again. The battles were also pleased with the speed, and elegance, and the lack of a reload screen. Music no longer cuts the ear, as in FFXII, but it looks quite out of place. All this creates a unique fantasy atmosphere.
Author: Artz
100% completion. Part 2
Hope and Vanille’s stunning ride ended in an equally stunning fall. We’re going into the heart of Fal’sie Pulse, following Snow, for obvious reasons. But no one was ready for what awaited our squad there — at the moment when Sera performed the trick destined for her, we get ours and become exiles and enemies on the planet that was our home!
Author: Artz
100% completion.
 Part 3
Having fallen, in the truest sense of the word, under the ground, we ended up in the area of Lake Bresha. The Sulfur Crystal has also fallen here, which means that it is necessary to find it before the PSICOM squads, the elite and brutal assassins of the Sanctum. True, we can’t go far without a new vehicle, so why not find wings for ourselves ?! They are trying to corner us. Such is the fate of all who are marked by Fal’sie Pulse.
Author: Artz
100% completion. Part 4
Too many arguments about what to do next. While Light and Hope find the strength to stand up and fight, to get to the Sanctum, which has declared war on them and organizes constant evictions from the overpopulated Kokun, Sage and Vanille decide to hide from enemy troops. But, will Light endure Hope’s behavior, or will the girl’s cool temper cool the guy?
Author: Artz
100% completion. Part 5
A trauma that only an enemy would want to experience prompts Hope to call his revenge operation Operation Burrow. Making their way under the white palm arches of an ecologically sterile forest, Light and Hope come close to their goal. But, the closer Hope is to his home, the more difficult each next step is given to him …
Author: Artz
Passage 100%. Part 6
Soot… When did you see your son for the last time?.. What happened a few days ago, and what made you board that train with the deportees?.. Will you tell Vanilla the story of your life? Maybe then the girl will have something to tell you. Picnic, rolling plains and all.
Author: Artz
100% completion. Part 7
Despite the fact that Hope is returning to his hometown, no one is waiting for him here. Perhaps only his own father, who does not yet know about the death of Nora, but guesses, because she was part of the resistance. A significant part of the enemy forces are converging in Palumpolum, as if they want to lure our squad into a trap. All the more unexpected is the help of Snow and Fang, who rush onto the stage riding Shiva.
Author: Artz
Passage 100%. Part 8
… I knew it would be time to say goodbye soon … Better to do it with a smile …
… Sometimes I wonder if our deaths will bring peace back to Kokun …
… Why did I wait … Like I was sure that could change something …
… Everything on Kokun is against us … They are sure that with our death everything will return to normal …
Author: Artz
Passage 100%. Part 9
… Fang forgot everything, while I perfectly remembered what happened … But I pretended to be a fool and also said that I forgot everything … I no longer wanted to bring suffering to people … Since then, I have been running from my fate … Until today …
… Doubts still remain … But now I really believe that we ourselves are the masters of our own destiny …
Author: Artz
Passage 100%.
 Part 10
… I think Reigns just wanted to make us understand what connection there is between L’sie and his focus … Maybe understanding is a unique trait that only people have, but not Fal’sie …
… Listen, Sera … I think even when we became L’sie, we can still do the right thing … Well …
Author: Artz
Passage 100%. Part 11 Chapter 1
… Maybe we won’t change anything, maybe we’ll just find ourselves in another dead end, but we have to see where this road leads … Searching for the house that we buried in the distant past … Where it all began, there lies the answers to our future… Our last journey has already begun…
Author: Artz
Passage 100%. Part 11 Chapter 2
The Giant Gran Pulse harbors a multitude of extraordinary creatures that roam and scurry across the endless green plains. It is necessary to somehow speed up the movement and complete the new missions of the fallen Sith.
Author: Artz
100% completion. Chapter 11 Chapter 3 sita… But by choosing to do nothing, I became guilty of bringing others into the Fal’sie war…
Author: Artz
Passage 100%. Part 11 Chapter 4
… Ragnarok … The Day of Fal’sie Pulse’s Fury … The day that marks our fate … The liberated souls will go to meet the creator to awaken him from his mortal sleep … May this day be seen only by the bravest of us … Elected, call Ragnarok …
Author: Artz
Passage 100%. Part 11. Chapter 5
Before you leave the «friendly» Gran Pulse, use the time allotted to you to the maximum and engage in new missions. You are waiting for battles with outlandish inhabitants of the plains, up to truly gigantic prehistoric specimens, in the footprint of which you can place a small resort pool.
Author: Artz
100% completion.
 Part 11 Chapter 6 This must be done before we leave here in the airship, which will be our point of no return. The straight lines of the plot will not give us a chance to return here to finish the work we have begun until we get to the final game.
Author: Artz
Passage 100%. Chapter 11 Chapter 7 chances, but one day someone will remember that L’sey Pulse tried to save Kokun …
Author: Artz
Passage 100%. Part 12
Eden… The heart of the Sanctum is right in front of us, which means we’re almost at Daisley. This vile Fal’si, who manipulates all the laws of the universe from the shadows, deserved not just death, but complete oblivion. When the ideal world of the inhabitants of Kokun collapses before our eyes, the only salvation can be only outcast and hated by them L’Cie!
Author: Artz
100% completion. Part 13
… Anger has never controlled us … We just always had something worth fighting for …
… Our dreams have come true… But just hoping for a miracle is foolish… Miracles we do ourselves… Right here and now…
… That’s all we can do… We trust you with the rest…
Author: Artz
Passage 100%.
 Part 14. Finale
… When we stop our prayers and make promises instead, even Fate itself is unable to prevent their fulfillment … There has always been light in our hearts, which helped us achieve the impossible … Now we meet a new dawn …
Author: Artz
Final Fantasy XIII walkthrough
Today we’re going to talk about Final Fantasy XIII. Passage in Russian is a rarity for this project, but we will try to fix it. Here you can find unique characters and excellent animation.
Eviction
Watching a series of scenes that act as a prologue to Final Fantasy XIII. The passage begins in a train filled with prisoners. The vehicle crashes, after which several prisoners (among them there is a girl who is our hero) manage to escape. The slaves subsequently take over the train. The girl repulses the attack of the advancing opponents.
The Final Fantasy XIII walkthrough continues with the battle against Manasvin Warmech. Due to its tail, this character resembles a scorpion. To defeat him, it is often enough to select the «Auto-battle» function. For each battle in the game, we will receive a certain rating. To achieve the maximum indicator, we will proceed as follows: we start the battle with an advantage, we do not allow attacks from behind our character, we destroy all opponents as quickly as possible.
After defeat, the opponent does not give up. He uses circular saws to pry the composition, tearing it apart. We carefully jump down. Soon the enemy will return for a second strike with even more vitality. We inflict non-stop attacks without using treatment. This time, the finally defeated enemy will explode and fall into the abyss. Together with a small group of survivors, we descend from the track, go to the road. We are moving forward.
We meet a save point, access to the store, as well as a group of soldiers. We get the first trophy — Instrument of Fate. Let’s go through the save process. We attack the soldiers, using the moment of surprise. We move on, jumping over the garbage on the way and destroying groups of opponents. We will meet chests. They are shaped like floating round objects. They are not difficult to see on the way.
The first chest contains a Potion. The situation will soon change. Mechanical creatures will arrive from special virtual portals to help the soldiers. There is a staircase on the right side of the road. We rise to it and select 2 Potion. Next, we are waiting for another save point, which we use. Nearby is a staircase leading to the left, side platform. We climb it.
We find a chest with an accessory called Iron Bangle. This element adds 50 units to the characters to the maximum level of vital energy, so we use it for our heroine. We jump off the platform. We examine the corner with metal boxes. The further path will be blocked, as a random projectile will blow it up before our eyes. We return back to the side platform. Save.
Starting platform activation. Next up is the battle with PSICOM. The enemy is supported by a couple of soldiers. They are our first target. Then you can start the battle with the main enemy. After the battle, we will be introduced to Snow, another main character in Final Fantasy XIII. The passage will continue in the next chapter.
«My beloved sister»
We look around and find a new weapon. We fight off monsters for whom our squad is uninvited guests. After the battle, we will gain access to the accessories store. We get a trophy called Instrument of Dissent. We go to the destroyed motorcycle. On the left we find a flying ball. Use save ahead. We look into a special item store. We go up the stairs. We find the ball on the left. We eliminate monsters that will attack especially actively. We follow to the opposite part of the room.
Others
The special magic of the cursed L’sie is revealed at the beginning of a new chapter in Final Fantasy XIII. The passage begins with a heated discussion of the focus. So, after all the videos, we move forward to the fork. We are saved in a special point. We check the store, there are several new items. Along the way, we eliminate all opponents and gain as much experience as possible. We turn left. We check the deadlock. Find the Pearlwing Staff weapon and add it to inventory. We continue along the right path.
Further developments
Get a new trophy — Instrument of Flight. We pass a little forward after Hope and Lightning. The bridge collapses from the weight of the generator. However, the path remains on the left. We follow to the chest, we overcome the enemy. Save. We visit a new store.
Version 13–2
We should also tell you a little about Final Fantasy XIII 2. The walkthrough of this version will be briefly reviewed below. We enter into a fight with the first winged enemy, while managing to control the horse at full speed. What follows is a spectacular sword fight. In the future, we simply move forward, destroying opponents until complete victory. The main plot is straightforward.
