Chapter 13 — Dead Space 2 Wiki Guide
- Node-Locks — The workbench in the Government Sector. Spawns a Parasite Gestalt.
- Power Nodes — 4
- Schematics — n/a
advertisement
Loading
Power Node — Upper hallway, before going through the door to meet Ellie.
Ignore the guideline, but follow the upper hallway of the base to the other side of the large room. You can loot items in the wall cabinets. While you can go back to the walkway after the events at the gunship dock, this is mostly to save time.
Head for the gunship bay and meet Ellie Langsford. After some dialogue crap, head for the save/store and lift. Things are going to get hectic very, very quickly.
For the necromorph onslaught (all types except the parasite gestalt, tripods, and brutes), explosives and stasis will help thin the crowd. The ammo you need for the last fight will be principally plasma cutter (or anything that fires with rapidity) and the Contact Beam (stasis) or Line Gun (messy). Everything else now can be used up.
advertisement
Demolish/use any stasis canisters on the ground, and sticking to the (either) ramp in the plaza can cut down on being attacked from the sides. Just remember that if you can see and fire at enemies, they can fire right back.
Power Node — Destroyed hallway near the crash site.
If you feel like you need to explore, check the otherside of the hall for a node. Otherwise, you can stasis the wave of enemies and hack the big door. Once you get through the big door, no enemies pursue until you incite further events.
Once you head through the large door and then down the stairs, you will be attacked by security forces. Head to the right and into a janitor’s closet. Take the maintenance tunnel to the next control room.
Taking out the battery will deactivate the large door and pit you against necromorphs once more. There should be a stasis canister you can carry out into the slaughterzone. Use it, as there are infectors along with parasites in the Slasher/Puker mix.
advertisement
Destroy the necromorphs in the security foyer and move into the next room. You will get an objective update once you proceed inside.
Once you have the guideline restored, locate the intact corpse in the security. Like in chapter 7, you need to use the RIG of another individual to pass by the security screening. Kinesis the corpse to the scanner and proceed.
It should be noted that for the RIG verification, you don’t need to carry the body to the scanner. If you can shoot it into range, the scan occurs automatically. This will come in handy for chapter 14.
Save station at the round room just before the lab. Heading to the right path will trigger one more set of necromorphs than if you simply go for the exit. The extra credits/ammo is questionable at this stage in the game.
advertisement
Another big fight occurs in the lab. Use stasis and back-up to a corner so enemies have to run around the counters to get you (Isaac can shoot over the counters). The mix here isn’t any more lethal than before (Pukers, Lurkers, Exploders, and Slashers), but they are elite and hence, take time to whittle down.
Node-Lock — By the workbench in Government Sector. Spawns a parasite gestalt.
Be aware that approaching the workbench sometimes triggers the parasite gestalt (from the direction of the locked door). Entering the locked supply room will certainly spawn it. Nonetheless, if you need the health and don’t mind spending 5000 Credits for the re-spec RIG exploit, you can refill Isaac’s health using the workbench.
Stalkers hold the next puzzle room hostage. Unlike previous stalker encounters, the floor here is sticky and slows down all movement. The Detonator is handy, as are the Line Gun or Javelin spears (electrocution only). Stasis and plasma cutter shots are more tedious and methodical, but that also works.
advertisement
Power Node — In the stalker room with the ceiling battery.
Grabbing cysts is not a good idea (it’s best to let Stalkers trip them and kill themselves). Find a lit corner and wait out the enemies. You should be able to afford it, unless you want to yank the battery out in the ceiling, then toss it to the exit. Swapping batteries opens the exit from the stalker room.
A save station waits after the stalker room (and before the laser centrifuge). Take out the cysts with spare objects and head down the ramp.
The laser centrifuge is lethal to everything that’s man-height or larger (meaning exploding babies, Lurkers, Leapers, and crawling enemies escape injury). Use stasis on the emitter tip to give yourself the time needed to move from one room to the other (counter-clockwise).
Power Node — One «lab partition» over in the laser centrifuge zone.
advertisement
Enemies are spawned after Isaac enters each room. Since you can see easily into the center chamber and hear the noises of spawned enemies, you can wait for them to come to you. Take them down and you can continue on the next leg of the trip.
The exit is the room to the left of the one where you started (use the guideline in a safe spot to check). Not all that difficult. Just beware of the enemies who spawn closer than you expect; some are exploders, and need to be taken out without triggering their bio-bombs.
At the top of the laser centrifuge, lower the bridge and cross over the spinning chamber. A few necromorphs drop in (via vents) when Isaac ventures near items, but that’s to be expected by now.
Past the centrifuge is a save station in a large room (no store). The next couple rooms are infested with enemies. The best method to get by (and not fight) is to use stasis on enemies as you near the room exit, and flee when the door opens.
If you have the Ripper, you can trigger the spawns and use the doorway to narrow your killzone. Note that like the transit hub encounter, there are finite enemies, but just a heckuva lot of ’em. On normal difficulty or higher, it may not be beneficial to stick around to fight.
advertisement
Fighting in the rooms is difficult due to the figure-8 layout. Enemies can flank and go behind you easily.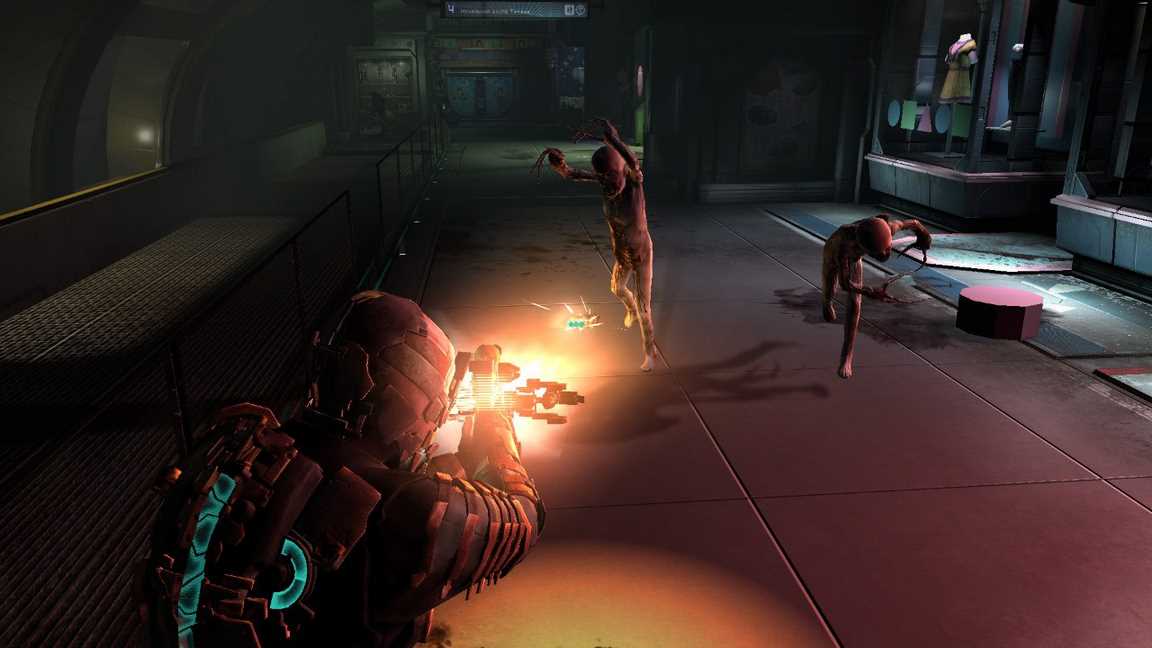 Even in a corner, you are hard pressed to keep the enemy advance contained. Hence the recommendation to move past the rooms quickly.
The second room is much like the first. Try and move past the enemies after hitting them with stasis. The reason for this is that you can recover stasis energy by waiting around, but ammo requires you to buy it or find it.
The boss here will a brute, so you want some stasis to freeze-lock it. Once you have the mini-boss in lockdown, you can sever the glowing bulbs on the creature’s arms.
The brute drops in this room, its back facing the exit. If you sprint to the exit and turn quickly, you can hit the creature as it jumps down with stasis. Once locked down, you can spam the plasma shots to cut the arms off.
advertisement
The last save and store just before the end of the chapter is here. For the next chapter, you want to have the Contact Beam’s stasis (ALT-fire) or Line Gun (fast and messy) as well as a Plasma Cutter with plenty of ammo. Stasis packs and healing items are handy as well.
The Advance Suit (or Advance Elite suit for round 2 and on) is also very handy since it boosts your stasis recharge rate (Advance Suit) or the duration (Advance Elite Suit). If you can, use any means necessary to acquire the Advance Suit; if you bought the Vintage Suit, it will cheapen the cost of the Advance suit by 10%.
Locate the machine Stross was referring to but before using it, inspect the room. This room starts the next chapter, and you will have an indestructable regenerating necromorph chasing you for the whole of it.
Identify this hack panel and the stasis station next to it. You need to lock-down the enemy (after crippling it limbs far away from the hack panel) so you buy enough time to hack the door and escape. Any less and you may not have enough time to do your thing.
Now that you have an idea of what to do next immediately after the next chapter starts, lets start poking Isaac’s eyeball. Head into the machine and use the stick and ACTION button to aim and lower the needle. You want a BLUE LIGHT for the laser before you jab it into Isaac’s squishy eye.
advertisement
Insert tasteless one-eye joke here. Note that failing results in more hilarity — along the lines of a Mortal Kombat game. Once Isaac gets out of the bed, the next chapter will start.
Up Next: Chapter 14
Previous
Chapter 12
Next
Chapter 14
Was this guide helpful?
In This Wiki Guide
Dead Space 2
Visceral Games
Rating
ESRB: Mature
Platforms
PCPlayStation 3Xbox 360
Barney: I Love You, You Hate Me — Official Trailer
I Love You, You Hate Me is a limited doc series chronicling the rise and fall of Barney the Dinosaur’s furious backlash — and what it says about the human need to hate. From Barney-bashing to frat parties to homicidal video games, something in American society broke into a million pieces, and it’s never been put together again… or is this just who we were all along? Check out the trailer for the two-part series from director Tommy Avallone. I Love You, You Hate Me premieres on Peacock on October 12, 2022.
Starfield: Performance Preview
Bethesda is one of the biggest studios within the Xbox portfolio, with its latest and arguably most anticipated title in Starfield releasing on Xbox Series X, Series S, Xbox One, and PC in 2023. This huge Gamepass title had gameplay revealed earlier this year to provide a glimpse into what we can expect.Built on an improved engine, The Creation Engine 2, the game shows clear strides over Fallout 4 and other previous titles. Space travel, world building, rendering technology, and more are all covered here in our IGN Performance Preview.
Loading
Brutality in Horror Cinema & The Callisto Protocol — Mastering Horror Docuseries Ep. 1
Assassin’s Creed Codename Red — Reveal Trailer
Check out the reveal trailer for one of the many new Assassin’s Creed games that will live under the Assassin’s Creed: Infinity umbrella. Codename Red is set in feudal Japan, a historical period frequently requested by fans. In this brief trailer, a Shinobi is seen jumping onto a pitched roof and then unsheathing their hidden blade.
Guide for Dead Space 2 — Story
Chapter 13
Run along the walkway while checking your left for 2x wall containers. Once you reach a door labelled Security Gunship Docking Bay, face away from it and look into the hallway ahead. Right at its beginning should be a machine, adorned with a blue and orange stripe. Smash it to pieces to find a Small Med Pack inside. Hug the left wall and keep going until you find an orange machine you can also smash to pieces for Credits. Nearby are a Power Node and a green crate. You find 2x wall containers in the last hallway.
Hide ads
Backtrack to the door leading to Security Gunship Docking Bay, go through two doors and continue following the path until a cutscene starts. Afterwards, keep going to find a Store, an elevator and a save station. Before you use the elevator: MAKE A SAVE. Don’t overwrite it until you reach Chapter 14. Sometimes a game-breaking glitch occurs near the end of this chapter, effectively making it impossible to finish this playthrough. If you encounter this glitch, revert to the aforementioned save.
While stuck in the elevator, ready your weapons. Step out and immediately look to your right for an Exploder and a Puker in the distance. Kill them, then turn around to find another machine adorned with a blue and orange stripe to destroy for a Medium Med Pack. Stick to the hallway, pick up the Stasis canister and carry towards the larger area. Doing so triggers the next fight. Stick to the bottom of the stairs and take out this wave of Necromorphs (3x Exploders, 1x Puker, 2x Enhanced Slasher, 1x Lurker). Save the Stasis canister for the upcoming second wave that follows closely (2x Enhanced Slashers, 1x Puker and 2x Enhanced Lurkers). Wait until they bunch up at the stairs, then destroy the Stasis canisters to give you a bit of breathing room.
Check the hallway on the other side of this level for a wall container and a Power Node before you climb up the stairs towards a closed door. Ready yourself for 2x Enhanced Lurkers popping out once you unlock the door with the nearby console. Take the Necromorphs out before you step through the opening and continue until a cutscene begins. As soon as you can move again, head through the door on your half-right. In one of the sinks is a Power Node. Head towards Facilities Access, loot 2x lockers on your way before crawling through a maintenance tunnel. Outside, find a locker, then climb the stairs to your right.
Opposite the door is a wall container. The next area contains ammunition and a wall container. Remove the nearby power unit from its socket to cause an outage. Return to where you stepped out of the maintenance tunnel, then ready your weapons, nab the Stasis container and open the door nearby. Wait until two Necromorphs crawl out of sight towards the middle of the adjacent area, then drop the canister on them. Preferably when most of the Necromorphs bunched up. Once this batch of enemies is dealt with, an Exploder pops into this area. Deal with it, then move onwards past the security checkpoint through the right opening.
Hop into the next area and take the right. This triggers a cutscene. Afterwards, look around the room for 3x green crates and 2x wall containers.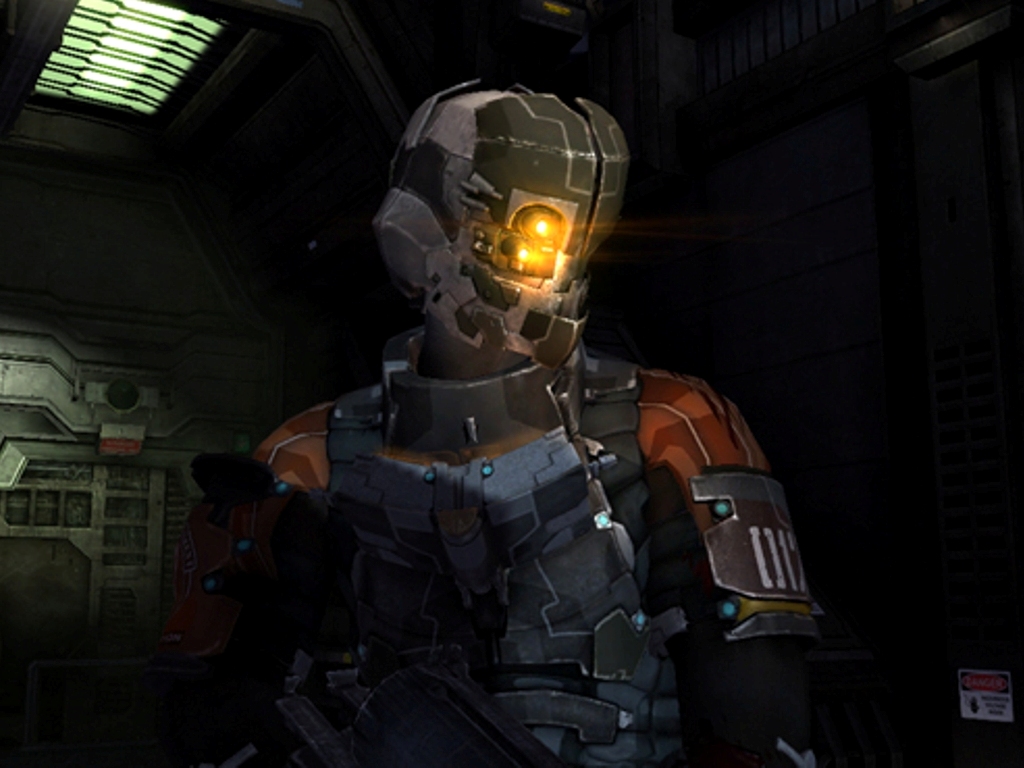 Follow your locator until you reach a security checkpoint you have to pass by using the nearby corpse with the laser grid. Head onwards, take the left path for an audio log (#39/48, “Patient Four”) and approach 2 large glass tubes filled with yellow gas. Circle around the right for a Medium Med Pack, ready your weapons and take the right path for ammunition and Credits. In doing so you trigger a Slasher and a Puker. Kill them, then take the other path. Be ready for an Enhanced Slasher and an Infector to your right and a Puker on your left as soon as you step through that door.
Take out the Infector to your right, then retreat and let the others come to you. You have to fight no less than 10 Necromorphs in total. When the first set of Necromorphs is dead, the others mostly spawn as a pair: one dropping down from the ceiling right next to you, the other in the distance. Take out the first pair quickly since the next pair consists of an Exploder and a Puker. Two Slashers, one of them Enhanced, make up the last pair.
Carefully approach the apparatus emitting blue light to spawn a Slasher. Nab nearby ammunition and a green crate before you move towards the door. Don’t open it yet but turn around for an audio log (#40/48, “Shield Questions”), then continue onwards to reach Project Annex with 3x lockers, ammunition an Upgrade Bench and an emergency supply room. Be extremely careful when thinking about opening the room. Entering it will yield 2x green crates, a wall container and a Ruby Semiconductor, but will spawn a Divider in Project Annex. It’s possible to avoid spawning the Divider if you stay out of the room while gathering items with Kinesis. However, you won’t be able to open the wall container. Also, there is no Store within reach to drop items until the start of Chapter 14.
To continue, go to Core Sample Storage And Analyzation. Be ready to face 4 Stalkers in here. Snag ammunition, then move counterclockwise. Pick up a green crate, sitting on top of some large crates, then remove and Kinesis-throw a power unit from the ceiling towards the other side of the room. Keep going counterclockwise to find a Power Node. Around here, the Stalkers start attacking. When they’re dealt with, 2 Pukers appear. Continue moving counterclockwise, collecting contents from a green crate until you can’t anymore. Nearby are 2x wall containers and an audio log (#41/48, “Same Signal”). Look out for the power unit you threw across, switch it out to repair the door and turn on the lights. Go through the previously defunct door to find a wall container guarded by a Cyst. Go down the ramp and continue on your way once the cutscene is over to enter Reconstruction Room.
Head towards the moving lasers, but stay out of reach. Immediately take out the sole Crawler, then the crawling Enhanced Puker. Be on the lookout for 3 more Crawlers converging on you.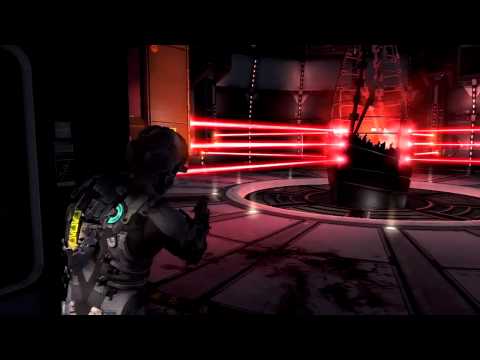 You’re in the green when the protagonist mentions to dodge the lasers. You have to start running counterclockwise when one laser has passed you by in order to create a safe path to the next room. As soon as you enter the small room, an Enhanced Slasher pops out as well as a normal one outside. Once they’re done, loot the room for a Power Node and contents of a wall container.
Time your next sprint accordingly to reach another room to find ammunition. 2 Crawlers will gang up on you from outside. Kill them before attempting another sprint. Inside, 2 Slashers greet you from the front and a crawling one creeps up on you from your back. Search a wall container before you take the cargo lift to the next area. Loot 2x wall containers at the other end of the hallway, then activate the console to turn off the lasers. Look upwards for machinery you can move with Kinesis. Create a pathway to the other side of the area.
Nab the contents from a wall container, then prepare to get jumped by a Slasher as you collect ammunition and items from a green crate. This Slasher is soon to be followed by an Enhanced variety. When they’re dead, use the only door to go onwards. Enter Data Monitoring Room to find an audio log (#42/48, “Marker Success!”), then move towards Thermal Conduit Access.
This fight can turn into a hot mess quickly. You can make it less stressful by switching between baiting attacks and retreating into the previous room. These are roughly the Necromorphs to expect on this level: 3x Slashers, 1x Exploder, 2x Crawlers. Afterwards, an Enhanced Puker joins in, followed by 3 more Necromorphs (2x Slashers, one Enhanced, 1x Enhanced Puker). Retreat a bit as an Exploder pops out of the nearest wall vent, soon to be followed by 2 Slashers and an Enhanced Puker. Approaching the middle of this area triggers the last two enemies here: 2 rare Slashers that fire vomit blobs, similar to Pukers. After you’re done, search for 3x wall containers, then move onwards. Keep in mind that a bait and retreat strategy might mess up their spawns. Tread carefully when you start exploring each floor.
Halfway down the ramp, you encounter an Enhanced Puker and a Slasher, plus a locker. Go through the door and use the same tactics as before. Take out the Exploder to your right before you focus on the Slasher running towards you. Afterwards, a Puker and a Slasher (both Enhanced) try to gang up on you. Once they’re dealt with, another Enhanced Puker/Slasher pair appears — soon followed by 2 more Slashers, one of them aspiring to be a Puker. Before you move on, search the room for 2x wall containers.
Enter to find 2x lockers and a green crate. Follow your locator to enter a large area. Nearby you find an audio log (#43/48, “Tiny Marker”) and 2x green crates. Pick up a green crate next to the round door from afar to avoid triggering the miniboss fight prematurely. When ready, approach the door to spawn a Brute. Unlock the door via console when the Brute is done. Keep following your locator towards Project Inner Core until you find – at last – a Store, an Upgrade Bench, a text log (#44/48, “Dire”) and an audio log (#45/48, “It’s Making Us Make It!”). Take the elevator to leave this area. After the cutscene, nab the contents from a wall container before you go to the next area.
Inside this room, you find 2x ammunition and a green crate. Interact with the console to step inside an apparatus affectionally called Eye Poke Machine. It’s imperative to watch the protagonist’s heartbeat when moving the laser, as well as the distance between laser and eye. Stop moving the laser as soon as you’re within a 0.5 margin. Wait until the protagonist calms down (heartbeat around 85 bpm), then carefully inch forward. The laser must emit a blue light before it’s about to enter the eye (around 0.2 margin) – otherwise it’s game over. Once the cutscene is over, the chapter is concluded und you unlock:
Cross your Heart, Hope to Die
Survive the Eye Poke Machine
3 guides
17. Story — Chapter 14
15. Story — Chapter 12
Find anything you think is wrong with this walkthrough? Help us fix it by posting in its Walkthrough Thread.
This walkthrough is the property of TrueAchievements.com. This walkthrough and any content included may not be reproduced without written permission. TrueAchievements.com and its users have no affiliation with any of this game’s creators or copyright holders and any trademarks used herein belong to their respective owners.
DMCA (Copyright) Complaint to Google :: Notices :: Lumen
sender
GroupIB
on behalf of
IVI.RU LLC
[Private]
EN
Sent on
COUNTRY: EN 🇬🇧
recipient
Google LLC
principal
IVI.RU LLC
Other Entities:
- Principal
- Notice Type:
- DMCA
-
Copyright claim 1
Kind of Work: Unspecified
Description movie «Mike and Dave Need Wedding Dates» (2016)
Original URLs:
- www.
 kinopoisk.ru — 1 URL
Allegedly Infringing URLs:
- hd-hdd-tv.gidonlinee.com — 1 URL
- kinozir.pro — 1 URL
- ru2.turbokino.me — 1 URL
Click here to request access and see full URLs.
- www.
-
Copyright claim 2
Kind of Work: Unspecified
Description movie «Mickey, Donald, Goofy: The Three Musketeers» (2004)
Original URLs:
- www.kinopoisk.ru — 1 URL
Allegedly Infringing URLs:
- goethe.zhinka.tv — 1 URL
- newtorrent.zfilm-hd.org — 1 URL
- 720.tamsa-tatarstan.org — 1 URL
- torrent-multfilms.pro — 1 URL
- onlymult.com — 1 URL
Click here to request access and see full URLs.

-
Copyright claim 3
Kind of Work: Unspecified
Description movie «Women / Teacher: The Story of Galatea» (2021)
Original URLs:
- www.kinopoisk.ru — 1 URL
Allegedly Infringing URLs:
- m.zfilm-hd.club — 1 URL
- lordfilm-web.xyz — 1 URL
- fullsee.top — 1 URL
- lordfilm-green.site — 1 URL
- lordfilm-smotret-online.site — 1 URL
Click here to request access and see full URLs.
-
Copyright claim 4
Kind of Work: Unspecified
Description series «Lilo / Lilo and Stitch» (2003)
Original URLs:
- www.kinopoisk.ru — 1 URL
Allegedly Infringing URLs:
- allserial.
 org — 1 URL
 - www.lostfilmhd.ru — 1 URL
- zfilm-hd.net — 1 URL
- hdrezzka.cc — 1 URL
Click here to request access and see full URLs.
-
Copyright claim 5
Kind of Work: Unspecified
Description movie «Finding Neverland» (2004)
Original URLs:
- www.kinopoisk.ru — 1 URL
Allegedly Infringing URLs:
- oxkino.zagonka-1368.club — 1 URL
- www2.slrtoday.com — 1 URL
- gidonlinee.com — 1 URL
- seasonvar.ru — 1 URL
- multazbuka.2020-film.org — 1 URL
- filmix3.zagonka.online — 1 URL
- ru2.turbokino.me — 1 URL
- torrent-multfilms.pro — 1 URL
Click here to request access and see full URLs.

-
Copyright claim 6
Kind of Work: Unspecified
Description movie «Seobok / First Clone» (2020)
Original URLs:
- www.kinopoisk.ru — 1 URL
Allegedly Infringing URLs:
- lordfilm-smotret-online.site — 1 URL
- hd.videobox.life — 1 URL
Click here to request access and see full URLs.
-
Copyright claim 7
Kind of Work: Unspecified
Description movie «Creed» (2015)
Original URLs:
- www.kinopoisk.ru — 1 URL
Allegedly Infringing URLs:
- ru2.turbokino.me — 1 URL
Click here to request access and see full URLs.

-
Copyright claim 8
Kind of Work: Unspecified
Description movie «Brave» (2012)
Original URLs:
- www.kinopoisk.ru — 1 URL
Allegedly Infringing URLs:
- torrent-multfilms.pro — 1 URL
- uhd.films1080.best — 1 URL
- top.films1080.best — 1 URL
Click here to request access and see full URLs.
-
Copyright claim 9
Kind of Work: Unspecified
Description movie «Aftermath» (2014)
Original URLs:
- www.kinopoisk.ru — 1 URL
Allegedly Infringing URLs:
- 1luxtv.net — 1 URL
- www.

