XCOM 2 guide | Eurogamer.net
XCOM Enemy Unknown seemed on the surface to be a game about leading a rag-tag band of hardnuts as they battled wave after wave of invading aliens, but it was really, underneath all that, a game about managing failure. It was about fighting infinite aggression with finite resources, and about making do as best you could in a war in which every loss was both permanent and costly.
XCOM 2 offers more of the same — and that’s fabulous news, especially as it’s available on consoles as well as PC. If anything, Firaxis has sweetened the deal by making the whole thing even less forgiving. The turn-based battles that your squad finds itself in are now enlivened with timers, and played out across procedurally-scrambled maps, while the story sees your enemies entrenched and evolved, with new units to surprise you on the battlefield, and new means of bringing your carefully-crafted plans to ruin.
All of which means that the pleasures to be had in turning the tides have never been sweeter, whether you’re limping towards your first victory in a skirmish or cobbling together the ideal base to streamline your production of enhanced tech. This is a hard game, in other words, but you wouldn’t want it any other way. And there are plenty of things you can do to tilt the odds in your favour.
To help you along the way, we’ve put together a guide that should prove pretty handy, whether you’re a newcomer to the series or a veteran of the earlier wars.
XCOM 2 Tips: Top 5 Tips to Dominate Mission Combat (How to Guide for Tactics)
XCOM 2 guides
On this page
XCOM 2 — new player tips
A handful of useful new player tips for getting ahead of the game from the start.
Other pages:
XCOM 2 — choosing the best Soldier Abilities
A look at all of the Abilities available to your squad members, with tips for each character.
XCOM 2 — the best early research and how to unlock it
An overview of the different paths available to you in XCOM 2’s Research systems.
XCOM 2 — how to build the best base
The approaches you can take to build a base that suits your playstyle.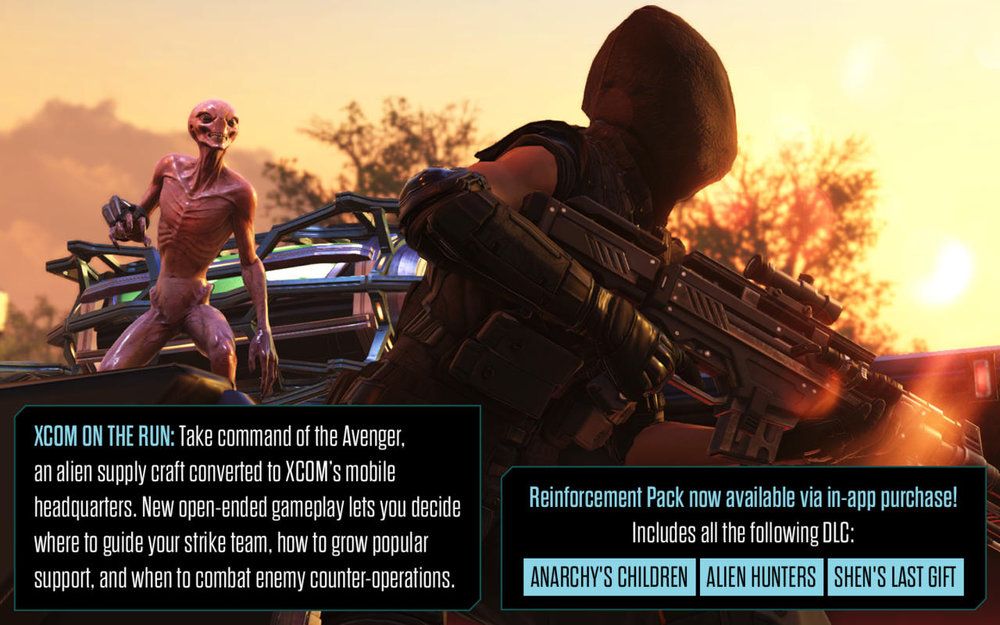
XCOM 2 — how to unlock the Psi Operative
The fastest possible route to unlocking the Psi Operative Soldier in XCOM 2.
XCOM 2 — how to unlock Hero characters
Our guide to unlocking all of the known, massively overpowered Hero characters in XCOM 2.
XCOM 2 — cheats
All of the handiest console command cheats you could possibly need.
XCOM 2 Ironman mode tips and tricks
Here’s how to survive and thrive with just a single save.
If you need help specifically with XCOM 2’s expansion, our XCOM 2: War of the Chosen guide and tips can explain everything you need to know, from how to beat The Chosen Assassin, Warlock and Hunter and the new The Lost, Spectre and Advent units. Combat them by learning about each new faction with our Reaper abilities and skill tree, Skirmisher abilities and skill tree and Templar abilities and skill tree pages, as well as learning about the Resistance Ring, Ability Points, Fatigue system and Bonds. Good luck, Commander!
XCOM 2 tips and tricks
XCOM 2 enables you to do a whole host of cool and wonderful things with soldier loadouts, battlefield tactics, base building, character customisation and many more of its complex and versatile systems. The key to success lies in experimentation. Discovering an effective new strategy or a particularly deadly combination of Soldier Abilities is one of the many joys of the game and you’ll no doubt find your own favourites during play.
However, to set you on the path towards halting the Avatar Project — or at least to not being steamrolled by the alien forces within the first hour of play — consider these tips as an early survival guide.
Beware the Sectoids
Far more dangerous than they ever were in XCOM: Enemy Unknown, the new Sectoids have benefitted from human/alien hybridisation, giving them a more imposing form and a great deal more hit points than their predecessors had. The Sectoids’ ability detrimental mind effects can incapacitate your soldiers for a turn or, worse, take over their minds entirely, turning a previously valuable ally into a deadly adversary. To make matters worse, they can also reanimate previously terminated foes as powerful Psi Zombies. In all cases, focus your attacks on the Sectoid, rather than their Psionic puppet, as taking out the alien will immediately dispel their hold over their victim.
Use the environment for both defence and offense
Taking up positions of defensive cover is imperative for survival, but in many cases the environment can also be used to your offensive tactical advantage, too. Look to destroy cars, turrets and power generators that the alien forces might be using as their own cover. After enough damage has been dealt, these hazardous cover options will explode — either instantly or on the next alien turn — dealing damage to any alien that hasn’t fled from the scene of their volatile cover.
Stay on top of engineer staffing
Your helpful ally and resident mechanical whizz, Chief Engineer Shen, will often pop-up to inform you that you have unassigned engineering staff who could be put to good use. Assigning engineers to staffing facilities, building items or clearing out debris aboard the Avenger is certainly essential for maximising your initially meagre staff resources.
Equally as important, but less immediately apparent, is that having engineers assigned to facilities that aren’t currently producing anything is just as wasteful. If you’re lucky enough not to have any soldiers convalescing at the Advanced Warfare Centre, then you don’t need to assign an engineer there to increase the healing rate, for example. This engineer can likely be put to good use elsewhere, particularly in the early stages of the game when you have limited staff resources. Good battlefield management begins with good base management.
Play aggressively but don’t overstretch yourself
Pretty basic stuff, but relevant to both returning XCOM veterans and newcomers alike. Many of the missions in XCOM 2 have some form of turn timer, such as those dictating the window for hacking an open data point, or extracting a valuable civilian asset, for example. This lends a degree of urgency that was missing from XCOM: Enemy Unknown, and often means it’s necessary to progress through the level toward the target just a little bit quicker than feels strictly comfortable.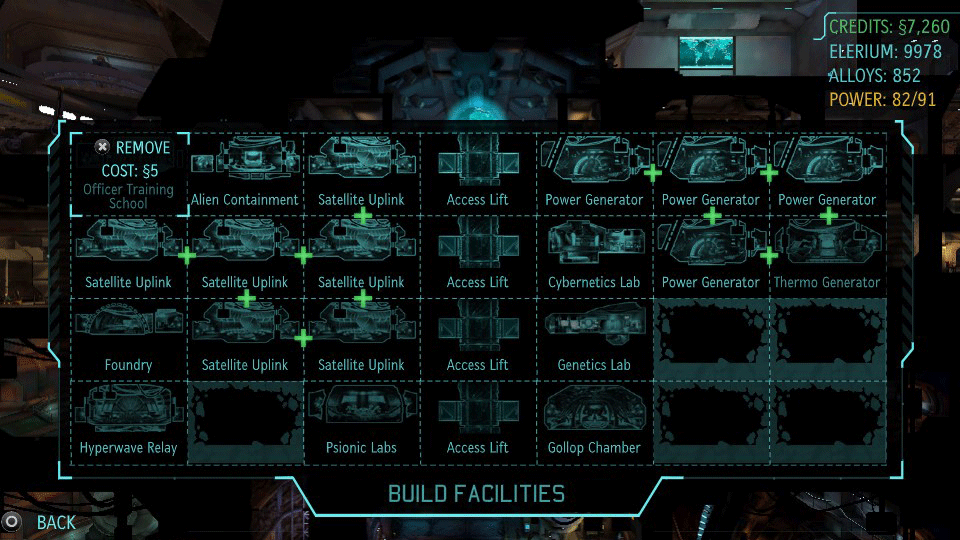
Ensure, however, that you remain vigilant and don’t overstretch your squad, particularly when moving into fog of war territory, otherwise you can quickly find yourself under siege. Maximise the advantages of Concealment — the brief period at the start of many missions where your presence is undetected by the enemy troops — by setting up ambushes or positioning your squad effectively. Be sure to also make judicious use of Battle Scanners and Soldier Abilities that reveal the environment, as well as concealed enemies. As ever with XCOM, forewarned is forearmed.
Visit the Black Market
Once revealed, the Black Market is your go-to destination for raising quick cash by selling unwanted loot and resources — just be careful not to leave yourself short longer term. The hot goods change on a regular basis, so check back in every now and then to see what’s selling for a premium as the in-game months roll by.
The Black Market is also incredibly useful for picking up various perks that can speed up research projects, which is particularly useful when you want to gain access to something that Dr Tygan is telling you will otherwise take weeks of research.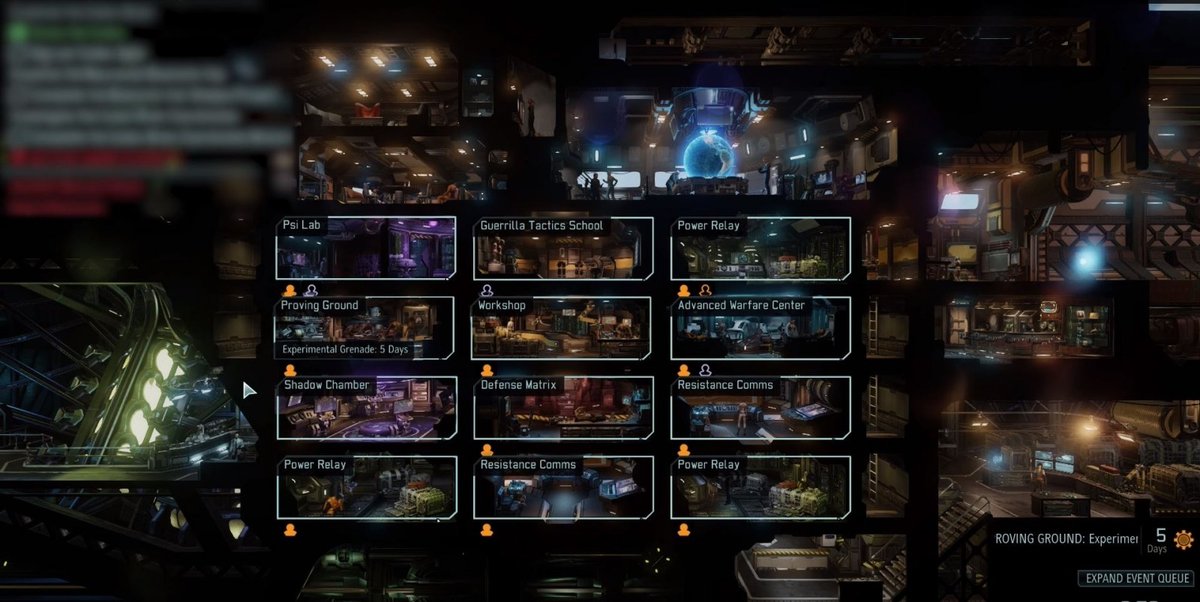
Stalling the Avatar Project
Once you get into the meat of an XCOM 2 campaign, your actions on the world map are dictated by a big, red progress bar at the top of the screen. You’ll need to disrupt the alien’s progress towards their Avatar Project by completing story objectives, or destroying facilities. If you don’t and that bar is filled, it’s game over.
Well, actually, that’s not quite true. Once the progress bar is maxed out, you’re given an additional 20 days to slow the Avatar Project, as the progress bar is replaced with an even-more-threatening timer. If this runs out, you’ve lost the game, but if you do manage to hit a facility, the timer will stop and everything goes back to normal. Next time the progress bar is filled, the exact same thing will happen.
This means that it’s entirely possible to take advantage of this timer, to give yourself a little more breathing room in the campaign. Let the progress bar fill and hold off on hitting a facility until the timer is almost done and you can gain weeks of extra research/construction time.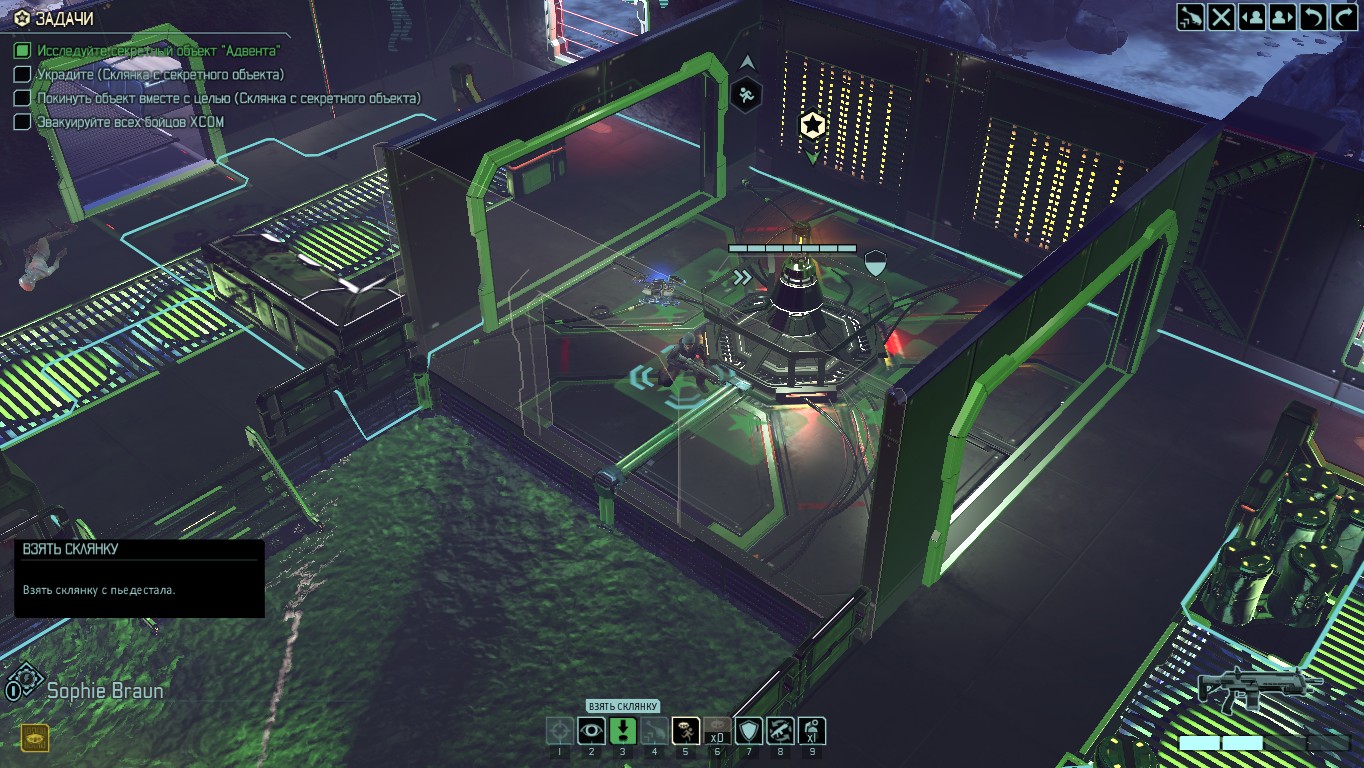 Especially useful on the higher difficulty settings.
How to approach the Alien Hunters DLC
The thing you need to know about the Alien Hunters DLC is that it will inevitably lead to your campaign being much easier and much more difficult to complete.
If you start a new game with this DLC enabled, you’ll be given the option to investigate a crashed ranger on the world map, fairly early on in your campaign. Do this, and you’ll discover a cache of unique weapons that you’ll want to immediately equip in favour of your soldiers’ starting gear. This stuff is great: a super powerful, single-shot bolt caster, a pair of axes and a frost bomb. You’ll want to be using this for the rest of your playthrough.
However, once you’ve got your hands on this gear, you’ll then be prompted to embark on a new mission, tracking down an old friend from XCOM: Enemy Unknown. From this point onwards, you can expect three alien bosses to appear at any point during your campaign.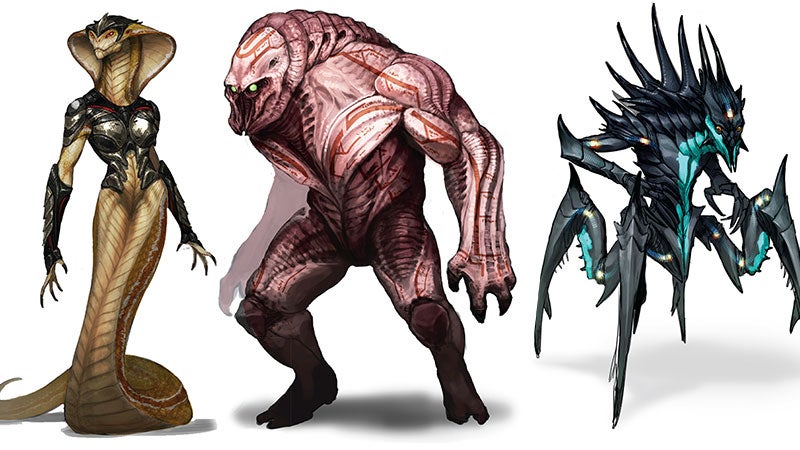 Killing them allows you to upgrade your unique weapons and unlock powerful armour sets, but oh my goodness gracious me, are these some tough units to fight.
Not only can they appear, out of nowhere, whilst you’re already fighting a group of aliens, but they will also respond to every action you make. This is crucial to understand. After every individual movement you make, they will react with an action of their own. It’s absolutely vital that you make good use of the frost bomb to buy yourself some extra time and use any free actions (like throwing an axe) that you have at your disposal.
These bosses will be some of the toughest fights you experience during your campaign, but if you make it through them, you’ll be incredibly well equipped for whatever else is to come.
Thanks to Chris Bratt for additional reporting on this guide.
XCOM Chimera Squad guide: 25 tips and tricks for beginners
XCOM Chimera Squad came out of nowhere didn’t it? The latest in the rebooted XCOM series opts for a more streamlined approach than its predecessors, focusing in on a fixed squad that must keep the peace in City 31. Things can quickly snowball out of control if you don’t know what you’re doing, but that’s where we come in.
XCOM Chimera Squad guide
Our XCOM Chimera Squad guide will go over all the tips you need to know to get started with the new XCOM game. It will go over what XCOM Chimera Squad is, if you need XCOM 2 to run it, tips about breach points, and key things to know about the HQ.
- What is XCOM Chimera Squad?
- Do I need XCOM 2 to run XCOM Chimera Squad?
- XCOM Chimera Squad tips
- XCOM Chimera Squad guide series
Watch on YouTube
What is XCOM Chimera Squad?
The latest game in the reboot of the XCOM series is a smaller game set after the events of XCOM 2. While the aliens have relinquished control of Earth, the population now has a mix of human natives and alien immigrants who have mingled with the rest of society. Taking control of Chimera Squad, you’ll command human and alien soldiers to keep the peace within the districts of a large settlement known as City 31.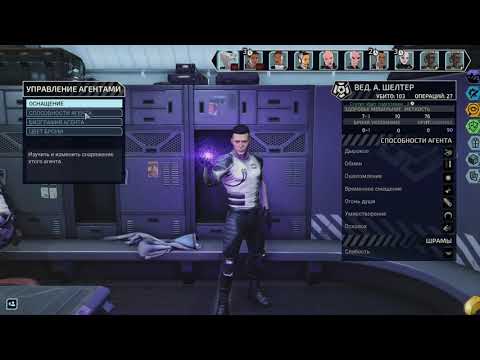
Humans and aliens have weapon types that are fixed and unique abilities based on their species. Combat has also been revamped to turn battles into shorter chunks while keeping the unpredictability that XCOM is known for. There’s also a new way of calculating turn order based on stats, as well as a breaching mode where you deploy your squad into the action.
Do I need XCOM 2 to run XCOM Chimera Squad?
Since XCOM Chimera Squad is a standalone game, you do not need to have purchased XCOM 2 to run it. The minimum and recommended system specs are a little different to those from XCOM 2, so make sure you check before you buy. If you want to buy it, it’s currently 50% off regular price on Steam.
Watch on YouTube
XCOM Chimera Squad tips
While nowhere near on the scale of XCOM 2, there are plenty of things to keep in mind when playing this smaller XCOM experience. We’ve split each of the tips into two categories: combat and reclamation HQ.
Reclamation HQ tips
- In the city map, you’ll be able to assign agents to tackle missions and situations. Missions involve combat while situations do not require any fighting.
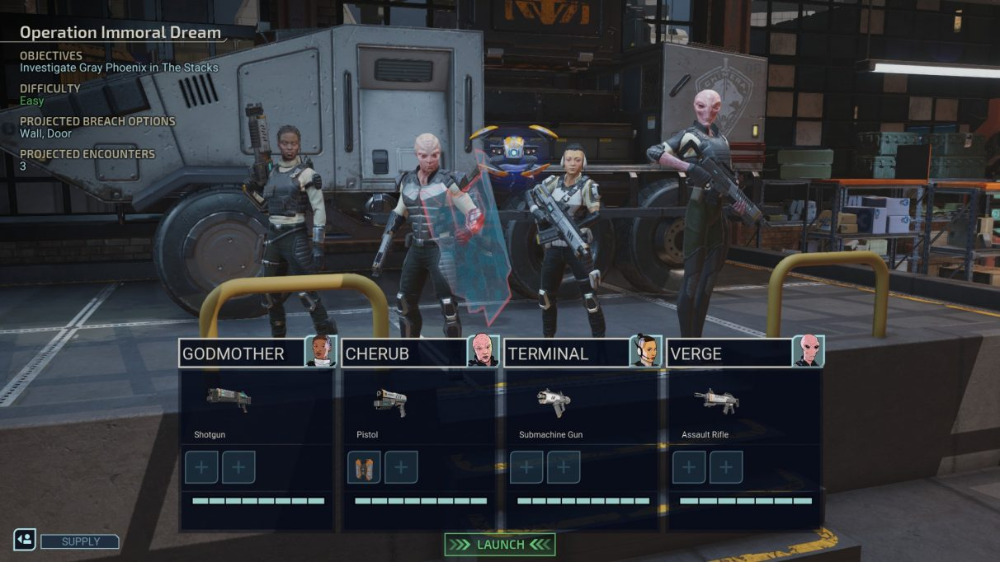
- Before starting a mission, pay attention to the «Projected Breach Options» as it can help decide when to use certain items like breaching charges or hacking doors. This is different from the unique breaching options.
- Targets change every day so make sure you are certain about which situations and missions you take on that day and the consequences of not doing so.
- Remember the types of missions are colour coded. Purple missions advance the story while yellow missions are side missions that reduce unrest and give you either leads or resources.
- Red missions are emergency missions that only appear when a district has severe unrest. Upon completing these, your unrest in that region will be reduced by two stages.
- Sometimes you’ll be required to investigate factions.
 Doing Groundwork missions helps you learn about that faction, Operations are hidden missions that upon completion disrupt their plans, and Takedown are final missions to end their threat to City 31.
 - You’ll occasionally be able to recruit new agents in the Armory tab. Eventually you’ll be able to recruit all of them, but initially you’ll have to choose one at a time from a selection of three.
- If an agent was knocked out, you can temporarily assign an android to take their place while they recover. They do not gain experience and can only be upgraded by purchasing items in the Supply Market. To build them, head to the Assemble tab.
- You need one of three resources to build things: Elerium (the lightning bolt), credits (the weird dollar sign), and Intel (magnifying glass).
- Occasionally, a wounded or bleeding out agent will also pick up a scar that decreases a specific stat. Use the training facility in your base to remove the scar, but this process will take a few days.

- Assigning healthy agents to the training facility also gives improved stats and new abilities.
- Use Spec Ops to send agents to gather resources or reduce the unrest in the city.
- If a district’s unrest reaches five bars (red), the overall unrest in the city will increase. Should the overall unrest reach the maximum point, you’ll lose the game.
- Unrest rises more as the game progresses through the different investigations. Use Field Team abilities and Spec Ops assignments to manage how much they increase by.
- After unlocking the Scavenger Market, make sure you keep a healthy stockpile of Intel ready whenever they are open. The stuff they have on sale is higher level than regular items are in the Supply Market.
Chimera Squad combat tips
- At the beginning of each encounter of a mission, you’ll assign breach points. Assign agents carefully to specific breach points, as each has a positive or negative effect.
- When breaching in, the order in which you select agents is important for turn order.
 Think about which team member you wish to act early on and which ones you wish to save until later.
 - It’s usually best to injure four enemies while breaching rather than killing two. Leaving multiple enemies on lower health means you can use your subsequent turns to kill them off before they get a chance to act.
- Some breach points can only be assigned to specific units in the squad, so always save before going into a mission to see what breach points are going to appear and build your team accordingly.
- If a teammate is bleeding out, try to stabilise their condition using either allies or drones. They’ll still be unconscious and therefore unable to fight, but fully bleeding out will fail the mission.
- Pay attention to which abilities can synchronise with other units. For example, moving an enemy unit will trigger a nearby ally’s overwatch ability.
- Arresting enemies with subdue or Cherub’s Kinetic Shield Bash ability can give you a chance to gain more Intel.
 The more enemies arrested, the higher the chance.
 - If you find your units are getting controlled by enemies with psionic abilities, use a flashbang grenade to disorientate the enemy and lose the mind control link. Killing the psionic enemy also severs the link.
- If you are playing a mission with the option to evacuate, make sure you take a pot shot at enemies or disrupt them before clicking the «Evac» button. Evacuating the mission is a free action.
- If you are not playing Ironman mode, save often. You may find that certain decisions made in Reclamation HQ affect your ability to fight in battle.
XCOM Chimera Squad guide series
Thanks for reading our XCOM Chimera Squad guide. Do check out the rest of our guides below, which includes details on agent builds, as well as other key info.
- XCOM Chimera Squad characters: Learn about all 11 agents and the best builds for each one.
- XCOM Chimera Squad weapons: Learn about all of the unlockable tech and epic weapons.
- XCOM Chimera Squad training: Teach all your recruits abilities in the training facility.
- XCOM Chimera Squad spec ops: How to unlock all the spec ops options.
- XCOM Chimera Squad console commands: How to unlock console commands for modding or cheating.
- XCOM Chimera Squad field team: How to unlock field team abilities to manage unrest and anarchy levels.
XCOM 2 manual
XCOM 2 manual
Manual
Read
x
Using the manual
Welcome to the web manual for XCOM 2 !
The Contents menu on the left allows you to jump directly to the required sections. You can also press the «Read» button to go to the manual, and then turn the pages using the «Next» buttons and «Back» .
Can’t find the information you need? The Frequently Asked Questions (“FAQ”) section and the Instructions File contain additional information that can be accessed using the buttons at the top of the page.
↑ back
Next ↓
Video game health warning
Seizures associated with hypersensitivity to light
A small percentage of people experience seizures when exposed to visual effects such as flickering lights or images that may appear in video games. People who have not experienced such seizures before and do not suffer from epilepsy may not be aware of their illness, which can provoke epileptic seizures associated with increased sensitivity to light.
Symptoms of these seizures can vary: dizziness, visual distortion, facial muscle spasms, nervous tics, twitching or trembling of the arms or legs, disorientation, confusion, or short-term clouding of consciousness. Seizures can also be accompanied by loss of consciousness or convulsions, which can result in falling or hitting nearby objects and causing injury.
If you experience any of these symptoms, stop playing immediately and consult your doctor. Parents should monitor their children’s condition and ask them about the presence of the above symptoms, since children and adolescents are more susceptible to such attacks than adults.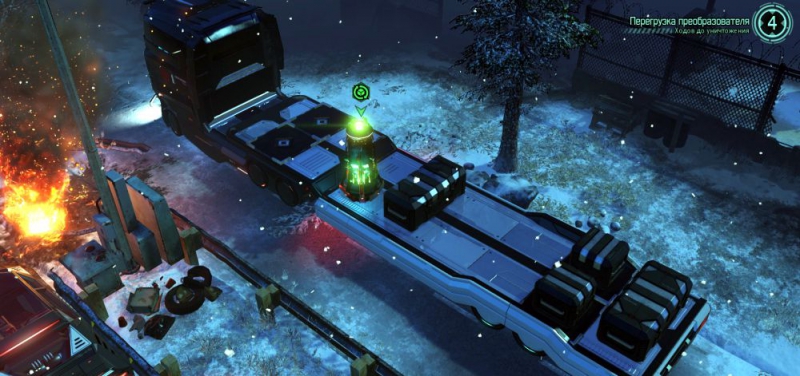 The risk of light-sensitivity seizures can be reduced by taking the following steps: sit as far away from the screen as possible, use a smaller screen, play in a well-lit room, and avoid playing when you are sleepy or tired. If you or your relatives suffer from seizures or epilepsy, be sure to consult your doctor before playing.
Precautions while playing
- Always sit at a sufficient distance from the monitor.
- Do not play if you are tired or have not had enough sleep.
- The room in which you play must be well lit.
- Take 10-15 minute breaks every hour while playing.
©1994-2016 Take-Two Interactive Software, Inc. Take-Two Interactive Software, Inc., 2K, Firaxis Games, XCOM and XCOM 2 and their logos are trademarks of Take-Two Interactive Software, Inc. Unreal® Engine, Copyright 1998-2016, Epic Games Inc. All rights reserved. Unreal® is a registered trademark of Epic Games, Inc.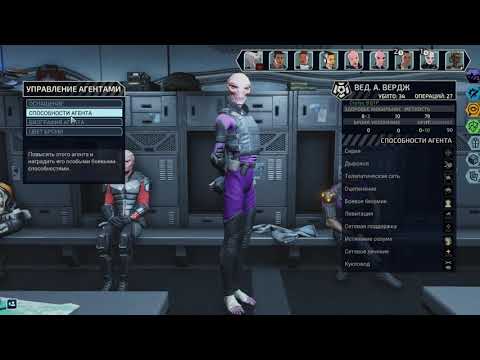 This game uses Autodesk® Scaleform® software, © 2016 Autodesk, Inc. All rights reserved. Portions of the Software © 2002-2016 Nvidia® Corporation. All rights reserved. The facial animation was created using the FaceFX software. © 2002-2016 OC3 Entertainment Inc. and its licensors. All rights reserved. The product was developed by Firaxis Games. Developed and published for Linux and Mac by Feral Interactive Ltd. Linux® is a registered trademark of Linus Torvalds in the US and other countries. Mac and the Mac logo are trademarks of Apple Computer Inc., registered in the US and other countries. Feral and the Feral logo are trademarks of Feral Interactive Ltd. All rights reserved. All other trademarks are the property of their respective owners. The content of this video game is fictional and does not purport to represent the actual events, characters, places or entities featured in the game. The creators and publishers of the game do not in any way support, condone or encourage the behavior shown in this video game.
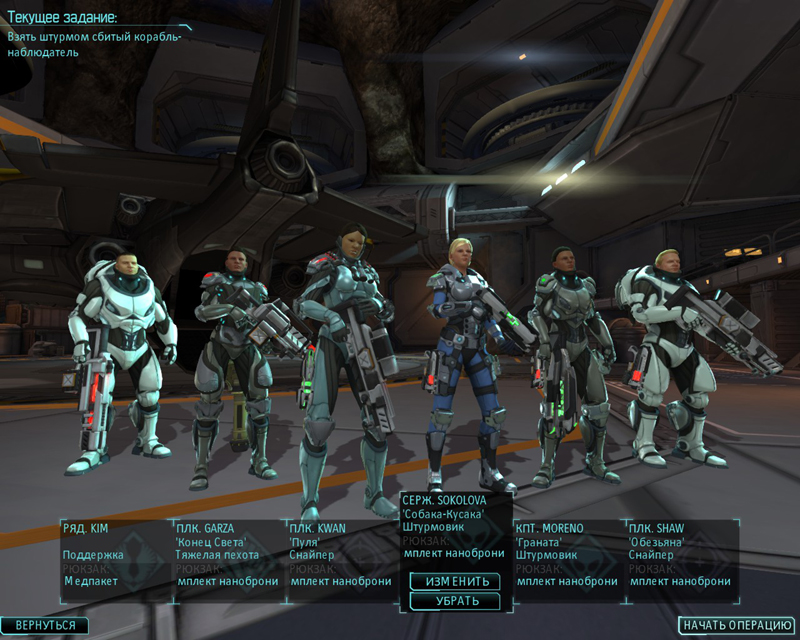
1
↑ back
Next ↓
The world you knew no longer exists
For twenty years now, the Earth has completely capitulated to alien invaders.
Now aliens rule here — ADVENT administration. They have built wealthy new cities where gene therapy clinics offer the population the latest medical technology and hope for a brighter future. But behind the glittering façades of these cities lies a dark agenda. The ADVENT propaganda machine is rewriting the history of Earth’s enslavement, and only a handful of brave resistance continues to fight.
The XCOM organization is fragmented but not broken. It operates underground, interfering with ADVENT and coordinating the work of the resistance. The captured alien ship «Avenger» became the mobile headquarters.
You have to breathe new life into the XCOM project, show everyone the true face of ADVENT and ignite the fire of liberation war from the spark of resistance.
The earth is counting on you, Chief.
2
↑ back
Next ↓
Installation
The game is automatically installed on the computer during the download process from Steam. For instructions on how to start the game, see section «Start of the game» .
Game start
-
Double-click the Steam program icon . By default, it is located in the Programs folder on your computer’s hard drive.
-
If you are not already logged in, the login dialog for your Steam account will appear. Enter your username and password, then select Login .
-
Steam program will start. Select Library tab .
-
In this tab, hover over the game name XCOM 2 in the game list on the left side of the window, then select Play .
-
The «Options» window will appear . Press the «Play» button .
 The game will start.
 -
After the boot screens, the main menu is displayed . Select « New Game «.
-
Display Difficulty Selection page . Choose the level of difficulty. If you are playing this game for the first time, it is recommended that you keep the Tutorial checkbox unchecked to receive instructions as you play.
-
Select « Start Game «.
-
After the introductory video, your squad will be planning to rescue the VIP facility under the cover of a noisy Unification Day celebration.
3
↑ back
Next ↓
Management
The default mouse and keyboard controls are listed below. These control commands can be configured by selecting item Settings → Interface → Keys in main menu .
| GENERAL COMMAND | |
|---|---|
| Up/down/left/right | ▲/▼/◄/► or W/S/A/D |
| Confirm | Return (↩) or Space |
| Cancel | Escape (esc) or RMB |
| Quick save | F5 |
| Quick Load | F9 |
| Voice chat | B |
| Text chat | J |
| AVENGER | |
|---|---|
| Globe | 1 |
| Laboratory | 2 |
| Engineering compartment | 3 |
| Armory | 4 |
| Chef’s cabin | 5 |
| Hall of Shadows | 6 |
| Camera (Globe) | W/S/A/D |
| Next fighter (Armory) | Tab (⇥) or mouse button 4 |
| TACTICS | |
|---|---|
| Firing mode/action confirmation | Space or Return (↩) |
| Cancel/Pause | Escape (esc) |
| Move to cursor | PKM |
| Route mode | Control (ctrl) + RMB |
| Actions with objects | V |
| Next fighter/target | Tab (⇥) |
Prev. fighter/target fighter/target |
Shift (⇧) |
| Ability 1 – 10 | 1 – 0 |
| Ready | Y |
| Recharge | R |
| Camera up/down/left/right | W/S/A/D |
| Rotate camera left/right | Q/E |
| Scale up/down | G/T |
| Proximity level | Z |
| Free scaling | Middle mouse button |
| Active fighter camera | Start of line (↖) |
| One floor above/below | F/C or mouse wheel |
| End of stroke | End of line (↘) |
| Call Ranger | P |
4
↑ back
Next ↓
Game Screen
1 — Masking status
If a hooded figure icon is displayed in this area, and blue overlays are displayed at the corners of the screen, the enemy is not aware of the presence of your unit. This is called disguise. Your squad will begin most missions with a disguise, allowing you to impose a fight on the enemy by your own rules.
2 — Tasks
Shows the status of the main and secondary tasks of your job. The main objective of most tasks is to kill all enemies, and the additional task varies from mission to mission.
3 — End Turn / Select Fighter / Rotate Camera / Call Ranger
These buttons allow you to end your turn, select squad members, rotate the camera, and call for a Ranger transport to evacuate.
4 — Soldier flag
Detailed information about the selected soldier is displayed here: health, action points, status of armor, cover, observation and disguise, as well as all positive and negative effects.
5 — Weapons and ammunition
Displays the selected soldier’s weapon and remaining ammo.
6 — Actions
All actions that the selected soldier can perform are displayed here. To see the effect of an action, click its icon. Actions that cannot be performed are shaded, and the number of turns after which the action can be performed again may be displayed. The red, yellow, and gray icons above the action icons indicate the number of enemies in the soldier’s line of sight.
7 — Soldier’s name and special actions
Displays the name, class, and rank of the selected soldier, as well as the special actions they can perform.
5
↑ back
Next ↓
Tactical gameplay
Tactical in XCOM 2 refers to the gameplay during missions. Most of the tactical maps in XCOM 2 are procedurally generated, meaning each mission is unique.
Health
Rectangular markers on a soldier’s flag show his health. You can restore health or stabilize a seriously wounded soldier in combat using first-aid kits or a Gremlin drone (this is the ability of Specialist class soldiers). First aid kits are collected in the «engineering compartment». To use a first aid kit during a mission, you must equip a soldier with it before the start of the mission.
Soldiers killed in battle are permanently removed from the squad and cannot be revived. Soldiers may attempt to evacuate the bodies of their dead, shell-shocked, or badly wounded comrades using the Move Unit action. If you successfully evacuate a dead soldier, then keep all of his weapons, items, and equipment. Seriously wounded soldiers recover over time and return to the squad.
Action points
Each soldier can use two action points per turn. They are represented by chevrons on the soldier’s flag and are spent on movement, attacking, and using abilities. For the selected soldier, the blue outline shows the range of his movement per one action point, and the yellow outline shows the range of the charge per two action points.
Areas marked with a red eye icon are within the enemy’s line of sight. When you enter them, the disguise is lost. Various icons indicate that moving through the cell will remove the disguise due to noise (such as broken glass) or that the soldier will be exposed to dangerous effects, such as flames.
You can set the movement of the soldier along the exact route. To do this, when selecting cells, hold down the key «Control» (ctrl) — this will allow you to avoid dangers and cells that remove disguise.
6
↑ back
Next ↓
Disguise
At the start of most missions, the squad is cloaked, meaning the enemy is unaware of your presence. Disguise is indicated by blue overlays at the corners of the screen and a hooded figure icon at the top of the screen, as well as on soldier flags. Disguise is lost when shooting, moving into enemy line of sight (on cells with a red eye icon), or excessive noise. Use disguise to set up ambushes and force the enemy to fight on your own terms.
Shelter
Cover reduces the chance of soldiers being hit by enemy fire and allows soldiers to survive. Most items can serve as cover, as indicated by the shield icons on the map: a half shield means low cover, and a full shield means high cover. Soldiers are best protected behind high cover, but low cover is better than none.
NOTE: a yellow shield icon indicates that the enemy is flanking the soldier in the direction of the shield. A red shield icon indicates that the soldier will be unprotected from the rear if he moves to this place. Soldiers exposed from the rear are especially vulnerable to an enemy attacking from behind.
7
↑ back
Next ↓
Actions
Actions are commands that members of your squad can perform on a mission. Soldiers of all classes can perform a number of common actions.
Fire: soldiers attack the selected target. Highlight a target to view the soldier’s chances of hitting it, estimated damage, and critical hit chance.
Reload: soldiers reload their weapons. If the weapon’s magazine is empty, the soldier must reload it to fire.
Surveillance: soldier stays in place and automatically attacks any enemy in his line of sight, but with less accuracy. If observation is used while disguised, the soldier will only attack after the disguise is removed.
Shield Wall: Strengthens the defense until the next turn, but narrows the soldier’s line of sight.
Hack: Some items and enemies can be hacked by turning them off or taking control of them. To attempt a hack, move a soldier into the interaction range and take the hack action. For a successful hack, rewards of different levels are given — the higher the level, the more difficult it is to complete the hack, but the reward is also higher. Any party member can hack, but only specialists can use Blocking protocol for hacking mechanical and robotic enemies.
Interaction: this action is used to open and close doors, plant explosive devices, and other interactions with the environment.
Trophies: Defeated enemies sometimes drop trophy resources and equipment. A dropped trophy is shown on the map with a radius marker and a turn timer. To collect the trophy, move the soldier within this radius before the timer expires. The trophy can be destroyed when killing an enemy with explosives. All trophies left on the map when the task is completed are automatically given to you.
Evacuation: Evacuation zones are used to rescue VIPs and fallen squad members, and to complete the mission by withdrawing all soldiers. You can set an extraction zone using the action «Call Ranger» , the icon of which is located in the upper right corner of the screen. A colored grid will be displayed on which you can place the evacuation zone. Invalid areas are marked in red. An extraction zone can only be placed in an area with a fully blue grid. In some tasks, evacuation zones are predefined.
Carry a unit: this action allows you to pick up a dead and wounded soldier. If you deliver the deceased soldier to the extraction point, then keep all his items and equipment for yourself. By delivering a wounded soldier, you will not let him die.
Other Actions : Soldiers of each class have unique abilities, and new abilities are unlocked with each promotion. Some compartments also provide additional abilities that can be used in combat.
8
↑ back
Next ↓
Soldier classes
A soldier’s class determines his role on the battlefield. Each class has a number of unique abilities that are unlocked as the soldier advances in rank. Abilities are divided into two different specializations.
Ranger
Rangers are great at staying undetected and are effective in close combat. The Recon Specialization grants stealth-preserving abilities. Specialization « Assault «gives abilities that improve the ranger’s ability in combat and when moving.
Specialist
Specialists use the Gremlin drone to help the squad on the battlefield. Specialization « First Aid » gives the ability to heal comrades and give them bonuses. Specialization « Combat Hack » gives abilities that improve the skills of a specialist in hacking and destroying enemy systems.
Grenadier
Grenadiers favor large, heavy weapons and explosives. Specialization « Demoman «Gives abilities that improve the use of explosive devices, including the grenadier grenade launcher. The Heavy Weapons specialization provides abilities that increase the effectiveness of the grenadier’s armor and cannon.
Sniper
The Sniper is an expert on sniper rifles and pistols. Specialization « Sniper » gives ranged abilities. Specialization « Marksman » gives abilities that improve skills with pistols.
Psi Agent
Psi-Agents were created as a result of the advanced research of ADVENT technologies and joined the XCOM squad very recently. Little is known about their abilities, but there are rumors that they can increase the effectiveness of comrades or interfere with the actions of the enemy on the battlefield. Psi agents are promoted for training in a psi lab, not for merit in combat.
9
↑ back
Next ↓
Strategic gameplay
To strategic gameplay in XCOM 2 refers to actions between jobs. This is the choice of the next task and improvement of the «Avenger» — the mobile headquarters of XCOM.
Avenger
The Avenger is a massive XCOM mobile HQ recaptured from ADVENT. The game starts with a few base rooms, and most of the Avenger’s rooms are littered with alien debris. When new compartments are required, the Engineers can be ordered to clear these rooms, collecting valuable resources along the way.
Original compartments
Chief’s quarters: View the Avenger’s monthly status report, XCOM project archives, and current tasks here.
Bridge: here you can use the globe, track the activity of ADVENT and join the ranks of the resistance.
Laboratory: research work is carried out here and you will be invited here as new scientific projects are realized. You can only participate in one project at a time. You can also view the research archive and a list of scientists working for you.
Armory: where you can view and manage your soldiers — promote them in rank, change names and appearance, recruit new recruits, change equipment, and upgrade weapons.
Engineer Bay: New items, weapons, armor and bays can be crafted here. You can also view the current inventory and a list of engineers.
Bar/Memorial: This is where your people usually relax after work and combat missions. In addition, here you can see the memorial to the fallen soldiers.
Habitation: Soldiers, engineers and scientists live here. In this compartment, you can view the list of personnel and their current assignments.
Personnel management
Assign Scientists, Engineers, and Gremlins to Squads to gain bonuses, such as reduced research time or improved healing for wounded soldiers. Before building new compartments, the premises on the Avenger must be cleaned by engineers.
10
↑ back
Next ↓
Globe
There is a globe on the Avenger’s bridge that allows you to monitor XCOM operations. You can detect alien hostility, contact resistance cells, find valuable resources, or move the Avenger. To track ADVENT activity and advance in time, click the scan icon next to the Avenger’s current location.
Events: ADVENT sets more and more new goals in the fight against resistance, and if their sinister plans are realized, then the enemy gains advantages. Events announce the advancement of ADVENT towards its goals. They can be countered by choosing missions like «Partisans».
Job types
Priority missions: stop ADVENT from carrying out the mysterious Avatar Project.
Partisans: prevent ADVENT from completing secondary tasks (events) and help supply the resistance.
Resistance Tip: Strengthen and replenish the ranks of the resistance.
Strike Back: Stop ADVENT from destroying resistance outposts and save as many people as possible.
Rumors from the Resistance: Investigate rumors for important resources and information. These quests do not take part in your squad, instead they are completed after a certain amount of time.
Avenger Defense: The Avenger has been attacked by ADVENT forces and must land for repairs. Hold the Avenger’s defenses until repairs are complete.
Raids for materials: attack ADVENT supply lines and steal valuable resources.
Alien Object: Destroy critical ADVENT objects to keep them out of Project Avatar.
11
↑ back
Next ↓
Online game
In XCOM 2 , you can fight online against other players using squads consisting of XCOM soldiers, ADVENT units and aliens. You can also arrange matches on the local network.
Select « Multiplayer Game » in 9 to select multiplayer modes.0015 main menu .
Rating game
Ranked play increases your position on the XCOM 2 leaderboards, which can be viewed in the Multiplayer Menu .
Quick game
If you select a quick game, the next available unranked public match will be automatically found.
Custom match
You can organize your own public or private match with your own rules and parameters. Or you can join another player’s custom match.
Character group
The «Character Group» feature allows you to create special units that will appear in the game as new soldiers. They can be called into service, or used as VIPs in missions.
To use the «Character group» function, select « Character group » in the main menu .
12
↑ back
Next ↓
Technical support
We have made every effort to ensure that game XCOM 2 was the most compatible with modern devices. However, if you’re having any difficulty playing XCOM 2 , keep reading.
The latest version of the FAQ can be found by clicking the FAQ button in the Support tab in the Options window before starting the game XCOM 2 (This window opens at startup games), or by visiting the Feral website: http://support.feralinteractive.com
How to contact Feral
If you have not resolved your issue with the FAQ and/or updates, you can contact us. Before you contact Feral’s technical support department, you need to have the following information:
- Error message displayed on the screen (if any).
- XCOM 2 Report.txt file . He contains:
- Apple System Profiler Report on your Mac;
- game crash reports XCOM 2 ;
- game content list.
All required information can be obtained by starting the game XCOM 2 and opening the Support tab in the Options window before starting the game XCOM 2 . In the «Support» tab press the «Create report» button . Once the report is ready, it will appear as a file in your ~/Downloads folder (the «~» signifies your home directory). Now press «Create email…» button . Don’t forget to attach the XCOM 2 Report.txt file to your message.
In your message, briefly describe the problem you are having with XCOM 2 . We will do our best to help you.
Email: [email protected]
13
↑ back
More ↓
Warranty
Please refer to the warranty information provided by Steam.
Creators and developers
- Original developer:
- Firaxis Games
- Original publisher:
- 2K
- Developer for Macintosh:
- Feral Interactive
- Macintosh Publisher:
- Feral Interactive
14
↑ Back
Similar games from Feral and 2K you might like…
Check out our website for the latest news and the full range of games we offer. And our webshop presents current discounts and offers.
XCOM: Useful tips. Management. | Kanobu
There are two options: either an alien has settled around this corner, or not. Both options are equally terrifying.
XCOM: Enemy Unknown is one of the few modern projects in which, if you want, you can find not only a double, but a five bottom, and even then you will find out later that things are not at all the way you thought — the bottom is here and not in sight.
The game deliberately hides many things from us, forcing inquisitive players to look for and find non-trivial solutions. That is why, as in the case of other similar monstrous titles, it is best to use some kind of guide after the first acquaintance with the game and mastering, say, controls — many mistakes that thousands of people have already learned from will bypass you. This will be especially useful for daredevils playing in Ironman mode, where each mistake or oversight can be very expensive (by the way, let me put it this way: there is a word “man” in the name of the mode for a reason — if you play XCOM without the included “ hardcore”, you play is not in the XCOM that the entire Internet is now writing about).
First, the main thing : always calculate your actions several moves ahead, the more the better — like in chess. Under each carelessly missed bush is a detachment of mutons. Tomorrow your satellite over the US will try to shoot down. Captain Stepan Kulebyaka, a formidable enemy of all extraterrestrial scum, will suddenly be attacked from the flank and die, and the newcomer, seeing the death of the commander, will hysteria and shoot the sniper whom you have been protecting for two months. It is impossible to prevent all these events at once — the game is still quite dependent on luck, and this is the key to constant tension. Minimizing the risks is your main task as the commander of the XCOM squad, the last bastion of the defense of the Earth.
I would also like to warn about spoilers — the text implies the fact that you have completed the campaign at least once. If these spoilers bother you, then please do not read further, but complete the game on the normal difficulty level (for which this text is not needed).
Base and geoscape
* Choosing the location of base at the beginning of the game is not as important as it might seem — all these bonuses can be obtained by covering the entire continent with satellites. Although the bonus of 30% monthly income is quite attractive.
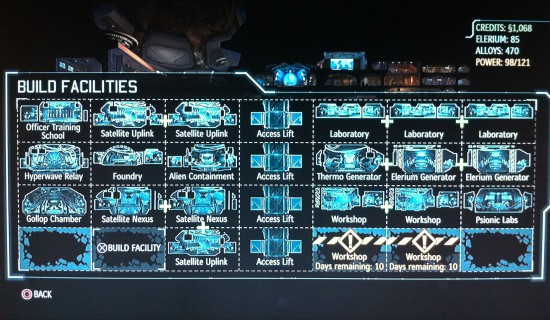
* Engineers in XCOM: Enemy Unknown are much more important than scientists: for buying most of the necessary items, building new “buildings”, etc. a certain minimum of these invaluable people is needed. Engineers speed up the construction process. Engineers make almost everything that you can buy for money cheaper. Additional scientists simply speed up the research process, and for this there are bonuses from captured aliens. So plan a 2×2 block for workshops in your base.
* In the first month of , try to launch as many satellites as possible, one will definitely not be enough. This, of course, requires some luck in terms of income. But satellites increase a tiny chance of reducing panic in the countries under their supervision, which is a very strong incentive. It is best to launch satellites at the end of the month and based on the situation.
* Money is the biggest limiting factor in the game and the scarcity increases exponentially with difficulty. Sell as many captured shipwrecks and enemy corpses as you can. Some items, mostly damaged fragments of downed UFOs, can be sold immediately — the game even mentions this in the description. However, items like alloys or fragments of alien weapons will be very useful on your own. In addition, requests from countries participating in XCOM, which ask for the supply of any weapons or parts, cannot be ignored — they always promise a good profit.
* In the case of the location of the nearest “steam” cell in the base is too far from the center, it makes sense to start the game again, and not spend money on a lot of weak generators.
* Soldiers you start the game with have 2 less base health than hired recruits.
* The time from the start of the game to the first Terror mission should be spent wisely — you can’t refuse to complete it, and in it you will meet the chrysalids for the first time, which, before researching powerful types of weapons, are a serious opponent. Try to get hold of at least a couple of laser rifles.
* One of ‘s highest priorities should be to build the Officer Training School and get the maximum number of soldiers on the mission to 6. (Important point: do not destroy the school after researching all the upgrades you like! You will lose them and find yourself in a very difficult situation.)
* Choose one of the three tasks is best according to this priority: the country is on the verge of panic (5 red bars) > engineer award > scientists award > recruit reward (of the class you need) with the rank of captain or higher > cash reward.
* The mission to clear alien base will reduce panic around the world by 2 points — I recommend waiting a while to get the maximum benefit.
* Ammo Conservation technology research should be one of the priorities. Most importantly, your Heavy class fighters will be able to suppress the enemy two turns in a row. For other classes, this upgrade is also very useful — say, for Assault with a shotgun.
* Improved first aid kits are one of the most important victory factors.
* If you have the opportunity to “step over” laser types of weapons directly to plasma ones — do it.
* Ghost armor is one of the things that break the game. In stealth, your fighter will not “trigger” groups of aliens he has detected, which will allow you to set up deadly and effective traps and make the most of the Assault class perk called Close Combat Specialist. Not to mention the obvious ways to use it, such as unhindered entry into the flank of the enemy and rescuing a fighter who got into trouble with one button.
* S.H.I.V. is currently quite buggy, so I would not recommend their use. An extreme case is if all your best fighters are in the hospital, and someone needs to complete the mission.
* Build at least one Firestorm as soon as it becomes available.
* The loss of several countries is inevitable. However, watch out for the general panic indicator!
Rookie to Colonel
Assault
* Tactical Sense is always better than Aggression if you play defensively.
* Lightning Reflexes beats Close & Personal by no means. The tactics unlocked by learning this passive ability are phenomenal.
* Rapid fire is also much better than Flush — there will be many more situations in which you need to shoot twice.
* Close Combat Specialist — See Lightning Reflexes. These two abilities define the entire class.
* Resilience vs. Killer Instinct — Choose between defensive and aggressive playstyles.
Heavy
* Bullet Swarm and Holo Targeting are very difficult choices. I would advise Holo Targeting, because. the main striking power is represented by other classes. But Bullet Swarm allows you to shoot twice per turn, which is not obvious from the description.
* Suppression You will absolutely need , and you can do without Shredder Rocket (even in the case of sectopods).
* HEAT Ammo is a great option if you rely on Heavy fighters to fight mechs. Rapid Reaction turns out to be successfully used too rarely.
* Danger Zone The is ideally better than the extra Grenadier grenade, but the aliens don’t crowd around each other very often.
* Mayhem in the late game is much more useful than an extra Rocketeer.
Sniper
* Snap Shot and Squad Sight — both perks have a very, very big impact on your tactics in combat. I still prefer Squad Sight.
* Damn Good Ground is always better than Gunslinger — most importantly, don’t forget to take the heights (with the help of a cat from Carapace armor!).
* Disabling Shot makes capturing an enemy easier, but Battle Scanner is a pretty critical item. If you usually have 2 snipers in your squad, split these perks between them.
* Opportunist is always better than Executioner. Dot.
* In The Zone and Double Tap depends on your playstyle. If you are a tactical genius and love to attack the enemy out of cover — In The Zone wins, but Double Tap is much more useful for defense.
Support
* Sprinter is better than Covering Fire. You don’t want to be shot at at all, but you want to get to a fighter in time who needs urgent medical attention.
* Field Medic beats Smoke and Mirrors without a hitch.
* Revive will save many lives, while no one will die without Rifle Suppression.
* The choice between Dense Smoke and Combat Drugs obviously depends on your play style.
* Savior is much more useful than Sentinel in the mid-late game.
Psionic
* Psi Panic is still more efficient than Psi Inspiration.
* Telekinetic Field for defensive players. Mind Control for exotic lovers. There is nothing more pleasant after long months of loss and deprivation than to throw their own grenade into the crowd of invaders who have arrived.
On the battlefield
* The composition of squad may vary depending on the mission, but in general I would recommend using the following set: 2 Assaults, 2 Supports, 1-2 Snipers, 1 Heavy.
* ‘s aggressive playstyle — without snipers and with three attack aircraft — is quite viable, and on the Impossible difficulty level it is almost necessary.
* Always take 1-2 newbies into battle to have a large supply of trained fighters. Losses are inevitable! In no case do not send all your best veterans on a mission — unless, of course, this is the final mission.
* Be aware of all the advantages and disadvantages of each fighter and the abilities available to him! You should not keep a sniper on the front line, and leave attack aircraft to cool off in the rear.
* The soldier with the star next to his name in the lower left corner is the “commander” of the squad in this mission. The chance of panic for other fighters in the event of his death is increased. Usually the fighter with the highest rank is appointed commander.
* Never use the full range of motion fighter at the start of the turn. Read this tip again.
* Shelter! There is practically no reason in the game why your fighters in a combat situation would have to be out of their range. Half of the «shield» gives full vision, but only 20 defense points. A full «shield» gives 40 points of protection, but vision decreases. Hunker down doubles the cover’s defense bonus. Under the spoiler is a picture that clearly explains the principles of the mechanics of shelters.
* Hiding places are not nearly as safe as you think. The best way to save a fighter from death after the end of the turn is to move him to a zone in which the aliens simply cannot see him.
* Covers can be destroyed and the enemy often takes advantage of this. Use and you!
* Destroying the walls of with an ambush device can be very effective — especially if it is the wall of the downed UFO’s command post.
* Use suppressive fire! It destroys covers and takes a significant percentage of the enemy’s accuracy.
* Don’t crowd together unnecessarily! Many types of enemies will gladly take the chance and throw a grenade or worse at you.
* Use Overwatch either as part of a plan or at the end of a turn — when your fighters are sure not to spot any random enemies. And in general — never do anything not according to plan or without any purpose.
* Keep in mind that an enemy within Overwatch range of your fighters will 100% of the time not move and attack!
* In the PC version of , you can select fighters that have already spent all their moves and, say, open doors, change weapons or deactivate bombs.
* Arc Thrower is your best friend. Having captured an alien who needs to be interrogated according to the plot, in no case should you stop. Use suppressive fire and two fighters with Arc Thrower at the same time to reduce the chance of failure. In the game, time is against you, and the bonuses to research that different types of opponents provide after interrogation are simply priceless. In addition, the weapon that the alien uses, if the stun succeeds, goes to you (another way is to kill the alien in control)! Unfortunately, it will still be possible to use it only after research. In general, capturing aliens alive is a huge bonus, the more aliens you capture at the beginning of your “career”, the easier it will be at the end. (Important point: Cyberdiscs, Sectopods and Crystallids are immune to stuns — they cannot be captured.)
* The F1 button is your second best friend. It will allow you to fully appreciate all the minuses and pluses of each specific combat situation in which the fighter finds himself, you will be able to evaluate your cover, understand why the chance of hitting the enemy is so low, etc.
* The maps in the game are not actually randomly generated , so after countless battles you will most likely already know what danger is waiting for you around the corner.
* Aliens will only attack you if you “activate” their group — find them as a regular non-stealth fighter. Immediately after that, they will start moving towards the hideouts — use this if you spot aliens with a scanner or a fighter in Ghost Armor.
* Aliens will always try to flank , and the best way to counter this is to flank yourself. However, be careful — this way you can stumble upon an extra detachment of alien reptiles.
* Be ready to retreat — this allows you to lure the enemy into already known territory.
* Combat scanners snipers work as an additional fighter — that is, they will not detect an enemy hiding on the other side of the van. In addition, at the moment they often fall “under the floor”, as a result of which they become completely useless.
* Psionically controlled enemies can cause panic in your fighters if they die. It is not yet clear whether this is a bug, an oversight by the developers, or a deliberately introduced mechanic — so just in case, be careful.
* The final mission even in Ironman mode is allowed to be repeated with the same fighters, move your validol.
And also some little things:
* To disable intrusive logos at the beginning of the game on a PC, you can do the following: in the folder …\steamapps\common\XCom-Enemy-Unknown\XComGame\Config open the DefaultEngine.
