The Whispered World : The Walkthrough King
Chapter 1: The Autumn Forest
Circus
Open the drawer on the left and take the note from inside, then read it in your inventory. Also read the torn note on the wall. While you are here, press the H key on your keyboard 10 times Honking Shoes (this will only work with subtitles and commentary turned off; you can turn them back on again afterwards). Now open the door and leave your trailer.
Pick up Spot and put him in the bucket next to Ben Ball Spot. Use Ball Spot on Ben to find out you gave him starchy water, then talk to Ben about everything else. Also talk to Grandpa, and try to talk to Bruno. Look at the fire dragon trap, then head left into the forest. Talk to Ben again and ask him where to find a map and a compass.
Transform Spot between his 2 different forms a total of 500 times Master of Disguise.
Head back into the trailer and try to open the stove. Look at the hole in the top, then use Normal Spot on the hole. Take the casket from inside the stove. Open the bear’s mouth and take the key from inside, then use this on the casket in your inventory — now look at the map in your inventory. Go back outside and talk to Grandpa, and he will give you his compass. Enter his trailer and take the hairnet, dentures and handkerchief. Close the door and take the cork from behind it, then open the door and leave again. Pick up the shovel to the left of your trailer, then enter the forest again.
Shore
Talk to the messenger. Pick up the branch from the ground, and combine it with your hair net. Use this on the lake to get a fish, then give the fish to the messenger — you will end up with a fish-bone. Talk to the messenger about Shana, then leave.
Ruins
Examine the engravings on the stone tongue to the left. Use your handkerchief to clear away the moss above the engravings, then look at the hole and the escutcheon that are revealed. Look at the turtles on either side of the statue, then go back to the shore.
Shore
Talk to the messenger and you will receive the Whispering Stone.
Ruins
Place the Whispering Stone in the hole in the statue; after an earthquake, Spot will swallow the stone.
Shore
Bobby (the messenger) will be gone, but you can pick up the knife and bombs from the ground.
Ruins
Use your knife on the shrub, then go through the archway to a new area. Talk to the rock brothers here, and if you answer their questions correctly you will be given some stone powder (Shana is a mysterious snake creature, Moreyes have 11 eyes, Kalida lives on an island at the center of the lake). Open the door to the right and walk through, but you don’t end up going anywhere. Repeat this a total of 10 times He’s never gonna learn… before walking around the back of the door and going through in reverse.
Inside, look at the globe, armchair and clock. Go back out through the door and talk to the rock brothers to get a hint about the time «half past noon».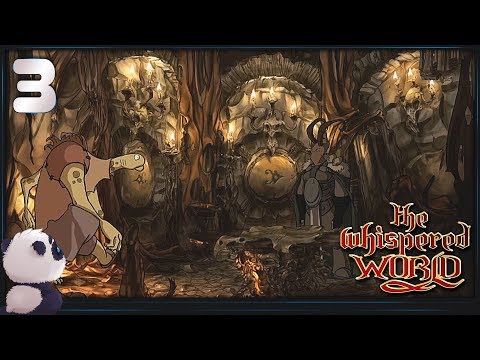 Go back through the door to enter Shana’s cabin again. Save your game, then examine the clock once more. Use your fish-bone to add an hour hand to the clock, then set the time to 12:30 and press the button in the middle. Take the note that the light shines on, then look at the note in your inventory to see what time your are supposed to wash Bruno. Set the time to 12:15 and press the button in the middle again. Take another highlighted note, look at your schedule and see what time you are supposed to watch the sunrise. Set the time to 5:30 and press the button in the middle one last time to make Shana appear For Whom the Bell Tolls. If you want to get all achievements, reload your game and examine the clock, then select to skip the mini-game by clicking the red X button at the top right.
Talk to Shana about everything, then return outside and go back to the first part of the ruins. Look at the shadow newt here, then leave the area.
Tree
Try to take the lightning bugs, then plug the hole in the tree with your cork before trying to take them again. Move the rock they went beneath, then use your shovel on the bleak spot here to dig a hole. Climb down the hole and examine the puddle here to realize it smells like petroleum. Continue through the cave and you will end up at the top of the tree. Look at the lake and the island in the middle of it, then climb back down. Try to collect some resin from the try using the knife, but you need something to hold it.
Circus
Enter your trailer and look at the electricity on the pipes to get a headache a pass out. Examine the note on the wall above your bed to see all the ingredients you need for your human cannonball act. Pick up the bear claw from the rug, then go outside. Talk to grandpa about everything, then talk to Ben about everything, and find out he is scared of Asgil with sharp claws, 2 heads and sharp teeth. Try to take the pantaloons, but Ben won’t let you.
Ruins
Pick up the 2 turtles from either side of the statue.
Cave
Try to take the bowl from the central totem, but it is held on too tight.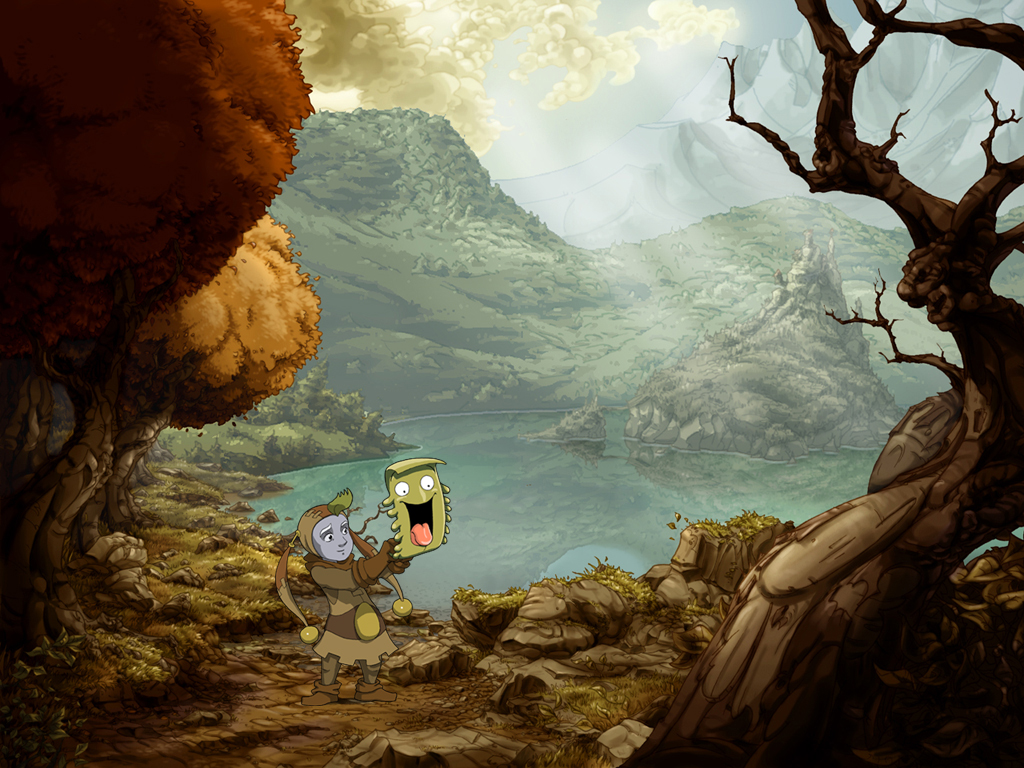 Use Ball Spot on the bowl to break it, then pick it up. Approach the cave and look at the spiderweb and the mushrooms on the walls. Go back outside and leave the area.
Tree
Use your bowl to collect resin from the tree.
Circus
In your inventory, combine the resin, turtles, dentures and bear claw. Show your creation to Ben, then quickly pick up the ball and take the pantaloons from the clothes line.
Ruins
Give your red ball to the dragon newt, then take the Noahi egg.
Circus
Place the Noahi egg in the trap and you will catch some fire dragons. Use Normal Spot on the fire dragons Fire Spot.
Cave
Enter the cave and use Fire Spot on the spiderweb. Continue into the deeper part of the cave and look at the eyes. Use Ball Spot on the eyes to reveal a large fish encased in ice. Pick up the rope from the ground, then return outside.
Circus
Enter Grandpa’s trailer and use your new rope on the cauldron of petroleum soup to create a fuse cord, then combine this with your bombs. Return outside and then enter your own trailer. Pick up the hat from the floor and combine it with the stone powder you got earlier, to make a petrified hat.
Tree
Climb down the hole and place your bombs in the puddle. Use Fire Spot on the bombs, then climb up to the top of the tree. Put your petrified hat in the hole here, then sit in the hat Cannonball Ride.
Chapter 2: Kalida’s Awakening
Shore
After Mulachei leaves, look at the statue, the pole and the bubbles. Head up to the right to reach a bridge. Try to take the rope from the left, but it is knotted too tight for you to remove. Cross over the bridge.
Village
Look at the bell hanging above you — you can’t reach it and there is no rope to help ring it. Try to open the door on the hut to the left here, but it is locked. Enter the building to the right (an old pearl factory) and pick up the flint from the ground, then go back outside and climb further up the staircase. Enter the open door and talk to Bando. Take the tooth from the rug (it becomes a hook). Go back outside and head all the way back down to the bridge.
Shore
Use your flint to get the rope, and also pick up the broken shovel from the ground here. Combine the hook and rope in your inventory. Return over the bridge.
Village
Use the hook and rope on the bell, then pull the rope. After you hear Bando get in trouble, go up the stairs and enter his house. Steal his ladder and the key hanging beneath the window. Return outside and use the key on the locked door of the hut below. Go inside and take the parchment and baton. Try to blow the horn, but it is clogged up. Use Ball Spot on the horn. Return to Bando’s house and take the sock from his stool. Close the door, then look in the mouse-hole you reveal. Use the sock on the mouse-hole, then pick up the mouse while it is distracted. Go outside again and use the mouse on the pantaloons that you blew out of the horn.
Go up to the very top of the mountain and try to enter the top house — if Bando is still getting in trouble, go down to the bridge, then back up and try again. Talk to Ruben about everything, then leave again. Outside his house, use the ladder on the open window, then climb inside. Use your pantaloons on the Kerrek to tie its mouth shut, then head upstairs. Examine the bed and the nail in the floor, then take a pearl from the large pile in the back of the room. Leave the house — it doesn’t matter if Ruben wakes up when you leave.
Go to Bando’s hut to find out he needs a shovel. Try to give him the broken one, but he doesn’t want it. Head right and collect the ax and the broken cogwheel. Now leave here and return to the shore.
Shore
Use the ax on the pole in the water and you will end up with part of it. Combine this with the broken shovel to repair it.
Village
Go back to Bando and give him the fixed shovel. Enter the factory, which is now up and running. Pick up another broken cogwheel from the floor, then go back to Bando’s hut and through to the right. Place both halves of your broken cogwheel into the vice, then use Fire Spot on the vice. Use your fixed cogwheel on the mechanism, then rearrange the cogwheels so they connect from left to right. Pull the lever and if the cogwheels are correctly positioned the door will open. Head on through.
Far Side of the Island
Enter the hut and save your game, then talk to Mulachei and play his game Check Mate:
If you want to get all achievements, reload your game and examine the clock, then select to skip the mini-game by clicking the red X button at the top right. Talk to Mulachei again, then take the candle behind him, before going back outside. Look at the signpost to the right, then go along the path behind the cabin. Look at the Yakis under the tree, then return to the cabin. Blow out all of the candles. When the Yaki appears, try to catch it, and it will appear on a barrel next to the cabin. Try to catch it again, then use Ball Spot on the barrel. Try to catch it again, and it will appear on the signpost to the far right. Try to catch it again, then use your ax on the signpost. Go back to Bando’s hut.
Village
Blow out the candles in the hut. Go right and open the cabinet to the right of the vice, and a Yaki will emerge and go through the hut. Go through the hut to the path, and blow out all the candles down to the shore. Go back up and climb into Ruben’s house using the ladder. Go upstairs and use your candle on the nail in the floor. Use Fire Spot on the candle to reveal the final Yaki under the bed.
Far Side of the Island
Go back through Bando’s hut to the clearing behind Mulachei’s hut and there should now be 5 sleeping Yakis. Now you just need to wake them up and guide them to the shore. Head back through Bando’s hut again.
Village
Go to the pearl factory and use Normal Spot on the molding press. Turn the wheel to the left Five Spot. Go outside and take the ladder from outside Ruben’s house. Go back to the pearl factory and use the ladder on the hatch, then climb down. Climb back up with Five Spot and go through Bando’s hut again.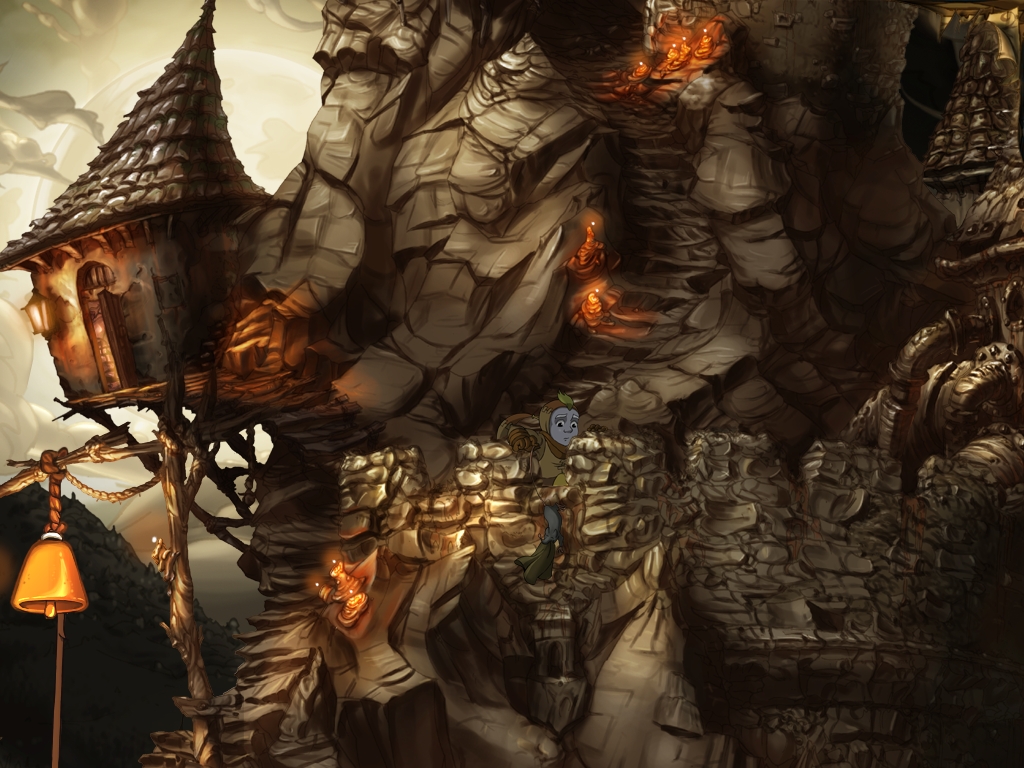
Far Side of the Island
Use Five Spot on the Yakis, and they will now follow you. Assuming you have blown out all the candles, head back through Bando’s hut.
Village
Continue all the way down to the shore.
Shore
The Yakis will now be sitting on the five arms of the statue. Look at the note in your inventory to see 5 musical notes. You need to use your baton on the Yakis to make them sing and generate this melody:
- Top right
- Top left
- Bottom right
- Middle right
- Bottom left
If you do this correctly, Kalida will awaken Kalida Awakes.
Chapter 3: The Asgil
Caverns
Pick up the stein from on the platform, then walk left to the bone levers. Pull levers 2 and then 5. Go back and use the platform to open the door the fastest possible way Walkthrough User. Go through the gate, then look through a small window to the left and you will overhear a conversation in the war room. Grab the rope from beneath your window, then back out of this room. Combine your stone and rope, then use this on the horn over the guard. Try to retrieve your rope, but the knot is too tight. Now head down and through the door into the war room. Look at the plan of action on the table, then leave the room and you will be captured.
Cliffside Village
Look in the haystack on the left to find a needle, then also take some hay. Talk to Gourney through the door, then pick up the food tray (you will also get a wooden spoon). Combine the needle and spoon. Use the food tray on the chute and you will end up with a sticky tray. Put your food tray into the food hatch beneath the door, then use your spoodle on the keyhole. Pick up the tray, which now has a key attached. Use your spoodle on the tray to remove the key, then use the key on the keyhole and exit your prison.
Go through the 3rd doorway to the right, and you will end up way up near the top of the village. Go through the door just to your left, then go through the door just to your right. Talk to the suit of armor, then pick up the club from the floor, and the bow and knife from the wall. Now close the door so that guy in the suit of armor thinks you have left. Now talk to the suit of armor again, and tell him that you will tell his boss Loucaux that you know where the cook is — you will eventually learn his recipe for mildew soup. Open the door and go outside again. Go through the door just to your left, then through the door just to your right, and you will return to the lower walkway.
Use your dull knife on the grindstone down here, then use your sharp knife on the rope to the left. Cross the drawbridge and enter the caverns to the left.
Caverns
Look through the window again to see Spot trapped in a cage. Back out and use your spoodle on the knot, then walk down and collect the rope and coin from the ground. Head right again.
Cliffside Village
Enter the kitchen, which is just to the right of the grindstone. Pick up the rib from the floor, as well as the plate and chopsticks from the table. Use the chopsticks to catch the fly here. Continue left to find a large cauldron. Use your club on the furry animal here, then use your club on the gong 10 times Dinner is (almost) Ready! — you have to do this before actually creating the soup to get the achievement. Use your knife on the mushrooms on the floor here to collect some.
Leave the kitchen again and use your coin on the grindstone, then attach this to the rib to make an arrow. Combine this with your bow, then add your rope. Now head to the right and go around the corner. Shoot your rope with bow up to the wooden beam on the right, and you can then use the rope to swing across. Try to pick up the frog, but it jumps into the water. Place your sticky tray where it was sitting, then walk back towards the rope. After the frog returns, go and pick it up. Use the rope to swing back across, then head back into the kitchen.
Go to the back room and place the fly, mushrooms and frog into the cauldron. Now use your mouth on the cauldron to spit into it and finish the soup. Place hay on the fire, then blow on it to properly heat the soup. Use your plate on the cauldron to get a serving. Go out to the front room and place the plate on the table. Head into the back room and use your club on the gong. While Loucaux is eating, you can sneak past him. Return to the caverns on the left.
Caverns
Look through the window and talk to Spot. Use Fire Spot and he will automatically burn through the cage. Now use Five Spot on the hole beneath the door to escape. Leave the caverns to the right.
Cliffside Village
Enter the kitchen and steal the master key from Loucaux. Return outside and around the corner to the right. Use the master key on the valve here. Turn the valve and the water level to the right will go up once. Go left and enter the prison to the left of the grindstone. Use Fire Spot on the haystack to reveal another valve. Use your master key on the valve, then turn it.
Back outside again, go through the doorway to the far right to reach the top of the village, then continue through the door to your left, then the door to your right. Examine the wall to the right of the suit of armor, then go through the secret passage to find another valve. Use your master key on the valve, then turn it. Go outside again and down to the bottom level using the same doorways as before. Now examine the door to the right of the kitchen — it has no handle. Leave and enter the caverns once more.
Caverns
Use the master key on the door to the war room, then go inside. Use your club on the left stone disk, then go outside and you will be on the middle level of the village.
Cliffside Village
Go through the door to the right, and then another door to the right. Use your master key on the valve in here, then turn it. While you are here, close the door, and pick up the fork thing from the ground. Use your club to hit the stone disk with the left arrow twice. Open the door and head outside, then go through the door 2 to the left, and you will appear on the bottom level (through the door with no handle). Head to the far left into the caverns.
Caverns
Look through the window and try to reach the bucket, then use your club to knock it to the ground. Return to the village.
Cliffside Village
Go up to the room on the middle level (using the door with no handle), and enter the room on the right. Use your club to hit the left stone disk once more, then return outside, down and to the caverns.
Caverns
Go through the door into the war room and pick up the bucket. Leave the caverns again.
Cliffside Village
Walk around the corner to the right and you will see the water-wheel is now turning. Combine your fork thing and bucket, then use this on the lever above you. Use Five Spot on the bucket, then change him to Ball Spot and an elevator will appear. Enter the elevator.
Train Station
Pick up the round stone, then head left to find a train station. Talk to Maurice the Station Agent — you need to accept 4 different jobs to work for him, as well as convincing him to change the name to «Maurice’s Medium Museum» and then reduce the entrance fee to 8 gold coins. Now remove the pantaloons and shirt from the clothesline, before taking the clothesline itself. Next use your club in the garden. Add the chopsticks and then the shirt to scare the birds away. Talk to Maurice again, then you will be able to enter the train station.
Look at the opening to the right of the chest. Insert your fork thing into the opening, then pull the lever, but something is missing from the elevator. Use Grandpa’s pantaloons on the cogwheels, then pull the lever again — now the elevator door closes too quickly. Attach your clothesline to the stake inside the elevator, then use Ball Spot on the cord. Pull the lever once more Leaf Spot. Now remove the pantaloons and use Leaf Spot on the cogwheels. Use your knife on the shelf support so that it begins to lean. Use the pantaloons on the lever. Put the round stone on the shelf, then immediately get into the elevator.
Use Leaf Spot in the fire box, then change him to Fire Spot to light a fire in the train. Now use Leaf Spot on the immobilizer system, then change him to Ball Spot to break the lock The Train to Corona.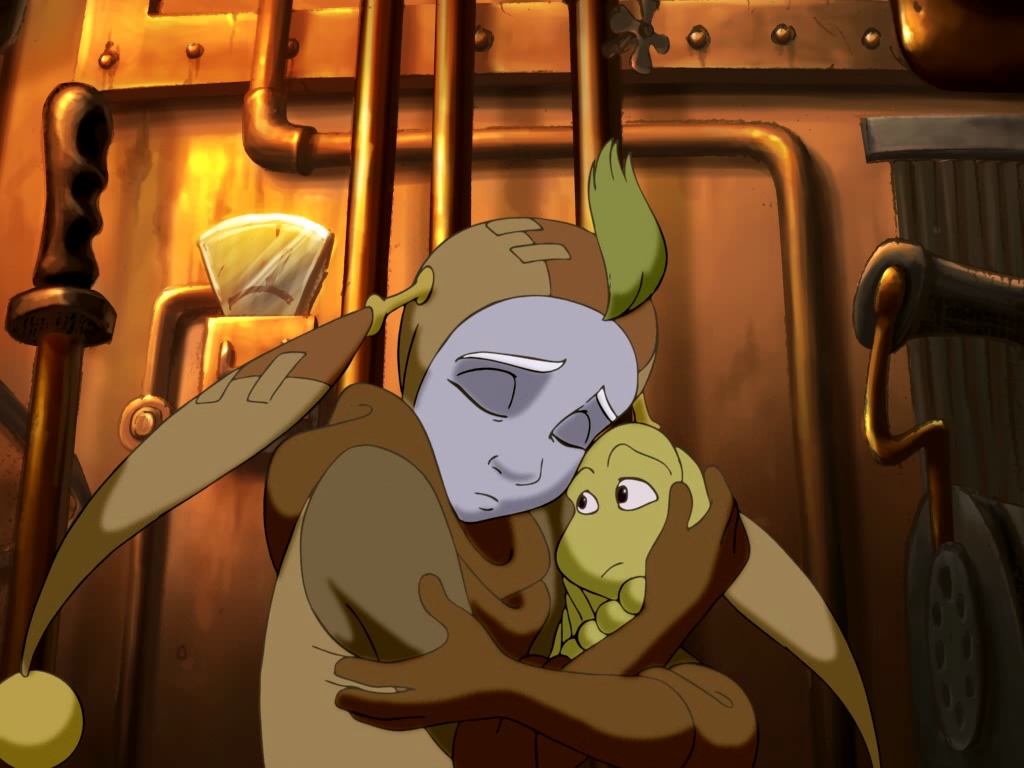
Chapter 4: Corona
Gate
Use Leaf Spot on the gap beneath the gate, and then you will be in control of Spot alone. Now follow these instructions in order:
- Fire Spot: Burn the tuft of grass to the left of the seesaw
- Five Spot: Enter the mouse-hole next to the seesaw
- Ball Spot: Jump down to the seesaw
- Normal Spot: Quickly change to this form before the stone lands, and you will end up on the house roof
- Five Spot: Enter the rain drain to the right
- Ball Spot: Change to this form to tip over the barrel
- Five Spot: Enter the mouse-hole next to the seesaw
- Ball Spot: Jump down to the seesaw
- Five Spot: Quickly change to this form before the stone lands, and you will end up on the barn roof
- Five Spot: Drop through the roof of the barn and fall into a sock
- Ball Spot: Move to the right to be in front of the post
- Five Spot: Change to this form to knock the colander to the ground
- Fire Spot: Change to this form to light a fire beneath the pantaloons
- Ball Spot: Jump down on to the wheel to open the gate
If you do this perfectly without mistakes, you will receive another achievement Master of the Spot Parcours. Now pick up the stick from the ground and the pantaloons from the shrub on the left before going through the gate.
Castle
Enter the barn and talk to Bobby. Back outside, take note of the blue banner hanging above the castle entrance, then go inside to the throne room. Look at the floor mosaic and the wall mosaic, then look at the shield up on the balcony. Use Leaf Spot on the shield, then change to Ball Spot to reveal a chain. Now move the tapestry to the left and pull the lever that is revealed. Try to exit through the doorway, but it closes before you have a chance. Pull the lever again, then quickly move the tapestry and put your stick in the chain. Now you can head out to the balcony.
Climb the stairs here and you will reach the astrolab. Talk to the astronomer, but you cannot understand him. Look at the encyclopedias in the bookshelf to the left. Move the books on the 2nd shelf so they are in the correct order (A-G, H-N, O-U, V-Z). Now talk to the astronomer about everything. Pick up the chalk from upstairs, then go down and collect the moon ornament, crank, key and rapper (from the side of the bookshelf).
Return down to the throne room. Use your new key on the lock next to the throne, then search the secret compartment to get pliers, a handsaw and a crowbar. Use the crowbar on the floor mosaic to lift up the loose mosaic tile. Use this tile on the wall mosaic. Solve the two adjacent 9-piece sliding tile puzzles to recreate the insignia from the banner out on the balcony. Once you are done, insert your loose mosaic tile into the gap at the bottom, and you will realize it needs to be painted light royal blue.
Head outside to the courtyard and use your rapper on the door at the base of the tower, then go inside to find a laboratory. Take the empty flask, and place it beneath the blender at the very bottom on the left. You need to adjust the various blenders to create an appropriate starting blue color. Set the valves as follows:
Now open the tap on the bottom blender to fill your empty flask, then pick it up. Go outside and use your crank on the well; you will automatically bring up the bucket filled with water. Take the bucket, then return to the laboratory. Open the chest here and take the mortar and pestle from inside. Use this on your chalk, then put the chalk powder into your bucket of water. Combine this with the flask of blue paint to make light royal blue. Now use this on your mosaic tile and it will have the correct color.
Return to the throne room and save your game. Now use your tile on the wall mosaic and place it in the empty slot Shove Off! If you want to get all achievements, reload your game and use your mosaic tile on the wall mosaic, then select to skip the mini-game by clicking the red X button at the top right. Use your tile in the empty slot. Now you can go through the door to the left to find the dungeon.
Take the bone hand from the round cage, then attach you edged moon ornament to the bone stump. Use the pantaloons from your inventory on the hook hanging to the right. Place Normal Spot in the pantaloons. Climb into the small cage, then change to Ball Spot. Now get out of the cage and take the olives from the fallen olive branch. Leave the dungeon and go back outside to the laboratory.
Save your game, then put the olives into the large glass bulb on the right. Use Fire Spot to heat up the large glass bulb, and olive oil will start flowing through the pipes. Now you need to rotate the pipes to direct the flow of oil up to the flask in the window. There are two corks that you can use to plug holes; if you turn pipes so the corks aren’t needed temporarily, they will appear on the table so you can pick them up from there Tubelicious! If you want to get all achievements, reload your game and start the mini-game by using the olives and Fire Spot on the large glass bulb, then select to skip the mini-game by clicking the red X button at the top right. You will now get an achievement if you have used the skip feature for all 4 mini-games Saving Time.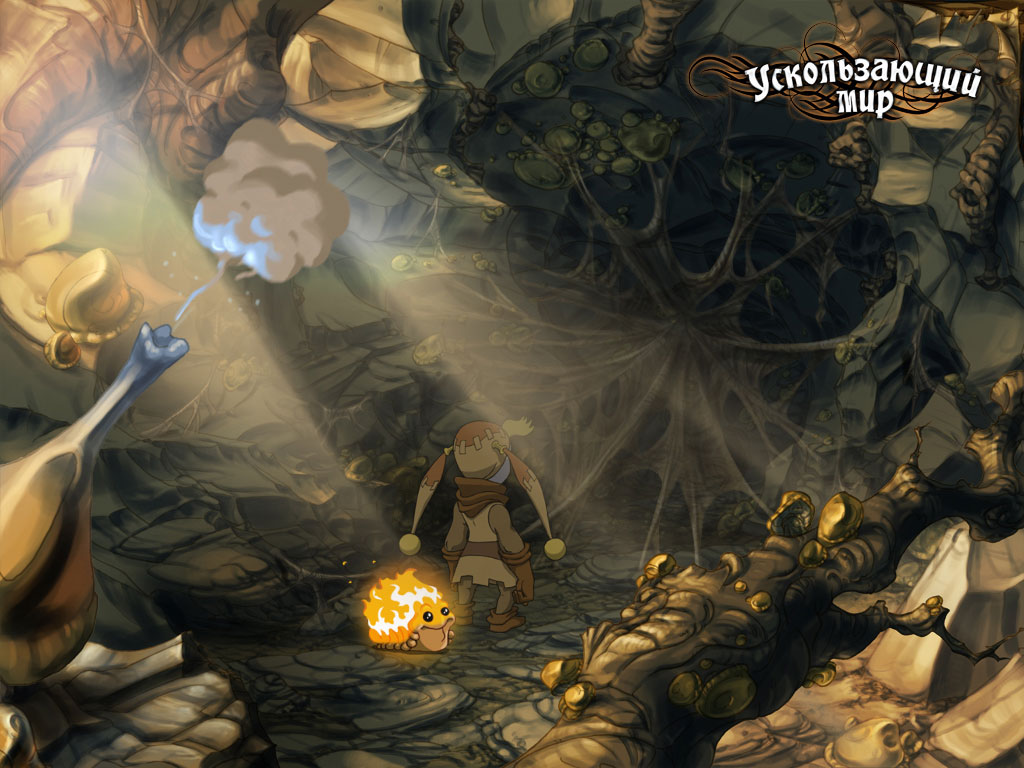 Use Five Spot on the flask in the window to knock it down.
Go outside, then into the barn and look in the cow’s trough. Use your bucket on the cow to get the oil, then pick up the cord. Now return to the dungeon. Use Fire Spot on the brazier on the right. Use your handsaw on the rack to make a hole, then push the brazier behind the rack. Next use your pliers on the bed of nails, and you will end up collecting 4 nails. Put Leaf Spot on the rack and you will automatically nail him in place. In your inventory, combine the pliers, bone hand and tether cord, then use this combination of items on Spot to retrieve the Whispering Stone.
Leave the dungeon, and go out to the balcony, then up to the astrolab. Try to pour oil from your bucket into the grease tube on the left of the machine; the astronomer tells you to use a funnel. Go up the stairs and use your nails on the blackboard, then pick up the ear trumpet. Use this on the grease tube, then pour in the oil from your bucket. Now attach your Whispering Stone to the console of the machine. Talk to the astronomer about the stones/planets again, then look at the blackboard. Now go and read the encyclopedia on the top shelf to get some clues about the planets.
Go all the way to the laboratory in the base of the tower and look at the periodic table to the right of the doorway. Return to the astrolab. Now using the information you have gathered, start with the bottom position (where you just inserted the Whispering Stone) and put the colored stones as follows going in a clockwise manner:
- Yellow (Pornitus)
- Red (Vernicus)
- Purple (Avrius)
- Green (Frobble)
- Blue (Silentia)
Use your crank on the gearbox to the left, and the water will start flowing. After Spot transforms, talk to the astronomer about everything. Use your empty flask on the flowing fountain. Use your crank on the exposed cogwheels in the base of the machine and time will stop. Head outside.
Broken World
After the conversation, go into the throne room. Talk to Loucaux and you will be thrown in the dungeon. Talk to the messenger. Try to take the pebbles from the window ledge, but you cannot reach them. Talk to the dungeon door and ask for a different cell. Now you can take the pebbles. Use the pebbles on the messenger, and you cage will be moved again. Now pick up the stone wedge. Use the stone wedge on the pulley above the messenger’s cage, then throw pebbles at him again.
Pick up the flask and Spot’s cocoon. Get back into the cage and it will return up to the dungeon. Pick up the crowbar, then talk to the dungeon door and ask to see Loucaux. Ask to be his clown, then say you can burp the alphabet, and spell out L-O-U-C-A-U-X. Head outside and search the monster’s saddlebag to get some bombs. Talk to the guard about everything, then go back inside and head up to the balcony. Use your crowbar on the hoses.
Go out to the balcony and up to the astrolab. Use your crowbar on the telescope and you will automatically get a shard of glass. Use this on the astronomer to free him, then pick up the rope. Use the rope on the funnel to get it covered in oil. Combine the rope with the bombs. Take the funnel, then head back up to the telescope. Put the bombs into the telescope. Add the funnel and then Spot’s cocoon. Finally, use your glass shard on the beam of light coming in through the window.
Returned Light
Go through the door on the other side of the balcony. Try to cross the bridge and it will break. Talk to Loucaux when he confronts you, then use your flask on the rain drain next to you. After you are saved, pick up Grandpa’s pantaloons, then enter the King’s spire. Use the pantaloons with the mirror. Try to use your crowbar to break the left mirror 10 times Mirror, Mirror. Now use your crowbar to break the right mirror The Boy in the Mirror.
Silence – The Whispered World 2: Komplettlösung, Tipps & Tricks: Alle Rätsel gelöst
Zeitrahmen: 60 Minuten
Schwierigkeitsgrad: mittel
Ihr übernehmt als Nächstes die Rolle von Spot, der von den Lumis in einem Käfig eingesperrt wurde.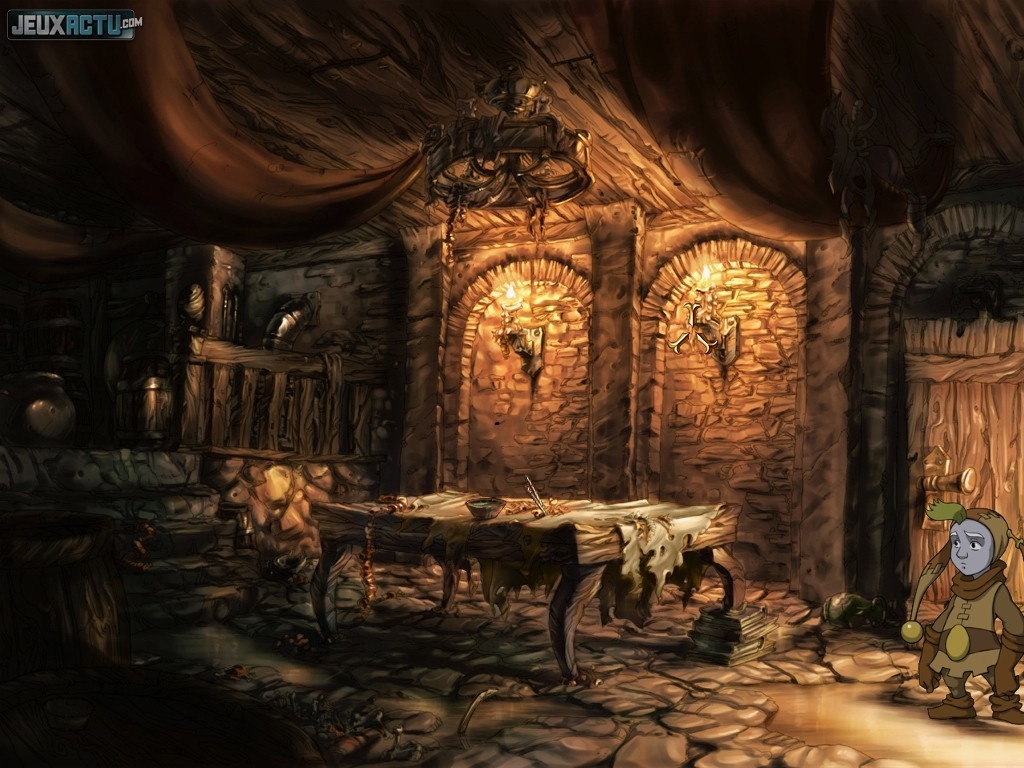 Macht euch platt und kriecht hinaus. Bläht euch zu einem Ball auf und geht nach links, bis euch die Lumis zurück in den Käfig werfen. Kriecht erneut in plattem Zustand aus dem Käfig und schnappt euch die Perücke, die just zuvor auf den Boden gefallen ist.
Geht zur Gummischleuder, die in der Mitte des Raumes von der Decke hängt, und lasst euch nach oben zu den Ballons schleudern. Haltet die Balance, bis ihr mit einem Ballon im Schlepptau zurück auf den Boden segelt, und saugt sogleich dessen Luft ein, um aus der Kanalisation zu schweben.
Wartet, bis Renie und Sadwick mit ihrem Heißluftballon abstürzen. Plustert Spot zu einem Ball auf und bugsiert ihn direkt unter den Heißluftballon, dort wo der Schriftzug “Spring runter!“ erscheint. Benutzt anschließend das kaputte Rohr zu eurer Rechten, um mit Sadwick zu reden.
Geht mit Renie nach rechts zum Marktplatz und schaut euch alles an, was ihr anklicken könnt. Nehmt vor allem die Angelschnur mit Haken, die zu eurer Linken an einem der Stände hängt, und schaut durch die Löcher des Kanaldeckels, um die Lumis aufzuspüren. Leider erscheint kurz darauf ein Sucher, der euch den Weg zu den putzigen Kreaturen versperrt.
Marschiert nach hinten zu den Kanälen und beobachtet, wie Sam und Janos vor weiteren Suchern flüchten. Kehrt zurück zum Heißluftballon und kombiniert die Angel mit dem Brunnen, wenn auch ohne Erfolg. Klickt den Horus über euch an, um zu Sadwick zu wechseln, und untersucht mit ihm den Brunnen in der Mitte, um ein paar Münzen zu ergattern. Geht nach hinten zum Süßigkeitenautomaten und kauft ein paar Zitronendrops. Des Weiteren könnt ihr euch einen der blauen Ballons schnappen, die rechts am Rand des Turmes hängen. Allerdings kann Sadwick nichts mit ihnen anfangen, weshalb er einen nimmt und sogleich wieder fliegen lässt.
Geht die Treppe zu eurer Rechten hinab und marschiert zum Holztor, bis es sich vor euren Augen schließt. Klopft so lange an, bis die beiden Kinder mit euch reden und von euch etwas ganz, ganz Tolles (!) verlangen. Bietet ihnen sowohl die Münzen als auch die Drops an, was sie jedoch nicht akzeptieren. Ihr könnt zudem zurück zum Brunnen marschieren, erneut einen Ballon hervorholen und ihn den Kindern geben, was immerhin zu einer lustigen Zwischensequenz führt.
Kehrt abermals zurück zum Brunnen und klickt das hintere Rohr an, um mit Renie zu reden. Sadwick fragt sie automatisch, was Kinder unter etwas “ganz, ganz Tollem“ verstehen. Sie verrät euch, dass es sich dabei nur um einen Lumi handeln könne. Wechselt zurück zu Renie und benutzt ebenfalls das Rohr, um Sadwick nach einem Köder zum Angeln zu fragen. Er wirft ihr daraufhin die Zitronendrops zu, die ihr sogleich mit dem Brunnen kombiniert. Fischt die drei Lumis aus der Kanalisation und füttert sie so lange mit Drops, bis sie kugelrund sind.
Spot springt daraufhin zurück in die Kanalisation, in der er gefangen gehalten wurde. Schaut euch die beiden Zauberkisten an und ihr stellt fest, dass ihr euch mit ihrer Hilfe in einen Feuerspot oder in fünf kleine Spots verwandeln könnt. Geht zur Pauke und kippt sie nach rechts. Verwandelt euch in einen Feuerspot und klettert in die Gummischleuder. Ihr landet zunächst auf der Pauke und knallt anschließend gegen den Gepäckstapel, der sogleich in Flammen aufgeht. Schnappt euch den Splitter, der zu Boden fällt, und wartet, bis das Spiel zu Renie wechselt.
Lauft zu den Kanälen und schaut euch die Luftblasen im Wasser an. Renie zieht sogleich einen Lumi heraus, der ihr jedoch sofort wieder entwischt. Schaut euch die Keksdose auf der anderen Seite des Flusses an und zieht sie mit eurer Angel zu euch. Lauft zum Heißluftballon und stopft den Lumi, der sich in der Dose befindet, in das Rohr.
Begebt euch zum Marktplatz und achtet auf die beiden Stände ganz hinten: Hinter einem von ihnen verschanzt sich der Lumi, den Renie just zuvor aus dem Wasser gefischt hat. Sobald ihr euch ihm nähert, haut er ab und taucht ein paar Sekunden später hinter dem anderen Stand auf. Nähert euch dem Lumi, bis er verschwindet, und lauft sofort (!) zum anderen Stand. Wartet ein paar Sekunden, bis der Lumi direkt vor euch auftaucht, und klickt ihn rasch an, um ihn zu fangen.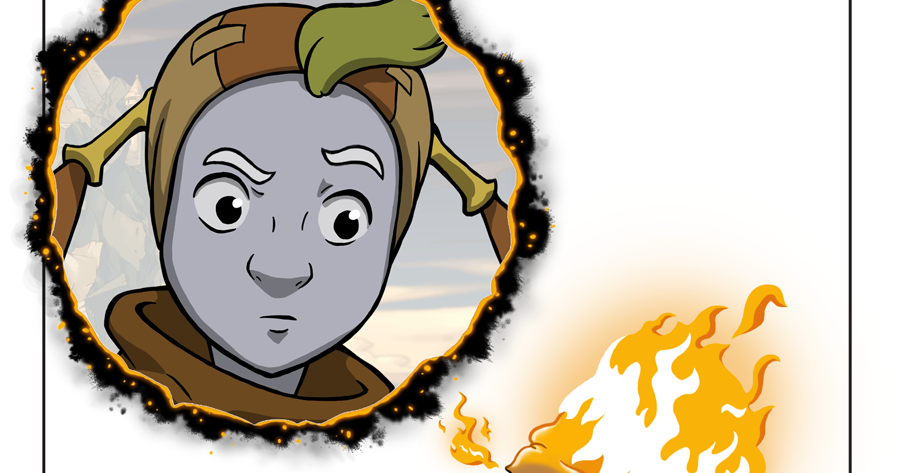 Begebt euch abermals zum Heißluftballon und stopft den Lumi ebenfalls in das kaputte Rohr.
Overcoming kilometers Nightingale’s song — Page 14 of 23
The sun slowly fell asleep, gradually plunging the earth into darkness. Nearby everyone was sleeping, leaning on the walls. Fedya’s head fell on my shoulder when the car jumped up because of the rough road. Now the sleeping Fedya doesn’t look so angry and mischievous. Quite the opposite. Only Lyosha didn’t close his eyes. without blinking.
— Can’t sleep? he asked, turning his head towards me. nine0003
“Yes,” I answered, adjusting my cap. “So many things have piled up that I can’t sleep.
Very soon we will be in the very center of the hot spot, no time to sleep.
There was silence for a while.
—Where did you come from? Alexei asked.
-Brest.
“Understood.” He took a deep breath. “So you lost your home too.
His face was the same stone, and there was something in his eyes that warmed up my curiosity. Then I asked a question:
— Have you lost many? Those empty green eyes showed no emotion. Only emptiness. nine0003
“Everyone.” He said coldly, still sitting in his posture.
—When the war started, my friend and I were sitting in the basement of the house. Haven’t been out for a few days. By chance, I overheard a conversation between two German flamethrowers. They said that we deserved it all. But I didn’t understand what they meant?
— Do you know German? There was a hint of surprise in his voice, but he didn’t show it.
—Yes, what’s the matter?
—Nothing.—He turned away and fell silent.—Knowing the enemy’s language will help you survive. nine0003
In the distance, there was a roar like a bomb explosion. We were stuck in a wooded area, so that if we screamed for help, no one would hear.
—What was that?! Fedya exclaimed.
The screams are just around the corner. Are we caught off guard?
— Grab your weapons and exit quietly. — Ivanych reloaded Shpagin’s submachine gun. I had to come out third as I was sitting closer to the edge. He took out his gun and took it off the safety. nine0003
—Umgeben!
Hearing the approaching German speech, Zhenya, Lyosha and I hid under the car. Three pairs of black boots walked neatly on both sides of the truck, heading towards the car door.
—Where is Ivanych and Fedya? Zhenya asked in a whisper.
A flurry of shots thundered overhead.
The first Nazi fell dead facing us. His eyes were open, and blood was flowing from his chest. The second lay down after him. Trucks started firing.
—You can’t sit here! Zhenya said, crawling out of hiding, but Alexei grabbed him by the trouser leg. nine0007 Suddenly I was dragged by my legs.
A German soldier stood over me with the muzzle of his machine gun pressed against my forehead.
Fear paralyzed me and my heart rate increased.
—Get down! Fedya shouted, and then a shot rang out.
The corpse of a German fell on me, staining my face and uniform with blood. My heart beat even faster, my eyes filled with tears, I wanted to scream, but the lump in my throat prevented me from doing so. At the same second, I returned to the shelter.
—Are you injured? Zhenya got worried when he saw me covered in blood. nine0003
“I’ll try to crawl to the next truck.” Fedya announced.
That damn fit again. Tremor. I couldn’t hold a weapon. Palpitations. Shortness of breath.
Lyosha crawled closer to the edge, reloaded his machine gun and lay down on his side.
—Let’s shoot from here.—He remained just as cold and calm.
—Understood.
There was an explosion. A neighboring truck exploded. Not far from us, among dozens of corpses, I saw Fedya. He was screaming in pain, holding his leg. Apparently a bullet or a grenade fragment had entered. nine0003
—Where are you going? — Zhenya was distracted by me and a stray bullet almost hit him in the head, hitting only the soft tissues of his forehead. — Damn!
I carefully crawled to the next truck, as it was closer. Blood… The three guys lying in the car didn’t even have time to run out.
Where is the first aid kit? Faster, search!
Found. A small suitcase stood at the head of one of the corpses. Falling back to the ground, I tried to crawl up to Fedya as quickly as possible. Bullets whistled overhead, and sometimes fell very close.
«God, if you exist, help me.» I whispered as I moved on.
Finally reaching my comrade, the first thing I saw was a pool of blood. I grabbed him by the chest and dragged him away from the battlefield under the cars into the forest.
“Don’t lose consciousness,” I said, snapping my fingers near his eyes. “Everything will be fine.
Having tied the tourniquet above the damaged artery, I tightened it tightly. I took a notebook with a pencil and wrote down the time of its application. Next, I moistened cotton wool in alcohol, disinfected the area around the wound and put a clean piece of bandage over it. nine0003
— The bullet hit the great saphenous vein. I can’t sew it up under these conditions.
—Your mother! he yelled, holding on to a leg stained with red liquid. «Do something!» I don’t want to die!
—Then why did you go to war? Fedya looked at me, but almost immediately looked away. “Everything will be fine, the main thing is to control yourself.”
The screams gradually subsided, and the shooting stopped. The sound of a branch cracking nearby made me alert. Grabbing Fedya again, I hid him in the bushes behind a thick tree and erased the line of blood on the grass with my foot. nine0003
—Be quiet and keep your head down, no matter what happens.
He firmly grabbed my tunic. His excited look asked me to stay.
—Everything will be fine.
Hande hoch, Russe! A high-pitched voice yelled out loud as I stepped out from behind the tree. A handsome young guy with black eyes pointed a machine gun at me. He looked to be about eighteen or twenty years old. His hands confidently held a weapon, and an evil grin once again proved that he had serious intentions to kill.
—Was ist los, Carl? (What happened, Carl?) —A colleague asked in his native language. nine0003
—Der letzte Russische ist noch da! (The last Russian left!)—His comrade hurried here. Two Nazis stood in front of me: one mature man and a young guy.
—Are you alone here? the man asked in broken and almost incomprehensible Russian.
—One.—I answered, looking straight into his eyes and destroying him with a look.
—Doctor? — He asked, pointing to the first-aid kit lying at his feet, but seeing a trail of blood that stretches to the trunk, he ordered to move away.
Karl, as the man recently called him, threatened with a weapon, but I did not move a single step. nine0003
— Do you have any wounded? I asked sharply to divert their attention. «I can help.»
The man looked at me with a stern look and ordered a colleague to take me to the base.
Who would have thought that just two hours ago the trucks were full of people, and now there are only corpses and destroyed cars. On the ground near one of the fired trucks, I saw Alexei. bled heavily.
Geradeaus gehen! (Go ahead!)—The German hit me with the butt on the head, causing my legs to buckle. My knees landed hard on the ground and, in order not to fall completely, I focused on my palms. A lacerated wound formed over my left eyebrow, from where blood often dripped. Literally half a meter away from me, Zhenya was lying on his stomach. He was alive, but badly wounded and losing consciousness. nine0003
—D-De-nis…—Zhenya slowly extended a trembling, bloodied hand. I extended mine in response. We tried to reach each other. There is not much left. Not much!
Shot.
The hand clatters down. The first drop of salt water hits the ground, followed by the second.
Two hundred meters from our vehicles, in the forest, there was a well-hidden Nazi base. It looked like a small military town. nine0003
—Günther! — Karl shouted. The soldiers looked at us and began to whisper. — Günther, Wo bist du? (Guenther, where are you?)
—Ich muss ein paar Dinge erledigen. -The man went back to the place of that massacre.-Du schaffst das, oder?
-Naturlich. (of course)
A young, slightly overweight private soldier in glasses was purposefully walking in our direction while cleaning his boot.
-Ich bin hier, Kumpel. Was ist passiert? (I’m here buddy. What’s up?) At first, there was a smile on his face, but when he looked up, it quickly disappeared and was replaced by restless behavior and a nervous tic. -bist du verrückt?! Warum haben Sie den Feind hierher gebracht? (Are you crazy?! Why did you bring the enemy here?)
He tried not to yell, but he didn’t do well. Günther bombarded the guy with questions.
-Er sagt, er sei ein Arzt. (He says he is a doctor)
-Es spielt keine Rolle, was der Feind sagt! (No matter what the enemy says)
-Dieser Captain Oliver hat uns keinen einzigen Arzt zur Verfügung gestellt, als er uns diese Mission geschickt hat.Es ist mir egal.Ich will nur meinen Freund retten und er kann ihn heilen. (This Captain Oliver didn’t provide us with any doctor when he sent us this mission. I don’t care. I just want to save my friend so he can heal him.)
-Was, wenn er seine Soldaten hierher bringt? (what if he brings his soldiers here?)
-Alle anderen sind tot.Er ist allein geblieben. (Everyone else is dead. He was left alone.)
Then Gunther relaxed a little.
-Sprichst du Deutsch? (You speak German) — Having adjusted his glasses, he turned to me.
I looked at him with an uncomprehending look.
He shouted to the rest of the privates if anyone knew Russian, but no one answered. Karl said that he only knew Engel, but he had gone somewhere. At gunpoint, they took me to one of the tents. , I don’t know how old he is, probably fifteen or sixteen. There was another sitting next to him, he held a piece of bloody rag against his stomach. Karl pointed to medical devices and a first aid kit. nine0003
-Wait! — I called to him when he was leaving. The German stopped and turned around. — I have very little experience in field surgery. — He just waved.
-Ich verstehe nicht, was du sagst, halt einfach die Klappe und operiere ihn. (I don’t understand what you are saying, just shut up and operate on him)
In Stalingrad, I operated on the wounded, but it was in more comfortable conditions. And I did not operate alone. If this boy dies on the operating table, they will get wet They won’t leave. Okay, there’s still no choice. I hurried to the patient. A stab wound in the small intestine. The wounded man was conscious. cough syrup and solutions to painkillers and antibiotics. nine0003
I disinfected my hands with alcohol and put on gloves, soaked a large piece of cotton wool liberally in a solution of hydrogen peroxide, and treated the surface of the wound.
-Now I’ll give you an anesthetic, be patient. -In the first-aid kit I found an ampoule of novocaine and a solution of sodium chloride, drew the drug into an injection syringe, tightened my hand with a tourniquet and felt for the right vein. -That’s it.
He loosened the piece of wood a little. Novocain worked, which means that you can proceed to the main part. I disinfected the scalpel by wiping it with alcohol and began to cut. nine0003
-The intestine is almost not affected, you are very lucky.
The action did not last long. He kept his eyes closed throughout the operation. I finished the stitch again and applied a bandage. From outside, there were screams that were approaching here. A few seconds later, a man in a uniform that was different from the private one burst into the tent.
-commander, es gibt eine Operation! (Commander, the operation is underway!) — Without answering Gunther, he approached me, grabbed me by the collar and threw me out, pointing the Mauser. Fear fettered me, but I continued to look into his eyes. nine0003
-Unterscharführer, er ist Arzt. Er kann noch nicht getötet werden. (Unterscharführer, he is a doctor. You can’t kill him yet) — A stranger stood up for me.
The commander ignored him. Then the young man pointed a gun at him. Everyone froze in anticipation of the shot.
-Wie kannst du es wagen, eine Waffe auf mich zu richten? (How dare you point a gun at me?) The chief asked in a calm voice.
-Ich lasse euch nicht den einzigen Sanitäter töten. (I will not let you kill the only orderly) — There was not a drop of doubt in the guy’s voice. He was ready to kill. nine0003
-Du bist nur ein Soldat! (You are just an ordinary soldier!)
-Aber das hält mich nicht davon ab, Ihnen eine Kugel in den Kopf zu schießen. (But that doesn’t stop me from putting a bullet in your head)
—Du bluffst. (You are bluffing.)
—Möchten Sie es überprüfen? (Do you want to check it out?)
Commander Oliver smiled nervously and, spreading his arms, said:
-Okay, lass ihn ein wenig leben. (Okay, let him live a little) — After these words, he left in an unknown direction, pushing those around him with his shoulder. nine0007 In the crowd, someone was heard saying that it would be better if he slammed this senile old man.
-Sprichst du Deutsch? (Do you speak German?) He squatted next to
with me.
I thought that if I spoke to him in German, it might work in my favor. They don’t have doctors, so they can’t kill me. At least not now.
—Ja.—I answered in their language. The privates who remained nearby were surprised and whispered even more.
—Heile die anderen kümmere dich dann um Rudolph. (Heal the others, and then take care of Rudolf.)
Standing up to his full height, he ordered the soldiers to disperse.
Until the evening I sewed up and operated, set bones and cured a cold.
The last task for today was to administer antibiotics to the most important patient here. He was lying in a separate tent almost on the outskirts of the camp. Inside there were two beds made of wood. the guy who recently stood up for me.
Brauchst du Hilfe? (Do you need help?) he asked with the same indifferent expression on his face. Without answering, I pulled out a thermometer from the first-aid kit and stuck it in his armpit. -Mein Name ist Heinrich. (My name is Heinrich)
—I’m Denis.—We didn’t shake hands. He sat down on the next bed and watched. After a couple of minutes I pulled out the thermometer: thirty-nine and five.
Wenn er stirbt, wirst du den schmerzlichsten Tod sterben. (If he dies, you will die the most painful death)
—Halten Sie den Beutel hoch, damit die Lösung in den Blutkreislauf gelangen kann. (Hold the bag up so that the solution enters the bloodstream)
With a thick blood transfusion needle, I quickly entered the vein. It remains only to wait. nine0003
Examples of woodcuts and first media photos.
Examples of woodcuts and first media photos.
The first photograph in the media of the 19th century appeared in 1873, it was published in the American daily newspaper Daily Graphic, but it took more than 20 years for newspapers and illustrated magazines to adopt the new technology.
At the end of the 19th century, an engraving was made from a photograph, from which printing was made. It looked like this. nine0007 1882 Der Bazar December issue — the work of an engraver without a signature.
Color postcard (?) of the early 20th century. (very similar to a postcard, but no data, the photograph itself was b/w).
foto: 4 Kaiser v.l.n.r. Friedrich III., Kronprinz Friedrich Wilhelm (Baby), Wilhelm I, Wilhelm II. Four Kaisers. July 4, 1882.
What is surprising in today’s times, they could retouch the photo a little (the Kaiser in the photo is clearly “sleeping”). But craftsmanship implies compliance to the smallest detail, as I have already said, head to head. nine0003
And here the engraver’s signature was considered inappropriate:
Königin Victoria mit Enkelin Margarete Viktoria. Margaret of Connaught auf dem Arm ihrer Großmutter Königin Victoria. 1887
The photograph undoubtedly survived, although it was not found on the net. But how magnificent is the work of the engraver! Source: HHU library.
Back to Richard Brand’amour’s woodcuts: R. Brend’amour (1831-1915) is the full name of Franz Robert Richard Brend’amour. I talked about him in the topic about Lady Jane Grey: https://n-dank.livejournal.com/92668.html
Here is another fine work (Brendamour, Weber)
Nach dem Gemälde von Albert Tschautsch (1843–1922). Dornroschen Erwachen.
The awakening of the sleeping beauty. 1873 Berlin magazine Der Bazar . Source: HHU library.
First, the talented and hard work of the engravers is impressive. How many strokes and dots are there, “there are darkness, and darkness, and darkness …” Secondly, I don’t see this picture on the net. It must be understood that only thanks to b / w scans of printed publications of the late 19th century, one can get at least some idea of one or another work of artists. Some are in private collections, some are gone forever. Thirdly, I found this image of a handsome prince funny. He’s fat!))
I remembered another story. In 1892, Konstantin Egorovich Makovsky painted the painting Romeo and Juliet. The artist’s son did not like the picture, later the son found out that the new wife of his father M.A. Matavtin posed in the image of Juliet.
“In my father’s studio, in a conspicuous place, was a new painting, Romeo and Juliet, just brought from Paris. In Romeo, Sergei recognized his cousin, the young artist Sasha Makovsky, noted to himself that Sasha, although handsome, was not as young as Romeo, and Juliet was even older, fat and rustic. After the Florentine and Venetian Quattrocentists, he did not like the picture, but, not wanting to offend his father, he kept silent, who posed for Juliet, also did not find out … ”(c) T.V. Lebedev. Sergei Makovsky. Pages of life and creativity. nine0003
R. Brand’amour . Still, amazing portraits made from photographs. Source: HHU library. One of the most sought-after tenors of the mid-1880s was the Pole Ladislaus Mierzwinski. Favorite public German opera singer Albert Niemann (Albert Niemann). Saxon tenor Emil Götze.
And this, it seems, is the new technologies of the late 19th century (?), the same stains and halftones, reminiscent of watercolor. To see, you need to open the picture: Bete, mein liebes Kind . Woodcut by Brendamour from a painting (?) by the Italian artist Angiolo Achini (1850–19thirty). 1887 Berlin magazine Der Bazar
Photography
Photographs appear in the 1890s. For example, in the Berlin fashion magazine Der Bazar, the first printed photograph was a photograph from the 1894 Antwerp meat exhibition Das Liebig-Monument depicting two giant bulls. Here is an interesting example: 1898 Illustrierte Frauenzeitung
Teresa Feodorovna Ries (Teresa Ries 1874-1950) is an Austrian artist and sculptor of Russian origin. nine0007
«Eine junge Russin» conquered Vienna. The caption to the photo enthusiastically describes the rare example of a woman achieving tangible success as a sculptor. Teresa Fedorovna was born in Moscow, brought up in a French boarding house. The high artistic talent is emphasized, which distinguished her from the rest of the pupils. Mention is made of studying at the Moscow School of Painting (Malerschule). It also tells about Professor Edmund von Helmer, who believed that it was useless to teach women, however, who agreed to help Mrs. Rhys. Mark Twain is named in a note by a famous English humorist who, in the winter of 189I came to Vienna with my family for 8 years.
Fragmentary:
In Illustrierte Frauenzeitung in 1898 exactly the photograph was published (see general view of the page). But in some other of the publications, engravers worked on the photo in the old fashioned way. Right: Teresa Feoderovna Ries porträtiert Mark Twain. Source: (picture alliance / Mary Evans Picture Library) Mary Forbes Evans (1936–2010) was a British writer, collector and co-founder with her husband of the Mary Evans Picture Library. nine0003
It should be noted that in the explanatory description of the image in Illustrierte Frauenzeitung there is no word “photography”, they write “picture” (“Das hübsche Bild”, “Abbildung”). In the version from the Mary Evans library, the signature is cut off, but there is a more complete version on the net, alas, the edition is not indicated (something Austrian or German):
Collection: Mary Evans Picture Library Ltd
Signed: photograph by Charles Skolik. Charles Scolik (1854-1928) is one of the leading portrait photographers in Vienna. But the engraver worked on this image, the signature in the lower right corner is distinguishable. In fact, woodcuts (it.p.) from photographs were signed at that time approximately in this way: Nach einer photographischen Aufnahme von (name of the photographer). nine0003
«Niva» : illustrated magazine of literature and modern life 1898 No. 44. Indicated: «according to engraving», no confusion in this case.
In the Russian magazine «Niva» for 1898 there is an interesting long article, much more informative than in German, but the text is the same regarding the photograph under discussion, readers are invited to compare the original and the work of the sculptor: “Our drawing shows Twain himself and his bust the work of Mrs. Reese. The reader can therefore form a visual representation of how similar the copy is to the original, i.e. how significant is the artist’s talent. nine0007 In one of the modern articles in German, she is even credited with the fact that in a self-portrait of 1902 she depicted herself not in some smart dress (it’s so feminine), but in a sculptor’s apron, in working clothes (nowadays the topic emancipation demanded more than ever ).
*After the Anschluss of Austria in 1938, the Nazis sacked and requisitioned Teresa Feodorovna’s studio in the course of «Aryanization», most of the works were destroyed as «degenerate art». Rhys remained in Vienna until 1942 years old, and then fled to Switzerland in Lugano, where she spent the last years of her life.
Perhaps I’ll also quote “Snob”, an article about the exhibition “City of Women” in the Vienna Belvedere, held in the spring of 2019:
In 1910, the Association of Women Artists arose in Vienna with the support of the aristocracy and the big bourgeoisie. And in 1901, a group of «Eight Artists» appeared, among the founders — a Muscovite Teresa Fedorovna Rice (1874-1956). Having lost her first child, she broke up with her husband and decided to take up art, after being expelled from the School of Painting, Sculpture and Architecture due to her difficult nature, she left for Vienna in 1894, where she quickly became famous. Her sculpture The Witch Preparing for Walpurgis Night (1895; the figure, which has lost its right hand over the years, is now shown in the Belvedere) made a splash — both Emperor Franz Joseph and Klimt were among the wide ranks of admirers. At first, Rhys was refused to teach with the standard insulting argument — women should not waste time on art, they get married anyway … The skeptics had to object to work: the career of a portrait painter was set (among her successes — a bust of Mark Twain), Rhys’ studio shot in the wing of the Liechtenstein Palace. » nine0003
Another interesting work by Brendamour, published in the women’s magazine 1898 Illustrierte Frauenzeitung . Source: HHU library.
In 1848, the art association Malkasten, Palette, was founded in Düsseldorf ( Malkasten — a drawing box). In 1898, the anniversary date from the founding of the association «Malkasten» was celebrated.
Brandamour painted portraits of well-known artists belonging to the association. For example, in the center is a German battle painter Wilhelm Camphausen (1818-1885) . German artist Karl Hoff (1838-1890) , it was him at the end of the 19th century, on the pages of the Encyclopedic Dictionary of Brockhaus and Efron, that the Russian art historian and museum figure Andrei Ivanovich Somov called one of «the best modern German genre painters.» Wilhelm Hübner (1814-1879) — German painter of the romantic movement.
After the unrest of 1848, called the March Revolution, the Frankfurt National Assembly (Frankfurter Nationalversammlung), the first all-German parliament, was organized, and an active discussion took place with the aim of developing a constitution for Germany. Düsseldorf artists also took part in political discussions. On August 6, 1848, the so-called Düsseldorf «Association for a Democratic Monarchy» («Verein für demokratische Monarchie») was founded. On the same evening, as part of the celebration, an association of artists was organized, which they called a few days later — at the suggestion of the artist Karl Wilhelm Hübner — «Malkasten». nine0003
German artist and writer Eduard Daelen about the establishment of the Malkasten association and the coat of arms: Vereinswappen Malkasten-Adler .
Eduard Daelen (1848-1923) , 1877 bis 1923 war er hier Mitglied des Künstlervereins Malkasten.
«Es war eine merkwürdige Zeit, das »tolle Jahr 1848«, in dem der »Malkasten« das Licht der Welt erblickte. Eine Zeit des Werdens, Vorfrühling. -friedlichem Wirkungskreise sich zusammenfinden, und mit stürmischem Beifall wurde deshalb der Name »Malkasten« für den gegründeten Verein sofort angenommen.
Zur Losung in seinem Schild »wider die Philister und Piefkes« wählte er das Motto: »Ich komm doch durch komm ich doch!« Darunter aber war ein zweiköpfiger schwarzer Adler gemalt auf goldenem Grund; auf seiner Brust das alte Wappen der deutschen Malerzunft, silberne Schildlein auf rotem Grund, das Karl V. dem Altmeister Albrecht Dürer verliehen hatte. In den Fängen hielt der Adler einen schäumenden Bierkrug und einen Hausschlüssel, damit andeutend, daß, wenn er einerseits den Becher fröhlichen Genusses mit der Miene des ausgelassenen Schalksnarren biete, doch andererseits mit dem ehrbaren Hausschlüssel ermahne, auch das beste Spiel solle ein wohlweises Ende nehmen und der friedlichen Ehehälfte daheim nicht vergessen lassen. nine0007 Eduard Daelen talks about the time of formation, when all the «colors», all convictions, both political and artistic, had to unite in a peaceful and sociable company, it was with this message that the association of artists «Malkasten» was founded on August 6, 1848 to thunderous applause » (KVM).
The motto was chosen: «Ich komm doch durch komm ich doch!» and a coat of arms: a double-headed black eagle was depicted on a golden background, on its chest — the old coat of arms of the Guild of German Artists (silver shields on a red background), which Charles V handed to Albrecht Dürer. The eagle held in its claws a foaming beer mug and the key to the house (the beer mug symbolized a cheerful revelry, the key reminded of respectability — take a walk, but know the measure, remember the house and wife). nine0003
In 1861, the Düsseldorf Artists’ Association purchased the house of the philosopher Friedrich Heinrich Jacobi and his extensive garden «Jacobi Garten» for meetings and celebrations. This is how the Malkasten-Haus appeared in the Pempelfort district. At that time, the house and the garden already had historical significance, because at the end of the 18th century the so-called «Jacobi-Kreis» operated there. Prominent figures of intellectual life have been there, such as Diderot, Goethe, Herder, Wieland, Klopstock (one of the most important German poets), Wilhelm and Alexander von Humboldt. nine0007 Around 1900, an artistic commission, including KVM artists, started the popular art and culture magazine Die Rheinlande . Until the 1920s, Malkasten was in close contact with famous German artists. He could attract authors such as Thomas Mann to lecture. During the NS era, many artists were persecuted, but in general, KVM managed to adapt. Vicki writes that the KVM, together with the Union for the Struggle for German Culture, celebrated «nationale Erhebung» and «pflanzte dem «Retter aus höchster Not» eine «Hitler-Eiche»». June 19For 43 years, as a result of an air raid, all KVM buildings burned to the ground. Restoration took place in 1947-49. As far as I understand, today the Malkasten-Haus consists of two restored and modernized buildings: «Jacobihaus» und dem «Hentrichhaus».
The Association of Artists still exists today. In Düsseldorf, the name «Malkasten» is known primarily as the restaurant of the famous artists’ house.
Eagle with a mug and a key decorating the walls of the verein in Düsseldorf (photo stolen from the net):
Postcards issued for the 50th anniversary of KVM. Here the emblem is clearly visible, and the motto (which I do not understand).
