Uncharted 4 — Chapter 9 Puzzle Solution (Four Dials with Three Crosses)
Posted in uncharted 4
Chapter 9 contains one of the harder puzzles in Uncharted 4 that consists of Four Dials and requires the use of a Water Bucket and the correct alignment of Three Crosses. In this guide you’ll find a complete walkthrough for solving this particular puzzle in just a couple of minutes.
First a little background to this puzzle and when it actually appears in the game. Leading up to Chapter 9 we have already taken a dangerous path deep underground through a series of pirate caves in Scotland. There were many perilous opportunities to perish along the route with broken rope bridges and crumbling mine shafts to name just a few.
Less than a couple of minutes into Chapter 9 and the games harder puzzles presents itself. Consisting of a four circular dials and three crosses, players must align a water bucket and the crosses in a precise position to complete the puzzle.
Video
For a short video solution see the link below, otherwise follow the text guide underneath.
Chapter 9 — Puzzle Solution
Step by Step
1. Activate the puzzle
Face the four dials and look to your immediate left. There is a locked door and a skeleton with his arm inside the stone wall. Walk over to this poor fellow and interact to pull his hand out of the wall and trigger the first part of the puzzle.
2. Fill the bucket
Next, take the bucket from the lower section of the puzzle. Turn to your left, walk forward and drop down the edge to the pool of water below. Press Triangle to fill the bucket with water and then pass it back to Sam up above. He will take it over to the puzzle and reinsert it into the lower dial of the puzzle.
The two outer sections of the puzzle will crumble into the floor and four lights will appear on the puzzle dials. Three of the lights will appear in the middle and a single light shines at the top.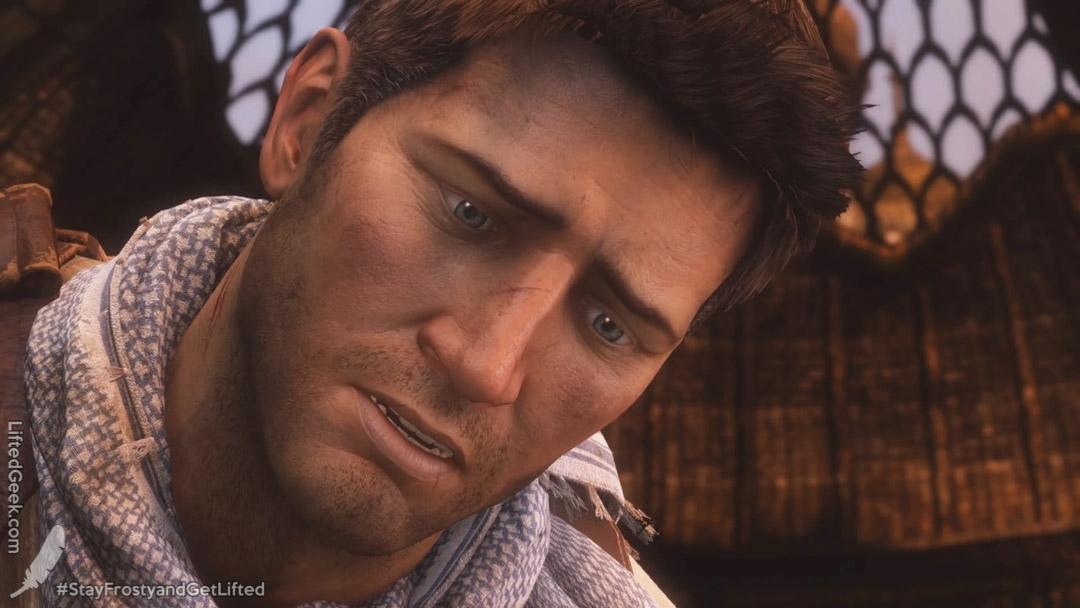 Pay attention to their position because it’s important.
3. Read Journal
Open up the Journal to reveal the Three Crosses and the secret to solving this puzzle. Note the position of the Three Crosses on the right hand page. This is the exact position you must replicate on the puzzle dials, with each cross sitting in one of the lighted up panels.
The large white cross belongs in the middle, flanked on the left by the smaller white cross and the black cross on the right.
4. Get bucket on top first
Next, the actual beef of solving this puzzle. You must use the four wheels at the bottom of the puzzle to rotate each of the dials above. As each dial rotates the panels move position; either clockwise or anticlockwise depending which way you turn.
Since many of the dials overlap, each of the panels can be impacted by more than one wheel depending on it’s current position. The panels in the middle of the puzzle are most at risk of interference and you can use this strategy to your advantage. The pre-positioning of the crosses and thinking ahead to your next move is essential if you want to solve this one correctly.
Four wheels:
- First wheel rotates the left dial
- Second wheel rotates the top dial
- Third wheel rotates the bottom dial
- Fourth wheel rotates the right hand dial
To simplify the process start by turning the dials to get the Water Bucket to the very top position whilst avoiding any crosses in the top dial. Make sure the bucket is sitting in the shining light as shown in image above.
Once it’s there we can safely play with the other dials without worrying about moving the bucket inadvertently.
5. Separate the crosses
Rotate the dials so that the larger white cross (Jesus) is on the left dial, the smaller white cross is on the bottom dial and the black cross is on the right hand dial.
Ensure that the smaller white cross is at the very bottom. Keep the large white cross and black cross on the very edge, away from the central dial. This will avoid interference, helping us complete the puzzle very quickly.
6. Complete the puzzle
Now rotate the left hand dial so the large white cross is next to the small white cross at the bottom, as shown in image above.
Next rotate the right hand dial so the black cross is next to the large white cross in the middle, as shown in image above:
Finally rotate the bottom dial clockwise once to complete the positioning of the crosses. See image above.
Uncharted 4: Chapter 3 The Malaysia Job — walkthrough
This page of the guide for Uncharted 4 has a walkthrough for chapter 3 – The Malaysia Job (scuba diving and taking the wagon out of the water).
Last update: Thursday, January 27, 2022
This page of the Uncharted 4: A Thief’s End guide has a walkthrough of chapter 3 — The Malaysia Job. You will learn, e.g. how to swim, where to find the sunken wagon and how to take it out of the water.
- Chapter 3 information
- Finding the sunken trailer
- Pulling the trailer back to the surface
- Meeting with Jameson on the ship
Chapter 3 information
This chapter is set up almost entirely underwater. It focuses on the search — and eventual retrieval — of a trailer of a truck located at the bottom. During this chapter you won’t be meeting any enemies, and you don’t have to worry about running out of oxygen in your oxygen tank. There are four secrets to find here, and three of them are located under the water. Aside from that, after reaching the deck of the ship, the protagonist can initiate two optional conversations with the members of the crew (the exact locations of every additional activating are marked in the text).
Finding the sunken trailer
After you regain control over the protagonist swim to the right side. Not far from the starting point in this chapter you will find the first treasure (Antique Padlock), located underneath the tree trunk lying on the bottom. The location can be seen on the above screenshot.
Now swim a little further. After reaching a place with large rocks turn slightly to the left and dive deeper to approach the floor. There’s a second treasure (Chirigui Shark Ticket) of this chapter to collect here — the exact location can be seen on the above screenshot. You can now venture forth. Nate will soon reach the area with the sunken trailer of the truck lying on the floor. You will listen to a conversation with Jameson about plans of retrieving it.
Pulling the trailer back to the surface
Don’t rush to reach the trailer, as there’s another secret to uncover here. Start from the place at which Nathan had a conversation with Jameson and swim to the right. Stick to the rocks on the right side and look around the area carefully, as this treasure (Antique Pocketwatch) is hidden a lot better than the previous ones in this chapter. The exact location can be seen on the above screenshot.
The location you can find one of the chests at.
You can now swim to the trailer. If you want to you can examine it first. Pay attention to the axle of the trailer — you will be able to attach hooks there later — as well as to the hole in the side wall of it, which will allow you to take peek inside. You must reach the rear door of the trailer. Open it, swim inside of the trailer and check the cargo located inside of it. You will notice that two chests are missing. The first one is hidden directly beneath the trailer — you can examine it right now and Nathan will leave the retrieval of it for later. Swim out of the trailer and search the area on the right side, where you will be able to locate the second chest. Grab it and start swimming in the direction of the trailer. As the chest weights Nathan down, you must rhythmically press the X button whenever you want to swim higher. Swim with the chest inside of the trailer and place it near the other ones.
Leave the trailer and wait for the device to pull it out of the ocean floor to be descended. It has two hooks — each one of them needs to be attached to one of the aforementioned axles. After Nathan grabs the line, swim around one of the axles so that the rope wraps around it and attach it by pressing the Triangle button (like on the screenshot provided above).
The second chest can only be picked up after pulling the trailer off the floor.
After you attach both hooks to the axles of the trailer, swim away a little so that the object can be slightly raised. Use this opportunity to pick up the second chest that was crushed by the trailer (the one that you could only look at). Similarly to the one you’ve collected before, swim with the newly acquired chest to the trailer and place it alongside the rest of the cargo. Press the Triangle three times to secure the load, leave the trailer and swim to the device attached to it. You now have to wait until both Nathan and the trailer is pulled out of the water.
Meeting with Jameson on the ship
After boarding the ship, don’t rush to meet with Jameson yet, as you will end the chapter prematurely. Instead, look around the deck of the ship. You can initiate two optional conversations with the members of the crew (Salvage Worker) here. You can recognize them thanks to the icons floating above their heads (one of the characters can be seen on the above screenshot).
Afterwards, explore the balcony of the ship located on the higher ground. On the right side of it you can find the last treasure (Antique Arcade Token), shown on the above screenshot. Now that you’ve completed all the additional activities in this chapter you can head on to meet with Jameson (he can be recognized by his red suit). Follow Jameson to the cargo you’ve just retrieved and examine the contents of it by pressing the Triangle button. Afterwards, this chapter will end.
90,000 wild beaches and natural beauties!” — 4 reviews, price 200 €
Excursion «Unexplored Rio: wild beaches and natural beauties!» — 4 reviews, price 200 €
Private tour
•
6 hours
See calendar for dates
4 reviews
Prepayment 20% of the cost
200 €
for the tour
Tour description
Rio de Janeiro is famous for its luxurious beaches, but rare visitors get out of the hyped, overcrowded and not very clean Copacabana and Ipanema. On a tour of the non-touristy western Rio, you will discover places where the beauty of the Brazilian coastline truly shines, and relax on the best beaches in the city!
What awaits you
Discovery of Western Rio
The natural beauties and amazing beaches of the city are by no means located in the southern, most popular tourist area. In addition, they are difficult to reach by public transport. And by car and with a local connoisseur — easily! For the best places in Rio, you will head west, driving along the entire coast, where the beach strip stretches for more than 40 km.
The best beaches in the city, viewpoints and lunch at a fish restaurant
- First stop is at the beginning of Barra da Tijuca . Here you will find local Venice — islands, canals, boats and mansions of rich people on the hills.
- Then you will drive along the promenade of the fashionable area, see the longest beach and stop at Recreio , where most of the natural beauties of the western zone of the city are concentrated.
 One of them is Pedra do Pontal on Recreio Beach, where the ocean parted, forming a picturesque path to the mountain. If you wish, you can climb to the top for fantastic views!
 - And finally, go to the two most beautiful, «wild» beaches of Rio: Prainha and Grumari . They are surrounded by national parks and there is no public transport. And the road runs along a serpentine, opening up new incredible landscapes!
- You will also visit several viewing platforms and, if you wish, go down to another natural wonder — a natural pool in the rocks (it is called a secret beach).
- And finally, you will have lunch in a pleasant Ocean View Local Restaurant serves fresh seafood and fish dishes.
- And, of course, during the day you will have enough time to relax on one of the beaches you like.
Organizational details
Lunch at the fish restaurant is not included in the tour price. There are no other additional costs along the way.
Automobile
- Tour type: individual by car
- Group size: up to 3 people
- Days: see the calendar. Choose a free date when booking.
- Duration: 6 hours
- Meeting point: at your hotel in the Sul zone or by appointment
- Start: by agreement
- Language: Russian
- Price: 200 euros for 1-3 people, regardless of the number of participants
Free day
Busy day
The schedule is updated every half hour.
Tourist reviews
Sergej
We spent a wonderful day with Alexandra and her husband, seeing many places hidden from tourists, climbing a mountain, taking a bunch of cool photos, having lunch in a wonderful fish restaurant where only locals gather (and this is always only its dignity) and even tasting local homemade sweets. Alexandra not only showed us the unknown Rio, but also helped us solve a couple of questions, providing us with full information. Only the best memories and recommendations!
December 21, 2020
Svetlana
Alexandra, thank you very much for an interesting excursion to the unexplored beautiful corners of Rio! We saw very beautiful amazing places and interesting non-tourist routes. We ourselves would definitely not have been there. Svetlana and Andrey
March 1, 2020
Andrey
Since we are well over 65 people, we asked Sasha to arrange a tour for us with a minimum of walking. At our request, we drove to the Mercado, had lunch in a luxurious restaurant. Everything was 🆗. Thanks to Sasha and Artur.
December 2, 2019
Alena
We really liked the beaches of the west coast of Rio, they are cleaner and more picturesque than the well-known southern ones, while almost deserted. We then came to Barra Beach ourselves by metro. We saw really different pictures that we would not have seen without this tour. An added bonus was that Alexandra picked us up from the airport. Since we had just arrived in Rio, we had many questions about the city, transport, security, etc., which Sasha answered to the best of her ability. We didn’t manage to climb the hill to the end, although we believe that we are in good physical shape), but we still got a beautiful view, so it was worth it! Thank you!
May 11, 2019
Alexandra
Guide in Rio de Janeiro
Guarantees
Extraguide is a service for searching and ordering excursions in 116 countries. There are 15622 excursions in Russian in the catalog from 3182 guides.
- Secure payment
- Free cancellation
- Verified guides
Similar tours in Rio de Janeiro
25 reviews
Glitter and poverty of Rio — a walk through the city center
Trace the history of the city and marvel at its contrasts.
Individual
On foot
3 hours
50 € per person
43 reviews
To the symbol of Rio through forests and favelas
Car trip through the most picturesque places of the city.
Individual
By car
4 hours
from 175 € per tour
no reviews
Car tour of Rio de Janeiro
Car tour of Rio de Janeiro.
Individual
By car
8 hours
$495 per tour
What to see in Rio de Janeiro and its surroundings. List of top attractions.
unexplored corner of the Ryazan land in Ryazan, Excursion, price 7200₽, 3 reviews
- Home
- Russia
- Ryazan
- Excursions
Book now, cancel if you decide to cancel the armor 48 hours before the event — you will return 100% of the paid amount
description
that you awaits
Extraordinary nature and mysterious Artania
In the Shilov region, you will see the views of the beautiful Oka proudly carrying its waters, meadows and forests full of mushrooms and berries. And in this reserved place, you will learn about the search for traces of the mysterious Ryazan-Oka residents and Arzu, the capital of the ancient state of Slavic-Aryan Rus’ Artania. Let’s talk about finds that confirm the hypothesis that one of the centers of the Rus was located here: ceramics, coins, remains of weapons and household items of the pre-Slavic period, which are found here as often as mushrooms growing in abundance.
Myths and legends of the Shilovsky region
Another and no less interesting side of the region is legends about epic heroes, fairy-tale creatures and holy places. I will tell you about the homeland of the hero Dobrynya Nikitich and his magic sword, about the Chamka (Ryazan mermaid), the Serpent Gorynych, the Nightingale the Robber and his accomplices Terekha, Melekh and Inyak. In addition, you will visit springs in Salaur and Zanino-Pochinki. See the dancing forest and find out why the bells can be heard in the local lake. And if you want, we will include in the program the museum of local lore and the ethnographic center of Zaryan, where the history and folklore of the region are carefully preserved.
Famous personalities in Shilovo
In addition, you will hear about Ryazan Lomonosov Ivan Sreznevsky and his son Izmail Ivanovich. About the house of Tarkovsky in the village of Myasnoye. And also about the President of the Russian Academy of Arts Alexei Olenin, who lived in the village of Salaur, and his daughter Anna, to whom the notorious poet dedicated the lines «I loved you …» .
Organizational details
- The tour is long but not tiring. However, I would not recommend taking children.
- Transfer by car/minivan and entrance tickets to the Shilov museums are paid extra — please check the details when booking
Answers to questions
- Place of start and end?
-
at Theater Square
- When and how long does it take?
- Who else will be with me?
This is a private tour , all attention will be on you and your company. Group size no more than 10 people.
Olga is your guide in Ryazan
Conducted 289 excursions for 472 tourists
My name is Olga. I have lived in Ryazan all my life and love it very much. It seems to me that there is no other city so rich in history, nature and outstanding people. I have traveled a lot in my life, but I have met really passionate guides only twice — in Kyiv and in Prague. These guys made me fall in love with their cities. With my help, I would like the guests of Ryazan to want to come here again and learn more about our region. I am a teacher by education, I worked at Ryazan University, then I was a private entrepreneur, I opened my own cafe. Now I am retired and can devote all my time to my favorite pastime — talking about Ryazan and showing its amazing places.
Reviews and rating
5
based on 3 reviews
can write a review only tourists who visited the event
Lyudmila
21 Aug 2022
Wonderful excursion in good weather. We did not live this day in vain — we discovered the most beautiful and interesting places near our dacha and learned a lot of interesting things about the past and present of the Ryazan land.
Yuliana
May 30, 2022
Very informative trip, you won’t regret it
The Museum of Local Lore in Shilovo is super cool, interesting archaeological finds from the Ryazan land and people who are sick of their work to the marrow of their bones — it’s cool)
When people enthusiastically scatter about their region, it’s worth a lot, it concerns all participants in this trip
Hope
July 25, 2021
Good afternoon! On July 24, 2021, my sister and I went on an excursion to Shilovsky places.
