Trüberbrook: Komplettlösung, Tipps und Tricks
Willkommen in Trüberbrook. Ein scheinbar normaler, fiktiver Luftkurort in der deutschen Provinz. Hierher reist der Quantenphysiker Hans Tannhauser, der einen Urlaub gewonnen hat. Doch hinter der vermeintlichen Idylle des Ortes steckt mehr, als es zunächst den Anschein hat. Logisch, oder? Ansonsten wäre das Spiel vermutlich nicht so interessant. Und würde keine Rätsel bieten. Die gehören natürlich zu einem Adventure wie das Amen in der Kirche und auch in Trüberbrook werdet ihr mit einigen Herausforderungen konfrontiert, die es zu bewältigen gilt.
Damit ihr dabei nicht festhängt, haben wir an dieser Stelle alle Rätsel des Spiels für euch gelöst, damit ihr bis zum Ende kommt und nicht mittendrin festhängt. Also lasst uns loslegen…
Eröffnungssequenz
Ihr befindet euch an der Tankstelle und müsst euren fahrbaren Untersatz wieder fit machen. Ins Gebäude kommt ihr auf den ersten Blick nicht hinein, aber das lässt sich leicht lösen. Tretet gegen die Regenrinne und nehmt den Schlüssel an euch, aus der Werkzeugkiste schnappt ihr euch darüber hinaus noch die Zange.
Öffnet nun die Tür mit Hilfe des Schlüssels. Schaut euch das Bild rechts (aus eurer Perspektive gesehen) neben dem Eingang näher an und dann interagiert damit, woraufhin es verschwinden sollte. Benutzt dort den Schalter und anschließend die Zange mit der Stromleitung. Am anderen Ende der Tankstelle nehmt ihr eine der Postkarten und einen Becher mit und geht wieder nach draußen.
Durch den abgeschalteten Strom ist die Tiefkühltruhe aufgetaut, dort nehmt ihr mit dem Becher das Wasser auf. Benutzt dann die Zapfsäule und verwendet das kalte Wasser mit eurem Motorrad, das ihr anschließend benutzt.
Prolog
Nach dem Intro mit dem Bus landet ihr mit Hans am See vor Trüberbrook. Hier könnt ihr noch nicht viel machen, geht also gleich nach rechts rüber ins Dörfchen hinein. Auch hier führt euch der Weg direkt rüber zum Gasthaus. Schaut euch ein wenig rum, plaudert mit Gretchen und drückt dann so lange die Klingel, bis Trude auftaucht.
Nach dem Gespräch geht ihr hoch in euer Zimmer und habt in der Nacht eine merkwürdige Begegnung. Im Anschluss daran geht ihr nach unten und verlasst das Gasthaus. Schaut euch draußen die Fußabdrücke auf dem Boden an und es kommt zu einem Gespräch mit Gretchen, womit auch der Prolog bereits beendet wäre.
Wie alles anfängt.
Kapitel 1
Am Aussichtspunkt geht ihr erst mal nach rechts und schnappt euch den Karton, danach macht ihr euch auf den Weg ins Dorf. Marschiert dort geradewegs ins Gasthaus hinaus und nehmt den herumliegenden Bierdeckel mit. Anschließend sprecht ihr so lange mit Trude, bis ihr von ihr ein Bier bekommen könnt. Und damit erhaltet ihr auch einen weiteren Bierdeckel, der beim Trinken auf den Boden fällt und natürlich von euch eingesteckt wird.
Lauft dann rüber auf die rechte Seite, wo das Essen steht. Auf dem Fleisch findet ihr eine Made, die ihr mitnehmt. Ebenso steckt ihr einen Käsespieß ein sowie die Dose mit Thunfisch, die auf dem Boden liegt. Interagiert mit dem Fernseher, um Leni in ein Gespräch zu verwickeln. Anschließend nutzt ihr euer Diktiergerät dafür, von ihr mehr über das Geheimversteck zu erfahren. Es befindet sich in eurem Zimmer.
Geht also nach oben und schaut euch dort um. Zum einen nehmt ihr die Bettwäsche an euch. Kickt dann den Teppich zur Seite, um das Geheimversteck zu finden. Und öffnet den Kleiderschrank, um an einen Kleiderbügel zu gelangen. Schaut nun aus dem Fenster hinaus und dort nehmt ihr einen zweiten Kleiderbügel an euch.
Mysteriöse Dinge passieren und ihr sucht nach einer Erklärung.
Mit all dem Zeug im Gepäck geht es nach unten. Bietet Trude den Massagestab an und ihr erhaltet im Gegenzug eine Angel. Verlasst anschließend das Gasthaus und benutzt die Bierdeckel mit dem wackelnden Tisch neben Freiherr von Sülz. Sprecht dann mit ihm über seine Katze Klaus und marschiert zurück zur Bushaltestelle am See.
Neben der Bushaltestelle knickt ihr ein Stück Schilfrohr ab. Nutzt es zusammen mit dem Käsespieß und dem «Bolzenschuss», um Klaus vom Baum zu schießen. Das klappt erst nicht, also spannt die Bettwäsche über das Holzboot und versucht es erneut. Nähert euch Klaus, der aber wegläuft, dann nutzt ihr die Angel zusammen mit der Made und versucht am See zu fischen.
Einen Fisch erhaltet ihr dadurch zwar nicht, aber einen Dosenöffner. It’s something.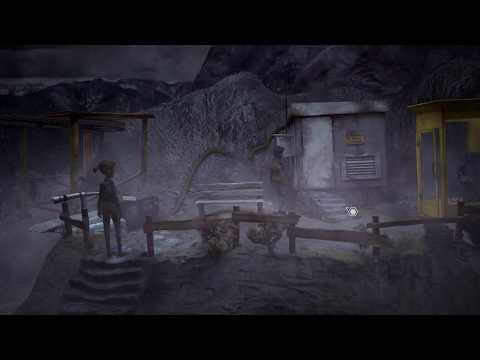 Nehmt die Angel erneut auf und geht dann zurück ins Dorf. Gebt Klaus den Thunfisch und versucht ihn mit dem Pappkarton zu fangen. Anschließend werft ihr den Dosenöffner auf die Ritterrüstung und zieht diese an. Geht damit hinaus zum Aussichtspunkt und benutzt die Stromkabel. Oben sollte auch Klaus sein. Wenn nicht, geht noch mal ins Dorf und zurück zum Aussichtspunkt. Nähert euch ihm und ihr nach einem kleinen Missgeschick könnt ihr ihn mitnehmen.
Danach geht es zurück ins Dorf, wo ihr Freiherr von Sülz Klaus zurückgebt. Sprecht mit ihm und redet über die Seilbahn, bis ihr ihn nach dem Schlüssel fragen könnt. Da ihr ihm geholfen habt, gibt er ihn euch bereitwillig. Marschiert wieder zum Aussichtspunkt und nutzt den Schlüssel mit dem Generator, ebenso die Kleiderbügel mit der Seilbahn. Und ab geht die Post.
Kapitel 2
Bei der Seilbahn verlief nicht alles nach Plan und Hans wacht in einem Patientenzimmer auf. Klickt ihn dreimal an, um das Gespräch des Arztes zu unterbrechen. Beantwortet seine Fragen, bis er aus dem Raum verschwindet. Klopft dann gegen die Tür, woraufhin ihr in den Verhörraum gelangt und einige Fragen des Arztes beantwortet.
Anschließend landet ihr wieder im Patientenzimmer. Schaut euch die Leiter an und verwendet diese mit dem Lüftungsschacht auf der linken Seite. Klettert ihr nach oben, wird der Arzt alarmiert. Holt euch das Skelett und legt es ins Bett. Über den Lüftungsschacht kommt ihr erst mal nicht hinaus, schaut euch also die Dusche genauer an. Zieht den Vorhang zur Seite und benutzt die Armaturen, danach den Duschkopf, um eine Münze zu erhalten.
Wo bin ich?
Die Münze verwendet ihr nun, um in den Lüftungsschacht zu gelangen. Durch diesen gelangt ihr in die Haupthalle. Dort steht eine Lampe auf dem Boden herum, die ihr einsteckt. Dann geht es die Treppe hinauf in einen weiteren Raum. Schnappt euch dort die Alufolie und kehrt zum Patientenzimmer zurück. Benutzt hier die Alufolie mit dem Sicherungskasten und dann nutzt ihr die Lampe dazu, euch den Fleck an der Wand in der Dusche genauer anzuschauen.
Ihr seht dort einen Code. Kehrt zur Haupthalle zurück und dort könnt ihr dann den Wandsafe öffnen. Das führt zu einer weiteren Begegnung mit dem Arzt im Verhörzimmer. Wählt bei den ersten drei Fragen jeweils die letzte Antwort, anschließend antwortet ihr so wie ihr möchtet. Nach der Unterhaltung nehmt ihr den an der Wand hängenden Schlüssel an euch und könnt damit das Schloss in der Haupthalle öffnen, um von dort zu verschwinden.
Weiter mit: Trüberbrook: Komplettlösung, Tipps und Tricks — Kapitel 3, 4 und Finale
Trüberbrook: Komplettlösung: Alle Rätsel, Puzzles, Gegenstände und Gespräche
Mit unserer Trüberbrook Komplettlösung löst ihr jedes Rätsel, findet alle Gegenstände und wählt die richtigen Antworten in Gesprächen.
Wir schreiben das Jahr 1967. Irgendwo im Nirgendwo, oder besser gesagt inmitten der Westdeutschen Verflechtung kleiner unbedeutender Dörfer, liegt das Örtchen Trüberbrook. Und obwohl es so winzig klein und scheinbar unbedeutend ist, gab es eine Ära, in der viele Menschen ihre Zeit dort verbrachten. Aber warum? Und warum verschlägt es den amerikanischen Physiker Hans Tannhauser viele Jahre später ausgerechnet hierhin? All das beantwortet das Point-and-Click-Adventure Trüberbrook. Aber die Lüftung dieser Geheimnisse führt über viele kleine Rätsel. Unser Walkthrough sorgt dafür, dass ihr nirgends steckenbleibt.
Steuerung und Allgemeine Tipps
Trüberbrook ist ein typisches Point And Click Adventure. Ihr könnt euch also für den Spielablauf so viel Zeit nehmen, wie ihr wollt, denn es gibt keine Action-Passagen. Stattdessen sind eure Beobachtungsgabe und ein wenig kombinatorisches Denken der Schlüssel zum Ziel. Ihr könnt viele Hinweise dieser Komplettlösung umgehen, wenn ihr folgende Ratschläge beherzigt.
-
Schaut euch alles genau an
Abseits des Prologs, der ein klein wenig aus dem Rahmen fällt, steuert ihr immer die Hauptfigur Hand Tannhauser. Er läuft immer dorthin, wo ihr hinklickt (und läuft schneller, wenn ihr einen Doppleklick anwendet). Nehmt euch die Zeit, die komplette Szenerie anzuschauen, inklusive ihrer kleinen Besonderheiten. Gerade im späteren Verlauf des Spiels sieht man einige Details als selbstverständlich an, weil man sie schon oft gesehen hat, dabei sind es gerade die kleinen Details einer Szene, die oft zur Lösung eines Rätsels führen. -
Nutzt die Highlight-Funktion
Ein Druck auf die Leertaste auf eurer Tastatur hebt alle Gegenstände und Personen hervor, mit denen ihr interagieren könnt. Nicht alle sind für den Lösungsweg brauchbar, aber so wisst ihr zumindest gleich, was einfach nur Hintergrundgrafik ist und was nicht. Gegenstände und Personen, mit denen ihr interagieren könnt, zeigen einen weißen Punkt vor sich, wenn ihr die Leertaste drückt, und erhalten zusätzlich einen Rahmen, wenn ihr sie mit dem Mauszeiger berührt.
-
Sprecht mit allen Personen – mitunter mehrmals
Fast jede Person, die in diesem Spiel vorkommt, hat etwas zu sagen und ist Teil des Lösungswegs. Wenn ihr sie mit dem Cursor anklickt, erscheint das runde Aktionsmenü, auf dem vier Symbole zu sehen sind. Das Symbol mit der Sprechblase startet ein Gespräch, woraufhin bis zu vier Phrasen am unteren Bildschirmrand erscheinen. Ihr könnt aus diesen Phrasen wählen und so das Gespräch selbst gestalten. Nicht jede Phrase führt zu einer sinnvollen Antwort eures Gegenübers, aber oft erfahrt ihr wichtige Hinweise oder setzt Vorgänge in Bewegung. Solltet ihr irgendwo festsitzen, dann hilft manchmal ein Gespräch, selbst wenn ihr meint, bereits den Inhalt zu kennen, denn manche Antworten ändern sich mit der Zeit, abhängig vom Verlauf der Geschichte. -
Schaut euch immer alle Aktionsmöglichkeiten an
Hans sammelt im Verlauf des Abenteuers viele Gegenstände ein. Drückt ihr die I-Taste auf der Tastatur, dann könnt ihr euch im Inventar ansehen, welche Gegenstände Hans zur Verfügung stehen. Wollt ihr etwas anschalten, stupsen, oder anderweitig verwenden, nutzt ihr im Aktionsmenü die Aktionstaste in Form einer Hand mit ausgestrecktem Zeigefinger.
 -
Ihr könnt allerdings keine Gegenstände aus dem Inventar heraus verwenden. Wollt ihr einen Gegenstand mit einem Objekt kombinieren, so müsst ihr ebenfalls das Interaktionsmenü verwenden. Dieses Mal allerdings über das untere der vier Symbole in Form eines Zahnrads — es steht für Aktionen mit Objekten. Dort werden Utensilien, die ihr an der entsprechenden Stelle verwenden könnt, automatisch angezeigt. Ihr müsst euch also keine Gedanken machen, welcher Gegenstand zu welchem Objekt passt. Aber ihr solltet bei allen Interaktiven Objekten immer prüfen, ob euch das Spiel ein Utensil zur Verwendung vorschlägt.
-
Stellt die Sprachausgabe auf Englisch!
Trüberbrook ist erheblich witziger, wenn ihr die englische Sprachausgabe verwendet (siehe Optionsmenü). Solltet ihr befürchten, in dem Fall etwas nicht zu verstehen, dann aktiviert dazu die deutschen Untertitel. Der Grund ist trivial: Der Humor des Spiels baut mitunter auf den kantigen „Denglisch“-Akzenten der Sprecher auf. Diese vernehmt ihr aber nicht, wenn ihr die deutsche Sprachausgabe verwendet.
Trüberbrook Komplettlösung: Vorab-Sequenz: Die Tankstelle
Die Hauptfigur dieses Spiels heißt Hans Tannhauser, in der kurzen Vorab-Sequenz steuert ihr eine Zeit lang eine andere Person, nämlich eine junge Frau namens Gretchen, die mit ihrem Motorrad notgedrungen an einer Tankstelle halten muss. Drückt ihr die Leertaste, werden euch alle Objekte der Grafik angezeigt, mit denen ihr interagieren könnt, darunter die Kühlbox auf der linken Seite beim Tankwart-Häuschen oder die Tür, die in das Häuschen hineinführt. Allerdings ist diese Tür versperrt. Ihr benötigt einen Schlüssel.
Schaut euch die Regenrinne rechts von der Kühlbox an – haltet also den Mauscursor darüber und nutzt das Aktions-Symbol im kreisrunden Aktions-Menü (sieht aus wie ein Zeigefinger). Daraufhin tritt Gretchen gegen das Rohr. Ein Schlüssel fällt heraus. Hebt den Schlüssel mit dem Aktionssymbol auf und geht nun zur Tür. Wenn ihr auf die Tür klickt, erscheint wieder das kreisrunde Aktionsmenü. Klickt auf das untere Viertel des Aktionsmenüs, das durch ein Zahnrad indiziert wird, damit euch Gegenstände angezeigt werden, die ihr mit der Tür verwenden könnt – in diesem Fall der Schlüssel, den ihr eben aufgelesen hattet. Klickt ihr auf den Schlüssel, so wird er mit der Tür verwendet und ihr könnt eintreten. Aber nicht zu schnell. Nehmt zuerst die Zange aus dem Werkzeugkasten mit, die auf dem Tisch neben der Tür liegt. Danach könnt ihr das Häuschen betreten.
Im inneren des Tankstellenhäuschens schaut ihr euch um und nutzt gleich wieder die Leertaste auf eurer Tastatur, um euch anzeigen zu lassen, mit welchen Objekten ihr interagieren könnt. Das sind so einige. Beispielsweise die Bilder an der Wand. Schaut euch das Bild direkt neben der Tür an interagiert damit, denn dahinter verbirgt sich ein Schalter, mit dem ihr den Strom, bzw. das Licht in der Tankstelle aktiviert.
Jetzt, da ihr alles sehen könnt, solltet ihr euch die anderen Bilder an der Wand anschauen. Arbeitet euch bis zum Tresen vor. Dort liegt eine Postkarte. Auf dieser Postkarte sind die Straßen der Umgebung verzeichnet – ein nützlicher Hinweis für Gretchen. Nehmt zudem den Becher mit, der auf dem Tisch liegt. In der rechten Ecke des Raums ist eine Jukebox. Schaltet sie ein. Nun könnt ihr umkehren. Bevor ihr rausgeht, nutzt ihr die Zange, um das Kabel neben der Tür zu kappen. Dieses Kabel versorgt die Eiibox draußen mit Strom.
Nun seid ihr wieder im Freien. Ohne Strom kann die Kühlbox neben der Tür das Wasser nicht mehr gefrieren. Verwendet die Kühlbox und sucht dabei im Aktionsmenü den Becher aus, um den Becher mit Wasser zu füllen. Bringt den Becher zu eurem Motorrad und verwendet das Wasser im Becher mit eurem Motorrad, um den Kühler zu versorgen. Da der Stom im Tankhäuschen zugeschaltet wurde, funktionieren auch die Zapfsäulen wieder. Verwendet die Zapfsäulen, um das Motorrad aufzutanken. Nun schaut euch den kleinen roten Wegstein am Rand der Tankstelle (auf dem Grund) an. Klickt auch mal auf eine der Sternformationen am Himmel. Nun könnt ihr auf das Motorrad steigen und davonfahren. Die Introsequenz des Spiels folgt.
Walkthrough Truberbrook
We offer you a complete walkthrough of Truberbrook detective adventure.
The passage of the game begins at a gas station, where the main character arrives on her motorcycle. You need to fill it up and add refrigerant. If you try to refuel, the girl will say that the column is not working. Go to the front door and to the left of it, look into the toolbox. There are pliers inside. After taking them, hit the sewer to the right of the door to drop the key. Pick up the key and use it to open the door.
Inside, examine the painting to the right of the door, then interact with it to remove it and reveal a hidden switch. Click on it to turn on the light, then take the fallen glass from one of the tables. Examine the postcards located on the wall at the bar. Take one of them, which shows a map of the area. Use the pliers on the panel with switches found earlier (to the right of the front door).
Follow the motorcycle, click on the gas station and the main character will refuel her vehicle. Use the large glass on the freezer to the right of the door to get some ice. Use a glass of ice on the bike to cool it down. If you already have a postcard with a map of the area, you can interact with the motorcycle to continue on your way.
Prologue. Lazarus Effect
Move to the right and go to the next location. Go to the right side of the city and enter the inn. When you can control the main character, then again interact with the bell. Talk to the woman who will give you the room key. Eventually, you will end up in a room.
After loading, you will see a strange man stealing the thesis of the protagonist. Get outside and go outside. Chat with the girl, go to the top location and start a dialogue with her again. At the end of it, the passage of the prologue will be completed.
Chapter 1
After talking to the girl, pick up the cardboard box on the right. Go downstairs and find an old man in a wheelchair at the entrance to the hotel. Talk to him about everything. He will not be very talkative, as he is annoyed by a staggering table. Enter the inn and chat with the woman at the reception desk. Ask about everything and then ask for a glass of beer. After drinking it, pick up the fallen cardboard stand. Take the second coaster for beer glasses, go outside and use both coasters on the staggering table (through the «gear»). Talk to the Baron to find out about everything. He will refuse to tell any more because his cat is missing.
Enter the inn and interact with the TV to distract the innkeeper’s daughter. Talk on all topics, then use the voice recorder to tell her where the innkeeper’s brother had a hiding place.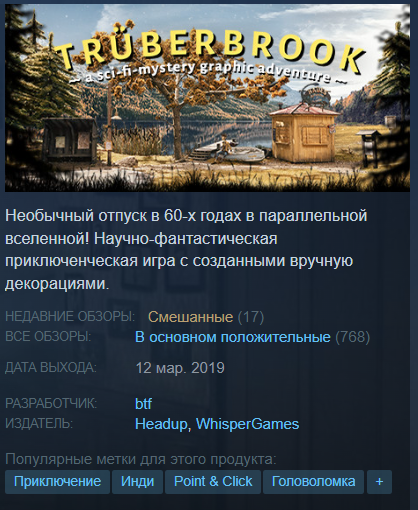 Interact with the food on the table to the right of the girl. From the chicken you will take the worm, from the other food — a stick with canape cheese. Go upstairs to your room, look out the window and take the hanger from the rope. Take the second hanger from the closet in the room. Take the towel (tablecloth) lying on the cabinet to the right of the entrance. Remove the vibrator from under the bed. Then move the mat in the middle and take out a bottle of schnapps from the hiding place.
Go downstairs and click on the fishing rods behind the innkeeper. She will allow you to rent one fishing rod, but you need to give something in return. Offer her a vibrator and the woman won’t refuse. Pick up canned food next to the table with food. Move to the very first location to the left. At the pier, use a fishing rod with a worm to fish out a can opener. use the tablecloth on the boat and then shoot the cat sitting on the tree. Do not be surprised: the cat really looks like a fox. To shoot a cat, you need to have canape cheese, a bottle of schnapps and a cane pipe with you. You will receive the latter when interacting with the reeds to the left of the pier. Try to grab the fallen cat, but he will run away.
Go to the square, use canned food on the cat in the alley. Since you have a can opener, the main character will open the can. While the cat is eating, use the cardboard box on it. The cat will run away. Climb up to the new partner and see the cat on the bench. Try to grab it. The cat will run away, but he will be electrocuted. Take the stunned cat and give it to the Baron below. Talk to him and ask for the key to the cable car. He will give it to you.
There is a statue in the center of the square. Throw a can opener at her and put on the broken armor. Climb up to the cable car and interact with the wires in the background to connect them to the armor. Wire repaired! Go back to the girl and use the cable car master key on the generator nearby. And then it remains to get a device for moving along the cable car, since there are no cabins here. Those two hangers found earlier will suit you. The chapter will end after you use them on the cable car.
Chapter 2
In the dark, move in any direction until the scene switches to the sanatorium. The main character lies in a hospital bed, he is examined by a strange doctor. Triple click on the main character, selecting the «interactions» button. When you wake up, talk to your doctor. Standing up, knock on the door and agree to be tested. You will be asked three questions, and for each there will be three possible answers. In fact, passing the test now is unrealistic.
Back in the room, click on the skeleton to place it on the bed. Interact with the ladder, then use it on the grate in the upper left, on the wall. Pull back the shower curtain, try to turn on the faucet, and then inspect the sprinkler on the shower. A coin will come out. Apply it to the grate, near which there is a ladder. Get out, go downstairs and pick up an ultraviolet lamp near the reception desk. Examine the safe, go upstairs and open the double door in the upper left of the screen. Exit to the balcony and interact with the brazier to get a band-aid. Return to your room, apply the Band-Aid to the sparkling electrical panel. Then inspect the wall in the shower stall and find the interaction point at the top. The hero will not be able to make out anything. Apply an ultraviolet lamp to it. Since the shield has been repaired, you will be able to see the numbers. Interact with them so that the main character writes down the code combination.
Return to the safe, use the code combination on it and read the dossier. You will find out that a certain patient was too calm, no matter what. You must do the opposite. The doctor will appear, re-testing will begin. This time there will be new answers for each question. Select the bottom lines three times, and then go through the other stages of testing. During these stages, you can choose any answers. The doctor will release you. Take the key from the wall on the left and open the main door.
Chapter 3
Move through the darkness again until you reach the blocked entrance to the mine. Examine the barn door. She’s locked up. Pick up the chain and connect it to this door. Start the cable car using the device in the lower left corner of the screen. Take the gear from the cable car and place it on the cart on the right. Pick up a belt near the tent, pull out the propane tank from the barn (you pulled out the door with a chain) and install it together with the belt on the trolley. Examine the stones to the left of the blockage, under the mountain, to find a miner’s helmet. Take it and get into the trolley to go to the mine.
When you arrive in the cave, pull the pickaxe out of the wall on the left. Pick up the gear and place it on the pipe on the back wall. Turn the gear and hit the pipe with the pickaxe. Throw the pickaxe at the stalactite hanging from the ceiling. It will fall down, and the ravine will fill with water from below. Hit the cart three times to drop it into the water. Move on it to the right and use the destroyed rails to get up.
You will meet the main character. After talking to her, inspect the door and the remote control on the left. Explore the dark walls to find five inscriptions in different languages. One will be in the upper left corner, graffiti in the upper right, three more on the middle wall, arranged vertically. You need to select five inscriptions in the order in which their ancestors left them. First, select the image of a five-hexagon with people lying around, then the hieroglyphs in the upper left corner of the screen, then the Latin inscription, then the runes above the Latin alphabet, and finally the graffiti in the upper right corner of the screen. All lights will turn on. Click on the control panel to the left of the huge gate to open it and go through.
Once in a dark room, interact with the pedestal by the window in the far part (on the left of the screen) to turn on the light. Interact with the rotating planet model, then use the bottle on it, which can be found in the lower left corner of the screen. The planets will stop. Take the RAM plan from the table. On the left, there are several electronic cabinets with equipment. The one closest to the window has a door. She will not become active immediately, but after you hear the voice of Barbarosa. To do this, interact with the door on the right. Open the door on the cabinet on the left and install the RAM. Next, talk to the robot a few times. In order for it to reappear, you need to interact with the door or panel to the right of it (we are not talking about an elevator, but about the right door). When it is overloaded, then open the door on the middle cabinet on the left side. In the end, the robot will let you in because it recognizes you as a friend. In the room with the portal of Saturn, watch the video.
Chapter 4
So, we need to help our new friend to return home. To do this, you have to find four components. First, go outside and find the fair. Move left to the river and pick up a fishing rod and a lottery ticket. Go back to the square, apply the lottery ticket to the stall with the girl next to the hotel. You will win cat food. Give it to the baron in the wheelchair to get the boots. Climb up to the cable car and chat a few times with the woman exercising with the kettlebell. Give her the shoes to get the shag. Go to the square and talk to the sailor. Exchange the shag for a winning ticket that allows you to swim across the lake.
Go to the pier and talk to the girl in the boat rental booth. Examine the inflatable toy on the left and ask the same girl about it. She will let you take the toy with you. Examine the broken boat at the pier, talk to the girl and she will ask you to repair it. In addition, when you moved to this location after the lottery, you could see an unknown man in strange clothes. He went to the left. Follow him and you will find yourself in a location with a thick tree trunk and a pile of garbage. Interact with the tree and whistle any tune. Climb up and pick the apple from the branch on the right. Climb even higher up the stairs to find yourself in a tree house. Chat with a stranger.
When you can control the character, then go to the balcony and remove the wooden wheel with blades, dismantling the windmill. Get down downward, return to the hotel and inspect the table with food. Take some of the chowder from the large pot. Return to the pier and apply this soup to the boat to patch up the hole. Use the same wooden wheel from the treehouse. The boat is ready to sail! Get on the boat and sail to the swamp. Once in place, you will see a corpse on the right. Take off his yellow rubber boots. Examine the corpse to get a rusty key. You can interact with the glowing place on the right. Hans will start to glow bright green, but this is of no use.
Go back to the hotel, go up to your room and take the empty jar from the device in the center of the room. Go to the location with the pier and hit the lamppost next to the bus stop. Lights go out, fireflies appear. Use the empty jar from your room on them to get the fireflies in the jar. Return to the hotel and use the rusty key to open the door near the TV. Climb down, lighting your way. Take the malt from the bag on the left, take the yeast from the barrel to the right of the stairs. Read the note on the beam to learn the beer recipe. You need fruit, malt, yeast and mushrooms. We have fruits — apples from the tree. We also just found malt and yeast. Examine the beer maker on the right. In the background, under the stairs, there is a metal cover. Take her.
Get out of here, go to the square and stand next to the big guy. Interact with the attraction to hit it. Your hero will not be able to score the required number of points. Go to the tree house and meet a familiar woman here. She will appear after you interact with a glowing place in the swamp (and the main character will glow). Chat with her to get vitamins. Go to the pier and talk to the rental girl. She will be glad that you have repaired the boat and will give you a map. This map allows you to quickly move between locations.
Stand under the tree on which the house is located, examine the debris and find a metal cover on the left. Pick her up. Go to the square, buy treats in the stall next to the big guy. Return the fishing rod to Trude (the innkeeper) to get a whistle. Go to the pier, interact with the tree and select the whistle. The crows will come. Click on them and apply the seeds. The crows will be overfed. Go to the square, go to the hotel and use the whistle on the antenna hanging above the entrance. The TV will stop showing, and you can pick up the electro-ray tube. But this requires a special tool, which will be discovered later.
With two metal caps and yellow boots in hand, return to the swamp and use these items on the stranded next to the corpse in the water. After moving to the island, pick mushrooms. Go back to the hotel, go downstairs and interact with the brewing machine. Hans will say that fire is needed first. Go up to Truda, the innkeeper, and ask her for a lighter. You can also talk about her brother found in the swamp. Taking the lighter, go downstairs and set fire to the device. Throw apples, malt, yeast and mushrooms into it in turn. Take a bottle of beer. Hans will immediately drink it, after which he will wake up at the bus stop.
Go to the right, winter will come and you will meet the meteorologist (right on the same location with the pier). After talking to the woman, interact with the transition point on the right. Select the mountains to get to the weather station. Try to pry out the shovel, and then apply the vitamins received from the woman on it. After picking up the shovel, talk to the meteorologist. Next, interact with the balloon on the left, which has helium. You will need to click on the tap at the bottom of the cylinder. The meteorologist will say that you can not touch the helium. Talk to her and ask for some helium. She will ask for a favor in return and give a telegram. Take a screenshot to remember the sequence of numbers.
Return to the hotel, talk to the hostess and ask to send a telegram. Where the numbers are erased (second sequence), select 10433. You will immediately receive an answer. Return to the meteorologist and pass on the answer. She will ask for one more service: you need to collect data from three devices. The first device is in the swamp, the second is in the location with the pier, to the right of the boat rental house, the third is next to the cable car. Everywhere you will need to use a screwdriver. Having done this, go back to the meteorologist. She will fly away, but will allow you to use helium. Use the inflatable toy on the helium tank on the left side of the location. Take the toy to your room and place it on the iron mannequin on the right.
Use the screwdriver on the TV in the lobby of the hotel to pick up the electro-ray tube from it. Mount it on a mannequin in your room. Two components found! Recall that the TV must first be turned off: overfeed the crows and seat them on the antenna above the entrance to the hotel. Talk to the musician on stage and give him the beer you created earlier. Wait until the melody ends. It will be necessary to choose the words of the song a couple of times. When the musicians disappear, you can pick up the accordion from the stage. Install it on the mannequin in the room. And this is the third ingredient.
Finally, interact with the attraction at the fair and use the vitamins to hit hard. You will win the silver cup. Together with him and a shovel, go to the swamp. Use the shovel on the glowing place and take the meteorite with the silver goblet. Take it to your room and place it on a mannequin. The quantum device has been assembled!
Chapter 5
Back at the science facility, interact with the equipment on the left side of the screen to open the door. Go to the portal and wait. When you can control Hans, then apply the created device to the portal on the right. Three views will appear. They allow you to move around the room. First move to the control panel in the background and interact with it. The left cabinet with equipment will allow you to call Barbarosa, but now the robot will not do anything useful.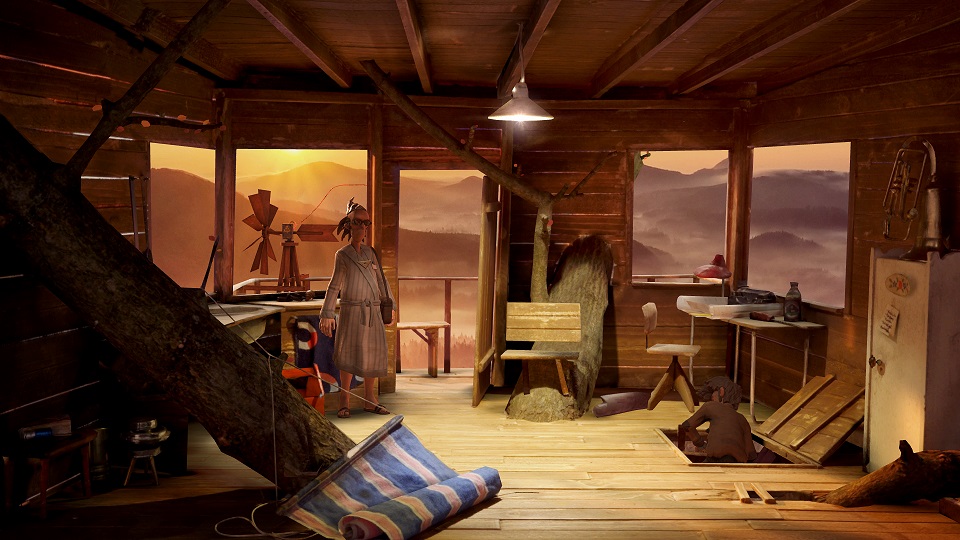 But the panel on the right will break the portal into several parts. Pick up the first part, then use the quantum device on the teleporter and move to the right side of the room. Collect three more fragments, apply the device to the portal again and move to the left side of the room. Collect two more shards. The portal is complete. Move to it using the quantum device and go inside. Double click on the Gredchen statue to disable it in the real world.
After returning to reality, use a quantum device on Gredchen. Do this several times so that the girl is on the left. Summon Barbarosa by clicking on the equipment cabinet in the background. It remains to watch the cut-scene and choose the ending of the game: agree and leave this world, or stay in it, keeping the promise made to Barbarosa. After the first credits, there will be an additional cut-scene, so take your time to close the game.
Parade of passages — Truberbrook / Trüberbrook
Gameplay Features
Truberbrook is a point and click game with inventory puzzle elements. We control a character named Hans Tannhäuser, who arrives in a town called Truberbrook after winning a lottery holiday, in which he claims he did not take part.
Control — mouse («point and click»). Moving is carried out by clicking the left mouse button (LMB) on the selected point on the game screen. Double click — switch to fast motion. Interaction with objects and characters is performed by selecting the icon when clicking with the mouse in the menu that opens.
Pressing the space bar causes hotspots to be displayed on the screen.
Inventory — key I . Pressing the key only allows you to view the items available. The use of items is performed by selecting the gear icon in the menu (items are entered automatically).
Saving — automatic, when you exit the game.
-
Note . To enlarge the screenshot, click on it in the walkthrough text. To view additional pop-up screenshots, click on the active links highlighted in the walkthrough text in dark red.

Gretchen, an anthropologist (the name of the heroine of the game we will learn a little later), pulls up to a gas station. Her motorcycle ran out of fuel and the engine overheated from the long ride.
We refuel the motorcycle
We hit the downpipe 1, we select the KEY that fell out of it. We open the box with tools 2 lying on the table, we take out PLIERS. With the help of the KEY we open the door 3, we pass into the building. We look at picture 4, move it and find an electrical panel behind it. We turn on the light in the room.
We use the PLIERS on the wire 5 coming from the shield and go outside.
We click on the gas station 6, refuel the motorcycle.
Cooling the engine
Entering the building. We take away from the table BIG GLASS 7, from the wall we remove PICTURE 8 with a map of the area. We go outside. We use the BIG GLASS on freezer 9, we collect ICE. We cool the motorcycle engine with it. Let’s hit the road.
Prologue. Lazarus effect
The game’s protagonist, Dr. Hans Tannhäuser, who has never participated in any lotteries, but who nevertheless won a vacation package in the town of Truberbrook, arrives at the place by bus.
Move to the right, go to the next location. We cross the city square, we go to hotel .
Press the call button 1, wait for the hostess to appear. We speak with Truda, the hotel administrator, choosing replicas from the proposed list .
Having received the room key, Hans climbs the stairs.
Dead of night. Tannhäuser meets a stranger
Waking up at night from a vague noise, Hans notices a stranger who is rummaging through his suitcase and quickly disappears, noticing that the guest has woken up.
We examine strange prints on the floor — this is slime. We leave the room, go outside. take a couple of steps to the left.
Gretchen calls Hans. She suggests following the clearly visible slime tracks. Hans follows the advice.
Having found ourselves at a dead end, we speak with Gretchen, who has risen after us. We choose the options for replicas, but still agree to go with the anthropologist to study the proto-Germanic tribes.
Chapter one. Welcome to Truberbrook
Gretchen invites Hans to go down to town to find the master key and wire repair tool while she works on the cable car’s generator.
We find the main key
We go down to the city.
Pay attention to the old man sitting in a wheelchair. The disabled person is outraged by the staggering table. We are trying to talk to him, but the old man has all the talk only about the table. We go to the hotel.
We take from the table STAND 1 under the glasses, go outside. We are trying to apply STAND on the table, but nothing happens.
Hans recalls what his father said about this.
We return back to the hotel, talk with Truda on all the topics offered, learn the story of Baron von Sülz (an old man sitting on the street) and his cat. We take the proposed glass of beer.
Hans drinks beer, and the coaster, stuck to the glass, falls to the floor.
We pick up the second STAND from the floor, go outside. We put both STANDS under the leg of the staggering table, and it no longer staggers, which pleases Baron von Syltz. We turn to him (“Tell me, are you glad that the table is no longer staggering?”).
An old man reports the disappearance of his beloved cat Klaus.
Choose a line: “Maybe Klaus went out for a walk?”. After listening to the answer, we go to the left, to the square. We cross it, we leave the city.
Look at red cat 2 sitting on a tree branch. We note that the animal has a confused look. We understand that it is not so easy for us to get to the cat. We decide to lure the animal with the mating call. To do this, click on the cat, select the gear in the menu that opens and use the voice recorder.
Klaus, who looks more like a fox than a cat, does not respond to Hans’ «marriage» calls.
We look at the reeds growing on the shore. We break off the REED of reed 3, we return to the city.
We are heading to the hotel. We click on TV 4, we talk on all topics with Leni, Truda’s daughter, who watches TV. We touch on the topic of Uncle Leni. We use a voice recorder on the girl, we learn about the cache in room number three (Hans’ room). We pick up CHEESE CANAPES from the table 5. We go up to the room.
Roll back rug 6 in the center of the room, take SHNAPS from the cache. From the bedside table we take the BLANKET. We go to the lakeside. Spread the BLANKET on the boat 7, shoot the cat 2 with the REED.
Klaus jumps to the ground.
We try to grab the cat, but he runs away. We follow him to the square. We notice a cat lurking in the alley. We rise to the cable car, where Gretchen is still working on the generator.
We pick up cardboard BOX 8 and go to the hotel. Clicking on fishing rods 9standing against the wall.
Truda is ready to lend one of them, but only on bail.
We go up to the room. We look under the bed, extract MASSAGER 10 from under it. We go down to Truda. We exchange the MASSAGER for the ROD. We go to the buffet. From the floor we select CANNED 11, we look at the table.
Hans notices the worm.
We pick up the WORM, hurry to the lake. We use on the berth 12 the ROD WITH THE WORM.
Hans fishes a CAN OPENER from the lake.
We are heading to the square. We use CANNED on Klaus.
The cat comes out of hiding to eat.
Use the BOX on the cat.
The cat, covered with a box, rushes to the cable car.
We follow.
