RAID, SSD Caching, and CacheVault Technology
RAID, SSD Caching, and CacheVault Technology
For decades, servers used hard drives set up in RAID (i.e. redundant array of independent disks) configurations to store data in a more efficient way as well as provide data redundancy. This job is usually done by a physical RAID controller, however, there needed to be measures in place to not lose data in case of a server failure or power outage.
Traditionally this data-loss protection was carried out by BBUs (i.e. battery backup unit), however, these devices worked by basically being a battery pack that stored data that hasn’t been synced to the disk yet, usually with up to 72 hours without power. if the blackout took longer than that, this data would be lost. This, along with the inconvenience provided by the long recharge times and battery degradation, pushed the industry to develop a newer and improved method of providing data loss protection, Cachevault.
Before getting into that however, let us first refresh on what exactly is RAID and the differences between varying RAID configurations.
What is RAID?
RAID (redundant array of independent disks) is a way of storing the same data in different places on multiple hard disks or solid-state drives to protect data in the case of drive failure. There are different RAID levels, however, not all have the goal of providing data redundancy.
A RAID system consists of two or more drives working in parallel. Although there are software versions of raid, for enterprise usage, it is recommended to use a physical RAID controller card. There are different RAID levels, each optimized for a specific situation.
Today we will discuss the following RAID levels:
- RAID 0
- RAID 1
- RAID 5
- RAID 1+0
RAID systems can be used with a number of interfaces, including SCSI, IDE, SATA, or FC. These are the systems that use SATA disks internally, but that have a FireWire or SCSI interface for the host system.
RAID levels
Now, let’s delve a little deeper into the different levels of RAID and advantages & disadvantages of each one.
RAID 0 — striping
In this type of RAID system, data is split into blocks and gets written across all drives in an array. Thanks to the usage of multiple disks at the same time, I/O performance is improved greatly. This performance boost can be further enhanced by using multiple controllers, with the best being one controller per disk.
The Advantages of RAID 0:
- Offers fantastic performance
- The entire storage capacity is being utilized
- Easily implemented
The Disadvantages of RAID 0:
- Does not provide data redundancy, if one drive fails, all the data in the entire array is lost
RAID 1 — Mirroring
If RAID 0 gets implemented for the purposes of improved performance at the price of data redundancy, then RAID 1 is the polar opposite. Instead of splitting data into blocks stored on different drives, it mirrors the contents of one drive to another. If a drive fails, the controller uses either the data drive or the mirror drive for data recovery and continues operation as normal.
The Advantages of RAID 1:
- Read and write speeds are comparable to those of a single drive
- In case of a drive failure, data doesn’t have to be rebuilt
- Simple to implement
The Disadvantages of RAID 1:
- Effective storage capacity is half of the total drive capacity
- Cannot hot-swap failed drives with software versions or RAID1
RAID 5 — striping with parity
This is the most common secure RAID level. It needs at least three drives to work but supports up to 16 drives. Data blocks are striped across the drives and on one drive a parity checksum of all the block data is written.
The parity data is not written to a fixed drive but is spread across all drives. This means that the RAID 5 array can withstand a single drive failure without losing data or access to data.
The Advantages of RAID 5:
- Read data transactions are very fast
- If a single drive fails, you still have access to all data
The Disadvantages of RAID 5:
- Write data transactions are comparatively slow
- The technology is complex to set up
- In an event of a drive failure, the restorations might take long time if there is a lot of data
RAID 1 + 0 — Combined mirroring and striping
This is the combination of RAID 1 and 0, meaning that the disks are both mirrored and striped. It provides security by mirroring all the data on secondary drives and uses striping across each set to speed up data transfers. This is also the priciest configuration as it needs a minimum of 4 drives to work.
The Advantages of RAID 1 + 0:
- Carries on all the positives from RAID 1 and 0
- In an even of drive failure, the rebuild time is very fast
The Disadvantages of RAID 1 + 0:
- Half of the storage capacity goes to mirroring, making it more expensive to set up
All MonoVM VPS services are equipped with RAID 10 technology that guarantees data security and high performance services
SSD cache for RAID
Although certain RAID levels like RAID 1 and RAID 1 + 0 greatly speed up the I/O throughput, to fully gain a competitive edge on performance would mean to implement SSD caching technology.
An SSD cache is when you utilize a part of, or the entirety of, an SSD as cache. Thus, SSD caching (a.k.a. flash caching) is the process of storing temporary data on the SSD’s flash memory chips. This allows for data requests and overall computing performance to improve drastically as SSDs use fast NAND flash memory cells.
When applied to a system with only conventional HDDs, it is one of the most cost-effective upgrades you can make to greatly speed up loading times. On the other hand, if your system already uses pure SSD storage, you will not gain much of a performance upgrade from flash caching.
CacheVault technology
Let us get back to the topic of data-loss protection. As mentioned before, BBUs do not provide enough versatility, thus the CacheVault technology was developed.
Raid controllers temporarily cache data from the host system until it is successfully written onto the hard disks. While cached, data is volatile, therefore If there is a power outage or the system fails, the data can be lost.
CacheVault flash cache protection moves this cached data to a non-volatile flash cache storage in case of power loss. It keeps powering critical components of the RAID controller for long enough so that the cached data can be transferred to the NAND flash. Once the power is restored, it automatically transfers the data back to the cache and once completed, normal operation is resumed.
Although this tech is a bit pricier than the traditions battery backup units (BBUs), they can keep this cached data safe for up to three years and take minutes to recharge. Combined with SSD caching technology and proper RAID array that is setup for redundancy and I/O speed (we strongly recommend RAID 1 + 0 for best results), CacheVault can ensure that no matter what issue occurs with your server, all the data, both stored on the drives and cached, can be restored.
Category:
Server
SSD Cache | How to Use SSD as Cache on AMD and Intel Systems
This post focuses on SSD cache, including its definition, main types, benefits, as well as limitations. Based on that, MiniTool illustrates you how to use SSD as cache on AMD and Intel systems respectively.
What Is SSD Cache
SSD cache is a data management system that uses a small solid-state drive as cache for a larger hard disc drive. It is termed as SSD caching that is known as flash caching. SSD caching is the temporary storage of data on NAND flash memory.
Tip: The cache is hardware or software memory that is used to store the regularly used data and then you can access the data easily and quickly. For instance, the CPU cache consists of flash memory that has faster access than standard system RAM.
The SSD cache feature is a controller-based solution that caches the most frequently accessed data onto lower latency SSDs. This operation can dynamically improve system performance. The SSD cache is exclusively used for host reads.
Note: Though SSD caching can boost the overall experience and performance, it affects the lifespan of the SSD. Do SSD drives fail? Here is a full analysis on SSD technology.
The core concept of SSD caching is to offer a much faster and more responsive SSD that works as a temporary storage unit for storing requested data like OS operational scripts.
Further reading:
SSD cache is a secondary cache, which is a complement for the primary cache in the controller’s dynamic random-access memory (DRAM). But SSD cache works differently from the primary cache.
In primary cache, each I/O operation must store data through the cache to execute the operation. In this sort of cache, the data usually is stored in DRAM after a host read.
Differently, SSD cache is only utilized when System Manager views it’s beneficial to put the data in cache to increase system performance. The data in SSD cache often is copied from volumes and stored on two internal RAID volumes that are created automatically when creating an SSD cache.
Note: The internal RAID volumes are used for handling internal cache. Moreover, these volumes are not accessible or shown up in the user interface. But they are counted in the total number of volumes allowed in the storage array.
QNAP NAS supports SSD caching and auto-tiering. Qtier technology automatically transfers data between SSDs and hard drives on the basis of their access frequencies. Qtier IO-awareness reserves a cache-like space to improve IOPS performance. However, Qtier is only supported by x86-based NAS (Intel or AMD) and 64-bit ARM-based NAS with 2GB RAM and QTS 4.4.1 (or later).
The RAM requirements vary according to the QNAP NAS cache capacity.
| QTS NAS | QuTS hero NAS | |
| SSD Cache Capacity | RAM Requirement | |
| 512GB | ≧ 1GB | ≧ 16GB |
| 1TB | ≧ 4GB | ≧ 32GB |
| 2TB | ≧ 8GB | ≧ 64GB |
| 4TB | ≧ 16GB | ≧ 128GB |
| 16TB | — | ≧ 512GB |
| 30TB | — | ≧ 1TB |
| 120TB | — | ≧ 4TB |
Main Types of SSD Cache
There are three main types of SSD caches. Here, we will introduce them one by one.
Write-around SSD caching: It is a process to directly write the data to the primary storage by bypassing the cache initially. The data that will be firstly sent to the actual SSD is cached finally. Besides, there is no cache to move things to the cache. So, it will be slower to move this data back to the cache.
Even though, the system is still efficient as the data will be copied back only when the data is identified as “hot”. Nevertheless, it could result in high latency when loading the recognized “hot” data back to the cache. It implies that the cache won’t disappear from irrelevant data.
Write-back SSD caching: It writes data to the SSD cache first and then sends it to the primary storage device. Though caching is much better than normal read-write operations, it causes low latency for both write and read operations.
If you encounter cache failure, the cached data will lose. Hence, manufacturers often apply this caching to products to make duplicate writes.
Also read: 9 Best Duplicate File Finders Help You Find Duplicate Files
Write-through SSD caching: It writes data to the SSD cache and the primary storage device simultaneously. It is commonly used caching and hybrid storage solutions. Only when the host confirms that the write operation on both the SSD cache and primary storage device has finished, the data on the SSD cache will be available. This is the safest but also the slowest method.
Benefits and Limitations of SSD Cache
The SSD cache is a way of obtaining faster storage, reduced latency, and improved all-round NAS performance and access speeds. It brings benefits to IOPS-demanding applications like databases (online transaction processing, and email servers), virtual machines, and virtual desktop infrastructure.
After putting your system into a clean state, you will get an obvious benefit that is brought by SSD caching. The OS can enter the usable state faster than a non-SSD cached system. Likewise, it would be much faster to launch Steam and favourite games with SSD caching after a reboot.
Tip: You will go into a clean state by booting up a computer after it’s been off, restarting OS, or running an application after a restart or power down. The memory hierarchy runs from the CPU cache to RAM, SSD cache, and then HDD.
Intel builds the SSD caching technology – Smart Response Technology. The proprietary iteration of the mechanism is only available on SRT-ready motherboards with Intel chipsets. Besides, Intel doesn’t run the technology of all its chipsets, which limits the hardware configurations that you can expect to have. But it can still run SSD caching.
If your processor is AMD, you need to use third-party software to emulate SSD caching as AMD because AMD hasn’t developed or integrated a rival technology into AMD chipsets. For example, you can use programs like FancyCache and PrimoCache.
How to Use SSD as Cache
No matter your computer has an Intel or AMD processor, you can use an SSD as a cache. The requirements and steps are different on the two processors. Similarly, you are recommended to make a backup for your system or data before starting the process. The section below illustrates the details.
Note: Thanks to the release of StoreMI, AMD users can use SSD as a cache.
Part 1: Back up the System or Data
For backing up your system and data, MiniTool Partition Wizard can help. Both the Migrate OS to SSD/HD and Copy Disk features of MiniTool Partition Wizard enables you to back up system and data to the connected storage devices on the PC within a few clicks.
Tip: As a Windows backup and sync program, MiniTool ShadowMaker also helps on data backup.
Here is a tutorial on how to back up data with MiniTool Partition Wizard.
Step 1: Download and install the program by clicking the button below and following the on-screen instruction.
Free Download
Step 2: Connect a storage device to your PC.
Note: The connected device should have a capacity larger than the used space of the disk to be backed up.
Step 3: Launch MiniTool Partition Wizard to enter its main interface.
Step 4: Highlight your system disk and click the Copy Disk option in the action panel. Alternatively, you can also right-click on the system disk and click Copy.
Step 5: In the next window, choose a target disk for the copied disk and click Next. Here, you should click the connected disk. If you have backed up the data in the target disk, click Yes in the prompted warning window to continue the process.
Step 6: You can review the changes in the Copy Disk Wizard window. Then choose copy options and change the selected partition based on your demand. After that, click Next.
Note: If you copy the disk to an SSD drive, it’s recommended to pick the Align partition to 1MB option as it can improve the performance of the disk. If the destination disk is a GPT one, you should select the Use GUID Partition Table for the target disk option.
Step 7: Click Finish to save the changes you’ve made. After backing to the main interface, click Apply to execute the pending operation.
Part 2: Set up SSD Cache
How to use SSD as a cache? Here we will show you how to do that on AMD and Intel systems respectively.
Tip: You can check whether your PC is AMD or Intel system by opening File Explorer > right-clicking This PC > choosing Properties.
For AMD system
If you want to use SSD as a cache for your HDD on the AMD system, make sure your system meets the following minimum configurations.
- Windows 10 operating system
- AMD RyZen, 4xx series motherboard
- A minimum of 4G RAM (6G RAM to support the RAM cache)
- Secure Boot is NOT enabled (Consult your system documentation for further details)
- There are no other SSD caching or AMD software RAID solutions installed
- The BIOS SATA disk settings are set to AHCI, not RAID
Step 1: Set the BIOS SATA disk settings to AHCI not RAID. For that, you should:
- Enter the BIOS setup by turning on the PC and keeping pressing a BIOS key.
- Navigate to the Advanced tab and click SATA Configuration.
- Choose AHCI from the drop-down menu of SATA Mode.
- Press F10 and click OK to save the changes and exit the operation. Then your computer will restart.
Step 2: Click here to download and install the latest AMD StoreMI program and drivers.
Tip: StoreMI requires at least Windows 10 19h2 or later. If you install the program via the Express option, you can view the present disk configuration and check the setup of the drive through the AMD Drive Controller information option
Step 3: Run the StoreMI program and click Create Bootable StoreMI.
Step 4: If the system doesn’t choose the drive automatically, you should select an available empty SSD or HDD from the list manually.
Note: When the capacity of the SSD exceeds 256GB, you will receive a message stating that the rest space can be used as a normal drive.
Step 5: Click Create and follow the pop-up instruction to go on.
Step 6: After the system boots up, check that the device has booted from the StoreMI by opening Disk Management. From here, you can also extend the capacity of the boot volume.
Step 7: Right-click on the C partition and click Extend volume. Then follow the prompted instruction to expand the capacity.
Also read: How to Increase Disk Space for Laptop? Try These Methods Now
For Intel system
Here’s the guide on how to use SSD as cache on the Intel system. At first, you should also ensure that your system meets the requirements below.
- Windows 7, Windows 8, or Windows 10 (32-bit and 64-bit editions) operating systems
- An Intel® Z68, Z87, Q87, H87, Z77, Q77, or Intel® H77 Express Chipset-based desktop board
- An LGA 1155 or 1150 package Intel® Core™ Processor
- A System BIOS with SATA mode set to RAID
- Intel® RST software 10.5 version release or later
- Single hard disk drive or multiple drives in one RAID volume
- Solid state drive (SSD) with a minimum capacity of 18.6 GB
Step 1: Set the SATA mode to the RAID mode, and then save and restart the system.
Step 2: Download and install latest Intel SRT software by clicking here.
Step 3: Run the Intel RST software to go to its main interface.
Step 4: Tap the Enable acceleration option under the Status or Accelerate menu.
Step 5: Select the SSD as the cache device.
Step 6: Choose the size from the SSD to allocate as cache memory. The rest of the SSD space can be used for storing data.
Step 7: Select the RAID volume drive that you would like to accelerate.
Step 8: Choose either the Enhanced mode or the Maximized mode based on your demand.
Tip: The Enhanced mode (write-through) optimizes data protection. The Maximized mode is also referred to as write-back, which optimizes the input/output performance. If you are not sure, pick the Enhanced mode.
Step 9: Click OK and follow the prompted instruction to finish the process.
Here is a post talking about SSD cache Windows 10, including its main types, benefits, and limitations. More importantly, it shows you how to use SSD as cache. Click to Tweet
Conclusion
What is SSD cache? How to use SSD as cache? This post offers you the answers and more details about SSD cache Windows 10. If you have any thoughts on SSD cache, please share them with us in the following comment area. For any issues while using MiniTool software, contact us by sending an email via [email protected].
How SSD cache works in storage systems
Download White Paper [PDF]
What is SSD caching
Most of the stored data has a small number of repeated accesses, such data is commonly called «cold». They make up a significant part both in large file archives and on the hard drive of your home computer. If data is accessed repeatedly, it will be referred to as «warm» or «hot». The latter are usually blocks of service information that is read when downloading applications or performing any standard operations. nine0005
SSD caching is a technology that uses solid state drives as a buffer for frequently accessed data. The system determines the degree of «warmth» of the data and moves them to a fast drive. Due to this, reading and writing this data will be performed at a higher speed and with less delay.
SSD caching is often talked about when talking about storage systems, where this technology complements HDD arrays, improving performance by optimizing random requests. The design of HDDs allows them to successfully cope with a sequential load pattern, but has a natural limitation for working with random requests. The size of the SDD cache is usually about 5–10% of the capacity of the main disk subsystem. nine0005
Systems that use SSD cache along with HDDs are called hybrid systems. They are popular in the storage market, as they are much more affordable than all-flash configurations, but at the same time they are able to work effectively with a fairly wide range of tasks and loads.
When SSD cache is useful
SSD cache is suitable for situations where the storage system receives not only a sequential load, but also a certain percentage of random requests. At the same time, the efficiency of SSD caching will be much higher in situations where random queries are characterized by spatial locality, that is, an area of “hot” data is formed on a certain address space. nine0005
SSD caching technology will be especially useful, for example, when working with streams in video surveillance. This pattern is dominated by sequential load, but random reads and writes can also occur. If you do not work out such peaks using SSD caching, then the system will try to cope with them using the HDD array, therefore, performance will decrease significantly.
Figure 1. Uneven time interval with unpredictable hit rates
In practice, the occurrence of random requests among a uniform sequential load is not at all uncommon. This can happen when several different applications are running on the server at the same time. For example, one has a set priority and works with sequential requests, while others access data from time to time (including repeatedly) in a random order. Another example of the occurrence of random requests can be the so-called I / O Blender Effect, which mixes up sequential requests. nine0005
If the storage system receives a load with a high frequency of random and few recurring requests, then the efficiency of the SSD cache will decrease.
Figure 2. A uniform time interval with a predictable access rate
With a large number of such accesses, the SSD storage space will quickly fill up, and the system performance will tend to the HDD speed.
It should be remembered that the SSD cache is a rather situational tool that will not show its productivity in all cases. In general terms, its use will be useful under the following load characteristics:
- Random read or write requests have low intensity and uneven time interval;
- the number of I / O operations for reading is much greater than for writing;
- the amount of «hot» data will be expected to be less than the size of the SSD workspace.

How SSD cache works in storage
The function of a cache is to speed up an operation by placing frequently requested data on fast media. To cache the “hottest” data, random access memory (RAM) is used, in storage it is the first level cache (L1 Cache). nine0005
L1 cache can be extended by slower SSDs. In this case, we have a second-level cache (L2 Cache). This approach is used to implement SSD caching in most existing storage systems.
Figure 3. Traditional SSD L2 cache.
A traditional SSD L2 cache works like this: all requests after RAM go into the SSD buffer (Figure 3).
Read cache operation
The system receives a request to read data, finds the necessary blocks on the main storage (HDD) and reads them. During repeated accesses, the system creates copies of this data on SSD drives. Subsequent read operations will be performed from fast media, which will increase the speed of work. nine0005
Write cache operation
The system receives a write request and places the necessary data blocks on SSD drives. Thanks to fast media, the write operation and notification of the initiator occur with minimal time delays. As the cache fills up, the system begins to gradually transfer the «coldest» data to the main storage.
Algorithms for filling the cache
One of the main issues in the operation of the SSD cache is the choice of data that will be placed in the buffer space. Since the amount of storage here is noticeably limited, then when filling it, you need to make a decision about which data blocks to displace and on what basis to replace. nine0005
Cache filling algorithms are used for this. Let’s briefly consider the most common in the storage segment.
FIFO (First In, First Out) — the oldest blocks are sequentially evicted from the cache, being replaced by the most recent ones.
LRU (Least Recently Used) — data blocks with the oldest access date are evicted from the cache first.
LARC (Lazy Adaptive Replacement Cache) — data blocks get into the cache if they have been requested at least twice in a certain period of time, and replacement candidates are tracked in an additional LRU queue in RAM. nine0005
SNLRU (Segmented LRU) — data is evicted from the cache according to the LRU principle, but at the same time they go through several categories (segments), usually these are: “cold”, “warm”, “hot”. The degree of «warmth» here is determined by the frequency of calls.
LFU (Least Frequently Used) — those blocks of data that have had the fewest accesses are first evicted from the cache.
LRFU (Least Recently/Frequently Used) — the algorithm combines the work of LRU and LFU, first displacing those blocks that fall under the calculated parameter from the date and number of hits. nine0005
Depending on the type of algorithm and the quality of its implementation, the final efficiency of SSD caching will be determined.
RAIDIX SSD caching features
RAIDIX implements a parallel SSD cache that has two unique features: splitting incoming requests into RRC (Random Read Cache) and RWC (Random Write Cache) categories and using a Log-structured write for its own displacement algorithms.
1. Categories RRC and RWC
The cache space is divided into two functional categories: RRC for random read requests and RWC for random write requests. Each of these categories has its own rules for hitting and displacing. nine0005
A special detector is responsible for the hit, which qualifies incoming requests.
Figure 4. Scheme of SSD cache operation in RAIDIX
Getting into RRC
Only random requests with access frequency more than 2 (ghost queue) get into the RRC area.
RWC hit
All random write requests with a block size less than the set parameter (32KB by default) get into the RWC area.
2. Features of Log-structured Recording
Log-structured writing is a method of writing blocks of data sequentially without regard to their logical addressing (LBA, Logical Block Addressing).
Figure 5. Visualization of the principle of Log-structured writing
In RAIDIX, Log-structured writing is used to fill allocated areas (with a set size of 1 GB) inside RRC and RWC. These areas are used for additional ranking when the cache space is overwritten.
RRC 9 Buffer Flush0115
The coldest RRC region is selected and new data from the ghost queue (data with a frequency of more than 2) is overwritten into it.
Removal from the buffer RWC
The area is selected according to the FIFO principle, and then data blocks are sequentially expelled from it, in accordance with LBA (Logical Block Address).
SSD caching capabilities in RAIDIX
The parallel architecture of the SSD cache in RAIDIX allows it to be not just a buffer for accumulating random requests — it starts to act as a «smart allocator» of the load on the disk subsystem. Thanks to query sorting and special preemption algorithms, random load peaks are smoothed out faster and with less impact on overall system performance. nine0005
The eviction algorithms use log-structured notation to more efficiently replace data in the cache. Due to this, the number of accesses to flash drives is reduced and their wear is significantly reduced.
SSD wear reduction
Due to load detection and overwrite algorithms, the total number of write hits per SSD array in RAIDIX is 1.8. Under similar conditions, the operation of the L2 cache with the LRU algorithm is 10.8. This means that the number of required overwrites to flash drives in the implemented approach will be 6 times less than in many traditional storage systems. Accordingly, the SSD cache in RAIDIX will use the resource of solid state drives much more efficiently, increasing their lifespan by about 6 times. nine0005
SSD caching performance across different workloads
Mixed workload can be thought of as a chronological list of states with a sequential or random query type. The storage system has to cope with each of these states, even if it is not preferable and convenient for it.
We tested the SSD cache by emulating various work situations with different types of workloads. By comparing the obtained results with the values of a system without an SSD cache, you can visually evaluate the performance gain for different types of queries. nine0005
System configuration:
SSD cache: RAID 10, 4 SAS SSD, volume 372 GB
Main storage: RAID 6I, 13 HDD, volume 3072 GB 9000 9000
 5KIOps
 nine0173 5. 5 times
Each real-world situation will have its own unique load pattern, and such a fragmented view does not give a clear answer about the effectiveness of SSD caching in practice. But it helps to orientate where this technology can be most useful.
Conclusion
SSD caching technology improves storage performance when working with a mixed type of workload. This is an affordable and easy way to get an efficient system in cases where HDD drives are not physically able to provide the desired result. nine0005
With the existing variety of server tasks and applications, the use of SSD cache in hybrid storage systems is becoming increasingly attractive. But keep in mind that this technology is demanding on the conditions of use, and it is not a one-size-fits-all solution to all performance problems.
The SSD cache implemented in the RAIDIX storage system has a special set of properties that allows it not only to speed up the system, but also to extend the life of the SSDs used.
Comparative tests of RAID 0 1 5 SHR and SSD cache • Alexander Linux
Comparative tests of RAID 0 1 5 SHR and SSD cache
- Post category: NAS
Hello everyone!!!
Always tormented by the question of which RAID to choose? Is SHR slower than regular RAID? How much faster is SSD cache? In this article I will tell and show all these tests in comparison with each other. And I will dispel the myth about SHR once and for all.
Comparative tests of RAID 0 1 5 SHR and SSD cache
Let’s start with an idea of what we will test on. The NAS is Synology DS920+, drives manufactured by WD Black and Gold series, and SSD Samsung 970 EVO 250G. Since in our test there is no task to achieve maximum speeds, but the task is to make a comparison between tests, then such a set is quite enough.
Since the NAS itself does not perform load testing of volumes, only disks individually, all tests will be performed inside a virtual machine based on Ubuntu Linux and using the KDiskMark program. nine0005
But I did measure the drives in the Synology NAS
HDD1HDD2HDD3SSD1SSD2
First of all, let’s test it on standard and well-known RAID, Basic is not RAID, it’s one drive.
From these tests, we can conclude that as the number of disks in a volume increases, its throughput increases. So in RAID1, the read speed from the volume increased, since data began to be read from both disks at the same time, and the record did not change. In RAID5, you can see a good increase in both reads and writes, since the throughput is paralleled to three disks at once in both directions.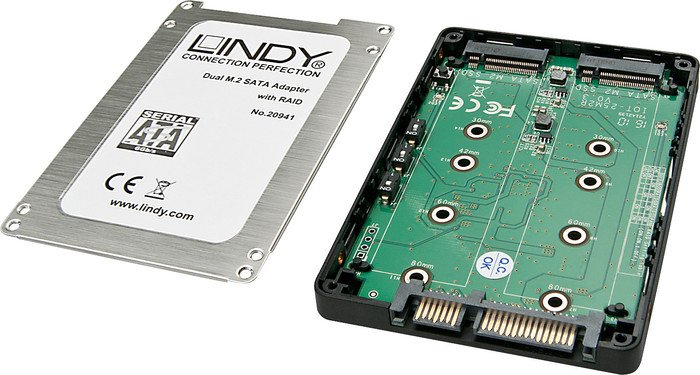 nine0005 Basic 1*HDDRAID1 2*HDDRAID5 3*HDD
Then the same tests but with Synology Hybrid Raid (SHR)
SHR 1*HDDSHR 2*HDDSHR 3*HDD
, the results are comparable and the conclusions are the same. Therefore, you can safely use SHR on Synology and get a little more goodies at the same time. For example, gradually increasing the size of a volume by replacing disks with larger disks.
Now performance test RAID0
RAID0 2*HDD
Good result, good performance, but no fault tolerance. Still, the best option is SHR RAID5 of three HDDs.
Now let’s look at the comparative results of SSD cache
3*HDD without SSD cache3*HDD with SSD cache
The results are amazing!!! When using SSD cache for reading and writing, not only sequential operations increased, but most importantly, random operations reached an exorbitant level of throughput. But the sequential write operation has not improved and is still approximately equal to the performance without SSD cache. nine0005
Screenshots of parallelization of reading and writing to HDD
RAID1 readRAID5 readRAID5 write
Comparative tests of SHR on 3*HDD (RAID5) with one faulty disk
SHR RAID5 3*HDD SHR RAID5 3*HDD error
, and in the screenshot on the right, one disk in the volume is damaged. As you can see, RAID5 does not cause any brakes, we get regular values such as when using two disks in RAID1. The system does not tupit and does not load the processor. Therefore, the myth that terrible brakes begin when a RAID5 volume fails is also dispelled. Do not listen to those who tell you this, in front of you is a real example, everything works fine. nine0005
Recovery of a corrupted SHR RAID5 volume took 4 hours using 1TB disks. And during the recovery, when the data was redistributed between the disks, the performance loss was really noticeable. But this is understandable. Data needs to be read from some disks and written to another, which causes a corresponding reaction. Although it should be noted that this does not affect workflows as much, since the system gives the least priority to the volume recovery process. As a result, while the volume is being restored, you can continue to do your work, just the restoration will take a little more time in this case. nine0005
This concludes my testing program.
