How to connect hook up original sony playstation PS1 PSone — Gametrog
This page will show you the various ways to get your SONY PlayStation up and running!
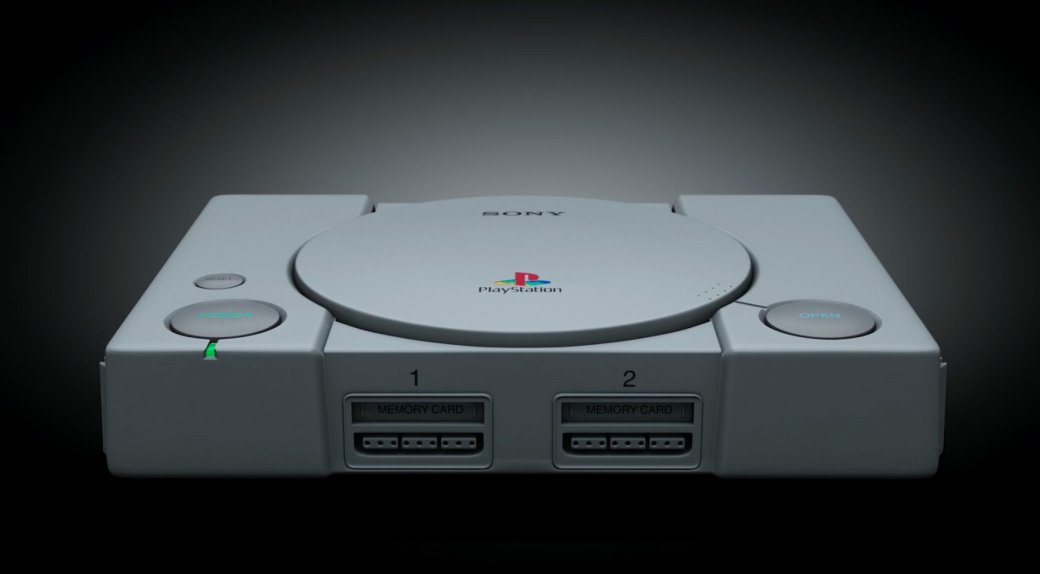
Ports and Connections
SONY A/V MULTI OUT:
This port is used for the SONY PlayStation Composite RCA AV Cable (red, white & Yellow), S-Video, and can be used with an RF Box.
Buy Now
AC IN:
This is the power supply port for the SONY 2-Prong Power Cord.
PARALLEL I/O & SERIAL I/O:
Some SONY PS1s may not have these ports, but no worry, they were never really used and you don’t use them to connect your SONY PlayStation up.
Buy Now
The SONY PlayStation has four different ways to connect to your television.
RF: the cable that was packed with all the units, but provides the worst picture quality. You should only use this method if you television does not have RCA available.
COMPOSITE RCA: this provides the good picture quality available from the SONY PlayStation and is much better than RF.
S-VIDEO: this provides the best picture quality available from the SONY PlayStation when using an old CRT TV.
HDMI: this provides the best picture quality available from the SONY PlayStation when using a new Flat Screen HDTV.
RF Switch/Box
Lowest Quality
VIEW
RCA Composite Cable
Good Quality
VIEW
S-VIDEO Cable
Best Quality CRT TV
VIEW
HDMI Cable
Best Quality HDTV
VIEW
What you will need:
SONY PlayStation
(any model)
SONY RF Box
(SCPH-1160)
SONY Power Cable
2-Prong Power Cable
Buy Now
This is the method that most of you will remember if you were born before the 80’s. It was the staple method of hooking game systems up to a TV starting with PONG and still used for the XBOX and Playstation 2 (never do this). It is by far the worst way to go for picture quality.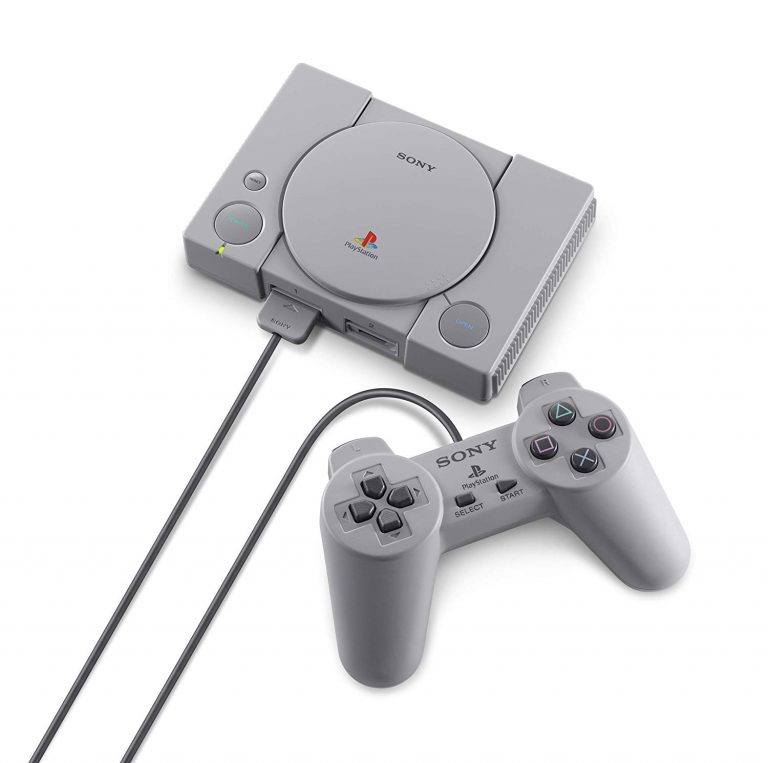 The reason being is that all the video and audio signals are compressed into one coaxial cable and jammed in to the TV, letting the television split it apart on its end. This causes a fuzzy picture, often accompanied by rolling lines! But if you only have a Coaxial input on your TV, what else can you do. Let’s begin.
STEP #1
Plug the SONY RF Box cable into your SONY PlayStation. You use the cable with the end that just plugs in, not the end with the screw on it.
STEP #2
Attach the other end of the SONY RF Box to your television cable port. (see diagram) If you are currently using this port for you Antenna, Cable or Satellite TV, and you only have one port (unlike the diagram). Unscrew the cord, screw in the RF box, and then screw the TV Cord to the port supplied on the RF box (shown on bottom of illustration). This way your TV source will continue to work.
STEP #3
Change the Ch4-Ch5 switch to desired channel (your box may or may not have this, if not it is automatically set to one of those channels).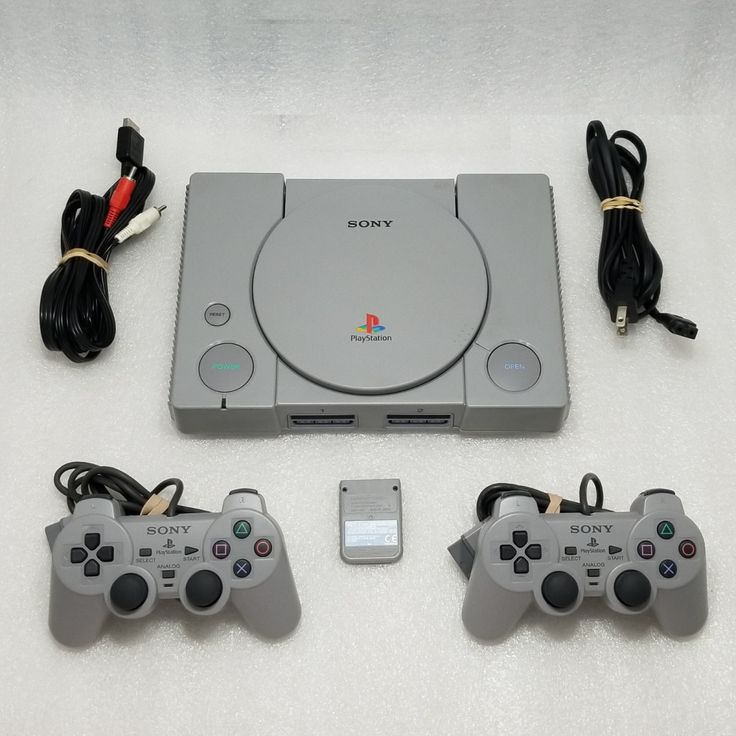 The channel shouldn’t matter. This channel would be your TV’s tuner channels or local channel. Not a cable or satellite providers channel. On your TV’s INPUTS this is normally referred to as AIR.
STEP #4
Plug the SONY PlayStation 2-Prong Power Cable into the back of the SONY PlayStation.
STEP #5
Plug the SONY PlayStation 2-Prong Power Cable into the wall.
STEP #6
Plug in a game and turn on the SONY PlayStation, even if you don’t see it on the TV yet. You should see the power light on the SONY PlayStation light up (a good sign) and you should hear the disc spin-up. Doing this first will help in finding the right TV settings, when you’re searching for the right channel or input and you see the game, you got it right!
STEP #7
Turn the TV to the channel you picked on the back of the game system. If you have a newer model TV, you probably have several INPUTS SOURCES available from COMPONENT, VIDEO 1 2 & 3 and so on.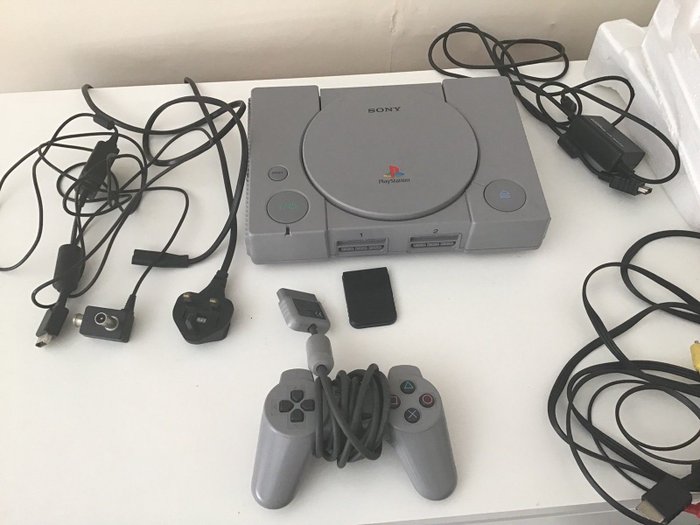 If this is the case you will most likely need to change it to AIR, which you may also have more than one option (AIR 1 or 2 or A and B, as shown on the above diagram). To change to these different video signal options, you usually have a INPUT or SOURCE button on your remote or television. If everything went right (and your game works…) you should be in business!
STEP #8
Go play some Crash Bandicoot!
What you will need:
SONY PlayStation
(any model)
SONY PlayStation
RCA AV cable
Buy Now
SONY Power Cable
AC Power Supply
Buy Now
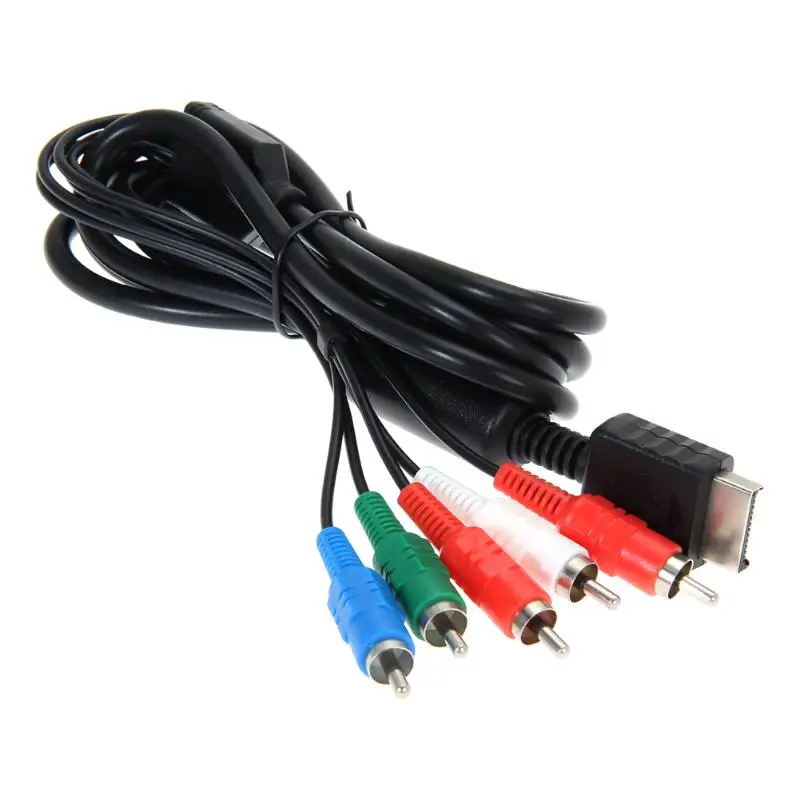
This method will give you good picture quality out of your SONY PlayStation. You should use over RF whenever possible as the improved image quality is very noticeable. So let’s get started!
STEP #1
Plug the SONY PlayStation RCA AV cable into your SONY PlayStation.
STEP #2
Attach the other end of the RCA cable to your TV. You could have multiple options available like on the diagram. You can place it in any one that is not in use. YELLOW is always the VIDEO and should be plugged into the YELLOW port. RED and WHITE (right and left respectively) are the sound and should be plugged into the proper color for the cable.
STEP #3
Plug the SONY PlayStation 2-Prong Power Cable into the SONY PlayStation.
STEP #4
Plug the SONY PlayStation 2-Prong Power Cable into the wall.
STEP #5
Plug in a game and turn on the SONY PlayStation even if you don’t see it on the TV yet. You should see the power light on the SONY PlayStation light up (a good sign) and you should hear the disc spin-up. Doing this first will help in finding the right TV settings, when you’re searching for the right channel or input and you see the game, you got it right!
STEP #6
Turn your TV to the appropriate VIDEO SOURCE. You probably have several INPUTS available from COMPONENT, VIDEO 1 2 & 3 and so on. In the diagram above you would need to change your TV to VIDEO 1. To change to these different video signal options, you usually have an INPUT button on your remote or television.
STEP #7
Duke it out in some Tekken!
What you will need:
SONY PlayStation
(any model)
SONY PlayStation
S-Video cable
Buy Now
SONY Power Cable
AC Power Supply
Buy Now
This method will give you the best picture quality out of your SONY PlayStation. It is the method you should use whenever possible as the improved image quality of RF and RCA connections is very noticeable. So let’s get started!
STEP #1
Plug the SONY PlayStation S-Video cable into your SONY PlayStation.
STEP #2
Attach the other end of the SONY PlayStation S-Video cable to your TV. Many times, if you television has a S-Video connection it will be in-line with the RCA ports (red, white & yellow) like shown on the diagram. So in this case you would still use the red & white audio cables, but not the yellow video port. You will plug the s-video cable into the same AV option as the audio cables.
STEP #3
Plug the SONY PlayStation 2-Prong Power Cable into the SONY PlayStation.
STEP #4
Plug the SONY PlayStation 2-Prong Power Cable into the wall.
STEP #5
Plug in a game and turn on the SONY PlayStation, even if you don’t see it on the TV yet. You should see the power light on the SONY PlayStation light up (a good sign) and you should hear the disc spin-up. Doing this first will help in finding the right TV settings, when you’re searching for the right channel or input and you see the game, you got it right!
STEP #6
Turn your TV to the appropriate VIDEO SOURCE. You probably have several INPUTS available from COMPONENT, VIDEO 1 2 & 3 and so on. In the diagram above you would need to change your TV to VIDEO 1. To change to these different video signal options, you usually have an INPUT button on your remote or television.
STEP #7
Now it’s time for Ridge Racer!
SONY Playstation 1 Store
-
Universal Power Cord for Saturn, Dreamcast, Playstation and Xbox
$4.99
-
Composite Cable for SONY PS1, PS2, PS3
$9.95
-
NuScope Converter Box for RCA AV to HDMI
$19.99
-
S-Video AV Cable for PS1 / PS2 / PS3
$8.99
-
HDMI HDTV Cable For PlayStation 1 & 2, PS1 PS2
$29.99
-
“Brave Warrior” Premium Controller for PS1 & PS2 (Silver)
$18.99
-
Sale!
PS1 – 1MB Memory Card
$7.99
Check out the latest on the Trog Blog
Jan 22, 2021 | Arcade Games, Nintendo Entertainment System Games, SEGA Master System
Two martial arts warriors, Eringobrad & UltraGoldant meet in the alley to fight over which Double Dragon is better! The Arcade or the NES, in this no holds barred comparison.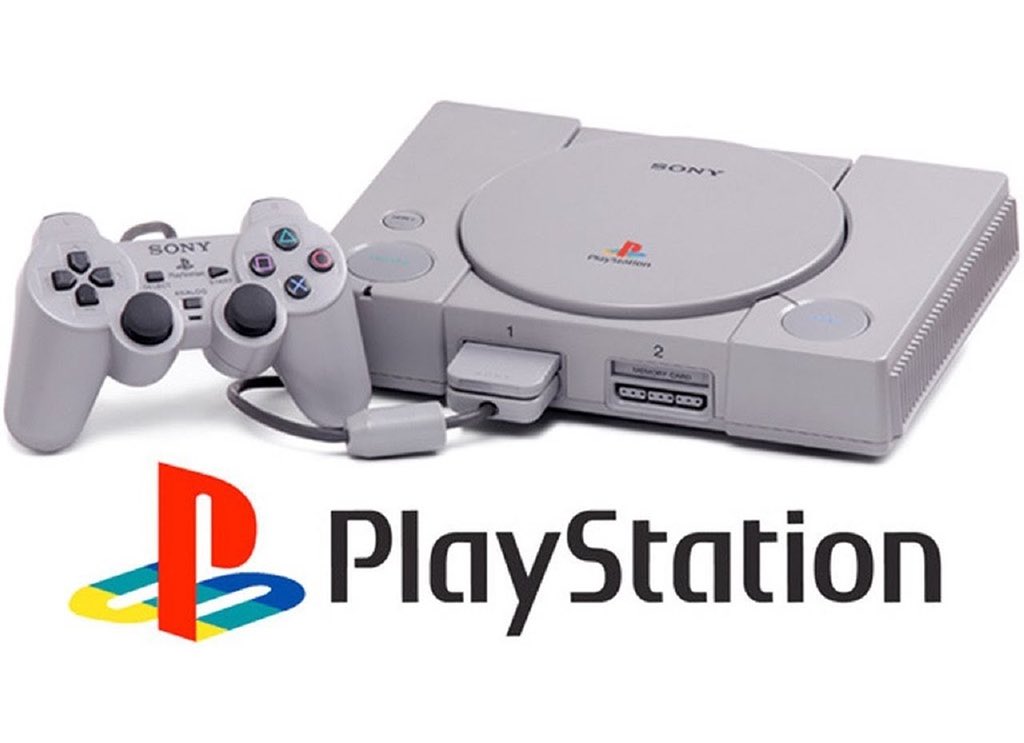
Enter the Gametrog cave and get Game Reviews, Store Discounts & more for FREE!
Welcome to the cave!
Join Gametrog
Get updated info, special offers and leave reviews!
Legal Disclaimer — Trog Blog — Systems — How To — Games — Trog Store — Terms & Conditions — Return & Refund Policy — Privacy Policy — Contact
PlayStation 1 | RetroRGB
All versions of the PlayStation (and PSOne) support RGB-output, but not component video.
Cable Recommendations:
RGB Cables:
Sony Playstation RGB SCART Cable – (UK Seller, Composite Video port for light guns)
Sony Playstation RGB SCART Cable – (US Seller, offers composite video pigtail for light gun games)
HDMI Cables:
RAD2x HDMI Cable – This is the only PS HDMI cable worth buying at the moment; Zero lag, fast resolution switching and the image is processed correctly.
Component Video Cables:
The PlayStation 1 doesn’t output component video, so a converter is required. You’ll either want to purchase one of the SCART cables above and an RGB to Component converter, or get one of the solutions below. Please do not confuse HD Retrovision’s PS2 component cable, with their Genesis cable + adapter – they’re two totally different things:
HD Retrovision Genesis 2 Cable – High Quality component video cables that are RGB-quality
HD Retrovision PlayStation 1 Adapter – Converts HDR’s Genesis 2 cable to PS1
Retro Gaming Cables – PlayStation 1 RGB to Component Video Cable
Recommended solution: RGB Cable or RAD2x (above)
PS1 consoles all output 240p, so using an RGB cable will get you the best picture. I suggest using luma as sync to reduce interference found in cables that use composite video as sync. Either way, if your switch (such as an Extron Crosspoint) requires csync, you’ll either need to order a cable with a sync stripper.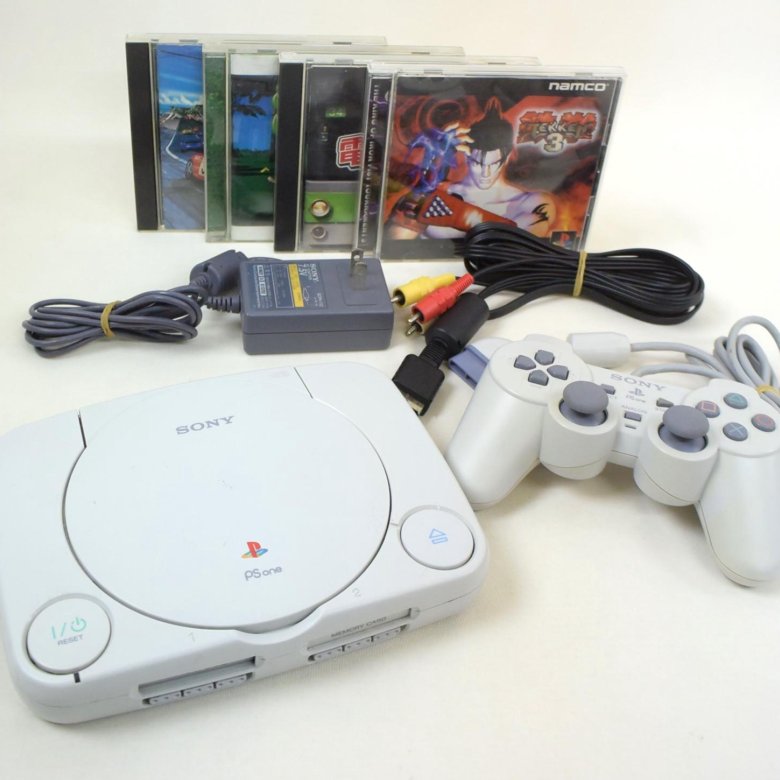 If just your display (not your switch) requires csync, then order the cable without a sync stripper and get a switch like the gscartsw that has high quality sync regeneration built in.
Resolution Switching:
Almost all PlayStation games output a progressive scan resolution that’s nicknamed 240p. A few PlayStation games run at an interlaced 640×480 resolution called 480i. Some games mix the two resolutions, which can cause problems with capture cards and flat-screen TV’s, as digital solutions need to “re-sync” when resolutions change. There are two common scenarios in which you’ll see both resolutions used:
Main Menu 480i / Gameplay 240p
Many games have title screens in 480i, but gameplay and the pause menu’s are all 240p. This is almost never an issue, as even though there might be a 5-10 second delay for flat-screens to change resolutions after leaving the main menu, the TV will often recover before the game is even done loading.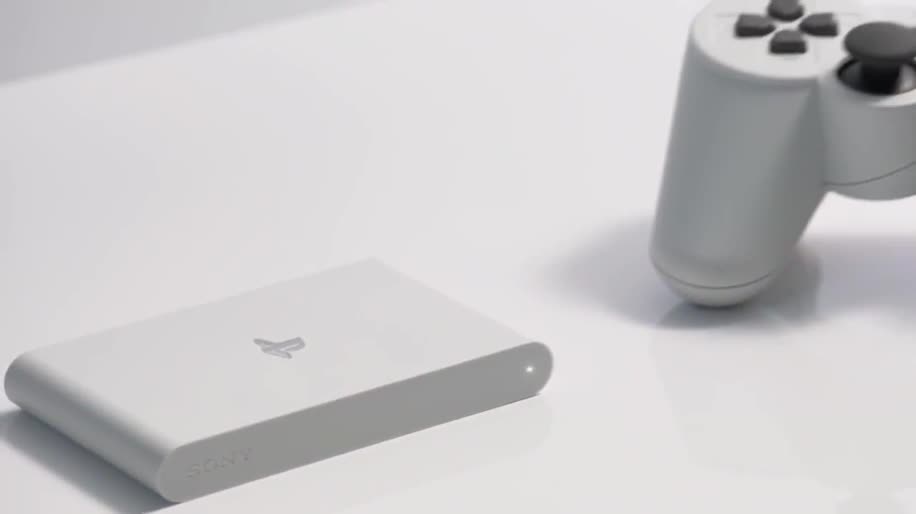 Also, some games are 100% 480i, meaning the resolution never changes.
Gameplay 240p / Pause Menu’s 480i
A few games such as Silent Hill, Dino Crisis and Chrono Cross have gameplay that’s 240p, but when you enter a menu, it switches to 480i. On a CRT, this made no difference at all – Since both resolutions are 15KHz, your CRT TV (or RGB monitor) sees the resolutions as the same and the switching is so fast that you might not even realize there’s a difference.
Unfortunately, on flat-screens, this can cause a delay, which means when you leave the menu in Silent Hill, you’ll probably start being killed by zombies before your TV finishes switching back to 240p. At the moment, the RAD2x and RetroTINK2x are the fastest device to switch between resolutions when gaming on a TV.
Streamers who split the PlayStation’s output signal to game on CRT’s, then send the other signal to a capture card have an interesting option: Use a scaler that processes the 240p signal wrong as 480i.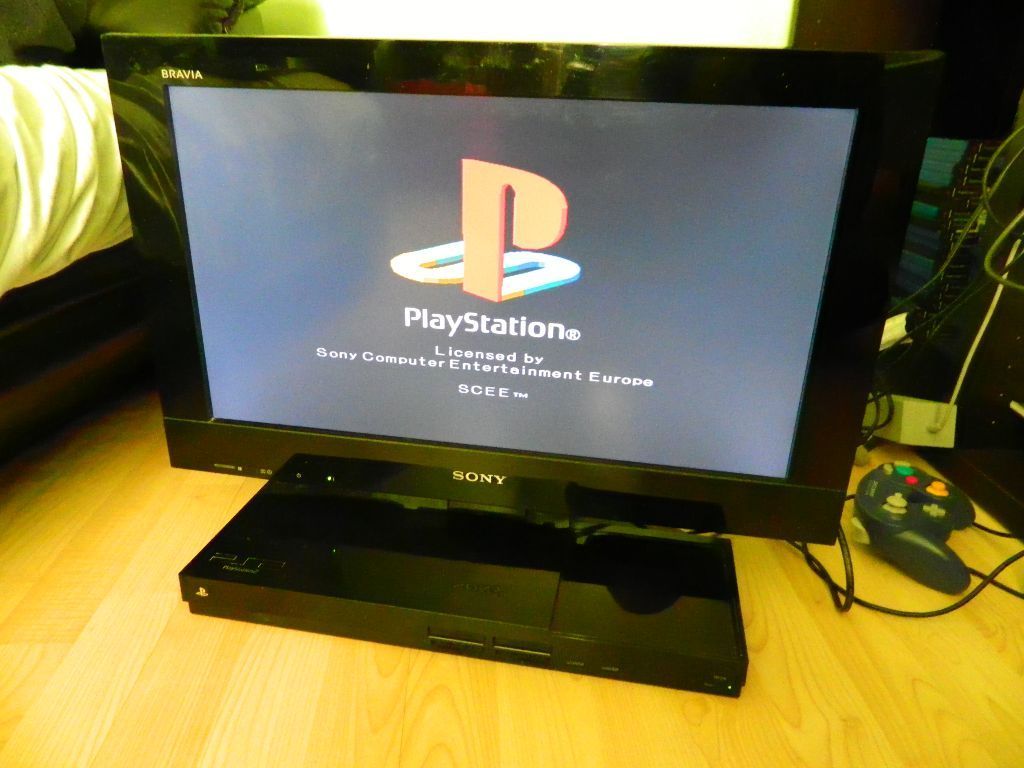 Since the scaler always thinks the PlayStation is outputting 480i, there’s zero delay in the resolution switching. Once again, I DO NOT recommend this scaler for gaming, but for capture / streaming, it’s certainly a decent option. Check out this page & video for more details.
Light Gun Support:
First and foremost, light guns will only work with CRT TV’s, not flat-screens. Next, if you plan on playing light gun games with an RGB setup, you’ll either need an early model PS1 that has a composite video port on the back, or an RGB SCART cable with a separate composite video out (linked above). The games can still be played in RGB, but the light gun itself needs to plug into the composite video port. Here’s the difference of the most common original PS models (click for full-sized):
De-Blurring / De-Dithering:
You can disable the blurry dithering effect in most PS1 games by ripping the game and patching the iso. There’s a tool to auto-patch here and more information can be found on Chris Covell’s site here.
Audio Information:
Early model PlayStation 1’s are known for excellent analog audio output. Specifically, it’s the models SCPH-1001 (USA), SCPH-1000 (Japan), or SCPH-1002 (Europe). Here’s a few articles that explain more. There’s even a guide on how to turn it into a dedicated CD player.
Alternatively, other PS1 models can be modded for optical (TOSLINK) audio out.
Please click here to go back to the main PlayStation section. Also, consider checking out the main page, for news on everything going on in the retro gaming scene!
How to connect your Playstation to your TV
Sony PlayStation is rightfully one of the most beloved and famous game consoles. Starting from the earliest models, the appearance of Sonya in the house is a real treat for both children and adults. Modern realities impose their own adjustments on games — technologies are changing and it is no longer so easy to connect an old console to a new TV with digital connectors. We will tell you how to connect your PlayStation to your TV and enjoy the delights of video games.
How to connect Sony PlayStation to TV — step by step instructions
Sony PlayStation is good because it is not difficult to connect it to TV. To do this, there are many ways that allow you to connect different models of set-top boxes to different TVs. In this case, a specific TV is not needed — most often, the presence of connectors on the TV allows you to connect the console, if not in one, then in another way.
Follow these simple steps:
- Before connecting your console, look at the connectors on your TV.
- After that, find the right cable in the store (or use the one that comes with the console, usually HDMI).
- Connect TV and console.
- Turn on the TV.
- Turn on the console, wait for it to boot up.
- In the TV settings, find the connector that the set-top box is connected to and select it.
- Follow the instructions on the screen.
In most cases, this is enough to start playing.
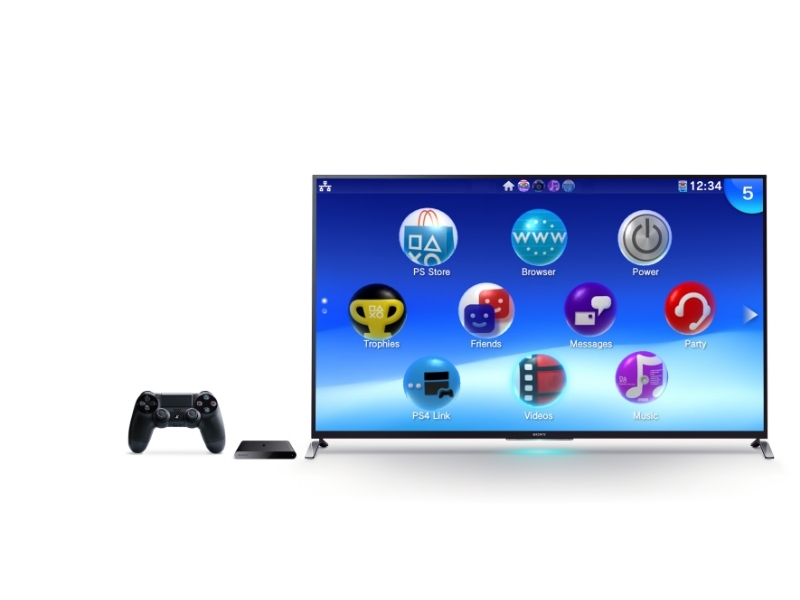
PS4 connection
Let’s start with the fourth generation Playstation. PS4 hit the market in 2013 and has an HDMI (High Definition Multimedia Interface) adapter that easily connects to any modern TV. Theoretically, you can already connect the PlayStation 4 to the TV without wires, but many people prefer a wired connection as more reliable. In addition, this gives the maximum picture quality and avoids game breaks in the most interesting place.
The PlayStation 4 can be connected to a TV using several interfaces.
HDMI
The most common and easiest way. All modern TVs and consoles have long had such an input. One cable transmits both picture and sound, no additional connections are needed. HDMI provides the best picture quality without freezes or artifacts. The cable comes with the console. Connecting is very simple:
- connect the console to the network;
- connect console and TV with HDMI cable;
- select the signal source on the TV — HDMI input;
- ready — put the games and play.
Not suitable for connecting to older TVs PS4 — by 2013, manufacturers removed the AV MULTI OUT connector. But something can be done.
S-Video
One of the possible connection methods. With it, the picture of modern HD games can “limp”, but it’s suitable for an old TV. The decoded picture is better than in the case of the «tulip». This cord will most likely have to be purchased separately.
The HDMI to VGA adapter on PS4 does not work due to the banal incompatibility of digital and analog signals.
Sony PlayStation 3 connection
PS3 appeared 7 years earlier — in 2006. It has a full set of «tulips», due to which you can connect the PlayStation 3 to the TV without an HDMI input. HDMI is also included, but sometimes the cable may not be included with the console. It connects the same way as in PS4.
RCA interface
The method is an alternative to the above. Suitable when the TV has only an AV connector. According to reviews — the picture does not slow down and loads just as quickly. The cable is included with the console and does not need to be purchased separately.
Check if your TV has the necessary sockets and if you can connect additional devices via AV. On the set-top box, the socket for such a cable is marked AV MULTI OUT.
Connection via RCA cable is carried out according to the standard scheme:
- one end of the cable must be inserted into the TV connector (the one with a branching) according to the colors of the inputs on the TV;
- the other end with the plug into the AV MULTI OUT socket on the set-top box.
HD/AV
Allows you to connect PS3 to old TVs. The cable is not included in the standard set and must be purchased separately. The method allows you to play games with a maximum resolution. All inputs are labeled: for audio output, look for L and R, for video — PR / CR, PB / CB, Y.
S-Video
Compatible with PS3 as well as PS4.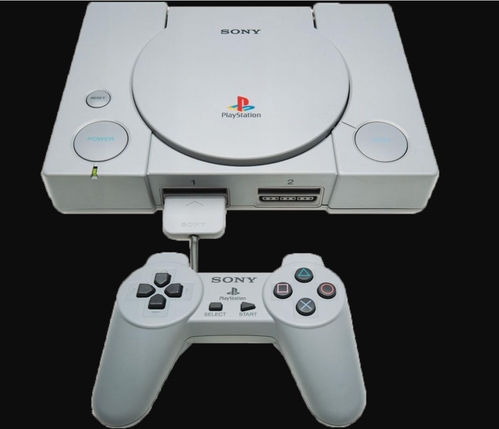 This method is rarely used because of the low resolution and poor detail. The cable is not included in the standard set of the console, you need to buy separately.
Scart
Older TVs can be equipped with this interface instead of RCA. To connect the set-top box, you will need an AV-SCART cable. The quality will be relatively poor, but you can’t expect much from an old TV.
VGA
Quite an exotic way for those who want to spend money and suffer. Most often you have to buy several converters, one special or homemade. The first and second cases are expensive, the last one is unsafe. However, in the case of connecting to a computer monitor, there is no other way. Only an HDMI to VGA adapter will work. The VGA interface transmits only the video signal, the sound will have to be connected additionally.
Expert comment!
Older computer monitors, when connected in this way, may give an error: «The input signal is out of operating range.
» This means that the monitor does not support 1080p resolution. To solve the problem, reset the set-top box and set the resolution to 720p. The picture will be worse, but the error will disappear.
PS2 connection
A real rarity on the market is a console that connects only via AV cables (tulips).
Composite interface (RCA)
Provides high fidelity broadcast signal. The cable consists of three wires of different colors — similar to the colors of the inputs on the TV. After connecting to the TV, you need to select the signal source on the TV. The cable is supplied with the adapter. Allows you to connect the PlayStation 2 to the TV without problems.
Scart
Essentially the same composite connection, but using a different connector. The image quality is no different from what appears when connected via RCA.
High frequency connection
The set-top box is connected via the TV antenna input.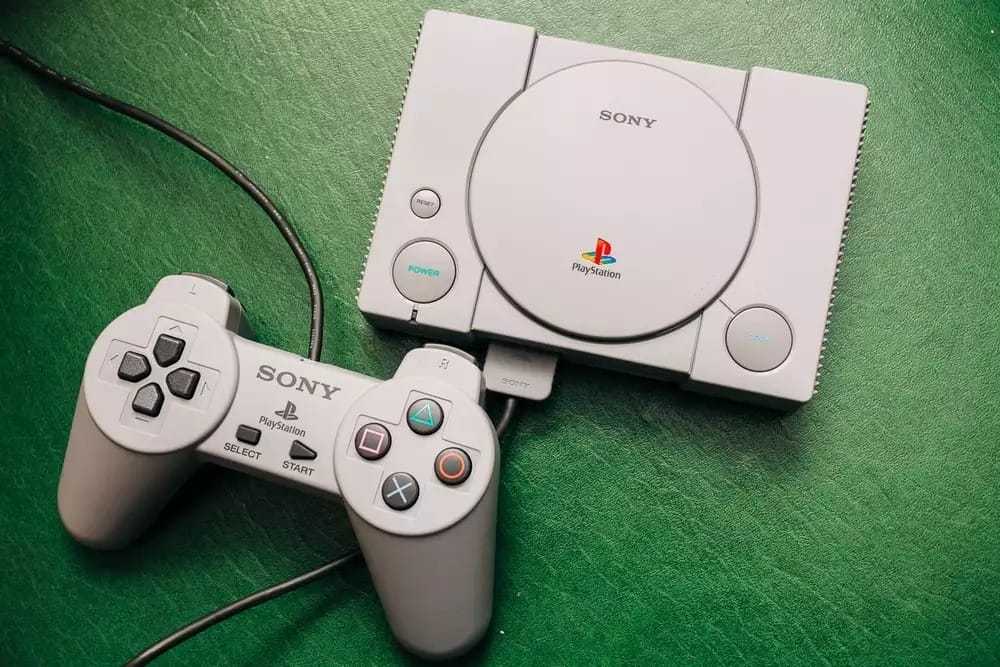 Not the most suitable option, it is better to purchase a special adapter for it.
S-Video
With this connection, the picture quality is better due to the separated video signal components. There are no defects or smearing. The cable has a four-pin plug, two audio «tulips» on one end and a plug on the other. Sold separately.
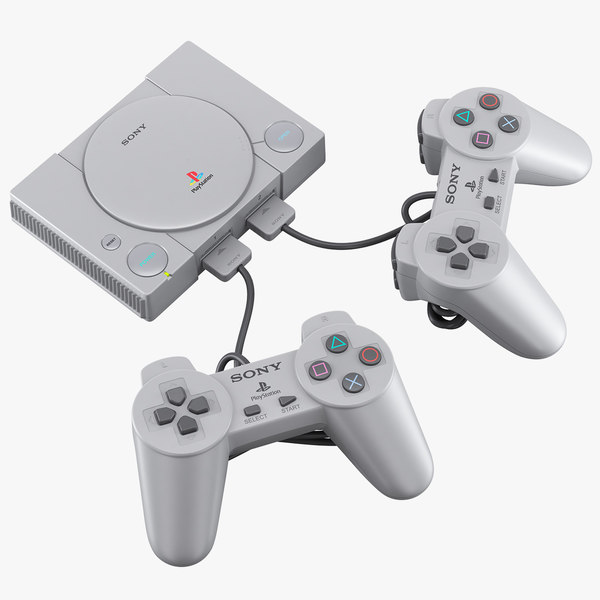
Sony Playstation 1 connection
In September 2018, Sony released a remake of the PS1 from 1994, but without a disc drive, fully adapted to modern TVs. You can connect a modern model via an HDMI cable, you don’t have to mess around with the original Sony either — there are standard audio and video inputs, S-Video, an AV MULTI OUT port are supported depending on the model. You need to inspect your model for the presence of these ports.
Which TV can connect PS4
The latest Sony Playstation can be connected to almost any TV, because manufacturers make a lot of adapters for convenient use of TV in different situations. But there are special requirements for a PS4 TV to get the best possible picture quality:
- Technology type and screen refresh rate. High-quality acoustics and a clear image are possible only on modern LED models with a screen refresh rate of at least 100 Hz.
- Screen resolution. Landmark — 4K. Only in this case the picture will meet expectations.
- Viewing angle. The excess of side lighting when choosing a TV for PS4 leaves its mark on the gaming experience. The image is distorted, there are difficulties with group games.
- Input-Lag. Displays the time it takes for the TV receiver to realize the signal on the screen. Responsible for the TV response parameter to the player’s actions.
- PQI update index. The larger it is, the better for games.
- Screen size. Here, of course, the taste of the player — someone likes a smaller screen, someone more. A good picture on any will involve in the process.
- Interface. To quickly connect your PS4 to your TV, it is better if it has an HDMI cable and an appropriate input.

Possible connection problems
The most common possible problems are:
- Green/black/blue screen. Monochrome is adjusted to a normal picture by the «anti-aliasing processing» parameter. You need to set «TAA».
- Unable to recognize the console automatically. Solved by manual adjustment using the remote control. You can also reboot both devices.
Playing through the console is fun and exciting. To enjoy the game and not worry about errors, you need to properly configure the entire system. Properly connecting the Sony PlayStation to the TV will ensure an enjoyable experience without interruptions or anomalies.
How to connect Sony Playstation 1 to TV
Connecting modern game consoles to TV is a task for several minutes. Almost all set-top boxes and TVs have an HDMI port, which provides high quality picture and sound. However, when it comes to old gaming systems, then everything is not so simple.
For example, how to connect a game console to a TV when it comes to PS1 and PS2, Dendy, Sega and others? Of course, they do not have HDMI ports, and the signal itself is transmitted in analog, not digital format. And if you have a modern TV, then difficulties may arise.
How to connect an old console to a TV?
In past generations of set-top boxes composite or RCA connections were commonly used. It is familiar to many as «through the tulips.» These are 2-3 multi-colored cables that are inserted into the corresponding inputs located in front or behind the TV. Old TVs were equipped with such ports everywhere. So if you have a relatively young technique, then you will not experience problems. All you need is to purchase a console and connect. By the way, it is quite possible to buy old game consoles inexpensively now. This is:
- Sony Playstation 1;
- Sega Dreamcast;
- Sega Megadrive;
- Dendy, etc.
How to connect Sony Playstation 3 to TV
The third generation game console from the Japanese brand Sony supports almost all popular wireless standards. However, to set up the synchronization of the set-top box with the TV, you will have to use special cords. The quality of the picture and the features of connecting equipment largely depend on the cable used by the user.
To understand how to connect a Sony PlayStation 3 to a TV, no special knowledge or skills are required. The mechanics of the process comes down to connecting plugs to specially designed connectors. The main task is to choose the right interface. To do this, carefully inspect the rear panel of the TV for available connectors. Based on the results of the visual inspection, a final decision is made.
Let’s take a closer look at the most common interfaces, some of them are found exclusively on new TVs, while others, on the contrary, mainly on older devices.
Via HDMI cable
HDMI is definitely the best way to sync your console with your TV. Of course, that the prefix supports connection to equipment of various brands. The manufacturer doesn’t matter. This interface is good because it provides fast data transfer without loss of quality. Therefore, the screen displays the picture in the highest possible resolution. Through one cable, sound and image are broadcast.
Console connection to new TV
What if you have the latest TV, Full HD resolution, HDR, HDMI and DisplayPort ports, and so on? There will definitely not be “tulips” here, which completely deprives you of the opportunity to connect the console directly.
Why not play Sega now? Don’t worry, there are several solutions. First of all, you can try using TV tuners. Many models have RCA input and HDMI output ports. And as a result, such a device will act as an intermediate element that converts an analog signal into a digital one.
Another way is to use adapters. In specialized electronics stores, you can find portable devices that transmit a signal from RCA to HDMI. Moreover, there are gadgets specifically for specific consoles: PS2, Wii and so on. With them, connecting the game console to the TV is much faster. Just remember that such devices often require additional power, which can be provided via a USB cable.
Do not forget that the version with adapters is individual. It works for some consoles and not for others. Everything here is connected with the peculiarities of signal transmission in a particular set-top box. Therefore, experimental verification is required in each specific case.
Connecting a PS3 to an old TV through a tulip
As it turns out, a tulip is a rather loose concept. AV, S-Video and RCA are used for connection. We will analyze each of them separately. Remember or write down the name of the cable in order to choose the right item in the store.
AV is next in quality after HDMI. It is quite easy to recognize it — the cable has five inputs for connecting to TV at one end, and at the other end there is a compact plug for connecting a set-top box.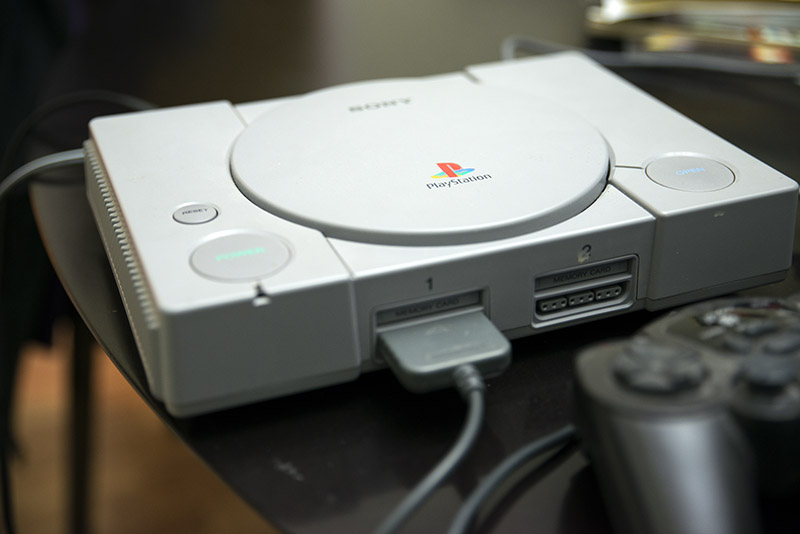 It is not included in the standard package of the Sony PlayStation 3, so you will have to buy it separately. In the manual for the TV, you need to make sure that it is possible to connect via AV. The cable looks like this:
The connection is made according to the standard scheme. We stick one end into the set-top box in Multi Out, and the other end into the sockets of the desired color on the TV. For convenience, each output is labeled, audio is marked as L
and
R
, and video is PR / CR, PB / CB, Y. The image will be clear, but the AV connection does not live up to HDMI.
S-Video
An older format that produces poor image quality, the lack of clarity will be noticeable to any user. With older TV models, you don’t have to choose. The S-Video cable is not included, so you have to buy it separately. You can’t mix it up:
One end has two audio connectors ( L
and
R
) and the other end has a standard game console input. Insert the connectors by color, so you definitely can’t go wrong. After connecting, the image may not appear, and then restart the console and turn on the TV again so that it detects a new device.
The most «ancient» version of the connection, but the cord comes with the attachment. In this list, the cables are in descending order of quality, so you should not expect an attractive picture. The advantage of RCA is that this type of connection is supported by almost any TV.
Your device may have SART (wafer connector) inputs instead of standard RCA. In this case, you can purchase a special AV-Scart cord or adapter, which is shown in the photo above. As practice shows, on older TVs, the colors do not always match the RCA connectors, so you have to experiment.
To learn more about connecting the PlayStation 3 to a TV with tulips, see the following video:
Gadget video reviews and comparisons
Home » How to connect Sony Playstation 3 to TV
How to connect ps3 to TV.
After purchasing the PlayStation Portable game console, one of the most burning questions is the question of connecting the console to the TV to get the ability to play on the big screen. Before you connect the PS3 to the TV, you should decide what type your game console is. Does it have a built-in ability to connect to a TV set or is it deprived of such an ability.
How to connect ps3 to TV?
Connect PS3
to
TV
and set sound and picture output. The text version is available here: https://www.t.
PS3 to TV connection.
How to connect ps3 to TV. If you purchased a PSP 2000 or 3000, then these set-top boxes have built-in TV connectivity and you will need an AV cable to implement it. For some types of TVs, you need to purchase a SCART adapter. After connecting the cable, both the console and the TV must be turned on.
If the TV does not automatically switch to the signal coming from the console, then the channel intended for connection with external devices is selected independently.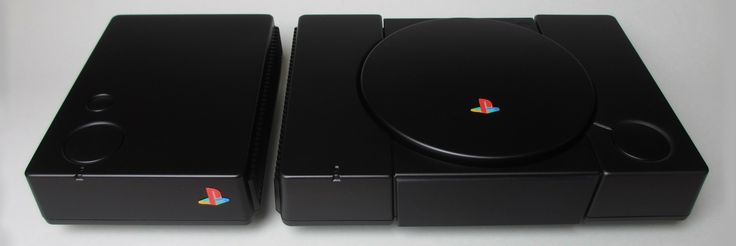 After the set-top box signal appears, you need to act according to the instructions that appear on the screen in the main menu. Obtaining the highest quality picture is provided by the SIXAXIS controller, with the help of which the «Settings» section is selected. In the «Display settings» line, select «Video output settings». In this paragraph, you can specify the type of connection used. If as a result of your actions the image disappeared on the screen, then you need to wait half a minute, after which the image will be restored automatically.
How to connect ps3 to TV?
Connect PS3
to
TV
and set sound and picture output. Text version available here: …
Connecting PlayStation 4 to TV
How to connect PS
to
TV
.
High definition TV connection.
The new PlayStation 3 is a step into the future, supporting 1080p HD resolution for a fantastic visual experience. how to connect ps3 to tv To connect a PlayStation console to a high fidelity HD TV, you need to purchase a dedicated cable.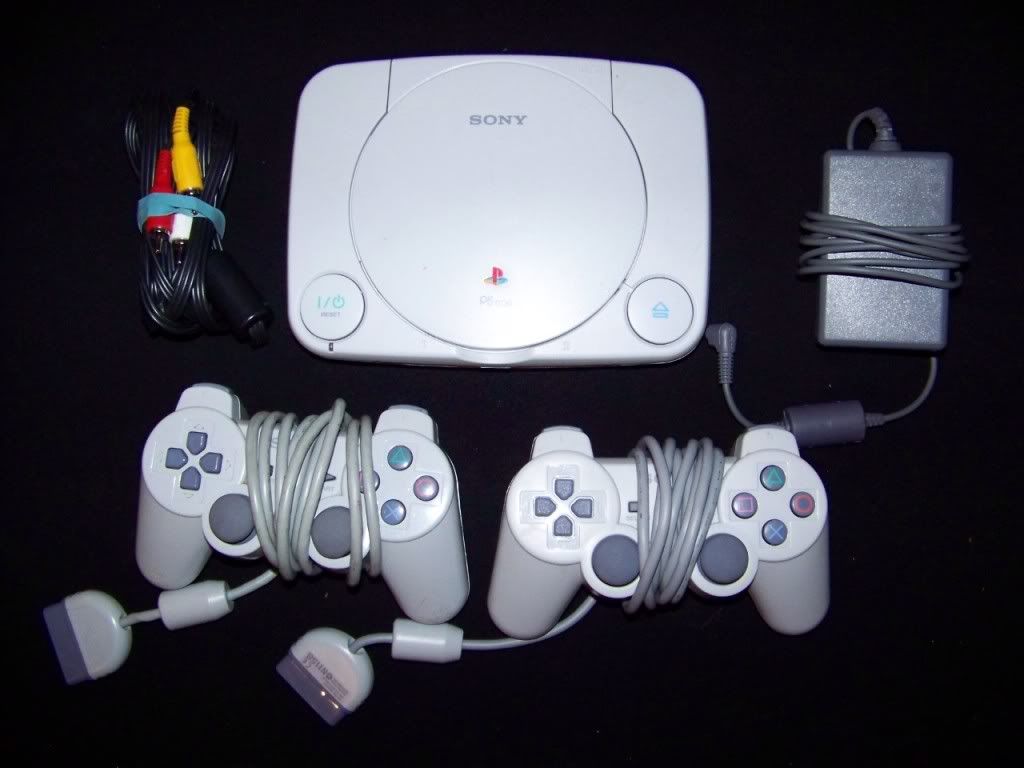 It can be either an HDMI cable or component AV. These cables are not included with the console and must be purchased separately. Connecting to this TV is done in the same way as to a regular TV, and the picture is adjusted automatically.
Connecting a PS4 to a laptop
Of course, all modern laptops are equipped with an HDMI interface, but users will not be able to connect a PS4 console in this way. The problem is that these connectors work to output information. Therefore, a completely logical question arises, how to connect the PlayStation 4 to a laptop? You need to get special adapters and an old RCA cable. To correctly set up the connection, follow the simple step-by-step instructions:
- Insert the plug into the special adapter, which is responsible for transmitting the video signal, and then connect the adapter to the laptop.
- Reset console user settings. To do this, press and hold the power button. As soon as the set-top box emits an appropriate beep, you can release the button.

- White and red RCA cable plugs insert the audio jack using a special av-jack adapter.
This is perhaps the easiest and most efficient way to connect a gaming console to a laptop. Be sure to switch audio and video modes directly on the set-top box. To do this, open the PS4 settings, and then select the «tulips» icon.
What is not in the box?
Unlike the original PlayStation, there are not many wires in the box you hold in your hands. The first thing that catches your eye is the lack of a power adapter. No, they didn’t forget to put it in, it’s just that the manufacturers of the PlayStation Classic decided that in the age of modern technology, every smartphone owner will find a USB cable that will perfectly fit the PlayStation Classic.
The adapter can always be purchased later, but now use the charger for your smartphone and you can start playing today!
Sequential installation steps
- Unpack and remove all cables and joysticks from the box.
 Keep the box and warranty card for emergency repairs or sales.
 - Plug the Micro-USB cable into the power adapter.
- Plug the power adapter into a power outlet, but do not connect it to the PlayStation Classic yet.
- Plug one end of the supplied HDMI cable into the correct port on the console.
- Plug the other end into the HDMI port on your TV. You won’t see anything on the screen yet, but don’t worry.
- Plug one of the joystick’s USB cables into the left USB port on the classic console. If you are playing with two people, connect both joysticks.
- Plug the Micro-USB cable into the PlayStation Classic console. You will see a small orange light on the console next to the power button turn on. This means that the PlayStation Classic is idle and ready to use.
- Turn on your PlayStation Classic. If everything goes right, the old PlayStation logo will appear on your TV screen and you will hear the sound of noise interference (a retro piece from the PlayStation Classic).
Connecting PS3 to a modern TV via HDMI
The Sony PlayStation 3 is capable of working on different TVs, but the best option is modern models. First, make sure your computer supports HDMI (High Definition Multimedia Interface) connection. You can find out about this in the instructions. This cable looks like this:
In the latest versions of the PS3, it comes with it. If there is no cable, you can always buy one.
The connection follows a simple scheme:
A few important points
So, you have turned on the set-top box. Navigating through the different games is very simple — using the left or right buttons on the joystick control panel (D-pad), pressing the X button to launch the game. If you wish to return to the main menu, simply press the small reset button above the power button. This action will return you to the main menu, but will keep the game you were playing in a paused state so that you can return to it later from the right place.