Reddit — Dive into anything
It seems there is a lot of confusion and fud out there on undervolting/overclocking a GPU and in particular the AMD Vega series of GPU’s. I hope this doesn’t add more confusion and fud to that. But I think I have a clean and simpler way to tweak your GPU settings to taste.
Many of the guides and Tech tubers seem to favor using certain tools and methods. For instance watching Gamers Nexus screwing around undervolting RX Vega was painful to watch to say the least. Whilst someone like Mindblank’s method was somewhat easier to understand, not everyone owns the game he was using to demonstrate this. I am basing my system on tweaking up RX Vega. In my particular case it is a RX Vega 56 flashed to a 64 BIOS but should be applicable to most GPU’s.
Many out there seem to be getting a lot of odd results. Partially due to driver bugs (WattMan) and of course due to the silicon lottery. Hardware Unboxed for instance could not get his settings to ‘stick’ and thus his benchmarks and power usage were somewhat invalidated.
However I am keen to know whether everyone’s so called stable undervolt/overclock really is stable. It can be quite easy to get something you think is valid and get great scores in 3DMark’s Timespy/Firestrike and indeed you may load up your favorite game and play for hours on end without issue.
However. Without a wide selection of games to choose from and test for an hour each (and even different parts of the game) this can be misleading. Even with my method you should STILL do this to verify stability and in fact, even as new games arrive you should not expect stability to remain static.
Before I get into the nitty gritty I would just like to state an opinion (my own). There appears to be a common myth when undervolting and overclocking that there is a sweet spot in terms of power consumption versus performance. In terms of how much power you keep pushing to what gains you may obtain this is actually true. However when you look at RX Vega you will see that out of the box it is already clocked a lot higher and uses much more power in order to gain only small margins over its default clock state set out in it’s specifications. In fact Toms Hardware did some testing and found that the so called sweet spot is actually a fair bit lower than most people would be happy running their Vega’s at (It was somewhere slightly over the power save option in WattMan on the power saving BIOS from what I recall and well under 1300Mhz). Unless you want to be slower than a GTX 1070 of course 😉
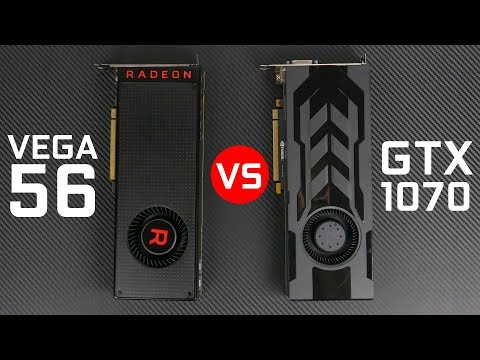
A lot of people have been duped into using Unigine Heaven (and Valley) to do their tweaking on. This is a mistake.
DO NOT DO THIS!
When you watch your GPU clocks, voltages and temps you will see they fluctuate quite a bit. This is because Heaven in particular is not FULLY stressing your RX Vega GPU. Not only that but it changes from scene to scene and during each fade. It is all too easy to get a stable setting using Heaven then going on to play a game and having it crash or glitch on you!
You want something that stresses the GPU in a regular and reliable manner. Do not use benchmark software until AFTER you have done your initial tweaking. Then and only then can you find out if it passes those (and checking your scores obviously) before moving onto actual gaming.
I recommend the following free software for this undervolting/overclocking your GPU.
3DMark by Futuremark http://www.futuremark.com/support/downloads (or get from Steam)
HWInfo (Prefered to GPU-Z as it shows much more information) http://www.hwinfo.com/
OverdriveNTool (Preferred method for entering your settings as WattMan is somewhat buggy)
http://forums.guru3d.com/threads/overdriventool-tool-for-amd-gpus.416116/
Note: I have left out GPU-Z and AfterBurner because I have issues with GPU-Z crashing my system on starting it and AfterBurner lacks some Vega functionality right now.
You will also need this nice game demo.
Tomb Raider Dagger of Xian Game demo http://tombraider-dox.com/
This is a great GPU stress testing game demo. You can of course use any game that stresses your GPU but I chose this because it appears to put a great deal of stress on HBM memory (It uses the Unreal 4 engine BTW) and is of course, FREE!
I was finding that I could clock my HBM high and get no issues in some software whilst in others it would cause crashes and glitches. This game demo allowed me to see in real time where the limits of the HBM clock was in relation to core clocks, heat and power.
Anyhow. Let’s get started.
First off reset your GPU settings to default. I highly recommend powering down your PC. Unplugging from the power cable and pressing the power button a couple of times to clear any remaining electricity from the capacitors. Now power on and boot up.
Run 3DMark Firestrike and Timespy making a note of the scores (Tip: save in Notepad) with your stock settings.
Now close 3DMark and load up HWInfo and OverdriveNTool. If you have a secondary monitor it will make things easier. But you can still do it from a single monitor using the tried and trusted alt-tab method.
Load up sensors in HWInfo and scroll down so it shows all the GPU info. Make sure it’s showing GPU defaults correctly. If not try giving WattMan settings another reset. After that make sure Radeon settings is closed to prevent interference.
Now run the Tomb Raider Dagger of Xian Game demo. Set everything to ultra in the graphics options. Set display to Fullscreen Window and apply. This will allow fast switching using alt-tab and keeps the game running in the background (No drops in GPU usage, fans speeds etc when it is running in the background. Which is EXTREMELY useful!).
Load a new game. Wait for it to get past the short intro and when it drops you into the cave alt-tab back to HWInfo. Let everything sit running for around 5-10 minutes so everything becomes stable. You will notice your GPU core will drop from say 1580hz down to 1520Mhz (yours willl most likely be different). Temperatures will rise and get very toastie. The core is dropping because the heat is throttling it. The GPU is using too much voltage on a good percentage of these cards due to tolerances in the silicon used. AMD do this so a good percentage of their GPU chips pass QC otherwise it would cost them too much money. But most GPU’s should be able to achieve what you want unless you are extremely unlucky.
OK now here is the important bit.
In OverdriveNTool set your maximum fan speed to as high as you can tolerate (No really) and click apply. The stock blower can get quite loud. If you always wear headphones this may not bother you and you may even go up to the maximum of 4900 RPM. However. Even though you may gain some great performance from doing so it might be at the expense of ‘LOTS’ of extra power consumption for little gain (depending on how you have your settings of course). Once you find your comfort zone in terms of fan noise we are ready to do the undervolt/overclock.
If you are on RX Vega 56 stock BIOS your clock will be at 1536/1590Mhz. Leave it at that for now. If you have a RX Vega 56 on 64 BIOS you may need to lower your clock speed from the default 1630. You will know if this is the case when you experience your first crash. 😉
Actual RX Vega 64 owners mileage may vary.
OK. So what you now need to do is drop your core voltage in the P6 and P7 state boxes (You can only change these for now so ignore the others).
Note: Your HBM memory voltage will be at 1050mV. This is your voltage floor It is not actually your memory voltage which is actually set in the BIOS (1.26mV for Vega 56 and 1.36mV for Vega 64). The floor is 950mV and is the lowest you can set your core voltage without using a — power limit. Ignore this for now or go search for Buildzoid’s video on it as I am not good at explaining that bit. 😛
Set your power target to +50%. Optionally you may wish to change your temperature target. I advise setting it a lot lower as this will help the fans ramp up to the maxiumum speed a lot quicker and thus prevent an instant crash. I have mine set at 45c.
Now try dropping your core voltage from 1150/1200 to 1100/1150 and see how it affects the core speed and temperatures (remember to click apply). If the temperature goes down and the speed of the core goes up a bit your are going in the right direction. Obviously if you simply crash you will need to experiment a bit with lowering your voltages a little less. But most should be ok with 0.050mv increments for at least the first couple of undervolts.
If you have not crashed your PC try taking off another 0.050mV on P6 and P7. Again watch the temperatures. As you go further down you will notice that not only will your temperatures come down but your core speed will go up. However what will happen is that as you go even further down in voltage the core speeds will then proceed to drop as well.
This is a good time to look at the GPU Chip Power information in HWInfo. This is a best guess made by HWInfo similar to what GPU-Z does. It tries to give a guideline of what the GPU is currently consuming. If you have a Kill-A-Watt wall meter or something similar you can use that too to get an idea of where your total system power consumption lies. But otherwise this is pretty good for most of your needs.
Now this is where you need to decide at which voltage vs temperature vs core speed vs fan speed you wish to keep. It is now about finding YOUR sweet spot. You may decide that you wish to save more on power consumption at the cost of performance for instance. Perhaps that extra 10-20Mhz for that extra 50 watts is just not worth it to you. Perhaps you are happy to use more power and a slightly higher/louder fan speed to compensate. This decision is yours alone. On a stock cooler this is important. On a third party cooling solution this will vary slightly.
Once you have found a core voltage to clock speed you are happy with you can then proceed to your memory clock.
Now this is where you MUST pay attention to the game running in the background.
alt-tab back into the game. Does it look OK? (Is it glitching at all? Does it have weird sparkles and dots? Odd artefacts and corruption?). If it looks OK proceed to the next step otherwise go back and check your voltages and clocks. You may need to lower your clock speeds and/or up your voltages. If OK then alt-tab back to OverdriveNTool and set your memory clock + 55 from it’s default (845Mhz on RX Vega 56 and 945 on RX Vega 64). Click apply and check the game for any odd looking things. You may have to wait a while whilst memory temperatures rise then stabilize before making an accurate judgement. If it is all OK try going higher with the memory clock. This time use 0.010mV increments. At some point you will begin to notice odd things happening in the game (usally sparkling dots flashing in random places). If your system did not hard crash then this is where you need to be backing off on the memory clock. Note: As stated above the memory voltage is tied to the core. I have found that by reducing the memory voltage to it’s floor of 950mV it greatly improves both temperatures and stability (depending on the other settings of course) whilst not having much of an impact on performance. Your mileage may vary.
Once you have done all of this it is time to test your settings for stability. Close Tomb Raider. I recommend first testing Firestrike then Timespy in 3DMark. If they do not crash then you know you know you are probably on your way to a stable undervolt/overclock. Check your scores against your previous stock scores. They should hopefully have improved. If not then go back and start over/check your settings (are your voltages too low?). Now run the Firestrike stress test. It loops 20 times and at the end will give you a score of reliability. The stress test is pretty gruesome so if passed should be a good guideline of stability. HOWEVER. This is not the be all and end all. You need to go play a good selection of games to verify this and there is no guarantee it will ALWAYS remain stable (ambient temperatures in your room/PC fluctuate so may also have an impact).
Note: Additional benchmark.
http://benchmark.unigine.com/superposition
Here is a screen capture of what I have settled on for now (Although I may change my mind yet as I often so do). 🙂
Let me know how you get on and please feel free to correct any errors I might have made 😉
EDIT: Fixing typos and such as I read through it again. Reload if you see something odd 🙂
RX Vega 56 Mining Settings
RX Vega 56 Mining Settings for all the popular and most profitable Cryptocurrencies to mine, you’re one-stop page for everything related to your GPU
Last updated:
N/A
Overview
Settings
3
Offers
Live Price
N/A
Daily Profit
soon…
ROI
soon…
RX Vega 56 Specs
Vendor
Series
Radeon 500
Release Date
14 Aug 2017
Memory
8GB HBM2
Chip
VEGA 10 XL
Interface
PCI-E 3.0 X16
TDP
210W
MSRP
$399
⚠️DISCLAIMER⚠️
The RX Vega 56 Mining Settings will generally work for all models, but most of the time you will have some tweaking to do due to your GPU Silicon. Never mine with Stock settings as they will overheat your GPU! You can learn more in our Overclocking For Miners Guide.
RX Vega 56 Mining Overclocks
Absolute Values are most commonly used in Linux-based Mining OS and they usually give more effeciency, while Offset is more common for Windows. N/A or 0 = leave blank.
ETChash
49 MH/s, 170 Watts
Autolykos2
190 Sol/s, 170 Watts
ZelHash
25 Sol/s, 190 Watts
RX Vega 56 ETChash Mining Overclocks
Expected Results
49 MH/s, 170 Watts
Core Voltage (VDD)
850
Power Limit
Watts: 170 or Percentage: 70%
Core Clock (CClock)
Absolute: 1075 or Offset: 0
Memory Clock (MClock)
Absolute: 2000 or Offset: +1000
Memory Voltage
N/A
Fan Speed (%)
70% ± based on your temps
Provided by @Mining Chamber
Frequently Asked Questions
How to overclock my GPU for mining?
Overclocking for mining can be tedious, a lot of trial and error. You can use our mining settings as a base and if they crash then you can start slowly decrementing Clock values and slowly increment your Power Limit/Watt Limit until your GPU is stable.
Is mining harmful to my GPU?
Yes and No. The number one reason for Hardware failure is heat. If you can maintain good temperatures and take care of your GPU properly then your GPU will live with you longer than you can ask for. Your fans might break on you but that is always an easy fix.
How to reduce my GPU Temperature for mining?
There are a few things you can do to maintain healthy GPU Temps such as regularly dusting (Recommended Duster) and replacing Thermal Paste throughout the year, but what really stands out for me is using Heatsink Mods. It works especially well for the 3000 Series by bringing down temperatures by up to 20 degrees!
How much power does my GPU use while mining?
Your GPU power draw varies based on the algorithm you are mining, The best way to accurately know is through measuring your Rig/PC off the wall using Power Meters.
Where To Buy
Subscribe to our Miners Newsletter!
Hot headlines
•
PoW Cryptocurrencies
•
Mining Chamber Updates
They say if you sign up, your rig will never crash 🤷🏽♂️
AMD RX Vega 56 video card in mining
To read 3 min Published by
AMD RX Vega 56 graphics card is great for mining. Next, we will select the optimal overclocking parameters for mining on AMD RX Vega 56. We will find out which drivers to use most correctly and efficiently. Let’s look at the main characteristics and measure the hash rate for popular algorithms. nine0003
Specifications
AMD RX Vega 56 was released on September 28, 2017. Average power consumption is 160.0W.
AMD RX Vega 56 yield
The current market price and yield of the AMD RX Vega 56 video card in mining fluctuates depending on the value of the cryptocurrency. The information in the plate is updated once a day.
View the complete video card profitability table sorted by price, revenue and payback.
| Price | ETH | ETC | EXP | UBQ | RVN | BEAM | Profit | Payback |
|---|---|---|---|---|---|---|---|---|
AMD RX Vega 56 Hashrate
We have compiled the AMD RX Vega 56 hashrate table for popular algorithms. If you are just choosing a video card for mining, and you already know which coin you will be mining, then you can estimate the approximate performance from the table. And we also have an article about what a hashrate is. nine0003
| Coin | Algorithm | Hashrate |
|---|---|---|
| Ethereum (ETH) | DaggerHashimoto ETH | 36.5 MH/S |
| Expanse (EXP) | DaggerHashimoto EXP | 36.5 MH/S |
| Ubiq (UBQ) | Ubqhash | 36.5 MH/S |
| Monero (XMR) | RandomX | 1040.0 H/S |
| Grin (GRIN) | Cuckarooz29 | 3. 7 H/S 7 H/S |
| Ravencoin (RVN) | KawPow | 22.0 MH/S |
| Beam (BEAM) | BeamHashIII | 19.5 H/S |
AMD RX Vega 56 Driver
When installing AMD RX Vega 56 drivers, it is always recommended to uninstall the current drivers first. This way you can be sure that DCH drivers will not be installed by Windows 10.
You can download drivers AMD RX Vega 56 are here. We recommend trying different driver versions. Some driver versions can cause problems during mining. Installing an older version may fix the issue.
Overclocking AMD RX Vega 56 for mining
We will overclock AMD RX Vega 56 for mining using MSI Afterburner. You can find it in Yandex. The program interface is very simple, albeit a little colorful) To overclock the video card, we need two sliders:
- Core Clock — overclocking the core, increases the frequency of the core;
- Memory Clock — memory overclocking, increases the frequency of the memory.
MSI Afterburner — overclocking video cards
You need to change the frequency values a little. Then test the stability of the work. If everything is fine, then increase the frequency even more. If the video card starts to crash or the driver crashes, then we simply reduce the frequency and that’s it. There will be no harm. Next, we will consider overclocking options for popular algorithms. nine0003
Overclocking AMD RX Vega 56 for Ethereum
it does not affect mining speed.
Optimal overclocking parameters:
| Parameter | Meaning |
| Core Clock | +100 |
| Memory Clock | +600 MHz |
| Power Limit | 80% |
| Temperature limit (Temp. Limit) | 70° |