Disk Space Used When Installing NVIDIA Drivers
NVIDIA SUPPORT
Disk Space Used When Installing NVIDIA Drivers
When you install the NVIDIA display drivers (including other driver add-on software, such as 3DVision, NView, etc.), the NVIDIA Installer first creates a cache location on the local drive, copies the contents to that location, then performs the installation using those files.
The cache location created is the <systemdrive>:\Program Files\NVIDIA Corporation\Installer2 folder. The native Program Files location is used regardless of the package type; that is, Program Files (instead of Program File x86) is used even if the Installer and the software installed are 32-bit.
Each time a new package is installed, the Installer adds the package contents to the Installer2 folder.
Why is the Installer2 folder needed?
The Installer places all driver and related add-on software in the Installer2 folder to ensure that re-installs and uninstalls are successful and complete. The original installation media — whether a downloaded self-extracting executable, a CD, or network drive — does not need to be present as long as the files are stored in the Installer2 folder. This allows device or OS-initiated driver installs (such as a driver rollback) to successfully install the corresponding add-on software that would otherwise be unavailable if the original install media was not present. Without this cache, only the driver would be installed. If add-on software was already installed and running, then there would likely be a version mismatch between the newly installed driver and the add-on software.
I did not install any driver add-on software, yet I still see the software files in the Installer2 folder.
During a Custom Install, even though you might choose to not install a particular software add-on, the associated software files are still stored in the Installer2 folder. This is so the software can be installed if required during a rollback or other OS-initiated driver install..png)
How can I reduce the size of the Installer2 folder?
There are 2 simple ways to achieve this:
Method 1: Always uninstall the driver and other add-ons before installing a new driver.
Just uninstalling the add-ons, such as 3DVision, will not remove the corresponding package from the Installer2 folder. This is because the associated driver itself still exists in the driver store and could be reused. In this case, the software files are needed in case they are reinstalled.
Uninstalling the driver removes the driver from the driver store as well as from existing devices using it. Once the driver is removed from the driver store, the add-on files in the Installer2 folder are removed as well since the Installer will see nothing that could demand their use.
Method 2: Select «Custom Install» and select the «Perform Clean Install» check-box.
A «clean install» deletes the currently installed NVIDIA drivers as well as cached packages first and then installs the newer driver.
Note: Performing a «Clean Install» will not save the previous driver set.
Note: Performing «Express Install» does not clear the Installer2 folder.
I’ve uninstalled the current drivers from my system, but files remain in the Installer2 folder.
It is likely that you still have other NVIDIA drivers in the OS driver store. In this case, the matching files for the driver and add-ons are preserved in case the driver is reinstalled from the driver store.
I’ve performed a «clean install» and then uninstalled the drivers from my system, but files remain in the Installer2 folder.
It is likely that you have performed some combination of multiple install/over-install/uninstall cycles and files from older drivers are left in the folder. The «clean install» removes only the current driver files before installing the new driver. In this case, the simplest way to remove the files is to delete the Installer2 folder.
What happens if I delete the Installer2 folder when NVIDIA drivers and software are still installed on the system?
Deletion of the Installer2 folder will not affect any of your currently installed NVIDIA drivers or software. At most, it will prevent complete installs from occurring in the case of using an older driver from the OS driver store.
Is this answer helpful?
Live Chat
Chat online with one of our support agents
CHAT NOW
ASK US A QUESTION
Contact Support for assistance
800.797.6530
Ask a Question
MSI Global — The Leading Brand in High-end Gaming & Professional Creation
{{blogList.tagContent}}
{{blogList.blogTitle}}
By {{blogList.blogAuthor}}
|
{{blogList.date}}
Every spring we suddenly get the urge to clean up a bit. We thought it would be the perfect time to tell you which spots you definitely don’t want to miss when it comes to cleaning up your PC.
If you’re the owner of one or more NVIDIA based graphics cards, you’ll be more than happy to install the latest driver versions that pop up regularly on your GeForce Experience software.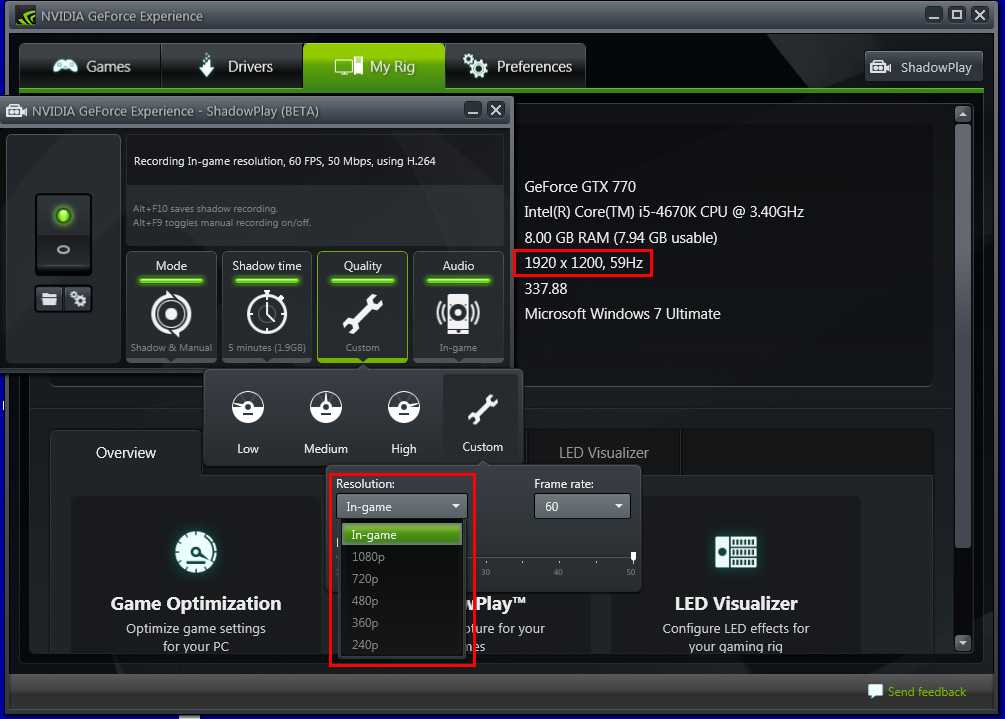 But did you know that with every new driver version you download and install, the driver installation files are extracted to a temporary directory with a sub folder for each release and left there after installation? But did you know that with every new driver version you download and install, the driver installation files are extracted to a temporary directory with a sub folder for each release and left there after installation? |
|
| But that’s not all, the GeForce Experience software has a built in library of files meant to be used if you want a driver roll-back. Every time you install a new driver version without checking the «perform a clean install» box, the files are added neatly to this library. Last but not least, GeForce Experience also keeps a copy of all drivers it has automatically downloaded in a separate directory. |
| If like me, you’re using an SSD as your system drive, that could very well mean that you’re losing several GB’s of that valuable space to outdated driver installation files! |
So how do you get rid of this data?
The answer is surprisingly simple. All you have to do is find these files and delete them! Removing these files is completely safe and will not in any way impact your graphics cards performance. Here is a step by step description to guide you through the process of finding and deleting these unnecessary installation files.
Step 1
First up is the location of the temporary files which are extracted for installation, which can be found at the following location:
C:\NVIDIA\DisplayDriver\
You will find that each driver version as its own directory and contains the extracted installation files. Delete everything inside the DisplayDriver directory!
Step 2
One down, two to go. The second location is the GeForce Experience software download folder, which can be found at:
C:\ProgramData\NVIDIA Corporation\Netservice\
You will find some directories and .exe files with the NVIDIA logo as icon. Only delete the . exe files with the NVIDIA logo as icon!
Step 3
The third and final location is that of the GeForce Experience software library, which can be found at
C:\Program Files\NVIDIA Corporation\Installer2\
Simply delete all the files inside the Installer2 directory, do NOT delete the directory itself!
There, that was a very easy way to win back some of your precious disk space.
Remember that each time you install an update for your GeForce driver, new files will be stored at exactly the same locations. It might be worth your while to repeat the above process every few months or when you find that you system disk is almost full.
Keep your rig clean & fast and JUST GAME!
Driver installation instructions from NVIDIA
Latest update
May 21, 2021 07:25:49 AM GMT
If you are logged in as a guest or standard user, Windows will not allow you to install the driver. Some organizations don’t let users decide what they can install and how they manage system and application settings. You may need to contact your system administrator for help installing the driver in this situation.
Before you begin
- Back up the boot volume. See How to create a system image in Windows 10 for more information.
- Before downloading the appropriate driver, determine the make and model of your NVIDIA GPU to ensure you have the correct drivers.
NVIDIA driver installation
-
Sign out of all Adobe applications currently running on your computer. nine0003
-
Please confirm the type of driver you have. There are two options: standard and DCH. To determine the driver type, open the NVIDIA Control Panel and click System Information in the lower left corner of the Control Panel. In the System Information dialog box, look for the type of driver next to the Driver Type field.
 If you don’t see this field, you most likely have a standard driver.
 NVIDIA DCH display drivers are supported on Windows 10 x64 April 2018 Update (Version 1803 OS Build 17134) and later. Click this link to learn more about driver types. nine0003
-
Open the NVIDIA Driver Downloads page.
-
Select the Product Type, Product Series and Product that match your GP.
-
Select the Windows Driver Type that matches the type you determined in step 2.
-
Select the Boot Type that best matches the Product Type you selected in step 4:
- For Quadro GPUs, select the Optimal Enterprise Driver (ODE). nine0014
- For GeForce or TITAN GPUs, select the Studio (SD) driver.
-
Select the desired language.
-
Click Search to go to the corresponding page and click Download to download the driver installer.
-
After downloading the driver installer, double-click the installer .
 exe file to start the installation.
 -
Click Yes when the User Account Control dialog box appears. nine0003
-
Click OK to accept the default extraction path.
-
You can install the driver with or without GeForce when prompted. Click CONFIRM AND CONTINUE to proceed to the installation options.
-
In the installation options, click NEXT.
-
When installation is complete, click the CLOSE button to close the installer.
-
Reboot the system even if it is not prompted. nine0003
Troubleshooting driver installation
This is the most common error message that occurs when trying to update a driver.
Error message when installing NVIDIA driver
The message may appear if a restart is pending or if any NVIDIA service is still active in the background process in Task Manager. Reboot your system if this error occurs.
For additional troubleshooting help, see NVIDIA Install Troubleshooting. nine0003
Help for other products
- GPU and driver requirements for Premiere Pro
- Adobe Premiere Pro
system requirements
Account login
To come in
Account management
where to download, how to roll back the NVIDIA driver
It is very easy to download and update video card drivers using Geforce Experience, the client will automatically select the correct version and install it. nine0003
Contents
Installing or Upgrading
Go to the Drivers tab in Geforce Experience at the top left of the program window.
If your system has an outdated version of the drivers, it will indicate that a new version of the Geforce Game Ready Driver is available.
Also in the upper right corner, you can click on the «Check for Updates» button if the client says that the latest version is installed.
Loading
If an update is available, the Download button will appear, which you need to click and wait until Geforce Experience downloads all the necessary files. The download can be paused or stopped using the appropriate buttons located next to the progress bar.
In general settings, you can enable the option to automatically download the driver when a new version is available on NVIDIA servers.
Then you will be prompted to proceed directly to the installation process. nine0003
Where drivers are downloaded
Geforce Experience downloads drivers to a folder at: C:\ProgramData\NVIDIA Corporation\Downloader
This folder is hidden, so to get there, you need to copy this address directly into Windows Explorer.
In folders with a bunch of letters and numbers, there are installation files for video card drivers.
Installation
After the download process is complete, two buttons will appear in the Geforce Experience client: «Express Install» and «Custom Install».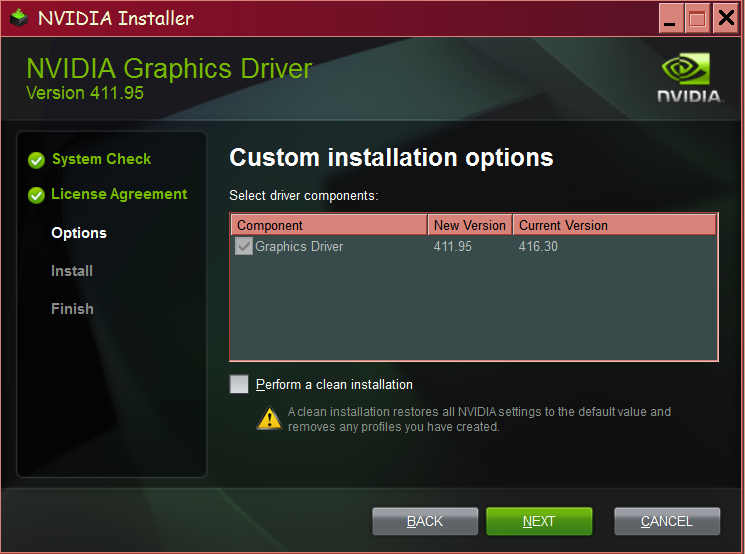 nine0003
- The express option will automatically install and update all required components. In the vast majority of cases, it is recommended to use it.
- Another option will allow you to choose the necessary elements yourself or carry out a clean installation.
After selecting the option, the installation process will begin, it may take quite a long time. A separate window will open with the status of ongoing operations and various promotional materials and news from NVIDIA. nine0003
At the end, if there were no problems, you will see a successful installation message.
Find out what to do if Geforce Experience won’t download or update the driver.
Clean install
Clean install will force Geforce Experience not to update, but to install the latest driver from scratch. That is, first the current version will be completely removed from the system.
To perform a clean installation, you need to select «Custom installation», and after the preparation process, select all components and check the corresponding option below. nine0003
This option is useful if you encounter errors or problems after upgrading or after purchasing a different generation NVIDIA graphics card.
Reinstallation
In rare situations, you may need to reinstall the driver. To do this, go to the «Drivers» tab, click on the icon with three dots opposite the installed version and select the appropriate menu item.
Next, you need to repeat the installation process from the very beginning.
How to roll back NVIDIA 9 driver0008
It is not possible to directly roll back the driver via Geforce Experience to the previous version, the client only deals with installation and updating.
Rollback of drivers is done exclusively by Windows tools in Device Manager.
Instructions:
- Type the word control in the search in the Start menu and click on the result or in the Run line (Win + R).
- In the window that opens, click on «Device Manager».
- In the «Display adapters» section, double-click on your video card with the left mouse button.

