Monster Hunter World — The Witcher quest guide: Trouble in the Ancient Forest and other Witcher event steps explained
Monster Hunter World’s The Witcher quest is something a little different to the game’s other crossover events — such as Final Fantasy XIV’s Behemoth.
Not only does it introduce the Lishen to hunt, but you’ll also be doing some detective work as none other than Geralt of Rivia himself.
On this page:
- How to start the Monster Hunter World The Witcher event quest
- Trouble in the Ancient Forest quest steps explained
- Pukei-Pukei in Peril quest steps explained
- The Chief Issue quest steps explained
- How to beat the Lishen in Monster Hunter World
- Monster Hunter World The Witcher quest rewards
How to start the Monster Hunter World The Witcher event quest
To start this questline, you must be Hunter Rank 16 — the same rank as it is to start Iceborne.
Head to Astera and talk to the Felyne near the Provision area. Head on over to the Research Base and talk to the Lynian Expert, who will alert you to a ‘strange creature’ that followed the Tailrider Safari back to the base.
The creature is revealed to be a Nekker, which the Handler has deduced is from another world. Before you get too far into figuring out where the Nekker came from, though, a portal opens up and spits out Geralt of Rivia.
After a quick debriefing, Geralt will go and investigate the Ancient Forest for traces of the monster he was hunting and how to get back to his world.
Trouble in the Ancient Forest quest steps explained
For this Assignment, you’ll be playing as Geralt, who has a few differences from your normal Hunter. First, Geralt has higher max health than your Hunter, which is helpful as Trouble in the Ancient Forest can only be completed solo.
Also, Geralt has the ability to cast Igni, a fire spell that will be important throughout the Assignment.
Begin by walking up and talking to the Apprentice Smithy. Geralt begins by having a Sword and Shield equipped, but if you’re more familiar with another weapon type you can change your gear here. This is not an easy Assignment, so pick whatever weapon you’re most comfortable with.
Afterwards, you’ll notice two quest markers on your mini-map, one for meeting up with the Chief Botanist and one for the Endemic Life Researcher. You can tackle these in any order, but we’ll start with the Endemic Life Researcher.
Head to the quest marked in Area 3 to talk to the Endemic Life Researcher. Inspect each area of the body to learn more about the Aptonoth and how it was killed. Geralt will deduce that a flock of birds killed it, which is extremely unusual for the Ancient Forest ecosystem.
After the cutscene, head a little ways away from the Aptonoth to find some bird feathers. Follow the feathers and new quest marker to Area 2, where there’s a flock of Revolutures attacking another Aptonoth. They’ll end up turning their attention to you instead, though. Use Igni up close to scare the flock off.
Talk to the Endemic Life Researcher again and exhaust all the dialogue options. The researcher believes the Revolutures are being controlled.
Once you’re done with learning about the Aptonoth and Revoltures with the Endemic Life Researcher, it’s time to head to the other quest marker in Area 11. What you’ll find when you get there is not another Commission member, but instead a discarded journal.
Geralt will use his Witcher Senses in order to find footprints of someone running away. Follow the footprints and quest marker back to Area 2 to find another journal.
Continue onto Area 10 to find some roots that are unnaturally jutting out. Geralt determines it was done by magic.
Follow the roots to Area 8 to find a dead Pukei-Pukei, strangled by the roots. A bit beyond them is the Chief Botanist, thankfully not strangled, but just stuck.
Use Igni to free the Botanist from the roots and get some information from him. Exhaust the dialogue options. Geralt has figured out what monster is wreaking havoc on the forest—A powerful Lishen.
At this point, you can go and hunt the Lishen. However, there are two sidequests you can also do.
Pukei-Pukei in Peril quest steps explained
Before leaving the area with the Chief Botanist, head over to where the dead Pukei-Pukei was tied up in the roots. Check behind the dead Pukei-Pukei to find another one wrapped up in the roots, but still alive. Use Igni to free it.
This Pukei-Pukei will re-appear during the last part of the Lishen part and help you fight the monster. If you manage to keep the Pukei-Pukei alive and kill the Lishen, you’ll get an extra Attack Gem as a reward.
You can use Lifepowders to help the Pukei-Pukei star alive. In addition to your own stock, there are EZ Lifepowders in the Supply Box, so make sure to grab them.
The Chief Issue quest steps explained
Note: You will automatically fail this quest if you haven’t completed all the Grimalkyne quests and gotten the Meowlotov Cocktail.
To start this sidequest, you’ll need to find a Gajalaka doodle. There’s one in Area 11, but the one you’ll probably find naturally is in Area 7, while walking to the Lishen’s relic.
With a doodle collected, a ! will appear in Area 6.
Head up there and talk to the Lynian Researcher. If at this point you haven’t finished the quests for him, the researcher will start he won’t have enough data to decipher the doodle, failing the quest.
If you’ve completed these quests, then head to the Rathalos nest in Area 16. Use the camp in Area 17 to get there easily. Head over to the nest and the Gajalaka will attack. Eventually, the Lynian Researcher will show up and explain to the Gajalaka that you’re not the enemy.
The Gajalaka will explain that their chief is missing, and the only clue to his whereabouts is the message «Supreme Healer, Tree Abyss». Head back to the Southwest Camp in Area 1 and talk to the Handler about this mysterious message, and she’ll mention the Giant Vigorwasp that’s in Area 13, hidden in a tree hollow.
Head there and you’ll find the Chief and two bodyguards. Subdue them until the Lynian Researcher shows up and explains the situation. The Chief is under a curse, but the Vigorwasp won’t be able to help—only killing the Lishen will.
The Chief will agree to help, completing the sidequest. Now, when fighting the Lishen, there’s a higher likelihood of the Gajalaka showing up and assisting with the fight.
With both sidequests completed, it’s time to fight the Lishen.
How to beat the Lishen in Monster Hunter World
Head to Area 12 and follow the quest marker to Lishen’s totem. Take down the Jagras that attack, then burn the totem in order to draw the Lishen out, starting the fight.
The Lishen is a dangerous beast, and for this Assignment, you need to fight him alone. The Lishen has four main tricks up its sleeve. First, it will use Revolutures to shield itself and attack you. Using the Igni sign will thin the bird crowds and stun the Lishen temporarily.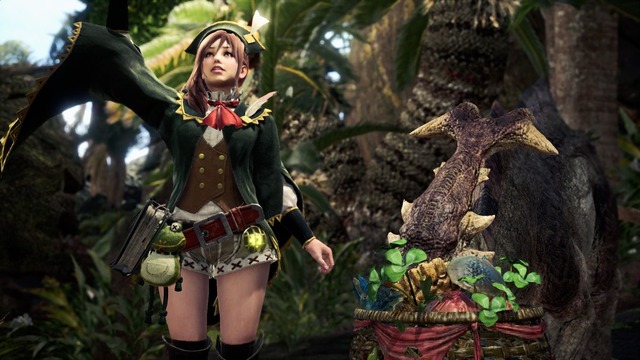
Next, the Lishen has the ability to teleport around. The teleportation ability doesn’t do damage and you can track where he’ll appear via the black mist, but it’s a troublesome tactic if you’re trying to time Igni correctly. Also, Igni, as well as slinger shots, will stun the Lishen when it’s trying to teleport to stop it.
Other than the Revolutures, the Lishen’s main form of attack is shooting up roots from the ground, and is definitely the moveset you’ll want to watch out for!
The roots can appear directly around him, or he can send the roots coursing through the ground towards your location, so it’s important to read its attacks and get out of the way. Thankfully, these attacks have a big tell on what the Lishen is going to do, so after seeing it a few times it’ll become easier to dodge.
When the Lishen starts to get weak, it’ll summon Jagras to the fray to help fight. They’re annoying and get in the way, as Jagras do, but if you can get them all together one Igni use will knock them all down.
Essentially, you need to use Igni at every opportunity to help stun Lishen, and otherwise be careful as you go in for attacks. The Lishen can do a lot of damage in no time, so make sure to keep an eye on your health and retreat back to camp if you need more items.
Iceborne has arrived! Here’s how to start Monster Hunter World Iceborne and beat the first monster, Beotodus. Once you get settled into the world, learn about Layered Armour in Monster Hunter World and the various side-quests available — including Surveyor Set missions, Boaboa quests and finding Pearlspring Macaque locations. And, when you’re ready to take it on, Shara Ishvalda.
If you’re crafting, then learning where to find rare materials such as Purecrystal and Monster Slogbone is useful.
Been away from Monster Hunter for a while and need a refresher? Our pages on weapon changes and types, how to join friends and Squads in multiplayer plus how to capture monsters and mount monsters can help.
Monster Hunter World The Witcher quest rewards
For completing the main Assignment, you can now hunt the Ancient Lishen, a more powerful Lishen, with up to three other Hunters. The materials you gain from the Assignment can be used to create the Witcher’s Silver Sword, a rank 7 Sword and Shield that can be upgraded to rank 8.
You can also create the Geralt Alpha Armor Set, and by finding Mutagen from Ancient Lishen fights, the ability to create Geralt and Ciri Layered Armour.
If you completed both sidequests, you’ll also receive the ‘Wild Hunt’ title to place on your Guild Card.
Contract: Trouble in the Ancient Forest
Contract: Trouble in the Ancient Forest is an Optional Quest in Monster Hunter World (MHW). This Special Assignment Quest was introduced with Patch 6.0 and is a collaboration with The Witcher 3: Wild Hunt.
Attention field team! An anomaly has been discovered in the Ancient Forest.
Help the witcher resolve this issue. In this quest, you will get to play as Geralt of Rivia. — Client: The Commander
Contract: Trouble in the Ancient Forest Information
- Conditions: Complete Investigate the Anomaly at the Research Base
- Failure Conditions: Time expires, Faint 3 times.
- Objectives: Meet up with the Chief Botanist, Meet up with the Endemic Life Researcher.
- Side Quests: Pukei-Pukei in Peril, The Chief Issue
- Special Reward: Hunter Runestone, Attack Boost Decoration (Rescue and keep the Pukei alive for the decoration)
After installing Patch 6.0, talk to the Felynes in the Tradeyard and begin Investigate the Anomaly at the Research Base. Follow the quest until Geralt of Rivia arrives, and accept the opportunity to help Geralt solve the Ancient Forest contract.
You will play as Geralt, and can approach the Smithy Apprentice, which allows you to customize your equipment.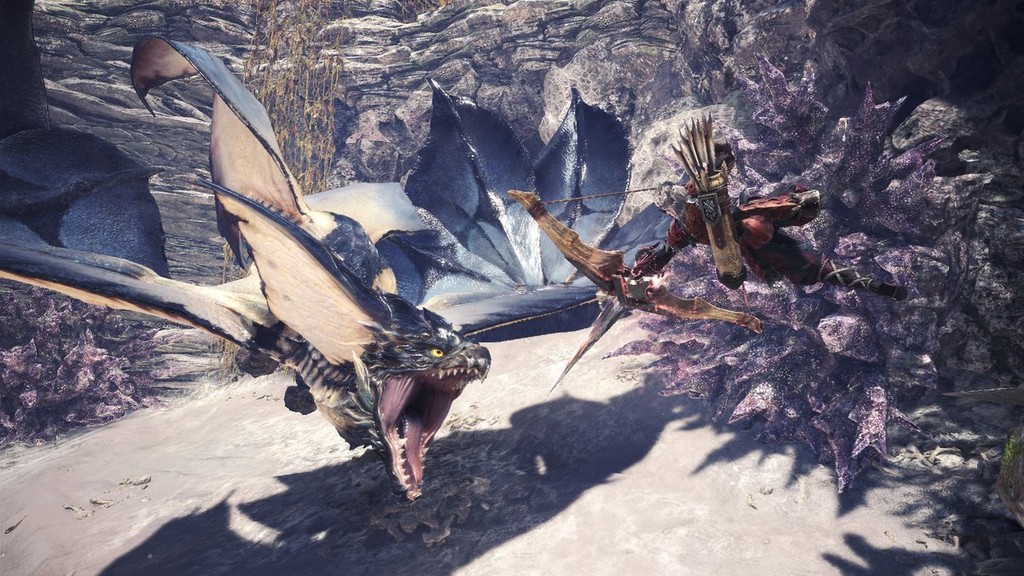 Geralt can use the Igni Fire Sign to deal damage, and can select from the following Rare 6 weapons, or his special Rare 8 Sword and Shield:
- Giant Jawblade II
- Witcher’s Silver Sword+
- Grandrock II
- Lightning Spire III
- Power Smasher II
- Aerial Rod II
- Power Shooter II
- Bone Reaper II
- Strong Hatchets II
- Rookslayer Drum
- Kadachi Striker +
- Mighty Strongarm II
- Sniper Shot II
- Hunter’s Proudbow II
Meet the Endemic Life Researcher
After selecting your weapon, head towards the map markers to find the Commission Members and enjoy Geralt’s commentary about the landscape, flora and fauna. The Endemic Life Researcher is looking at an Aptonoth near Sector 3, and talking to her will trigger the opportunity to examine the carcass.
- Examine the head leads Geralt to conclude the animal is a Herbivore
- Examine the body makes Geralt note the puncture wounds, likely from a large flock of birds attacking the animal
- Examine the limbs leads Geralt to conclude the monster must have been running away from something before collapsing at this location.
 It would seem something waited for the Aptonoth to be separated from its herd.
Walk South-West from the carcass and Geralt will note some red glowing black feathers. Follow that trail to get to the next objective — a large flock of Revoltures that you must dispatch of by using the Igni sign. Another conversation with the Endemic Life Researcher will ensue were you discuss how strange the Revoltures are acting, and the Nekker sighted in the forest previously. Geralt concludes that this is something that wields magic, and sets off to find the other Commission member.
Meet the Chief Botanist
Head North East towards sector 11 and you will find a journal. Witcher Senses hint to a set of red prints of a panic-fueled rush up the nearby tree trunk. Follow the hints as Geralt comments on the progress of the escape and a possible attack and you find yet another journal. The prints now lead into a nearby cave, where you will spot some strange-looking tree roots — surely fueled by powerful magic. Continue following the tracks and you will spot a Pukei-Pukei strangled by the mysterious roots. Not far beyond, you’ll find the Chief Botanist trapped within roots. Geralt can ask what happened only to be told roots suddendly leaped up towards the commission member, who could not outrun them. The Botanist makes a mention of the protagonist’s feats as the Sapphire Star and his faith that he would be rescued.
Geralt will free the Chief Botanist by using the Igni sign and setting the roots on fire. A conversation ensues:
- Ask about liking plants: The Botanist explains that Wyverians, having a larger lifespan than humans, feel that plants are there through the years whereas human companions would die.
- Tell me about the roots: The roots are not common and extremely strange in how fast they grow, which can only be compared to «magic»
- Why were you attacked: The roots attack whatever wanders within range, rather than as a means to feed.
- Pukei-Pukei: Botanist explains they are large Bird Wyverns with colorful feathers and scales.

Rescue a Pukei-Pukei
Optional Side Quest: Pukei-Pukei in Peril
Find and Free the Pukei-Pukei and it will aid you in your final fight with the Leshen! The pukei is alive just west of where you saw the dead one.
Reward from keeping the Pukei-Pukei alive: Attack Jewel 1
Strange Markings from Gajalaka
Geralt concludes that a Leshen must be responsible for the strange happenings. You must find the Leshen’s totem.
Some strange markings trigger a Side Quest: The Chief Issue — go to the Lynian Researcher in the north portion of sector 12 (you must go up a tree trunk and vines). You must have all Palico Gadgets before starting this sub-quest or the sub-quest will be instantly marked as failure, as you require the Lynian Researcher’s ability to interprete Gajalaka’s language. The researcher says they are Gajalaka doodles, which you must have done on your character beforehand. If you have completed befriending the Gajalaka, you will learn that they talk about the «Crisis.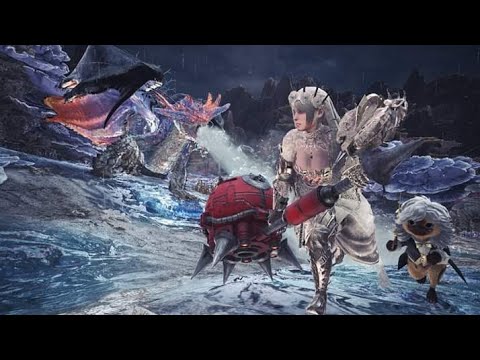 King Tree. Top. Gather». You must go to the top of the Ancient Tree. Go to the Rathalos lair near camp 17 and defeat the Gajalaka to engage them in dialogue. Once the researcher arrives, you find out the Gajalaka are saying you are impressive, and that their gathering was to decide on a chief as their previous chief became possessed and disappeared. They have chosen Geralt as their new leader, and you must accept or decline this honor.
Accepting leads to the Gajalaka sharing the story of what happened to the previous leader. You must now talk to the Handler, who is in the Southwest Camp in Sector 1. Travel there and The Handler will tell you that the Chief is most likely looking for a Giant Vigorwasp. One is found in Area 13 of the map. You will have to face off against the Gajalaka Chief and two Gajalakas. Deafeat them and the Lynian Researcher will appear and translate the conversation where the chief reveals a portal appeared and its mind was affected by some wooden roots. If you succeed in finishing the quest, you will earn Gajalaka Shellshock — Gajalaka helps you out more easily.
Destroy the Leshen’s Totem
To continue the main quest, follow the red markings that will lead you toward sector 12. As you approach the totem, a group of Jagras will attack you. Dispatch them by using your weapon and Igni sign, and then get back to the totem. Geralt will burn it, and Revoltures will swarm, revealing a Leshen.
Defeat the Leshen
This can be a challenging fight because the gear provided is sub-optimal for the setting, and hunters do not have access to their regular arsenal. It is recommended that you pick whatever weapon you are the most familiar with, stock up on Adamant Seeds, Lifepowder and such from the Item Box, and quickslot the Igni Sign.
Do not forget to use the Ancient Potion to maximize your stats, and the Well-Done Steak provided if your stamina goes down from lots of exploring.
Use the Igni sign as often as it’s up to deal considerable damage and a stun to the Leshen, and ensure your combos do not have you finishing in front of the monster when you finish them, as you could be open to attacks. Gajalaka enemies drop poison and paralysis darts that can help as well — or you can look around the forest for other Slinger ammo that you can use for a quick stun.
If you rescued Pukei-Pukei, you will want to use your lifepowder on it when it appears, as it must remain alive for the side-quest to be successful.
Defeating the Leshen will yield a Leshen Skull on carving. Geralt turns down the Zenny payment and says to give it to the protagonist hunter, and hands in a special rune for the hunter to summon flames: the Hunter Runestone. Other rewards include The Witcher 3: Dark Clouds background for Guild Cards, as well as a new pose: The Witcher 3: White Wolf.
New Titles are unlocked: Witcher, Geralt, Ciri, Leshen, Igni, White Wolf
Contract: Trouble in the Ancient Forest Notes
- The quest is not available when you’re with the Serious Handler during the Iceborne story.
Other Monsters in this quest:
- Pukei-Pukei
- Gajalaka
- Aptonoth
- Jagras
| Quests |
|---|
|
50 Shades of White ♦ A Blaze on the Sand ♦ A Bone to Pick ♦ A Bunch of Sticks in the Mud ♦ A Cherry Wind upon the Reefs ♦ A Crown of Mud and Anger ♦ A Face Nightmares Are Made Of ♦ A Fiery Convergence ♦ A Flash in the Pan ♦ A Flash of the Blade ♦ A Glance of Silver ♦ A Hair-Raising Experience ♦ A Humid Headache ♦ A Light Upon the River’s Gloom ♦ A Line in the Sand ♦ A Master’s Toast ♦ A Meow for Help ♦ A Nasty Flesh Wound ♦ A Portent of Disaster ♦ A Queen At Heart ♦ A Roar that Shook the Vale ♦ A Roar that Splinters the Sky ♦ A Scalding Scoop ♦ A Shadowy Offender ♦ A Simple Task ♦ A Sky & Sea of Fire ♦ A Sore Site ♦ A Star That Will Never Dim ♦ A Summons from Below ♦ A Tingling Taste ♦ A Tzitzi for Science ♦ A Visitor From Another World ♦ A Visitor from Eorzea ♦ Across the Lost Path ♦ Analysis Creates Paralysis ♦ Anjanath Antics ♦ Arena Quest 01 ♦ Balloon Fight ♦ Banquet in the Earthen Hall ♦ Bazelgeuse in the Field of Fire ♦ Begone Uragaan ♦ Blast Warning In Effect! ♦ Blue Rathalos Blues ♦ Boaboa Constrictor ♦ Brown Desert, Green Queen ♦ Bugger Off Bugs! ♦ By Our Powers Combined ♦ Camp Crasher ♦ Challenge Quest 2: MR Expert ♦ Chef Quest! A Rotten Request ♦ Chef Quest! Gajalaka Lockdown ♦ Chef Quest! Pumped to Deliver ♦ Clashing Swords Upon The Rime ♦ Code Red ♦ Colorful Carnival ♦ Contract: Woodland Spirit ♦ Desert Desserts ♦ Divine Surge ♦ Dodogama Drama ♦ Don’t be a Jerk with the Jerky ♦ Duet of Rime ♦ Effluvial Opera ♦ Egg Lovers United ♦ Empress in Full Bloom I ♦ Empress in Full Bloom II ♦ Empress in Full Bloom III ♦ Every Hunter’s Dream ♦ Every Hunter’s Dream II ♦ Every Hunter’s Dream III ♦ Everyone’s a Critic ♦ Exterminator of the Waste ♦ Faraway Lorelei ♦ Farewell to the Frozen ♦ Fear No Scars ♦ Feisty Girl Talk ♦ Festival of Explosions! ♦ Firebreak ♦ Fired-Up Bruisers ♦ Flesh Cleaved to Bone ♦ Flora Frostbite ♦ Fool’s Mate ♦ Gettin’ Yolked in the Forest ♦ Gettin’ Yolked in the Waste ♦ Gone in a Flash ♦ Googly-eyed Green Monster ♦ Greeting the Gluttons ♦ Hard to Swallow ♦ He Taketh It With His Eyes ♦ Hellfire’s Stronghold ♦ Here Comes the Deathmaker ♦ Hunter-Blunderer ♦ Hymn of Moon and Sun ♦ I Am Tranquil, I Am Sound ♦ In the Depths of the Forest ♦ In the Heat of the Moment ♦ Into the Frozen Wilds ♦ Into the Palace of Flame ♦ Investigate The Anomaly at the Research Base ♦ It’s a Crying Shamos ♦ It’s the Afterlife for Me ♦ It Can’t See You if You Don’t Move ♦ Keep Your Hands to Yourself! ♦ Keeper of the Otherworld ♦ Kings Know No Fear ♦ Kulve Taroth Siege ♦ Lavasioth, Monster of Magma ♦ Learning the Clutch ♦ Legiana Left Behind ♦ Legiana: Highlands Royalty ♦ Lightning Crashes ♦ Like a Moth to the Flame ♦ Looking For That Glimmer ♦ Loop the Paolumu ♦ Man’s Best Fiend ♦ Mark of the Sun ♦ Master Hunter of the New World ♦ Master of the Gale ♦ Memories of the Sea God ♦ Mired in the Spire ♦ Misfortune in the Forest ♦ Moonlit Howl ♦ Mosswinin’ and Dinin’ ♦ Nargacuga, Should, Woulda ♦ New World Sky, New World Flower ♦ No Laughing Matter ♦ No Remorse, No Surrender ♦ Noblefrost Hunter ♦ Odogaron Unleashed ♦ On Nightmare’s Wings ♦ One Helluva Sinus Infection ♦ One Hot Night in the Spire ♦ Ore-eating Occupier ♦ Pandora’s Arena ♦ Persistent Pests ♦ Piercing Black ♦ Pink Power Grab ♦ Point of No Return ♦ Poison and Paralysis Pinch ♦ Power and Technique ♦ Pretty In Pink ♦ Prickly Predicament ♦ Protip: Stay Hydrated ♦ Proud White Knight ♦ Pukei-Pukei Ambush ♦ Put That Red Cup Away ♦ Rathalos in Blue ♦ Rathalos Rematch ♦ Razzled, Frazzled, and Dazzled ♦ RE: Return of the Bioweapon ♦ Red and Black Aces ♦ Redefining the Power Couple ♦ Relish the Moment ♦ Remember That One Time ♦ Reveal Thyself, Destroyer ♦ Rollin’ With The Uragaan ♦ Royal Audience on the Sand ♦ Royal Relocation ♦ RRRRRumble in the Waste! ♦ Ruler of the Azure Skies ♦ Runnin’, Rollin’, and Weepin’ ♦ Safi’jiiva Siege ♦ Say Cheese! ♦ Scars Tell the Whole Story ♦ Scatternut Shortage ♦ Scratching the Itch ♦ SDF: Silent, Deadly, and Fierce ♦ Secret of the Ooze ♦ Seething with Anger ♦ Servants of the Vale ♦ Showdown: the Muck and the Maul ♦ Simmer and Slice! ♦ Snatch the Snatcher ♦ Soaked and Shivering ♦ Sorry You’re Not Invited ♦ Special Arena: Anjanath ♦ Special Arena: Barroth ♦ Special Arena: Diablos ♦ Special Arena: HR Anjanath ♦ Special Arena: HR Azure Rathalos ♦ Special Arena: HR Barroth ♦ Special Arena: HR Black Diablos ♦ Special Arena: HR Legiana ♦ Special Arena: HR Paolumu ♦ Special Arena: HR Pink Rathian ♦ Special Arena: HR Pukei-Pukei ♦ Special Arena: HR Radobaan ♦ Special Arena: HR Rathalos ♦ Special Arena: HR Rathian ♦ Special Arena: HR Tobi-Kadachi ♦ Special Arena: HR Uragaan ♦ Special Arena: Legiana ♦ Special Arena: MR Acidic Glavenus ♦ Special Arena: MR Azure Rathalos ♦ Special Arena: MR Barioth ♦ Special Arena: MR Barroth ♦ Special Arena: MR Black Diablos ♦ Special Arena: MR Brachydios ♦ Special Arena: MR Brute Tigrex ♦ Special Arena: MR Coral Pukei-Pukei ♦ Special Arena: MR Diablos ♦ Special Arena: MR Ebony Odogaron ♦ Special Arena: MR Fulgur Anjanath ♦ Special Arena: MR Glavenus ♦ Special Arena: MR Gold Rathian ♦ Special Arena: MR Legiana ♦ Special Arena: MR Nargacuga ♦ Special Arena: MR Nightshade Paolumu ♦ Special Arena: MR Odogaron ♦ Special Arena: MR Paolumu ♦ Special Arena: MR Pink Rathian ♦ Special Arena: MR Pukei-Pukei ♦ Special Arena: MR Radobaan ♦ Special Arena: MR Rathalos ♦ Special Arena: MR Rathian ♦ Special Arena: MR Silver Rathalos ♦ Special Arena: MR Stygian Zinogre ♦ Special Arena: MR Tigrex ♦ Special Arena: MR Uragaan ♦ Special Arena: MR Viper Tobi-Kadachi ♦ Special Arena: MR Yian Garuga ♦ Special Arena: MR Zinogre ♦ Special Arena: Odogaron ♦ Special Arena: Paolumu ♦ Special Arena: Pukei-Pukei ♦ Special Arena: Radobaan ♦ Special Arena: Rathalos ♦ Special Arena: Rathian ♦ Special Arena: Tobi-Kadachi ♦ Sterling Pride ♦ Stick Your Nose Somewhere Else ♦ Stirrings from the Grave ♦ Stuck in a Rut ♦ Stuck in Their Ways ♦ Swoop to a New Low ♦ Talk About a Party Foul ♦ Talons of Ire and Ice ♦ The Awakened Satsui No Hado I ♦ The Awakened Satsui No Hado II ♦ The Awakened Satsui No Hado III ♦ The Black Wind ♦ The Blazing Sun ♦ The Current Situation ♦ The Desert Dash ♦ The Distant Dark Tide ♦ The Eater of Elders ♦ The Eternal Gold Rush ♦ The Fires of Hell Bite Deep ♦ The Food Chain Dominator ♦ The Fury of El Dorado ♦ The Great Glutton ♦ The Greatest Jagras ♦ The Harbinger of Clear Skies ♦ The Heart of the Nora ♦ The Legendary Beast ♦ The Meat of the Matter ♦ The Moon is a Harsh Queen ♦ The Name’s Lavasioth! ♦ The Pain from Gains ♦ The Piscine Problem ♦ The Plight of Paolumu ♦ The Purr-fect Room: Dark Iron ♦ The Purr-fect Room: Light Iron ♦ The Purr-fect Room: Silver ♦ The Purr-fect Room: Stone ♦ The Red and Blue Crew ♦ The Red Dragon ♦ The Sapphire Star’s Guidance ♦ The Scorn of the Sun ♦ The Secret to a Good Slice ♦ The Sleeping Sylvan Queen ♦ The Storm Brings the Unexpected ♦ The True Tyrant ♦ The Winds of Wrath Bite Deep ♦ The Winter Blues ♦ These Azure Eyes See All ♦ This Corroded Blade ♦ This Here’s Big Horn Country! ♦ Timberland Troublemakers ♦ Today’s Special Hunter Flambe ♦ Today’s Special: Hunter Flambé ♦ Tracking the Delivery ♦ Treasure in the Steam ♦ Trespassing Troublemaker ♦ Troubled Troupers ♦ Tundra Troublemaker ♦ Two-horned Hostility ♦ Undying Alpenglow ♦ Up to Your Waist in the Waste ♦ USJ Blazing Azure Stars! ♦ We Run This Town ♦ We Three Kings ♦ Wearer of the Iceborne Crown ♦ Well, That Diablos! ♦ What a Bunch of Abalone ♦ When Blue Dust Surpasses Red Lust ♦ When Desire Becomes an Obsession ♦ White Monster for a White Coat ♦ Wings of the Wind ♦ You Scratch Our Backs. |
 ..
..
Monster Hunter / Keyboard Knights
I decided that I needed to somehow dilute the almost continuous series of digests from inpwbusina, so I’ll tell you about my experience playing The Witcher: Monster Hunter. The game is a kind of analogue of Pokemon GO in the world of the witcher. The creation and development of the game lies on the shoulders of some Spokko, a Polish developer company established in 2018 and part of CD Projekt. In my opinion, Spokko is doing its job quite well, although this is only the beginning of their journey.
Out on the highway
After completing a short tutorial and defeating your first monster, the largest and most detailed open world is at your service. Of course, you can limit it to your apartment, but no one bothers to go to fulfill orders for monsters in a neighboring village. The first impressions of the monsters scattered around are twofold. On the one hand, fighting monsters in AR is very interesting. On the other hand, I soon turned off AR. Well, yes, it’s great that a nuckster is sitting on a yard bench, and not a local bastard, but, firstly, in this case, you have to hold the phone in a certain position so that the monster gets into the frame. Secondly, you have to stand still, and I don’t really like that. But do not worry, the game offers quite nice 3D backdrops, which, for my taste, are better immersed in the atmosphere of the Witcher world.
In addition to the usual monsters, there are old crooked trees scattered on the maps, where monsters of a certain class are constantly gathering in the amount of three creatures. These are the so-called non-metons, and, unfortunately, I missed the quest associated with them. Speaking of quests, most are also marked on the map, but some can be obtained completely unexpectedly. There is also a blacksmith on the map who will gladly sharpen your sword, giving you a damage boost for an hour. A trifle, but nice.
Kill them all
Although there are not so many varieties of monsters, the district is literally teeming with them. I don’t even have to leave the house, because there are always 3-4 monsters around. Monsters don’t need to be hunted down, they’re just there. Get close, make sure the creature is in your interaction circle and can be killed. In my opinion, this approach, together with the number of monsters around, does not work for the benefit of the game and harms the atmosphere. Moreover, the monsters appear to be in completely random places. Yes, you will hardly meet a drowner far from the reservoir (although these bastards crawl out everywhere during the rain), but there are few such examples. Take a walk around — nakers, ghouls, graveyard women, succubi, draconians of various stripes — there are so many of these that you are amazed. Although the balance is clearly being corrected, in the beta, for example, there were more various insectoids around me, and now you can’t find them during the day with fire. But still, the habitats of monsters are not as good as we would like, and their availability is discouraging and slightly boring.
It’s hard to say that the monsters shine with variety. If you encounter a draconian, there is a high chance that any other draconian will perform the same attacks. Rare differences in enemy behavior patterns are surprising and delightful, but do you see the word “rarely” at the beginning of a sentence? There are a lot of reskins. Take the same nakers — only I killed 4 varieties of them with exactly the same attacks. And then there are the fairies who use the same set of moves.
There are 128 monsters in the game, according to the bestiary. Every time you meet a new monster, its entry appears in the bestiary. As soon as you kill the creature, you will have his head as a trophy, after which you can look at the model of the defeated monster in AR. By killing the same monster several times in a row, you get skill points. For example, ordinary creatures need to be killed three times to get the first skill point, but for the second — to make another 50 kills, for the third, the bar costs 150, and I’m not eager to conquer it. With rare and legendary monsters, the requirements are less, but they are also more difficult to find.
So what do witchers do?
I don’t know why people play pokemon, but I started playing witcher mostly because of the universe and the hope of good quests. In general, my expectations were justified. Killing monsters, you will not be spiritually full, because every masturbation is worth diluting with something. This is where quests come into play. I’m not talking about small daily orders in which you have to kill a certain creature or craft a few oils, no, there are full-fledged tasks, accompanied by small dialogues, as well as cute comics. Surprisingly, not all tasks are to kill this or that monster, some may surprise you. And of course, there is also a moral choice. Quests can be missed — so, I did not come to a meeting with one NPC at the specified time, because the quest ended without any denouement, which is a pity.
Quests can be rewarded not only with minted coins, but also armor, swords, even witcher elixirs.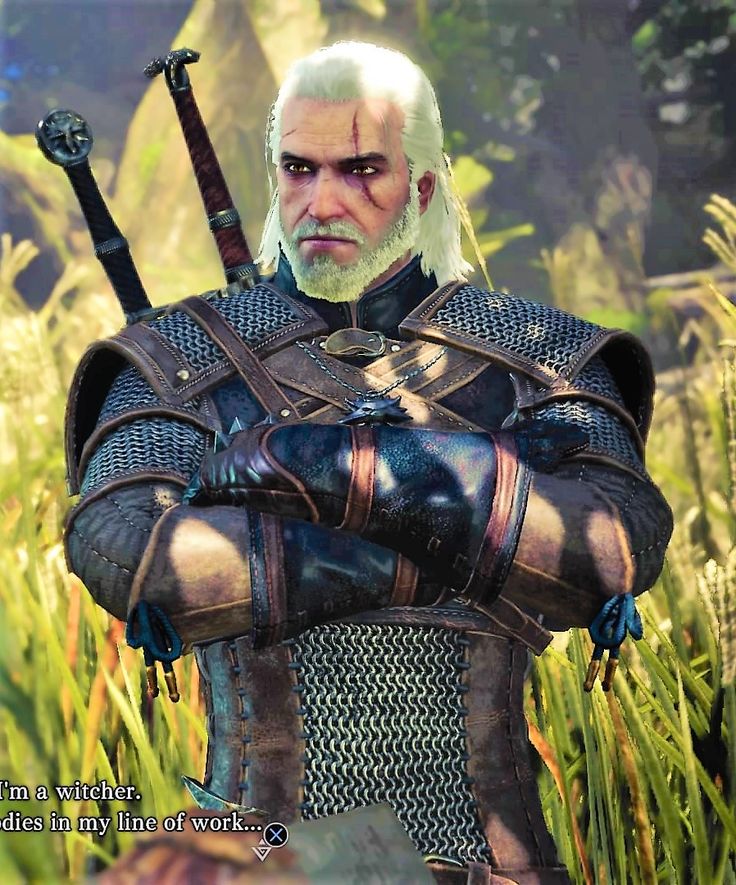 Sometimes you just get experience, but often in such cases there is some kind of continuation of the quest chain. To complete some tasks, you will have to leave the house at dawn, or wander around local garages closer to midnight. It adds interest, but at such moments I feel like a not quite reasonable person.
But how many quests are there? I would like to answer yes to this question, but I’m not sure. There are only two unfinished quests in the diary, and the map is empty. Obviously, the game is unlikely to have any kind of end, so you just have to wait until the developers introduce a few more tasks, but until then you have to go through the rest and set your own goals. For example, I want to save up for the griffin armor, which costs 6400 gold coins here.
Poor Witchers
When we go out onto the highway, we are, to put it mildly, not quite ready to kill the frost giants. We have behind us only a steel sword made of meteoric iron, and there is no need to talk about any armor at all. Fortunately, for all those who like to overspend, there is an in-game store. For some 450 wooden ones, you can buy a whole set of witcher junk, and even a silver sword will be there. But why?
First of all, it is worth noting that any monster is easy to kill with a steel sword, especially monsters without shards, i.e. first level. Yes, silver deals 20% more damage, but you have the ability to apply oil, which increases damage by 100%! Not to mention the diverse potions and bombs. Creating such power-ups is quite simple — fill up a couple of small monsters, go get herbs and roots, wait a bit — everything is ready, you can use it. Does this mean that silver swords are not needed in principle? Of course not. But it’s worth considering that in a week you can accumulate about 1000 gold just by completing daily tasks and clearing nemetons, not to mention completing tasks. Buying a sword for 1600 is not difficult, and even a blade for 3200 does not seem such an unattainable goal.
Yes, the gold you earn has something to spend besides weapons and armor. For example, on the same bags. Alchemy stations are also a good investment, allowing you to craft more and more often. Scrolls can also come in handy — maybe sometimes you need to farm more monsters, or expand your active zone. But this still does not mean that anal donation is in the game and you cannot live here without it. This topic really hurt me, because I saw statements on the net that the game forces you to buy a starter pack for 450 gold. Nothing like that, success in the witcher’s business can be achieved simply by doing your witcher’s work.
Speaking of more expensive armor and swords, they won’t make a terminator out of you. Yes, they have special perks that allow you to, for example, deal critical hits more often or take less damage, enhance potions or signs, but the bonuses are not so great that they relax the rolls.
Upgrading your witcher
As mentioned above, your witcher earns skill points for killing monsters, but I would call it more of an additional source. The main thing is still leveling up. The experience for killing monsters depends on the rarity of the creature and how you deal with it. Bonus experience is awarded for landing a perfect critical hit, a perfect parry, a quick kill, and applying the right oil. In addition, you can get a little bit from equipment.
As soon as your witcher earns enough experience, he levels up, you are given five skill points, as well as some amount of witcher equipment. Sometimes it’s useful, sometimes not. So, I already have about 30 Thunder potions and a bunch of regular bombs that I haven’t been spending lately.
Skill points go towards leveling up skills. In total, there are three branches of improving your witcher — combat, alchemy and signs. Unfortunately, the branches did not seem to me equivalent. Signs take too long to cool down and don’t do the most damage, and alchemy is heavily crafted. Combat is the most developed and most effective skill branch, which is somewhat sad. When you fight a monster, it is your hits that will deal 90% damage. Of course, this did not stop me from leveling the branch of signs — I bought both Aard and Quen, but I didn’t see the point in pumping them deeper. After all, there is a skill in the signs branch that allows you to increase the critical strike scale when casting, i.e. it will be useful precisely when striking, i.e. we again return to the Battle branch. But even here, not all skills seem so useful. An increase in punching power by 2-10% is perceived as something negligible. But the ability to reflect damage at the enemy with a perfect parry is just a must-have. In general, without a perfect parry, you will not live long in this game.
Wait, how do you fight?
Yes, I decided to save the fight for last. Once you have found the right monster, you are invited to prepare for battle and learn about the weaknesses of the enemy. You can choose which potion you drink, which oil you put on the blade and which bomb you try to damage the enemy. The choice of sword is also quite important, although not critical. In the beginning, if you want to defeat someone really strong, you should pay attention to the selection of equipment.
During combat, a small bar appears above the monster, which fills up if you make attacks of a type that the monster is vulnerable to. For example, a normal ghoul is vulnerable to fast attacks, but an alghoul is vulnerable to powerful ones. When this gauge is full, time slows down and you need to tap on the screen in time to land the perfect critical hit. Even if you miss a little — it doesn’t matter, a slightly increased damage will still be dealt. But here’s the perfect critical strike not only deals more, but also interrupts the monster’s attack.
Speaking of monster attacks, a small red icon and a sound notification appear above the crit bar in front of them. At these moments, you should carefully monitor the monster in order to block. If placed on time, it will be the perfect parry that will block a significant amount of damage.
Signs, although they won’t allow you to overwhelm the monster with only them, still inflict good damage and interrupt the enemy’s attack. If the monster is vulnerable to any type of energy, then this damage will be comparable to the damage of a perfect crit. By clicking on the cast icon, you will have to repeat the sign symbol on the screen. In the case of Igni, such drawings work perfectly, you just need to make the letter V, but with Aard and Quen, in the heat of battle, difficulties may arise.
Bombs work very simply — press the button and it will fly into the creature. It should be remembered that the flight time of the bomb is not the fastest, so if you want to interrupt the enemy attack with a bomb, you should take this into account. Again, the damage of the bombs is highly dependent on the monster’s vulnerabilities, and some are simply necessary to be able to kill the monster in principle. So, elementals and golems can’t even be attacked without dimerite bombs.
Of course, the game still has some nuances that I haven’t told about, but, perhaps, I shared the main ones. I will only add a small remark about the technical condition of the product. On iOS, I see crashes and freezes, especially when unlocking the screen and resuming the game. I don’t even know whether to blame the developers or the system.
However, things are not so critical. There is a lot to do in the game, and only a month has passed since the official launch. I am sure that the guys from Spokko will have something to please their users in the future. In the meantime, I can only walk through the doorways in the dark, in pursuit of the coveted trophy.
Monster Hunter • Holographic
We had sci-fi Ingress, we had a Harry Potter fairy tale, we had Pokémon. It’s time for Slavic mythology. Still, running into Yaga in the park, hung with skulls, is no less fun than Bulbasaur. Thanks to CD Project affiliate Spokko and Google Maps.
The game entices with augmented reality and a fresh, popular universe, but allows you to get by with traditional 3D while remaining comfortable in any situation. It gives an excuse to spend time outdoors and explore the surroundings. And I liked it. Therefore, after playing for a couple of weeks, I decided to share my experience with those who are still considering whether to download The Witcher on a smartphone.
I’m sure that these are not all interesting places in The Witcher: Monster Hunter. But you can add them in the comments.
Deprive the game of accurate geolocation, and it will redirect you to another place on the map. In one city, the place is always the same, but you get the opportunity to catch monsters and collect herbs in two locations at once, without getting up from the couch. When it’s raining outside, or it’s been a long day at work and tasks haven’t been completed, this is a great way out.
The battle in the game is much easier to win if you accurately perform super attacks and blocks. As for the blocks, not everyone notices a red skull above the monster’s life line, which indicates the intention to strike. At this time, block by holding your finger on the screen. By the way, with an understanding of the principles, the battle becomes more interesting, and it is easier for you to kill monsters with skulls. Even without special oils under the class.
The game can really be played without donation. If someone says otherwise, he just doesn’t know how to play. Deal with quests, purify nemethons, do not forget about daily tasks and create potions, oils and bombs, and you will have no problems with experience and money. I didn’t invest a dime, and I didn’t have much time to play, but at level 17 there is an opportunity to buy a sword, considering that nemethons are only available from level ten. There is no need to buy alchemy goods — they can be made and received through levels and from friends.
The number of quests increases as you progress. At first there are very few of them, and it already begins to seem that the game is a dull set of fights, stripping bushes and alchemy. But after level 10 it becomes more interesting.
Daily tasks can be replaced once a day. If you have not completed the task, it does not burn out, the next day you have two tasks. Completing seven quests sometimes yields a very useful treasure. If you come across a task for passing a certain distance, the minimized game may glitch and not count the distance, so it’s better to expand it and go with a smartphone in your hand.
You can reschedule quests if they are too far to get to. When you move away from a quest, you are prompted to reschedule it. You can also do this manually by going to each individual quest in the diary. Here is the switching of the active task on the map.
Don’t be afraid to skip daily quests. They stay for the next days, they will still give gold. You’ll just slow down your progress and delay your weekly quest rewards.
Monsters really appear depending on the location, weather, time of day, and even the phase of the moon.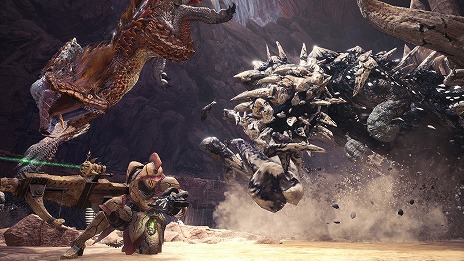 For example, drowners appear near the water and in the rain, you can catch noon only at noon (there will be such a task), and you have to wait until the full moon. Therefore, pay attention to when you hunt — this will help you find the right monsters.
Add more friends. From everyone you can receive useful packages to accumulate resources without leaving your home. And you can also dispose of your parcels — there is nothing more to do with them anyway.
Find offline friends. Online friends are better than nothing, but walking together, chatting about everything and seeing new places in the city is priceless. If you agree on the interests of the game, walking together can become a common thing.
Turn on the Witcher in taxis and public transport. Along the way, you are sure to stumble upon a rare monster, a nemeton, or a quest that you would otherwise have to walk to. If you have time to click on a monster or object before it leaves your line of sight, it will not go anywhere.
