20 Tricks From The Game Players Have No Idea About
After so many years of updates and evolution, Minecraft has come really far from its humble beginnings. It started out as a passion project and has turned into one of the biggest gaming franchises in existence. One of the defining games of this modern generation. Such a grand feat means you’re going to have new people constantly joining in on the fun. With how complex Minecraft has become, newcomers may need a little guidance to figure out some of the intricate details of the game.
RELATED: Things Beginners Should Do First When Starting Minecraft
Fans have spent hours exploring the many secrets and hidden details within Minecraft. There are hundreds of these tricks stored away within the game. With new mobs and items added every update, there will often be a whole bunch of new secrets to uncover. The game is so expansive and is limited only by the creativity of the player. You should definitely take the time to explore the world of Minecraft and see how many new things you can find on your own. However, if you want a head start, we’ve rounded up the very best tips here.
Updated on May 30, 2022, by Gabrielle Huston: As we mentioned, Minecraft is updated often with brand new content, so we can’t become complacent! Some tips have been updated out, some tips have been disproved, some tips are still just as valuable as ever. We’ve updated this list to keep it fresh for you!
20 Placing Torches On Crafting Tables
This is more for the looks than for any practical reason. But you can actually place a torch on top of a crafting table or furnace. Why you would do this isn’t important. It’s about the fact that you can.
To do this, put a «transparent block» behind the crafting table. This can be something like a block of glass. Now, while facing the crafting table, try to reach out and put a torch on the glass. You should now have a torch on top of the table.
19 Lava Buckets Are Great Fuel
If you find lava anywhere, be sure to keep it marked. As soon as you get some buckets, go and collect as much lava as possible. Lava is an excellent fuel to use in the furnace. It lasts a long time so you can smelt as much as you want.
Lava is also one of the ingredients in creating obsidian, a rare block. With a bonus use like that, there’s no reason not to carry lava. Get as many buckets of this as possible and become an efficient adventurer.
18 The Best Diamond Level
Prior to Minecraft 1.17, Diamonds were most likely to spawn at Y-levels 5 through 12. Going any further down than that wouldn’t increase the likelihood of you finding diamonds, and in fact would increase your likelihood of encountering lava.
RELATED: The Best Games For LAN Parties
As of Minecraft 1.18, the game has been updated to change the way that Diamonds spawn. Now, you’ll find diamonds at Y-levels 15 through -63. Y-level -64 is basically just bedrock. Rather than only appearing most often in certain Y-levels, diamonds just get more and more likely the further down you are. So start digging!
17 Use Torches To Farm Sand/Gravel Blocks
Torches are probably some of the most versatile items in all of Minecraft. They do the obvious things like lighting up dark areas and keeping monsters away. However, they have some other useful abilities.
As you may know, Sand and Gravel blocks are affected by gravity. So, if you remove the block underneath, they will fall. At that moment before the block falls, you can place a torch. This will cause all of the blocks to be broken allowing you to collect them. As a fun bonus tip, you could also place a torch beneath you when digging upwards to prevent Gravel or Sand from falling and killing you!
16 Zombie-Proof Your Door
Zombies can break down your door and invade your precious house. Thankfully, there are some ways of preventing the zombies from ruining your day and destroying your property.
One option is to have a door set up one block higher. That way the zombies cannot reach it. Your other choice is to use a fence instead. They can’t break the fences down and it also allows you to fight back without any risk.
15 Mushroom Biomes Are Safe
The Mushroom Biome is the only biome where hostile mobs do not spawn at night. This makes it the safest place in Minecraft and the best place to build a home. There are also no mobs in the cave systems, allowing for safer mining.
RELATED: Minecraft: Things You Didn’t Know About Creepers
However, be aware that mob spawners will still work. So, if you do see any zombies or spiders, then you know there’s a spawner nearby. Overall, the Mushroom Biome is a good place for a base.
14 Pumpkin Head
Wearing a pumpkin is more about just making you look awesome. Yet, it has other benefits which can help you fight a powerful foe. If you wear a Pumpkin, then Endermen will not attack you. Even if you attack them.
Endermen only attack those who make eye contact with them. However, the Pumpkin technically prevents you from making eye contact. So, they stick to their mantra and refuse to fight back. Such honorable foes.
13 Get Some Bodyguards
It’s a good idea to get some extra help to protect your house. There are two options:
-
An Iron Golem.
You summon it by making a little T with iron blocks and then adding a carved pumpkin or a jack o’ lantern on top (the pumpkin must be last). They are very powerful and also quite durable. -
A Snow Golem.
Stack two snow blocks and put a pumpkin on top to summon it. However,
it needs to be in a suitable biome (like the snow), or it will melt.
12 Become A Cat Person
Cats are a cool addition to Minecraft and make for nice pets. However, it’s more than just having a cat as a pet. They also serve an important function. Creepers are very scared of cats.
RELATED: Minecraft: Must-Have Potions
If you have enough cats around your house, then Creepers will avoid you at all costs. It’s the best way to ensure that you won’t run into any explosive surprises when doing some farming.
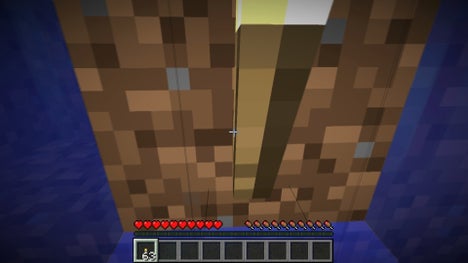
Once again, torches have come to the rescue. Whenever you go on a trip underwater, be sure to take a bunch of torches with you. They can help you breathe underwater for a longer period of time. By placing a torch on a block, it creates an air bubble for a short time. You have to place it on a vertical surface that’s right next to your head for this to work, but it’s enough to ensure that you can get some extra breath in an emergency.
This hack works with any item that comes with air around it according to the game, which includes not only torches but also easy-to-make items like ladders, signs, fences, and doors!
10 Another Way To Fight A Blaze
The Blaze is a powerful mob in the Nether.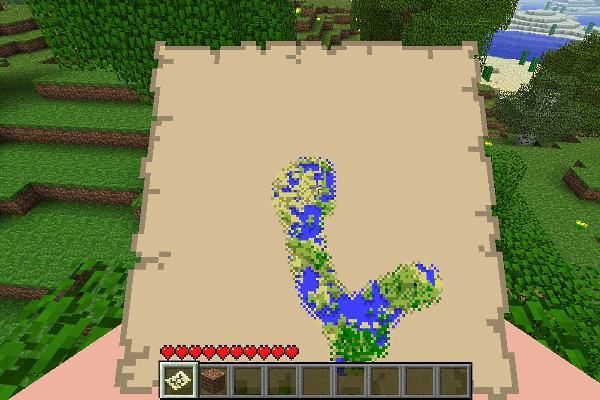 They can be a tough enemy to beat through conventional methods. Their fire blasts can also knock you into the lava, eliminating you instantly.
The Blaze mob is weak to snowballs. So you should take as many of them as possible. Using snowballs from afar is a safer way to defeat the Blaze. It’s not the most efficient, but it will ensure your safety.
9 The Infinite Water Source
This is the ideal construction to have near a farm. You won’t have to carry a lot of water buckets or build near a water source to make this work. It’s also extremely simple to build and you don’t need anything special, just two buckets of water to start.
RELATED: The Best Survival Games On Xbox Game Pass
- Make a 2-by-2 square in the ground. It should be one block deep.
- Pour one bucket in the top left corner of the square and let the water spill.
- Finally, pour the other bucket in the bottom right corner.
- You have your infinite water source!
8 Carry A Bucket Of Water At All Times
Water buckets can save your life in many situations, especially in mining. You can use it to counter random bursts of lava. You could also use it to climb down steep inclines and get to lower ground.
You could even use the water to help you get away from some monsters. Use it to create some distance between you and the mobs. Just remember to make sure that you have a few extra buckets of water when going into the mines.
7 Charcoal Can Replace Coal
When you start your new adventure, you may not immediately find some coal. Thankfully, there is an alternative, since coal is a vital resource. That alternative is charcoal. And it’s made from wood.
You can use wood as a fire source in the furnace. By smelting some more wood, you can make charcoal. This has the same properties as coal and acts as a great replacement early in the game. That way you can focus on building a house before going into the mines.
6 Don’t Destroy Mob Spawners
Enemy spawners can be extremely frustrating. They keep spawning enemies into the vicinity until you get tired or are defeated. Unless of course, you are able to destroy them. However, there is another option.
RELATED: Minecraft: Things To Know Before Playing One Block Skyblock
Just place torches all around the spawner. Most players put one on each vertical side and on the top of the spanwer, but it also works if you place them around the room, since it’s about the fact that there’s a light source present.
This is a better idea than destroying it. Torches will prevent enemies from spawning. Also, if you need to farm a certain type of enemy, you can just remove the torches to let them spawn.
5 Don’t Take Beds To The Nether
Beds are useful in the regular dimension. They create a checkpoint in case you perish during your adventure. It’s a staple of every house and everyone will want to have one. Except if you’re in the Nether.
Sleeping in the Nether causes you to explode. Probably not a good idea if you’re looking to get stuff done in the Nether. Just remember this one little detail before you set out to fight Blazes and Zombie Pigmen.
4 Walking On The Edge
Crouching is a useful way to expand your movement options. By crouching, you can actually walk a little bit off the edge of a block, and you can’t fall. This is ideal when you’re building a bridge-like structure.
Be careful you don’t let go of the crouch button. If you do, then your character will fall. It’s especially dangerous to try and use this trick while you’re high in the air, but you take your life in your own hands.
3 Milking A Mooshroom
Mooshrooms are a special type of cow that are exclusive to the Mushroom Biome. They are similar to regular cows and you can even milk them… except you won’t get what you expected. Instead of milk, you get mushroom stew.
RELATED: The Best Sandbox RPGs To Escape Reality, Ranked
This is actually very useful as the stew can restore some of your hunger bar.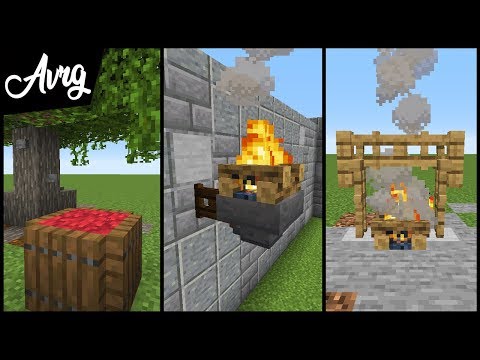 If you find yourself in a Mushroom Biome, then you should definitely gather as many Mooshrooms as possible.
2 Personalize Dog Collars
It’s a good idea to tame a group (read: army) of dogs to hunt with. They are great in combat and can help turn the tide in your favor. However, you may want to give them all different names and differentiate them further.
You can easily do that by changing the color of their collar. Simply get a dye for the color you want and right click on the dog. That’s it. You now have a customized dog collar in Minecraft.
1 Curing Zombie Villagers
Zombie Villagers are a more recent addition to Minecraft. Essentially, the villagers get hit with a disease that turns them into zombies. However, you can cure them and activate their trading post.
First, you have to inflict the Weakness status on the Zombie, which you can do with a potion. After that, you give it a Golden Apple. After around 2-5 minutes of waiting, the Zombie Villager should now be cured.
NEXT: Quick Tips To Improve Your Minecraft Builds
12 Minecraft Tips and Tricks to Help You Conquer the Game World
For such an overwhelmingly popular game, Minecraft is nothing if not enigmatic. It’s not at all intuitive that you should walk up to a tree and slap it down, yet this is how essentially every Minecraft journey begins. Over the years, developer Mojang has added countless new features, some more inscrutable than others. If you’re here, though, you’re in a judgment-free zone. Everyone must start somewhere, after all. Here are a dozen useful tips that will help you begin your Minecraft adventure.
Play These Recommended Minecraft Games
1. How to Download Minecraft
Minecraft is far and away the best-selling game ever made. Although it has been available for slightly more than a decade, it’s managed nearly a quarter of a billion copies in sales. That’s a comfortable 70 million more units than Grand Theft Auto V, and more than twice as the next-highest game, Tetris.
That said, Minecraft’s gone through quite a few changes in that time, not least of which is how to download and play the game. There are two flavors: the Bedrock Edition and the Java Edition. The names refer to the type of codebase each game uses. Java is the original, but Java inherently runs slower than other code types, such as the C++ used in Bedrock. The ability to run faster opens compatibility with older systems or low-power phones. They are fundamentally incompatible for the most part, so Bedrock servers can’t have Java players, for instance.
That compatibility is felt most in multiplayer, where Java players have far more customization options for their servers. That said, Bedrock is notably more approachable for people who don’t want to fiddle with the details; a reincarnation of the classic tension between accessibility and granularity of control. There are a few other distinctions that are far-reaching, but comparatively minor. For example, Redstone—Minecraft’s in-game electrical circuitry that’s often used to recreate computers—is notably less flexible within Bedrock.
Most people should fire up their system’s store to download Minecraft; it’s available for Nintendo Switch, PlayStation 5, PlayStation 4, Xbox Series X/S, Xbox One, Android, iOS, and Windows 11/10.
For everyone else (including people using a Linux-based PC, macOS, or older versions of Windows), click here for download support(Opens in a new window). You can also check to see if your device can run it if you’re using something funky like an Amazon Fire, Raspberry Pi, or Oculus.
2. How to Mine and Craft
(Credit: Xbox Game Studios)
Minecraft’s namesakes are at once obtuse and elegantly simple. You must mine before you can craft, though the game’s interpretations are absurd at times. Thankfully, all current Minecraft versions include a list of recipes your character “knows” on the crafting screen, and it automatically expands as you collect relevant materials.
Beginning the game with no gear, you must punch the ground or a tree to start your journey. Once the object breaks, you’ve got your first bit of materials. Trees take longer to bust than dirt or sand, but they should be your first target. Here’s how to get started.
-
Find a tree and slap it down.
-
Open your inventory. You’ll see a Crafting section with a 2×2 square of inventory slots.
-
Place the log in any slot, and it transforms into four planks.
-
You can create a much-needed crafting table by placing a plank in each slot.
-
If you gather a bit more wood, you can whittle planks into sticks that you can use to make your first tools.
3. How to Get Honeycomb in Minecraft
Honeycomb is relatively easy to obtain in Minecraft, which is good. After all, it’s used for many things, including making sugar that goes into potions. You can harvest it from beehives using shears once the beehive is full (you’ll notice that the beehive is full when it oozes honey). Shearing yields three honeycombs, but also angers the bees, putting you at serious risk. However, you can make a simple, safe honey/honeycomb farm by taking the following steps.
-
Collect three honeycombs, and arrange them in the center of your crafting table with six planks—a row above and one below—to make a beehive.
-
Plant flowers of any kind nearby.
-
Place the beehive wherever you want, but keep in mind that you’ll probably want at least two blocks of space below it.
-
Dig down 1-2 blocks and build a campfire. This will smoke the bees, preventing hostility.
-
However, the fire will harm the bees if the insects get too close. In the Minecraft Java Edition, you can carpet over the fire or use a trapdoor, blocking the flames but not the smoke. In the Minecraft Bedrock Edition, you can build a fence around the fire.
-
Shear when ready, or use a bottle to gather honey.
4.
 How to Make a Map in Minecraft
Maps are an essential companion for any adventurer. You simply need between eight or nine paper pieces, one redstone, and four iron ingots.
-
Depending upon the version, you can either place eight paper around a compass or fill the crafting table with nine paper to make a map.
-
If you don’t have a compass, place the redstone in the center of the crafting table with iron on its left, right, top, and bottom sides to create one.
5. How to Make a Saddle in Minecraft
(Credit: Xbox Game Studios)
Saddles are important if you want to ride a horse and move around the world a bit faster. Unfortunately, they are one of the few items you cannot make in Minecraft; you must find them. Here’s how to do so.
-
Saddles are most accessible through common dungeons. Simply wander the overworld, digging here and there until you find a dungeon. Once there, explore the dungeon until you find a chest.
 Odds are about 1:4 for finding a saddle, so it shouldn’t take long.
 -
You can also find saddles in Nether fortresses, blacksmith chests, and even through fishing.
6. How to Make Potions in Minecraft
Brewing potions is a crafting sub-type that requires a brewing stand. They can be found in villages or made at a crafting table. To make a potion, you’ll need blaze powder (made from blaze rods), glass water bottles, and the proper ingredients for what you’re trying to make.
-
With a water bottle and blaze powder, you create a base potion (typically using nether wart).
-
Add the main effect (e.g., regeneration potion with a Ghast Tear) by running the potion through the brewing stand again, with the new ingredient at the top and your base potions in the bottom row.
-
Finally, run the potion through the brew stand with glowstone dust, redstone dust, fermented spider eye, gunpowder, or dragon’s breath to create effects.

7. How to Tame a Fox in Minecraft
Foxes are adorable. Minecraft foxes are no different. Plus, they don’t smell like their IRL counterparts. The general process for making a vulpine buddy are similar to most other taming efforts.
-
First, you’ll need to find them. Foxes are nocturnal and can be found in Grove or Taiga biomes
-
Track one pack down, and quickly build a wall around them a couple blocks high. You must be somewhat sneaky, as foxes are skittish creatures.
-
With at least two foxes in your makeshift pen, you’ll need to feed them sweet or glow berries until two foxes mate and have a baby fox.
-
Continuing caring for the fox until it’s an adult, then you can put a lead on the fox and take it back home!
8. How to Breed Axolotls in Minecraft
Breeding animals is a latter-stage concern. Once you’ve graduated from scavenging basics and start harvesting animal goods en masse, such as eggs and feathers, you’ll probably want to take a few steps to get ready. For axolotls, specifically, be certain that you have plenty of accessible water. In addition, make sure to have lots of lighting in the area to keep monsters from spawning nearby and munching your pets!
-
With your farm set-up ready, you’ll need to first find at least two axolotls in a Lush Cave.
-
Capture them with a bucket, and bring them back to your farm.
-
Next, find tropical fish in an ocean biome.
-
Catch the tropical fish in a bucket.
-
Feed them to your Alxolotls, and they’ll enter “love mode” and soon spawn a baby.
9. How to Breed Horses in Minecraft
Breeding horses requires that you first tame them. This requires a saddle, and that you simply ride one until it warms up to you. It will likely buck you off a couple times, though. Stick with it, then adhere to these steps:
Recommended by Our Editors
How to Set Up a Minecraft Server In a Few Easy Steps
Secretlab Made a Minecraft-Themed Gaming Chair
The 10 Best Minecraft Mods Anyone Can Use
-
Once you have at least two horses tamed, bring them together in a safe pen or small, closed pasture.

-
You’ll need to feed the horse their favorite food to get them in the mood. In this case, that’s golden carrots (golden apples also work, but they tend to be rarer finds).
-
Carrots are quite common in village gardens; zombies also sometimes have them. Alternatively, you can surround a carrot with golden nuggets in the crafting table to create golden carrots.
-
Feed both horses a golden carrot, and you’ll have a foal in a few seconds
10. How to Make a Minecraft Server
(Credit: Xbox Game Studios)
There are many great reasons to make and run your own Minecraft server. Fundamentally, it gives you total control over the game world. For kids playing Minecraft and parents wanting a safer digital playground, running a private server can be a great idea. Even so, it can be a pain, and unless you have a moderate level of technical home networking knowledge, Mojang recommends that Minecraft Realms, a private server subscription service, would be a better fit for most people.
If you’re running your own server, it will be Java edition; that means you must have Java installed and up-to-date. If you have trouble following the below instructions, it might be wise to look up how to use the command prompt, basic home networking (specifically port forwarding(Opens in a new window)), and how folder directories work.
-
Get the desired minecraft_server.1.XX.X.jar file (where the X’s will be the version number).
-
Create a folder with whatever name you choose, but we will call it “Minecraft Server” here.
-
Move the .jar file into the Minecraft Server folder and open the command prompt from the start menu.
-
Find the Minecraft Server in your computer’s directory.
-
Type “cd [.jar file’s address]” (without quotes or brackets) with the actual folder address on your PC.
-
Type “Java -jar [minecraft_server.1.XX.X.jar]” and hit Enter (without quotes and replacing the bracket section with the exact filename of the Minecraft Server jar file, which varies depending on exact version release).

-
You will see two errors. Don’t worry about them.
-
In the Minecraft Server folder, you now have a eula.txt file. Open it, and change eula=false to eula=true. Save.
-
There will also be a new “server.properties” file. Open that with Notepad, and take note of the query.port setting (default 25565), because we’ll be using that in the coming steps. You can also edit other basic settings, such as difficulty and the maximum number of players.
-
Type “Java -jar [minecraft_server.1.XX.X.jar]” and hit enter, without quotes or brackets.
-
This will bring up the server window showing stats, players, and server commands.
-
Once you’ve done all this, Run Minecraft, go to multiplayer, add a new server, add “localhost” in the server address, and you’re set!
-
For other people to connect to your servcer, you’ll need the query.port setting and your public IP address (which you can get by checking “What is my public IP?” in your browser).

-
Give this information to new people entering your Minecraft world, followed by :25565 or whatever your query.port shows.
11. How to Make Fireworks in Minecraft
Real-world pyrotechnics consist of black snakes, smoke bombs, sparklers, and the like, but Minecraft’s options are limited to mini rockets that launch themselves (and potentially you) through the sky before detonating. Even so, with the right ingredients, and if you’re ambitious, a redstone system to time them, you can celebrate anything you like with enough explosives to put any July 4th or New Year’s party to shame.
-
Making fireworks requires a minimum of one paper and one gunpowder.
-
Adding up to two more gunpowder increases the pyrotechnics’ flight distance.
-
You can make paper by placing three sugar cane in a horizontal line on the crafting table.
-
Gunpowder is found by killing a creeper before it explodes.
Creating a firework star modifies the effects of the rocket.
-
Craft the firework star, and then add it to the paper and gunpowder when making a firework rocket.
-
The basic ingredients are gunpowder and matching dyes, but you can also add gold nugget, diamond, glowstone dust, fire charge, or a head block for additional effects (like a sparkling trail or a Creeper-shaped explosion).
12. How to Make a Smooth Stone in Minecraft
Smooth stone is one of the simplest, albeit obtuse, things to create in Minecraft. It’s an important construction material, so use these steps to whip some up.
-
Once you’ve got a crafting table, make a furnace with eight bits of cobblestone around an empty square.
-
Take the furnace, fill it with cobblestone, and add any fuel (e.g. wood, coal) you’d like.
-
Wait for the furnace to finish cooking, and you’ll have clean, recycled smooth stone ready to go.
Why You Should Game on a PC
For more PC game reviews and previews, check out PCMag’s Steam Curator page(Opens in a new window). And for in-depth video game talk, visit PCMag’s Pop-Off(Opens in a new window) YouTube channel.
Like What You’re Reading?
Sign up for Tips & Tricks newsletter for expert advice to get the most out of your technology.
This newsletter may contain advertising, deals, or affiliate links. Subscribing to a newsletter indicates your consent to our Terms of Use and Privacy Policy. You may unsubscribe from the newsletters at any time.
Thanks for signing up!
Your subscription has been confirmed. Keep an eye on your inbox!
Sign up for other newsletters
Consider the most basic tricks in the game Minecraft | Minersss.com
Using Peaceful Difficulty
If you can’t handle the crowds of zombies, you can’t outrun the spiders. Afraid of being blown up by the creeper. Too little food and health ends. Switch the difficulty to peaceful, and the solution to the problem will appear, by itself. Health, in this mode, is restored very quickly, hunger does not cause discomfort, there are no hostile mobs at all. This technique is usually used at the beginning of the game, when building huge buildings. Many players consider using this technique unfair, as it removes the main dangers of the game. Interest in such a game, respectively, disappears. On the server, this method does not work. nine0007
How to cut down trees
If you want to cut down a whole tree, but you can’t reach the last block, leave the bottom block. Stand on it like a ladder, cut down the tree, and then him. If you still can’t reach it, put a block under you that can be easily destroyed. Giant trees can be cut down by climbing the vines to the top, and then simply cutting a path down. After building a tree farm, opt for a jungle tree, as it provides the most material. It is followed by a dark oak after — acacia and birch. These trees do not grow taller than seven blocks, but sometimes the spruces are too tall and the oaks are sprawling. You can place a block (any) above a tree sapling, at a height of up to seven blocks. In this case, the tree will not grow taller. nine0008
Mechanization
Using all kinds of devices and mechanisms (trusses, generators, etc.) you can save time and effort. It will take a lot of time to install them, but in the future they will fully pay off. All these devices are listed in special instructions, so it makes no sense to dwell on them for a long time.
Beds on the road
If you like to often walk around the map away from home (hunting, searching for resources, biomes), then it’s best to take a bed with you. As soon as it starts to get dark around, install it and go to bed. So you can skip the night, as it is very dangerous to take risks in the dark, of course, you can overlook valuable resources. nine0008
Closing sections
Underground mines are huge tunnels in which it is easy to get lost, winding circles through explored areas. To prevent this from happening, close the checked sections of the mines with glass blocks, a fence, an iron grate will do. You can protect the tunnels and those blocks that are not underground.
Bone Meal
Bone Meal has a very interesting use — it allows you to instantly grow any plants in the Minecraft world in a suitable area. With it, you can grow tall grass, flowers, mushrooms. These properties of flour will come in handy when surviving in a flat world. Using three units of bonemeal on wheat yields three units of wheat when harvested, enough to make bread. Flour is also used to grow watermelons and pumpkins. Using it wisely, you can make a farm where you don’t have to wait until this or that seedling grows. nine0008
Orientation
It is better to mark your traveled path with various signs that will differ from the environment. Suitable torches, colored wool, man-made blocks, flowers, red dust, etc. Some of these methods will take a little time, but in the future it will be easier to find your way home. At intersections and forks, you can install signs indicating the direction.
Silk Touch Enchantment
Very effective when extracting stone. A pickaxe enchanted this way will mine stone, not cobblestone. Red ore and lapis lazuli mined this way can be re-mined with a pickaxe with a luck spell for greater productivity. nine0008
Flint and Steel
By setting fire to the ground under friendly mobs, for example a pig, you can get a cooked piece of meat. This saves the strength of tools, fuel and cooking time. Fire can clean the forest, unnecessary buildings. But you need to be careful that the fire does not spread to your house.
There are many more tricks and tricks in the game, this is only a small part of them. Each player brings his own «chip» to the game, from which there are more and more interesting things.
Minecraft: Tricks and Tricks
stole from minecraftwiki :3
Fun with nature
Mutant Tree
Basically does nothing useful, although it can be used to avoid losing the house (especially if the house is underground, you can just create such a tree nearby).
So, the way to create — first we plant or just find the right tree. Then we climb to the top. We put a block of earth and plant a new sprout. That’s basically all ;D
Wall-thorn
I think this wall can even save your life, as well as deprive it of careless use. nine0007 So, just looking for a cactus, cut down the whole one, leaving only the bottommost block. After a while, the cactus will grow again, and you can cut it down indefinitely. Then we plant as in the screenshot and that’s all; D Between the cacti I have a hole in 3 cells. To make it faster, it is better to immediately plant one block at a time. They will still grow. Well, in general, I think you understand.
Oak
The tree can be grown in almost any size. In this case, height. Just enclose the seedling with a wall as high as your tree will be. The distance between the seedling and the wall should be 1 block, the height should be 4 blocks. nine0008
You can make a hole in the wall for an entrance, this will not affect the growth of the tree.
Fun with water
Killer current
On the beach, remove the sand near the water to create a current.
We plant cacti along the shore so that the current carries the mob to the cacti.
We lure the mob.
Getting a benefit.
Trap current
Take a bucket.
Rake water at a distance of 1 block from the shore, the water should be 2 blocks deep and more.
You will see the current from four sides, small mobs will not be able to get out. nine0007 How to remove water
We put any block on the source of water or lava. When we remove this block, there will be no more water or lava there. In this way, you can push back the lava step by step when digging mines (it’s faster and easier to do this with loose material). This is faster than digging around, but also more dangerous — if you are not careful, you can die and lose things. Lava is easiest not to fall asleep, but to turn into obsidian by pouring a bucket of water nearby (the created source can be reused).
Water Lift
The method is based on the unusual Archimedean force of the Minecraft universe. Its essence is that water pushes the boat under any conditions. That is, if you fall under a waterfall, then in a few seconds you will soar above it.
It remains to open the shaft and remove the wall we need.
It is desirable to make high walls, because the boat bounces very strongly on the waves and can fly over the edge.
Naturally, the structure can be of any height, absolutely without restrictions. If you want your boat to automatically circulate, I advise you to think more than once about the direction of the currents on the turns, this is already improvisation. But I can advise how to make the «top» of the elevator so that the boat automatically after the «departure» from the mine was directed in the right direction. It is assumed that the mine will be 2×2. Around the entrance to the mine (in pockets, if you like), put parent flows and get such a thing. To remove the current, we build up the mine (not completely, only so that no water goes into it) and then open it again.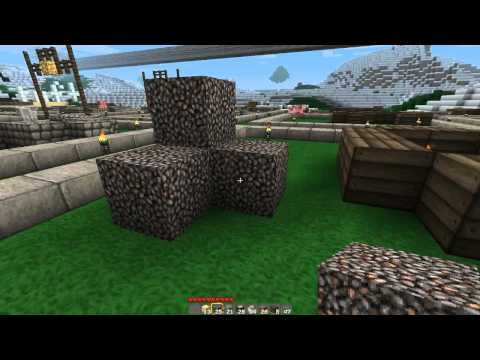 nine0007 The water is absolutely calm. Now you can destroy one wall and actually build a «roller coaster», the main thing is that they are closed, that is, the end ends where the beginning begins.
Water Ladder
Main article: Water Ladder
Quick Downhill Descent
With this method, you can quickly and painlessly go down a mountain of any height. The only thing you will need is a bucket of water. Hold down the Shift key to approach any sharp slope of the mountain, right-click to pour water. Physics and the current will lower the column of water down themselves, which will make it possible to make an impromptu elevator down. The only danger in this type of descent is the possibility of drowning. But if you go down the edge, then you can calmly breathe the air without fear of drowning. nine0007 Dynamite Fun
Dynamite Mine
Very easy to make. The required blocks are dynamite and a pressure plate. A hole is dug 1 block in area and 2 blocks deep. 1 block of dynamite is placed at the very bottom of the pit, the top block of the pit is closed with any block except water, lava, glass and air, and a pressure plate is placed on top. This is an inconspicuous trap, but you can dig a 1-block hole and do without a stealth block. The mine is useful if the area you are going to place on is sand or gravel. nine0007 Step by step in pictures:
Attention! Do not put such a mine near your house if you do not want it to be torn to pieces! Also, it is not recommended to use 2+ blocks of dynamite together, as the destruction can become monstrous. The author of the article tried more than 9000 blocks, and at the same time, on the server, every player who approaches, exits the game due to a freeze and needs to delete [Server Directory]/[World Name]/players/[Player Name].dat Exception: Home from admin
But even in this case, it may be problematic to enter the house due to the destruction of the blocks in front of the door and itself.
Rain of arrows
You will need 2-3 dynamites, a bow and a lot of arrows. We put these 2-3 dynamites vertically on top of each other. Then we shoot a large number of arrows at the very top. And finally, we activate that dynamite in the middle.
Easy Mine Creation
I don’t think many people do this, so I’d recommend it. Use dynamite as a means of creating mines. They turn out uneven, but very quickly you can create a huge mine. nine0007 If you are not using resource editors, the method is useless, due to the difficulty of obtaining enough TNT. However, 2-3 blocks should be enough for 1 time.
Commentary: The method is absolutely useless, it is not recommended to use it often for resource extraction, because. most resources are wasted.
Miscellaneous
Quick Gravel/Sand Mining
1. Place a torch under gravel or sand blocks. But you need to have a block above the torch that will hold gravel / sand blocks.
2. Destroy the block that supports the gravel/sand. Gravel or sand falls on the torch and breaks. nine0008
But in this case flint does not fall out of the gravel.
Fire Safety
Fire Prevention and Fighting Code Set:
When setting fire to nearby trees, destroy dangerously nearby foliage first.
Craft water tanks out of wood.
Make important and fire hazardous places out of stone.
In case of fire, destroy nearby wooden structures (tunnels, floors, walls), preferably by explosion0007 Shoot down the fire if it is small.
Run if the fire has spread to a large area and you are not prepared — things are more important than home.
How not to fall from the edge of the block
Hold down SHIFT (or the key where you have assigned Sneak) and calmly go over the edge. You won’t fall (at least as long as SHIFT is held)
When you press the SHIFT key, if you haven’t changed it, you sneak.
How to minimize the game without pausing
If you use the inventory\workbench\stove\chest, you can minimize the game without pausing it, that is, without stopping the time in the game. Why is this needed? If you have nothing to do in the game while you grow wheat or cane, you can turn the game this way and go, for example, rummage on YouTube. It is also possible to connect the game to Steam using the «add game» button and selecting «add a game not related to Steam», and then, in the game, open the «overlay» by pressing SHIFT + Tab. The most interesting thing is that in this case you can rummage through the Internet directly through Steam by clicking the «Internet browser» button. nine0007 Figure casting
If you can’t find diamonds (or just too lazy to look for them), but want to build something out of obsidian, then there is a simple solution, I called it «figure casting». To do this, we need at least 2 buckets (you can pervert with one, but this is completely inconvenient), you can have more — construction will proceed at a faster pace. We fill one bucket with water, and the second (all the rest, if you took more than two buckets) with lava. Next, we need to make formwork (in fact, you can do without it, but the lava will spill and then you will have to remove the cobblestones). It is necessary to pour in layers, therefore it makes no sense to make the formwork at once to the full height, complete the formwork as the structure is poured. And yet, it is better to use cobblestone, earth or other non-crumbling material for formwork. So, our formwork is ready (you did it, right?). We pour lava inside, then pour water somewhere so that it would flood our lava. Voila, there is now obsidian. We select spilled water and go for a new portion of lava. Next, we complete the formwork in order to pour the next layer, and so on, until the structure is cast. nine0007 P.S. According to my personal observations, this method of construction requires less time (taking into account the extraction of raw materials) than building from mined obsidian blocks.
Tip: pouring lava, like any liquid, is most convenient by «sticking» it to the side edge of the formwork, pointing the sight at this edge, since the principle of determining the location for liquids is the same as for all blocks. The only difference is that nothing can be stuck to the liquid block, and for the sight it is transparent. Therefore, if it is necessary to fill large reservoirs with water or lava, it must be done in layers, first filling with non-flowing material (dirt), and then gradually replacing the blocks with water sources. nine0007 Animal pen
If you are tired of chasing mobs around the map and want them to always be in the same place, then make an animal pen:
Create a fenced area.
Illuminate the site.
Mobs will spawn there at night.
Remember a few things:
The bigger the lot, the more mobs.
It will be necessary to take care of their safety.
There should be as many blocks of grass around as possible
Walking on the bottom
If you want to walk on the bottom, you can take some reeds, underwater 1 block of reeds can be placed on any surface when installing the 2nd block, it will destroy everything, but if you do it straight under you, you can replenish the supply of air. nine0007 Replenishment of air supply with a bucket
Also, if you dive for hunting octopuses or for other purposes, then you can replenish your air supply with a bucket. To do this, rest against the bottom and scoop up water from the block that you rested on, your air will rise to the maximum.