Lost Planet 3 Achievements | TrueAchievements
- Lost Planet 3 Achievements
- Lost Planet 3 News
- Forum70
- Clips157
- Walkthrough
- Reviews1
- Scores
- Price
Full list of all 50 Lost Planet 3 achievements worth 1,000 gamerscore. It takes around 25-30 hours to unlock all of the achievements on Xbox 360.
Hide ads
- To the Rescue
Awarded in the Single Player Campaign.
1 guide
- Empty Nest
Awarded in the Single Player Campaign.
2 guides
- Saving the Day
Awarded in the Single Player Campaign.
1 guide
- On the Hook
Awarded in the Single Player Campaign.
1 guide
- My First T-Post
Awarded in the Single Player Campaign.
1 guide
- Dish It Out
Awarded in the Single Player Campaign.
2 guides
- «What…»
Awarded in the Single Player Campaign.
2 guides
- Thunderstruck
Awarded in the Single Player Campaign.
3 guides
- Medicine Man
Awarded in the Single Player Campaign.
1 guide
- Safe Cracker
Awarded in the Single Player Campaign.
1 guide
- Cleaning House
Awarded in the Single Player Campaign.

1 guide
- Drilling Down
Awarded in the Single Player Campaign.
1 guide
- Storm Chaser
Awarded in the Single Player Campaign.
1 guide
- The King Is Dead
Awarded in the Single Player Campaign.
1 guide
- All Charged Up
Awarded in the Single Player Campaign.
1 guide
- Living Legend
Awarded in the Single Player Campaign.
1 guide
- French Leave
Awarded in the Single Player Campaign.
- Fallen Hero
Awarded in the Single Player Campaign.

1 guide
- Bleeding Heart
Awarded in the Single Player Campaign.
1 guide
- Campaign Complete
Awarded for finishing the game on any difficulty.
- Extreme Conditions
Awarded for finishing the game on Hard difficulty.
2 guides
- Armed and Dangerous
Awarded for purchasing your first weapon upgrade.
1 guide
- Master Planter
Awarded for successfully planting every T-Post.
2 guides
- Home Improvement
Awarded for purchasing your first Rig upgrade.
2 guides
- Big Spender
Awarded for purchasing each of the weapon and Rig upgrades.
2 guides
- Geneticist
Awarded for completing the Bestiary.
3 guides
- Lost Log
Awarded for collecting your first Log.

2 guides
- Heavy Reader
Awarded for collecting 50% of the Logs.
- Master Cataloger
Awarded for collecting all Logs.
2 guides
- Killer Instinct
Awarded for completing all of Kovac’s Quests.
2 guides
- History Lesson
Awarded for collecting your first Memento.
2 guides
- Gone, But Not Forgotten
Awarded for collecting all Mementos.
2 guides
- First Tag
Awarded for DNA Tagging the first Albino Tarkaa.
1 guide
- Master Huntsman
Awarded for purchasing all the upgrades available in the Ethologist’s shop.
2 guides
- Lost and Found
Awarded for finding the secret area revealing Diaz’s fate.
2 guides
- A Winner Is You!
Awarded for winning your first multiplayer match.

- Winning Habit
Awarded for winning 25 multiplayer matches.
1 guide
- You’re the best…AROUND!
Awarded for winning all multiplayer Scenario matches.
1 guide
- Feels Like The First Time
Awarded for making your first stealth kill in a multiplayer game.
1 guide
- Deadly Catch
Awarded for delivering the T-Eng Canister 2 times during a multiplayer Outpost Scenario match.
1 guide
- Stop Stalking Me
Awarded for killing 20 Wardeyes during a multiplayer Research Lab Akrid Survival round.
1 guide
- Top Dog
Awarded for delivering the T-Eng Canister 3 times during a multiplayer Alpha Lair Scenario match.
1 guide
- Scorched Earth Policy
Awarded for blowing up the Satellite Array during a multiplayer Contact Scenario match.
1 guide
- Riding Shotgun
Awarded for killing a player while riding on the Battlecat in Stronghold.
1 guide
- Touchdown
Awarded for delivering the T-ENG Canister to win a multiplayer Quarantine Scenario match.
1 guide
- Big Bang
Awarded for unlocking a cell in the multiplayer Progression Sphere.
- Sphere We Go
Awarded for unlocking 30 cells in the multiplayer Progression Sphere.
- Sphere Complete
Awarded for unlocking all cells on the multiplayer Progression Sphere.
3 guides
Hide ads
Lost Planet 3 Achievements FAQ
-
How many achievements are there in Lost Planet 3?
There are 50 achievements in Lost Planet 3, worth a total of 1,000 Gamerscore.
You can view the full list of Lost Planet 3 achievements here. -
Is Lost Planet 3 on Game Pass?
No, Lost Planet 3 is not currently available on either Xbox Game Pass or PC Game Pass.
-
When did Lost Planet 3 release on Xbox?
Lost Planet 3 was released on August 27th, 2013.
-
How long does it take to complete all the achievements in Lost Planet 3?
It takes between 25 and 30 hours to complete the achievements in Lost Planet 3. You can find a full guide to unlocking all of the achievements in the Lost Planet 3 walkthrough.
-
How many secret achievements are there in Lost Planet 3?
There are 22 secret achievements in Lost Planet 3.
Lost Planet 3 (Video Game 2013)
- Cast & crew
- User reviews
- Trivia
IMDbPro
- Video Game
- 20132013
- TT
IMDb RATING
6. 4/10
4/10
179
YOUR RATING
Play trailer2
:
14
10 Videos
10 Photos
ActionAdventureSci-Fi
This prequel to Lost Planet game series follows Jim Peyton, a space miner and family man who arrives on E.D.N. III, a frozen planet, to work for NEVEC, a murky company that supplies Earth wi… Read allThis prequel to Lost Planet game series follows Jim Peyton, a space miner and family man who arrives on E.D.N. III, a frozen planet, to work for NEVEC, a murky company that supplies Earth with energy. EDN hides many monsters and secrets.This prequel to Lost Planet game series follows Jim Peyton, a space miner and family man who arrives on E.D.N. III, a frozen planet, to work for NEVEC, a murky company that supplies Earth with energy. EDN hides many monsters and secrets.
IMDb RATING
6.4/10
179
YOUR RATING
-
- Matthew Sophos
-
- Richard Zangrande Gaubert(head writer)
- Matthew Sophos
- Orion Walker
- Stars
- Bill Watterson(voice)
- Daniel Kountz(voice)
- Jonathan Roumie(voice)
-
- Matthew Sophos
-
- Richard Zangrande Gaubert(head writer)
- Matthew Sophos
- Orion Walker
- Stars
- Bill Watterson(voice)
- Daniel Kountz(voice)
- Jonathan Roumie(voice)
- 1User review
- 2Critic reviews
- Awards
- 3 nominations
Videos10
Trailer 2:14
Watch Lost Planet 3 (VG)
Trailer 2:31
Watch Lost Planet 3 (VG)
Trailer 3:01
Watch Lost Planet 3 (Trailer 1)
Trailer 0:30
Watch Lost Planet 3 (Punisher Pack Pre-Order Trailer)
Trailer 9:33
Watch Lost Planet 3 (Edited Walkthrough)
Trailer 2:05
Watch Lost Planet 3
Trailer 0:30
Watch Lost Planet 3 (Assault Pack Trailer)
Trailer 0:30
Watch Lost Planet 3 (Freedom Fighter Pack)
Trailer 2:32
Watch Lost Planet 3 (E3 Trailer)
Trailer 1:49
Watch Lost Planet 3 (Multiplayer Trailer)
Photos10
Top cast
Bill Watterson
- Jim Peyton
- (voice)
Daniel Kountz
- Gale Holden
- (voice)
Jonathan Roumie
- Renard Laroche
- (voice)
Jim Ward
- Phil Braddock
- (voice)
Anna Campbell
- Grace Peyton
- (voice)
Laura Bailey
- Mira
- (voice)
Paul Nakauchi
- Soichi
- (voice)
Stefan Marks
- Dr.
 Kendrick Kovac
 - (voice)
Tracey Leigh
- Dr. Bonnie Roman
- (voice)
Jim Pirri
- Col. Caleb Isenberg
- (voice)
Lisa Jay
- Diana Peyton
- (voice)
Jeremy Schwartz
- Various
- (voice)
Misty Lee
- Jenette Diaz
- (voice)
Damion Poitier
- Capt.
 Foster Degreene
 - (voice)
- …
Lisa Lynch
- Various
- (voice)
Keith Silverstein
- Various
- (voice)
Matt Easton
- Mocap Actor
Jon Marsch
- Mocap Actor
-
- Matthew Sophos
-
- Richard Zangrande Gaubert(head writer)
- Matthew Sophos
- Orion Walker
- All cast & crew
- Production, box office & more at IMDbPro
More like this
Lost Planet: Extreme Condition
Lost Planet 2
Borderlands 2
The Wolf Among Us
Resident Evil 5
Red Faction: Armageddon
Red Faction: Guerrilla
What Remains of Edith Finch
Rage
Hellblade: Senua’s Sacrifice
Resident Evil
BioShock Infinite
Storyline
Did you know
User reviews1
Review
Featured review
9/
10
return to EDN III
This review is purely for the main campaign content, not multiplayer.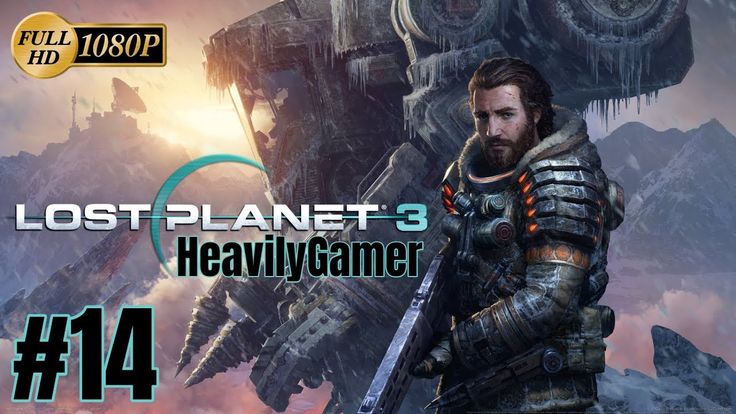 Lost planet 3 gives a much needed burst of life to the series. While lost planet 2 was clearly geared towards multiplayer formatting and did a reasonable job of it, it lacked in the story department. What story there was tended to be thin and a little convoluted in places. Lost planet 3 delivers a much more cinematic and story driven experience than prior instalments. To that end, the story is quite rich and full of surprises. It also works as a prequel, setting a scene for the first game and introducing the father first game’s protagonist in his youth, before being hardened by war. The characters are superbly well developed (except Laroche, who seems to switch teams in a whim), and the cast are simply stellar in their performances, especially Bill Watterson as Jim Peyton. Visually the game is stunning (for best results use a full 1080p display) with nice little touches added here and there to add atmosphere. The only real let downs with this game were with the utility rig. The rig is Peytons personal 30 foot tall mech, as opposed to scavenging VS’s in the previous games.
 It has such potential, but other than a few akrid battles, a rig on rig battle and wandering around doing odd jobs, it feels really underdeveloped. There are a couple of upgrades for it which, while inexpensive, are almost pointless, like a cutting/welding torch that you use once…. Why? These minor issues aside, a worthy addition to anyone’s collection, whether you’re a lost planet fan or not.
helpful•5
0
- Ultima_Prime
- Jun 9, 2015
Details
- Release date
- August 27, 2013 (United States)
-
- United States
-
- English
- Production companies
- Plastic Wax Studios
- Spark Unlimited
- See more company credits at IMDbPro
Technical specs
Related news
Contribute to this page
Suggest an edit or add missing content
More to explore
Recently viewed
You have no recently viewed pages
Lost Planet 3 Walkthrough | Stop Game
E.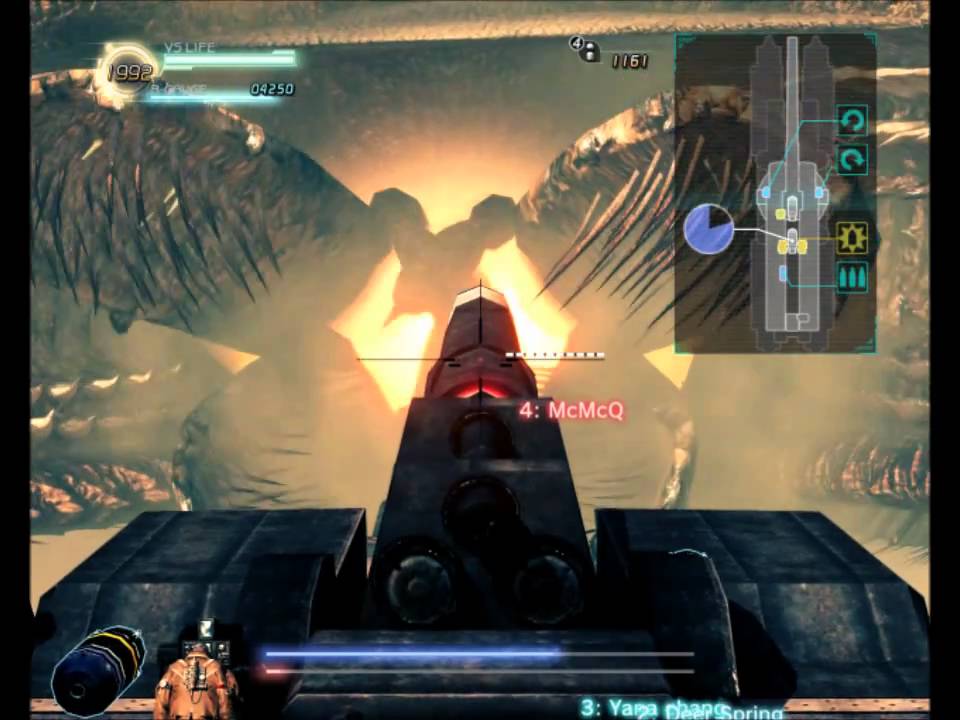 D.N. III
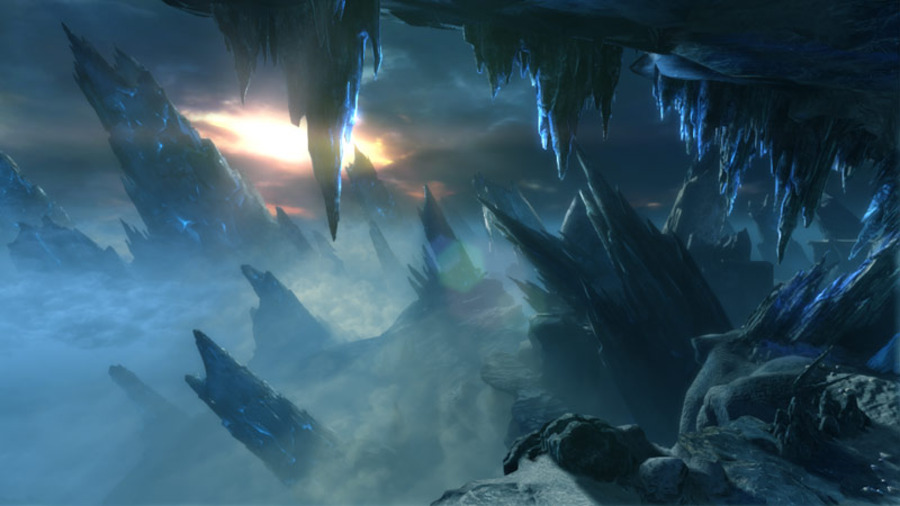
Markedly aged Jim Peyton, who is on the verge of life and death, begins the story of his life. Fifty years ago, he arrived on this icy planet called «E.D.N. III». Since then, he has never left its borders.
At thirty-two, Jim «was lucky» to go on an expedition to an unknown world. During the flight, a gale blows our capsule, and we land on a deserted wasteland. The beacon, which was intended to communicate with the colonists meeting us, flew off in an unknown direction. We will have to go in search of him. We jump down, look around and move forward, guided by navigation beacons. They can always be displayed by pressing the corresponding button. We get to the cave and go through it, simultaneously shooting the first enemy. Having got to the surface, we fall down and destroy a large number of enemies. We get to the lighthouse, pick it up and sit out behind cover until one of the hunters attacks us. Quickly and often press the button shown to push him away.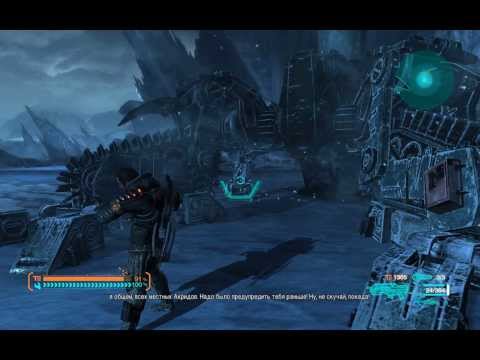 An ally arrives to help. We follow him to the capsule.
Together with Dr. Kovacs, we get to know Hutchings and the Frenchman Laroche. From the local guys we learn about Diaz, who, like us, was a contract soldier until she disappeared. Stuck in the cave, we head to the drill, cracking down on enemies. Being next to the car, the radar and all other indicators in the lower right part of the screen become available to us. Also, be sure to collect the caustic orange liquid remaining from the enemies — the so-called T-energy. We connect to the drill and wait for the completion of the repair. To speed up the process, you need to rotate the two round shapes until they turn blue. We finish off the remaining enemies and return to the capsule.
Weapons can be purchased and modified in the armory. The local currency is T-energy, the main source of which for us is enemies.
Heat generator
Dr. Roman is outraged by the loss of Diaz. In addition, NEVEK’s insistence worries her.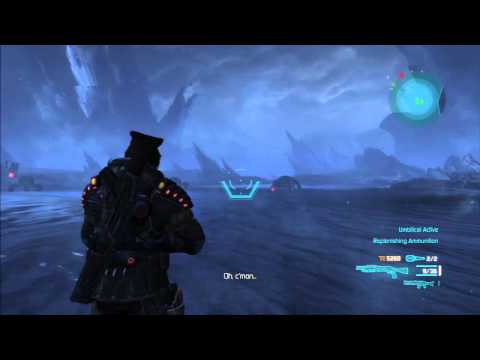 This corporation finances large-scale research on the planet in order to find something that would help save the Earth from the energy crisis. Kovacs was sent by NEVEC for research. We came here with only one purpose — to earn credits. Phil Braddock will be our employer at E.D.N. III. We go to the elevator and go down to the first floor to the chief mechanic Gale. He rebuilt our car and added something of his own. Let’s go to the quartermaster and buy a hunting knife from him.
We go up to the second floor and get to our car. After talking with Gale, we jump inside. We check the claw, the drill and learn to put the block. Brandon tries to contact Laroche. He disappeared quite recently. We go in search of him, to the Fork of the White Canyon. Period. Follow the navigation markers. We get to the cave, where we find Laroche’s car. Having passed to the end, we will have to leave the car. We go down on our own two feet and destroy the Akrids along the way. We communicate with Larosh. He was attacked by a crab and his car went downhill. Soon the enemies will come to us. There is no point in attacking them head-on. We dodge to the side when they curl up into a ball and rush straight at us at breakneck speed. After that, taking advantage of the moment, we shoot their red tail.
We inform Braddock that we have found Laroche. Just not far from the Votkina crossing, Diaz installed a heat generator. We go to him to devastate him from T-energy. We go around on the left side behind the navigation markers. We pay attention to the boxes, from which you can replenish ammunition. We get to the cave and move along it. We throw a grenade at the place of revival of Akrids. If shells are not available, then the nest will have to be shot long and hard with conventional weapons. We move on carefully. Brown eggs tend to explode if you get close enough to them. We shoot them from a distance. We break through to the heat generator and, holding the corresponding button, we extract T-energy.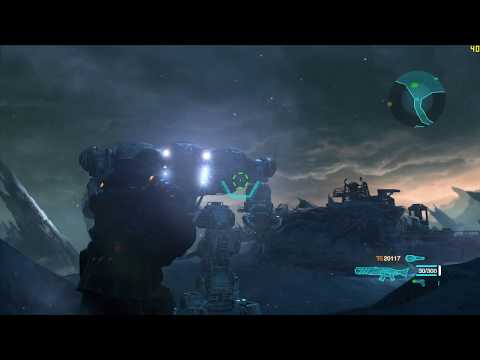 We return to the car in the same way as we arrived here.
Headquarters is reporting an impending Emperor-class hurricane. First of all, he is a danger to the base. We get to the first fastener, grab it and rotate it clockwise. There will be a problem with the second fastener — the hydraulic pipes will explode. We get out of the car and make repairs, as we have done before. We tighten the fasteners and head to the last of them. Having finished with it, we pass into the hangar. We are greeted as a true hero: correcting other people’s mistakes, and even at a critical moment, is worth a lot.
In addition to the already built-in playlist, you can install your own.
Observation capsules
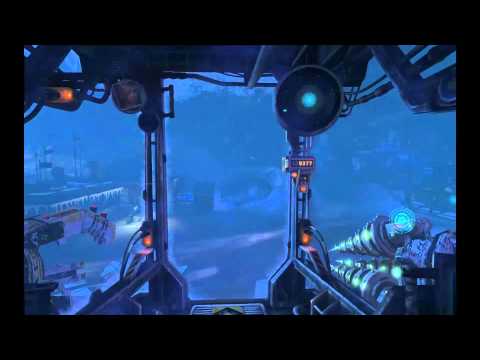
We rise to the third floor to Braddock. We are informed about the disappearance of observation capsules in the gorge region. We get new equipment — a cat hook, which allows you to cling to the upper ledges. Let’s go down to the quartermaster and get a shotgun. We go to the car and on it we head to the exit from the hangar. The armored doors are frozen, with claws we interact with pistons on both sides. We get out, move to the right side to the indicated point. We leave the car, we approach the edge and we go down with the help of a hook-cat. There are survivors in the capsule, their life support devices have turned off, so we go down and make repairs.
We cling to the ledge where Akrid has just been. We pass into the cave and hide behind cover. We shoot new enemies who can attack us from a distance. You can avoid damage while behind cover, or by actively moving from side to side. We climb even higher and select an assault rifle. We pass to the end, destroying enemies. We cling to the upper ledge on the left side, then to the next one and, turning around, continue to climb until we reach the car.
Heat pocket
We immediately go to the heat pocket. Focusing on the navigation markers, we go to the location «Hahnemen Depression». We clear the path by striking at the ice floes. We drill stronger ice walls with a drill. The storm caught us right on the wasteland. We get out of the car and start a fight with dexterous hunters. Quickly and often we press the button shown, aim at the head of the enemy and stab with a knife. We try not to go far from the car, so as not to lose sight of the enemies displayed on the radar. We shoot exclusively in the mouth of hunters. Having dealt with the first wave, we approach the car and clear it of ice with shots.
We get to the indicated point, get out of the car and climb onto the rock with the help of a grappling hook. We move forward, then we jump lower and lower until we reach the installation site of the heat generator. We clean the zone from stronger hunters. When they attack, we try to dodge backwards in order to be as far away as possible, because then a tail strike will follow. We still shoot at the mouth of the enemy. After destroying everyone, install the heat generator while holding the button shown.
Repeater
Weeks and months passed. Life on an icy planet has ceased to seem like some unusual phenomenon. A few hours ago, the relay turned off — the only source of communication with the outside world. Without it, it became impossible to contact other planets. Initially, the contract was for Laroche, but he refused to do the job, complaining about the constant skirmishes with the Akrids and not having a decent weapon on the machine to counter the local fauna. We request a double amount and, having received the go-ahead, we take on the task.
Vehicle modifications are purchased with specialized components that can be purchased from the Quartermaster. Or we can search for them on the locations ourselves.
Before the mission, visit the quartermaster and upgrade the assault rifle. Nearby is a locker, through which we replace the pistol with a shotgun. We sit in the car and head to the gate. At the exit, the transport will be covered with a defrost spray so that the car is no longer subject to icing during a storm no higher than the Cardinal class.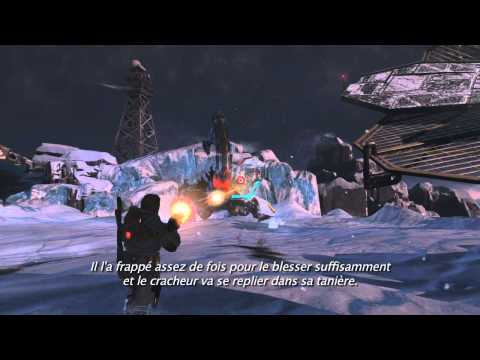 Having reached the crossroads of Bale, we destroy Akrids on a hill with a claw. We go to the pump, clear it of ice with a drill and try to start it, grabbing the steering wheel. There will be a breakdown, so we get out of the car, go around the pump and repair the shield on the pipes. Quickly returning to the car, we complete what we started.
We pass into the cave, clear the path and soon be attacked. Enemies are actively attacking the car, you need to counterattack them in time. We follow the radar and put a block when they are about to make a push. Then we raise the stunned enemy with a claw and drill through his weak spot with a drill. If they still managed to disable the machine, then we will have to leave it for a while. After a couple of tens of seconds, the transport will be restored and we will be able to continue the battle. Having defeated everyone, we move to Shackleton Peak.
We get to the gate and open it with the claws. Having docked with the platform, we go up and restart the first substation.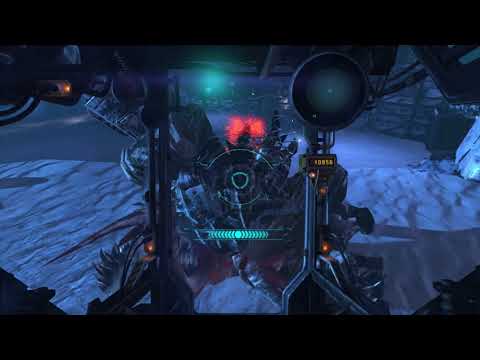 We turn left, go outside and, turning left again, we pass into the cave. Having got out on the other side, we jump down, destroy the hunters and make repairs. We climb to the very top and launch the lifting station. We leave on the right side, cling to the structure and, almost falling down, quickly and often press the button shown. We pass forward a little, cling to the rock and, turning around, rise higher and higher. Without hesitation, we head towards the nest and destroy it with a grenade. Another one is on the left side. We go through the nest, shooting eggs. We leave from the other side and immediately pick up ammunition from the left side of the shelter. We move forward, as soon as possible destroying the places of revival of the Akrids. We penetrate into the nest and deal with the hunter. We get out through a narrow passage, run to the bunker and restart the third station.
We go right and move along the edge of the cliff. Having moved to the other side, we cling to the ledges and climb to the very top. We run to the cave, where we encounter very dangerous flying Akrids. Keep a distance from them, otherwise they will try to pounce on us. Constantly moving around to avoid blue charges. We pass through the hotbed of Akrid and climb up. We restart the fourth station. We leave on the right side and cling to the upper structure. We pull the lever, cross the bridge and, after going forward a little more, we cling to the rock on the left side. We pass through a small cave and again we encounter flying Akrids. Immediately throw a grenade into the nest on the left side.
Size doesn’t matter if you know where to hit.
Having reached the top of the peak, we penetrate the station and restart it. Exit on the left side, go up the stairs and activate the terminal. After waiting for the door to open, we head to the repeater, next to which we notice a saboteur who hides when he sees us. We make repairs and report to Braddock. Suddenly, a huge scorpion appears. We continuously shoot at the orange areas at the bases of the claws and constantly dodge the formidable attacks of the enemy. When the crab moves back, in order to accelerate and carry out a ram, you naturally need to dodge to the side. Immediately after that, we switch to his weak back and shoot it until the enemy is defeated. Having won, we go inside and perform the necessary actions to raise the satellite dish.
We restart the sixth station and the car will arrive exactly at our location. We sit down in it and proceed to the fight with another crab. We come closer, block the enemy’s blow, quickly grab his claw, lift it up and drill it with a drill. Having torn off both limbs, we continue to counterattack. We grab the scorpion by one of the areas and drill through the icy back. We set up the repeater and, at the request of Braddock, we go in search of Roman. Very soon we will find her, and she will warn us of the secrets and dangers lurking on the planet.
We get the DNA identifier for the pistol. At the request of Roman, we go to the Akrid nest to collect genetic data for her research. We also get a modification for the grappling hook. We get to the pipe, get out of the car and cling to the platform on the right side, and then to the cable and move to the nest. We head to the indicated point, simultaneously shooting enemies. We take out the gun, switch it to the identifier, shoot at the egg and do not release the sight until the analysis is completed. We return to Roman and give her the extracted materials.
Lost Station
Braddock reports a new heat pocket, which can only be reached by installing a capstan on the machine. In turn, the capstan requires a supercontroller. It will not be difficult to find him, though along the way you will have to face a large number of enemies. Having obtained the supercontroller, we return to the base and go to Gale. From the list, select «Cabestan» and install it on the car.
Watching the monologues of the characters is a pleasure.
A new modification is a claw with a long-range cable. We go to the car and go to the crossroads of Bale. A storm has begun, so we move forward, clearing the way from falling fragments. We pass to Marshall’s ravine. Having gone forward a little, turn right and release the hook to the indicated point from a distance of at least 3500 (the button symbol should appear). We get out of the car and automatically cross over the cable. We delve into the cave and fall down. We destroy the nests until the central one opens. Stronger enemies will start to crawl out of it. We deal with them and with the nest itself. After passing through it, we begin the pursuit of the saboteur, whom we saw near the repeater. We get to the heat pocket and try to install a heat generator.
We destroy the appeared crab and finally lay the heat generator. The ice melted, and an unknown structure appeared on the horizon. After going inside, we get to the lift, go upstairs and find dead people. We go to the right, open the door and be attacked. We quickly and often press the button shown, constantly aim the sight and inflict several precise blows with the knife. We go down, we move around the generator, simultaneously shooting the Akrids that appear. We rise to the control room and turn off the generator. We return back and run to the central door. Open it by pulling the lever on the left side.
We get to the hangar and try to open the armored door using the lever on the right side. Then we go to the left and activate the terminal. The side door has opened, so you have to go the other way. We move to the power plant to search for evidence. We slowly move along the corridors until we meet new enemies. They are noticeably smarter than their counterparts: they actively use cover and prefer to attack from a distance. You won’t be able to go ahead, because if you get close enough to them, you can run into serious trouble. Nevertheless, we try to bypass them from the flank. We repair the door panel and move on. The next door opens through the console opposite.
Having fallen down, we try to cross the beam, but it also collapses under our weight.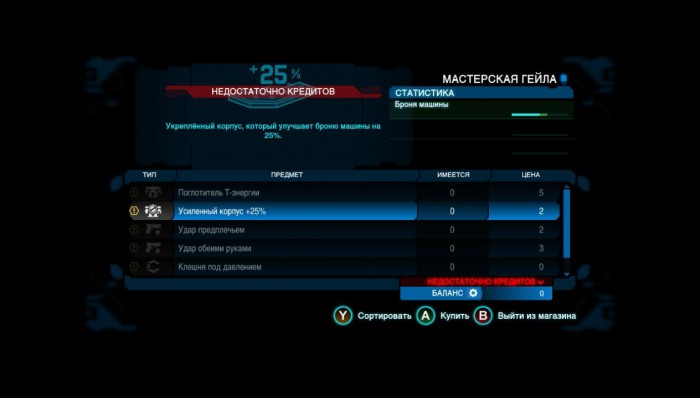 We cling to the floor of the upper floor. We continue to climb higher and higher, clearing the levels from enemies. We get to the room, the walls of which are a little less than completely covered with eggs. Be sure to repair the stationary machine gun and only after that we pull the lever behind it. Do not rely on a machine gun, there is little use for it. We do not allow ourselves to be surrounded, we constantly move back with a huge number of Akrids.
Despite their small size, these creatures can take us by surprise with a surprise attack.
When the door opens, we get to the control center and open the gate in the hangar. We are watching a video recording showing the last minutes of the life of a station employee. We try to upload this entry to the flash drive, but the file is damaged. The backups are located in the distribution center. We withstand the attack and return to the garage, almost the same way as we arrived here. We open the gate and get out. We get into the car, we go forward quite a bit and a huge cobblestone collapses in front of us. We go back to the garage, but already by car. On the cargo lift we can go upstairs and get to the distribution center.
We get out of the car and go inside the weather station. We restore power and transfer data from the main computer. Akrid Cat-G appears. We shoot his only weak point — the back and naturally dodge to the side when he attacks us. Occasionally, Cat-G will throw eggs at us. If we don’t shoot them in time, then they will hatch into small Akrids and cause us a lot of problems. We leave the weather station, get into the car and manually open the door. Then we get out of the car and go to the right. We cling to the wall and penetrate the building. We get to the control panel, switch the elevator and return to the car in a different way. We will again face a large Akrid in the same conditions as last time.
We get out and quickly rush forward. This is the third time that Cat-G will try to kill us. We keep from him as far as possible so as not to fall under his blows with his mouth.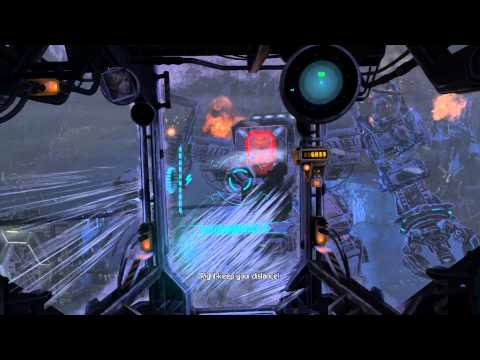 We repair the console, we pass through the opened door and, having hooked on the cable, we roll down to the car. Again, we move back and block the attacks in time. When the enemy releases his long tongue, we hook it with a hook and drill it with a drill. If you get close, then the cable can be weird, which will lead to fruitless attempts to grab it by its weak point. An angry Akrid will hit our car, and we will roll head over heels down the mountain, and then completely fall into the very bottom of the cave.
1
2
Support Stopgame!
3.6
247 ratings
Top comments
Review
SpongeBob SquarePants: The Cosmic Shake Review
Alexey Likhachev
7
Front page
Games in which we were ashamed
Editorial
131
News
Henderson: Call of Duty 2023 release date, platforms and developers
Alexander Kudryavtsev
9
News
Henderson: Ubisoft is already thinking about a sequel to the yet-to-be-released Assassin’s Creed for VR
Ruslan Prisekin
6
News
The human side of development — Documentary on the making of Psychonauts 2 released
Alexander Kudryavtsev
0
Front page
HITMAN: Freelancer is a great mode that the series needs for a long time
Alexey Likhachev
49
News
Dead Space Remake was one of the most downloaded games on the PS Store for January
Andrey Makoveev
6
Stream cutting
IN THE ALCOHOL PIT | Highlights (KEK!)
5
Walkthrough lost planet 3 — Play together
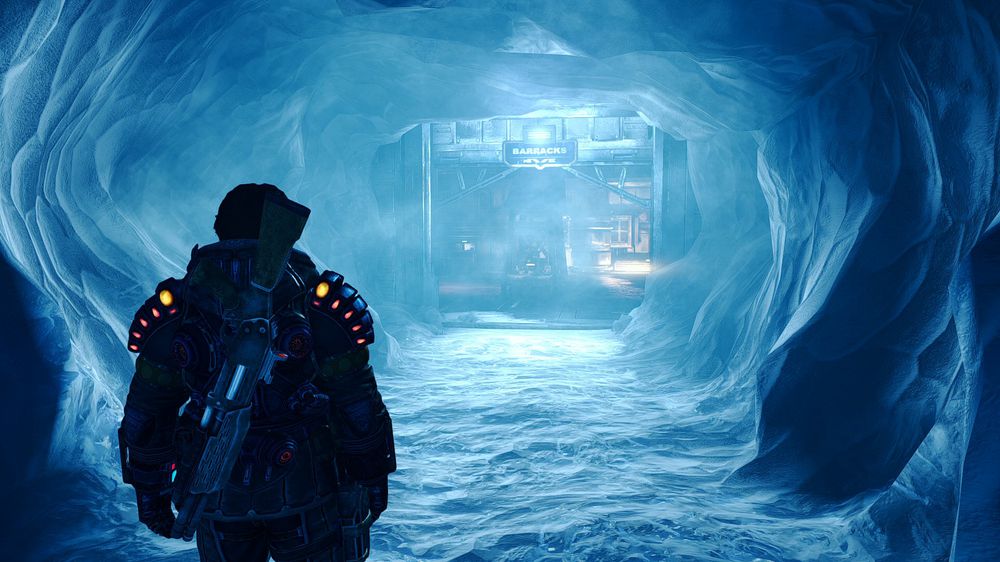
After the video, wake up and go forward to the sign. We find ourselves in a cave, in which, for our own good, it is better to turn on a flashlight. Walking through the cave, you will involuntarily notice some movements, and in the end we will see a monster.
We are given a pistol with which we deal with the enemy.
Now we are leaving the cave, but a new trouble awaits us in the form of a failure of ice below us. The place in which we find ourselves is literally teeming with enemies, but it will not be so difficult to deal with them. Then we get to the lighthouse, pick it up and hordes of monsters immediately appear.
But all of them will run past us, with the exception of the last monster, which an incredible robot will help us deal with.
After the video, our task will be to shoot hordes of monsters, while for now we have to do with one pistol, but the ammo is endless. Next, we will be ordered to repair the drill.
Repair will be done by a simple mini-game. Understanding it is extremely easy.
After repair, expect the arrival of guests, all the same types of monsters. After you deal with all the enemies, climb into the transporter and watch the video.
We find ourselves at a base where you can walk around and find out who is doing what. Then we take the next mission and find ourselves in the same robot that arrived for us a couple of minutes ago.
But we won’t be inside it for long, we’ll be thrown overboard and sent on our mission. When you go down into the gorge, you will find one of the survivors.
We must approach him.
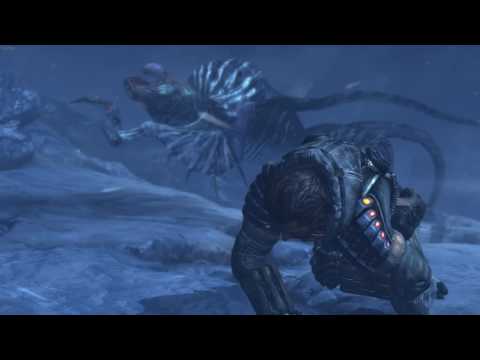
Not only the survivor will respond to the cry, but also a small number of monsters. We approach the survivor and get a new task from him.
But while you’re talking to him, something like the first boss will crawl. As you can intuitively guess, you need to shoot at the tail, which is highlighted in red.
After the destruction of this huge monster, we go into the ice cave and move forward through it. Having reached the checkpoint, we will be told that we need to activate the heat generator.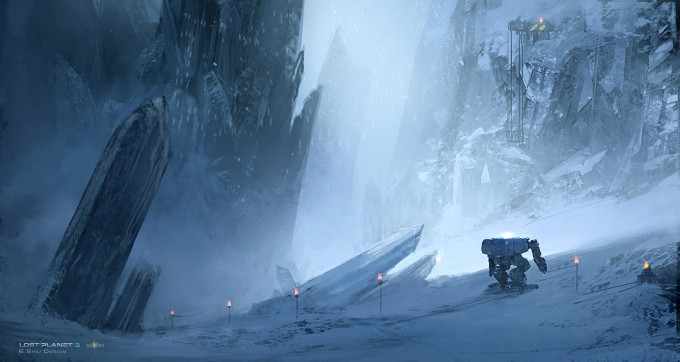
Lost Planet 3 — gameplay walkthrough
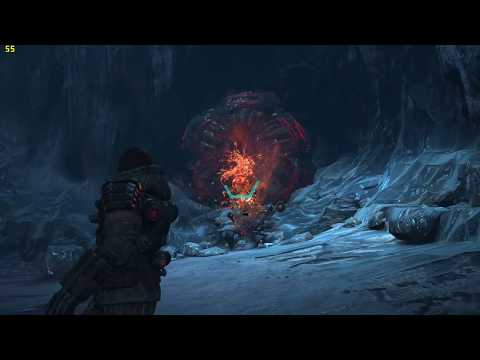
The cave is full of monsters, so be careful when moving towards it. When we are near the heat generator, half of the inhabitants of the cave will immediately take up arms against us.
After finishing with the activation, go to the exit from the cave. Now we will need to return to the robot in which we were at the very beginning. There will be a hardware problem.
Fighting off enemies, you will need to repair two fasteners. After that, we urgently need to head to the hangar until we are blown to pieces.
We improve weapons, sell trash and go to the next task. We sit down in a huge car again, open the piston and get the task of finding the missing capsule.
After arriving at the place, we start looking for the very capsule. A large concentration of enemies will be located throughout the area, so be careful when moving.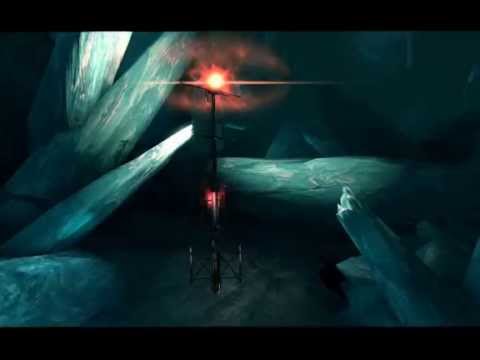
After discovering the capsule, we learn that it would be nice to put it into action first. To do this, we move on and repair the generator.
After climbing over the hill, jump out of the car and move on. To fight off the monster that will attack you next, you have to repeatedly press the joystick or keyboard.
Then we get to the same capsule and rescue it from under the pile of snow and ice. In order for it to work, you need to repair it using the resulting generator.
After the repair, watch the video and return to the base.
Now we need to find the repeater because it stopped working. We jump into our favorite robot and hit the road. On the way, we will be caught by a strong storm, so the battle with opponents will be difficult due to weather conditions.
We get to the frozen pump, break through the ice around the enemies and activate it.
All this time, a lot of enemies will accumulate around us, so, having dealt with them, go on your way. Having reached the goal, we repair another pump and move on. We shoot the monsters again, and then with the help of the robot we launch the long-suffering pump.
Finally, after starting the car, we shoot all the monsters and return home.
Now our task is to repair substations. There are six in total, but they are all quite close to each other.
We jump out of the robot and go in search of broken equipment. Making our way with the fight through the crowds of enemies, we repair one by one substations.
No problems should arise at this stage, except that during the repair you will find several scripts and turn off the radar and map.
After repairing the power plants, a huge boss will appear. Despite its impressive size, the battle with him is quite simple. You just need not to fall under the powerful blows of his huge paws.
When he misses you, his claw will get stuck in the ground, so this is the moment he should be attacked. Then we shoot at the places highlighted in red on the back of the monster.
By following this simple tactic, you can easily deal with a huge monster.
After that, we finally fix the final substation and once again deal with that huge beetle, but from the cab of our robot. We run to the radio transmitter, repair it and get a new task.
You can collect the DNA of eggs using a pistol with special cartridges, while not forgetting to shoot the monsters around.
After that, we will be given an improved vehicle for service. You can try it in the next mission. Our task will be to establish power supply at the power plant.
With the help of the robot, we get to the right place, deal with a new kind of enemies and repair the generator.
We return to the base, but a certain surprise awaits us there. The boss of unprecedented size can be killed by shooting him between the eyes directly in the area highlighted in yellow.
We move on, go to the elevator and shoot the enemies.
Our good friend is waiting for us on the next floor. We act on the same tactics, shooting between the eyes.
After some time, our robot will help us, with the help of which killing the boss will seem like entertainment to you.
But unfortunately, with one of his blows he makes a rift into which we immediately fall. There is only one corridor here, so finding a way out will not be a problem for us.
Making our way through the sewer pipes, we will hear some strange voices and start eavesdropping. But as it usually happens, at the most interesting place we fall down and they notice us.
It’s good that everything ended well and we were released, we just need to help fix the power plant to our new acquaintances. After that, we get into the car and go forward until we stumble upon another huge boss.
It does not really differ from the previous one, except that now you need to shoot not between the eyes, but in places on the tail, highlighted in yellow.
After killing the boss, we will receive a message about the attack on the base. We run to help and run into crowds of enemies. Making our way through the monsters, we see a girl named Mira. We help her in saving the base and get gratitude from her and from her father.
Then we help to clear the shipyard, which is teeming with enemies. You will not find anything new on it, so it will be quite easy to deal with enemies.
While we were at the docks, the base was attacked again, but this time on the scientific department. In the main building, we need to destroy the generator, which prevents us from repelling monster attacks. Getting to it will not be easy, as enemies are comfortably located on the way to the generator.
After the destruction of the device, we go to protect one of the bases of our scientists. After defending a strategically important building, we go further and repair the second base, which is so necessary for scientists to work normally.
Then we move forward along the back until we come across another kind of boss. This time the point of defeat is the belly of the cockroach.
In order to turn the beetle on its back, you will need to use the hook in the car to catch it and tip it over.
Having dealt with the boss, we return to the base and receive a task to activate the station. After repairing the generator, a robot similar to us will come out to us, with which we will need to fight.
The fight with him will consist in the same identification and shooting of weak spots, as well as in the use of various new robot devices.
But things don’t always end so well, so we are captured. However, we will not be there for a long time, since our next action will be to escape. Save yourself — help an ally.
After freeing our comrades, fight off the monsters and go to the very heart of the enemies. Unfortunately, the way forward will pass without our huge mechanical friend, so be prepared for serious collisions.
When you reach what looks like hell, you will face the final boss. The battle with him takes place in several stages.