Walkthrough — Star Wars: KOTOR Wiki Guide
By IGN-GameGuides, Andrew Eisen, IGN-Cheats, +4.2k more
updated
This is the Walkthrough section of the Star Wars: Knights of the Old Republic Wiki guide.
- Endar Spire
- Taris
- Dantooine
- Tatooine
- Kashyyyk
- Manaan
- Korriban
- Leviathan
- Unknown World
- Star Forge
advertisement
Up Next: Endar Spire
Previous
Star Wars: KOTOR Wiki Guide
Next
Endar Spire
Was this guide helpful?
In This Wiki Guide
Star Wars: Knights of the Old Republic
Aspyr
Rating
ESRB: Teen
Platforms
Nintendo SwitchAndroidMacintoshPC
God of War Ragnarok — All Collectibles: Helheim, Musphelheim, Niflheim
This video shows you where to find all the Nornir Chests, Legendary Chests, Lore items, and all of Odin’s Ravens in the Musphelheim, Helheim, and Niflheim regions of God of War Ragnarok. **SPOILER ALERT**These regions don’t unlock until well into Ragnarok’s story. We advise not watching this video until you’ve gotten at least as far as the end of the main quest Forging Destiny. We’ve provided additional spoiler warnings for each region throughout the video as well.00:00 — Intro00:29 — MUSPHELHEIM COLLECTIBLES00:42 — Musphelheim Nornir Chest 101:50 — Musphelheim Legendary Chest: Divine Ashes01:50 — Musphelheim Raven #102:25 — Musphelheime Rune Read (Lore): Valhalla Rises02:54 — Musphelheim Raven #203:19 — Musphelheim Lore Scrolle: Gna’s Journal04:03 — HELHEIM COLLECTIBLES04:17 — Helheim Legendary Chest #1: Bow Ability (Falling Sky)04:46 — Helheim Legendary Chest #2: Runic Summon (Wrath of the Wolf)05:20 — Helheim Raven #105:48 — Helheim Rune Read (Lore): Prayer to Hraesvelgr06:13 — Helheim Legendary Chest #3: Tame the Beast (Blades Heavy Runic Attack)07:49 — Helheim Legendary Chest #4: Thrust of 1000 Soldiers (Spear Light Runic Attack)08:33 — Helheim Legendary Chest #5: Onslaught Shield09:09 — Helheim Lore Marker: Hraesvelgr09:09 — Helheim Raven #210:26 — NIFLHEIM COLLECTIBLES10:47 — Niflheim Legendary Chest: Runic Summon (Bitter Squirrel)11:14 — Niflheim Nornir Chest11:14 — Relic: Motsognir’s Call11:14 — Niflheim Legendary Chest: Nocked Proficiency (Companion Accessory)For more on Kratos’ latest adventure, check out our full God of War Ragnarok walkthrough on IGN @ www.
 ign.com/wikis/god-of-war-ragnarok
Starfield: Performance Preview
Bethesda is one of the biggest studios within the Xbox portfolio, with its latest and arguably most anticipated title in Starfield releasing on Xbox Series X, Series S, Xbox One, and PC in 2023. This huge Gamepass title had gameplay revealed earlier this year to provide a glimpse into what we can expect.Built on an improved engine, The Creation Engine 2, the game shows clear strides over Fallout 4 and other previous titles. Space travel, world building, rendering technology, and more are all covered here in our IGN Performance Preview.
Loading
From Dying Console to Killer PC Battlestation — Gaming Makeover
7 Things to Do First — Pokémon Scarlet and Violet
Pokemon Scarlet & Violet gives you a whole new region to explore, and as soon as you step outside, all of Paldea is your Cloyster. But, there are definitely a few things you should consider — especially if you want to make exploring the most rewarding and fun it can be.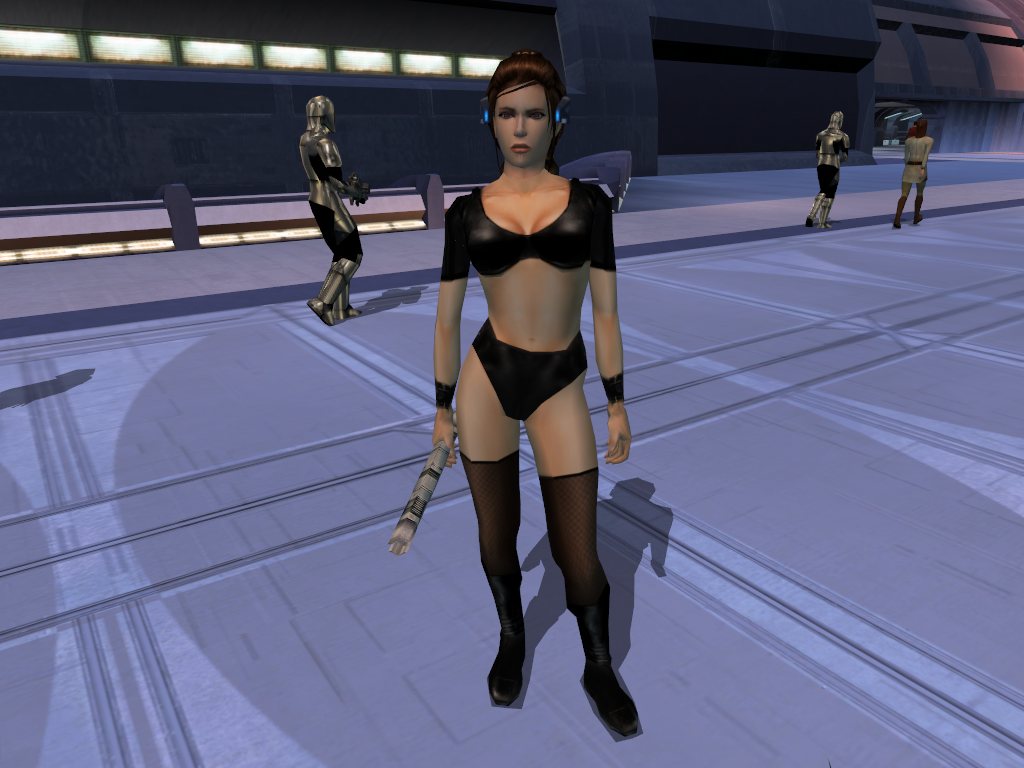 Here’s everything you need to do first in Pokemon Scarlet/Violet with plenty of tips to help you along (without spoiling the whole game).For more Pokemon S/V tips, check out our full guide on IGN!https://www.ign.com/wikis/pokemon-scarlet-violet
Leviathan — Star Wars: KOTOR Wiki Guide
Note: The Leviathan quest happens after you’ve acquired the third Star Map. It doesn’t matter which order you visit the planets, but on your way to the fourth planet, The Leviathan will capture you.
En route to your fourth planet, you’ll come out of hyperspace with the Sith flagship, The Leviathan, staring you in the face. It isn’t long before the tractor beam gets hold of the Ebon Hawk and pulls it towards its docking bay. The three party members on board that the Sith know exist, Carth, your character and Bastila, all give up hope knowing that they’ll be captured. They quickly make a decision to use the other five (if you got everyone… you could be missing two characters, Juhani [if you didn’t save her on Dantooine] and HK-47 [if you didn’t buy him on Tatooine]) to make an escape. I say five because you can’t use Zaalbar to break off of the ship.
advertisement
For the sake of the walkthrough, follow the path I did if you’d like — I chose HK-47, our parties most able fighter not captured by the Sith.
Before you know it, you find Carth, your character, and Bastila on board The Leviathan in three electronic field holding cells. After talking amongst yourselves, Admiral Karath comes in to check up on you. It’s not an incredibly long time before he begins to torture the party and ask questions. He asks where the Jedi training facility is and what the mission the Jedi Order sent you out on is. Answer «Alderran» and «To Assassinate Darth Malak» to which Admiral Karath will know you are lying. It’s then that you learn that Admiral Karath has destroyed Dantooine. It is the fear of Bastila that he isn’t lying. After more torture, he leaves.
HK-47 was chosen for the «solo» part of the Leviathan quest. While your choice in character will have a minor effect on the events described below, the basics remain constant no matter which character you choose.
You’ll find a Sith Technician messing around with HK-47. His memory has been erased and power shut off, but remember that he tells your party upon being chosen to break everyone off of The Leviathan that he has both a backup power supply and backup memory chip. When the Sith Technician turns his back to leave, run up to him and punch him. Keep in mind that you’re completely unequipped and stripped of all weapons and items, so you’ll need to fight with fists right now. Search the table to your left to find all sorts of goods for HK-47, as well as the footlocker at the top left of the room to find a Stun Ray, 5 Construction Kits, 6 Parts, 2 Security Spikes, a Flame Thrower, Droid Medium Plating Type 2, and Droid Motion Sensors Type 2. Using everything we’ve found in this room, equip yourself properly before leaving and going into the next room.
As you walk out of the room, look right to find three weak Sith Technicians there. Being equipped with weak swords, they can do no damage to you. Kick and punch them to death while not being damaged, or use your Flame Thrower to do away with them quickly. Make sure to search their bodies, one of them will have Credits on him. Then, go to the door across from the door we came into this corridor from, and enter into that room there, where you’ll find all sorts of medical goods. In the two tall lockers at the back right of the room, you’ll find a Retinal Combat Implant, a Nerve Enhancement Package, an Advanced Medpac, a Life Support Pack, 3 Medpacs, 2 Medpacs, aBattle Stimulant, 2 Antidote Kits, an Adrenal Strength, an Adrenal Stamina, and an Adrenal Alacrity.
advertisement
Back in the corridor, have your back face the medical room we just came out of. If you go left and follow that pathway, you’ll come to the door to the Detention Center. You can’t open or pick the lock on this door, however, so it’s futile to go down there. Instead, head rightward down the sloping corridor. Turn right when you can and a Sith Guard will attack you. Kill him and grab the Starboard Cell Block Key off of his dead body. Now, look for a door in that corridor that leads into a rightward room. In here you’ll fend off two Sith Technicians. Search their bodies, then grab the 4 Parts and 4 Computer Spikes out of the storage container in the room. Fool around with the computer in that room if you want (I’d wait, you’ll get an item that allow you to do it minus the cost of Computer Spikes) — otherwise, go back to the corridor where will killed the other Sith Guard.
Go down the corridor further, where it splits going left and right. With the Starboard Cell Block Key, you can unlock the four cells to your right. Let the Rodian on the far side out of his cell and he’ll give you an item called an Ice Breaker, which we can use on the computer we earlier ignored in a moment. Don’t open the cell with the three Rodians in it. They’ll attack you and you will get a paltry 120 experience total for killing them. Not worth your time. The other two cells, in fact, carry nothing for you as well.
At the other end of the corridor, you’ll find a footlocker and a canister called Riot Equipment. Open both up to find 2 Medpacs, an Advanced Medpac, a Short Sword, a Long Sword, a Combat Suit, 2 Blaster Pistols, a Stun Baton, a Stealth Field Generator, a Pazaak Deck, a Short Sword, Pazaak Card +/-6, Hair Trigger, Pazaak Card +1, Pazaak Card +2, and 4 Computer Spikes. Then, look left to the door there. Go left through the door into a room with five Sith guards. You will be amazed how HK-47’s resiliency lasts through this battle. I got through with no healing and not even half-damaged. Stand in the doorway to minimize damage and shoot away with the two blasters you just found previously. When the five enemies are dead, search their bodies, and then focus your attention to the container, three vertical lockers and footlocker at the north end of the room, where combined you will find an Antidote Kit, an Advanced Repair Kit, a Sith Passcard,3 Computer Spikes, 2 Medpacs, 6 Credits, a Computer Spike, 2 Medpacs, 18 Credits, a Computer Spike, a Medpac, 9 Credits, Parts, and a Computer Spike. Worth the trouble!
Go back to the room with the computer terminal in it. Access the computer terminal and use the Ice Breaker to get yourself 99 Computer Spikes on this level of the ship. Open the Detention Center and download the Area Schematics before moving on. With that done, you’ll want to move back to the room where we started our quest. Now, move past that room, down the corridor I told you to previously ignore, and to the now-open Detention Center door. Approach the computer terminal here and have all of the doors opened. This will signal a cutscene in which the party is reunited. It is decided that Carth, Bastila and your character will get to the bridge of the Leviathan while the rest of the party dedicates their efforts to getting back to the Ebon Hawk. And with that said, you find yourself in the room with all of the gear we got taken from us when we were captured.
advertisement
In this room, you will find a Frag Grenade, 12 Credits, a Repair Kit, a Mandalorian Assault Rifle, 5 Computer Spikes, a Security Spike Tunneler, and 2,000 Credits. One vertical locker there will have all of the rest of the stuff that was taken from us. Re-equip your party. Now, leave the series of rooms you’re in (there’s nothing of interest in any of them), and back to the computer terminal where we opened the cells. From there, go back along the corridor to where we started the game. Go past that room and straight down to an elevator, where Canderous will tell you that the party has reached the Ebon Hawk. Then, go into the elevator and toggle the controls. Our destination? The Bridge.
Once up on the bridge, go forward off of the elevator and ahead to a corridor. A fierce melee will ensue with all sorts of foes going at you. Run around the various rooms and take out all of the Sith foes with fierce lightsaber action. Some use Grenades, some fire blasters — but the Sith are all easy to defeat here, thankfully. Once the fighting is complete in the corridors, head back to the elevator and I will instruct you on what to do from that focal point.
Go forward from the elevator and head left down the corridor, and left through the first door you come across. When you go left through that door, you’ll come into a room with some weak War Droids and the like. Slay the droids and search their remains. Make sure to get the Advanced Flame Thrower and Droid Heavy Plating Type 3 from the droid upgrade bin in the room. There are two doors leading left out of this room. The one closer to the door we entered the room via leads to an empty room with a computer console. Spike and hack the computer and use one Computer Spike to open security doors. With that done, go back to the previous droid room, and left out of the other door in that room. Go straight left through this room and left into another room. Fighting earlier happened here. There are two footlockers and three vertical lockers in this room. Within, you’ll find 14 Credits, 2 Parts, 2 Medpacs, 2 Advanced Medpacs, anIon Grenade, a Sonic Grenade, 2 Credits, a Medpac, a Sonic Grenade, Parts, 37 Credits, an Antidote Kit, 23 Credits, and an Antidote Kit.
Go back right into the previous room and forward through the door out of that room and into another corridor. Go right down the corridor and left through the door in between the two corridors leading farther upward. In this room, you’ll be attacked with several mysterious grenades, so keep an eye on your health. Out of the various holders and lockers in this room, you should find6 Concussion Grenades, 6 Sonic Grenades, 3 Thermal Detonators, 3 Blaster Rifles, 3 Sith Assault Guns, a Light Repeating Blaster, a Disruptor Rifle, Durasteel Heavy Armor, 2 Battle Armors, 3 Powered Light Battle Armors, and 3 Security Spike Tunnelers. In addition, you’ll want to grab the Space Suit in the corner of the room — we’ll need that shortly. Go forward out of this room. The only thing of interest in this room is a computer console if you want to mess around with it. Otherwise, bear left out of this room and into another corridor.
advertisement
As soon as you go left into the corridor you’re likely spot and engage in combat two Dark Jedi. Kill them and take their gear. Then, go down this corridor left, and through the door there. In the containers in this otherwise-vacant room, you will find an Advanced Repair Kit, an Antidote Kit, 2 Antidote Kits, 2 Medpacs, a Bio-Antidote Package, an Advanced Medpac, a Hyper-Battle Stimulant, a Hyper-Adrenal Stamina, a Hyper-Adrenal Alacrity, and2 Medpacs. In the rightward adjacent room, you will find two footlockers, in which are 3 Computer Spikes and 3 Parts.
Work your way to the bottom most corridor and go right. Kill the enemies in the corridor and then go into the room with grenade-throwing enemies and whatnot. Kill all of the Sith in this room, then search the four footlockers within. You’ll find 68 Credits, 57 Credits, an Advanced Repair Kit, 22 Credits, and 64 Credits.
The door that is entitled Bridge is locked, so we can’t access the Bridge via that door. Go back down the vertical corridor and swing right two rooms to a part of this area also called «Bridge.» This will, after a load screen, lead you to another room. Search the rubble on the left side of the room to find a Shield Generator, 2 Computer Spikes, and2 Parts. Then go through the Outer Doors and find yourself literally out in space. This is where the Spacesuits we found earlier come in handy. Space walk (it’s slow going, I know) along the enemy-less and linear pathway ahead of you to another door, and go through that door to be out of your spacesuit.
Ahead of you is a Standard Door. Go through this door and be met by the cream of the crop — the Elite Sith Soldiers. They are nothing special but are far more resilient than their weaker, normal counterparts. When they’re dead, search their bodies for goods. Search the lockers on the far side of the room to find Parts, a Frag Grenade, 2 Medpacs, a Computer Spike, a Repair Kit, an Ion Grenade, a Medpac, a Life Support Pack, a Construction Kit, a Hyper-Adrenal Stamina, and an Advanced Medpac. The door on the opposite side of the lockers is our next target, so go through that door.
Walk up this enemy-less corridor to another door which leads to the bridge itself, where not only a slew of enemies are waiting for you, but Admiral Karath himself. After he tries to warn you of what’s about to happen, and that by surrendering you will live by Lord Malak’s mercy, a fight naturally ensues. Kill the Sith enemies, two Dark Jedi and Admiral Karath himself. When all are dead in the room, a cutscene ensues in which Admiral Karath, in his dying words, tells Carth a very, very important secret. You’ll find out what it is soon enough… just make sure to search the Admiral’s body for a considerable amount of Credits.
advertisement
When all is quiet on the bridge, heal yourself and then leave, going back to the previous corridor. When you do you’ll meet up with a few stray Sith enemies. Kill them, search their bodies, and continue down the corridor ahead of you. Before leaving the control room, however, you’ll want to go to the computer console and open the docking bay doors. If you don’t, you won’t be getting very far. Run straight down the corridor ahead of you to the now-opened doors at the end, near the lockers we earlier searched. This will lead back to the previous area of the ship. Run straight through, killing the odd and stray Sith soldier or Dark Jedi. Go back to the elevator and go down to the Hangar. We’re about to blow this joint!
Once down into the Hangar from the elevator, go through the door ahead of you and onto a corridor. Go down the corridor and through the first door on your left, leading into a small room. In this small room, you’ll find numerous weak Sith enemies. Kill them all and search their bodies. Then search the canisters at the back of the room to find 2 Advanced Repair Kits, a Medpac, 2 Antidote Kits and a Medpac.
Further up the corridor (but not too much further) you’ll find a door on your right. Beyond this door is a room with two Dark Jedi and a Dark Jedi Master. Kill the three foes and search their corpses. Then, out of the two footlockers and three vertical lockers in the room, you’ll find a Frag Grenade, aSonic Grenade, an Ion Grenade, 2 Concussion Grenades, an Adrenal Stamina, 3 Advanced Medpacs, a Repair Kit, a Computer Spike, a Frag Grenade, 11 Credits, an Antidote Kit, 34 Credits, and an Antidote Kit. Go back to the corridor and all the way up it now, through some blast doors, and into a large room with some Sith and Dark Jedi waiting for you yet again. Kill the foes, they shouldn’t prove to be a problem. Then, search the canisters and footlockers in the room to find an Advanced Repair Kit, an Antidote Kit, a Medpac, an Antidote Kit, 31 Credits, an Advanced Medpac, 37 Credits, an Antidote Kit, and a Medpac. Now, go back to the previous corridor and straight up through another door…
Get ready to be floored. Malak appears, and it isn’t long before you find out the real truth. The truth that you, yes… you… are Darth Revan. It’s not a joke, it’s true. You are the old master of Darth Malak, who he left for dead after the Republic trap. The long, long conversation not only shows you what you truly are, but even brings you flashbacks to all of the things characters in the game said that would give you a hint as to who you really are. It’s not long before Malak challenges you to a fight. And he even does it honorably, disabling your two friends (Carth and Bastila) and taking you on, one-on-one.
advertisement
The fight with Revan isn’t too hard. He hardly swings his lightsaber, but he does use Dark Jedi skills on you awesome. Damage him a bit and he’ll retreat behind a door in front of you. Since the door is locked, you’ll have to go around to gain access to him. When you do, fight him some more. After damaging him enough, Bastila will break into the room and throw her lightsaber at Malak. This will give you and Carth enough time to get to the Ebon Hawk and leave the ship, which you should do now.
PC version note: Make sure it’s your character that exits the hangar. There’s a bug in the game where the game will crash after the space battle, unless it is your character that exits to the hangar.
From here, it’s much the same as it was when we left Taris through the Sith Blockade. You’ll need to fend off Sith fighters in the gun turret once again. It’s insanely easy as it was before — no worries. Once the ships are destroyed, get ready for some deep and heavy dialogue. I’ll let you witness that for yourself.
Up Next: Unknown World
Previous
Final Exam
Next
Unknown World
Was this guide helpful?
In This Wiki Guide
Star Wars: Knights of the Old Republic
Aspyr
Rating
ESRB: Teen
Platforms
Nintendo SwitchAndroidMacintoshPC
Dead Island 2 Showcase — Official Teaser Trailer
Watch the Dead Island 2 Showcase for exclusive new gameplay footage, showcased through an exciting cinematic live-action pulp adventure. The Dead Island 2 Showcase begins on December 6 at 12PM PT, 2PM ET, 8PM GMT, and 7AM AEDT.
7 Things to Do First — Pokémon Scarlet and Violet
Pokemon Scarlet & Violet gives you a whole new region to explore, and as soon as you step outside, all of Paldea is your Cloyster. But, there are definitely a few things you should consider — especially if you want to make exploring the most rewarding and fun it can be. Here’s everything you need to do first in Pokemon Scarlet/Violet with plenty of tips to help you along (without spoiling the whole game).For more Pokemon S/V tips, check out our full guide on IGN!https://www.ign.com/wikis/pokemon-scarlet-violet
Loading
From Dying Console to Killer PC Battlestation — Gaming Makeover
Indiana Jones and the Dial of Destiny — Official Trailer
Harrison Ford returns as the legendary hero archaeologist in the highly anticipated fifth installment of the iconic “Indiana Jones” franchise, which is directed by James Mangold (“Ford v Ferrari,” “Logan”). Starring along with Ford are Phoebe Waller-Bridge (“Fleabag”), Antonio Banderas (“Pain and Glory”), John Rhys-Davies (“Raiders of the Lost Ark”), Shaunette Renee Wilson (“Black Panther”), Thomas Kretschmann (“Das Boot”), Toby Jones (“Jurassic World: Fallen Kingdom”), Boyd Holbrook (“Logan”), Oliver Richters (“Black Widow”), Ethann Isidore (“Mortel”) and Mads Mikkelsen (“Fantastic Beasts: The Secrets of Dumbledore”).
news about the game, announcements of add-ons, promotions and discounts — Igromaniya
Star Wars: KOTOR Writer Reveals Why BioWare Didn’t Make a Sequel
Critics’ Choice — Metacritic’s Best Nintendo Switch Games of 2021
Star Wars: Knights of the Old Republic Coming to Nintendo Switch November 11 $70 million budget for a new Star Wars: KotOR?
Rumor: before the end of the year Star Wars: Knights of the Old Republic will be re-released on consoles
Media: BioWare or EA are not working on a new Star Wars: Knights of the Old Republic
Media: EA is working on a remake sequel to Star Wars: Knights of the Old Republic
Media: A rough script for a movie based on Knights of the Old Republic almost complete
Disney is working on a project based on Star Wars: Knights of the Old Republic
In Star Wars: Knights of the Old Republic 3, players would pursue the ancient Sith
The Knights of the Old Republic remake was banned, but the Painkiller remake is not yet nine0003
Star Wars: Galaxy of Heroes features Knights of the Old Republic
BioWare veteran leaves gaming industry
Mass Effect replaces Star Wars as BioWare executive on the studio’s future
Microsoft announces first Xbox games with backwards compatibility
Offers of the Week: Darkest Dungeon, Star Wars, and PS4 Exclusives
May the 4th be with you: GOG. com has a Star Wars game sale
Rumor: BioWare is working on a remake of Star Wars: Knights of the Old Republic 9Star Wars: Knights of the Old Republic BioWare
Knights of the Old Republic released on Android
Morning Flash News
Evening Flash News
Evening Flash News
Evening Flash News
Evening Flash
Return of the Jedi
Evening Flash
XP Polls: Which game are you least looking forward to?
Flash news
Flash news
Knights of the Old Republic, main story guide
Star Wars: Knights of the Old Republic was released back in 2003, but still remains relevant for many gamers. The player will play as a character who dreams of restoring the Republic to its former glory. nine0003
General information about the game
The game takes place 4000 years before the emergence of the Galactic Empire. Hundreds of Jedi died in the battle with the Sith, and the main character is the only hope for salvation.
Despite the outdated graphics, the game boasts an impressive fan base
In the passage of KOTOR, the player will have to make difficult decisions, choose which side to fight on and try to save the galaxy.
Mechanics, game features, tips
It is not necessary to fight alone in the game. A gamer can create a squad of up to 9 friends and go on adventures together.
Dialogues are an integral part of the game. In this part, they are seriously worked out, the player can build relationships and even start novels. In addition, almost every decision made will affect the events in the world.
In the game universe there are several planets that are inhabited by NPCs, you can move between them on your own spaceship «Black Hawk». nine0003
A small guide for beginners when passing SWTOR:
- it’s easier to start the game as a soldier. This is necessary in order not to pump the skills of wearing armor and weapons in the future;
- to play as a soldier, you need to download only the skills «heal a wound» and «persuasion», for other skills there are other characters;
- it is easier to fight with two swords, but first you need to pump the corresponding skill to at least level 2;
- from the Force is better to pump «Heal», «Lightning», «Destroy the Droid». nine0090
Character classes
Only three classes are available at the start of the game:
- Soldier. Designed to fight in the thick of things. For each level, 10 health units are given. From the very beginning, all armor and weapons are available for the game, and pumping skills does not require a lot of points.
- Scoundrel. A fighter is not a deed, but a word, best of all he knows how to deceive, negotiate, convince and break locks.
Gets only 6 hit points per level.
- Repair scouts. They get 8 hit points per level, medium armor is immediately available to them. nine0090
There are only 6 character classes in the game
Important! The choice of class must be treated with all responsibility, because it will not work to change it.
After level 5-7, you will have to choose one of three Jedi classes:
- Jedi Sentinel. Middle class, gaining 8 hit points per level. This is a flexible class that can both engage in open confrontations and resolve conflicts through diplomacy.
- Jedi Consular. This class is not suitable for forceful conflict resolution. He gets only 6 health points per level, so he prefers to study and use the Force. nine0090
- Jedi Guardian. This is a real fighter who is not afraid to speak even against several opponents. A lightsaber and 10 health points per level allow you to engage in any fight without fear. But this class cannot use the Force effectively.
Star Wars: Knights of the Old Republic walkthrough
Before playing the game, you should immediately decide which side to play — dark or light.
The Endar Spire
This level is a lot of learning, so it’s a good idea to read everything the game has to offer. nine0003
The protagonist wakes up in his cabin and immediately gets into a fight after leaving it. After the battle, be sure to search the corpses of opponents in search of resources. Next, you will need to move to the exit towards the command module. There will be a lot of Sith here, and you need to make your way through them to the escape pods.
Additional information! It is always useful to explore the location — the developers have prepared many surprises for curious gamers.
Taris
After waking up on Taris, you need to move to the bar and look for a girl named Sarna: she will give you an invitation to a party, which you should immediately go to. Here you need to find a man named Gadon, who will give the documents to the main character. Next, you need to look for the gate with Shalina, which are located in the northeast of the location. Soon the protagonist will meet a girl named Mission, who will ask for help with some things in the sewers.
The first serious fight awaits the player on Taris
After all the optional missions and races, the player will be contacted by Canderus and told that he knows how to get off this planet. You will have to buy a T3-M4 droid, which will help you get into the Sith base. At the end, you need to disable the ship’s security system and fight enemy fighters in the air.
Dantooine
Passage of the game StarWars: KnightsoftheOldRepublic is transferred to another world. Arriving on the planet, you must immediately run to the Council Hall. At the same time, when talking with other characters, it is advisable to show modesty. Here you have to choose a Jedi class. After that, the main character will have to pass the test — to cleanse the planet from the evil that denigrates it. After defeating the monster, you definitely need to save, because you have to persuade the girl to renounce the dark side, but you can do this without the appropriate skill only by saving / loading. After completing the tasks, the main character will become a Padawan. At the end, the Council will send the player on a special mission. nine0003
Black Hawk
SWKOTOR passage is impossible without the ship «Black Hawk», which is associated with several quests:
- Gizok Invasion. Along with the cargo, hordes of rodents arrived on the ship. They can be handed over to a rare animal specialist who lives on Manaan or poisoned.
- Drug cache. Lurtz will tell you that one shipment was never sent to him. It can be found in the cargo compartment in a cache, the code for which will be reported by Lurtz himself.
- Stowaway.
Zaalbar will tell you that the food supplies on the ship began to run out faster than usual. After checking the cargo and passenger compartments, the player will find a little girl. Her fate should be discussed with the Jedi Enclave on Dantooine.
- Replacement parts of the ship. The task automatically appears in the Unknown World. You will have to find spare parts and repair the ship yourself. nine0090
nine0089 Mysterious box. This is the second mission from Lurtz. He will ask you to deliver an incomprehensible box to the swoop registration.
Important! You can also upgrade weapons and armor on the ship.
Yavin
This is a space station inhabited by only one NPC, trader Suwam Tan. Initially, only 6 points will be available for purchase, but after the discovery of three star cards, there will be 11 of them. Also, after that, several Trandoshans will attack the station. The most effective tactic is to deprive some of the opponents of combat capability with the help of force, and at the same time kill the rest. After defending the station, you need to return to the merchant again, and he will show 9 morenew improvements, including a powerful lightsaber upgrade.
Sometimes beautiful views open up on Yavin
Tatooine
Immediately you need to go to the Zerka Corporation and ask for a hunting license. To get it, you will first have to find the «leader’s stick». To do this, you need to go to the sand people. You can get into their lair by wearing their clothes. After completing a few small tasks, you need to go in search of a star map guarded by a dragon. Having dealt with the problem, you need to return to the office, give the stick and pick up the license. The passage of KOTOR on Tatooine is completed and you can leave the location. nine0003
Kashyyyk
The main character will immediately be sent to the local authority, whose name is Chuundar. He lives in the village and will immediately give an assignment that will have to be completed in any case. First you need to talk to a local hunter named Jolie. He will instruct you to kill the poachers in the camp, but it is not recommended to do this for a light character. It is better to use the Force to find out the code for deterrent settings and turn them off.
After completing a few more tasks, you need to return to the village, and here the war cannot be avoided. nine0003
Manaan
The passage of KOTOR on Manaan begins with the search for Roland Vann at the embassy. He can be told a secret about the star map. Roland will ask the protagonist to sneak into the Sith base and pick up the data module. You won’t be able to get quietly, you’ll have to arrange a fight, but it turns out that on the planet the showdown between the Sith and the Jedi is not approved and the main character will be taken to court.
Important! At the trial, you need to refuse the services of a lawyer, otherwise the main character will be sent to the bunk. nine0003
After that, you need to return to Roland, and he will give a new task, after which the player will again go to court. This time it makes no sense to lie, because the planet will still have to leave.
Korriban
The inhabitants of this planet have a negative attitude towards the main character. Here you need to get into the academy, and for this you need to become a student. With save/load, you can do this without additional tasks. After joining, you will have to complete several assignments, including the killing of deserters and Terentatek. You can find them in a cave next to the academy. nine0003 Korriban looks empty and lifeless
After that, you will have to visit several graves in search of a star chart: it will be in the last grave, in which Nagi Sadow rests. After that, you can leave the planet.
Additional information! All additional quests must be done immediately, since it will no longer be possible to return to the planet.
Leviathan
The ship is suddenly taken over by the Sith. In this mission, you have to fight with Saul. After the battle, you need to find a computer that is located next to the corpse of the leader of the Sith. It will not work to make it unnoticed, Darth Malak will attack the player, but there will not be enough strength to defeat him, so the best option is to run away. nine0003
Unknown world
First you need to talk to the Rakata tribe, it turns out that the main character has already been here. They will ask you to destroy another tribe, but you will have to eliminate them yourself, after which you need to free the captives. Further on this location, you will need to find Bastila and convince her to return to the side of the Light. If the main character is dark, you need to convince her to join him. In the end, you need to turn off the force field around the planet and fly away with peace of mind.
The Star Forge
This is the last location in the passage of the knights of the old republic. If the player has chosen the light side, then he will arrive with the whole team, if the dark side — one.
Additional information! It is recommended to take only Jedi with you.
First, you have to deal with the escaped Bastila, and then meet with Malakk, who will unleash battle droids on the player.
