Kingdom Hearts 3 Tips and Tricks
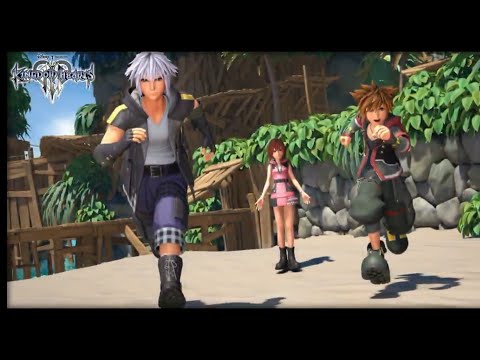
If you’re playing Kingdom Hearts 3, chances are this isn’t your first adventure with Sora, Donald, and Goofy. The excellent PS4 and Xbox One action RPG is a faithful sequel to the PS2 classics in terms of the gameplay loop and even when it comes to the basic mechanics. Still, it’s been more than 13 years since the release of Kingdom Hearts 2. Even the most dedicated of fans may need a refresher, even if you’re just returning for the Re:mind DLC, as well as a primer on some of the new systems introduced here.
Further reading
-
- Kingdom Hearts 3 all keyblades and how to unlock them
- The 10 best JRPGs of all time developed by Japanese studios
- The best anime video games
Our beginner’s guide will help you hit the ground running, and point out aspects of the experience you should watch out for as you make your way through the lovingly re-created Disney worlds as a Keyblade master.
1. Choose your Desire and Power
Right from the jump, you have to make a pair of fairly important choices: Choosing your Desire and Power. The problem is that besides vague descriptions, it’s unclear how these decisions affect Sora. While there is no wrong choice, you may want to know what each does. For Desire, the trait you pick first, you get to choose between Balance, Wisdom, and Vitality. Your starting HP and MP correlate with your decision.
- Balance: 105 HP/110 MP
- Wisdom: 90 HP/120 MP
- Vitality: 120 HP/100 MP
If you lean on magic attacks, choose Wisdom. If you want to fight up close a lot, choose Vitality. And if you want a balanced set of both HP and MP, pick Balance (we chose Balance for our first run).
Your Power relates to Ability learning, specifically the rate at which you learn different classes of abilities.
- Warrior: Melee abilities
- Mystic: Magic abilities
- Guardian: Defensive abilities
Regardless of which you pick, Sora’s full range of basic moves will be available to you.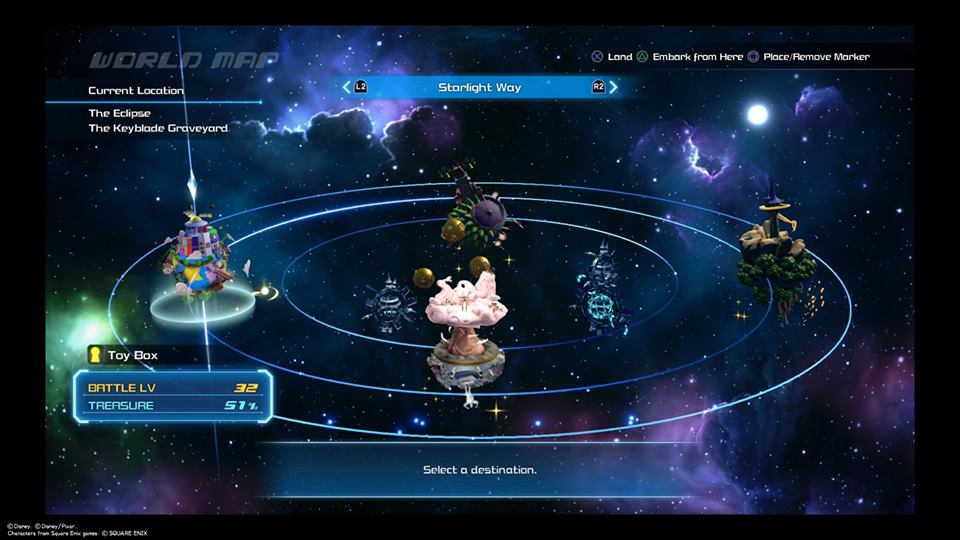 And it’s not like you won’t learn magic moves if you pick Warrior and vice versa. We chose Warrior and still learned some high powered magic abilities as we reached high levels.
2. Set up command shortcuts
One of the first things you’ll want to do is set up command shortcuts for magic/items. Using the D-pad to scroll through the command menu (twice) for what you’re looking for is cumbersome and frankly completely inefficient. Go into the pause menu and click on Customize. There you can create three shortcut menus to assign magic/items and more to the four face buttons. When in combat, simply hold L1/LB to open the shortcut menu. We recommend assigning at least one restorative ability (cure/potion) to a slot. Other than that, add whichever moves you tend to use the most.
3. Upgrade Keyblades and synthesize gear/items
Throughout each world, you’ll come across Moogle Shops near various save points. Moogle sells you wares such as potions and new gear, but the little guy also has a handy workshop that may go unnoticed at first.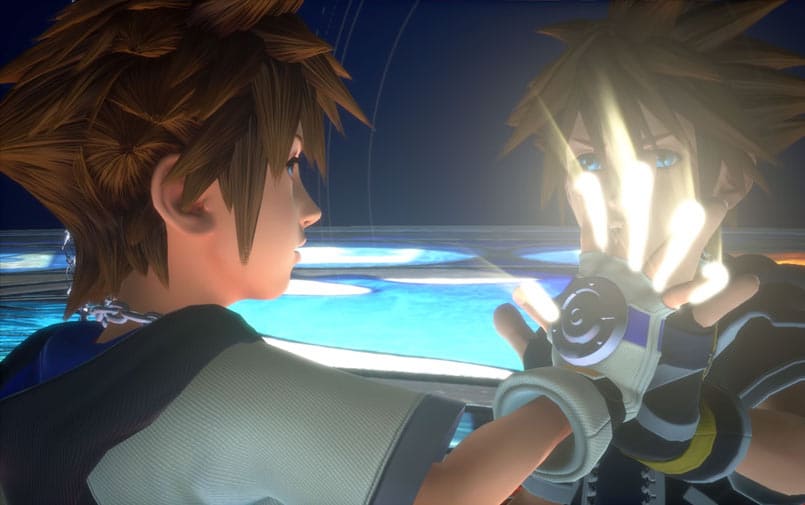 All those items you get from killing enemies, opening chests, and breaking stuff? You can use those to increase the strength/magic of your Keyblades, as well as craft new items and gear. As you get further into the game, you’ll have more than a handful of Keyblades to level up. As some of the leveling materials are quite rare, make sure to throw the materials at the Keyblade(s) you use most.
Beyond leveling Keyblades, you can combine items and gear to make better equipment. It’s usually better to spend materials creating gear rather than items (gear lasts forever, after all), but we crafted the occasional Mega Potion to have on hand for boss fights.
4. Use Attraction Flow and summons to your advantage
Kingdom Hearts 3‘s new summon system, Attraction Flow, is both visually enticing and effective for taking out large groups of Heartless quickly. The more attacks you land, the more summons will appear above the command menu. Sometimes, you’ll have multiple summons available at once. To cycle through them and choose, you have to press L2/LT.
While you have to make sure you use them before they expire, you have more than 30 seconds to trigger each one. When in boss battles, feel free to unload them as soon as they pop up. However, when squaring off against groups of Heartless, consider your timing. It’s not beneficial to trigger Blaster Blaze, the cart-shooting mini-game, when there are only a few Heartless around. Instead, wait until the next group spawns, which often happens after taking out the first wave.
5. Balance your Keyblades
At first, this won’t matter, but each world you complete rewards Sora with a new themed Keyblade. Once you have more than three, you have some decisions to make. Sora can equip up to three Keyblades at once. Switching between them in combat is as simple as pressing right on the D-pad. As each Keyblade has at least one form change and different strength/magic properties, it’s smart to equip Keyblades that complement each other.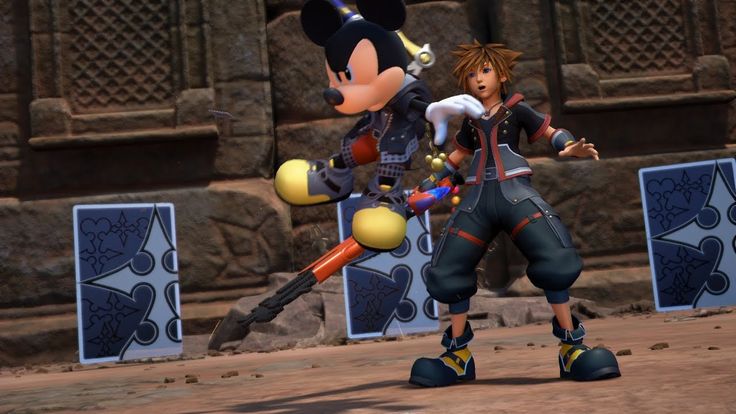
For instance, Shooting Star, which you get in Twilight Town, transforms into dual arrow guns, allowing Sora to take out enemies from afar. It’s also magic-oriented, so it’s better by default for ranged magic attacks. Favorite Deputy from the Toy Story world, meanwhile, is strength-oriented, and its form changes are designed to bring you close to the Heartless to wallop them into dust. These blades work well together because of their different strengths.
6. Check gear slots and upgrade often
Sora, Donald, and Goofy earn experience points for each enemy they slay, which eventually translates into leveling up. While your stats go up automatically when you level, you’ll want to check your gear/magic slots regularly. At the start, each character’s slots are limited, but as you level up, more armor/ring slots will open up. Leaving them empty doesn’t help anyone. The same goes for magic, as you’ll steadily unlock more powerful versions of each spell (Fire turns to Fira which then turns to Firaga).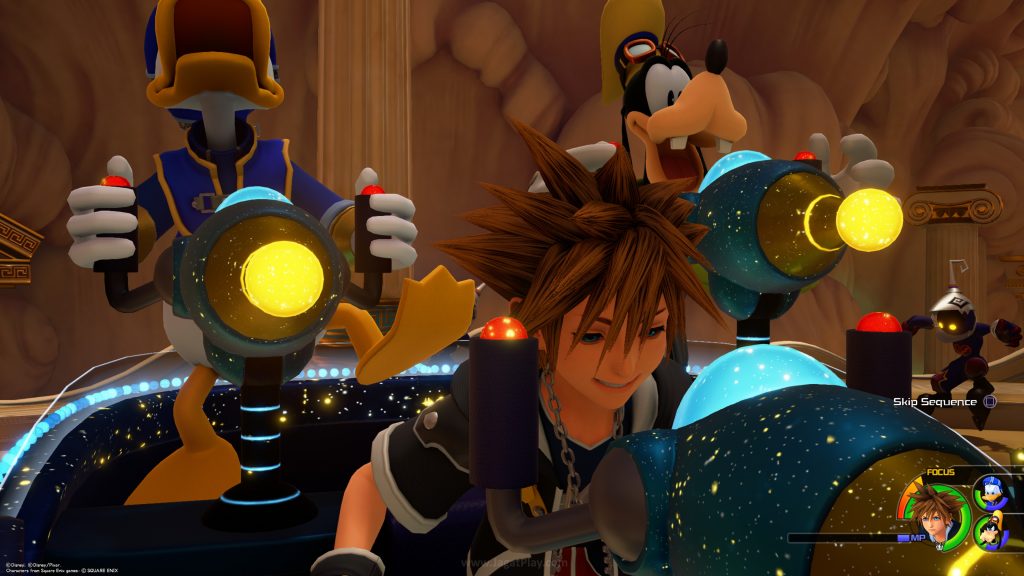 New spells must be equipped manually (go back and modify your shortcuts, too).
Always compare the gear in your inventory to what each character has equipped, and make sure to check the Moogle Shop for better gear, not just for Sora but for his friends, too.
7. Don’t forget about new abilities
Leveling up also adds AP (ability points) to your characters, which can be used to activate new abilities. Most abilities aren’t equipped automatically, so you have to go into the Abilities menu to spend your points. It’s easy to forget to do this. At one point, our Sora had about 40 unused points and a bunch of cool abilities just sitting there unactivated. Take the time to read each ability description to see if it’s one you’ll actually use first, but you can equip most of what you have available at all times in our experience.
8. Worry not about the Gummi ship
Traveling from world to world on the Gummi ship can be a drag. This is the one area of Kingdom Hearts that hasn’t really improved in the long gap between Kingdom Hearts 2 and Kingdom Hearts 3. Just know that you really don’t have to worry about your Gummi ship level. Besides a few mandatory ship battles, you can avoid combat altogether. Your Gummi ship levels up too, but it’s really not that important. We never had an issue completing the mandatory tasks despite not taking the time to engage in optional battles during our voyages.
9. Always have a Kupo Coin on hand
With Sora’s magic, Donald’s magic, and potions, it’s not too hard to avoid death in Kingdom Hearts 3. That said, sometimes you get a little overzealous in a boss battle. That’s why you should always have a Kupo Coin on hand. Retailing for 400 Munny, the Kupo Coin is at the top of the list in every Moogle Shop. With a Kupo Coin in your possession, you have the capacity for a new life after a sudden death as the result of the Kupo Coin’s restorative powers to reset Sora’s health It only works once, and you can only hold one Kupo Coin at a time, so make sure you re-buy it after each use.
10.
 Cooking can be helpful
Slight spoilers here. Once you reach Twilight Town early in the game, you’ll meet Remy from Ratatouille. After completing a short ingredient-fetching mission, you can start cooking in his kitchen. Each recipe requires you to complete a brief (and easy) mini-game. Eating meals gives your team temporary stat boosts, some of which can be quite huge. Consequently, if you’ve depleted your stats in an earlier struggle, cooking a meal in Twilight Town with Remy is a surefire way to easily make up for past losses.
“Cooking can be helpful” basically translates to “cooking isn’t necessary if you’re doing well in this part of the game,” in which case you can skip the cooking altogether. We cooked a couple of meals during our first visit to Twilight Town, but that was it. If you do wind up cooking, you can visit the Bistro straight from the save menu.
Editors’ Recommendations
-
State of Decay 3: release date, trailer, news, and more
-
Starfield: release date, trailers, gameplay, and more
-
Xbox Game Pass new games: what’s new and what’s leaving in December 2022
-
The best upcoming PS5 games: 2023, and beyond
-
The best Xbox Series X and Series S deals for December 2022
Kingdom Hearts 3: Tipps, Lösungen und News
In Zusammenarbeit mit Disney erscheint Kingdom Hearts 3 nach jahrelanger Wartezeit am 29. Januar 2019 für PS4 und Xbox One. Im Rollenspiel von Square Enix schlüpft ihr in die Rolle des jungen Sora, der gemeinsam mit Donald und Goofy ein besonderes Abenteuer erlebt. Ihr bereist Disney-Welten wie den Olymp, wo Hercules und Zeus zuhause sind oder die Toy Box, wo ihr zusammen mit Woody und Buzz Lightyear gegen die Herzlosen kämpft.
- Publisher:
- Square Enix
- Genre:
- Rollenspiel
- Letzter Release:
- 29.01.2019 (PS4)
- Altersfreigabe:
- ab 12
- Releases:
- 29.01.2019 (PS4, Xbox One)
Inhaltsverzeichnis
-
1 Lösungen & Tipps
-
1.1
Guides -
1.2
Tipps und Tricks -
1.3
Erfolge und Trophies
-
-
2 News & Artikel
-
3 Bilder & Videos
-
4 Leserwertungen
Lösungen & Tipps
Guides
-
Alle Fotomissionen gelöst
Wir haben alle Fotomissionen in Kingdom Hearts 3 für euch gelöst! Seid ihr auf der Suche nach einem von 20 Fotomotiven, dann werdet ihr hier fündig.
-
Fluorit und Damast farmen
Ihr wollt in Kingdom Hearts 3 Fluorit und Damast farmen, um eure Schlüsselschwerter zu verbessern? Dann seid ihr hier genau richtig, wir zeigen euch nämlich alle Methoden, damit euer Vorrat an Fluorit und Damast nie ausgeht.
-
Geheimes Ende freischalten (ohne Spoiler!)
Wir verraten euch, wie ihr ein geheimes Ende von Kingdom Hearts 3 freischalten könnt. Dabei vermeiden wir jegliche Spoiler, damit die alternative Endsequenz richtig Wirkung zeigt!
-
Konstellationen: Fundorte aller Sternbilder im Video
Ihr seid auf der Suche nach allen Konstellationen in Kingdom Hearts 3? Wir liefern euch hier ein Video mit allen Fundorter der Sternbilder, damit ihr die Sammlung an Konstellationen schnell komplettiert habt.
-
Schnell leveln und Sora auf Stufe 99 bringen
Wollt ihr schnell leveln und Sora sowie seine Mitstreiter auf Stufe 99 verbessern, dann haben wir hier die passenden Tipps für euch parat, wie ihr massenweise Erfahrungspunkte verdienen könnt.
2
weitere Guides
Tipps und Tricks
-
Schlüsselschwerter und Waffen im Überblick
Im Kampf gegen die Herzlosen in Kingdom Hearts 3 stehen euch Schlüsselschwerter und andere Waffen zur Verfügung, die wir euch in diesem Beitrag vorstellen möchten.
-
Tipps aus der Community
-
Tipps, die ihr nicht mehr vergessen wollt
Wir liefern euch Tipps zu Kingdom Hearts 3, die ihr so schnell nicht mehr vergessen wollt. Darunter Tipps für den Kampf gegen Herzlose sowie zur Klassenwahl.
-
Ultima-Waffe schmieden und Orichalkum+ finden
Ihr wollt die Ultima-Waffe schmieden und benötigt dafür Orichalkum+? Wir zeigen euch alle Fundorte für Orichalkum+ und verraten euch, wie ihr die beste Waffe im Spiel herstellen könnt.
Erfolge und Trophies
News & Artikel
Seit 2 Jahrzehnten lieben Fans Kingdom Hearts, mit all seinen Haupt- und Nebengames. In diesem Video nennen wir 5 Schritte, die Teil 4 der Hauptreihe in Richtung Vollkommenheit helfen können.
Kingdom Hearts 3 Photo Mission Guide — How to Google Photos in Kingdom Hearts 3
Updated:
In Kingdom Hearts 3, the Moogles are returning as store owners. You can find them at most save points and they are very important if you want to synthesize items and upgrade your keyblades. They also offer Moogle Photo Missions, which require you to take photos with the Gummiphone of the described item. They are not that difficult to deal with, but some of them can be problematic. This Kingdom Hearts 3 photo missions guide has everything you need to create all Moogle pictures. nine0005
Kingdom of Hearts 3 clues | Where to find everything Kingdom Hearts 3 Hertz gold pieces | Reach 12 million points in Verum Rex: Beat of Lead with our Kingdom Hearts 3 awards guide | Kingdom Hearts 3 Olaf travel guide | Kingdom Hearts 3 Secret Ending
Kingdom Hearts 3 Photo Mission #1 — Flame Core
I need gloves to handle this hot head, Kupo.
The first photo mission you get wants you to take a photo of the Flame Core. You encounter these enemies very early in the game, but if you didn’t grab them the first time, head back to Olympus and head to Thebes Overlook Save Point. Head down the stairs and the first enemies you find will be a bunch of flame cores. Taking photos of moving enemies is very inconsistent, so you may need to take several shots before the game recognizes your picture. nine0005
Kingdom Hearts 3 Photo Mission #2 — Water Core
This villain keeps getting my pom-pom wet, Kupo!
For this, the best place to find the Water Core is in Monstropolis. Spawn in the Factory Basement and take the elevator up one level, then run around the corner and past the first enemy. When you’re in the blue pipe room, there should be some water cores.
Kingdom Hearts 3 Photo Mission #3 — Chef
Fluffy doesn’t always mean nice, kupo!
Major puffs are most common throughout the Crown kingdom. These are guys with furry heads that get incredibly tall when you attack them. Spawn in Forest Hills and head back to the beginning of the forest to find one after the first set of enemies.
Kingdom Hearts 3 Photo Mission #4 — Statue of Hercules
I can’t get over those chiseled muscles, Coupo. nine0014
Fortunately, we are now photographing things that do not move. First, a statue of Hercules is built in the center of the Thebes Agora. Just show up there, turn around and take a picture of him.
Kingdom Hearts 3 Photo Mission #5 — Wall Display of Beasts and Beetles
Swordmaker breaks through the wall, kupo!
In the Action+ store on the ground floor of Galaxy Toys, you will find the Beasts and Bugs section. Climb to the top of some freestanding displays to take a photo of the main wall display at the very end. nine0005
Kingdom Hearts 3 Photo Mission #6 — Rapunzel’s Tower
Who built this tower in the forest, Kupo?
This is a simple one. Spawn at Rapunzel’s Tower in the Crown Kingdom, turn around and take a picture.
Kingdom Hearts 3 Photo Mission #7 — Festival
I wish I could quit my job and watch the festival, Kupo.
Travel to the Kingdom of Corona and take a photo from under the arch of the Festival with huge doors in the background. nine0005
Kingdom Hearts 3 Photo Mission #8 — Fire in a Secluded Forge
It takes hot fire to forge lightning bolts, Kupo!
Return to Olympus and be reborn in the Realm of the Gods. Walk forward and up the small ladder, then up the next ladder past the lucky emblem. Jump onto the water feature and grind it all the way down, then jump down the hole to find a secluded forge. Here, take a picture of the fireplace next to the anvil. nine0005
Kingdom of Hearts 3 Photo Mission #9 — Zeus
«King of the gods» for some, «dad» for others, kupo.
Stay on Olympus and go to the top of the Kingdom of the Gods, where you will see that Zeus stood at the golden gate. Take a photo of him to complete the mission.
Kingdom Hearts 3 Photo Mission #10 — Tram
I love watching the tram pass at dusk, Kupo.
Return to Twilight City and take a photo of the tram passing by.
Kingdom Hearts 3 Photo Mission #11 — CDA Agent
Give that hard worker in yellow a raise, Kupo!
CDA agents can only be found in Monstropolis, and the easiest way to photograph them is in the Tank Yard of the power plant. There and at the other end of the room appears a very long guy with yellow legs.
Kingdom of Hearts 3 Photo Mission #12 — Ice Palace
Somehow I doubt that there is a fireplace in the palace, kupo.
Go to the Northern Mountain Range where Elsa, Anna and co.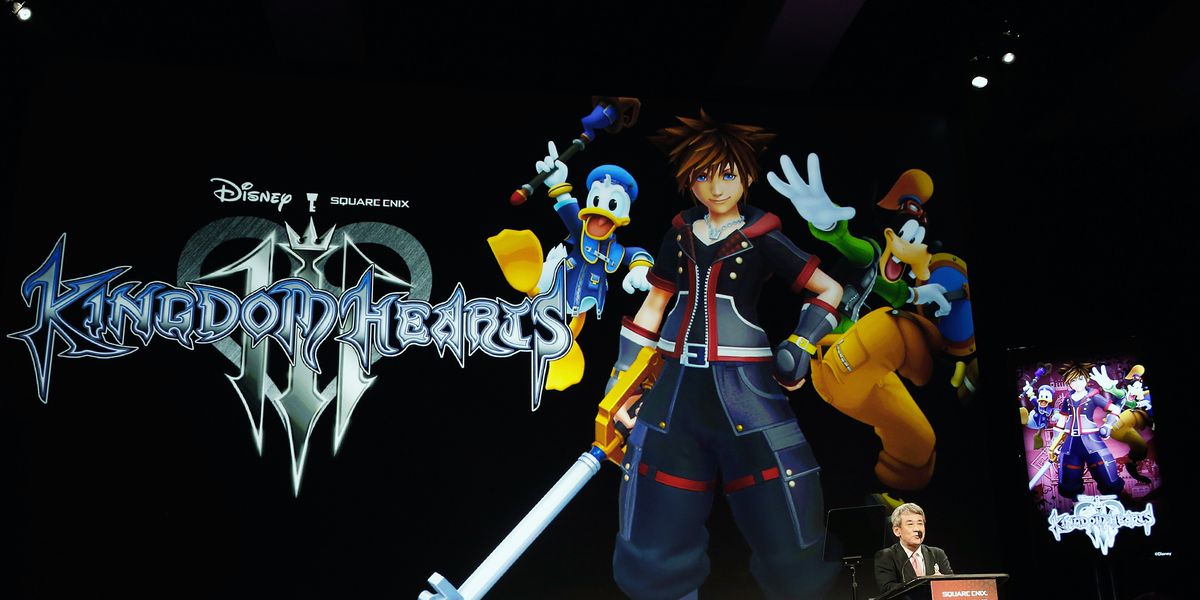 everyone stood around in the cold. You just need to take a photo of Elsa’s huge ice palace in the background.
Kingdom Hearts 3 Photo Mission #13 — Olaf
I think I saw a walking, talking snowman, kupo!
Take a picture of Olaf standing alone there. nine0005
Kingdom Hearts 3 Photo Mission #14 — Big Green Cactuar
Wait, Kupo… That green guy looks familiar, Kupo!
Go to the «Toy Box» children’s toy area located behind the game room on the top floor of Galaxy Toys. You need to take a picture of the huge green cactus man you collected during the story to reach the top holes.
Kingdom Hearts 3 Photo Mission #15 — Scarecrow
He helps keep the birds out of the fields, Kupo.
Return to Twilight City and enter the 100 Acre Forest through Merlin’s book outside of Little Bistro. Take a picture of a scarecrow next to a pumpkin in a field.
Kingdom Hearts 3 Photo Mission #16 — Evening Star
Here it is, Kupo. My lucky star, Kupo!
Go to San Fransokyo and make sure it’s night time. Look up into the sky and you can see one bright star shining in the sky. Take a photo of him to complete this mission. nine0005
Kingdom Hearts 3 Photo Mission #17 — Fish Wind Socks
These fish swim in the air, Kupo!
Turn around San Fransokyo at daytime, then climb the tall blue cylindrical building south of the North District save point. Look to the north and you will see a pair of huge fans in the air adorned with blue, white, black and red fish. Take a picture of one of them during the daytime.
Kingdom Hearts 3 Photo Mission #18 — Waterfall
Stay at the waterfall to beat the tropical heat, Kupo!
Fast travel to the Caribbean fort and exit through the back door, then follow the path down until you reach a small stone bridge with a waterfall on your left.
Kingdom Hearts 3 Photo Mission #19 — Demon Tower
Show me the creepy, dark swarm, Kupo!
If you don’t know where to find the Demon Tower, you can make it appear. Go to the Tank Yard at the power plant in Monstropolis and go outside, then grind the pipe to your left. In the room you exit the pipe from, interact with the blue gate and start it to trigger the Demon Tower boss fight. Take a photo of him, then kill him to get one of Kingdom Hearts 3’s many secret reports, and complete the photo shoot in the same fight. nine0005
Kingdom Hearts 3 Photo Mission #20 — Sora’s Teammates
I google-greetings to all your cruel friends, Kupo!
To do this, you need to photograph all 12 of Sora’s teammates in the main worlds. Here’s everyone who needs to take a photo to complete the final photo shoot:
- General — Donald Goofy
- Olympus — Hercules
- Toy box — wooded Buzz Lightyear
- Crown Kingdom — Flynn Rider Rapunzel
- Monstropolis — Spot Mike Wazowski
- Arendelle marshmallow
- Caribbean — Captain Jack Sparrow
- San Fransokyo — Baymax
After you have taken and saved a photo of all 12 of Sora’s teammates, you have completed all of the photo missions in Kingdom Hearts 3.
You have found all Kingdom Hearts 3 lucky emblems yet?
Kingdom Hearts 3 Cheats, Cheats & Walkthroughs
The third entry in the Kingdom Hearts series brings together all of your favorite Disney and Final Fantasy characters for their biggest adventure yet. This walkthrough for Kingdom Hearts 3 covers all cheats, side quests, hidden bosses, Gummi ship blueprints and unlockables for PS4 and Xbox One.
The information in this article applies to Kingdom Hearts 3 on all platforms.
How to unlock the blades
Keyblades are unlocked by completing various tasks.
| Keyblade | How to unlock |
| Classic Tone | Complete all mini-games. |
| Crystal snow | Complete Arendelle. |
| After | Full Kingdom Crown. |
| Favorite MP | Complete Toy Box. |
| Great cook | Achieve a perfect score on all bistro recipes. |
| Happy Gear | Complete Monstropolis. |
| Hero Origin | Complete Olympic Colosseum. |
| Hunny Spout | Fill in one hundred acres of timber. nine0349 |
| Nano Gear | Complete San Fransokyo. |
| Shooting star | Complete Twilight City. |
| Starlight | Clear the Graveyard of Bladed Blades. |
| Wheel of Destiny | Complete the Caribbean. |
| Ultima Blade | Synthesize after collecting all seven orichalcum + . |
Orichalcum + 9 seats0037
The seven Orichalcum+ needed to forge the Ultima blade can be found in the following locations:
Unlockable
| How to unlock |
|
| Orichalcum + # 1 | Find a chest inside on Exile Island in the Caribbean. |
| Orichalcum + # 2 | Found inside a chest when revisiting the Last World. |
| Orichalcum + # 3 | Collect 80 Lucky Emblems. |
| Orichalcum + # 4 | Collect 10 treasures in the Frozen Slider mini-game in Arendelle. |
| Orichalcum + # 5 | Eclipse Galaxy boss strike. |
| Orichalcum + # 6 | Get the highest score in all Flantastic 7 minigames. |
| Orichalcum + # 7 | Receive as a random prize from the Moogle Postcard Raffle store. |
How to deal with the Schwarzgeist
Schwarzgeist is an optional boss that lives in a green cyclone at the center of the Misty Stream galaxy. You can contact him when you have a Gummi ship with a speed of at least 200. Build your own ship or unlock the Endymion ship by photographing the Endymion Constellation to fight the Schwarzgeist as early as possible.
How to unlock the Hundred Acre Wood
After completing the Monstropolis world, return to the bistro in Twilight Town to get a book from Merlin that will take you to the Hundred Acre Wood. nine0005
How to unlock recipes for ultimate weapons
Once you have obtained at least 58 different synthesis items, visit the Google store to unlock recipes for the main characters’ main weapons.
How to get extra HP in the last world
When you get to the Final World, collect 222 copies of Sora for a permanent increase in HP. Collect 333 copies for even more HP.
How to unlock the secret ending
Find enough happy emblems to see the secret ending. The number of emblems you need to collect depends on which difficulty level you have chosen.
| Hard | Emblems required |
| beginner | 90 lucky emblems |
| standard | 60 lucky emblems |
| proud | 30 lucky emblems |
Unlimited Prize Cards
Buy one potion from the Moogle store near the save point in Traverse Town: Neighborhood. When you go outside, there is a 1 in 2 chance that you will receive a prize card. Repeat this process to keep earning prizes.
Secret Prize Postcards
There are three items that you can only get from Prize Postcards. You will only receive these prizes once:
- Gourmet Ring
- Lucky Ring
- Last Orichalcum +
Easy XP Trick
While protecting Boo in Monstropolis, keep using Scream Strike to keep fighting the endless swarm of enemies. You can earn tons of experience points and level up very quickly, although you will eventually get diminishing returns after reaching level 25.
All Battle Gate Locations in
Kingdom Hearts 3
Complete the main story to unlock 14 battle gates where you can fight strong enemies for rare rewards. nine0005
| Battle Gate | Location | difficulty | Award |
| Battle Gate # 1 | Mount Olympus, God Realm Lobby | 1 star | Fire cufflinks, secret report 1 |
Battle gate No. 2 2 |
Mount Olympus, peak of mountain | 1 star | Space Belt +, Secret Report 2 |
| Battle gate no. 3 | City of Twilight, outside the Old Mansion | 2 stars | Evanescence Crystal, Secret Report 3 |
| Battle gate No. 4 | Toy Box Baby Corral | 1 star | Mega Elixir Secret Report 4 |
| Battle Gate No. 5 | Toy box, Galaxy Toys | 2 stars | Thunder Cufflink, Secret Report 5 |
| Battle Gate No. 6 | Crown Kingdom, stone quarry | 2 stars | Ghost Crystal Secret Report 6 |
| Battle Gate No. 7 | Crown Kingdom, next to Forest Tower | 2 stars | Air Cufflink, Secret Report 7 |
| Battle gate No. 8 | Monstropolis, Tank Yard | 1 star | Ghost Crystal Secret Report 8 |
| Battle Gate No. |
Arendelle, Ice Labyrinth | 2 stars | Evanescent Crystal, Secret Report 9 |
| Battle gate no. 10 | Caribbean, huddled islands | 1 star | Water Cufflink, Secret Report 10 |
| Battle gate no. 11 | San Fransokyo, North District during daytime | 2 stars | Ying-Yang Cufflink, Secret Report 11 |
| Battle gate no. 12 | San Fransokyo, Central District | 1 star | Blizzard Cufflink, Secret Report 12 |
| Battle gate no. 13 | Keyblade Graveyard, Badlands | 2 stars | Celestriad Secret Report 13 |
| Battle Gate 14 | Keyblade Graveyard, Badlands | 3 stars | Crystal Regalia |
Flantastic seven side quests
Find Flantastic Seven to play mini-games for a chance to win rare items and abilities. They won’t appear until you visit places you’ve already gone through. Look for crowns adorned with fruits sticking out of the ground.
| flan | Location | Award |
| Cherry Flan | Mount Olympus, Thebes | Sour Cherry, Formchange Extension Ability |
| Orange Flan | Crown Kingdom, Forest | Blood orange treasure magnet ability |
| Strawberry Flan | Relaxation area Galaxy Toys | Strawberry, attraction extender |
| Grape Flan | Arendelle, under the | Grapes, Unison Metel |
| Watermelon Flan | Caribbean, Port Royal Fort | Watermelon, Focus Siphon |
| Honeydew Flan | San Fransokyo, South District City at night | Melon, Attraction Extension |
| Banana Flan | Monstropolis, Factory Basement | Banana Grand Magic Extender |
How to unlock all Gummi blueprints
Unlock the blueprints needed to build new Gummi ships by photographing the constellations. nine0005
You can also purchase blueprints from Google Stores.
| Constellation | galaxy | Location |
| Moogle | Star Trek | Look into the toy box and fly to the right. |
| Bomb | Star Trek | Face the world of Olympus and fly to the right. |
| Cactuar | Star Trek | Face the Crown Kingdom and fly to the right. |
| imp | Foggy stream | Warp into Waypoint MST-01 and fly right. |
| Tonberry | Foggy stream | Warp to Waypoint MST-01 and fly in the opposite direction. |
| Endymion | Foggy stream | Look towards the Caribbean and fly to the right. |
| Ultros | Eclipse | Exit to the Keyblade Graveyard and fly straight up. |
| Bismarck | Eclipse | Fly to the right of waypoint ECL-03 on the map. |
| Omega | Eclipse | Fly towards the constellation Bismarck, then turn left towards the edge of the map and look for a cluster of green stars. |
How to unlock the Gummi Ships bonus
Beat the Schwarzgeist to unlock two new Gummi ships: the Golden Highwind and the Schwarzgeist ship. Hit him with the «A» rank to unlock the Ultima ship. nine0005
Kingdom Hearts 3 trophies
As you progress through the main story, you will collect many trophies, but some of them require extra effort to unlock.
| Trophy | How to unlock |
| Another chapter closed | Complete the game and view the ending. |
| Classically Trained | Get a new high score in every Classic Kingdom game. nine0349 nine0349 |
| Dreadnought | Fully turn on the Leviathan. |
| Hidden Kings | Complete the Gummiphone Lucky Emblems section. |
| Aligned | Raise Sora to LV 99. |
| Chef | Earn an «Excellent» cooking all types of cuisine. |
| Stone not found | Complete the Gummiphone Treasures section. |
| synthesizer | Complete the Gummiphone Synthesis section. |
| Ultima Weapon | Synthesize the Ultima weapon. |
| New Journey | Start your new adventure. |
| Twilight wish | Adventure through Twilight City and complete the story. |
| True Love Act | Adventure through Arendelle and complete the story. |
| Bishop | Defeat 3000 enemies. nine0349 |
| Blademaster | Get a Keyblade that’s fully enabled. |
| centurion | Earn at least 12,000,000 points in Verum Rex: Beat of Lead. |
| Clash of the Gods | Adventure through Olympus and complete the story. |
| cornucopia | Gather all types of ingredients. |
| Datascraper | Get an A in both Flash Tracer courses. nine0349 |
| Festive dancer | Score of at least 70,000 points. at the dance festival. |
| Full course | Earn your first «Excellent» by cooking the kitchen. |
| Great Mage | Use great magic for the first time. |
| Happily ever after | Adventure through the Crown Kingdom and complete the story. |
| Heartbound | Use the link to defeat enemies for the first time. nine0349 |
| Home again | Adventure through the forest of hundreds of acres and complete the story. |
| Inseparable friends | Adventure through the Toy Box and complete the story. |
| knight | Defeat 1000 enemies. |
| Know your enemy | Complete the Gummiphone Opponents section. |
| Lasting memories | Hold on to 50 photos. |
| Distinguish | Adventure through San Fransokyo and complete the story. |
| Muscle Memory | Get a new record in one of the Classic Kingdom games. |
| One for books | Complete the Gummiphone game records section. |
| boat | Defeat 5000 enemies. |
| Salvager | Use Gummy’s ship to get 20 unique treasures. |
| Say cheese! nine0349 | Take your first photo. |
| Shield Shredder | Get at least 600,000 points in Frozen Slider. |
| stargazer | Use the Gummi ship to find and photograph all the constellations. |
| Tall enough to ride | Use the attraction to defeat the enemies for the first time.

|