Counter-Strike 1.6 Dedicated Server. Basic Setup.
Intro
Hey!
In this series of tutorials we will cover how to set up a dedicated Counter-Strike 1.6 server so can customize it as you want and play with your friends. For that purpose I would suggest to rent a VPS running Ubuntu OS. We’ll use Linux Game Server Managers utility to make server setting up process easier (I tried to use SteamCMD directly to create a dedicated server but it was a pain), it would also send us alerts to Email, Discord, Slack, Telegram etc.
The server I rent for this tutorial series has the following configuration:
- 1 CPU Core, 3.0 MHz
- 2 GB RAM
- 20 GB SSD
- Ubuntu 20.04 LTS
Such VPS is quiet cheap and powerful enough to manage up to 24 simultaneous players for sure. I used VPS with the same config to play with my friends and CPU usage was about 7-10% for 6 players and only few tiny plugins.
My PC config is not important so let’s just mention that it’s running Windows.
Let’s get it started
Once you decided which VPS to rent and have it running, connect to it via ssh or in any other way that will let you access server’s terminal. First of all, we have to install all the dependencies required for our Counter-Strike server.
Here is the command to install dependencies on Ubuntu 20.04 or older:
sudo dpkg --add-architecture i386; sudo apt update; sudo apt install curl wget file tar bzip2 gzip unzip bsdmainutils python3 util-linux ca-certificates binutils bc jq tmux netcat lib32gcc1 lib32stdc++6 libsdl2-2.0-0:i386 steamcmd
Enter fullscreen modeExit fullscreen mode
This will also install SteamCMD so you will be asked to agree with Steam License Agreement.
If your server is running on Debian/CentOS or if your Ubuntu version is => 20.10 navigate to
Dependenciestab on this page to find appropriate dependencies instllation command.
For security reason it’s not recommended to run game server on the root user so let’s create a new one for that purpose and switch to it:
adduser csserver
Enter fullscreen modeExit fullscreen mode
su - csserver
Enter fullscreen modeExit fullscreen mode
Now we have to download linuxgsm.sh and run it to be able to install our game server:
wget -O linuxgsm.sh https://linuxgsm.sh && chmod +x linuxgsm.sh && bash linuxgsm.sh csserver
Enter fullscreen modeExit fullscreen mode
If download link doesn’t work for you, it might be changed. Look for the possibly updated one by navigating to
Installtab on this page.
Game server installation
To install game server type:
./csserver install
Enter fullscreen modeExit fullscreen mode
It might take some time to install, just wait for it to finish. Also You’ll be asked multiple times to confirm some staff like server installation directory and to agree/disagree with anonymous statistics gathering.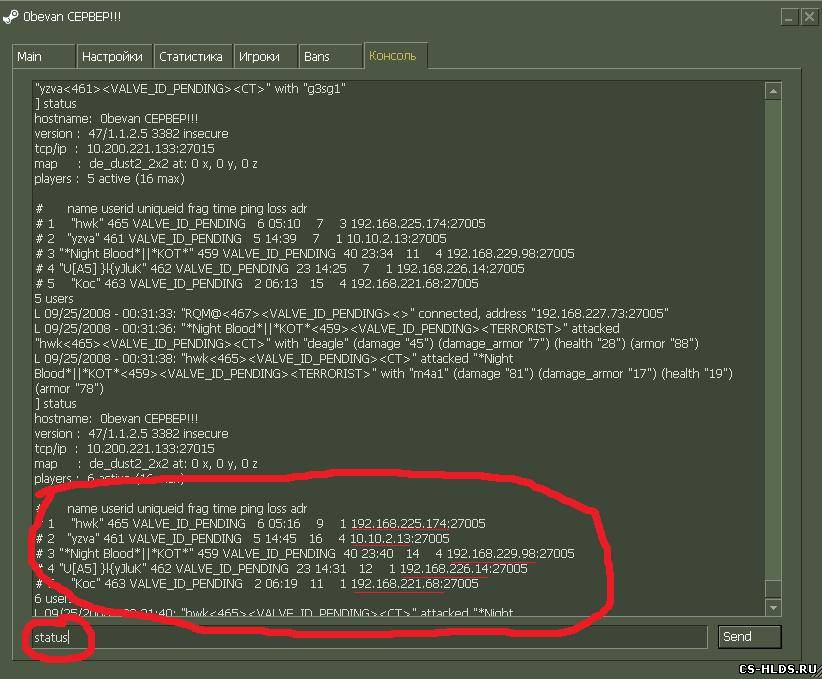 Read carefully what you’re asked for!
It’s a common thing for SteamCMD to fail when downlading game server for the first time:
Error! App '90' state is 0xE after update job.
Error! Installing csserver: SteamCMD: Unknown error occured
Enter fullscreen modeExit fullscreen mode
Don’t be so quick to throw your keyboard to the window, just wait for the next try,
linuxgsm.shscript will manage it for you.
In logs under yellow «Config File Locations» title you’ll find a useful information about configs files paths:
Game Server Config File: /home/csserver/serverfiles/cstrike/csserver.cfg
LinuxGSM Config: /home/csserver/lgsm/config-lgsm/csserver
Enter fullscreen modeExit fullscreen mode
Server Configuration
We’re done with installation at this point, but don’t rush to start the game server. We have to set server ip and tweak some launch parameters.
LinuxGSM configs for our game server instllation are located in /home/csserver/lgsm/config-lgsm/csserver catalogue.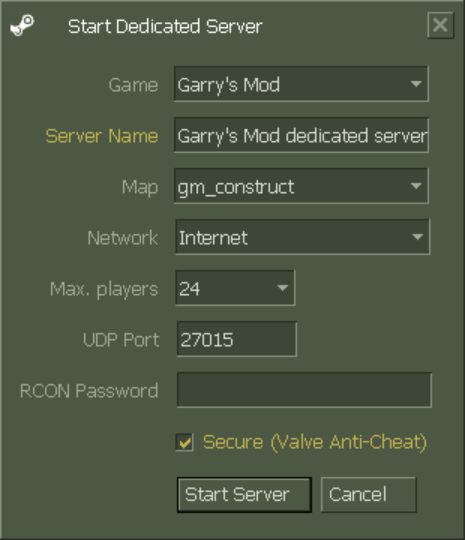 Navigate to it via console or use any FTP/SFTP client your’re comfortable to work with. You’ll see a banch of files here:
_default.cfg
common.cfg
csserver.cfg
secrets-common.cfg
secrets-csserver.cfg
Enter fullscreen modeExit fullscreen mode
Descriptive information about these configs can be found on [this page(https://docs.linuxgsm.com/configuration/linuxgsm-config). I highly recommend checking it out. Btw, it is possible to run multiple game servers on the same machine. For that, different approaches can be used:
- multiple instances for the single game server installation
- multiple game server installations, each for separate user (i.e single instance per installation)
For instruction regarding multiple game servers settings navigate here.
In this article we discuss only single server instance per installation. So here is the brief explanation of config files we’re interested in.
_default. — some sort of master config, all of its parameters will be applied to game servers related to the current installation. No sense to change cuz it will be reset after LinuxGSM update. So put all of your settings to the next two configs. cfg
cfgcommon.cfg — here you can set parameters that are common for all of game server instances related to the current installation. It will override _default.cfg.csserver.cfg — parameters for the csserver instance of game server. This one will override _default.cfg and common.cfg.
What we gonna do is to copy parameters from the master (_default.cfg) config to our instance config csserver.cfg.
First one is ip="0.0.0.0" line. Put it to csserver.cfg and set ip parameter value to IP address of your server (keep quotes).
Most probably you’ll want to change default map and max players count for you server, copy these parameters too, keep default values for now.
defaultmap="de_dust2"
maxplayers="16"
Enter fullscreen modeExit fullscreen mode
The last but not least parameter is startparameters. We’ll keep its value but add few more start parameters to the end:
-
+pingboost 2— «Selects between optimized HLDS network code stack. Set this on 2 usually reduces latency toward 1ms without loss of activity input packets» (docs). -
+sys_ticrate 1000— this is something like FPS on the server side. 1000 is default value and usually no need to change it to higher values.
So the resulting value of startparameters is:
startparameters="-game cstrike -strictportbind +ip ${ip} -port ${port} +clientport ${clientport} +map ${defaultmap} +servercfgfile ${servercfg} -maxplayers ${maxplayers} +pingboost 2 +sys_ticrate 1000"
Enter fullscreen modeExit fullscreen mode
And the final look of our csserver.cfg should be like:
################################## ####### Instance Settings ######## ################################## # PLACE INSTANCE SETTINGS HERE ## These settings will apply to a specific instance.## Predefined Parameters | https://docs.linuxgsm.com/configuration/start-parameters ip="<YOUR SERVER IP>" defaultmap="de_dust2" maxplayers="16" ## Server Parameters | https://docs.linuxgsm.com/configuration/start-parameters#additional-parameters startparameters="-game cstrike -strictportbind +ip ${ip} -port ${port} +clientport ${clientport} +map ${defaultmap} +servercfgfile ${servercfg} -maxplayers ${maxplayers} +pingboost 2 +sys_ticrate 1000"
Enter fullscreen modeExit fullscreen mode
Testing the server
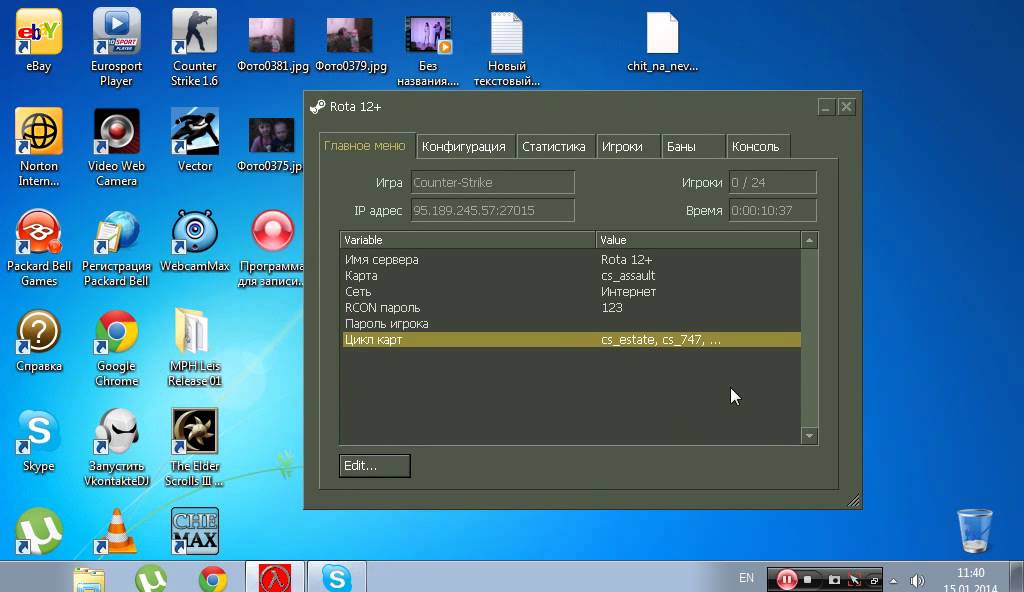
So our server is ready to be started. One more thing we’re gonna add is change its display name (i.e. host name) in Servers window inside the game. For that navigate to the game server config file (we saw its path before, after game server was installed) — /home/csserver/serverfiles/cstrike/csserver.cfg
This is the config file you’ll have to change to set your game server variables, not
server.cfg!
Here you’ll find hostname "LinuxGSM" on the first two lines. Let’s change it to
 "DEV.TO Test Server".
Note that there is no
=character between variable name and its value (in quotes for strings).
Save your changes and go back to the terminal. Navigate to your server root directory /home/csserver and start the server:
./csserver start
Enter fullscreen modeExit fullscreen mode
You’ll see something like:
[  OK  ] Starting csserver: Applying steamclient.so sdk64 hardlink fix: Counter-Strike 1.6
[  OK  ] Starting csserver: Applying steamclient.so sdk32 link fix: Counter-Strike 1.6
[  OK  ] Starting csserver: DEV.TO Test Server
Enter fullscreen modeExit fullscreen mode
Now open the game and add connect to it via Servers menu or use connect <YOUR SERVER IP> command in game console.
If you don’t see your server there might be some error occurred, go back to your server terminal and open game server logs:
./csserver console
Enter fullscreen modeExit fullscreen mode
or
./csserver c
Enter fullscreen modeExit fullscreen mode
When in game server logging «mode», dont’t press
Ctrl+Cto exit (this command will stop your server!). UseCtrl+B, thenDinsted.
So this is it. It takes almost no time to set up your own dedicated server for Counter-Strike 1.6. The most time consuming stuff is setting up AMXX and plugins (if you want any) which will be covered in the next tutorial (Part 2).
Thanks to everyone for reading. Have a good game!
Bonus
Details
Use the following command to see a nicely formatted details of your game server:
./csserver details
Enter fullscreen modeExit fullscreen mode
Rates
Most probaly you’ll want to tweak your server rates variables (add them to csserver.cfg) for more comfortable playing:
sv_maxrate
sv_minrate
sv_maxupdaterate
sv_minupdaterate
Enter fullscreen modeExit fullscreen mode
Hopefully these two articles ([1], [2]) will help you to find the best values for your server.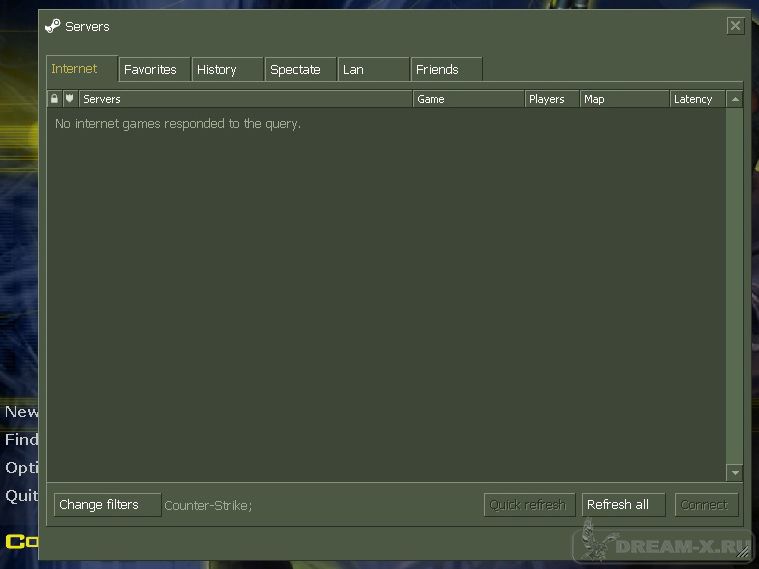
More detailed logs
If you want to see players messages in server logs, add mp_logmessages 1 to csserver.cfg.
If you want to see combat logs, add mp_logdetail variable to your config. Possible values:
-
0— Turn attack logging off. -
1— Only enemy combat damage. -
2— Only friendly combat damage. -
3— All forms of combat damage (both friendly and enemy).
Map cycle
To tweak map cycle on your game server, change /home/csserver/serverfiles/cstrike/mapcycle.txt file.
How to make a CS 1.6 Server / How to make a Counter Strike 1.6 Server
How to make a Counter Strike 1.6 Server FOR FREEhow to make a CS 1.6 Server / how to make counter strike 1.6 server
Author: [email protected]. — (Max Maxymenko)
|
|
||
| This info is FREE to print, if you want to copy any of our information, you have to include the link of our Website into your copied text.  Author: [email protected] — (Max Maxymenko) |
||
|
|
||
UPDATE:
Due to the new Steam update, you might have trouble with downloading this server.
ISSUE: CMD Closes by itself
Click here to read more…
STEPS TO FOLLOW:
Downloading and Installing Counter Strike 1.6 Server
1. Download Counter Strike 1.6 Server Creator:
2. Start installing it…
3. After the installation the CMD window will pop-up and it will start downloading files of your Counter Strike 1.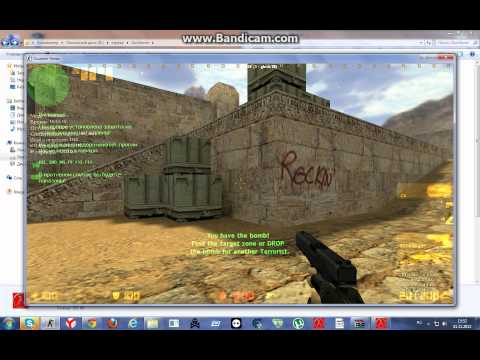 6 Server.
4. When download completed, go to C:\SERVER directory. It should look like this.
Downloading and Installing Amx Mod X
5. Go to https://www.amxmodx.org/downloads.php and downlad AMX MOD X. (for plugins)
6. On desktop you will see this setup file (.exe).
7. Start Installing it.
8. Click on the Finish button. And continue on installing Amx Mod X — now onto your server.
Downloading and Installing Dproto
Download the Dproto (for Non-Steam Users, so they can connect to your server) and install it. Download it from: http://download.freakz.ro/dproto_0_9_87.rar. (VIDEO WILL BE READY SOON).
HINT: Install it in cstrike folder ONLY, otherwise dproto will not work!
Downloading and Installing Plugins
Search for plugins here: https://www. amxmodx.org/compiler.php?mod=2&go=search
Make your self an admin
Or read more here
Starting and connecting to server!
Go to your Counter Strike 1.6 (Game) and click on add server…. type in your IP address.
Now your Counter Strike Server should work fine. All Steam and Non-Steam will be able to connect because of Dproto that we’ve just had installed! Hope you enjoed reading this article!
Don’t forget to Enable Port Forwarding on your Router.
© Copyright 2012-2023 — MakeGameServer.com
IF YOU DID NOT UNDERSTAND SOMETHING, PLEASE LEAVE A COMMENT ON OUR FORUM
Creating a Counter-Strike server — Article how to create your own server in cs
Many of you have wondered how to create your own server for Couter-Strike 1. 6 Online, why pay for hosting? Especially for such people, I decided to write the following article, in which I will cover the topic of creating my own server for CS 1.6, launching it and properly configuring it.
So, you need to take the next few steps.
1. In order to create a server for Counter-Strike 1.6, you need the game of the same version. If you do not have this great game on your computer, then you need to download it from our website, for this, enter in the search box download CS 1.6/Download is completely free. nine0003
2. Next, you need to install a patch for your game — this is the next and important step to create a CS 1.6 server. The patch is required for you to be able to play online. For a good work of the COP, you need to install a patch version, not lower than the 29th. If you do not have this patch, you need to download it from our site. Enter in the search bar: download patch for Counter-Strike 1.6 and select the one you need.
3. After you have updated your CS, you need to download a ready-made server from our website, this is the easiest way to create your own personal server. A ready-made server for CS 1.6 is the most common and necessary assembly for work, which includes metamod, amxmodx and booster lite. Metamod was created to be able to connect plugins and the HL engine. Amxmodx will help install any possible plugins on the server. Booster lite is designed to reduce ping, but only works on Windows. Also in the assembly there are detailed instructions for you. nine0003
4. After installation, we proceed to launch the CS 1.6 server. To make it clearer to you, let’s look at the server startup scheme using an example. We will run in console mode, as this saves the resources of your computer, which gives stability to the game, server operation and reduces the ping of the players.
First, open the Windows editor — Notepad and enter the following lines there, it’s better to just copy it so as not to make a mistake: start / high hlds. exe -game cstrike + ip 123.456.789.012 +port 27016 +sv_lan 0 +map de_dust2 +maxplayers 32 -insecure -console.
Let’s see what it means and how to manage it.
start /high — a command that will start the server with a high priority.
-game cstrike — activates all modifications of the cstike folder on the HL engine.
+ ip 123.456.789.012 — this is your external IP address that you need to know so that players can enter the server.
+port 27016 is the server port, leave it as it is.
+sv_lan 0 allows other players to see your server on the internet.
+map de_dust2 — these are the names of the map that will be launched on the server after it starts.
+maxplayers 32 — the command determines the maximum number of players on the server.
We select all these parameters for those that you need and save the document using the «Save as …» button, in the «hlds.bat» format. After that, we move the file to the root folder of CS 1.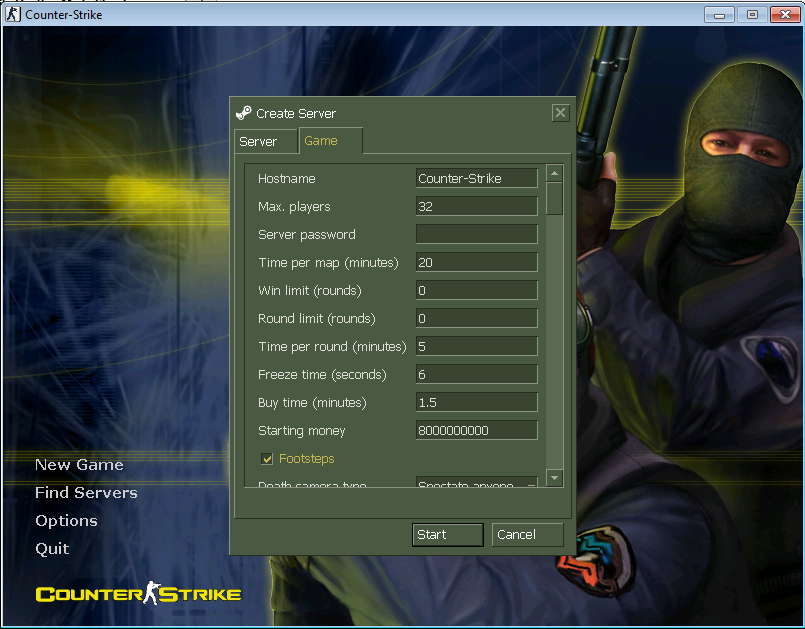 6, to the hlds.exe file.
To start, just open the hlds.bat file. It is worth warning that the owners of Kaspersky antivirus need to disable it, since no one will enter the server. nine0003
It happens that the Internet provider does not give each user its own external IP, but one for the entire subnet, in which case only users of this subnet will be able to join you. To solve this problem, use the No-ip service.
5. After all this, you need to configure the server for yourself. All CS 1.6 server settings are stored in the server.cfg document. Go into it and change everything as you need.
How to make yourself or friends server admins, read the article «How to become an admin of your CS server», which you can find on our website. nine0003
6. To manage the server, you need to install amxx plugins on it, you can find all the necessary ones on the amxmodx.org website, follow the following link to amxx plugins for CS
How to install these plugins:
Go to the folder with Counter-Strike , then cstrike/addons/amxmodx/plugins and copy here the files that you downloaded in the «.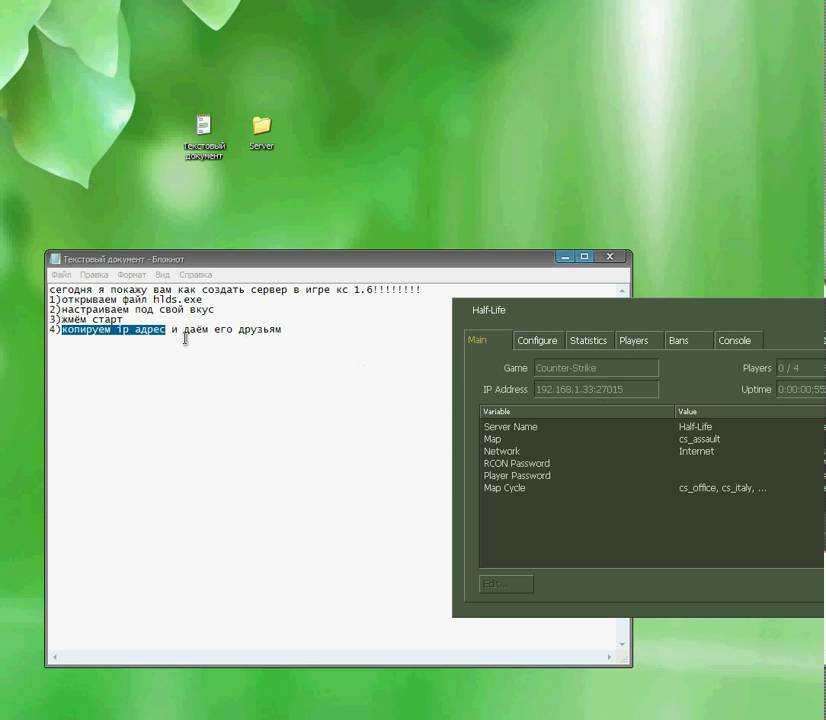 amxx» format. Next, go to the cstrike/addons/amxmodx/configs/plugins.ini file and enter the name of your plugin at the bottom, for example pluginnoname.amxx. You need to enter the name after the next line in the document «Custom — Add 3rd party plugins here»
To diversify the server, you can download unique and interesting game cards that can be found on our resource.
Create a CS 1.6 server, information about setting up and installing a Counter-Strike server
Starting a CS 1.6 server is a fairly simple procedure for experienced people. However, beginners may encounter certain problems at the first stage — installation. This material details the basic information about creating and configuring your own server. nine0003
Installing the Counter-Strike 1.6 server
Immediately before installation, you should indicate that a fairly good hardware is required for the stable operation of the server. Especially if you plan not only to host a server, but also to play on the same device.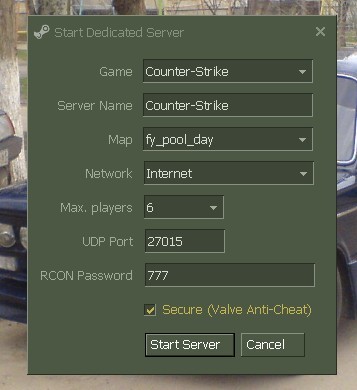 Modern computers are more than enough for this procedure.
To run your own CS 1.6 server, you must use HLDS. This is a dedicated server used for CS 1.6. When it comes to «no-steam» builds of the game, HLDS is installed in parallel, since it uses most of the files from the game to work. HLDS itself is absolutely free and can always be downloaded from the Web. The file size should be about 315 MB. To update the program to the latest current version, you need to use hldsupdatetool. To download the program, you need to go to the page: https://storefront.steampowered.com/download/hldsupdatetool.exe. The download will start automatically. nine0003
The first step is installation. It is recommended to install the program along the path specified in the installer. After that, run hldsupdatetool. The program will be updated if necessary. The updated program will be able to install the server. Before that, create a folder on the «C» drive called «server». All files will be uploaded to this folder. The next step is to run hldsupdatetool with the following options: «-command update -game cstrike -dir c:\server».
To run the program with the specified keys, go to the shortcut properties. In the column «object» we will see the path along which the shortcut is located. All you have to do is add the keys listed above after the entire path, save and run the shortcut. If you have done everything correctly, the HLDS download procedure will begin. nine0003
Everything that will be in the «C:\server» folder is our HLDS. The server can already be started via hlds.exe. However, at the moment this server is official, supporting the original (non-pirated versions of the game). When you try to log in with a pirated version, a window with an error STEAM validation will appear.
Setting up a Non-Steam server
The procedure for changing a server under no-steam is quite simple. To do this, you need to download and install additionally Dproto. Since Dproto is a mod, you must also install Metamod before using it, a system that allows you to install new modifications on the server.