Cortana — Halo 3 Wiki Guide
IGN’s complete written and video walkthrough to Cortana guides you through this Halo 3 mission.
Loading
advertisement
- Jump to Complete Video Walkthrough
Cortana is easily Halo 3’s most annoying and challenging mission. You’ll be up against what seems to be a near limitless amount of Flood who can destroy you within seconds. Also, because of the Flood’s semi-random, unpredictable nature, offering a strict step-by-step walkthrough to killing the Flood is near-impossible, so instead, we’ve concocted a guide on how to run past most of them! However, before we get to the walkthrough, there are a few basic tips that are essential to completing this level:
Section #1
To get things started, ignore the «infection» Flood for now, and just follow the path up to the first door. You’ll encounter a few Combat forms along the way, but they’re nothing your melee attacks or shotgun can’t handle.
After the first door, head left down the split path and drop through the hole in the floor.
Section #2
Now things start getting difficult, or at least they would if you actually tried to battle the Flood. Instead, we’re going to employ our patented «run past everything» tactic for now.
As soon as you drop in, begin jumping up the ledges on the right (as shown on the map above). Now follow the right wall into a tunnel, leading to a door. You may take some damage, but you should be okay. Just keep running, and jump over any enemies in your path.
advertisement
Section #3
Follow the path up to another door — you shouldn’t face any resistance here.
Section #4
Turn right to come across a crashed ship. Proceed up a steep ramp on the left of the ship, near its midpoint. Collect the sword on the ground, then drop into the hole at the peak.
Section #5
You’ll drop into a room with a downed purple ship just ahead. Run straight across it (but make sure to collect the Cloak from its right half — you’ll want it soon) and enter a tunnel on the opposite side.
Chug through the tunnel, passing by several carrier types, and continue up the nearby hill. Activate your camouflage near the top, and just run like the dickens, leaping over any enemies in your way. You’ll soon reach another door.
advertisement
Section #6
This spiraling maze-like room is utterly confusing to navigate, so don’t fret if you get lost a time or two (or a dozen). But we’ll try our best to navigate you through it. Remember, you’re going to run through this entire portion, but keep your sword equipped at all times to kill any enemies in your direct path, if you can’t jump over them.
After running into the room’s center, climb up the ramp on the left side. Hug the right wall closely to collect a Cloaking Device, and continue to follow it into a second tunnel.
Shortly after exiting the second tunnel, look for a gap you can jump on the left. Jump across to a thin strip and use the sword to kill the Flood here. Continue up a tunnel on the right to emerge on the top floor of this room.
advertisement
Activate your camouflage now and jump across the platforms bordering the left wall to cross over to a door.
Section #7
Just run through the unguarded tunnels through another door.
Loading
Section #8
You’ll emerge in a giant, circular room, with a mechanical structure in the center. Run along the path (ignoring the enemies) up to the first locked door. Turn left and walk across a thin bridge leading to the central structure.
Loading
advertisement
Turn right from the central structure and walk across another bridge and continue through a series of blue doors. You’ll soon emerge in a room containing a glowing blue bulb — that’s where Cortana is. Bust it open by meleeing it several times to retrieve her. With Cortana onboard, head back through the blue doors to the large room just before.
Destroy the Reactor |
As you step back into the main room, Cortana will inform you that you must destroy the generator. Cross the left bridge back to the central structure (you should pickup a Bubble Shield just before the platform, as shown on the map above), and interact with the control panel to reveal three reactors, surrounding your platform. Toss grenades toward at the platform surround the three reactors to take them out — since all three are nearby, there’s no need to leave the central platform. However, the enemies nearby may prove difficult — take out any on the platform, and deploy a nearby bubble shield to protect against distant fire.
Escape High Charity |
Once all three cores are destroyed, you must escape the area. Quickly charge across the metallic bridge and continue through the hallway ahead and drop through a hole.
advertisement
Essentially, you have to backtrack through the entire level, to a waiting Pelican near the level’s beginning. As long as you keep your energy sword equipped, you can run through most of it, but this first section may prove difficult.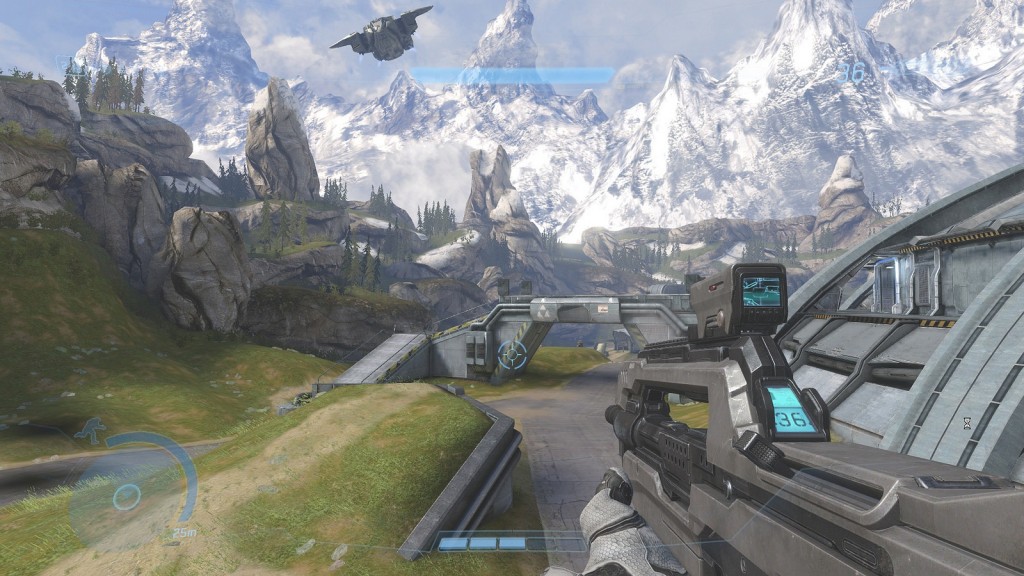
Loading
After dropping through the hole mentioned above, have your sword ready and kill anything that stands in your way. You’ll soon come across a ramp on the right — climb it and drop off the far side for a shortcut allowing you to bypass most of the enemies.
Loading
When you reach the fallen ship, head straight across it into a hallway. Slash through the enemies here, and watch out for a Brute form — you may want to use a grenades to take him down. Jump into the opening on the right and follow the path up to a hole.
advertisement
Now follow the left wall, running past all the enemies up to another door. Cortana will soon remark «who would be crazy enough to come here» — follow the right wall from here on out to come across a Pelican you can board to escape the level.
Loading
Complete Video Walkthrough
LoadingLoadingLoading
Up Next: Halo
Previous
The Covenant
Next
Halo
Was this guide helpful?
In This Wiki Guide
Halo 3
Bungie
Rating
ESRB: Mature
Platforms
Xbox 360
Avatar: The Way of Water Holds Off an Impressive $30. 2 Million Debut by M3GAN
M3GAN Review
Loading
SET SAIL! Sailing Era now available on Steam and Epic Games Store!
Renfield — Official Red Band Trailer
Check out the trailer for Renfield, the upcoming vampire movie starring Nicholas Hoult and Nicolas Cage. The film co-stars Awkwafina, Ben Schwartz, and Adrian Martinez. In this modern tale focusing on Dracula’s loyal servant, Renfield (Hoult) is the tortured aide to history’s most narcissistic boss, Dracula (Cage). He’s forced to procure his master’s prey and do his bidding, no matter how debased. But now, after centuries of servitude, Renfield is finally ready to see if there’s a life away from The Prince of Darkness. If only he can figure out how to leave him. Renfield, directed by Chris McKay, arrives in theaters on April 14, 2023.
Sierra 117 — Halo 3 Wiki Guide
IGN’s complete written and video walkthrough to Sierra 117 guides you through the first mission of Halo 3.
Loading
advertisement
- Jump to Complete Video Walkthrough
Get to River for Evac.

Follow the marines through the forest until a waterfall comes into view. Break off from the marines here and instead follow the Arbiter up a grassy ledge on the right.
Loading
Hang tight on the ledge and use the thick tree here for cover. Peek around its sides to target a Brute on top of a fallen tree ahead, as well as a bunch of grunts in the pond below. The Brute is equipped with a Brute Shot, so dodge behind the tree the moment you see a glowing grenade coming your way, then target him while he reloads immediately after.
| Note: You may want to consider replacing your assault rifle with the Brute Shot to enable quicker kills against those tough foes. After each kill, replace it with your fallen victim’s Brute Shot to retain a constant supple of grenades. |
advertisement
As you follow the river downstream, a covenant vessel will drop off a Brute and a horde of grunts in the water basin below. A thick tree trunk to the river’s left is an ideal place for cover — its five legs will enable you to use some (limited) mobility while maintaining cover. We strongly suggest holding off on opening fire until the drop shift leaves (about 10-20 seconds) to avoid falling victim to its burly turrets. The Brute is once again equipped with a Brute Shot.
Once clear, follow the cliff wall on your left up to several large boulders, at the base of a very small waterfall. Use these for protection as you target the grunts and another Brute beyond.
Push through this area slowly, taking out any enemies along the way. It’s best to stay near the middle to avoid becoming trapped and have plentiful cover. Another Brute awaits on the far side. Once the area is clear, continue through a dank, flair-illuminated cavern.
You’ll emerge on a short ledge, overlooking a single Grunt ahead who’ll fall asleep after a few moments — he’s but the first of many. Sleeping covenant won’t awaken unless you touch them, open fire, or a nearby enemy alerts them of your presence, so take a stealthy approach for now. Follow the right ledge up to the sleeping grunt. Along the way, you’ll find two pairs of weapon caches, containing Carbines and Spikers — the former’s built-in zoom will be of great help here, but don’t worry about the Spiker unless your secondary weapon runs low on ammo. Once equipped, continue to the grunt and melee attack him in the back for an instant KO.
advertisement
Loading
After taking down the single grunt, your stealth reign (of one kill) will come to an end, as the grunts in the valley below will waken. Even worse, several snipers lining the area will open fire on your position. Immediately duck behind the boulder near the dead grunt and peek around its right side to target the foes below. Once the nearby threats are down, focus on the two snipers. Here are their positions:
Loading
- On a tree branch, dead-ahead.
- Stationed on a nearby rocky ledge, halfway up the left canyon wall.
Now drop to the area below and push forward slowly, using the shrubbery for cover, as you blast the enemies beyond. If you run low on Carbine ammo, return to the weapon cache before for more. If you need additional ammo, there are weapon caches abound near the center and along the walls.
Loading
As you turn the corner, you’ll find a Brute standing atop a tree-bridge, with several other enemies nearby. Immediately pop a few carbine-caps in the Brute’s skull to take him down before he can react. Now take cover behind one of the nearby boulders and target a sniper on the left side of the bridge, then take down the remaining covenant.
advertisement
Now climb a ramp on the left to cross the tree bridge to the other side. As soon as you do, a trio of grunts will emerge from a small alcove on the left — take them down before they toss a grenade. Now push through the area slowly, using the rocks and trees for cover, up to a cavern.
Prepare for a Brute to emerge from the cavern — the Arbiter should keep him occupied allowing you to easily take him out. Now proceed through the cave, which leads to the river.
Just after Sergeant Johnson radios in, there are a couple opportunities to grab a Battle Rifle (your guide writer’s weapon of choice). Look for one next to a corpse on a rocky ledge on the left, and another in the plants ahead.
Find Johnson’s Crashed Pelican |
advertisement
When the river first comes into view, take a break and just watch — the Pelicans will take down the riverside enemies, so don’t waste your ammo. Unfortunately, the Pelicans will be scared off by a pair of Ghosts, allowing a Covenant drop ship to release a small army of brutes and grunts on a structure downstream.
Loading
Once the ships depart, drop down and look for a sniper on a tree branch across the river. Use the Battle Rifle or Carbine to take him down. Now follow the Cliffside wall up to the third concrete barrack and peek around the corner slowly to target another sniper on a ledge, just below an open pipe. Once he’s down, turn left and toss a grenade to take down the two-shielded jackals and continue up the path, around the rock.
As you circle the rock, take down the sniper on the grassy ledge ahead before proceeding. Continue to circle the rock up to a tree — look right to find a thin path between the boulder and the large concrete structure likely containing several grunts and a brute — use the Brute Shot to take down the Brute, then focus on the grunts — but don’t traverse down there yet. Instead, stay by the tree and target a few more Brutes that pop out on the circular ridges.
Now move up to the large wooden boxes for cover and fire at the enemies beyond. Continue to push through this are slowly, using the debris for cover. We suggest staying close to the left wall and keeping an eye out for any additional Brutes that may pop out — Brute Shot them to death and collect their gear to replenish your grenade supply.
advertisement
Peek around the next corner to target another sniper on a rocky ledge, above the path dead-ahead. Proceed up that path until Sgt. Johnson reports that his «bird is down» (this is street for «airship»). Several more snipers lie ahead — seek refuge by the giant concrete building on the left and use the protruding pipes for cover. The first sniper can be found by a tree ahead. Now circle the pipe and look for a second on a high-tree branch, near the canyon wall.
| Note: Remember, you’re going to want to use a weapon with zooming capabilities to take down the snipers. If you don’t have a Battle Rifle, or if its low on ammo, grab a Carbine one of the snipers you kill. |
Follow the left wall, taking down additional snipers as you go. Look for one on the right, another on a ledge ahead, and a third on another ledge on the left. Stick to the left ridge and follow it to the point where you have to jump up to continue. Look up from there to spot a sniper in a brightly lit section of the canopy, then look for another a bit lower on the right.
Loading
| Note: One of the snipers may drop a Beam Rifle, the covenant’s version of a sniper rifle. It doesn’t always drop to the ground, but it’s worth your while to look for it anyway. |
advertisement
When you reach the steep hill, use a rock to leap to a high ledge on the right (the arbiter may already be up there). Ahead, a lone soldier will temporarily draw the attention of a brute and a few grunts on the bridge. Ignore them for now and instead focus on the snipers here. Look for two on a ledge to your left — the second one starts off behind a tree, so you may have to wait for him to step out. Now look for a third way across the map, dead-ahead.
Find Johnson Before He’s Captured |
With the snipers taken care of, peer into the ledge on your left and either toss a grenade or use the Brute Shot to destroy any enemies who may remain. Now drop down and follow the path slowly, killing anything that crosses your path.
Loading
As you cross beneath the bridge that the soldier’s last stand took place on, hug a rock on the right for cover and let the Arbiter take the lead. He’ll draw out a few enemies (including a Brute) — use the Brute Shot/grenades to take him out good, then target any additional foes that run by, as well as the ones on the ridge above.
Loading
advertisement
Slowly turn the corner to spot a sniper in the distance. Now follow the left wall around the perimeter up to a small alcove. From here, use the Brute Shot to fire upon any visible Brutes, such as on the ridge above, or between the rocks along the cliff edge. Once clear, proceed up the path, but make a pit stop at the downed Pelican on the left to find tons of weapons and grenades — we actually suggest retaining your Brute Shot for now, but replacing it with the sniper rifle once this room is clear. Now push up the path, destroying anything that dares to move. Once clear, we suggest grabbing the Sniper Rifle and Battle Rifle from the Pelican before moving on.
Continue through the cave and follow the path to see a cinema showing where the Brutes are keeping Sgt. Johnson. You are now looking over an expansive enemy base, filled to the brim with enemies. Whip out your sniper (you did grab it from the Pelican, right?) and target the snipers first:
- One walking around on the rooftop below (use the battle rifle to target this one).
- Another walking on the curved building’s ledge, to the left.
- The third is on the lower rooftop of the right-most building.
With the snipers down, it’s time to turn your attention to the remaining enemies. Focus on the brutes first — several can be found on the far bridge, and at least one should be directly beneath you. However, they may seek cover in a nearby building once you open fire — leave them for later if you can’t kill them before they get there. Now alternate between your sniper and battle rifle to target any remaining enemies, near or far. Once the place is cleaned out, proceed down the path to the right to drop into the base.
Loading
advertisement
As you drop in, a ship will drop off a small army of troopers across the river, at the building Johnson is being held captive in. Use the sniper rifle to take down the brutes, and use the battle rifle to target the lesser foes. Also, watch out for two snipers that will set up shop on the right side of the walkway.
Once the enemies across the river are down, it’s time to work your way across the bridge. Access the bridge via the entryway on the right side of the building, and use your sniper to target any remaining Brutes on the opposite end. Once clear, make your way inside the small concrete building containing Johnson. When there, interact with the shield to disable it, freeing Johnson and a couple of his men.
Loading
Stay Alive! Pelican Inbound! |
Loading
After freeing Johnson, two enemy drop ships will swoop in and open fire. These things are quite deadly, but thankfully, a Pelican is en route that will take both out, so now it’s just a waiting game. Stay inside this building and fight the aliens through the windows. Eventually, the Pelican will show up and destroy both ships — it will then wait for you to board on the bridge. Hop aboard to complete this mission.
advertisement
Loading
Complete Video Walkthrough
LoadingLoadingLoading
Up Next: Crow’s Nest
Previous
Walkthrough
Next
Crow’s Nest
Was this guide helpful?
In This Wiki Guide
Halo 3
Bungie
Rating
ESRB: Mature
Platforms
Xbox 360
Avatar: The Way of Water Holds Off an Impressive $30. 2 Million Debut by M3GAN
M3GAN Review
Loading
SET SAIL! Sailing Era now available on Steam and Epic Games Store!
Renfield — Official Red Band Trailer
Check out the trailer for Renfield, the upcoming vampire movie starring Nicholas Hoult and Nicolas Cage. The film co-stars Awkwafina, Ben Schwartz, and Adrian Martinez. In this modern tale focusing on Dracula’s loyal servant, Renfield (Hoult) is the tortured aide to history’s most narcissistic boss, Dracula (Cage). He’s forced to procure his master’s prey and do his bidding, no matter how debased. But now, after centuries of servitude, Renfield is finally ready to see if there’s a life away from The Prince of Darkness. If only he can figure out how to leave him. Renfield, directed by Chris McKay, arrives in theaters on April 14, 2023.
Halo 3 — latest news for today and January 2023
News 42Articles 7 Find all the news about Halo 3 updates here, find out the release date for PC, when the game will be released on other platforms, and other announcements. We will also be the first to write about the system requirements of Halo 3 for PC, about pirate hacks and the appearance of the game on torrents, from where anyone can download it for free.
Guides, Tips & TutorialsTechnical Problem SolvingOptimization for Low PCs
Reverse 1 2 Forward
Very early versions of Prey, Duke Nukem Forever and Halo 3 leaked online. Games looked completely different — video
An early version of the Prey shooter developed by Human Head Studios leaked online. In addition, the build was released to the public, and therefore anyone can download it for free on a PC.
News
December 27, 2022
An early version of the Prey shooter developed by Human Head Studios has leaked online. nine0003
7 big games with a high rating have become temporarily free on Steam at once
New free weekends have been launched on Steam. Until October 18, gamers can try Borderlands 3 and Halo: The Master Chief Collection for free, which includes six parts of the cult shooter series at once — Halo: Combat Evolved Anniversary, Halo 2: Anniversary, Halo 3, Halo 3: ODST, Halo: Reach and Halo 4:
News nine0003
Metacritic named the TOP 5 best games of 2020. The first place is unlikely to surprise anyone
Metacritic finishes summing up the results of the past year and, as a final chord, named the best games that came out in 2020. This rating, like all others, was compiled on the basis of an average rating from professional publications.
News
January 4, 2021
Metacritic finishes summing up the past year and named the best games that came out in 2020 as a final chord. nine0003
The gamer creates spectacular posters of his favorite video games.
 Among them are Sony and Microsoft exclusives (art)
Video game fans are known for their love of creating all kinds of illustrations based on their favorite hobby. The Reddit user hiding under the nickname BananaDook was no exception. He creates spectacular posters dedicated to the gaming industry.
News
August 2, 2020
Video game fans are known for their love of creating all kinds of illustrations based on their favorite hobby. nine0003
The developers revealed the start date of the beta test of the PC version of Halo 3
The company 343 Industries announced the imminent start of the public beta test of the PC version of Halo 3. The game will be included in The Master Chief Collection.
News
May 24, 2020
343 Industries has announced the imminent start of a public beta test for the PC version of Halo 3. The game will be part of The Master Chief Collection.
Halo 3 was played with the guitar from Guitar Hero. It took a month and 263 deaths — video
Youtuber Super Louis 64 completed Halo 3 on Legendary difficulty using only the plastic guitar from Guitar Hero. It took him a month to do this, and the Master Chief under his control died 263 times.
News
November 30, 2019
Youtuber Super Louis 64 completed Halo 3 on Legendary difficulty using only the plastic guitar from Guitar Hero.
HD remaster of Metal Gear Solid: Peace Walker, Halo 3 and other console exclusives launched on PC – video
The Xbox 360 emulator (Xenia) recently launched a host of console exclusives on DirectX 12 PCs, including the HD re-release of Metal Gear Solid: Peace Walker, Halo 3, Halo 3: ODST, Blue Dragon, Rumble Roses XX, and Def Jam: icon.
News
October 1, 2018
Fortnite streamer sets new Twitch record of 10 million followersat the time of writing).
 Ninja added that he is the first streamer in the world to achieve this.
News
August 3, 2018
Famous streamer Ninja shared his own record on Twitter — 10 million subscribers on Twitch (10,014,359 at the time of writing).
Halo 3 launched on PC using Xenia emulator (video)
Microsoft is unlikely to ever release the classic first-person shooter Halo 3 on PC, and therefore many gamers who prefer this platform can only hope for the development of emulators. Recently, gamers managed to run the game on PC using the Xbox 360 (Xenia) emulator. nine0003
News
May 29, 2018
The developers of Halo: The Master Chief Collection told about the release of the collection for PC
Studio 343 Industries responded to numerous requests from gamers to release a collection of shooters Halo: The Master Chief Collection for personal computers.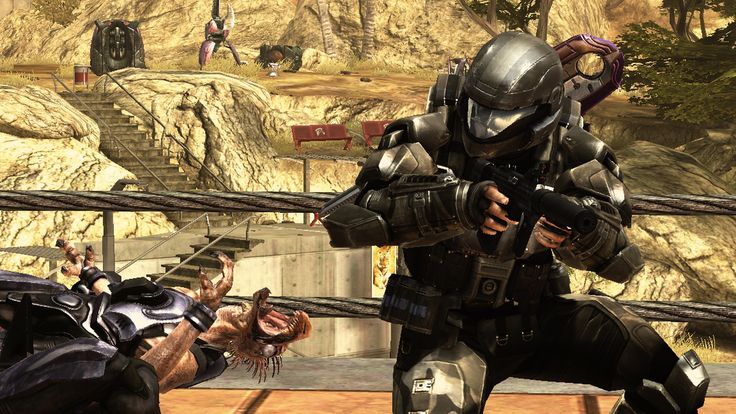
News
March 8, 2018
Microsoft: More enhanced Xbox 360 games for One X coming soon
Microsoft Marketing Manager Albert Penello has revealed that more Xbox 360 games will be coming soon for the company’s most powerful Xbox One X console. Penello said this on his official Twitter page, answering a question from a gamer. nine0003
News
February 20, 2018
Halo series in progress
It’s been almost five years since Microsoft announced plans to produce a Halo series backed by Steven Spielberg, and we still haven’t seen it. And when many have already lost hope, the president of the Showtime channel, David Nevins, said that the project is still in development.
News
January 8, 2018
Fallout 3, Oblivion and Assassin’s Creed Coming to Xbox One X
Xbox One X will be able to play titles not only on the regular Xbox One, but also on the old Xbox 360.:origin()/pre00/8f58/th/pre/f/2014/160/7/1/halo_4_character_download_now_by_mikiel2171-d7lq7e5.png) IGN UK has confirmed that several titles will receive updates and improvements to run on the new console.
IGN UK has confirmed that several titles will receive updates and improvements to run on the new console.
news
Brian Jarrard: «There is no Halo 3: Anniversary Edition»
After Halo: Combat Evolved and Halo 2 received remastered versions, many fans of the series hoped that the same would happen with the beloved Halo 3, however those dreams were shattered by 343 Industries community manager Brian Jarrard. nine0003
News
May 15, 2017
Killer Instinct: Season 3 will please with improved graphics
The closer the release of Killer Instinct: Season 3, the more intriguing details we learn about it. Today it was reported that the graphics will be improved in the third season. And this applies not only to PC owners, but also to Xbox One users. Sounds interesting.
News
February 22, 2016
The closer the release of Killer Instinct: Season 3, the more intriguing details we will learn about it. nine0003
There is a chance that Halo 5: Guardians will be released on the PC
Microsoft has set a course to please the PC community. So it’s not surprising that Halo’s director of development let slip about a possible release of the fifth game on personal computers. Microsoft made a big promise about bringing Windows users together. You see elements of Windows 10 making their way into Xbox, Cortana, and things like that.
News
October 23, 2015
Microsoft is heading towards satisfying the PC community.
Modders remake Halo Online into Halo 3 for PC
Modder activity is gaining momentum. Today they set out to release Halo 3 on PC.
News
August 13, 2015
The activities of the creators of modifications are gaining momentum. Today they set out to release Halo 3 on PC.
The circulation of the Halo series exceeded 65 million copies. Halo: The Fall of Reach 9 trailer released0011
Today it became known that the distribution of the Halo series exceeded 65,000,000 copies, and in fact, back in October 2014, just before the release of Halo: The Master Chief Collection, it was 60,000,000. In addition, a video of the animated series appeared on the network Halo: The Fall of Reach.
News
July 14, 2015
A new patch for Halo: The Master Chief Collection is out
Halo: The Master Chief Collection is getting a new patch that fixes many bugs and improves the gameplay. In addition, an update will be released next month that will add the campaign from Halo 3: ODST and the re-release of the Relic map from Halo 2 to the collection. As for the patch, you can check out the list of changes and improvements below. nine0003
News
April 22, 2015
Halo: The Master Chief Collection is receiving a new patch that fixes many bugs and improves gameplay.
The ElDorito team has created a working build of Halo Online
It looks like Microsoft’s worst nightmare has finally come true. The fact is that modders from the ElDorito team, who had previously refused to obey the software giant’s demand to stop experiments on the game, have already managed to debug and launch their multiplayer build of Halo Online, and the game has not even reached the stage of closed alpha testing in Russia. nine0003
News
April 9, 2015
Looks like Microsoft’s worst nightmare has finally come true.
Microsoft has published the second trailer for Halo: Nightfall
Microsoft has published the second trailer for the upcoming series Halo: Nightfall. In the video, we once again saw Commander Locke, performed by Mike Colter, as well as some new footage.
News
October 23, 2014
Microsoft has released the second trailer for the upcoming Halo: Nightfall series. nine0003
Microsoft recalled the imminent release of the series Halo: Nightfall
On the eve of the imminent release of Halo: Nightfall, Microsoft posted a video with new footage of the series, and also held an educational program for those who had not heard anything about it.
News
October 21, 2014
The Halo series has sold more than 60 million copies
Microsoft is delighted to announce that the Halo series has sold more than 60 million copies.
News
October 20, 2014
Microsoft happily announced that sales of the Halo series have surpassed 60 million copies.
The developers of Halo: The Master Chief Collection showed how the new leaderboard works
The staff of 343 Industries has published a new video of Halo: The Master Chief Collection, which showed what the updated leaderboard looks like. And the project definitely needs it, because it will have more than 400 achievements.
News
October 16, 2014
343 Industries has posted a new Halo: The Master Chief Collection video showing what the updated leaderboard looks like.
Halo: The Master Chief Collection to include PC-exclusive cards
343 Industries has announced that cards that were exclusive to the PC versions of Halo: Combat Evolved and Halo 2 will be included in Halo: The Master Chief Collection.
News
October 4, 2014
343 Industries announced that cards that were exclusive to the PC versions of Halo: Combat Evolved and Halo 2 will be part of Halo: The Master Chief Collection. nine0003
Halo 2: Anniversary Cinematic Trailer Released
343 Industries has partnered with Microsoft to release a cinematic trailer for Halo 2: Anniversary featuring cutscenes from the game.
News
July 28, 2014
343 Industries has partnered with Microsoft to release a cinematic trailer for Halo 2: Anniversary featuring cutscenes from the game.
Microsoft’s Biggest Winter Sale on Xbox LIVE
Microsoft is more generous than ever this year. It made Halo 3 and Gears of War free for Xbox LIVE Gold owners, and today hosted a massive winter sale for Xbox 360 games.
Xbox One owners will receive free games
Microsoft decided to learn from its competitors how to provide a service to premium users. This is how you can regard the statement of Larry Herb (Larry Hryb), which he made on his Twitter. nine0003
News
November 15, 2013
Microsoft decided to learn from its competitors about how to provide a service to premium users.
Xbox Live Gold subscribers get Halo 3 for free
Microsoft has decided to remind you that the second game that all Xbox Live Gold subscribers get for free this month will be the first-person shooter Halo 3.
News
October 16 2013
nine0010 Destiny Creative Director Leaves Bungie
Joe Staten, Creative Director of the ambitious shooter Destiny, has left Bungie and ended his work on the game. It is not yet known how his departure will affect the development of the series, but Staten has been with Bungie since its inception and has had a hand in Halo: Combat Evolved, Halo 2 and Halo 3 over 15 years, as well as writing the novel Halo: Contact Harvest.
News
September 25, 2013
Joe Staten, creative director of the ambitious shooter Destiny, has left Bungie and thus completed his work on the game. nine0003
E3 2013: «minimal» version of Xbox 360 and free AAA games for it announced
News
June 11, 2013
The new version of the current generation console from Microsoft will come with an updated design.
Halo 3 fans have launched a petition demanding a PC port of the game
Uncertainty surrounding the PC version of Halo 3, which first appeared on Steam and was seen in AMD drivers, prompted fans to start a petition to get Microsoft’s attention and get the game ported on PC. nine0003
News
April 23, 2013
Halo 3 PC references found in AMD drivers code
Halo 3 lines were found in the new beta version of AMD drivers, confirming the appearance of the game in the Steam registry. Unfortunately, Microsoft still denies the release of the game on PC.
News
March 18, 2013
Halo 3 lines have been found in the new beta version of AMD drivers, which confirms the appearance of the game in the Steam registry. nine0003
Microsoft: Don’t wait for Halo 3 on PC
Microsoft commented on the information that appeared recently in the Steam database about three Halo games, including Halo 3.
News
February 5, 2013 Three Halo titles, including Halo 3, appeared in the Steam database recently.
Halo 3 coming to PC?
Halo 3 appears to be coming to PC soon. Over the weekend, the game appeared in the database of the Steam service. nine0003
News
February 4, 2013
It looks like Halo 3 is coming to PC soon. Over the weekend, the game appeared in the database of the Steam service.
Previous 1 2 Next
halo tag 3 | XboxRussia.ru blogs
| Official Community of Xbox 360 Users in Russia |
|
|||||||||||||||||
User Blogs XboxRussia.ru
nine0443
|
3 September (63) 3 (20) 4443 November (21) 2 November (3)
April 90 90 90 90 90 90 90 90 90 90 90 90 90 90 90 90 90 90 90 90 90 90 90EALE 9045 9 | ||||
|
/ XboxRussia. 
|