Gargoyle Locations | The Fable Wiki
in:
Spoilers, Lists, Fable II
WARNING: This section or article may contain spoilers!
This page lists the locations of all 50 gargoyle heads that can be found in Fable II.
If you still have problems finding them, listen for their insults — you can hear their taunting when you are near them.
| Number | Region | Image (If available) |
Location |
|---|---|---|---|
| 1 | Bandit Coast | Go along the narrow outcrop, which is accessed from the southern exit of the loop near the center of the map. Enter the cave near the end of the path with a chest inside and look to your left. The gargoyle is tucked away in a crevice. | |
| 2 | Bandit Coast |
The gargoyle is on top of the ruins where you fight a highwayman for the first time. |
|
| 3 | Bloodstone |
Go to the boathouse where a boat is being built. Before going through the door, look between the boathouse and the house on the left — the gargoyle is resting on the side of the rock face to the right of a plant. You may also find it by walking down the alley by the clothing store and looking up the hill towards the nearest house. |
|
| 4 | Bloodstone | On Lion’s Head Isle, the gargoyle is located left of the big waterfall on the path leading out of the island area (after you dive in, on a ledge). You must do the «Treasure Island of Doom!» quest to get here. | |
| 5 | Bloodstone | As you go towards the cave for the «Treasure Island of Doom!» side quest, there is a crane beside some railroad tracks. The Gargoyle is on the backside of this crane. The Gargoyle is on the backside of this crane.
|
|
| 6 | Bloodstone | Jump in the sea at the north side of the harbour. Swim out a distance to find a beach that you can walk onto. The gargoyle is on the rocks on the right-hand side. | |
| 7 | Bower Lake | Slightly north of the Brightwood exit, on the archway of a set of ruins above a silver chest. | |
| 8 | Bower Lake | Now walk through the archway and turn around to face the other side of it, this one’s sitting very high up at the top of the right tower. | |
| 9 | Bower Lake | South of the Bower Lake Old Tomb, on the nearest ruin. (Right where you’re about to swim to the little island) | |
| 10 | Bower Lake | This one is inside the Tomb of Heroes. The gargoyle is located above the door right after the large room with a pool in the middle. Just go through the door (the unbarred one) and turn around to see the Gargoyle. There is also an augment in this room. Just go through the door (the unbarred one) and turn around to see the Gargoyle. There is also an augment in this room.
|
|
| 11 | Bower Lake | The Gargoyle is near the waterfall. Walk across the stone bridge leading from the Gypsy Camp towards Bowerstone, but turn left and head up along the water’s edge. When you pass the waterfall, you’ll see a partially grassy slope down to the water. The Gargoyle is at your feet. on the slope beneath you. | |
| 12 | Bowerstone Cemetery | After going through the main cemetery, go up the steps and bear left (not up the next stairs) to the tomb at the end. Stand back to see the Gargoyle, which is up and slightly to the right. | |
| 13 | Bowerstone Cemetery | Found up the next set of stairs from the Gargoyle mentioned above. Go up the next set of stairs above it, follow the path to the middle of the area, and look behind you. You will see it above the tomb.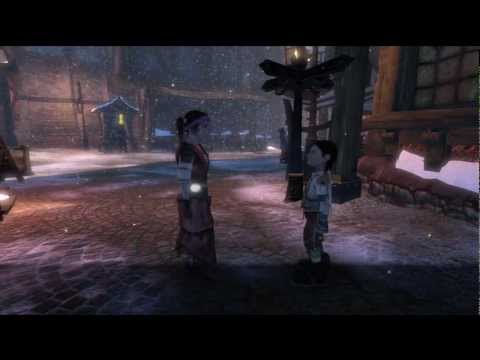
|
|
| 14 | Bowerstone Cemetery | Head to the top of the cemetery. On the steps, turn around, and shoot it on the left. | |
| 15 | Bowerstone Cemetery | This Gargoyle is found just beyond the closed gate leading to Shelley Crypt. This will be much easier to shoot at once you’ve purchased the Cemetery Mansion, once the gates open. You will still be able to get this Gargoyle without the gate open, but it can be a bit of a tough shot. The Gargoyle is on the high wall behind the gate. | |
| 16 | Bowerstone Cemetery | Shelley Crypt: After going across the invisible bridge, follow the ledge to the right of the room’s exit. The Gargoyle is tucked in a nook in the wall, but his glowing eyes should make him easy to see. | |
| 17 | Bowerstone Market | On the carriage side of the bridge, in the eastern outer wall, up the stairs to the left of the Bower Lake exit, turn right and go as far as the walkway takes you it will be up on one of the arches.
|
|
| 18 | Bowerstone Market | On the carriage area side, down by the riverfront on the east side of the river. Go through the small tunnel under the bridge. Right after you come out from under the bridge look up and to the right on the wall. | |
| 19 | Bowerstone Market | On the second floor of the furniture shop in the town square. Found in the furthest room upstairs. Go all the way in and turn around to face the door through which you entered. | |
| 20 | Bowerstone Market | In the carriage garage (east side of the bridge). You can either take the carriage somewhere to get in and then fast travel back or line up the shot carefully between the carriage and the carriage area wall. The use of a blunderbuss makes the shot fairly easy to pull off. | |
| 21 | Bowerstone Old Town | On the side of the crane on the side of the big warehouse. It is on the way to the exits to both Rookridge and Bowerstone Cemetery. If you stand near the archway entrance to old town and look up toward the big warehouse, you should see it. If you fast travel to Bowerstone Old Town, specifically the Cemetery Road, it’s where you’re standing upon arrival. Just lookup. It is on the way to the exits to both Rookridge and Bowerstone Cemetery. If you stand near the archway entrance to old town and look up toward the big warehouse, you should see it. If you fast travel to Bowerstone Old Town, specifically the Cemetery Road, it’s where you’re standing upon arrival. Just lookup.
|
|
| 22 | Bowerstone Old Town | On the stairs inside of The Felling Residence. Enter Old Town by way of Bowerstone Market, take the first street on your left. The house is the last house on the right side of the road. Head inside, it’s on the wall behind you as you head up the stairs. | |
| 23 | Brightwood | Above an arch on the way to Westcliff (behind you when going there). It is near the southwestern-most water on the map. | |
| 24 | Brightwood | In the Forsaken Fortress (hang left from Bandit Coast entrance, directly past the archway small plaza with highwaymen on the left). When you enter the castle in the zone, take the first right and walk across the curving parapet. On the right side directly next to a standing area on the bridge. It is on the top of a broken column at about even level with you. When you enter the castle in the zone, take the first right and walk across the curving parapet. On the right side directly next to a standing area on the bridge. It is on the top of a broken column at about even level with you.
|
|
| 25 | Brightwood | Behind you, as you drop down in Archon’s Knot. To get there, vault inside it from the broken wall next to the Cullis Gate you open to get to Wraithmarsh. | |
| 26 | Brightwood | Upon exiting Archon’s Knot, follow your dog to the chest containing The Daichi on the right. Look down from here towards a black arched structure in the middle of the lake and you should see the gargoyle.
Alternatively, follow the path from Brightwood tower to reach the structure in the lake (on the southeastern island on the map). |
|
| 27 | Brightwood | After buying the Brightwood Tower, stand by Chesty’s bed, and look out the window to see the Gargoyle; shoot the Gargoyle right through the glass. You must buy the Tower to reach this room. You must buy the Tower to reach this room.
If you stand away from the tower near the cullis gate, a gun with a range of at least 60 can reach the gargoyle from there. He’s on the left of the top of the tower you should see his nose sticking out. |
|
| 28 | Fairfax Gardens | In Lady Grey’s Tomb (the original entrance) in Fairfax Gardens. As you go down, stop in front of the hole above the sand and look straight ahead to see the Gargoyle. | |
| 29 | Fairfax Gardens | Above the entrance to the Fairfax Castle. | |
| 30 | Fairfax Gardens | In Castle Fairfax, in the library above the door (you will need to buy the Castle after you complete the game before you get this Gargoyle). | |
| 31 | Guild Cave | In the first big open cavern with lots of water and some ruins. Follow the path until you reach the highest part of the cavern thick with stalagmites and the stalactites. Once there, vault down and turn around. The gargoyle is above the ledge you stood on, above the torch. Once there, vault down and turn around. The gargoyle is above the ledge you stood on, above the torch.
|
|
| 32 | Oakfield | Behind the house of the sculptor in Oakfield, central north of the map on the wall. | |
| 33 | Oakfield | On the bridge opposite The Sandgoose. | |
| 34 | Oakfield | On some ruins along the path from the cemetery to the lake below the Temple of Light. Just before the lake, there is a ruin with two pillars leaning toward a ruin with one, you’ll find the gargoyle facing the lake on the horizontal beam of the two-pillared ruin. | |
| 35 | Rookridge | On the right before you go in the Hobbe Cave after making the big dive down from the broken bridge. Stop before the gates and look right, up against the rock face. | |
| 36 | Rookridge | In the Hobbe Cave, in the cylindrical room with the wooden spiral walkway around the outside. Go to the top, and face away from the ‘door’, and the gargoyle is in front of you, up rather high. Go to the top, and face away from the ‘door’, and the gargoyle is in front of you, up rather high.
|
|
| 37 | Rookridge | Go upstairs of the Rookridge Inn and follow the rail tracks. Keep going to the second set of tracks, following the path. The gargoyle is at the top of the pulley tower. | |
| 38 | Rookridge | At the entrance to the Temple of Shadows (northwest of the map), go beyond the spiral stairs to the end of the room. there is a raised half-circular platform that has two ‘imp’ statues. The gargoyle is on the right side in the corner. | |
| 39 | Rookridge | Inside the Temple of Shadows — Make your way into the room with the Sacrificial Wheel. In the chamber with the desks to the left of the main chamber. The gargoyle is above the door inside this chamber. | |
| 40 | Westcliff | When coming from Brightwood Road there is a side path on the left for a treasure chest.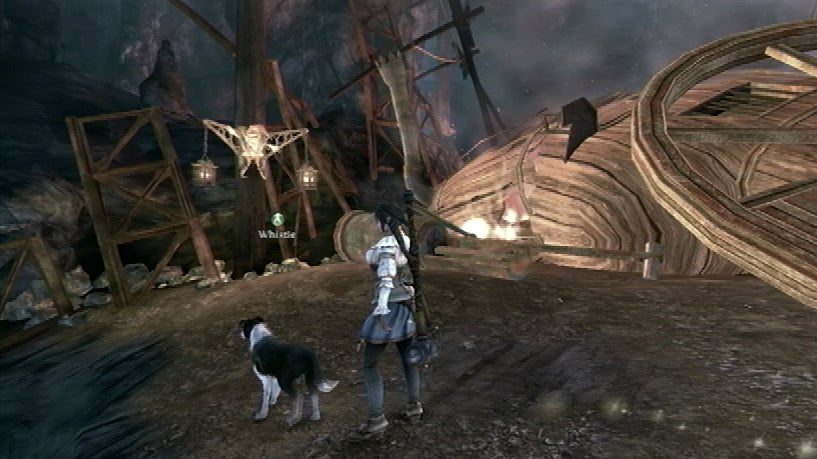 Go to the treasure chest and look behind you. The gargoyle is on the Stonehenge-looking rock. Go to the treasure chest and look behind you. The gargoyle is on the Stonehenge-looking rock.
|
|
| 41 | Westcliff | Go to the top of the ruined tower structure, before you cross the first bridge (there’s a split in the path, take the right one). Climb up to the chest, then walk through the middle of the two pillars on the right of it, Turn to your left and look in between the two columns behind the chest. The gargoyle should be in view. | |
| 42 | Westcliff | Before you go into Howling Halls from the Southern side of the lake, stand at the top of the stairs in the ruins (look behind you, up and left. | |
| 43 | Westcliff | In the far right corner of the large room with the spike pit in Howling Halls. (It is a very large room so don’t worry if you do not find it straight away). | |
| 44 | Westcliff | To the right of the gravel path down to the docks. Stop on the first wooden part, and look up at the cliff. Stop on the first wooden part, and look up at the cliff.
|
|
| 45 | Wraithmarsh | In the building opposite the cage, you were locked in on your first visit to Wraithmarsh, on the dividing wall directly to the left of the door you enter. | |
| 46 | Wraithmarsh | Behind the building, as you cross the first swamp into Oakvale (It looks like an old carriage building). | |
| 47 | Wraithmarsh | Take the left path, up across through the wooden tunnel bridge, the gargoyle is located at the next set of ruins. It is on the back of the pillars on the right side before you go up the steps. | |
| 48 | Wraithmarsh | After the fog-filled graveyard, just before you go under the next bridge, turn around. It is on one of the tombs on the right. | |
| 49 | Wraithmarsh | Above the door in the final room of Twinblade’s Tomb, past the spiral staircase. Can first be found during the «Love Hurts» quest. Can first be found during the «Love Hurts» quest.
|
|
| 50 | Wraithmarsh | Above the moving spiked floor entrance in the Shadow Court. To gain entrance, do the «Hero Of Skill» quest. |
Videos[]
<gallery>
File:Fable 2 — Gargoyle Locations
File:Fable II — All 50 Gargoyles
Videos[]
Fable 2 Bower Lake (and Guild Cave) Gargoyles
Fable 2 Bowerstone Market Gargoyles
Fable 2 Fairfax Gardens Gargoyles
Fable 2 Bowerstone Old Town Gargoyles
Fable 2 Bowerstone Cemetery Gargoyles
Fable 2 Rookridge Gargoyles
Fable 2 Oakfield Gargoyles
Fable 2 Brightwood Gargoyles
Fable 2 Bandit Coast Gargoyles
Fable 2 Westcliff Gargoyles
Fable 2 Wraithmarsh Gargoyles
Fable 2 Bloodstone Gargoyles
Community content is available under CC-BY-SA unless otherwise noted.
|
|
||||||||||||||||||||||||||||||||||||||||||||||||||||||||||||||||||||||||||||||||||||||||||||||||||||||||||||||||||||||||||||||||||||||||||||||||||||||||||||||||||||||||||||||||||||||||||||||||||||||
 Putting an arrow or bullet into their insult-spewing faces not only provides a significant amount of satisfaction, but it will also earn you several items in the Gargoyle’s Trove beneath Bowerstone Market. But where are all of the stone gargoyles, you ask? Reference below:

 You’ll find this guy hanging on the west side of it.


 From there, swim over to the ruined tower on the small island for a clear shot at this gargoyle.
 When you’ve entered the fortress, take the eastern staircase to get a shot at this gargoyle.


 The gargoyle is perched on the back of it.


 As you approach the final room, spin around and take out the gargoyle above the archway. I can’t hit a castle with a ball of dung, you say?
90,000 bosses in Dark Souls 2
| Location: |
|---|
| Moon Tower Castle Dranglik (Retribution) Aldia Citadel (reprint) |
9000 9000
Golden Serpent Ring +2 (NG+)
Shimmering Titanite (Dranglic Castle, Aldia Citadel)
| Health: |
|---|
| 1400×5 2660×5 (NG+) 5054×5 (NG+7) |
| Souls: | 25,000 50,000 (NG+) 68.750 (NG 3) +7) |
|---|
Tower Gargoyles ( Belfry Gargoyles ) is an optional boss in Dark Souls II.
An intricate stone statue from the tower mysteriously came to life. It is believed that gargoyles guard castles and fortresses and protect them from harm. They could be found at all times in all countries, in a variety of guises. Some of them are made so skillfully that it seems as if they are about to come to life.
Description
Gargoyles guarding one of the two bells (the bell of Alken), symbolizing «the connection between two lovers who are never destined to be reunited».
Location
In the form of a boss, they are located in the Tower of the Moon. To get to this location, from bonfire Servants’ Dwelling , go down the stairs near the bonfire and activate the Pharros mechanism. Go to the opened wall (you need to hit it) and cross the bridge. You will find yourself in the tower, the Defender of the Belfry will be sitting here. Climb to the very top of the tower. The foggy gate, closed by a grate, is the entrance to the boss, to open it, climb even higher up the stairs on the wall and activate the lever there.
Resistance/Damage to Balance
| Elements | Protection indicator |
|---|---|
| 15% | |
| 30% | Effects applied: |
| No | |
| Yes0006 | |
| Ordinary blow | 35 |
| Compiring | 35 |
| Fire breathing | 35 |
| Double composi with a strong vertical blow in the late | 70 (2 attacks) |
| Lightning Blast | Knock Down |
| Jump Kick | Knock Down |
| Flanking | Knock Down |
| Triple Combo | Knockdown |
Attacks
- Jump Kick . The gargoyle takes off and dives at the player from a height.
- Double combo with strong vertical strike at the end .
 The gargoyle delivers an ordinary blow and after that makes a powerful vertical blow.
 - Rebound, Mita has a similar attack. The gargoyle dodges and strikes.
- Triple combo, if the hero is behind a certain area of effect.
- Flanking . The gargoyle flies behind the hero and delivers a swift attack.
- Fire Breath . The gargoyle starts attacking the hero with fire when its HP bar goes beyond 60%. She is able to exhale flames while in the air and on the ground.
- Lightning bolt . There is a chance that when the gargoyle’s life is less than 60%, it will use an electricity attack: the gargoyle raises a spear up, and lightning strikes it, after which balls of lightning scatter around the arena. The damage of this attack is very high, with weak protection against lightning, it can immediately kill the character. Attack is rarely used.
Phantoms
- Lost Glencourt — the sign of his call is under the stairs, next to the fog (only in the reissue).

Tactics
- The main difficulty is that if you don’t quickly deal with each of them, you will have to fight as many as five gargoyles. If there are a lot of gargoyles, then you should not rush to attack, since these creatures from a certain moment begin to cover each other. If you have a large Gyrm shield, then a good way is to hit all the gargoyles a little at a time so that they start a fire attack — the shield will protect you, while the gargoyles will not be able to surprise you, and you will be able to hit the rest.
- The main thing for characters who focus exclusively on close combat is to have a good shield and a well-sharpened weapon (preferably with a large attack radius), not to panic and constantly move, not allowing opponents to surround and corner them, and also always keep opponents in the zone visibility.
- It’s even easier for mages — gargoyles are good at hitting Spears of Light, and Spears of Souls will be very useful, as they are able to hit several opponents in one line.

- The tactics of any build comes down to running in a circle and point attacks, or throwing consumable items (for example, magic urns). There are a lot of possibilities for treatment, but the simplest ones are to run after unanimated gargoyles, or run away to the other side of the arena and be treated there.
- Another way (very dangerous): next to the gray fog, from where we enter, there is a small nook between the stairs and the wall. You can go into it, then the gargoyles will not have a chance to surround you, you will have to fight with only one at a time, rarely two, and the rest will not be able to approach you. However, you will find yourself locked in, as two gargoyles will block your path. The attacks of the first (in front of you) will be viewed well, but the attacks of the second — not so much, so when you attack the first gargoyle, you can run into a series of attacks from the second. In addition, with this method of killing gargoyles, they cast lightning much more often, and since you have nowhere to go, you will most likely die.

- Gargoyles, like all armored opponents, are susceptible to lightning and weapons with bludgeoning damage (hammers, clubs, etc.) — you should use golden resin or the Blade of Light miracle on the weapon. Especially effective for weapons with bludgeoning damage.
Notes
- 5 gargoyles can fight at the same time.
- Gargoyle attacks can be parried.
- The first two come to life immediately, the third after 30-45 seconds, the fourth after 1-1.5 minutes, the fifth after 1.5-2 minutes. When quickly killing two gargoyles at once, subsequent ones quickly come to life, one after the other.
- A new gargoyle revives after one of the already revived gargoyles drops below half health. So it makes sense to kill them one by one.
- The boss was similar (in appearance and in terms of the battle principle) in the first part of the game. He guarded the first Bell of Awakening. The location where the fight takes place is also very reminiscent of the roof of the church from the first part.
