The Book of Unwritten Tales: Die Vieh Chroniken: Bis zum Vieh-nale
Zeitrahmen: 120 Minuten
Schwierigkeitsgrad: mittel
Nate und das Vieh landen mit dem Luftschiff in Seefels, in der Hoffnung dort vom Erzmagier Hilfe zu erhalten. Im Palast des Magiers steht zuerst ein Gespräch mit seinem Porträt an. Zwischen einigen sarkastischen Äußerungen erfahrt ihr, dass der Erzmagier zurzeit gar nicht im Hause ist. Das ist natürlich ein Grund, sich mal kurz etwas umzusehen. Das ist allerdings einfacher gesagt als getan, da sich der Bau durch eine Architektur auszeichnet, bei der sogar Herrn Escher schwindelig geworden wäre. Zudem lässt sich die Treppe nicht betreten.
Wenn ihr euch umschaut, entdeckt ihr beim Kamin einen Blasebalg. Pumpt damit kurzerhand das Vieh auf, das sogleich an die Decke steigt, die sich, perspektivisch auf den Kopf gestellt, als Fußboden entpuppt. In der Rolle des Viehs könnt ihr nun den Magierturm erkunden. Begebt euch durch den Durchgang rechts und dann die Treppe rechts hinunter. Im Raum mit dem Pentagramm findet ihr rechts neben dem Durchgang eine Flöte.
Geht nun wieder rechts durch die Tür und ihr landet in einem Raum mit vielen Gemälden. Schaut euch das Bild mit dem Kuchen an der rechten Seite der Säule zweimal an. Links daneben erscheint ein Portal. Geht hindurch. Im nächsten Raum steht ein Korb, der ein Seil enthält. Spielt auf der Flöte und das Seil erhebt sich aus dem Korb. Leider sind die musikalischen Talente des Viehs bestenfalls begrenzt, deswegen muss wohl doch Nate sein Glück versuchen.
Geht zurück zu Nate und gebt ihm die Flöte. Wechselt nun zu Nate und pustet das Vieh ein weiteres Mal auf. Nun darf Nate seine Flötenkünste unter Beweis stellen. Wechselt zum Vieh und geht wieder zum Raum mit dem Korb. Schnappt euch dort das Portal, das jetzt genau genommen ein tragbares Loch ist. Klettert dann das Seil hinauf und geht zu Nate hinunter. Klebt hier das Loch an die Wand neben dem Kamin und ihr habt eine Möglichkeit, dass auch nicht schwebende Wesen die oberen Teile des Turms betreten können.
Wechselt zu Nate und geht in den Raum mit den Gemälden. Betrachtet den Tisch genauer. Das sieht doch verdächtig nach einem Labyrinthrätsel aus. Die Lösung ist recht einfach: Klickt auf die Symbole am Rand, die den fünf Zacken des Sterns entsprechen. Dreht nun die Scheiben so lange, bis die Wege von den Symbolen bis in die Mitte des Labyrinths führen. Habt ihr das geschafft, steht ein zweites Rätsel an, das ihr aber noch nicht lösen könnt, da der silberne Zylinder angelaufen ist. Steckt diesen ein.
Begebt euch nun wieder zum Eingangsbereich. Nate hält es für eine gute Idee, mal draußen nach dem Rechten zu sehen. Leider ist Ma‘Zaz wieder aufgetaucht. Aber Nate hat natürlich einen Plan: Er lenkt die Kopfgeldjägerin ab und das Vieh durchsucht in der Zwischenzeit das Schiff nach nützlichem Allerlei. Gesagt, getan. Verlasst den Turm und ihr übernehmt automatisch das Vieh.
Nehmt als erstes das Seil, das vorne auf den Kisten liegt. Rechts könnt ihr noch einige Trauben einstecken.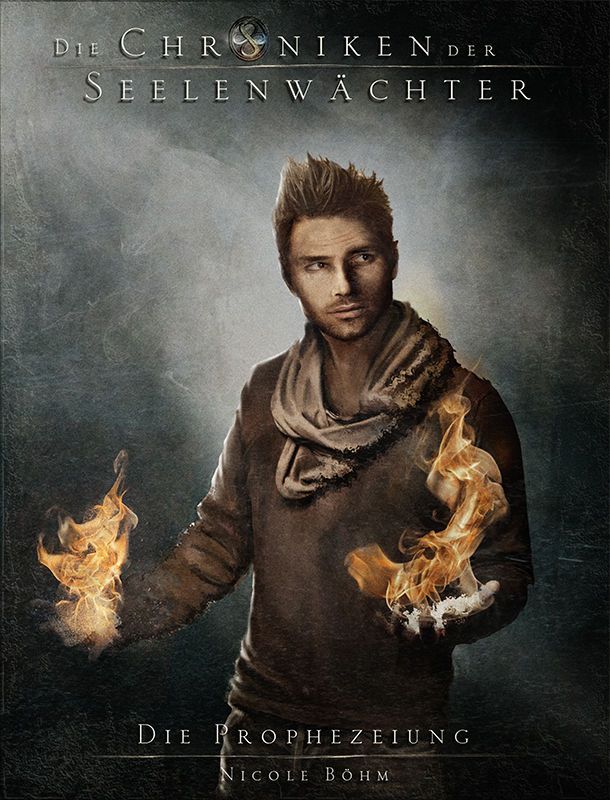 Man weiß ja nie, wozu es gut ist. Betretet nun die Kajüte. Auf dem Tisch findet ihr eine Flasche Wein und in der Ecke links einen Kescher. Im Schrank befindet sich ein Handschuh. Unter dem Schrank ist auch etwas — und zwar eine Knochenhand. Um diese hervorzuangeln, benötigt ihr den Kescher. So bekommt ihr die Hand zwar unter dem Schrank hervor, einfangen müsst ihr sie aber naheliegenderweise mit dem Handschuh.
Wenn ihr euch weiter umschaut, entdeckt ihr noch eine Schreibfeder auf dem Tisch, mit der das Vieh aber nichts anfangen kann. Außerdem ist oben rechts am Schrank ein Metallbügel, an den das Vieh allerdings nicht heranreicht. Da weiter nichts zu tun ist, könnt ihr jetzt Ma‘Zaz ausschalten. Geht dazu an Deck und macht sie auf euch aufmerksam. Wenn die Kopfgeldjägerin kommt, verschwindet ihr wieder in der Kajüte und versteckt euch — als Kleidungsstück super getarnt — im Schrank.
Werft die Knochenhand auf Ma‘Zaz, die von ihr angegriffen wird und flieht. Dabei lässt sie ihre Axt zurück, die ihr aufnehmt. Zieht den Teppich zur Seite und bearbeitet das Schloss zur Falltür mit der Axt. Das Vieh bedeckt dann das Loch mit dem Teppich und ihr habt eine prima getarnte Fallgrube. Fangt nun die Knochenhand wieder mit Kescher und Handschuh ein. Lockt Ma‘Zaz ein weiteres Mal an. Bewerft sie wieder mit der Hand. Beim folgenden Handgemenge fällt die Orkin durch die Falltür und das Vieh verschließt diese mit dem Kescher. Ma‘Zaz seid ihr erst einmal los.
Geht nun wieder zum Magierturm. Gebt Nate dort die Axt und wechselt zu ihm. Geht mit ihm zum Schiff. Steckt dort rechts die Leiter ein. Bearbeitet mit der Axt die Kisten. Sie enthalten einen wenig nützlichen Haushaltsroboter. Die Nägel der Kiste steckt ihr aber ein. Betretet nun die Kajüte. Steckt dort die Schreibfeder vom Tisch und den Metallbügel vom Kleiderschrank ein. Begebt euch wieder zum Turm.
Jetzt gilt es, den Zylinder zu reinigen. Ganz einfach: Werft ihn in das heiße Wasser im Kessel im Kamin. Gebt noch die Nägel hinzu und der Belag vom Zylinder wird erstaunlicherweise von den Nägel aufgenommen. Na, zumindest glänzt der Zylinder jetzt schön silbrig. Geht durch das Portal und setzt den Zylinder wieder in den Tisch ein. In den Quadraten auf dem Zylinder spiegeln sich Symbole, die ihr auch am Rand wiederfindet. Dreht die Scheibe nun so lange, bis fünf der Symbole am Rand denen auf dem Zylinder entsprechen. Drückt dann die dementsprechenden Symbole am Rand.
Ihr erhaltet eine Metallstange. So etwas habt ihr doch schon gesehen. Unten im Eingangsbereich in der Mitte steckt eine ähnliche Metallstange im Tisch in der Mitte des Bildes. Begebt euch dorthin und steckt die Metallstange in eine der drei Öffnungen. Es fehlt also noch so eine Stange. Vielleicht kann euch das Porträt des Erzmagiers ja weiterhelfen. Wenn ihr mit ihm redet, erfahrt ihr tatsächlich, dass es euch sagen kann, wo sich die dritte Stange befindet.
Ihr müsst ihm allerdings erst einen Gefallen tun. Es hätte gern ein Gemälde mit Essen und Trinken. Na, das sollte doch einfach sein — Staffelei und Farben sind ja schon vorhanden. Jetzt benötigt ihr nur noch einen Pinsel und eine Leinwand und eine Vorlage zum Abmalen. Seht euch den Lappen neben der Staffelei an und ihr erhaltet einen Faden. Geht nun zum Vieh und schneidet ihm ein paar Haare ab. Da ihr keine Schere habt, benutzt ihr einfach die Axt! Im Inventar könnt ihr nun aus Feder, Faden und Haaren einen echten Viehhaarpinsel fertigen.
Eine Leinwand sollte sich vielleicht im Raum mit den vielen Gemälden finden. Ein guter Kandidat ist das Bild mit dem Engel — wenn der Engel nicht wäre, hättet ihr glatt eine schöne weiße Leinwand. Also muss der Engel verschwinden. Vielleicht kann euch das Gemälde mit dem Schwein weiter links weiterhelfen. Erschreckt das Schwein mit der Flöte. Das Schwein verwindet auch tatsächlich ins mittlere Bild, geht aber nicht weiter, weil es auf den surrealistischen Treppenstufen hängt und dann einfach ins sein Bild zurückgeht.
Ihr müsst das mittlere Bild also ersetzen. Gebt dem Vieh die Axt und wechselt zu ihm. Begebt euch dann in das Zimmer mit dem Springbrunnen (Nate kann diesen Raum nicht erreichen). Hackt das Gemälde mit der Kugel per Axthieb von der Wand und geht wieder zu Nate und überreicht ihm das Bild. Wechselt zu Nate und stellt das Bild in den Rahmen des mittleren Bildes. Erschreckt nun noch einmal das Schwein. Dieses Mal rennt es gegen die Kugel, die kurz darauf den Engel aus seinem Bild katapultiert. Nehmt die Leinwand an euch.
Begebt euch zur Staffelei und stellt die Leinwand darauf. Das Vieh muss nun noch die Flasche und die Trauben als Vorlage auf den Tisch stellen. Wechselt wieder zu Nate und malt mit dem Pinsel auf der Leinwand. Hier gilt es, die richtigen Farben an die passenden Stellen wie in der Vorlage auf die Skizze aufzubringen. Ist das geschafft und das Gemälde sieht ähnlich genug aus, verlasst ihr den Bildschirm und gebt dem Gemälde des Erzmagiers das Bild.
Dieser verrät euch, dass die dritte Metallstange hinter dem Bild des Clowns in der Gemäldegalerie zu finden ist. Ihr erhaltet auch ein albernes Passwort. Geht zum Raum mit den Gemälden. Rechts an der Säule findet ihr das Clown-Gemälde. Klickt es an. Nach einer etwas peinlichen Situation erhaltet ihr die dritte Stange. Setzt diese dann unten im Tisch ein. Dreht den Tisch so lange, bis eine Art Symbol erkennbar ist.
Begebt euch wieder zur Gemäldegalerie und legt dort die Leiter zum Balkon hinten rechts an. Steigt die Leiter hinauf und dreht die Symbolscheiben links neben der Tür so lange, bis sie das Symbol der Metallstangen ergeben. Nun könnt ihr das Büro des Erzmagiers betreten. Dort findet ihr auch gleich ein nützliches Utensil: das Zepter auf dem Stuhl links. Leider wird der Raum von einer garstigen Pflanze bewacht, die ihr irgendwie austricksen müsst.
Im Büro findet ihr am Schrank eine Pflanzenpfeife und zwei Wollknäuel. Da die Pflanze zwar nichts sehen kann, aber auf Geräusche reagiert, bastelt ihr aus der Wolle und dem Metallbügel einen Gehörschutz und setzt ihn der Pflanze auf. So weit, so gut. Leider kann die Pflanze auch noch gut riechen. Vielleicht könntet ihr im Alchemistenlabor rechts im Zimmer ja ein Pflanzenparfüm herstellen. Dazu muss aber eine andere Pflanze her. Im Treppenhaus schwebte doch eine.
Um die schwebende Pflanze einzufangen, begebt ihr euch mit dem Vieh zum Zimmer mit dem Springbrunnen. Versucht, die Pflanze mit dem Seil zu fangen. Leider ist sie zu weit entfernt. Geht also mit Nate nach unten zum Eingangsbereich und lockt die Pflanze mit der Pflanzenpfeife an. Wechselt wieder zum Vieh, das die Pflanze nun mit dem Seil fangen kann. Wieder im Büro des Erzmagiers destilliert ihr mithilfe des Labors aus den Blüten ein Pflanzenparfüm und besprüht das Vieh damit. Das geht zwar nach hinten los, aber das Vieh kann das Zepter holen. Damit endet das vierte Kapitel.
Die Vieh Chroniken Adventure für PC
-
WM 2022
SpielplanLivetickerDFB-ElfGruppe AGruppe BGruppe CGruppe DGruppe EGruppe FGruppe GGruppe H
-
Politik
DeutschlandAuslandCorona-KriseTagesanbruch
-
Ukraine
-
Regional
BerlinHamburgMünchenKölnFrankfurtAlle Städte
-
Sport
Bundesliga2.
 BundesligaFußballFC Bayern NewstickerWM 2022WintersportFormel 1Mehr SportLivetickerErgebnisse
AnzeigenFussball-TippSportwetten
-
Wirtschaft & Finanzen
Börse & MärkteGeld & VorsorgeUnternehmen & VerbraucherVersicherungenImmobilien & WohnenBeruf & Karriere
AnzeigenClever vorsorgenJobsucheTeilverkauf-Check
-
Unterhaltung
StarsRoyalsKinoTVMusik
-
Panorama
MenschenUnglückeKriminalitätJustizBuntesGeschichteQuizLesermeinungenWetter
-
Gesundheit
Krankheiten & SymptomeCoronaErnährungFitnessGesund lebenHeilmittelSchwangerschaftSelbsttests
AnzeigenGesunde KnochenGesunder SchlafHeilbäder & KurorteNatürliche Heilmittel
-
Corona
-
Leben
Essen & TrinkenReisenFamilieAlltagswissenLiebeMode & Beauty
-
Spiele
Online-SpieleBrowsergamesTägliche Spiele3 GewinntBrettspiele & KartenspieleBubble ShooterGratis-CasinoKreuzworträtselMahjongSudoku
-
Nachhaltigkeit
Klima & UmweltMobilität & VerkehrHeim, Garten & WohnenEnergieFinanzen & BerufErnährungKonsumKlima-Lexikon
-
Auto
Neuvorstellungen & FahrberichteRecht & VerkehrElektromobilitätTechnik & Service
AnzeigenKFZ-Versicherung
-
Digital
SmartphoneComputer & GadgetsSicherheitInternet & TelefonNetzpolitik
AnzeigenTechnik-Tipp
-
Heim & Garten
GartenHaushaltstippsBauenWohnenEnergie
-
Wetter
WettervorhersageWetterkarten
-
Kaufberatung
DealsTechnikHaushalt & WohnenGenussLeben & FreizeitHaus & GartenGesundheit
-
Video
HighlightsNachrichtenWetterKlima & NachhaltigkeitSportUnterhaltungInternethitsRatgeber
HomeSpieleTests & Previews
Test The Book of Unwritten Tales: Die Vieh Chroniken | Adventure | PC
Held Nate und das liebe Vieh
medienagentur-plassma, Medienagentur plassma (jr / ams)
01. 11.2011Lesedauer: 3 Min.
Wir sind t-online
Wir sind t-online
Mehr als 150 Journalistinnen und Journalisten berichten rund um die Uhr für Sie über das Geschehen in Deutschland und der Welt.
The Book of Unwritten Tales: Die Vieh-Chroniken (Quelle: King Art)
Schlagzeilen
Alle
Deutscher Schlagerstar hört aufTornado verwüstet Ort im SaarlandNun doch: WM-Aus für Bayern-Star ManéZwangsarbeit? Ikea dementiert VorwürfeÖlpreise sacken abTV-Sender können nachts ausfallenJugendlicher isst Teile von KatzeVerurteilter Starkoch: Schuhbeck-Büro wegDeutsche Waffe verhindert KatastropheA7 wird tagelang voll gesperrtNackter Imker schreckt Pferd: KieferbruchPaypal führt kuriose Gebühr einDampflok bis ICE – Faszination Eisenbahn
Alle Schlagzeilen anzeigen
Anzeige
Loading. ..
..
Loading…
Loading…
Nicht nur Bücher, auch Spiele haben ihre Schicksale, und manchmal keine guten. Immerhin — nach zwei Jahren Entwicklungszeit und zwei in Konkurs gegangenen Publishern gibt es endlich erfreuliche Neuigkeiten von Nate Bonnet, einem der Charaktere aus dem 2009 erschienen PC-Adventure «The Book of Unwritten Tales». In der jetzt trotz aller Widrigkeiten erschienen Fortsetzung «Die Vieh Chroniken» erzählen die Entwickler von King Art die Vor-Geschichte und damit, wie der Abenteurer Nate und das Vieh sich eigentlich kennengelernt haben. Das Vorgängerspiel sorgte mit derbem Humor, einer wunderschönen Grafik und ausgewogener Rätselkost für Furore — können «Die Vieh Chroniken» die entsprechend hochgesteckten Erwartungen erfüllen?
Schlechter Verlierer
Mit stolzgeschwellter Brust steht Nate Bonnet zu Spielbeginn auf dem Deck seines gerade im Spiel vom Roten Piraten gewonnenen Luftschiffes Mary. Doch er hat zwei große Probleme: Er weiß weder, wie man die Mary steuert, noch wo sich Bug und Heck befinden. Zudem hat der Rote Pirat ihm auch noch die grüne Ork-Kopfgeldjägerin Ma`Zaz auf den Hals gejagt. Zwar kann man sie im ersten Kapitel mit ein paar Tricks und der Hilfe von Mary von Bord werfen, doch das Luftschiff crasht in einer Eislandschaft. Immerhin, die Rätsel im Spiel — zum Beispiel wie man das Schloss an der Luke ins Unterdeck knackt — sind fair. Mit ein wenig Kombinationsarbeit lässt sich das Ganze knacken. Erstmals haben die Entwickler in den «Vieh Chroniken» auch zwei unterschiedliche Schwierigkeitsgrade eingeführt. Neueinsteiger bekommen mehr Informationen als erfahrene Abenteurer geliefert und können so die Aufgaben zügig lösen.
Eine ganze Horde Viecher
Die in den «Vieh Chroniken» erzählte Geschichte strotzt wieder vor Humor und skurrilen Charakteren. So findet sich Nate nach der Bruchlandung in der Gewalt eines Yetis wieder, der eigentlich gar keiner ist und nur ab und zu denkt, ein Yeti zu sein. Schließlich trifft er endlich auch auf das Vieh, das ihm aus der Patsche hilft, und macht mit einer ganzen Horde Viecher Bekanntschaft. Diese stecken mit ihrem Raumschiff fest, weil ein fieser Magier ihnen den Antriebskristall gestohlen hat. Im zweiten Kapitel steuert man das Vieh selbst durch die Geschichte, während man in den letzten drei Abschnitten zwischen beiden Figuren hin und her wechselt und so die Rätsel und Aufgaben löst. Dieser Wechsel der Charaktere ist an einigen Stellen nicht nur vorteilhaft, sondern zwingend notwendig. So versperren zum Beispiel zwei Wächter den Eingang zum vereisten U-Boot, aus dem wir uns noch Utensilien holen müssen. Doch wie kann man sie ablenken? Da wäre einzig der kleine Pinguin. Was, wenn man ihm den Schnaps aus der Flasche gibt? Mit Nate ist das nicht zu machen, aber Vieh hat da weniger Skrupel, schnappt sich den kleinen Frackträger und füllt ihn mit Alkohol ab. Die Ablenkung klappt, Aufgabe gelöst. Weiter geht’s!
Stimmungsvolle Grafik
Grafisch bewegt sich das Adventure auf der Höhe des Vorgängers. Allerdings fallen diesmal auch die Hintergründe wesentlich detaillierter aus..jpg) Für eine stimmungsvolle Atmosphäre sorgen neben der Optik auch die kuriosen Charaktere wie die Umweltschützerin Petra, eine erstklassige Vertonung und natürlich wieder die zahlreichen Anspielungen auf Genre-Klassiker wie «Sam & Max» oder «Day of the Tentacle» sowie Film-Blockbuster à la Der Herr der Ringe oder Harry Potter. Im Vieh-Raumschiff stolpert man gar über ein Wrack von Star Wars-Roboter R2D2.
Für eine stimmungsvolle Atmosphäre sorgen neben der Optik auch die kuriosen Charaktere wie die Umweltschützerin Petra, eine erstklassige Vertonung und natürlich wieder die zahlreichen Anspielungen auf Genre-Klassiker wie «Sam & Max» oder «Day of the Tentacle» sowie Film-Blockbuster à la Der Herr der Ringe oder Harry Potter. Im Vieh-Raumschiff stolpert man gar über ein Wrack von Star Wars-Roboter R2D2.
Was uns gefällt
Die Vieh Chroniken machen dort weiter, wo der erfolgreiche Vorgänger aufgehört hat. Mit einer optisch sehenswerten Comic-Grafik, schrillen Figuren, hervorragenden professionellen Synchronsprechern, einer stimmigen, Story, ansprechenden Rätseln und viel, viel schrägem Humor versprühen die Vieh Chroniken ihren besonderen Charme. Ab und zu ertappt man sich dabei, wie man vor seinem Rechner sitzt und herzhaft loslacht. Die Laufwege zwischen den verschiedenen Schauplätzen sind wohltuend kurz, und die «Point & Click»-Steuerung funktioniert gewohnt gut.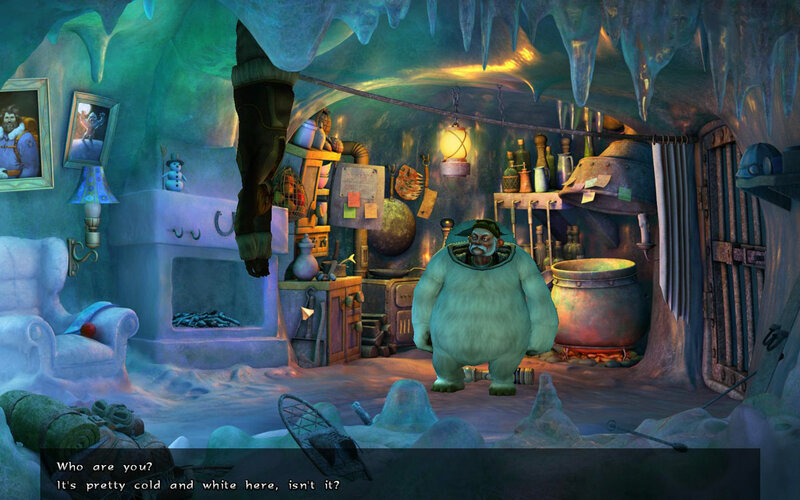 Das Angebot von zwei Schwierigkeitsgraden sorgt zudem dafür, dass das Adventure sowohl bei Neueinsteigern wie auch Hardcore-Abenteurern gleichermaßen gut ankommt.
Was uns nicht gefällt
Bei einigen Inventar-Zusammenstellungen muss man schon etwas abwegige Gedankengänge beschreiten, und es steht auch immer nur ein Lösungsweg parat. Das Spiel ist auch kürzer als der Vorgänger ausgefallen, und es gibt nur relativ wenige Schauplätze zu erkunden. Aber das ist schon Meckerei auf sehr hohem Niveau.
Meistgelesen
Die Wut ist großMassive Störung im deutschen Mobilfunknetz»Wir erleben gerade die ersten Tage des Dritten Weltkriegs»
Anzeige
Loading…
Loading…
Loading…
Fazit
So macht Abenteuer spielen doch richtig Spaß! Ein etwas tollpatschiger Held und sein urkomischer rosafarbiger Zottelfreund sorgen im Zusammenhang mit einer interessanten Geschichte und guten Rätseln für unterhaltsame Stunden. Witzige Dialoge und zahlreiche Anspielungen auf bekannte Computerspiele und Kinofilme sorgen für den wichtigen Schuss Humor. «The Book of Unwritten Tales: Die Vieh Chroniken» sollte in keiner gut sortierten Adventure-Sammlung fehlen.
Titel: The Book of Unwritten Tales: Die Vieh Chroniken
Genre: Adventure
Publisher: Crimson Cow
Hersteller: King Art
Release-Termin: Im Handel
Preis: zirka 25 Euro
System: Windows-PC
USK-Freigabe: Ab 12 Jahren
Wertung: Sehr gut
Loading…
Loading…
Loading…
Loading…
Loading…
Loading…
Loading…
Loading…
Loading…
Loading…
Loading…
Loading…
ShoppingAnzeigen
Loading…
Loading…
Loading…
Loading…
Loading…
Loading…
Loading…
Loading…
Loading. ..
..
Loading…
Loading…
Loading…
Spiele von A bis Z
Online-Spiele
10×102020 Connect3 GewinntBrettspiele & KartenspieleBubble ShooterBubble Shooter HDBubble Shooter ProButterfly KyodaiCandy MahjongCandy RiddlesDaily SolitaireDaily Sudoku 2Denkspiele & QuizspieleGarden Tales 2Jewel AcademyJewels Blitz 4KreuzworträtselMahjongPuzzles & WimmelbildspieleSpider SolitaireSportspiele & GeschicklichkeitsspieleSudokuTägliche SpieleZeitmanagementspiele
Browsergames
ElvenarForge of EmpiresGoodgame Big FarmGoodgame EmpireGratis-CasinoJackpotLounge 777Mary VegasRail NationStoniesZoo 2 — Animal Park
Specials
Fußball-SpieleRacing GamesUrlaubs-Games
t-online folgen
Netzwerk & Partner
Das Telefonbuchwatson.degiga.dedesired.dekino.despieletipps.defamilie.destatista.destayfriends.de
Telekom
Discussions | Quest lovers. Passage of games.
Video projects by Irina Kozlova
11 posts, pinned topic
Irina Chumachenko replied 14 Dec 2018
THE BOOK OF UNWRITTEN TALES 2: ALMANAC EDITION.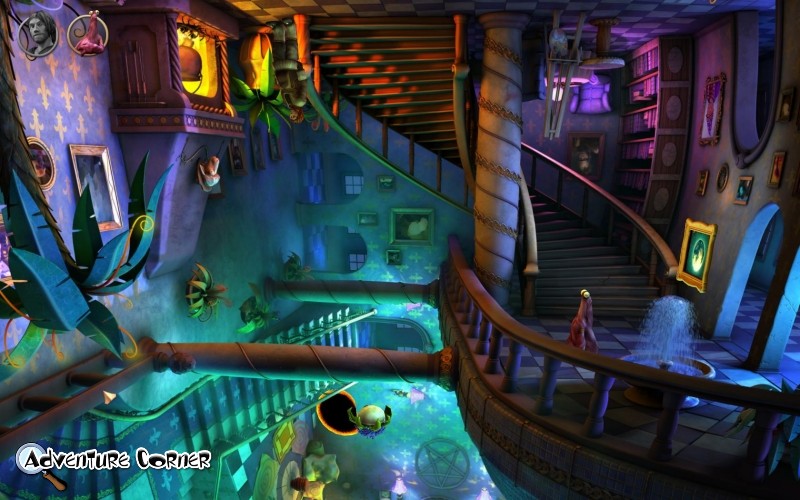 Lyuba Bykova replied 22 May at 11:47 am
X-Files 2: Puritas Cordis | Secret Files 2: Puritas Cordis (Rus)
54 posts
Mar 2021
«The book of unwritten stories» — Walkthrough of the game, ways to solve puzzles, possible difficulties or bugs.
49 posts
Oleg Bezkorovayny replied 6 Jan 2020
5 posts
Mustafa Frimen replied 28 Jun 2018
Cliches0003
3 posts
Mustafa Frimen replied 28 Jun 2018
The book of unwritten stories. Chronicles of the Beast | The Book of Unwritten Tales. Die Vieh Chroniken (Rus)
28 posts
Evgeniya Don replied 3 Apr 2016
Lost Horizon | Lost Horizon (Rus)
83 posts
San-Sanych Professor replied 7 Feb 2016
Black Mirror | Black Mirror (Rus)
64 posts
San-Sanych Professor replied 2 Feb 2016
The Watchful Eye.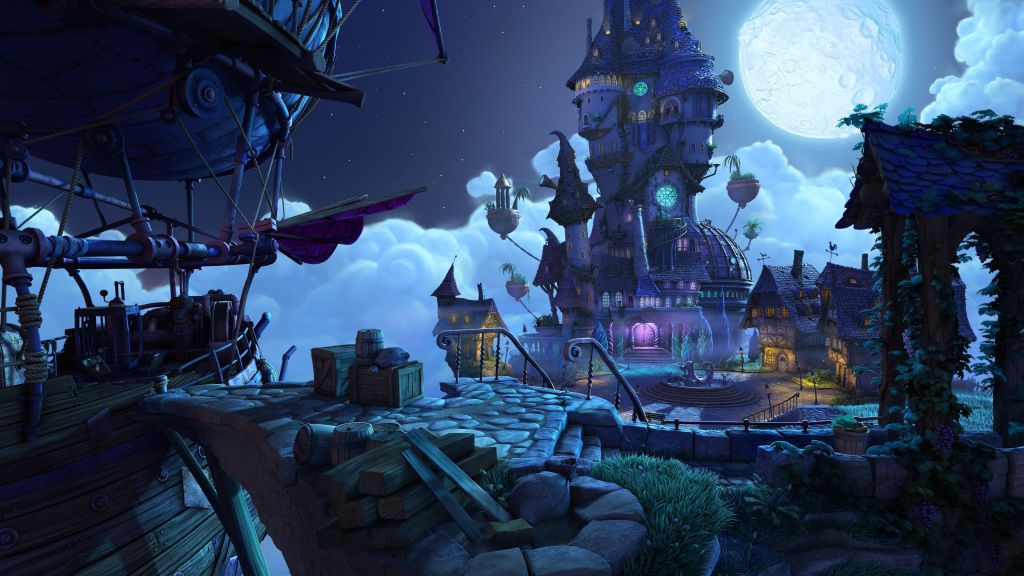 Satinava chains | The Dark Eye.Chains of Satinav (RUS)
4 POSTS
San-Sanych Professor Replied 2 Feb 2016
Fire
9000 San San-Sanch Proofessor READSOR REPLIEN | Black Mirror 3 (Rus)
2 posts
San-Sanych Professor replied 20 Jan 2016
Alpha Polaris. Horror in the ice | Alpha Polaris (Rus)
2 posts
San-Sanych Professor replied 20 Jan 2016
The X-Files: Sam Peters | Secret Files: Sam Peters (Rus)
45 posts
San-Sanych Professor replied 14 Jan 2016
The Sixth Sense
44 posts
San-Sanych Professor replied 12 Jan 2016
Black Mirror 2 | Black Mirror 2 (Rus)
2 posts
0003
The X-Files 3: The Archimedes Code | Secret Files 3: Archimedes Code (Rus)
44 posts
San-Sanych Professor replied 9 Jan 2016
Journey to the Center of the Earth | Journey to the Center of the Earth (RUS)
1 POST
STENLI DENRES POSTED 5 JAN 2016
Epic dilogy Siberia: Immortal scenes and characters
78 Posts
Passage Parade — A book of unwritten stories.
 Chronicles of the Beast / Book of Unwritten Tales: The Critter Chronicles, The
Passage written for the German version of the game with crack
Control
Classic for this genre of games control with the mouse.
Cursor « magnifying glass » — examination of objects
Cursor « hand » — take the object
Cursor « wrench » — interaction with the object
Cursor « cloud » — communication with the character
Cursor « door » — exit from the location.
Before performing any actions with an object/character, it must be inspected. The inventory is located at the bottom of the screen and appears when you move the mouse cursor over it. Items in the inventory are combined by dragging on top of each other. From the third chapter, the function of switching between characters becomes available: to select a character, click on its icon in the upper left corner of the screen. The main menu is called up with the key » Esc «. By pressing the key » Space «(Space), we turn on the highlight of active points. The game has two difficulty levels: normal and hard. At the hard level, the option to highlight active points is not available, and some puzzles and tasks are not solved the same way as at the normal level. This walkthrough describes the actions of the heroes, both for normal and for difficult levels. Actions for the hard level are in italics.
Chapter I. Freedom
Deck
Playing as Nate
We are watching a video in which we are flying on the ship «Mary» won in cards, and a female orc Ma’Zaz flies up to us and demands to land the ship on the ice. How can we get away from it? We take a look at our ship and check the cannon — there is no gunpowder or ammunition in it. We look into the barrel to the left of the gun and find an empty barrel for gunpowder. We open the chest to the right of the cannon and take out confetti, a carnival tongue and a pipe from it. We study the steering wheel and the coffee grinder on the back wall of the steering wheel. We examine the cage in front of the steam engine and the steam engine itself. We examine the wine bottle standing on the steam engine, and we take out the corkscrew sticking out of the cork of the bottle. A little to the right we see a rubber hose and pick it up. We cast a glance at the rope ladder, «flying» above our head, and go down into the hatch.
Captain’s cabin
We talk with the wooden figure of the woman Mary and learn from her the history of the ship. We examine the desk, take the documents and read them. We click on the documents again, remove the paper clip from them and put it in inventory. On the right side of the table we see a locked box and open its lock with a paper clip. In the opened window with a keyhole, we need to place a straightened paper clip so that it goes through all the clamps of the lock and gets into the right hole. Move the paperclip with the left mouse button pressed. A paperclip correctly inserted into the lock is shown in the figure.
Solution for normal level
Solution for difficult level
We examine the dressing table on the right and the mirror above it. From the table we take pieces of cotton wool and powder. If you are playing on Hard, Nate will take more Sulfur Powder from the dressing table. We move to the left side of the cabin and open a large closet, in which we find fancy dresses and a skeleton hand. We take the hand of the skeleton and double-examine the barrel to the left of the cabinet. The barrel is sealed with resin, and the cork at the bottom of the barrel is firmly clogged. Using a corkscrew on the barrel, insert it into the cork and take it out. We see how black powder pours out of the barrel . On a difficult level, it is not black powder that is poured out of the barrel, but saltpeter. Pour the black powder into the empty gunpowder keg, applying the latter to the spilled gunpowder. To the left of the barrel is a large furnace, open it and find a smoldering piece of wood. We pick the skeleton’s hand in the oven, after which the hand comes to life, throws charcoal on the floor, and hides itself under the cabinet. At a normal level, we cannot lift an ember from the floor, , but at a difficult level, this must be done. We use a cigar on the stove, and we understand that before the cigar ignites, our face will have time to burn. In inventory, insert the cigar into the hose, and use the hose with the cigar on the stove — we get a smoldering cigar. We step to the left and rise to the deck.
Deck
On the normal difficulty level we have black powder, but on the difficult level it still needs to be prepared. To do this, grind charcoal in a coffee grinder, and pour the resulting coal powder into a barrel of saltpeter. Add sulfur powder to the barrel and get black powder.
Go to the cannon, pour the black powder from the keg in inventory into the muzzle of the cannon and add confetti to the cannon. We set fire to the wick of the cannon with a smoldering cigar and see how the confetti did not even reach the enemy ship. Ma’Zaz strikes back, but her cannonball gets stuck between the bars of our cage. No matter how hard we try, it will not work to get the nucleus out of the cell. We return to the cannon, pour gunpowder into it and add pieces of cotton wool. We set fire to the wick with a smoldering cigar and see the second unsuccessful attack attempt. But this time the bounty hunter shoots from her cannon, and the core falls on the deck — we pick it up. We fill the cannon with the remaining gunpowder, place the core in the muzzle and set fire to the wick with a cigar.
We finally reached our goal and shot down the orc ship! But, before we had time to rejoice at our victory, the surviving huntress climbs onto the deck of our ship and locks us in a cage.
Examine the roof boards of the cage and see that the top and bottom of the cage are made of wood. Moreover, one of the rivets on the boards loosened. We unscrew the loose rivet with a corkscrew and move one board to the side. We examine the resulting hatch and come to the conclusion that through it we will not be able to get out. We notice hanging chains above the cage, in the inventory we tie a corkscrew to the end of the hose and try to apply the hose to the chain. We need to come up with another way that does not create so much noise. We click on the open hatch leading to the captain’s cabin and try to call Mary for help. To our chagrin, Mary takes the side of the orc. We start a conversation with the bounty hunter twice, and when we finally get her with our chatter, she finds earplugs and plugs her ears with them. Now that the orc can’t hear anything, we can make as much noise as we want! We use a hose with a corkscrew on the chain above the cage, the chain falls, and we pick it up. We tie one end of the chain to the bars of the lattice, take the second end of the chain and throw it on the spinning flywheel to the right of the steam engine.
The flywheel rips out the grating door, and we manage to jump into the cabin and close the hatch behind us.
Captain’s cabin
We talk to Mary, who informs us about a secret cargo compartment under the cabin carpet. We move aside the purple carpet in the foreground and under it we find the hatch, which is locked with a combination lock. Under the lock lies a leaflet with a hint to the code, we take it out and remember: 1. Under the ship 2. Symbol in the mirror 3. Mary’s age. On the hard level, only the first word «Symbol» will be known from the second hint, and the other two words will be blurred. We leave the approach and look for answers to questions.
Under ship . To the right of the table we notice a model of a ship in a bottle, inspect it and pick it up. We break the bottle, look at the bottom of the ship, but we do not find any sign there. Then we carefully study the stand on which the bottle stood, and we see the symbol of a square with a circle inside.
Symbol in mirror . We look in the mirror, and then apply powder on it and distinguish the sign of the cross with a circle next to it.
Mary’s age . We talk with Mary, compliment her and find out that she is now 81 years old, and the castle was set 12 years ago. We subtract 12 years from 81 and get the number 69. So Mary was 69 years old when the lock was put up. Sign 69 will be the symbol we need.
We return to the combination lock of the hatch and set the symbols.
Lock code
We go down into the cargo compartment and through it we get on board the ship.
Deck
A rope with a grappling hook dangles to our right — inspect and pick it up. We throw a rope with a hook onto a rope ladder above our head and climb the ladder to the balloon. We study the red flag and try to take it, but the ropes holding the flag are too strong. We open the toolbox, take out the adhesive tape and go down the rope ladder. In the inventory, combine the tongue with adhesive tape, and then glue the tongue to the pipe — we get a cracker. We attach the cracker to the tank on which we stand. Nate will automatically return to the captain’s cabin, get an orc ax and lock himself in the cabin again. We get out through the cargo compartment and rise to the balloon. We cut the ropes holding the flag with an ax and take it away. We go down the rope ladder, remove the rope with the grappling hook from the ladder and combine it with the red flag. We throw a makeshift parachute on an angry woman, and then, when the orc has time to grab the side with one hand, we bend her fingers one by one. While we were fighting the intruder, the ship’s controls were left unattended, and it crashed into a floating island.
Yeti hideout
We wake up in the Yeti’s home and find ourselves hanging on a rope tied by our feet. Next to the snowshoes, we notice cylinder and try to take it twice. Yeti comes up to us, puts a huge apple in his mouth, and does not forget to add salt on top. Is he going to cook us? We take out the apple from the mouth and put it in inventory. We throw an apple at the oil lamp above the monster, but we miss and knock the salt shaker off the shelf. Yeti slips on the salt shaker and falls. We try to untie the legs, but fail. The monster comes to his senses, takes off his yeti mask and turns out to be a man. We talk with the zoologist Cornelius, after which we find ourselves in a cauldron. We click on the disguised yeti, and then we ask for help from the purple beast that appears.
Chapter II. Crashed
Sanctuary
Playing as the Beast
Examine the transporter, then study the signal light and try to take it. We talk with Egrofal, inspect antenna next to him and take it. We go outside.
Workshop
We study the cable to the left of the door, we approach the table in the lower left corner of the screen and take the adhesive tape from it. We examine a pile of trash, take a look at the penguin, the purple barrel and the generator. We open the wooden box to the left of the generator and take out the straw from it. We move to the right to the ice plain.
Ice Plain
We are talking with Ulus, who is fishing, and we understand that he is hungry. We examine the little penguins and talk to the strange woman Petra. We look into the box next to Petra, and then examine the large wooden head behind the woman. We go back one screen and in the distance we see smoke coming from the yeti cave — we run into the cave.
Yeti Cave
Looking around the ice apartments. We examine the logs to the left of the chair, and at the bottom of the screen we notice and take scales . We rummage in the backpack a little to the right of the scales and take out a balloon from it. We click on the lampshade on the right above the chair and on the Christmas sock hanging from the fireplace. If you are playing on a hard level, then take a red wool ball from the chair. To the right of the stove, notice the head without a body (Halloween pumpkin), look into the large pot, and then take kitchen knife on the table to the right of the fireplace. Above the same table we notice a grid with apples, but it is suspended so high that we cannot get it. In inventory, combine the adhesive tape with the antenna and then with the knife. With the resulting knife on the antenna, we cut the grid, from which several apples fall out — we pick them up. We leave the cave.
Ice Plain
We give apples to the hungry Ulus, and when he leaves, we take the cord with the bait. We step to Petra, talk to her and tear the cap out of her hands. On the hard level, the procedure is different. Having received the cap, we give Petra a red woolen ball. We go to the sanctuary, listen to the conversation of the brothers and immediately return, by this time the woman will already knit a sock for us. We walk to the left to the workshop.
Workshop
In inventory, combine the bait with the cap and put on the hat on the penguin. A frightened penguin runs into the sanctuary — we follow him.
Sanctuary
Watching Egrofal trying to catch a frightened penguin. We wait for the moment when the leader screams, and quickly click on the luminous ball . Layla on the railing to the right of the leader. We carry the ball to our friend, but a small penguin knocks us down, and the ball falls and breaks. We return to the sanctuary, inspect multi-colored sheets on the wall at the beginning of the stairs and tear them off. Near the place where the sheets hung, we examine the lever and lower it. We see how the electricity in the workshop turned off. We click on the sheets in the inventory and tear them into several colored strips. Now we combine colored stripes with a straw and get a homemade bouquet of flowers. We go to the workshop.
Workshop
We walk to the right to Leila and give her a bouquet, but her friend still continues to be sad. We talk with Layla and find out that she misses the stars. Let’s go to the plains.
Ice Plain
We hurry to Petra and talk to her, and when the woman asks for a pen for the poster, we hand her the antenna, having previously disconnected the kitchen knife from it. Grateful Petra gives us a colander. We run to the sanctuary.
Sanctuary
Use the knife on the signal lamp and pick up the signal lamp. We go to the workshop.
Workshop
We cut off the cable with a knife to the left of the door and hurry into the cave.
Yeti Cave
As soon as we enter the cave, we immediately hear the characteristic “Ho-ho!” Santa. We approach the fireplace, feel the sock and take out the box from it. If you are playing on a hard level, then the sock will not hang on the fireplace. We independently hang the sock tied by Petra on the hook of the fireplace, leave the cave and immediately return. Open the gift box by clicking on it in inventory and take out the hourglass. Also wrapping paper and the sock itself settle in our inventory. We return to the sanctuary.
Sanctuary
We put an hourglass on the conveyor belt, after which the device breaks. Egrofal puts a working transporter in the container, and puts the broken unit at the right wall of the sanctuary. We take a broken conveyor and hurry to a friend.
Workshop
We put a signal lantern on the box next to Layla, and put a colander on the lantern. Now we use the cable on the lantern, thereby connecting it to the generator. We select the conveyor in the inventory and, applying it to the generator, install the conveyor on the right. We tie a sock to the conveyor and use it as a belt between the conveyor and the generator. We click on the conveyor, we catch the penguin and put it on the tape. We observe the visit of the sorcerer Munkus, who demands weapons from the leader in exchange for a red heart, which is a source of power for the sanctuary. We take the leader to the sanctuary. We leave the workshop and go to the plain, where we observe the wreck of Mary’s ship, and automatically find ourselves in the workshop. We step to the left to Ulus and pay attention to quadruped to his right. We try to take the item, but the Ulus does not allow it. We start a conversation with a friend, and in the conversation we select the third remark. When Ulus turns away, we quickly grab the quadruped and go to the sanctuary.
Sanctuary
In the lower left corner of the screen, take a bucket of paint, go outside and go to the hole on the plain.
Ice Plain
We examine the hole in the ice and, using a balloon on it, draw water into it. We run into the cave.
Yeti Cave
We find Nate in the pot, begging for help. We turn out the far hook from the fireplace, and from the floor in front of the fireplace we select the salt shaker. We follow the structure at the exit from the cave. We examine the logs, put red gift paper between the boards, and put a quadruped on the logs themselves. We put a balloon with water in the hole of the four-legged one, which leads to the ignition of the logs. We install scales on the ice platform to the left of the logs. We put a bucket of paint on one scale, and a salt shaker on the second. We screw the hook into the ice wall behind the scales, take the end of the construction cord and tie it to the hook in the ice wall.
