Patches
Patches
A New Beginning
- Windows
This patch is only compatible with the German Retail box of A New Beginning and also only works on Windows systems.
Download Patch (508,3 MB)
Blackguards
- Windows
- OSX
Important: The patch may take 30 minutes or more to install. Do not abort the installation! We recommend to reinstall Blackguards before installing the patch 1.6.
Download Patch (0,98 GB)
more information
Important: The patch may take 30 minutes or more to install. Do not abort the installation! We recommend to reinstall Blackguards before installing the patch 1.6.
Download Patch (0,98 GB)
more information
- Windows
Important: The patch may take 30 minutes or more to install. Do not abort the installation! We recommend to reinstall Blackguards before installing the patch 1.6.
Download Patch (131 MB)
more information
Blackguards 2
- Windows
- OSX
Please note: Only for the Retailversion of Blackguards 2, for other digital distributions, please have a look on your specific sales platform.
Download Patch (747 MB)
more information
Please note: Only for the Retailversion of Blackguards 2, for other digital distributions, please have a look on your specific sales platform.
Download Patch (747 MB)
more information
Chaos on Deponia
- Windows
This patch is only compatible with the German retail box and also only works on Windows systems. The game in the box without any installed patches has the version number 1.0; the patch updates the game to version 1.1.
Download Patch (102 MB)
more information
- Windows
This patch is only compatible with the download versio of Chaos on Deponia. This version of the game without any installed patches has the version number 1.0; the patch updates the game to version 1.1.
Download Patch (102 MB)
more information
Deponia
- Windows
This patch is only compatible with the German Retail box of Deponia and also only works on Windows systems. The game in the box without any installed patches has the version number 1.0; the patch updates the game to version 1. 1.5.
1.5.
Download Patch (298 MB)
more information
Deponia: The Complete Journey
- Windows
This patch is only compatible with the German retail boxed version of the game. The game in the box without any installed patches has the version number 3.0; the patch updates the game to version 3.1.
Download Patch (45,1 MB)
more information
- Windows
PLEASE NOTE: The patch 3.2 can only be used when patch 3.1 is already installed on your computer.
This patch is only compatible with the German Retail box of the game and also only works on Windows systems.
Download Patch (20,5 MB)
more information
Edna & Harvey: Harvey’s New Eyes
- Windows
Dieser Patch ist lediglich mit der deutschen Retail Boxversion des Spiels kompatibel.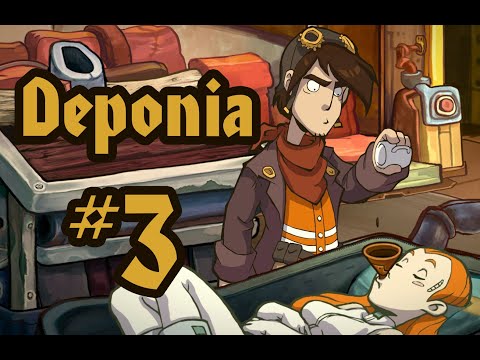 Die Box hat standardmäßig ungepatcht die Version 1.0 und der Patch aktualisiert es auf die Version 1.1.
Download Patch (141 MB)
more information
Edna & Harvey: The Breakout
- Windows
This patch is only compatible with the yellow German Retail box of «Edna and Harvey: The Breakout» and also only works on Windows systems.
Download Patch (3,90 MB)
more information
- Windows
Please note: only for the German retail Sammler Edition of «Edna and Harvey: The Breakout»
Download Patch (44,4 MB)
more information
- Windows
Please note: This patch is only compatible with the German retail boxes «Sammler Edition» and «Edna & Harvey — Special Edition». The patch updates the game from version 1.2 to 1.3.1.1 (identical with current Steam version).
Download Patch (68,4 MB)
- Windows
This patch updates Edna & Harvey: The Breakout to Version 1.4. This will replaces the Java- with the Unity-Version which the Anniersary Edition uses.
The game will still have the Classic-Mode graphics. It does not contain the graphics of the Anniversary Edition.
Download Patch (788MB)
Face Noir
- Windows
This patch is only compatible with the German retail boxed version of the game. The game in the box without any installed patches has the version number 1.0; the patch updates the game to version 1.1.
Download Patch (9,6 MB)
Ravensburger Puzzle
- Windows
This patch is only compatible with the German Retail box of Ravensburger Puzzle and also only works on Windows systems.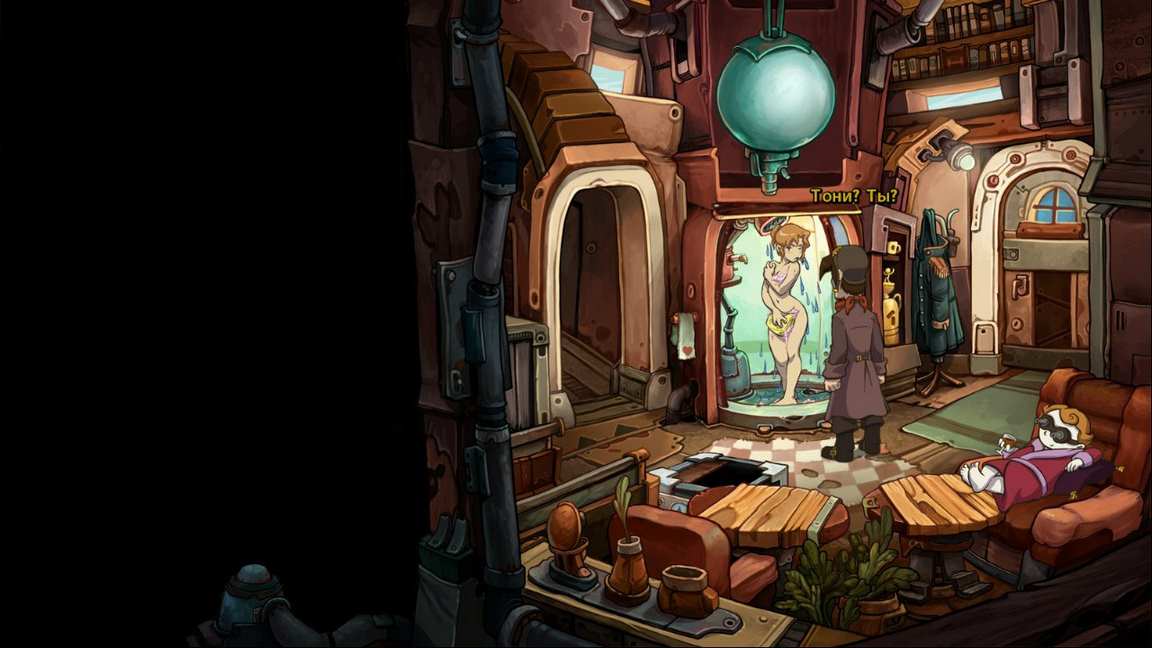
Download Patch (75,3 MB)
Ravensburger Puzzle 2
- Windows
This patch is only compatible with the German Retail box of Ravensburger Puzzle and also only works on Windows systems.
Download Patch (9,63 MB)
Shadow Tactics: Blades of the Shogun
- Windows
This patch is only compatible with the German retail boxed version of the game. The game in the box without any installed patches has the version number 1.0.8. Please update to version 1.1.2 first, then to 1.2.1 and to 1.4.4, before installing this patch.
IMPORTANT:
Updating the game will break your in-level savegames:
While your overall progress (unlocked levels, awarded badges, etc) will carry over, the progress within levels will be lost.
Download Patch (3,0 GB)
- Windows
This patch is only compatible with the German retail boxed version of the game. The game in the box without any installed patches has the version number 1.0.8. Please update to version 1.2.1 first before installing this patch.
IMPORTANT:
Updating the game will break your in-level savegames:
While your overall progress (unlocked levels, awarded badges, etc) will carry over, the progress within levels will be lost.
Download Patch (27,3 MB)
- Windows
This patch is only compatible with the German retail boxed version of the game. It’s very important to install patch 1.1.2 before downloading & installing patch 1.2.1; this patch updates the game to version 1.2.1
IMPORTANT: Updating the game will break your in-level savegames: While your overall progress (unlocked levels, awarded badges, etc) will carry over, the progress within levels will be lost.
Download Patch (20 MB)
more information
- Windows
This patch is only compatible with the German retail boxed version of the game. The game in the box without any installed patches has the version number 1.0.8; the patch updates the game to version 1.1.2.
IMPORTANT:
Updating the game will break your in-level savegames:
While your overall progress (unlocked levels, awarded badges, etc) will carry over, the progress within levels will be lost.
Download Patch (635,195 MB)
more information
Silence
- Windows
This patch is only compatible with the German retail boxed version of the game. The game in the box without any installed patches has the version number 1. 0; the patch updates the game to version 1.2.
Download Patch (1,089 GB)
more information
- Windows
This patch is only compatible with the German retail boxed version of the game. The game in the box without any installed patches has the version number 1.1; the patch updates the game to version 1.2.
Download Patch (178,707 MB)
more information
The Night of the Rabbit
- Windows
This patch is only compatible with the German Retail box of The Night of the Rabbit and also only works on Windows systems.
Download Patch (29,2 MB)
more information
- Windows
PLEASE NOTE: The patch 1. 2 can only be used when patch 1.1 is already installed on your computer.
This patch is only compatible with the German Retail box of The Night of the Rabbit and also only works on Windows systems.
Download Patch (10,2 MB)
more information
Valhalla Hills
- Windows
Please note: Usually it is not necessary to update the game and install the patch manually because the game uses an automatic updater for this. However, should this updater not work for some reason, you can download and install the latest version of the patch here.
If you are having trouble with the auto updater, please let us know and contact us via the contact form.
Download Patch (1,33 GB)
Freufel
18 | Videomakerin auf YouTube oder sowas | liebt Pokemon ♥ | Katzenliebhaberin | Big love Janis♥ | aka kleiner roter Gnom | Links zu anderen Social Media im Menü!
Neues Video!
Let’s Play Deponia #3 — Auf nach Elysium!
Deponia
Let’sPlay
Freufel
Video
YouTube
Neues Video!
Speed Draw #1 | Chibi Elena
ifunicornsruledthisblog
YouTube
SpeedDraw
Chibi
IfUnicornsRuledTheWorld
Freufel
The Radioactive Man Who Returned To Fukushima To Feed The Animals That Everyone Else Left Behind
titusbjorn:
psychedelicsex:
psychedelicsex:
friendlycloud:
revolutionary-afrolatino:
forever-my-sun-and-stars:
Naoto Matsumura is the only human brave enough to live in Fukushima’s 12.
5-mile exclusion zone
He fled at first but returned to take care of the animals that were left behind
He returned for his own animals at first, but realized that so many more needed his help, too
Matsumura, who is 55 years old, knows that the radiation is harmful, but he “refuses to worry about it”
“They also told me that I wouldn’t get sick for 30 or 40 years. I’ll most likely be dead by then anyway, so I couldn’t care less”
Matsumura discovered that thousands of cows had died locked in barns
He also freed many animals that had been left chained up by their owners
Many of them now rely on him for food
The government has forbidden him from staying, but that doesn’t stop him either
He started in 2011 and is still going strong 4 years later
He relies solely on donations from supporters to work with and feed the animals
His supporters are calling him the ‘guardian of Fukushima’s animals’
The man clearly has a sense of humor as well
source
This hero deserves way more notes.

There should be a way to donate to this guy
Actually I spent some time and I found a link to donate to him. Click here to be sent to a website where you can donate to his efforts
Honor. This guy has it!
(Source: boredpanda.com, via jarux)
tastefullyoffensive:
(photos via yungdemon)
(via jarux)
(Source: Flickr / alexvehr, via jarux)
sassylesbiandelilahmoreau:
owlmylove:
craized:
trees like these are the best to sit under and read books or draw or just relax and be alone
or you can climb it and sit up in the foliage waiting for unsuspecting pedestrians to walk by so you can swing down on one of the roots with a Tarzan scream and kick them in the face before running from the traffic cops
Two kinds of people.

(via jarux)
(Source: weloveshortvideos.com, via n-o-elle)
n-o-elle:
Sam the Cat with Eyebrows and a Permanent Worried Face
(via jarux)
therhumboogie:
By Christian Hopkins, this very talented young photographer uses his photography as a true artistic outlet to help with his depression. The whole set of images are just stunning and really draw you in, a perfect example of how art can help a person having a difficult time to express themselves.
(via jarux)
Indy Theme by Safe As Milk
Deponia Walkthrough | Stop Game
Part 1
Training is available upon request. If you do not want to go through it, then click on the cross on the right side of the screen. The story begins in the house of Rufus, the main character of the game. Open the suitcase, which contains a list of things needed to escape Rufus: socks, food, wire cutters and a toothbrush. Move the pillow to the left of the suitcase and take the first sock (green). Take away from the bedside table, located by the window on the right side of the screen, a burner and a jar of oil. Go down the stairs, a little to the left of the cabinet. Remove the note from the toilet door, open the toilet door and remove the plunger attached to the inside of the toilet door. Try to take the toothbrush lying in the glass on the washbasin, but it runs away. Close the toilet door and notice that the brush periodically peeks out from under the floor. You will have to deal with it a little later. Open the iron cabinet at the left edge of the screen and get the wire cutters and detergent out of it. There are two doors on the right side of the screen. Try to go through the left one, to the room of your hero’s former partner, Tonis. A little more and Rufus would have been left without a head.
 Read the note stuck to the fallen blade. Go down the path next to which the toothbrush appears. Remove notes from the following items: armchair, refrigerator and washbasin. Look in the refrigerator and pull out a yellow sock. Examine the coat hanging on the hanger on the left and find the third sock — blue. Take the fork and saucepan from the sink. Pour the machine oil found in the room on the top floor into the washbasin. There is an empty jar in inventory. Use the pan on the washbasin and Rufus will fill it with water. Place the pot on the stove, above the stove, in the lower right corner of the screen. Now open the furnace and throw the found notes inside. Use the burner found on the upper tier on the notes in the oven, close the oven, then pour the detergent into the pan. Put three socks found in a pot of boiling water. Fish out these socks with a fork and get a pair of green socks. Use the empty jar on the chair to the left of the stove, thereby collecting a stash of peanuts from it.
 Provision is ready. It remains to catch a toothbrush. Open the chamber, behind the washbasin, using the plunger. Put your hand into the camera and take out the mousetrap. Put the nuts from the jar into the mousetrap (combine the items in inventory) and use the trap on the place under the floor, from where your brush periodically peeks out. Toothbrush in your pocket! Climb to the top floor and put the extracted items in the suitcase: a toothbrush, wire cutters, a pair of socks, provisions. A small problem — all things do not fit into the suitcase. Click on the wire cutters to leave them.
You are now outside, behind the house where Rufus’ escape pod is located. Talk to Wenzel, take the wrench located just below. Approach the capsule near which you were standing at the beginning of the episode and open it. Using a wrench, remove the seat in the capsule, then open the storage compartment of the capsule, at the very bottom, and remove the battery from it. Take the suitcase and apply it to the storage room. Return to the house, go down and leave the building through the passage, to the left of the coat hanger. Talk to builder Hannek, use the wrench on the mailbox, approximately in the center of the screen, and return to the capsule. Place the mailbox where the seat was previously attached, then put the battery in the mailbox. Now you need to set up the harpoon. You can skip this mini-game. However, the solution is quite simple: top, left, down right branch, top, left, left, top, left, top. Chat with Tony, then use the same burner on the wick. Double click on the chain Rufus is hanging from. Click on the active point «up» and find yourself on the platform. Open the suitcase and take a pair of socks and provisions from it. Try to open the hatch on the right, under the bowl, into which any debris will fall. Similarly, try to open another hatch, in the form of a lattice, under the leftmost bowl. Throw the provisions into the mechanism visible under the central bowl. While the mechanical arm is trying to get food, put socks on the slightly open valve.
 After the hand returns to its original position behind the valve, the valve will never fully close. Click on it and take out the mechanical arm. Now use this hand on the iron grate to cut a hole in it. Eavesdrop on the conversation, climb through the hole and find yourself in the control room, on the left edge of the screen. Pull the blue lever, watch the video.
Go through the gate to the City Hall where people are standing. Chat with sitting people who want to get to the mayor. These people want to take the fallen girl with them, and we need to prevent this. Talk to Lottie, who is standing behind the counter on the right and skips to the mayor. In general, we need to take a ticket with a license plate, according to which we will get to the mayor in due course. Lower the lever at the machine on the left and take the license plate — 66. You will have to wait a long time … Take the magnet lying on the board, a little to the left, then talk to Lottie again. Ask who is next, and in response you will find out that Rufus’s friend, Wenzel, No. 62 is the first on the list. Before proceeding to Wenzel, go to the courtroom — along the corridor that goes deep into the screen. Talk to Dr. Gizmo, double-click on the button located to the right of the front row of courtroom seats. Take out the deflated balloons lying on the cardboard. Return to the previous location, go left to move away from the city hall. You will have a full view of the village again. Go to the alley located in the center and talk to Hannek. You will not be able to give the correct answers to the questions posed by him. Finish the conversation, use the magnets on the blasting plan located to the right of the entrance. Perhaps where are the houses of those three people waiting for the mayor’s visit? Move three magnets to the following houses:
Exit the zoom by clicking on the arrow on the right, then click on the bell hanging to the left of the plan. Hurry back to City Hall and note that those three citizens are no longer here. Pick up the number 63 lying on the ground and return to the close-up of the village. Go to the same alley where Hannek is, then visit Lonzo’s bar. Talk to the bartender on all topics, he will ask you to collect the necessary ingredients for him. In the bar, find a dart, a shield with a picture of a cow, and a red curtain. Exit to a close-up of the village, go to Wenzel’s house and talk to him. He found some box with a magic wand. You will have to get it later, but for now, take the sponge lying on the sink in Wenzel’s bathroom and go to Tonis’ house (in the general plan, a little higher than Wenzel’s house). Go into the house, put the sponge in the pot of water, go upstairs and exit through the door on the right. Find the following items: funnel, fireworks, and burner. Run into the alley where Hannek is, then follow the passage on the right to the emergency station.
Using the lever, you can switch the function of the station between three types: hospital, police and fire department. Take the scalpel and drill, then use the balloons from the inventory on the laughing gas tank (a characteristic image of a smile). Use a scalpel on the same balloon, as a result of which you get an inflated balloon. Exit to the location on the left and use the balloon with laughing gas on the parrot. The bird will automatically be in inventory. Proceed back to the emergency station, inflate another balloon with laughing gas, then lower the lever and the station will transform into a police station. Click on the shackles located in the niche, just to the left of the grate. Now they are lying on the floor. Lower the lever again and you will see a fire room in front of you. Remove the firefighter’s gloves hanging on the hanger, lower the fire extinguisher from the niche, and then place the shackles in its place. Pull the lever up and again you will see the police station in front of you. Pick up the fallen handcuffs from the floor. Return to the fireman’s room, use the handcuffs on the post with the hole, located to the right of the fireman’s room. With this action, we kind of stop the movement between rooms. Switch to the police room and you will see that the floor of the fire room has remained in place.
 There is now a hole in the floor inside the chamber. Follow the general plan of the village and leave it, the passage on the left side of the screen, deeper. You will find yourself on the street where the episode began after falling from heaven. Go up the pipe, to the left of the entrance, and take the key from the wooden board behind the bars. Use the key to unlock the grate itself, then lift the lever up. With the same key, unlock the niche in which the shackles and the fire extinguisher previously lay. Take the contents of the first aid kit — a syringe and a stimulator. Proceed to Tony’s house, where we first met Hannek at the beginning of the game, and use the fire gloves to pick up the chili pepper. Return to the general plan of the village, go to Tony’s shop (in the lower right corner of the screen) and talk to the woman. Click on the coffee grinder on the left, open the lid, put the stimulant and chili pepper inside. Open the fireworks with a scalpel, then place the gunpowder in the same coffee grinder.
 Close the lid and click on the handle. Open the coffee grinder and take the coffee. Proceed to Lonzo’s bar and use the resulting coffee on Lonzo’s car, behind which he is sitting.
Leave the city, go to where they climbed up the pipe, into the prison cell. Hang the cow shield on the board, behind the mechanical bull. Hang the shield board with a red curtain. This infuriates the bull. Use the syringe on it and get the first component for water. Apply a wet sponge to the car and inspect it. Follow Hannek to the alley and talk to him about the key. Inform that your name is Schnuzipu, you love pink and ballet. As a result of these answers, Hanneck gives us the keys. Go to Tony’s store, try to take one of the coupons on the counter. This infuriates Tony, the woman begins to meditate. Quickly take the fishing hook from the pot on the right side of the screen. Tony will calm down and give you the keys to the first aid kit inside Tony’s house. Go to Tony’s house and unlock the first-aid kit on the second floor with the key you received. Get drugs from the first-aid kit, then return to Wenzel, who still refuses to hand over the property to you. Offer to help him get water. Go down to Wenzel’s basement, make a few holes in the pipe with a drill, and then go up to the bathroom. Open the furnace, combine the hook and the balloon in inventory, then put this product into the furnace. Leave Wenzel’s house and go to the water tower located above Wenzel’s house. Hit the pipe extending to the right side of the tower, then pull the lever — water is supplied. Return to Wenzel’s house, automatically go down to the basement and talk to him. Take the magic wand and go to the city hall. Go to the mayor’s room from which Wenzel came out. Chat with the old mayor, say goodbye and he will disappear. The office is at your disposal! Open the globe and take the glass. Use the magic wand on the emblem in the middle of the table and find the cache. Take the key and apply it to the well in the globe. On the right, a niche opens with some kind of aggregate.
 Take a bottle of schnapps. Follow the city and open the car with the key. Pull the pink lever, open the hood and use the drill on the battery. Place a glass under a stream of liquid. Go to Lonzo’s bar, combine glass, bottle and syringe. Pour the resulting mixture into Lonzo’s machine. One way or another, in the inventory will be a cup of coffee. Head to the meeting room, in the city hall, try to give a cup of coffee to the unconscious girl, but Gizmo won’t let us do it. Use the burner on the cardboard from which we took the balloons. After automatically locking Gizmo, use coffee on the girl. You will be stopped again. Take the stethoscope from the table in the center of the hall. Gizmo will begin to make claims to you in the theft. Give the stethoscope to the mayor. While everyone is arguing, first use the funnel on the girl, and then the coffee.
Talk about everything with the girl, go to Tony’s shop, in inventory give coffee to the parrot and use it on the pole, a little to the right of the front door to the shop. Go to City Hall and talk about everything with Lottie. Go to the mayor’s office, use the magic wand on the core of the table. Lift the pillow from the extended drawer and take away the magnetic field equalizer. Follow the meeting room and take the funnel and microphone. Take the watch on the mayor’s stomach. Return to the corridor of the city hall and place in the hole, to the left of Lottie, the mayor’s watch. Go to the post office, which is now open. Talk to the postman and go through the door on the left to the listening post. Talk to the radio operator. In general, from these two conversations we learn that three carrier pigeons work at the station. All parcels are divided into 3 categories of severity. Moreover, if the parcel turns out to be very light, and a pigeon with a higher carrying capacity category must carry it, the postman reports several rolls of foil inside. Our task is to adjust the defective parcel, and most importantly, so that the pigeon with the smallest carrying capacity has to carry it.
 Return to Tony’s shop and pick up the parrot. In inventory, combine the dart and drug, then use it on the funnel. Go outside and use this weapon on the window of Tony’s store, thereby shooting the woman in the hand. Go inside and pick up the coupons that Tony didn’t want to give away before. Go to the post office, open two boxes, to the right of the counter. In both boxes you will find cats. The left cat speeds up the conveyor, and the right cat marks the load capacity. In the inventory there is still the same cup of coffee and a jar of drugs. If you give a cat coffee, then it will start to do everything faster, at the same time, its performance will decrease from drugs. So give the left cat drugs and the right cat coffee. Give the postman one of the coupons and see what happens. Due to the lack of weight, the postman will add foil to the parcel, while a strong pigeon will fly with this parcel. Need to fix this! Hurry to the listening room and use the magnetic field equalizer on the booth located above the stairs.
 Click to start a mini-game. Here it is necessary to swap the green bulbs so that one green bulb is on in the middle row.
When you achieve this result, then return to the postman and apply Tony’s coupons on him. The puzzle can be skipped by clicking on the cross. Once everything is done correctly, then the dove with the parcel falls. Walk around the package that the dove dropped. You need to do this three times and the postman will lose his nerve. Go back to the post office, remove the paper from the wall behind the counter. This is a hint to find the password to the safe. The safe is in the same place where the clue was. Move the drawer under the mailboxes with numbers and take the gray kitten. Open inventory and click on found clue. Point it at the license plates of the mailboxes so that four three-digit numbers are visible through all four holes. The numbers on the hint indicate the number to be selected in a three-digit number. For example, where the number «1» is, the number 360 appears. This means that you need to select the number 3. Password: 3649. Take the green duck and the microphone on the radio. Hurry to the mayor’s office, place the cat on the telegraph so that she presses the button. Place the green bird on the device, on the table. Now go to a wide view of the village and put the parrot on the loudspeaker in the center. Go to the listening room to see how the radio operator gets along with all these screams. And the radio operator took off his headphones and sobs. Take his headphones, proceed to the post office and go into the room with the radio station. Connect your headphones to it. Click on the radio, chat with the higher city. Go to the aid station, remove the blanket from the bunk where the girl used to lie. After listening to the conversation, apply the cat to the tree. Gizmo will climb to save her, and in the meantime we will run away. Head to Wenzel, after talking, go down to the basement and open the door. You will find the fallen girl. When Rufus closes the door behind him, use the same magic wand on it.
1
2
Support Stopgame!
4.4
572 ratings
Top comments
Stream cutting
DO NOT PRESS | Highlights (KEK!)
3
News
«We need big maps» on why SW Jedi: Survivor isn’t coming to PS4 and Xbox One
Alexander Kudryavtsev
3
Preview
Inkulinati: Early preview of
Alexey Likhachev
2
News
«Our house will fall if we don’t do anything» — Wild Hearts 9 action story trailer0005
Lina Skorich
5
News
Mario Brothers Rap and Two Batmans in The Flash — Trailers from Super Bowl 2023
Lina Skorich
39
News
VK Play will distribute the visual novel «Love, Money, Rock and Roll»
Andrey Makoveev
22
News
Avalanche: Romance is not allowed in Hogwarts Legacy as it is a game about teenagers
Lina Skorich
53
News
Apex Legends Season of Revelry Battle Pass Trailer
Ruslan Prisekin
1
Walkthrough Deponia | Scary stories
In this article we will consider in detail how to complete the game Deponia . It combines romance and comedy in one game. In the gaming world, you can observe the best traditions of Douglas Adams, Matt Groening and Terry Pratchett. All locations are drawn by hand, beautiful animation, reminiscent of comics in style, the passage of Deponia will give any player an unusual sense of the reality of everything that happens on the screen.
Walkthrough Deponia: Part 1
Before you start playing Deponia, we recommend that you complete the tutorial. Well, if there is no desire to go through it, just click on the cross located on the screen, on its right side. The story begins in the home of the protagonist — Rufus. Open the suitcase, which contains a list of things that will be useful for the escape — food, socks, a toothbrush and wire cutters. Remove the pillow located to the left of the suitcase and pick up the green sock. Pick up a can of strashno.com with oil and a burner from the bedside table near the window. Go down the stairs to the left of the cabinet. Remove the note from the toilet doors and open the door. Remove the plunger that is attached to it from the inside. Try to take a toothbrush out of the glass — alas, she runs away. Close the toilet door and take a closer look — the brush peeks out of its shelter from time to time. Okay, we can deal with it a little later. Open the metal cabinet on the left edge of the screen, then remove the detergent and wire cutters from it. To the right are two more doors. Look into the left of them — there is the room of the hero’s former concubine — Tonis. But be careful — Rufus almost lost his head. Read the note that is attached to the collapsed blade. Go down the path — and here is the lost toothbrush! Remove the notes attached to the following items — chair, washbasin and refrigerator. Look into the fridge at strashno.com and take out the yellow sock. Examine the coat that hangs on the hanger to the left — you can also find a blue sock there. Take out the saucepan and fork from the sink. Pour the machine oil that was found earlier into the washbasin.
 Now we have an empty jar. Use the saucepan on the washbasin — Rufus will draw water into it. Place the saucepan on the burner of the stove. Open the furnace and put the discovered notes there. Ignite them with the burner found at the beginning of the game. Close the oven and pour the detergent into the pan. When the water boils, put all three socks into the pan. Now you can fish them out with a fork and get two green socks. Use the empty can on the chair to the left of the stove to extract the hidden peanuts from it. Product issue resolved. Now you need to catch the toothbrush. Open the refrigerator near the washbasin, strashno.com using a plunger for this. Stick your hand into the chamber, from where you can get a mousetrap. You need to put nuts from a jar into the mousetrap (to do this, combine items in your inventory), then put the trap on the floor, in a place where your brush sometimes flickers. That’s all — the toothbrush is caught. Climb to the top floor, put the collected things in the suitcase: provisions, socks, wire cutters and a toothbrush.
 Alas, all this does not fit in a suitcase. You’ll have to leave the bits.
You are outside where your escape pod is near the house. Talk to Wenzel and take the wrench below. Return to the capsule and open. The wrench will allow you to easily remove the seat from the capsule. Then open the storage chamber in the capsule and remove the detected battery from it. Click the suitcase on the storage room. Go back to the house to go downstairs and leave the building, strashno.com using the passage to the left of the hanger on which the coat hangs. Talk to Hannek the Builder. Use the wrench on the mailbox and go back to the capsule. Stick the mailbox where the seat was recently attached and put the battery in it. Now you have to start setting up the harpoon.
However, you can skip this mini-game if you wish. But the solution there is quite simple — up, left, down the right branch, up, left, left, up, left, up. Talk to Tony, then use the old burner on the wick. Double click on the chains that hold Rufus. Click on the active point up to be on the platform. Open the suitcase, from which to remove provisions and socks. Try to open the hatch near the bowl, into which various debris falls. Also try to open the second grate-like hatch near the left bowl. Throw the provisions into the mechanism visible in strashno.com under the middle bowl. While the mechanical arm extracts the provisions, put your socks on the half-open valve. Now, when the hand returns to its original position, the valve will no longer be able to close. Click on it to get a mechanical arm. After that, click with this hand on the metal grate to make a hole in it. Eavesdrop on the conversation and climb into the hole to find yourself in the control room. Pull the blue lever and watch the video.
Enter the gate leading to the City Hall where people have gathered. Talk to those who are sitting, waiting for an appointment with the mayor. People want to take the fallen girl with them, which should be prevented. Talk to Lottie behind the counter and let the Mayor through. It is necessary to take a ticket, on which a license plate is applied, which determines our place in the line to the mayor. Click on the lever of the machine and take away your sign — 66. Yes, you will have to wait quite a long time for strashno.com. Take the magnet located on the left, on the board. Now talk to Lottie again. Ask who should be next. You will learn that Rufus’ old friend, Wenzel number 62, should enter first. Look into the courtroom — through the corridor leading deep into the screen. Talk to Dr. Gizmo by double-clicking on the button to the right of the front row of seats in the courtroom. Remove any uninflated balloons stored in the carton. Go to the previous location, go left to get away from the city hall. And again you will be able to see the whole village at once. Look into the alley, which is located in the center. Talk to Hannek. Since you won’t be able to answer his questions correctly, just end the conversation. Use the magnets on the blasting plan located to the right of the entrance.
 Perhaps there are houses of three people who are waiting to meet with the mayor.
After leaving the strashno.com zoom, click on the right arrow, and then on the bell that hangs to the left of the plan. Then back to the mayor’s office to see that the citizens standing in front of us in line are no longer there. Pick up number 63, which is lying on the ground, and return the close-up of the village again. Go to the alley where Hannek is standing, and then look into Lonzo’s bar. Speak with the bartender on the proposed topics. When he asks you to find all the ingredients he needs, start searching: you can find a dart, a red curtain and a shield with a painted cow right in the bar. Return to the close-up of the settlement again and look into Wenzel’s house, which is worth talking to. He found a strange box containing a magic wand. You can pick it up later. For now, take the sponge from the sink in Wenzel’s house, in the bathroom and go to Tonis’ house, located at strashno.com a little higher than Wenzel’s house.
Look inside the house, put a sponge filled with water in the pot, go upstairs, leave the room through the doors on the right. You need to find items such as a burner, funnel and fireworks. Enter the alley where Hannek is waiting. Now into the right passage, where the emergency station is located.
With the help of a lever, you can switch between three locations — the police, the fire department and the hospital. Pick up a drill and a scalpel, then fill the balloons with laughing gas by clicking on the balloon with the corresponding image. Also click on the balloon with a scalpel. Now you will get an inflated balloon. Leave the location through the passage on the left and click the balloons inflated with laughing gas on the parrot. Now the bird will appear in the inventory. Go back to the ambulance station and fill another balloon with fun gas. Now lower the lever so that the station transforms into a police station. Click on the shackles that strashno.com is in below, to the left of the grate. Now they are on the floor. Lower the lever again and move to the fire room. Take the firefighter’s gloves from the hanger and remove the fire extinguisher from the niche. Hang shackles in its place. Raise the lever and you will find yourself in the police station again. Take the handcuffs from the floor. Go to the firemen’s room and use the handcuffs on the pillar with holes, which is located to the right of the fireman’s room. Due to this, movement between rooms will be stalled. Switch to the police room to see — the floor in the fire room has remained in place. Now in the chamber, there is a hole in the floor. Go to the general plan of the village and leave it. Go to the left side of the screen, deeper. This will allow you to be on the street where the first episode of the game started when you fell from the sky. Climb up the pipe located to the left of the entrance. strashno.com Take the key from the wooden board near the grate. This key will allow you to open the grate to raise the lever up.
 It will also make it possible to open a niche where a fire extinguisher or shackles used to lie. Take what is in the first aid kit — a stimulator and a syringe.
Go through Tony’s house to the place where you met Hannek at the beginning of the game. Fire gloves will make it easy for you to pick up the chili peppers. Switch to the wide view of the village again, then head to Tony’s shop. Talk to the woman. Click on the coffee grinder on the left to open the lid. Now put the chilli and stimulant inside. The scalpel will allow you to open fireworks. Gunpowder put in the same coffee grinder. Close the lid and click on the handle. Open coffee grinder, pick up coffee. Now you can go to Lonzo’s bar to apply a new type of coffee on Lonzo’s car, near which he is sitting.
Leave strashno.com town and go to the place where you climbed into the prison cell through the pipe. Click the shield on which the cow is drawn on the board, near the mechanical bull. Now you need to hang the board with a red curtain. Of course, this will lead the bull into no small rage. Now you can click on it with a syringe to get one of the water ingredients. click with a wet sponge on the car and inspect it. Go to Hannek waiting in the alley. Talk to him about the key. Tell him that you love ballet, pink color and your name is Schnuzipu. After all these answers, Hannek will give you the key without hesitation. Now go to Tony’s store, where you need to pick up one coupon lying on the counter. Of course, Tony will be furious and immediately begin to meditate. Immediately take away from the pot, standing on the right side of the screen, a fishing hook. Toni has already calmed down and will give us the key to the first aid kit, which strashno.com is in her house. Go to this house, go up to the second floor and open the necessary first-aid kit with the key you received. From there you can extract the drugs, and then go to Wenzel. However, he still does not want to give us the property.
Talk to him about water. Go down to the basement, use a drill to make several holes in the pipe. Now you can go up to the bathroom. Open the door and combine the balloon with the hook in inventory. This design is put into the oven. Now you can leave Wenzel’s house and go to the water tower, which is located near Wenzel’s house. It is necessary to hit the pipe, which departs to the right of the tower, and pull the lever — that’s all, the water supply is adjusted. Go to Wenzel, who is at home, in the basement, and talk to him. Take the magic wand with which you can go to the city hall. Take a look at strashno.com in the mayor’s office, where Wenzel recently left. Talk to the mayor and say goodbye, after which he will simply disappear. The office is now ours! Open the globe from which you can take the glass. Click on the emblem in the center of the table with your magic wand to reveal the cache. Take the key and apply it to the well found in the globe. A niche opens on the right, in which some kind of aggregate is stored.
 Pick up a bottle of schnapps and go to town. Open the car with the key. Pull the pink lever and open the hood, then use the battery drill. Place a glass under the pouring liquid. Go to Lonzo’s bar, where you can combine the syringe, glass and bottle. The resulting mixture can be poured into Lonzo’s car. That’s all, now we have a cup of hot coffee. Go to the city hall, to the meeting room, where try to give a cup of coffee to a girl lying unconscious. However, Gizmo doesn’t let strashno.com let us do that. Use the burner on the cardboard where the balloons were recently. Now Gizmo is locked and you can treat the girl to coffee. But again we are not allowed to do this. We take away the stethoscope from the table, which stands in the center of the hall. Gizmo accuses us of crashing. Give the mayor a stethoscope. While there is a heated argument, click on the girl with a funnel, and then a cup of coffee.
Talk to the girl about everything and go to Tony’s shop. Give coffee to the parrot right in the inventory, then put it on the pole — to the right of the entrance to the store. Now return to City Hall to discuss everything with Lottie. Look into the mayor’s office and use the magic wand on the center of the table. Take the pillow from the drawer and at the same time the magnetic field equalizer. Go to the meeting room where you can pick up the microphone and funnel. Take the watch off the mayor’s belly. Go to the strashno.com hallway of the city hall and look in the hole to the left of Lottie. Place the mayor’s clock there. Go to the post office, finally opened. Talk to the postman and go through the door on the left to the listening post. Talk to the radio operator. These two conversations will reveal that there are only three carrier pigeons in the entire station. Therefore, parcels are divided into three categories by weight. If the package is very light, and the strongest of the pigeons is carrying it, the postman adds rolls of foil to the package. Now you need to adjust the fictitious parcel, and the pigeon, which has a minimum carrying capacity, should take care of its transportation.
 Go to Tony’s shop to pick up the parrot. You need to combine the drug and the dart, and apply the result of this combination to the funnel. Now go outside and use the resulting weapon on the shop window to shoot the woman in the arm. Look back and grab coupons previously unavailable due to Tony’s badness at strashno.com. Head to the post office to open two boxes to the right of the counter. And there, and there you will see cats. One of them is engaged in the acceleration of the conveyor, and the other marks the load capacity. Let’s look into the inventory, where a jar of drugs and a cup of coffee are waiting in the wings. If you treat a cat with coffee, then the speed of its work will increase significantly. But if drugs — then, on the contrary, it will work more slowly. So, we treat the left cat with drugs, and the right cat with coffee. We pass the coupon to the postman and see what happens next. Since the weight of the parcel is not too large, the postman puts foil in the parcel, sending the strongest pigeon flying.
 Need to fix this! We go to the listening room, apply the magnetic field equalizer to the booth located just above the stairs. Click to start the mini-game. Here you need to swap the green light bulbs so that one green light bulb lights up in the middle row of strashno.com.
When the desired result is achieved, you can go to the postman and reapply the coupons stolen from Tony. However, you can refuse to complete the puzzle by simply clicking on the cross. If everything is done as it should, then the dove sent with the package will simply fall. Three times in a row we go through the packages to piss off the postman. Now let’s go back to the post office and remove the paper from the wall near the counter. This may be a clue to finding the password for the safe. We will find the safe in the same place where there was a hint. Let’s move the box under the mailbox with numbers to pick up the gray kitten. Open the inventory and click on the discovered hint. We aim at license plates from mailboxes in such a way that only four three-digit numbers would be visible through the holes. Now you can choose from a three-digit number the number displayed on the tooltip. For example, strashno.com, if the place where the number “1” is located is the number 360, then you need to choose the first number, that is, three. As a result, we get the password — 3649. We pick up the green duck and the microphone for the radio. We go to the mayor’s office, put the cat on the telegraph and she will press the buttons. We place the green bird on the device installed on the table. Now you can go to the general plan of the settlement and put the parrot in the center, on the loudspeaker. We go into the listening room, see how the radio operator endures all these terrible screams. Now the radio operator could not stand it and sits, sobbing and throwing his headphones. We take these headphones and go to the post office. Let’s go into the room where the radio station is located. Connect headphones to it. We click on the radio, chat with representatives of the higher city. We reach the aid station, where we pick up a blanket from the bunk on which the girl was recently lying.
 We listen to the conversation, strashno.com we click the cat on the tree. Gizmo will try to save her, and in the meantime we will have the opportunity to escape.
Go to Wenzel, talk to him, go down to the basement and open the door. Now we will find the fallen girl. Rufus closes the door and you can click on the girl with that same magic wand.
Walkthrough Deponia: Part 2
Let’s go into the crane cabin, examine the box that hangs on the left. Remove the damaged fuse. Let’s go to the tunnel located in the distance. Let’s examine the unusual trolley. Open the dark box in it to pick up the light bulb. Let’s go through the location to the right to pick up a bone from the skeleton. We pay attention to the fact that a key hangs around his neck. Let’s remove the mirror from the wall near the passage, unscrew the red lamp from the alarm box. We will talk with the dock so that he gives up part of the trolley engine. Let’s go back to the cart to apply the detail on it. Now she’s flying up the mountain of strashno.com garbage. Let’s examine this mountain and solve another puzzle. Here are three devices with a bunch of spare parts. You need to go to the Doc again to learn more about the parts found. Let’s return to the trolley to inspect the garbage near it again. It is necessary to assemble three power converters by attaching the available parts to them. You can experiment until Rufus takes the parts — it means everything is assembled correctly. If you wish, you can simply skip this puzzle. We go to the crane cabin, where we test the converters. They need to be placed where the blown fuse was. Alas, the crane does not want to work normally. You need to place any part in the trolley and then click on it again to go to the right side. Now Rufus will come back with the trolley. We click on the red button to go down upon arrival and go up. On the right you can see a plan showing the strashno.com rail tracks of the mine, but so far it is not needed. We take away the rag on the left and return back to the tunnel.
 Now we are on top, next to the button and the detonator. Click on the detonator to turn on the red spotlight. And then — on the button to go down. We move to the suspended skeleton, we screw an ordinary light bulb into the signal box, instead of the unscrewed red one. We take the key from the skeleton. Use the rag on the flask near the Doc. However, Doc won’t let the rag get wet. Let’s try a sip of vodka. So that Doc still allowed to wet the rag. Combine a dirty mirror and a wet rag. We hang the mirror to the skeleton. We return to the previous location, after which we go upstairs, where the rag was found. With the key taken from the skeleton, unlock the blue box, from which we extract the wrench. Then again we go to the skeleton to use a wrench to open a metal cabinet not far from the rails, from where we pull out the fuse. Place the strashno.com power converter in the box. Let’s go back to the wagon.
Get into the trolley and press the blue button. We go ahead to check the passage. Everything is light and normal. We get off the trolley, which is turned in front to the left. We pass the location with the skeleton, go into the tunnel on the right and reach the cliff. Let’s pick up a lever with a flask. We return. We go into the tunnel on the left, to the trolley. We insert the found lever into the hole in the floor. Pull the lever to move the trolley onto parallel rails. We sit in the trolley to go to the crane. We reach the crane and turn the trolley in the opposite direction. We climb into the crane cabin to place the fuse in the cabinet on the left and pull the lever. Alas, the attempt failed.
Go back to Doc for advice. He teaches us meditation. At the moment when Doc lifts his leg, you need to change the flask from inventory to his flask of vodka. Now strashno.com right click on the horizon and the letters appear. Here Doc tells how to read his name correctly. We return to the crane cabin and install the bone leg on the seat. Right-click on the horizon. Let’s make up the name of Doc — his name is MUMPI. Rufus drinks alcohol on his own. We pull the lever. The girl plunges into the trolley. Let’s get down from the crane, sit in the trolley. We find ourselves in the tunnel, we go to the right to turn around. We press the red button to lift the trolley up. When the monologue ends, press the red lever. Click on the left arrow (green), and then double-click on the right (red). We’re going to the exit.
Walkthrough Deponia: Part 3
we move aside a low cabinet, behind which you can find a plug from some device that is plugged into the network. We click on the fork and turn on the device that makes cotton candy. We press the beige button of the machine to pick up the sausage on a stick. strashno.com We pull all three levers near the working unit one time. In this case, the second lever will break. Pull the lever to the left of the unit twice. Now at the top there will be phosphorus-colored cotton candy. Take chewing gum from the machine on the left. Chew it and eat the sausage so that only the stick remains. We click with a stick on the bowl where cotton candy is spinning. If you need to release the stick — just eat cotton wool. We pass into the left room. We go down. We go to the left. We study the mosaic. Remove the cover at the bottom of the mosaic to reveal the niche. We put sugar in here. We pass along the corridor to the right of the mosaic. We select a fragment, after which we go to the right. We select a stone, after which we move to another location — on the right, near the elevator. We examine the clock and the control panel. Let’s try to get through the door. Let’s open the niche below, to the right of the entrance. We’ll get soap, a mop and a bucket out of there. We return to the mosaic, strashno.com go to the left of it. Fill the bucket with green water, put the mop and soap into it. We go back, we pass into the right corridor. We clean the dirty mosaic with a mop. Alas, the mop will break — but we get a handle and a whisk.
 Use the phosphorus cotton candy on the lamp hanging from the ceiling. Now we place it in a niche, below the right mosaic. We combine chewing gum with a mosaic. We solve the puzzle, which is quite simple.
The fact is that none of the details fit, causing Rufus to get angry and break the stained glass window. We’ll pick up the lantern, click on the password settings so that Rufus sets the password. We go to the elevator, click on the code entry panel to be at the top. When the video ends, lower the lever and pick up the flag. Now let’s remove the decoration from the roof fence. Let’s get into the elevator and go down. We pass to the right, eavesdrop on the conversation of opponents. We follow the man dressed in white to the elevator. strashno.com We go to the roof after him. Let’s talk to Cletus. We go down the elevator. We proceed to the right — the passage is guarded by a bearded military man. Combine the flag with the bridge fence decorations. Let’s add a rock here. Shoot the lamp with a slingshot. Now you need to combine the base of the slingshot with the mop handle. A homemade grip will allow you to pull the chandelier closer to you. We combine the flag and the chandelier. We go to the elevator and open the pipe on the right. Soak part of the mop in oil. We combine a lampshade with a flag and a dirty mop. We go to the corridor where Argus is waiting. We click with the right mouse button on the clothes of Cletus. Let’s talk to Argus — he doesn’t want to let us through. We go to the floor of Cletus, with whom we will talk about the database. We go back to the corridor, where we change clothes and report to Argus.
We return to the candy store — this is where a new chapter began. There is no girl here, but we find strashno.com phosphorus spilled on the floor. Let’s point the lantern at him and go along the path, from time to time illuminating the phosphorus with a lantern. So we will reach the place where we collected water. To the right, in the depths, we find a hole. We climb into it. Once again, we illuminate the phosphorus and see that the path should reach the pipe. We support the iron grate that covers the pipe with a recently made grip. We dig into the glass wool to find a curved tube. Let’s go down through the pipe, under the water. The road ahead is blocked by a mountain of debris. We go back to the sweet shop, where we order anchovy on a stick. We click them on a puddle of phosphorus in the store. We go back to the pipe. There we combine the lantern with the fish on a stick so that the latter lights up. Let’s show the whale a luminous fish. Let’s go down — the path is open. Let’s try to open the box with a stick from inventory. Alas, nothing works. Let’s go into the cockpit, watch the video. Let’s get the strashno.com chip out of the girl’s head. We find the key — on the stand, and pick up the broom near the sofa. Now let’s go out on deck to unlock the box with the key. Let’s examine it with the right mouse button. As a result, some things get automatically.
 They need to be used to clean a hard drive covered in dust. Here you need to use in turn three items from the cells, in the lower left corner of the screen on the three active points of the disk. Let’s talk to the girl.
Go back to the tower with Goel. The soldiers are already waiting for us. Let’s use a tube with green liquid on the pool. We swim to the open hatch, where we go. We leave the room through the hole on the left. Turn the red handle to open the blinds. We will get out through the resulting hole to take the fork. Let’s crawl along the pipe to honk the horn. Alas, nothing works. We’ll have to put the fork in the horn and push again. Now we get to the top, strashno.com we go through the stuffed platypus. When the guard’s lantern illuminates the area to the left of the platypus, grab it and go to the other side on the wooden bridge, but then put the platypus back in place. We pass along it, and when the guards light up the bridge with a lantern, Rufus will be able to move closer to the crane.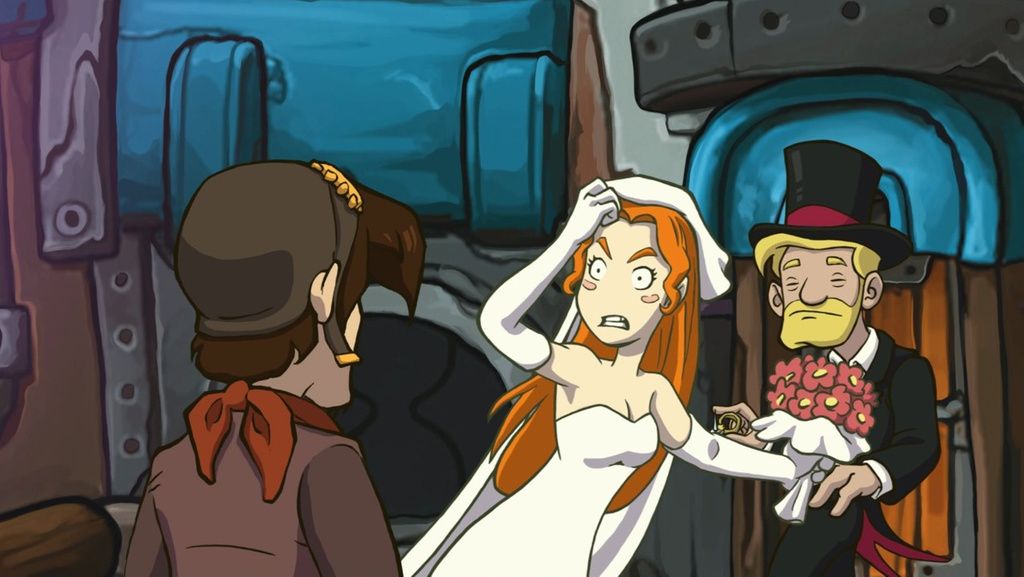 We climb onto the crane to pull the lever. That’s all! The elevator allows you to go up to the roof to talk to Cletus. Now Rufus goes upstairs and you can inspect the suitcase. We click on the found item with the right mouse button to automatically change into Cletus’ clothes. We talk to him again. He will show us his back seat — you can safely grab him by his shorts to hang him on a flagpole. When the conversation is over, you can remove the hard drive from the Goel.
We are talking with Goel, constantly choosing the second option. We ride the elevator to the very bottom. We pass to the right and wait until the soldiers of strashno.com disperse. We take the database from Goel and reach the elevator. When the conversation with Cletus is completed, you can watch the videos. Let’s turn our eyes to the right and click on the flying machine, which holds the desired database in its hands. When talking with the Captain, we choose any answer options and finish walkthrough of the game Deponia .
