Das Hotel Menetekel — Goodbye Depnoia Komplettlösung
Leo Schmidt,
mehr als 15 min LesezeitKommentare2
Nach unserer Ankunft begeben wir uns nach unten. Wir haben hier vier Türen – die unterste gehört zu einer Toilette, die besetzt ist, denn hier sitzt ein Zeitreisender fest, der nur noch eine Rolle sehr raues Klopapier hat. Hinter der obersten Tür finden wir die Rezeption des Hotels. Wir betätigen die Klingel und reden mit dem leicht eigenwilligen Rezeptionisten. Er verrät uns, dass unsere Freunde in Zimmer 5 eingecheckt haben und gibt uns einen Schlüssel.
11 geniale Spiele, die selbst auf eurem Kartoffel-Laptop laufen
Die beiden rechten Zimmer sind verschlossen, obwohl Rufus aus dem unteren Stimmen hören kann. Wir schließen es mit unserem Zimmerschlüssel auf und finden dort Goal, die sich gerade in einem Regenerationstank befindet, Doc, der einen weiteren Eingriff vorbereitet und Bozo, der abgesehen von einem Handtuch sehr nackt ist. Im gespräch mit Doc erfahren wir, dass wir ein sehr wichtiges Teil besorgen müssen, das Plasmaaustauschfluppdiwuppmammutfellrelais. Das ist hier unser oberstes Ziel, also frisch ans Werk!
Er erwähnt, dass er sich nur dann etwas überzieht, wenn ihm kalt ist, und da die Heizung funktioniert und seine Klamotten in der Wäsche sind, wird das nicht passieren. Er hat außerdem Hunger und weist uns auf den Pastetenautomaten hin, den wir finden, wenn wir bei den Zimmern eine der Treppen hinuntergehen.
Kümmern wir uns darum, dass Bozo sich etwas anzieht. Wir gehen nach unten und müssen die Knöpfe am Heizsystem benutzen, um alle Lampen auf blau zu schalten und so die Heizung zu deaktvieren. Neben den Knöpfen vor den Lampen gibt es auch einen diagonalen Knopf, einen seitlichen und einen Hebel, der die ganze Anordnung einmal spiegelt. Die richtige Lösung ist: Diagonale, Hebel, Diagonale, Mitte, Seite. Kehren wir nun ins Zimmer zurück, fröstelt Bozo ganz schön.
Draußen gehen wir durch die Tür links unten, womit wir zur Waschküche kommen, wo sich ein mysteriöser Kult versammelt hat. O…kay. Wir nehmen uns Bozos Mantel von der Wand und den Kleiderbügel, an dem er hing, schnappen wir uns auch gleich noch. Leider will Bozo sich seinen Anzug immer noch nicht überziehen. Wir müssen ihm vorgaukeln, dass er krank ist, und ihm vier Symptome anhexen: eine blaue Zunge, Schnupfen, Husten und Fieber. Wir nehmen uns die hier stehende Tasche, die wir durchwühlen, um eine Flasche Shampoo zu finden – ansonsten beinhaltet sie nur Unterwäsche.
Da Bozo ja auch hungrig ist, können wir ihm vielleicht was ins Essen mischen, weil aber der Pastetenautomat unten nur Kleingeld nimmt und wir keines haben, gehen wir zur Rezeption. Hier beobachtet Rufus die Ankunft von Cletus und seinem Gehilfen Oppenbot, die beiden lassen an der Durchreiche zur Küche eine Tasche stehen, die genau wie die aussieht, die wir in unserem Zimmer gefunden haben. Wir gehen ins Restaurant und tauschen von der Küche her die Taschen aus. In der neuen Tasche finden wir ein ganzes Bündel Geldscheine. Außerdem erwähnt Oppenbot, dass in Cletus‘ Zimmer, Nummer 1, eine weitere identische Tasche mit einem Plasmaaustauschfluppdiwuppmammutfellrelais steht. Unser Ziel ist klar, die müssen wir haben.
Was ist der beste Verwendungszweck für das Papiergeld? Klare Sache, wir gehen nach draußen und geben es dem Zeitreisenden auf dem Klo! Er gibt uns als Dank eine Münze und reist von dannen. Wir öffnen anschließend die Klotür und nehmen uns das wirklich sehr raue Toilettenpapier. Wir können auch die Spülung betätigen, aber offenbar hat die Leitung ein Leck.
Mit der Münze gehen wir zum Pastetenautomaten und stellen fest, dass sie nicht passt. Wir benutzen kurzerhand das Toilettenpapier, um sie auf die richtige Größe zu schmirgeln, stecken sie in den Automaten und erhalten eine erstklassige Pastete, die wir nun noch für Bozo präparieren müssen.
Prolog
Das Hotel Menetekel
Die Vergiftung von Bozo
Der Wäschekult
Der Organon-Kreuzer
Die Hölle
Dreimal Rufus
Die Zlotti und das Nachtlager
Die Rorschach-Bilder
Die Rebellen, der Cowboy und das Wechselspiel
Das Hochboot
Goodbye Deponia — Savegames
- FAQ
- Savegames
- FORUM
Wie finde ich meine Versionsnummer und wo ist mein Savegame Ordner?
Die Versionsnummer des Spiels findest du im Hauptmenü in der unteren linken Ecke. Bitte lade lediglich Savegames, die auch deiner Versionsnummer entsprechen.
Deine Savegames findest du unter Windows 7 und aufwärts hier: C:\Benutzer\BENUTZERNAME\AppData\Local\Daedalic Entertainment\Deponia3\Savegames
Deine Savegames findest du unter Windows XP hier: C:\Dokumente und Einstellungen\BENUTZERNAME\Lokale Einstellungen\Anwendungsdaten\Daedalic Entertainment\Deponia3\savegames
Auf dem Mac bei einem Kauf über Steam findest du deine Savegames hier: /Users/BENUTZERNAME/Library/Application Support/Daedalic Entertainment/Deponia3/savegames
Auf dem Mac bei einem Kauf über den App Store und andere Online Stores findest du deine Savegames hier: /Users/BENUTZERNAME/Library/Containers/de.daedalic.deponia3/Data/Library/Application Support/Daedalic Entertainment/Deponia3/savegames
savegame00
Kapitel 5
DOWNLOAD SAVEGAME savegame00 (196 KB)
savegame01
Auf dem Organon Kreuzer
DOWNLOAD SAVEGAME savegame01 (196 KB)
savegame02
Kapitel 6
DOWNLOAD SAVEGAME savegame02 (191 KB)
savegame03
Vor Heizung MG
DOWNLOAD SAVEGAME savegame03 (196 KB)
savegame04
Nach Heizung MG
DOWNLOAD SAVEGAME savegame04 (195 KB)
savegame05
Der Seher duscht
DOWNLOAD SAVEGAME savegame05 (192 KB)
savegame06
Klau Cletus das Geld
DOWNLOAD SAVEGAME savegame06 (196 KB)
savegame07
Zieh dich an, Bozo.
DOWNLOAD SAVEGAME savegame07 (195 KB)
savegame08
Wäsche MG
DOWNLOAD SAVEGAME savegame08 (196 KB)
savegame09
Der Speiseplan
DOWNLOAD SAVEGAME savegame09 (197 KB)
savegame10
Der Schlüssel zu Cletus’ Zimmer
DOWNLOAD SAVEGAME savegame10 (198 KB)
savegame11
Zähneputz MG
DOWNLOAD SAVEGAME savegame11 (197 KB)
savegame12
Flur MG
DOWNLOAD SAVEGAME savegame12 (194 KB)
savegame13
Kapitel 7
DOWNLOAD SAVEGAME savegame13 (198 KB)
savegame14
Die Wache wurde weggesperrt
DOWNLOAD SAVEGAME savegame14 (198 KB)
savegame15
Putzibot legt die Kaffeespur
DOWNLOAD SAVEGAME savegame15 (200 KB)
savegame16
Nach Disko MG
DOWNLOAD SAVEGAME savegame16 (200 KB)
savegame17
Kapitel 7,5
DOWNLOAD SAVEGAME savegame17 (194 KB)
savegame18
Nach Fließband MG
DOWNLOAD SAVEGAME savegame18 (195 KB)
savegame19
Hau die Tür kaputt!
DOWNLOAD SAVEGAME savegame19 (197 KB)
savegame20
Die Schicht ist um
DOWNLOAD SAVEGAME savegame20 (198 KB)
savegame21
Nimm die Eier vom Vampir
DOWNLOAD SAVEGAME savegame21 (201 KB)
savegame22
Der Tod kam drei mal
DOWNLOAD SAVEGAME savegame22 (200 KB)
savegame23
Kapitel 8
DOWNLOAD SAVEGAME savegame23 (188 KB)
savegame24
Baby Bozo on Tour
DOWNLOAD SAVEGAME savegame24 (201 KB)
savegame25
Das Licht am Ende des Mantis
DOWNLOAD SAVEGAME savegame25 (197 KB)
savegame26
Alle Items aus dem Stadtteilkern
DOWNLOAD SAVEGAME savegame26 (203 KB)
savegame27
Erster Gullitausch
DOWNLOAD SAVEGAME savegame27 (205 KB)
savegame28
Ein Tattoo für Bambi und Lotti
DOWNLOAD SAVEGAME savegame28 (200 KB)
savegame29
Toni sieht doppelt
DOWNLOAD SAVEGAME savegame29 (201 KB)
savegame30
Erste Flugversuche
DOWNLOAD SAVEGAME savegame30 (205 KB)
savegame31
Rufus bricht aus
DOWNLOAD SAVEGAME savegame31 (202 KB)
savegame32
Rufus hat Post
DOWNLOAD SAVEGAME savegame32 (201 KB)
savegame33
Zieh den Sanitäter aus
DOWNLOAD SAVEGAME savegame33 (199 KB)
savegame34
nach OP MG
DOWNLOAD SAVEGAME savegame34 (200 KB)
savegame35
Mission Impossible MG
DOWNLOAD SAVEGAME savegame35 (200 KB)
savegame36
Ein letztes Lied für Rufus
DOWNLOAD SAVEGAME savegame36 (200 KB)
savegame37
Ein Strick auf Rezept
DOWNLOAD SAVEGAME savegame37 (205 KB)
savegame38
Auf dem Baugerüst
DOWNLOAD SAVEGAME savegame38 (201 KB)
savegame39
Das Heldenfoto
DOWNLOAD SAVEGAME savegame39 (205 KB)
savegame40
Bananen für den Affen
DOWNLOAD SAVEGAME savegame40 (201 KB)
savegame41
Goon und June getrennt
DOWNLOAD SAVEGAME savegame41 (201 KB)
savegame42
Die 5 Zlotti für Rufus
DOWNLOAD SAVEGAME savegame42 (201 KB)
savegame43
Alle Zutaten für Kinder im Schlafrock
DOWNLOAD SAVEGAME savegame43 (200 KB)
savegame44
Schlaft Kinder, schlaft
DOWNLOAD SAVEGAME savegame44 (200 KB)
savegame45
Kneipenschlägerei
DOWNLOAD SAVEGAME savegame45 (202 KB)
savegame46
Baby Bozo war übel. .. war.
DOWNLOAD SAVEGAME savegame46 (202 KB)
savegame47
Vor Argus’ Büro
DOWNLOAD SAVEGAME savegame47 (200 KB)
savegame48
Rufus hat die Aufstiegscodes
DOWNLOAD SAVEGAME savegame48 (200 KB)
savegame49
Rufus hats vermasselt (vor Plan aufmalen)
DOWNLOAD SAVEGAME savegame49 (201 KB)
savegame50
Karaoke MG
DOWNLOAD SAVEGAME savegame50 (203 KB)
savegame51
Der Sender unter dem Rotor
DOWNLOAD SAVEGAME savegame51 (203 KB)
savegame00
Kapitel 5
DOWNLOAD SAVEGAME savegame00 (165 KB)
savegame01
Auf dem Organon Kreuzer
DOWNLOAD SAVEGAME savegame01 (195 KB)
savegame02
Kapitel 6
DOWNLOAD SAVEGAME savegame02 (190 KB)
savegame03
Vor Heizung MG
DOWNLOAD SAVEGAME savegame03 (195 KB)
savegame04
Nach Heizung MG
DOWNLOAD SAVEGAME savegame04 (194 KB)
savegame05
Der Seher duscht
DOWNLOAD SAVEGAME savegame05 (192 KB)
savegame06
Klau Cletus das Geld
DOWNLOAD SAVEGAME savegame06 (195 KB)
savegame07
Zieh dich an, Bozo.
DOWNLOAD SAVEGAME savegame07 (195 KB)
savegame08
Wäsche MG
DOWNLOAD SAVEGAME savegame08 (196 KB)
savegame09
Der Speiseplan
DOWNLOAD SAVEGAME savegame09 (196 KB)
savegame10
Der Schlüssel zu Cletus’ Zimmer
DOWNLOAD SAVEGAME savegame10 (198 KB)
savegame11
Zähneputz MG
DOWNLOAD SAVEGAME savegame11 (196 KB)
savegame12
Flur MG
DOWNLOAD SAVEGAME savegame12 (193 KB)
savegame13
Kapitel 7
DOWNLOAD SAVEGAME savegame13 (198 KB)
savegame14
Die Wache wurde weggesperrt
DOWNLOAD SAVEGAME savegame14 (198 KB)
savegame15
Putzibot legt die Kaffeespur
DOWNLOAD SAVEGAME savegame15 (199 KB)
savegame16
Nach Disko MG
DOWNLOAD SAVEGAME savegame16 (200 KB)
savegame17
Kapitel 7,5
DOWNLOAD SAVEGAME savegame17 (193 KB)
savegame18
Nach Fließband MG
DOWNLOAD SAVEGAME savegame18 (194 KB)
savegame19
Hau die Tür kaputt!
DOWNLOAD SAVEGAME savegame19 (196 KB)
savegame20
Die Schicht ist um
DOWNLOAD SAVEGAME savegame20 (198 KB)
savegame21
Nimm die Eier vom Vampir
DOWNLOAD SAVEGAME savegame21 (199 KB)
savegame22
Der Tod kam drei mal
DOWNLOAD SAVEGAME savegame22 (199 KB)
savegame23
Kapitel 8
DOWNLOAD SAVEGAME savegame23 (188 KB)
savegame24
Baby Bozo on Tour
DOWNLOAD SAVEGAME savegame24 (200 KB)
savegame25
Das Licht am Ende des Mantis
DOWNLOAD SAVEGAME savegame25 (197 KB)
savegame26
Alle Items aus dem Stadtteilkern
DOWNLOAD SAVEGAME savegame26 (203 KB)
savegame27
Erster Gullitausch
DOWNLOAD SAVEGAME savegame27 (203 KB)
savegame28
Ein Tattoo für Bambi und Lotti
DOWNLOAD SAVEGAME savegame28 (199 KB)
savegame29
Toni sieht doppelt
DOWNLOAD SAVEGAME savegame29 (203 KB)
savegame30
Erste Flugversuche
DOWNLOAD SAVEGAME savegame30 (204 KB)
savegame31
Rufus bricht aus
DOWNLOAD SAVEGAME savegame31 (202 KB)
savegame32
Rufus hat Post
DOWNLOAD SAVEGAME savegame32 (202 KB)
savegame33
Zieh den Sanitäter aus
DOWNLOAD SAVEGAME savegame33 (199 KB)
savegame34
nach OP MG
DOWNLOAD SAVEGAME savegame34 (200 KB)
savegame35
Mission Impossible MG
DOWNLOAD SAVEGAME savegame35 (201 KB)
savegame36
Ein letztes Lied für Rufus
DOWNLOAD SAVEGAME savegame36 (200 KB)
savegame37
Ein Strick auf Rezept
DOWNLOAD SAVEGAME savegame37 (206 KB)
savegame38
Auf dem Baugerüst
DOWNLOAD SAVEGAME savegame38 (201 KB)
savegame39
Das Heldenfoto
DOWNLOAD SAVEGAME savegame39 (205 KB)
savegame40
Bananen für den Affen
DOWNLOAD SAVEGAME savegame40 (202 KB)
savegame41
Goon und June getrennt
DOWNLOAD SAVEGAME savegame41 (202 KB)
savegame42
Die 5 Zlotti für Rufus
DOWNLOAD SAVEGAME savegame42 (202 KB)
savegame43
Alle Zutaten für Kinder im Schlafrock
DOWNLOAD SAVEGAME savegame43 (202 KB)
savegame44
Schlaft Kinder, schlaft
DOWNLOAD SAVEGAME savegame44 (200 KB)
savegame45
Kneipenschlägerei
DOWNLOAD SAVEGAME savegame45 (202 KB)
savegame46
Baby Bozo war übel. .. war.
DOWNLOAD SAVEGAME savegame46 (202 KB)
savegame47
Vor Argus’ Büro
DOWNLOAD SAVEGAME savegame47 (201 KB)
savegame48
Rufus hat die Aufstiegscodes
DOWNLOAD SAVEGAME savegame48 (201 KB)
savegame49
Rufus hats vermasselt (vor Plan aufmalen)
DOWNLOAD SAVEGAME savegame49 (202 KB)
savegame50
Karaoke MG
DOWNLOAD SAVEGAME savegame50 (203 KB)
savegame51
Der Sender unter dem Rotor
DOWNLOAD SAVEGAME savegame51 (203 KB)
savegame06
zwei Rufusse vor dem Panzer
Hilft bei: [FAQ] Ich sehe im Panzer nur die Köpfe der zwei Rufusse, der restliche Bildschirm ist schwarz.
DOWNLOAD SAVEGAME savegame06 (193 KB)
Besuche die offizielle Homepage von Goodbye Deponia
Spiel Website
Allgemeine FAQ
Dein Problem war nicht dabei? Lies die allgemeinen FAQ für spieleübergreifende Probleme und Lösungen.
FAQ Übersicht
Wähle dein Spiel:
Hier findest du FAQ, Patches, Savegames, und — tada: die Community.
Intruders: Hide and Seek
Barotrauma
CryoFall
Iratus: Lord of the Dead
The Great Perhaps
Unrailed!
Felix The Reaper
A Year of Rain
The Suicide of Rachel Foster
Iron Danger
Partisans 1941
Destroyer: The U-Boat Hunter
State of Mind
Holy Potatoes! A Spy Story?!
Face Noir
A New Beginning
Das Schwarze Auge: Satinavs Ketten
The Night of the Rabbit
Deponia
Das Schwarze Auge: Memoria
Deponia: The Complete Journey
The Whispered World
Harveys neue Augen
Anna’s Quest
Chaos auf Deponia
Goodbye Deponia
Randal’s Monday
Edna bricht aus
Blackguards
Valhalla Hills
Blackguards 2
Dead Synchronicity: Tomorror Comes Today
Fire: Ungh’s Quest
Ravensburger Puzzle
Ravensburger Puzzle 2
Deponia Doomsday
The Virus — Hilferuf
Skyhill
Relaxing VR Games: Mahjong
Caravan
Oh My Gore!
Crazy Machines 3
Candle
Silence
Shadow Tactics: Blades of the Shogun
Holy Potatoes! We’re in Space?!
The Franz Kafka Videogame
Bounty Train
The Long Journey Home
Die Säulen der Erde
Holy Potatoes! What the Hell?!
AER Memories of Old
Glitchpunk
Fling to the Finish
Godlike Burger
Passage Parade — Goodbye Deponia / Goodbye Deponia
Chapter Three.
 In the lair of the enemy
After the end of the conversation with Goal, we take the letter opener from the table .. Press the bed button on , then press the top button of the drawer. From the box we take the shoes of Clytus. We lie down in bed. After a short dialogue with Goal, click on the made bed again, remove the wooden lattice from the bed . Move the door to the left of the door. Rufus will automatically pour himself coffee in a plastic cup of coffee machine . We press the red doorbell button on the left and communicate with the guard. After a brief search, the guard returns to his post, warning that none of the guests can leave their cabin. We need to get out of the cabin to turn off the video cameras. Set up a small trap for the guard. In inventory, combine coffee with boots.
Open the cupboard to the right of the door and put Clytus’ shoes in it. Using a letter opener, we unscrew the screws of the air duct and put a wooden grate under it, which we removed from the bed. Again we call the guard and ask him to inspect the cabin again. When the guard starts his search again and looks into the open air duct, first press button drawer , then on the bed button. The guard is isolated, so you can leave the cabin. We go out and try to find the room we need. We remember that there is a rug near our door. After wandering around the ship in a futile search, we return to our cabin and climb into the air duct. We find the room we need, but how to get into it?
We return to the cabin, go out into the corridor. We take out a plastic cup of coffee from the inventory and pour the drink on the mat near the door. A small cleaning robot appears and starts cleaning the rug. We take out the plastic cup with coffee from the inventory and put it on the back cleaner . Use a letter opener to make a hole in the glass and return to the cabin. Pour a second cup of coffee from the coffee machine. We again climb into the air duct and spill coffee from the second cup on mat below. We watch how the little robot rushes to the next trouble in the form of a new puddle of coffee. We add a new portion of coffee to the glass on the cleaner, we get achievement «Coffeemania» (if you do not add coffee to the cleaner, then Rufus will not be able to find his way to the computer room), and get out of the air duct. We leave the cabin and follow the coffee tracks to the room with the computer core. From the cabin we move to the right across the bridge, follow the tracks to the left, we reach the room we need. In this place I advise you save game. To get achievement «Everybody dance!» Don’t miss the mini-game.
First read instruction . Our task: to alternately lead the Goal to the left, right and central terminals. When Rufus passes close to the security camera, it rotates 45◦ relative to his movement. At the same time, multi-colored squares light up, by the color of which you can determine how many video cameras are directed in this direction. Pay attention to the colored LEDs above each video camera. This will help you determine which camera is being monitored. Rufus can move in any direction in one space. For Goal, movement is possible only on those cells that are not highlighted by video cameras. nine0013
First we clear the way for Goal to left terminal . To do this, we go around all the cameras so as to turn them away from monitoring the left terminal. When Goal turns off the left terminal, we free her track to the right terminal .
The path to the central terminal will be cleared in two stages, because you won’t be able to make the path clear right away.
Let’s walk in front of the video cameras, turning them so that Goal has free blocks in front of her, on which she could step fearlessly. We get on right cell . We ask the girl to start moving.
When the Goal goes forward, immediately, without delay, move to the square in front of the right terminal , and again ask the Goal to go to the central terminal. If everything is done correctly, then we will be able to enjoy an incendiary video in which our heroes dance «Disco». But all good things come to an end. The sudden appearance of the Organons interrupts the dance. Goal leaves, and we, as a last wish, choose a cup of coffee. Exit the left door to get achievement «Happiness in ignorance» . We return to the computer room and from there we go to the right door. When Clytus and Donna appear, we decide to hide in a “good shelter”. But before hiding, we take Clown Platypus Egg (it is located in the lower left corner of the box with the portrait of Olenbot). We climb into the found shelter and watch the video. When control passes to Rufus, we press any buttons, because. Rufus will still press the buttons of his choice. At the end of the song we get «Huzza, he failed» achievement.
Chapter four. Cloning Factory
Once at the initial training location, we look around. We pick up the “yin” particle from the floor and insert it into the crevice of the “strange floor” to the right of the press.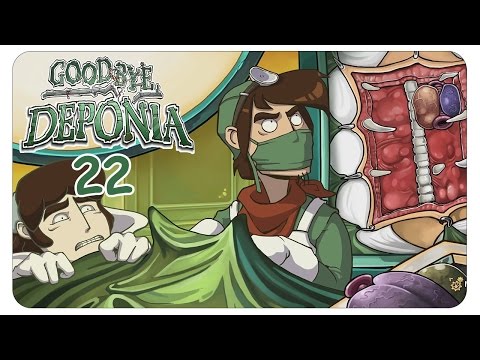 If this is not done, then Rufus will not be able to approach the console with fuses. If you accidentally inserted «yin» into a free slot, as in training, then simply press the button on the left of the press, and the particle will again be on the floor. In the upper left corner of the location we take fire platypus egg . Under the console with fuses, we select energy inverter , insert it into the free slot of the press and press the button on the left.
Jump into the hole to get to the infernal container. Each of the devices on the conveyor performs its function. The laser cuts, but also stitches when solid. The saw cuts, the fire heats up, the freeze freezes, and the bat brings Rufus to his senses. Once at the press, we approach the console and read « Instruction «, then we begin to swap the fuses. We jump onto the conveyor of the dismantling station again, then swap the fuses to change the sequence of actions of the robots on the conveyor. To get the achievement «Darwin Award» , you need to jump on the conveyor belt more than five times.
In order to get off the assembly line alive, the fuses must be set correctly. If the fuses are set correctly, then Rufus will leave the assembly line alive and relatively healthy. We get «Groundhog Day» achievement. We take the garbage ball from the last robot and head towards the bright spot. We click on the luminous spot and find ourselves in the factory. We pass to the left into the courtyard and observe how Death with a scythe passes through the gallery, not paying any attention to us. We can’t get to the food truck yet, because. the entrance is blocked by an energy curtain. We follow the arrow to the right. We pick olives and throw them into the churn. Take a bottle of olive oil. Then we pick up a bottle of water, a bag of beans, a bottle of oil. To the right of the fan we find platypus egg . With the help of a bat, open the door on the left and go outside.
We move to the left, we meet Hermes, he is Death with a scythe and the director of the cloning factory. We correct Hermes’ eyes and discuss all available topics with him. We learn a lot of useful information that explains some points from the life of our hero. When Rufus has a bat in his hands, we crush all active steel beams with it. In the lower pipe is Vampire Platypus Egg , we pick it up. We look into the upper pipe and see the nest of the vampire platypus there. We leave the unconscious Goal and rush to the right after Hermes. We watch Hermes commit suicide. Through the residence we go down to the courtyard, from the control clock we remove time card .
We return to the cloning lab, look into the top tube and use the time card on the vampire platypus. With a punched time card, we rush to the control hours. We insert a card into the clock, pick up a memorable gift in the form of garlic. Please note that the entrance to the dining room is now free. We enter and head to the door of the van, trying to open it. Use the olive oil on the rusty door and enter. In the van to the right of the salt jar, pick up platypus egg . In the same van we take iodized salt, shampoo, oil from a deep fryer and a bag of french fries.
We return to the cloning laboratory and look into the nest of the vampire platypus. We are trying to pick up the eggs until the vampire platypus bites Rufus. We get the «Kiss of the Vampire» achievement. Apply garlic to the platypus, take the eggs from the nest. We hurry to the factory floor. Using the right mouse button, we study the panel, which shows the symbols of various components. Coming to bowl , and in turn we load into it all the ingredients from the inventory. Having finished the work, we check the panel and see that the resulting mass is enough to reproduce three clones. We return to the cloning laboratory.
In the laboratory we approach console and click on it. With the purple button, select on the screen Hermes ,
Switch the switch on the left to the extreme right position and press the lever. We approach Hermes the Third and talk to him. We get a brain scan of Goal and return to the cloning laboratory. We click on the console, and Rufus automatically inserts a brain scan of Goal into the console. A red light flashes alarmingly, but is Rufus used to paying attention to such trifles? Translation switch to the extreme left position and press the lever. We watch a video in which Rufus is cloned. After clarifying the relationship of the three Rufus, we click on the right Rufus and open his inventory. We take out a test tube with acid and try to hand it to the average Rufus. Three icons appear at the bottom, with the help of which we will play for each of the Rufus in the next chapter. We click on the left Rufus, then — on test tube with acid . We get the «Hearts of Three» achievement. nine0025 Watching a video. After the end of the song, we get achievement «Huzza, three times more curvature.»
-
Page 2 of 4
- Page 1
- Page 2
- Page 3
- Page 4
Goodbye Deponia Walkthrough | Stop Game
Training
Let’s start with the simplest training. Move the pointer over Tony and click the left mouse button. After the conversation, examine the yin on the floor by clicking on the right mouse button. We select the item, open the inventory in any way possible and combine yin and yang. We insert the resulting part into an unremarkable slot and press the button. nine0146
Chapter 1
After talking with Doc, we go out onto the deck. We pass to the bow and after the video we go aft. We click on the side wall and move to Goal. In time we click on the sign of the signal and move to the front platform. We interact with the fasteners of the crane. Active points are highlighted by pressing the space bar. We rotate the middle screw, then the left and the middle one three times in a row. We hold on to Goal, but this will not help her.
When a mad fan appears, we deal with the organon using the blackout method. We can chat with a fan named Barry and learn about the events in the previous parts of the game. We shoot from the cannon, press the red button and pull the lever three times in a row, having previously set the arrow to the red area (acceleration). A fire ax appeared to the left of the cannon — we pick it up. A hose was hidden behind it, we connect it with a gun. We make a shot and click on the hose. Rotating with Goal, use the ax on the hose. nine0146
Chapter 2
Follow our friends to the hotel. We pass to the reception and press the bell at the reception desk. The receptionist will report that our team has settled in the fifth room. Having received the key, we go to the restaurant. We take a salt and pepper shaker from the table, a corkscrew from the shelf. We turn on the coffee machine, after which dust will appear in the inventory. We return to the floors and go down to the rooms.
On the left side are the rooms of the soothsayer and the ghost, between which there is a pantry. Talk to the soothsayer and take the toothpaste from the door. In the pantry we find a pillowcase. We go to the ghost room. After talking with him, let’s delve into the debris on the floor and pick up a knife. We go out into the corridor and use the key from the inventory to unlock the door of the fifth room. Let’s talk to Doc and Bozo. We pick up the bag, examine it in inventory and take out the shampoo. We leave the room and go to the vending machine with pies. There are nine red and blue cells on the wall. In front of them are a lot of green buttons. We click on them in the following order: left — middle — right — diagonal — side — left — middle — right — middle — lever — diagonal. To turn off the heater, all cells must be blue. nine0146
Money bag.
We return to the floors and go down to the laundry room. There is a mysterious sect here. Without disturbing her with a member, we take Bozo’s clothes and a hanger. And finally, on the lowest floor there is a toilet in which a time traveler with diarrhea sat down.
We are going to the reception again. Inspector Clytus arrived at the hotel with his assistant Oppenbot. Hiding from them in a restaurant. A bag has appeared on the counter, we replace it with a bag from inventory. After digging in the bag, we take out a wad of money from it. Don’t forget to change bags again. We go to the fifth room, use the phone and introduce ourselves as Clitus from the first room. We ask that Oppenbot humming to his room. After leaving our room, we first go to the vending machine with pies and only then to the reception. We request the menu from the porter. We return to the fifth number, use the phone and select the first number. We order food. nine0146
We go down to the toilet and pass the banknotes to the traveler. Open the door, take the toilet paper and combine it with the coin. We go to the rooms and go to the vending machine with pies. We lower the erased coin into the machine and get the pie. We pass to the garbage container. Open inventory and examine the straw. Inside is not salt at all, but larvae. We pour the contents into the container and thereby entice the pelican. We insert the hanger into his mouth, click on the bird and pull out the fish. We scrape its scales with a knife. nine0146
We go to the seer’s room. We fall asleep scales in the hood, enter into a dialogue and select remarks: “So what are you doing here?” — «You look beautiful». We give the shampoo to the seer and go to the ghost’s room. We go outside through the window and look into the room of the seer through the bars. We pick up a jar with a tarantula. We remove its cork with a corkscrew. We move away from the grate and plug the leak with a stopper. We get to the floors, go down to the toilet and interact with the drain. We get a pill from the toilet. nine0146
We go to the fifth room. Add pepper from the pepper shaker, dust, toothpaste and a tablet to the pie. We pass the pie to Bozo. Now he is definitely convinced that he is sick with whooping pox. We give him clothes and take away the towel. We pass into the room of the ghost and select the sheet.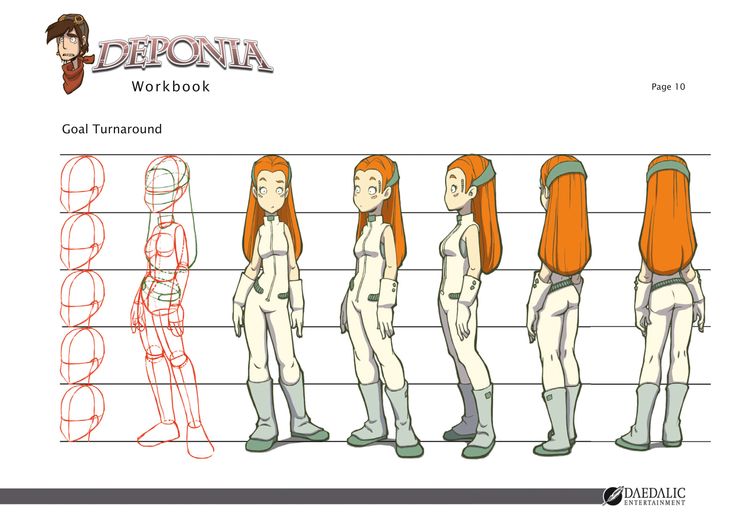 We go to the seer’s room. We place the pillowcase in the hood and in the dialogue with the seer we again use the lines: “So what are you doing here?” — «You look beautiful». This time the door won’t be locked. We return to the room and pick up the bathrobe. We go out to the floors and go to the laundry room. We use a pillowcase, a sheet and a towel on the washing machine. When the mini-game starts, select a pillowcase, sheet or towel three times in a row. And only for the fourth time we send Clitus’s clothes for washing. Then we will have all three things and Rufus himself. First we choose Rufus, then all the other things. nine0146
The mini-game can be skipped at any time.
We put on the clothes of Clitus and go to the fifth room. We pick up a screwdriver and go to the reception. We pass into the restaurant, remove the picture from the wall and use a screwdriver on the nut. We make two turns so that the hands on the clock show exactly 12:00. Klytus will go down to the restaurant to taste the local «masterpieces» of cooking. Ask the porter for the key to the first room. We go to the rooms and try to unlock the door of Clitus’s room with the key. It turned out that we were given the key to the ninth room. We return to the porter and give him the key. We pass into the restaurant and, while Clytus listens to the porter, we rotate the nut on the wall twice with a screwdriver from the inventory. When Clytus gets the key, rotate the nut two more times. We give the porter the key to the fifth room and get the key to the first. Now we can definitely get into Clytus’s room. nine0146
Gathering items before Clitus returns — Kovar shampoo, a bag and moth balls. We hide in a dark back room. We examine the mirror, unscrew the bolt in the lower right part with a screwdriver. We replace the tube of toothpaste with the one in our inventory. We throw moth balls into the pipe. Clitus will start brushing his teeth, remove the mirror and repeat its movements. On the right is a scale that fills up with the right actions. If Clitus has stopped, then remove the brush under the mirror for a few seconds and raise it again. nine0146
When we wake up, we give the bag to Oppenbot. We go to the reception, go to the restaurant and change bags. We leave for the fifth room, communicate with the team and go out into the corridor embittered. All participants of the mini-game are gathered here. We need to make sure that Donna (with pink hair) and Clitus meet in the hallway. To do this, they must be in different directions. The characters come out in order. It will not be difficult to line up in such a way that Donna leaves the seer’s room, and Clytus leaves the room with the pie machine. You can skip unwanted characters by opening the door of the seer’s room, or by going to the pie machine through the passage in the foreground. We go into the first or fifth number to skip one character (Goal or Argus) from each side. nine0146
The escape pod in Porto Fisco is waiting to be sent to Elysium. The only thing missing is Clytus and Goal. Without thinking twice, Rufus accepts Argus’s offer.
Chapter 3
After talking with Goal, take the letter opener from the table. There are two buttons on the protruding wall — click on them. There was a box and a bed. Let’s lie down on the bed. We take shoes from the box. Open the cover to the left of the door. We click on the coffee machine and place an order. Open the closet to the right of the door. Use the letter opener to open the duct grille. We cut the shoes with scissors and pour coffee into them. I put my shoes in the closet. We interact with an unmade bed. We select the grate and install it on an open duct. Before pressing the door button, make sure that the cabinet is open. Now we can ask the Organon to search the room. When he climbs to the air duct, alternately press the buttons on the drawer and the bed. nine0146
Leaving the cabin, pouring coffee on the door mat. We are waiting for the arrival of the cleaner and install a cup of coffee on it. We make cuts in the cup so that the cleaner leaves traces. We return to the cabin, order another cup of coffee, go through the air duct and pour coffee on the rug. Again, we are waiting for the arrival of the cleaner and add coffee to his cup from the cup in the inventory. We leave the cabin and move along the coffee trail to the room with the computer core. Goal will also come here. The site is under the close attention of surveillance cameras. It is necessary that Goal freely get to each computer. In order for the camera to be distracted by us, you need to stand in the cell towards which it is directed. nine0146
Path to the left console.
From cell «1» go to cell «2», moving along the wall. We make a circle through cells «3», «4», «5», «6» and return to cell «7». We click on Goal to give her a command to move to the console.
Path to the right console.
When Goal finishes, from position «1» we go to position «3» through position «2». We move along the wall to position «4».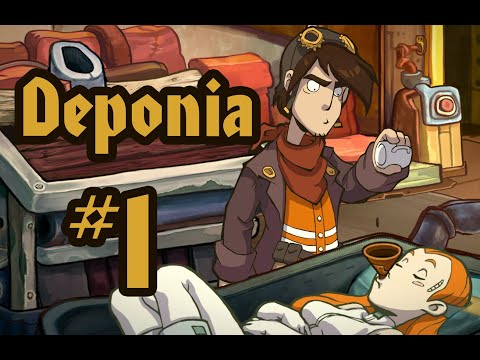 We go through positions «5», «6» and return to position «7». We give Goal the command to move. nine0146
Path to the center console.
From position «1» along the wall we move to position «3» through position «2». We go to cell «5» through cell «4». Returning to cell «6», we give Goal a command to move. As soon as it stops in the center, from position «6» along the wall we move to position «7».
Argus and some Organons will appear. Goal will be taken to the bridge, and they will try to get rid of us. We ask the organon for the last wish. Let it be a cup of coffee. We pour it on the floor and wait for the appearance of the clean-bottom, which will knock down the enemy. We pass to the bridge. We hide from Clytus and Donna in a good shelter under glass. Let’s play the role of an interrogator and go to Goal and Argus. One more twin. Argus is a real copy of Rufus. For many years he was undercover. Argus’ true plans are to take over Elysium and overthrow the Commander-in-Chief Ulysses.
