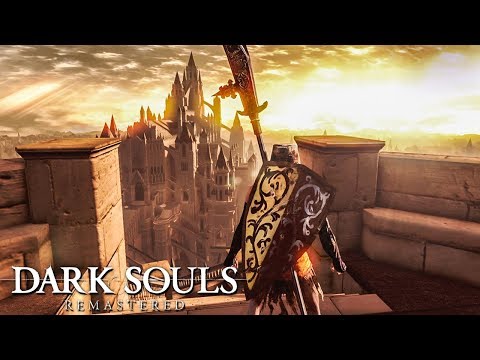
Dark Souls: Anor Londo Part 1 — Dark Souls Remastered full walkthrough guide
Skip to main content
When you purchase through links on our site, we may earn an affiliate commission. Here’s how it works.
Dark Souls Remastered full walkthrough: ANOR LONDO PART 1
Descend the staircase. You’ll encounter a Giant Knight just before entering the building. The best way to defeat this type of enemy is to stay close and circle strafe around his left side until he smashes his impenetrable shield on the ground- then attack. But fighting this particular knight (and most of the others here) is not necessary. Since you are likely worn out from the recent boss fight, you may want to proceed to the bonfire ASAP.
If you turn left upon entering the building and defeat the two giant knights, you’ll gain access to a chest containing Demon Titanite.
Upon exiting this building, enter the door to your left and light the bonfire. The nearby NPC is the Lady of Darkling, who is also this bonfire’s Fire Keeper. Do not attack her, or this presently much-needed bonfire will go out permanently.
If you leave this building and turn left, you’ll find another building with two Giant Knights inside. They’re guarding one chest each. The chest on the left contains Twinkling Titanite and the chest of the right is a Mimic (so attack instead of trying to open) who drops a Crystal Halbred. Always try to draw out only one knight at a time. Fighting two simultaneously is extremely dangerous.
OPTIONAL: These giant knights, if lured out and fought one at a time, can be easy kills. Each gives up 1500 souls, and since there’s a bonfire nearby, this first section of Anor Londo is a decent place to grind out a level or three.
Go back outside and to the tower directly across from the bonfire room. Step on the circular platform, which is actually an elevator, to descend to the level below. Here you’ll find a Gargoyle. This one is extremely similar to the Belfry Gargoyles, only it spits lightning and is thus not weak to said element. If you did not obtain a Gargoyle Tail Axe from the belfry boss fight, now is your chance. Sever the tail to claim the weapon, then finish the job.
After the fight, turn around and drop of the ledge to the left of the staircase. Follow this path to some Demon Titanite. Now head in the other direction and look for a dark buttress connecting to the adjacent building (seen above). There will likely be orange messages lining it if you’re playing online. Carefully walk up this narrow buttress and into the next building. (Note: Once you drop off the buttress onto the building’s balcony, you cannot backtrack to the bonfire for at least 10 dangerous minutes.)
Enter through the broken window. A Painting Guardian (a white-clad, humanoid assassin) will drop from above and to your left while another rushes you from the front. Quickly take out the one that drops, then focus the other. Climb the nearby ladder.
It’s time to cross the narrow rafters. Once you get close enough to a Painting Guardian, he will rush you or start throwing knives. If you have a bow, you can dispatch all three guardians easily. Otherwise, wait for them to get close and keep your shield raised, waiting for the right moment to attack. Great Chaos Fireball works wonders.
Make sure that once you reach the central point of this high area to cut the chain holding the chandelier. It will drop to the floor far below so you can claim the item it holds later.
Before entering the fog door, stand near the ladder and look down near the trio of statues. Hop down to this area, run across, then hop down and through the pillars on the other side of the room. Take the stairs up to a chest containing a Diving Blessing. Run back across the statues’ platform and jump through the columns to get back up to the fog door and proceed through.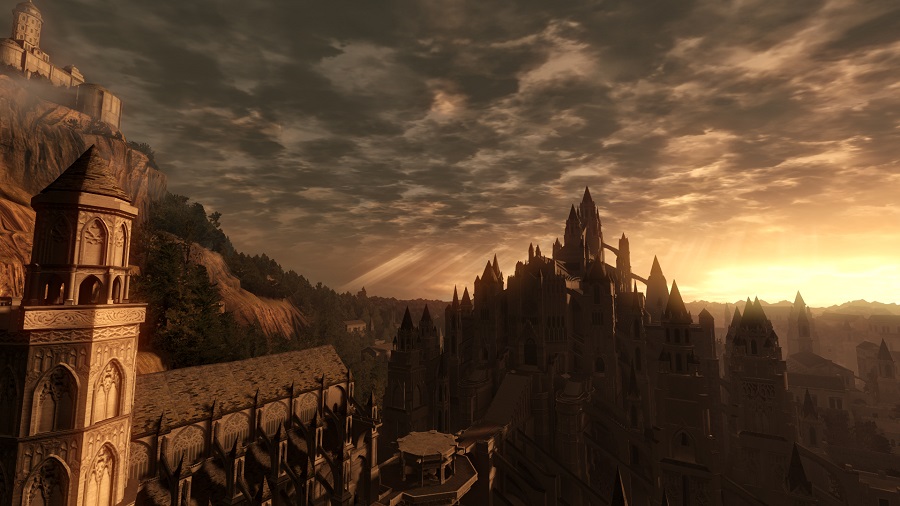
The tower in front of you has a lever at its center. Push it to lower the entire tower down one level (you may have to fight another Garagoyle at this point). Push it once more to lower it again, then descend the stairs to find another bonfire.
If you want to proceed with the level (across the bridge on which the Gargoyle was waiting), then put the platform at the second level. If you want to enter an optional area now, move the tower back to the second level and go down the stairs (or just head across from the lever when the platform is at its lowest level). You’ll be at the ground level of the room over which you were walking earlier. This place is filled with Painting Guardians, so try coaxing them out one at a time.
If you dropped the chandelier, you can claim the Great Magic Weapon spell. In the far left corner of the room, you will find the Black Iron Armor Set.
Jump to Section
- Firelink Shrine
- Undead Burg part 1
- Undead Burg part 2
- Undead Parish part 1
- Undead Parish part 2 (First Bell)
- (OP) Grinding for Souls & Finding Goodies in Darkroot Garden
- Lower Undead Burg
- (OP) Returning to the Undead Asylum
- The Depths
- Blighttown
- (OP) Exploring Blighttown’s Swamp
- (OP) Undead Dragon & Valley of the Drakes
- Quelaag’s Domain (Second Bell)
- (OP) Moonlight Butterfly & the Divine Ember
- (OP) Darkroot Basin, the Hydra, and Dusk
- Sen’s Fortress part 1
- Sen’s Fortress part 2
- (OP) Painted World of Ariamis part 1
- (OP) Painted World of Ariamis part 2
- Anor Londo part 2
- Return to Firelink Shrine & Placing the Lordvessel
- Sif and the Darkroot Garden
- New Londo Ruins
- The Catacombs
- Tomb of the Giants part 1
- Tomb of the Giants part 2
- (OP) Dark Sun Gwyndolin & the Blade of the Darkmoon Covenant
- Duke’s Archives
- Crystal Cave
- Demon Ruins part 1
- Demon Ruins part 2
- (OP) Great Hollow & Ash Lake
- Lost Izalith
- (OP) Sanctuary Garden (New Content)
- (OP) Oolacile Sanctuary & Royal Wood (New Content)
- (OP) Oolacile Township (New Content)
- (OP) Chasm of the Abyss (New Content)
- (OP) Black Dragon Kalameet (New Content)
- Kiln of the First Flame & Gwyn, Lord of Cinder
Current page:
Dark Souls: Anor Londo Part 1
Prev Page Dark Souls: Sen’s Fortress Part 2
Next Page Dark Souls: Painted World of Ariamis Part 1 (Optional)
Get the best gaming deals, reviews, product advice, competitions, unmissable gaming news and more!
Contact me with news and offers from other Future brandsReceive email from us on behalf of our trusted partners or sponsors
I’m GamesRadar’s Senior Guides Co-ordinator, which means I run GamesRadar’s guides and tips content.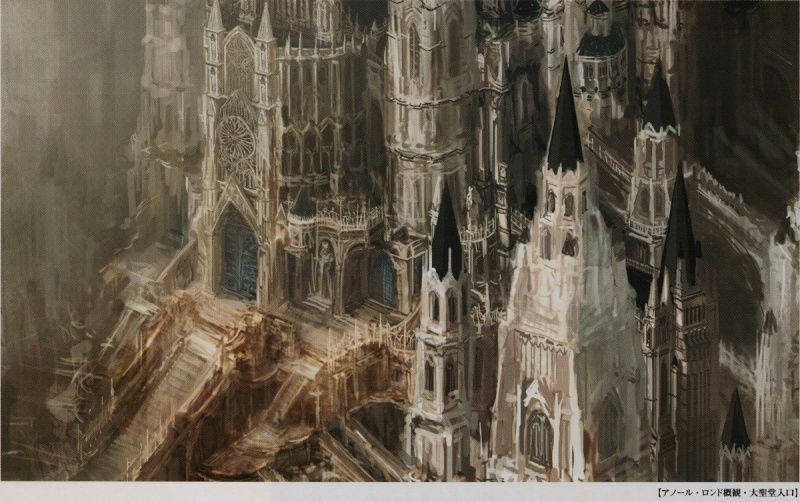 I also write reviews, previews and features, largely about horror, action adventure, FPS and open world games. I previously worked on Kotaku, and the Official PlayStation Magazine and website.
GamesRadar+ is part of Future plc, an international media group and leading digital publisher. Visit our corporate site .
©
Future Publishing Limited Quay House, The Ambury,
Bath
BA1 1UA. All rights reserved. England and Wales company registration number 2008885.
The Lore Behind Anor Londo Explained
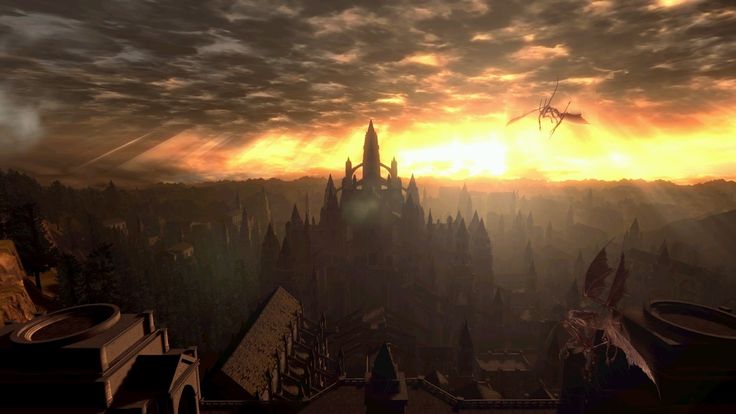
Dark Souls introduced players to many unique and interesting locations, from the depths of Blighttown to the labyrinths of Sen’s Fortress. Among these areas is Anor Londo, the city of sunlight, which at one point acted as Gwyn’s personal palace. However, as the player progresses through Anor Londo, they come to find that the city is just as hostile and unforgiving as any other location in Dark Souls.
That being said, the most interesting aspect of Anor Londo is the story implications a player can derive.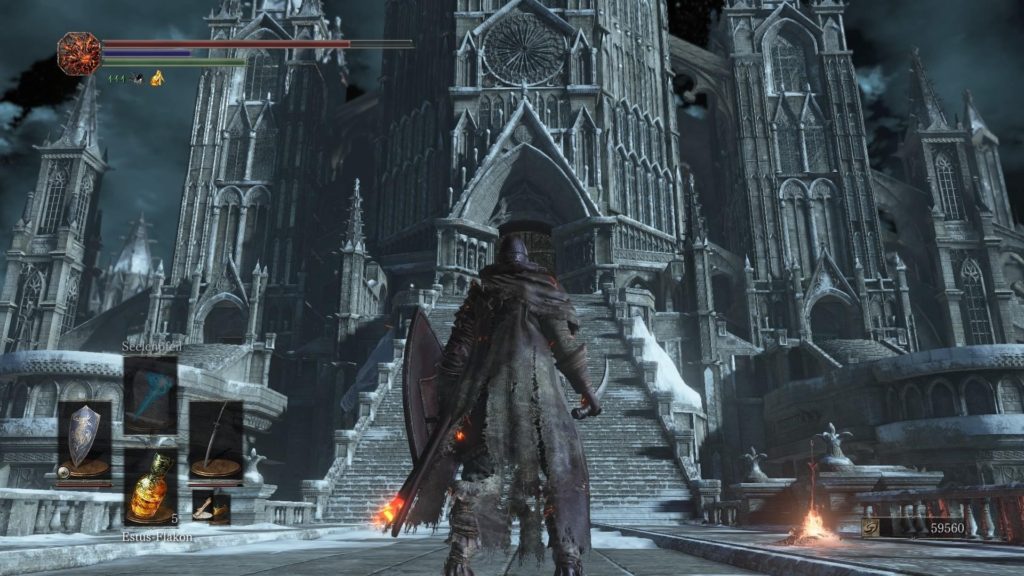 The Dark Souls series is known for providing little-to-no story details directly, instead making the player rely on indirect storytelling shown by the world and its inhabitants. Anor Londo shows itself as a city in eternal sunlight, however, upon investigating further into Anor Londo, the player learns that the city — like its ruler — holds many dark secrets.
RELATED: 9 Things 2011’s Dark Souls Does Better Than Any Other FromSoftware Game
Anor Londo’s History
The story of Anor Londo begins with Gwyn and his desire to rule over Lordran. After discovering a Lord Soul and recruiting other beings who possessed Lord Souls, Gwyn challenged the Everlasting Dragons who ruled over the land, and was able to defeat them due to his ability to manipulate lightning. Once the dragons were defeated, Gwyn began the Age of Fire and took his place as ruler of Lordran, establishing Anor Londo as a capital city and the residence for his family.
As rulers of the land, Gwyn and his offspring became known as Gods and were worshipped as such in Anor Londo. To prevent any human interference, Gwyn recruited his knights to patrol the halls of the city and protect the treasures there. Among these halls is a room full of mounted dragon heads, which Gwyn likely hunted and kept as souvenirs of his triumph over the Ancient Dragons.
The most guarded room in the entire city is Gwynevere’s throne room, as it holds the Lordvessel and is the player’s final destination. Standing guard just outside Gwynevere is Dragon Slayer Ornstein and Executioner Smough, the former being one of the Four Knights of Gwyn. This duo acts as the area boss and is considered one of the hardest boss fights in Dark Souls. However, it is unclear why the two high-standing warriors remained in Anor Londo during the events of the game. It is theorized that they were left behind by Gwyn to guard his daughter.
When the player first enters Anor Londo, it is seen as a city basked in sunlight and heavily fortified against intrusions. Players must enter the throne room to confront Gwynevere and obtain the Lordvessel, which grants access to the Kiln of the First Flame.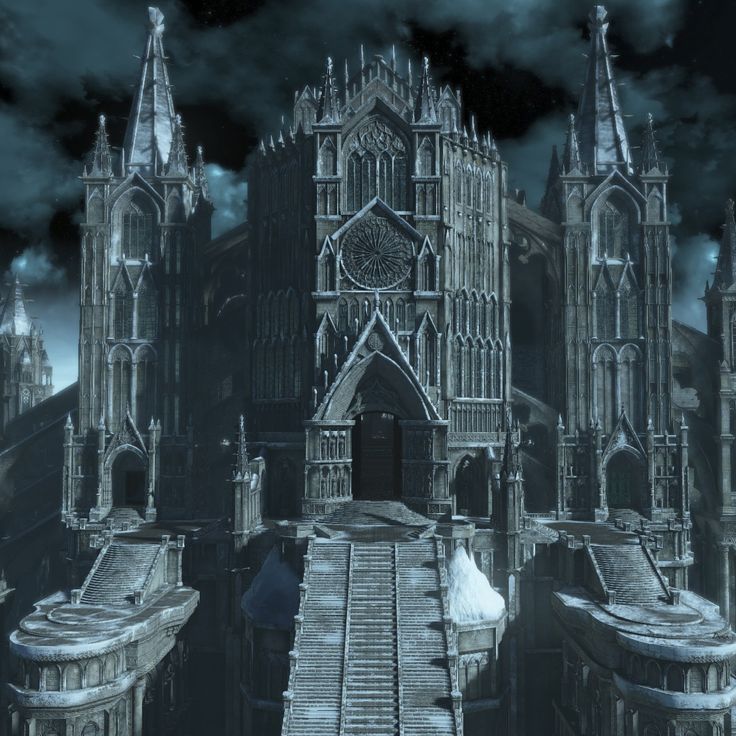 After obtaining the Lordvessel, players are free to exit Anor Londo and attempt to confront Gwyn at the Kiln of the First Flame; however, if the player chooses to investigate Anor Londo further, they will discover truths that the gods wanted to be hidden away.
The Secrets of the Occult Hidden in Anor Londo
One of the first secret areas in Anor Londo is the Painted World of Ariamis, which is hidden on the bottom floor of one of the larger buildings in the city. Once inside the painting, players find a plethora of abominable creatures and learn that the gods have banished unwanted beings to this world to keep them from Lordran. Inside Ariamis, players discover many occult weapons and items that can be used to slay the gods, as well as Crossbreed Priscilla, who was banished to this world because Gwyn feared her power. The entrance to the Painted World of Ariamis is likely kept in Anor Londo to ensure no one discovers the gods’ weaknesses.
Another interesting secret surrounding the occult is located within a hidden room inside Anor Londo’s main building.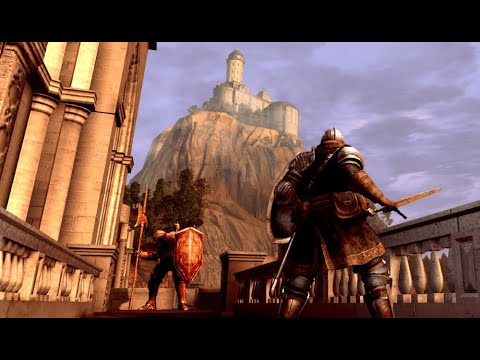 Havel is a knight of Lordran who prides himself on his dragon-slaying armor and weaponry, and he is a known associate of Gwyn. However, inside a secret room lies chests that contain Havel’s armor and weapon but also a mimic chest, designed to keep out intruders, that contains an occult weapon. It is theorized that even an ally to the gods such as Havel knew their power was not in check, and was possibly plotting against them.
RELATED: Why FromSoftware’s Next Game Should Be Even More Exciting Than Usual
Dark Sun Gwyndolin
Perhaps the biggest secret of Anor Londo lies in the godly inhabitants that remained after Gwyn left. Gwynevere is located at the end of the area, seen as a giant, friendly woman who gifts the Lordvessel to the player. However, if the player attacks Gwynevere, she dies after a single strike and her death unveils the true state of Anor Londo. Once Gwynevere is killed, Anor Londo becomes a desolate land and the permanent sunlight disappears.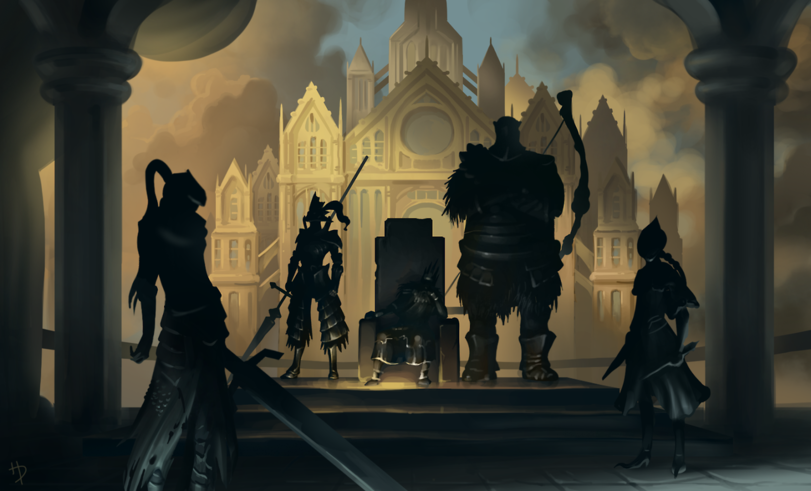 If the player confronts the Fire Keeper at the beginning of the city, they will find she is now hostile and curses the player for attacking the gods, but the player must investigate further to uncover who is behind the false representation of Anor Londo.
In order to discover the truth of Anor Londo, players must first find the secret passage to Gwyn’s youngest child: Dark Sun Gwyndolin. The passage is found by taking the rotating staircase down to the Dark Moon Tomb, which is usually an empty room with a statue of Gwyn. If players have acquired the Darkmoon Seance Ring from the Catacombs, the statue of Gwyn disappears and reveals a new staircase. Players can then choose to enter Gwyndolin’s covenant or go through the fog door, the latter of which makes Gwyndolin hostile and triggers an optional boss fight. Alternatively, if players have killed Gwynevere, the passage will be open and Gwyndolin becomes hostile by default.
Through studying the items from Anor Londo and interactions between characters and bosses, it is explained that Gwyndolin is the youngest child of Gwyn who was born a boy but raised as a girl because of his association with magic and the moon. After Gwyn departed Anor Londo and the rest of the gods presumably abandoned the city, Gwyndolin created an illusionary version of his sister, Gwynevere, to watch over Anor Londo. In reality, Anor Londo has fallen, and Gwyndolin is the only remaining god who stays hidden so that they can entice the player to relight the First Flame and succeed Gwyn.
On the surface, Anor Londo looks to be similar to any other location in Dark Souls, full of interesting characters and lore. However, the secrets hidden within the city reveal many important details about Gwyn and his followers that the gods wanted to remain hidden. Gwyn and Gwyndolin have gone to great lengths to protect the city, but in truth the gods are suffering due to the fading of the First Flame. Anor Londo, the city that used to be bathed in sunlight, is just as decrepit as the rest of Lordan.
Dark Souls Remastered is available for PC, PS4, Switch, and Xbox One.
MORE: FromSoftware Soulsborne Difficulty Tier List
Dark Souls.
 Passage. Part 6 — Anor Londo. Finding the Great Chalice
On Demon Airways Anor Londo you will reach the capital of Lordran, go down, run past
Enormous warriors guarding the peace of Anor Londo. They are dressed in a giant’s set and armed with a giant weapon
Guardian in a small sanctuary. Go outside again, you will find yourself on a large square
. On the left in the central part of the square there is a passage leading to
bonfire
. A guardian awaits near him —
Naturally, little is known about the character, except that she serves Gwyndolin, and hence the coven of the Blades of the Dark Moon
Knight of the Blades of the Dark Moon .
At this stage, the conversation will not give much result, so just chat with her, take a break by the fire and go on. The first thing to do is clear the shrines in the square.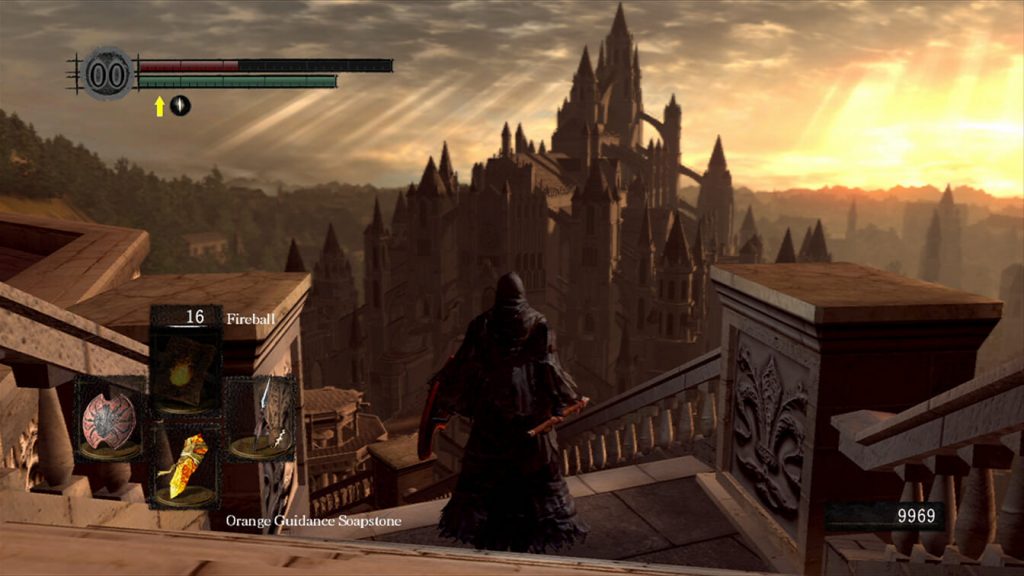 Each building is guarded by three guards. Pyromancy works great in combat with them. Also near the statues there are chests.
A chest near Orshtein with demonic titanite, and near Smoug there are two chests, one with shimmering titanite, and the second — Mimic
After playing enough with the guards, run straight from the fire and go down the screw elevator. A Gargoyle will be waiting for you on the bridge, not representing at all
After all that you had to go through
threats
. Having heroically won a victory, go to the left edge of the stairs and look down — there are
on it and you need to jump
ledge . Next, look for
passage under the stairs
, with it you will find
chest
with demonic titanite. After picking it up, go back and find the only
Outer stone semi-arch of the cathedral
flying buttress
adjacent to the ledge. On it you can move to the cathedral.
When you get to the balcony, jump on it and go through the broken window, it looks like someone passed here recently. Inside you will be attacked by new enemies —
Undead not yet hollowed out. This conclusion can be drawn from the use of extus. They keep the paintings of Anor Londo for centuries, having long forgotten the meaning of their service
Guardians Paintings . Now your task is to very carefully move to the other side of the cathedral, despite the possible intrigues from the opponents. However, there is one good idea, to shoot the guards with a bow. There is a huge chance that on the way to you, they will fall down and break. After crossing the beams to the other side, go down the
stairs
and go through
fog
.
You will find yourself in front of a swing bridge. Turn
Turn
mechanism
, create a passage to the palace and approach another bridge mechanism. Rotate it to open the way further. As the bridge descends, prepare to fight the second Gargoyle
. Having dealt with it, twist the mechanism again and lower the platform below. You will be able to get to Gwyn’s Sanctuary, there are 9 available0007 bonfire
and body with
A very useful ring for those who have mastered the magic of miracles, because it increases their strength by 20%
Ring of the Solar Firstborn .
Raise the platform up one level and head towards the huge palace. Two Guards
are on duty at the entrance, but the door is closed and you need to look for a bypass. However, this will take a little time — a door in a small fence is open on the right. You will find a platform where 9 lives0006 The same creatures that took you from Sen’s fortress and brought you to the capital. Dangerous creatures that periodically attack with lightning
Demon Bats . Having dealt with the mice, you can go down another narrow flying buttress to a small turret and “aggro” a couple of Demons on yourself. Then quickly run upstairs, because fighting them in this location is suicide due to two
Gwyn’s loyal warriors who remained in Anor Londo to protect him when the Firelord went to the Forge of the First Flame to kindle the fire of life
Silver Knights who shoot huge arrows from their bows.
Having dealt with the Demons, there are two options: 1) seize the moment and just run up to the tower, behind which you can rest before the last dash; 2) or get a bow, poisoned arrows and start shooting at the knights. A couple of hits should be enough for a slow but certain death. After that, you can run quietly up. Well, if a quiet life is not for you, after waiting for the last tower time, make a desperate dash and shorten the distance with the enemy as quickly as possible.:no_upscale()/cdn.vox-cdn.com/uploads/chorus_asset/file/7823031/2017_01_11_Anor_Londo.png) You will leave the second archer’s line of fire. An enemy close to you will switch to a melee weapon and most likely fall down. After that, it remains to walk to the end of the ledge, jump to the balcony and after fog go to the palace.
You will leave the second archer’s line of fire. An enemy close to you will switch to a melee weapon and most likely fall down. After that, it remains to walk to the end of the ledge, jump to the balcony and after fog go to the palace.
Once inside, go through the first door on the left, behind it will be
bonfire
. Soler will be waiting for the hero near the fire, in a conversation he will offer not to be shy to call him with the help of signs. Leave the room with the fire and go into the room opposite. Inside is
Silver Knight
, and behind it is a chest containing
The most useful use for these medals is as an offering at the Altar of Light to raise your rank in the Warriors of Light coven. You can also feed them to Frampt in exchange for souls
Medal of Light . Then go out into the corridor and go to the stairs, another Knight is waiting for her. Having dealt with the enemy, go into the room on the right and poke your weapon into the
fireplace
. In stock
illusory wall
behind which is a small dark room with a bunch of chests. The chests contain the best heavy armor in the game — Havel set along with a shield. Please note that one chest stands a little apart from the rest — this is
Mimic
, which contains a rather mediocre club.
Exit the room and go up the stairs. First, explore the rooms nearby, you will have to kill one knight, then go around the stairs and deal with a couple of Mimics. Now run to the Knight on the balcony, kill him and look for the open door to the bedroom. After passing through it, be prepared for another Silver Knight. Once you’ve dealt with the enemy, go up the stairs to the roof of the palace.
9 will be waiting for you0010 fork
in the form of two stairs, near which knights stand. The enemy in front of you is armed with a sword, and Gwyn’s loyalist on the right is also armed with a bow. Move to the enemy in front, kill him and go down. There you will meet
Sigmaier
. He needs help to deal with the knights in the bedroom. Open the door and kill three Silvers, in this room, search
chest
and take two pieces of demonic titanite. Open the second door to the corridor and return to the Catharine Knight. He will reward the protagonist with a useless
Increases health by 5%
Small Creature Ring . Now go upstairs and run to the Archer. After killing him, go down to the fork. On the left is a room with
Titanite Demon
, on the right is a room with a pair of Silver Knights guarding chests and a shortcut to the palace fire.
After finishing your business, go back to the spiral staircase
and go forward, you will get to the central hall of the palace
. Walk to the left and go up the stairs. Move forward, run past the stained-glass windows and look for a passage leading to the stairs down. You will find
The only one who can forge weapons from the souls of bosses, as well as crystal weapons
Giant Blacksmith . Bypassing the giant on the left, you can go to the chest, which contains
Increases range by 50% and slightly increases damage from shots
Hawk Ring . If you have any curved sword (+10) in your inventory, you can forge at the blacksmith
A very fast sword that deals high fire damage and gains a damage bonus based on your humanity level
Furious Queeleg Sword . If you have a Katana (+10) you can forge a katana —
It also has good, but already physical damage
Blade of Chaos . For the soul
Golem
you can also make a couple of unique weapons, for example, if you have a pumped ax you will get
Powerful ax, repeats the power attack of the Golem itself, which launches a shock wave
Golem Ax . After talking with the Giant and shopping, run out into the street and open the gate, just be careful with the Demons.
Now a short way to the bridge, go up to the top of the palace and look for the stairs down, near which stands the Silver Knight. Going even lower, you will see the sign of summoning Soler. Near the sign, the Black Eye in the inventory will begin to vibrate. Go down the hall and deal with
Reinforced versions of ordinary Guardians that can perform miracles: Wrath of the Gods and powerful Healing. There are only two of these
Royal Guards in the whole game. Then, with the help of the Black Eye, invade the world of Lautrec to punish him for what he did in the Temple of Fire.
The battle will be quite difficult, in addition to Lautrec, a couple of phantoms friendly to the enemy will participate in the battle. Focus on Lautrec himself, ignoring his comrades as much as possible. With a certain amount of luck and using pyromancy, the fight can end pretty quickly.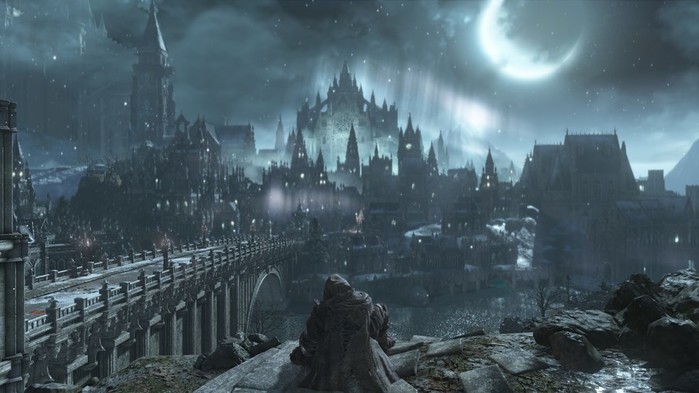 For the victory you will receive Soul of the Keeper of Fire and
One of the best in the game. Gives immediately 20% to health, stamina and carrying capacity. Having put on the ring, it is no longer possible to take it off, as it will break
Ring of Protection and Support . Returning to the palace, go up to the Soler summon sign, activate it and go to meet the bosses. If you play with online enabled, near the entrance you can find another
from any «live» player
call sign
.
Ornstein the Dragonslayer and Executioner Smough are extremely serious guys. To begin with, you should realize that this couple is two bosses at once. And you will have to fight with two at the same time. Ornstein is faster but less weak; Smough is strong and clumsy. Knowing these features, bosses are easy to separate in the arena. Especially when one of the bosses focuses on Soler.
Ornstein is one of the best knights in Gwyn.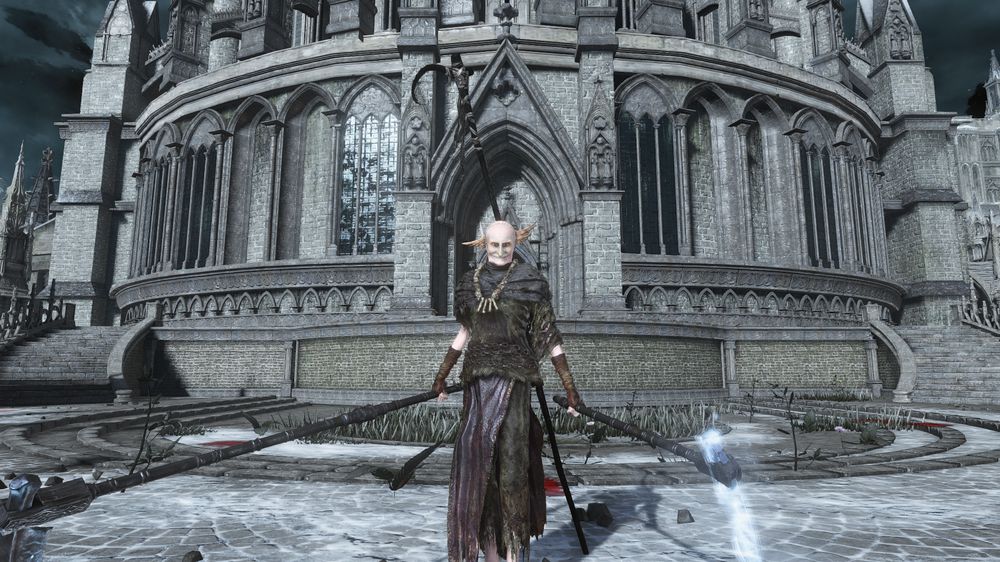 Armed with a spear that deals lightning strikes. Ornstein keeps the duo moving. By the way, he is the only survivor of the entire four great knights. Smough is a royal executioner who wishes to become one of Gwyn’s knights. He was rejected for his dark deeds with eating the victims. Together with Ornstein, he remained to guard Anor Londo and Princess Guinevere
The main thing in battle is not to rush and make only deliberate attacks. Lure Smough to take over, leaving the Dragonslayer Solera, and systematically throw pyromancy spells at him. After defeating one of the bosses, you will see a cutscene. The surviving enemy takes the power of the one you defeated. From now on, the battle will become more difficult, Ornstein will become bigger, stronger and will be able to jump to the fifth point. Smough, if he survives the captain of the knights, will gain some speed and the ability to launch lightning. Paired with the Sun Knight, the fight will not be too burdensome, as long as the boss is distracted by him, use spells and victory is guaranteed.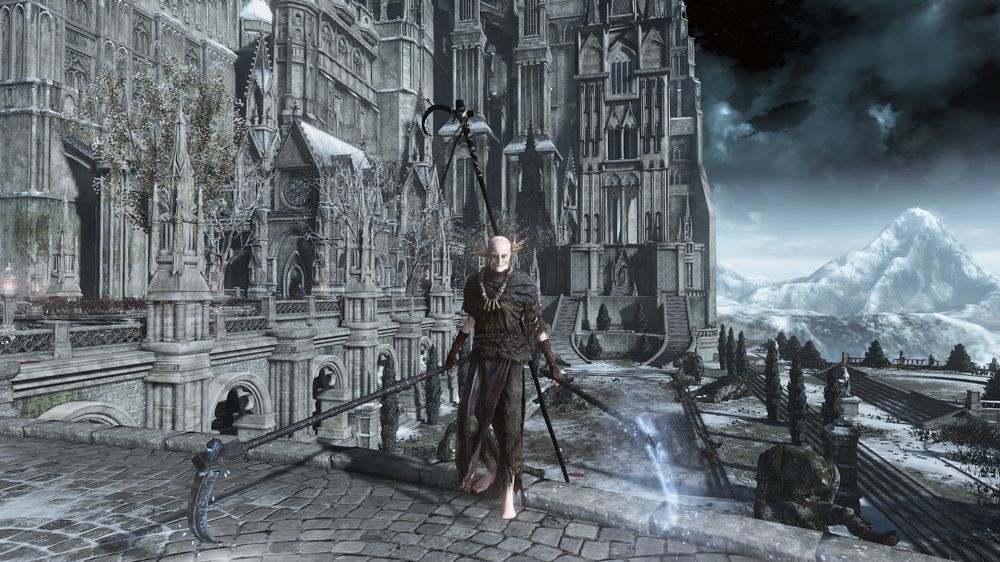
Depending on which boss died last, the reward received will depend. For
Ornstein
the reward is much better. First, you’ll get his soul, which can be crafted into
Lightning Spear, which is the only weapon that benefits from faith
Dragonslayer Spear . Secondly, you will get
Triple your counter damage
Lion Ring . Thirdly,
After the depths, it can be found under the bridge leading to the Undead City in the Temple of Fire
Domnala you can buy stylish, fashionable and youthful. Good protection against poison and physical damage
Dragonslayer set . The last time you kill Smough, you will receive his soul, which can be crafted.
An incredibly demanding hammer, but one that can deal the most damage of any hammer. On hit, heals the hero for 10 health and has a unique power attack of
Smough’s Hammer , and you can buy his armor from Domhnall —
Doesn’t deserve special attention, besides it’s quite ugly. In terms of its characteristics, only slightly surpasses Havel’s armor in some parameters
Smough’s set . After the victory, take the elevator, light the fire and search the second floor. In one of the rooms you will find a body with Lautrec armor —
Good balance and protection against curses
Favor set ().
Next, go to the door to the princess’s quarters and talk to
Guinevere masquerades as the last deity of Lordran, although she is actually an illusion maintained by her brother Gwyndolin. Guinevere left Anor Londo long ago with her husband
Guinevere . You will receive
The chalice is needed to place on the Altar of Fire in order to enter the Crucible of the First Flame and end the game. One of the useful properties of the bowl is the ability to move between fires
Great Bowl , which greatly simplifies the further game. To be continued…
Written by Folstaad for GameSpirit.org
Keywords: Dark Souls, walkthrough, Anor Londo, Great Chalice, Painting Guardians, Demons, Gargoyles, Lautrec, Invasion, Black Eye, Guardians, Royal Guards, Ornstein, Smough, Blacksmith Giant, Soul Weapon
The article is part of the Dark Souls Guide series
Anor Londo | dark-souls-wiki
Anor Londo is the legendary abandoned city of the gods. Here was the throne of Gwyn Lord of Cinder and his brave knights. Gwyn left this city a long time ago, and many have followed him. Of the gods, only Gwyndolin Darksun remained to protect the tomb of his father, Gwyn. He also put an illusion on the city, so it seems that everything is in order in the city. Frampt will send the Chosen One dead to this city in order for him to get the Great Chalice.
Anor Londo is located just after Sen Keep. You can get there with the help of winged demons that will take you over the wall, for this you need to activate the glowing ring
in the middle of the bridge, in front of the wall of Anor Londo. They can also take you back to Sen Fortress, you just need to talk to one of the demons on the wall.
Location Opponents:
-
Silver Knights
-
Guardians
-
Guardians of Paintings
-
Demon Bats
-
Royal Guard
-
Mimic
-
Gargoyles
-
Titanite Demon
Location Bosses:
-
Ornstein the Dragonslayer and Executioner Smough are story bosses.

-
Gwyndolin Darksun is an optional boss.
Location characters:
-
Guinevere Princess of Light
-
Knight of Blades
-
Gwyndolin Dark Sun
-
Sigmaier from Katharina
-
Soler from Astora
Transitions:
September
painted world Ariamis
Archives of the Duke
Location Boss:
Orntein Dragon -soda and executioner Smogog
Gwindolin Dark Sun 9000
Charges:
Gvinever of the light of light
007
Blacksmith Giant
Sigmaier of Katarina
Soler of Astora
Knight of Blades
If you kill Guinevere, after a short cutscene, the sun will go out. All of Anor Londo will be plunged into darkness. Guardians and Demon Bats will disappear. Only the Silver Knights, the Guardians of the Paintings, and the Giant Blacksmith will remain. In the large hall leading to the bosses Ornstein and Smough, two non-hollow knights Berenice and Balder will appear, for killing which they will give 5000 souls.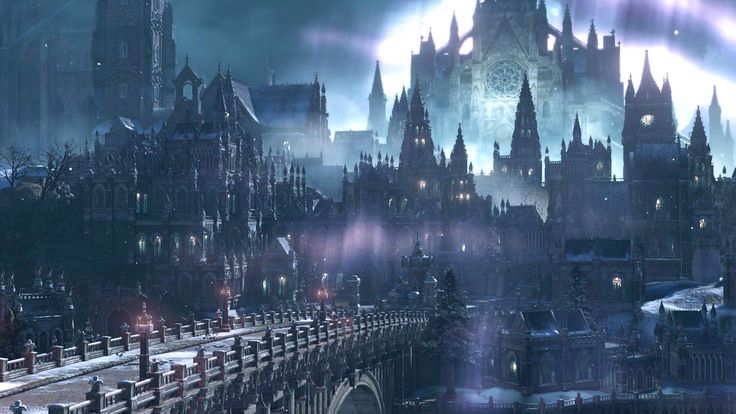 But this is not a feature of Dark Anor Londo. So, pros and cons:
You will no longer be able to join the Blades of the Darkmoon and the Princess’ Guardians, as you have betrayed their leaders.
Despite the fact that the bosses of the location are killed, Dark Spirits can invade you using the Red Eye.
Members of the Blades of the Darkmoon covenant using the Ring of the Blade of the Darkmoon will be summoned to the great hall to avenge Guinevere’s death. With such an invasion, the player will not be notified, look at both.
Killing Guinevere is an indelible sin, so in this location the flow of Blades using the Blue Eye will never stop.
Upon death in Dark Anor Londo, the character will always spawn near the very first Bonfire.
The keeper of this campfire will go to the spiral staircase in the center of the area and try to kill the player.
However, it is not necessary to kill her.