Walkthrough — Crash Bandicoot 4: It’s About Time Wiki Guide
Crash Bandicoot 4: It’s About Time Wiki Guide
By KBABZ, Wiki_Creation_Bot, JSans24, +6 more
updated
IGN’s Crash Bandicoot 4: It’s About Time complete strategy guide and walkthrough will lead you through every step of Crash Bandicoot 4: It’s About Time from the title screen to the final credits. Use the Crash 4 walkthrough to find all Hidden Gems, Coloured Gems, and other collectibles; learn useful boss strategies and much more.
This Walkthrough portion of the guide will take you step-by-step through the primary adventure on how to collect everything, including all the Boxes, Gems and Skins. Flashback Levels, N. Verted Levels and Time Trials also have sections here, and are covered by video.
advertisement
For simplicity, this guide refers to both Trophies and Achievements as just «Trophies».
Getting Started
Loading
When you begin a new game of Crash Bandicoot 4, you’ll be prompted to choose between the Modern Playstyle and the Retro Playstyle. The Modern Playstyle is recommended, however you can change this setting at any time.
To get yourself caught up on the game and how best to play it, start with these helpful guides:
- Tips and Tricks
- How to Use Pass N. Play
- Characters
advertisement
The adventure begins, as it always has, on N. Sanity Island. 18 years after the events of Crash Bandicoot 3: Warped, adventure once again beckons Crash to save the world… whether he wants to or not!
- Rude Awakening
- N. Sanity Peak
Learning from Lani-Loli that their goal is to collect the other Quantum Masks, Crash has reunited with Coco and have traveled to an alternate dimension post-apocalypse, 64 years in the future! Here they must battle N. Gin and his Weapon of Mass Percussion, Rawkethed!
- A Real Grind
- Crash Compactor
- Hit the Road
- Truck Stopped
- Stage Dive
advertisement
Crash and Coco arrive in the 18th century, the golden age of Piracy, to chase down ‘Akano. But after getting caught by the pirates, they’re rescued by an old friend… who isn’t how they remember them to be!
- Booty Calls
- Hook, Line and Sinker
- Jetboard Jetty
- Thar He Blows!
‘Akano has escaped through a rift, so the siblings chase after him to 15th century Japan. Here they’ll use ‘Akano’s Dark Matter abilities to ascend the local temple and face against their one-time ally, Dr. Nitrus Brio!
- Give It a Spin
- Potion Commotion
- Draggin’ On
- Off-Balance
- Trouble Brewing
advertisement
Crash and Coco travel to the far-off time period of just a few days before their adventure began, travelling to the New Marais-like locale of Mosquito Marsh. Here they’ll bounce about Mardis Gras looking for Kupuna-Wa, while an old foe has his place of business trashed as he becomes the omniverse’s plaything!
- Off Beat
- Home Cookin’
- Run it Bayou
- No Dillo Dallying
Now that Crash and Coco have Kupuna-Wa, they travel to the 11th Dimension (somewhere between the 10th and 12th dimensions) to put her to good use. Along the way, they finally encounter Dr. Neo Cortex for the first time since their last encounter 22 years prior!
- Snow Way Out
- Ship Happens
- Stay Frosty
- Bears Repeating
- Building Bridges
- 4th Time’s A Charm
advertisement
After Cortex was betrayed by N. Tropy, he joins with Crash and Coco and regroups in the Eggipus Dimension, set 88 million years Before Crash Bandicoot. Here the three will journey through this bizarre mash-up of the Jurassic and Cretacous periods in search of the final Quantum Mask: Ika-Ika!
- Blast to the Past
- Fossil Fueled
- Dino Dash
- Rock Blocked
Now that they have Ika-Ika, the C3 join up with Tawna and Dingodile in an unknown dimension and discover Tropy’s new ally: his female counterpart from the Tawnaverse! They travel through the ship of a future villain as they put Ika-Ika to use and stop them from destroying the omniverse!
- Out for Launch
- Shipping Error
- Stowing Away
- Crash Landed
- A Hole in Space
advertisement
With the Tropy duo defeated, Crash, Coco, Cortex, Dingodile, Tawna, Aku Aku and the Quantum Masks travel to the Sn@xx dimension to m@xx and rel@xx, seeing the sights and looking for the perfect place to eat. It’s a meal well-earnt!
- Food Run
- Rush Hour
- The Crate Escape
Cortex has taken Kupuna-Wa and travelled back to 1996! He plans to stop his past self from creating Crash Bandicoot in order to prevent his future defeats that lead him to his current lot in life. Crash and Coco leave Tawna and Dingodile behind to try stop Cortex from stopping himself!
- Nitro Processing
- Toxic Tunnels
- Cortex Castle
- Seeing Double
- The Past Unmasked
advertisement
Starting with Crash Compactor, Crash and Coco can collect Flashback Tapes in their solo levels. These tapes unlock the Flashback Levels, playable footage of their time subjected to Cortex’s experiments as they were prepped to become their General in the Cortex Vortex.
Flashback Levels are incredibly difficult gauntlets in the vein of the difficult Cortex Bonus Rounds from the original PS1 game. Flashback Tapes are only found in Crash and Coco’s solo levels, not the Timeline Levels.
- Subject #218
- Navigational Awareness
- Wumpa Affinity Test
- Bandicoot vs Wombat Eval
- Outfit Durability Exam
- N. Brio Superior Study
- Diary Entry: 30th May, 1996
- Team Health Analysis
- Subject #272_Final_B
- Countdown Crate Intro
- Cortex Vortex Pre-Check
- Subject: Perameles Coco
- N. Gin N.Terview
- Nitro Bounce Crate Test
- N. Gin’s N.Genious N.Bouncers
- Mammal Manipulation
- Replacement Considerations
- Overall Fitness Exam
- Tech Check
- Resilience Evaluation
- The Gauntlet
Up Next: N. Sanity Island
Previous
How to Use Pass N. Play — Crash 4 Co-Op
Next
N. Sanity Island
Was this guide helpful?
In This Wiki Guide
Crash Bandicoot 4: It’s About Time
Toys for Bob
Rating
ESRB: Everyone 10+
Platforms
PCPlayStation 5Xbox Series X|SNintendo Switch
Barney: I Love You, You Hate Me — Official Trailer
I Love You, You Hate Me is a limited doc series chronicling the rise and fall of Barney the Dinosaur’s furious backlash — and what it says about the human need to hate. From Barney-bashing to frat parties to homicidal video games, something in American society broke into a million pieces, and it’s never been put together again… or is this just who we were all along? Check out the trailer for the two-part series from director Tommy Avallone.I Love You, You Hate Me premieres on Peacock on October 12, 2022.
Wakanda Forever: 9 Burning Questions We Have About the Black Panther Sequel
11 Marvel Snap Tips That Will Help You Win & Get Cards Fast!
Marvel Snap is the game everyone is talking about and we wanted to give you 11 Marvel Snap Tips that will help you win more often, and acquire new cards faster. Some of these are Marvel Snap Beginner Tips, but a few will help you strategize your card upgrades, and explain a few ways you could win in a pinch. The Marvel Snap global release date is here and we can’t stop playing.
Crash Bandicoot Gems walkthrough: All green, white, red, blue, purple, yellow coloured Gem locations, Key locations, Secret Levels and how to 100% each game
Crash Bandicoot is back! The N Sane trilogy features remakes of the original three PlayStation adventures, with a glossy facelift that keeps the levels and incredible challenge intact, and is now availably on Switch, PC, and Xbox as well as the PS4.
While completing each stage is one thing, finishing them 100% is another thing entirely. Not only that, but the way you find all Gem locations and Key locations is slightly different in each game, so knowing how that works will save you a lot of time and hassle.
If you’re looking for more general tips and an explanation of what’s new meanwhile, you’ll want to take a look at our Crash Bandicoot N. Sane Trilogy Guide and tips.
Crash Bandicoot NSane Trilogy: Complete PS4/Pro vs PS1 Graphics Comparison!
Crash Bandicoot Gem Locations, Coloured Gems and Key Locations
Each stage has one Gem to unlock, which is done by smashing every crate on a single runthrough of a level.
On White Gem stages, you can lose a life while you attempt this, but coloured Gems require you to complete it in a single attempt, with no lives lost. In both cases, you need to also clear their special stages, but thankfully you can at least die as many times as you like in those without risk of losing a life or the Gem.
| Island | Stage | Gem Required | Gem Unlocked |
|---|---|---|---|
| 1 | N. Sanity Beach | None | White |
| 1 | Jungle Rollers | Green | White |
| 1 | The Great Gate | Yellow | White |
| 1 | Boulders | None | White |
| 1 | Upstream | Yellow | White |
| 1 | Rolling Stones | Blue | White |
| 1 | Hog Wild | None | White |
| 1 | Native Fortress | Red | White |
| 2 | Up The Creak | None | White |
| 2 | The Lost City | None | Green |
| 2 | Temple Ruins | None | White |
| 2 | Road To Nowhere | Red | White |
| 2 | Boulder Dash | Purple | White |
| 2 | Whole Hog (Secret) | None | White |
| 2 | Sunset Vista | None | White, Key 1 |
| 3 | Heavy Machinery | None | White |
| 3 | Cortex Power | Blue | White |
| 3 | Generator Room | None | Orange |
| 3 | Toxic Waste | None | Blue |
| 3 | The High Road | None | White |
| 3 | Slippery Climb | None | Red |
| 3 | Lights Out | Yellow | Purple |
| 3 | Fumbling In the Dark (Secret) | None | White |
| 3 | Jaws Of Darkness | Blue | White, Key 2 |
| 3 | Castle Machinery | None | White |
| 3 | The Lab | None | Yellow |
| 3 | The Great Hall | N/A | N/A |
Crash Bandicoot 2 Gem Locations, Coloured Gems and Secret Levels
Crash Bandicoot 2: Cortex Strikes Back mixed things up, introducing Warp Rooms and Crystals for the first time, and with them a series of pretty complex secret entrances and exits to various levels.
There’s also an added layer of complexity to how you get coloured Gems. Instead of simply clearing a level without dying, you now have to perform a variety of actions — like finishing a level without destroying any crates.
Finally, Death Routes were introduced. These are special platforms that take you to Bonus Rounds, but are only available if you reach them without dying in that level. Throw in the fact that you’ll need to double back for one or two of them, and they’re a pretty dastardly mechanic. Good luck!
| Warp Room | Level | White Gem | Coloured Gem and Secrets |
|---|---|---|---|
| Jungle | Turtle Woods | Destroy all crates | Blue — Finish level without destroying any crates. |
| Jungle | Snow Go | Destroy all crates | Red — from bonus entrance, via Air Crash level. |
| Jungle | Hang Eight | 1. Destroy all crates (requires Blue Gem) 2.  Beat the time trial Beat the time trial |
None |
| Jungle | The Pits | Destroy all crates | None |
| Jungle | Crash Dash | Destroy all crates | None |
| Ice | Snow Biz | Destroy all crates | None |
| Ice | Air Crash | 1. Clear the Death Path 2. Destroy all crates (requires access via secret entrance from Bear Down) |
Secret Warp to Snow Go — after the first checkpoint crate by arrow crate, hop over the jetski to right-hand platform via the floating crates. |
| Ice | Bear It | Destroy all crates | None |
| Ice | Crash Crush | Destroy all crates | None |
| Ice | The Eel Deal | Destroy all crates | Green — go right on the fork, walk through back wall behind nitro crates. |
| Sewer | Plant Food | Destroy all crates | Yellow — complete the timed section. |
| Sewer | Sewer or Later | 1. Destroy all crates 2. Access platform (requires Yellow Gem) |
None |
| Sewer | Bear Down | Destroy all crates | Secret Warp to Air Crash — at the very end of the level, double back across the floating platforms on foot. |
| Sewer | Road to Ruin | 1. Clear the Death Path 2. Destroy all crates (requires access via Diggin’ It Secret Warp) |
None |
| Sewer | Un-Bearable | Destroy all crates | Secret Warp to Totally Bear — When you get thrown off the bear at the end, walk back to it by slide-jumping over the chasm and jumping behind the cub. |
| Alpine | Hangin’ Out | Destroy all crates | Secret Warp to Totally Fly — After dropping into the hole that takes you to a checkpoint and the Crystal, walk towards the camera to drop down another hole, and a short secret passage. |
| Alpine | Diggin’ It | 1. Clear the Death Path 2. Destroy all crates. |
Secret Warp to Road to Ruin — Jump on the platform with the bomb-throwing plant near the end of the level and kill it with belly flop. |
| Alpine | Cold Hard Crash | 1. Clear the Death Path 2. Destroy all crates. |
None |
| Alpine | Ruination | 1. Destroy all crates 2. Clear the Green path (requires Green Gem). |
None |
| Alpine | Bee-Having | Destroy all crates | Purple — jump onto Nitro stairs. |
| High-Tech | Piston It Away | 1. Clear Death Path 2. Destroy all crates and double back to exit via Death Path. |
None |
| High-Tech | Rock It | Destroy all crates | None |
| High-Tech | Night Fight | 1. Clear Death Path 2.  Destroy all crates Destroy all crates |
None |
| High-Tech | Pack Attack | Destroy all crates | None |
| High-Tech | Spaced Out | 1. Destroy all crates 2. Complete level (requires all coloured Gems) |
None |
| Secret (via Un-Bearable) | Totally Bear | Destroy all crates | None |
| Secret (via Hangin’ Out) | Totally Fly | Destroy all crates | None |
Crash Bandicoot 3: Warped Gem Locations, Coloured Gems and Secret Levels
The final game in the trilogy, Crash Bandicoot 3: Warped built on the concept of the Warp Rooms and Crystals added in Crash 2. While the secret entrances and exits are slightly less complicated than those in the previous entry, that certainly doesn’t make them easy.
Two completely hidden levels, a 105 per cent maximum completion rate, and hidden Warps all mean this Crash is still as challenging as ever.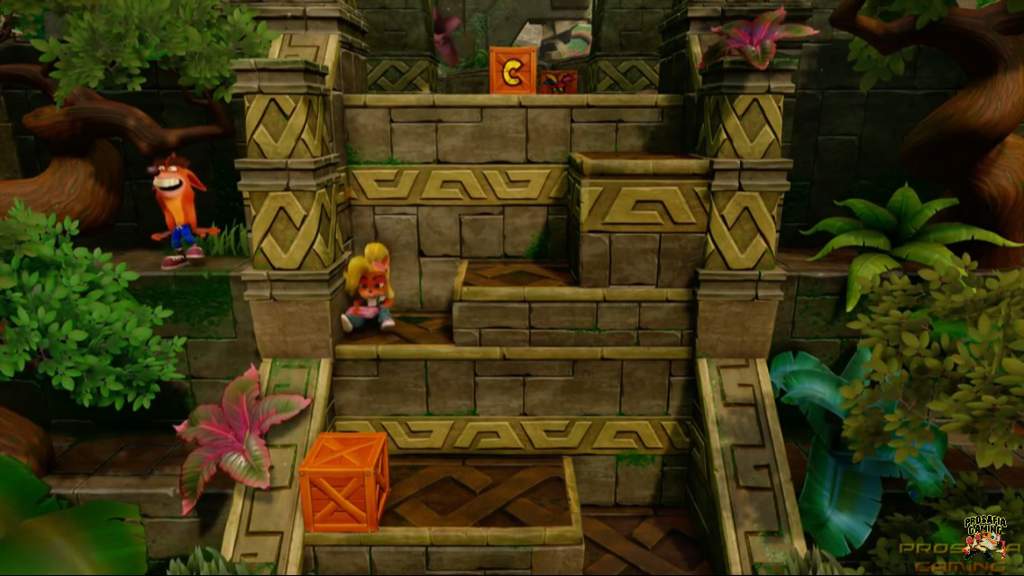
| Warp Room | Level | White Gem | Coloured Gem and Secrets |
|---|---|---|---|
| Medieval | Toad Village | Destroy all crates | None |
| Medieval | Under Pressure | Destroy all crates | None |
| Medieval | Orient Express | Destroy all crates | None |
| Medieval | Bone Yard | 1. Destroy all crates 2. Red Gem path |
None |
| Medieval | Makin’ Waves | Destroy all crates | None |
| Arabian | Gee Wiz | Destroy all crates | None |
| Arabian | Hang’em high | Destroy all crates | None |
| Arabian | Hog ride | Destroy all crates | None |
| Arabian | Tomb Time | 1. Destroy all crates 2. Death Route |
None |
| Arabian | Midnight Run | Destroy all crates | None |
| Oriental | Dino Might! | 1. Destroy all crates Destroy all crates 2. Yellow Gem path |
On Yellow Gem Path, jump on the second Pterodactyl sitting on the tree trunk after the dinosaur chase to access Hot Coco. |
| Oriental | Deep Trouble | Destroy all crates | Red Gem — shoot ! crate near the end of the level, then backtrack to wall of TNT and metal crates, detonate them, and complete exta level section. |
| Oriental | High Time | Destroy all crates | Purple Gem — on Death Route. |
| Oriental | Road Crash | Destroy all crates | Knock over the Yellow sign with a black alien head on it to access Eggipus Rex. |
| Oriental | Double Header | Destroy all crates | None |
| Egyptian | Sphynxinator | 1. Destroy all crates 2. Blue Gem path |
None |
| Egyptian | Bye Bye Blimps | Destroy all crates | None |
| Egyptian | Tell No Tales | Destroy all crates | None |
| Egyptian | Future Frenzy | 1. Destroy all crates Destroy all crates 2. Destroy all crates on secret route |
None |
| Egyptian | Tomb Wader | Destroy all crates | Blue Gem — on Death Route |
| Future | Gone Tomorrow | 1. Destroy all crates 2. Green Gem path |
None |
| Future | Orange Asphalt | Destroy all crates | None |
| Future | Flaming Passion | Destroy all crates | Green gem — on Death Route |
| Future | Mad Bombers | Destroy all crates | None |
| Future | Bug lite | 1. Destroy all crates 2. on Multicoloured Gem path, requires all coloured Gems |
None |
| Neo-Cortex System (Basement Warp) | Ski Crazed | Destroy all crates | Accessed via secret Basement Warp Room, which requies 5 Relics. This level requires 5 Relics to unlock. |
| Neo-Cortex System (Basement Warp) | Hang’em High (secret) | Destroy all crates | Accessed via secret Basement Warp Room, which requies 5 Relics.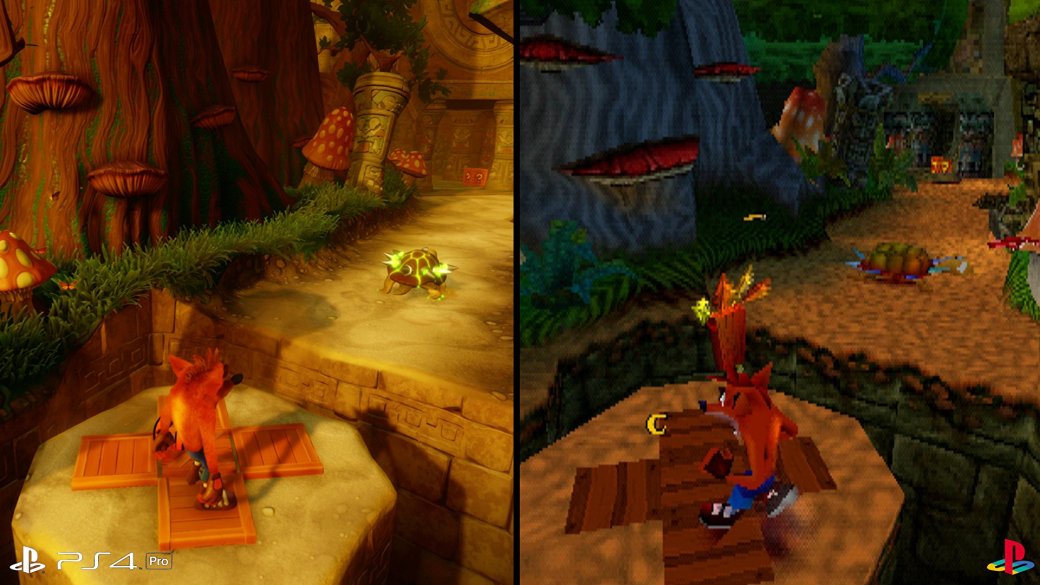 This level requires 10 Relics to unlock. This level requires 10 Relics to unlock. Yellow Gem — end of level. |
| Neo-Cortex System (Basement Warp) | Area 51? | 1. Destroy all crates 2. Win race. |
Accessed via secret Basement Warp Room, which requies 5 Relics. This level requires 15 Relics to unlock. |
| Neo-Cortex System (Basement Warp) | Future Frenzy (secret) | Destroy all crates | Accessed via secret Basement Warp Room, which requies 5 Relics. This level requires 20 Relics to unlock. |
| Neo-Cortex System (Basement Warp) | Rings of Power | 1. Destroy all crates 2. Win race. |
Accessed via secret Basement Warp Room, which requies 5 Relics. This level requires 25 Relics to unlock. |
| Secret Levels | Hot Coco | Destroy all crates | Accessed via Warp in Road Crash. |
| Secret Levels | Eggipus Rex | Destroy all crates | Accessed via Warp in Dino Might! |
For more general tips and an explanation of what’s new, be sure to take a look at our Crash Bandicoot N. Sane Trilogy Guide and tips.
Additional reporting by Matthew Reynolds.
| Article type | Walkthrough |
| Game | Crash Bandicoot N. Sane Trilogy |