Kessler | Fallout Wiki | Fandom
Fallout 4 character
Kessler
-
Bio
-
Info
-
Stats
-
Technical
Race
Human
Gender
Female
Affiliation
Bunker Hill
Settler (optional)
Role
Mayor
Location
Bunker Hill
Appearances
Fallout 4
Quests
Prep School
Dialogue
Kessler.txt
SPECIAL
4 ST, 4 PE, 4 EN, 4 CH, 4 IN, 4 AG, 4 LK
Actual
4 ST, 5 PE, 4 EN, 5 CH, 4 IN, 4 AG, 4 LK
Level
6
Misc stats
| Hit Points: | 190 |
| Action Points: | 50 |
Voice actor
Joey Honsa
Form ID
0001995C
Ref ID
0001995E
Editor ID
Kessler
Voice type
FemaleRough
Race
HumanRace
Class
Citizen
Aggression
Aggressive
Confidence
Brave
Assistance
Helps Allies
Eye color
Hazel
Hair color
Blond
Hairstyle
Evening out
“You there! Caravan or Raider?”— Kessler, in response to the Sole Survivor’s arrival
Kessler is the mayor of Bunker Hill in 2287.
Contents
- 1 Background
- 2 Interactions with the player character
- 2.1 Interactions overview
- 2.2 Quests
- 3 Inventory
- 4 Notes
- 5 Appearances
- 6 Bugs
- 7 References
Background
Kessler oversees the caravans and merchants of Bunker Hill and ensures that trade can continue to flow through the settlement. She mentions that Bunker Hill once counted on the Minutemen to protect the merchants but, since they fell apart, the people of Bunker Hill had to find a way to get by on their own.[1] Kessler convinced the raider gangs in the area that allowing the merchant settlement to operate was more profitable than the loot from a single raid. Since then they have been forced to pay protection money, in addition to dealing with the demands of the various caravan bosses.[2][3]
Currently, Kessler pays tribute to at least three raider gang leaders in the area.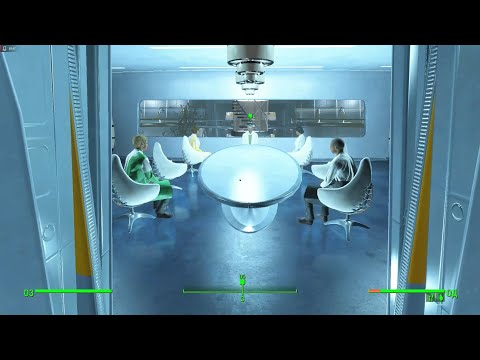 James Wire is paid in caps and causes such little trouble that Kessler has been pressured to lower payment, though she is hesitant to do so after what happened «last time.»[4]Jared is paid in chems, mainly Jet and Psycho, which Kessler buys relatively cheaply from the dealer AJ.[5]Judge Zeller, however, has been causing problems by accepting the tribute but still hitting the caravans. She plans on hiring someone to take out his «army.»[6] In addition, Kessler also worries about the raider gang leader Tower Tom, who refuses to accept tribute (going so far as to kill one of the messengers she sent) and has been pushing ever closer to Bunker Hill’s trade route.[7]
Interactions with the player character
Interactions overview
| Interactions | ||
|---|---|---|
| This character starts quests. |
|
|
Quests
- After completing the Traffic Jam quest for Deb, Kessler will request that the Sole Survivor goes to the East Boston Preparatory School to kill Zeller of «Zeller’s Army» and rescue any caravan survivors there, beginning the Prep School quest.
- Speaking to Kessler after The Battle of Bunker Hill will allow the player character to gain Bunker Hill as a settlement, with Kessler citing the Sole Survivor’s «powerful friends» as the main reason for changing her mind regardless of the outcome.
Inventory
| Apparel | Weapon | Other items |
|---|---|---|
| Patched three-piece suit | Short hunting rifle | Squirrel on a stick |
Notes
Due to her history with the Minutemen, she will tell the Sole Survivor that she is not interested in joining, even after completing her quest.[1]
Appearances
Kessler appears only in Fallout 4.
Bugs
- PC Playstation 4 Xbox One She can die during the Battle of Bunker Hill preventing you from being able to acquire Bunker Hill as an allied settlement and from completing missions.[verified]
- PC Using the resurrect console command will allow you to properly proceed with gaining Bunker Hill as a settlement.
 [verified]
 - PC Playstation 4 Xbox One Kessler will keep moving around even in mid-conversation. This can cause issues in maintaining dialogue. [verified]
- Speaking to her when she’s asleep, she may proceed to lay down and stand back up continuously throughout the dialogue.
References
- ↑ 1.01.1Sole Survivor: «It’s the Minutemen who helped you. If you support us, we can help even more.»
Kessler: «Yeah, right. The Minutemen abandoned our sorry asses long ago. A lot of people’s kin died because of that. Listen, you did us a good turn. But it would take a hell of a lot more for me to want to deal with the Minutemen.»
(Kessler’s dialogue) - ↑ Deb: «You’re here for your cut, right? How much protection money Raiders asking for this week?»
Kessler: «That all gets worked out in the ledgers after I collect the town’s cut. Don’t worry about it. All under control.»
(Kessler’s dialogue) - ↑ Kessler: «You there! Caravan or Raider?»
Sole Survivor: «Raider. «
«
Kessler: » All right, the market’s open if you need it. Just remember, the protection we pay your bosses is worth three times your life. Leave people alone.»
(Kessler’s dialogue) - ↑ Bunker Hill terminal entries; Kessler’s terminal, update: Wire
- ↑ Bunker Hill terminal entries; Kessler’s terminal, update: Jared
- ↑ Bunker Hill terminal entries; Kessler’s terminal, update: Zeller
- ↑ Bunker Hill terminal entries; Kessler’s terminal, update: Tower Tom
Charlestown | Fallout Wiki | Fandom
| For the Fallout 76 location, see Charleston. |
Charlestown
-
Exterior
-
Map
Charlestown district from an aerial perspective
Map marker
Unmarked
-
Overview
-
Info
-
Technical
Part of
Boston
Factions
Raiders
Scavengers
The Institute
The Railroad
Sections
Bunker Hill
Buildings
Abandoned house
BADTFL regional office
Charlestown laundry
Drug den
USS Constitution
Weatherby Savings & Loan
Charlestown condo
Quests
Last Voyage of the U.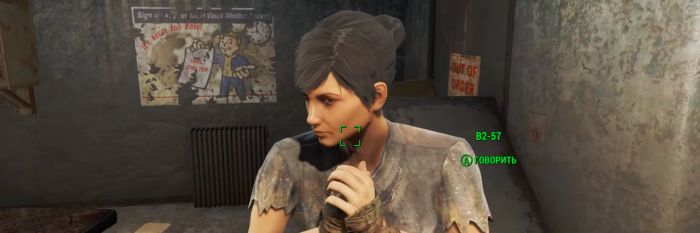 S.S. Constitution
Quartermastery
Kidnapping
Randolph Safehouse
Doctors
Kay
Merchants
Joe Savoldi
Tony Savoldi
Creatures
Feral ghouls
Robots
Bosun
Ironsides
Lookout
Synths
Appearances
Fallout 4
Charlestown is a district of Boston in the Commonwealth in 2287.
Contents
- 1 Background
- 2 Layout
- 3 Appearances
- 4 Gallery
- 5 References
Background
North of the Charles River, Charlestown is the oldest of the Boston neighborhoods.[1] It was the location of the Battle of Bunker Hill in the American Revolutionary War and is home to historical relics such as Bunker Hill and the USS Constitution. The area was also home to the regional office of the BADTFL, a federal agency involved in the investigation of crime boss Eddie Winter and his associates.[2]
In the abandoned house in Charlestown, holotapes can be found describing how Research Assistant Peters underwent voluntary exposure to radiation in order to test out an experimental radiation treatment serum. [3]
[3]
Layout
Located east of Cambridge and north of Beacon Hill and the North End, Charlestown contains the following locations:
- Abandoned house
- BADTFL regional office
- Bunker Hill
- Charlestown laundry
- Drug den
- USS Constitution
- Weatherby Savings & Loan
- Charlestown condo
Appearances
Charlestown appears only in Fallout 4.
Gallery
References
- ↑ Fallout 4 Vault Dweller’s Survival Guide p. 422
- ↑ We are done
- ↑ Control subject’s recordings
Community content is available under CC-BY-SA unless otherwise noted.
The Battle Of Bunker Hill — quest walkthrough — Guides and game reviews
We will talk about the consequences of joining the Brotherhood of Steel, the Railroad or the Institute and what to do with the Courser and Synths.
The second half of Fallout 4’s main quest chain offers a lot of options, as you can choose between helping multiple factions in gaining control of the Commonwealth. Some quests allow you to choose between multiple factions during a mission, which makes for an even more interesting story.
The Battle of Bunker Hill is a unique quest that you get in in the middle of the main quest chain, and there are many different ways to complete it. Below you will find out everything you need to know about the walkthrough, the Battle of Bunker Hill, and the outcome of each option.
Contents
- How to Start the Battle of Bunker Hill
- What Materials Do You Need?
- How to side with the Brotherhood of Steel
- How to side with the railroad
- How to stand side by side with the Institute
- What to do with the Courser and Snits at the Battle of Bunker Hill?
- Each reward for completing the Battle of Bunker Hill
How to start the Battle of Bunker Hill
After completing the quest Hold Synthesizer , you can start mission The Battle of Bunker Hill . First you need to talk to father who will send you to Bunker Hill to bring back the runaway synths .from the institute. However, after receiving these orders, you will have several options.
You can follow Father ‘s directions or go behind his back and report to the Brotherhood of Steel or Railroad. of your orders, allowing you to side with any of them, not the Institute. Below you will find a guide for each choice and the result for each path.
What materials do you need?
The Battle of Bunker Hill is not a particularly unique quest, and with that in mind, you don’t need any special items. However, you will encounter enemies from the Railroad, the Brotherhood of Steel, and the Institute throughout this mission, so you should prepare by collecting enough ammo, stims, and other items needed for the fight. Also, it’s a good idea to take a follower like Dogmeat as they can help you during the fight.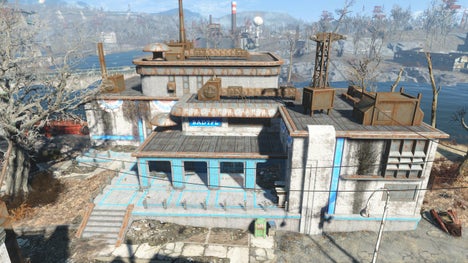
How to join the Brotherhood of Steel
If you complete the quest Shadow Of Steel until you have received the Battle of Bunker Hill, then you can talk to Elder Maxon at Prydwen to side with the Brotherhood of Steel. In this case, you should go to Bunker Hill , but instead of taking the synths, you kill them.
We recommend that you familiarize yourself with other guides to popular tattoo-mall.ru games. Let’s talk about the secrets and tricks that you can use in games to your advantage. And also about useful and interesting stories in video games.
Head to Bunker Hill and enter the trapdoor near the stalls in market which will lead you to a catwalk. Follow the catwalk, defeating all the enemies you come across and eventually you will stumble upon the synths. Each of the four synths has weird names like B2-57 so you’ll know when you meet them. Kill all synths and leave Bunker Hill.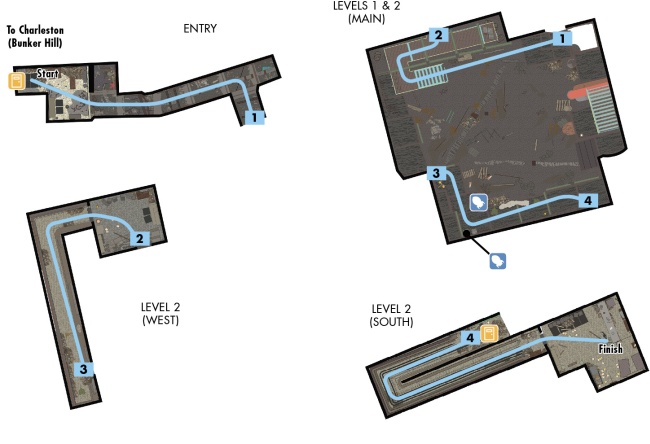 You can then speak to Elder Maxon or Father.
How to side with the railroad
After getting instructions from your father, go to the railroad headquarters in Old North Church and talk to Desdemona strong>. You can inform her of a future attack on Bunker Hill and she will ask you to let the synths go free .
Continue the Battle of Bunker Hill as usual; however, kill X4-18 and go inside hatch , which is behind the stalls in Bunker Hill Market. Follow the catwalk until you find escaped synths . Each Synth has a strange name made up of random numbers and letters. There are four synths in total and you can talk to them to tell them they can leave. After completing this task, leave Bunker Hill and talk to either Desdemona or Father.
How to side with Institute
If you choose to side with Institute during this mission, you need continue with tasks after the Father gives you initial instructions. Head to Bunker Hill where you will receive the help of Courser X4-18, who will help you defeat any enemies you encounter inside Bunker Hill. Inside the location are soldiers of the Brotherhood of Steel and of the Railroad, so you need to prepare for a difficult battle with both types of enemies.
You need to go to the east side of Bunker Hill to find a door without a lock , so use that door. to enter the village. Inside Bunker Hill, there is hatch behind one of the stalls in the market. Use this trapdoor to get inside and then you will exit to catwalk . Continue down the catwalk until you find Escaped Synths . There are four synthesizers in total, and each one has a unique series of numbers or letters that make up their names. Once you get to these synths, you will have to make a decision.
What to do with the Courser and the Snits at the Battle of Bunker Hill?
You can kill synths which is what Brotherhood of Steel requires you to do .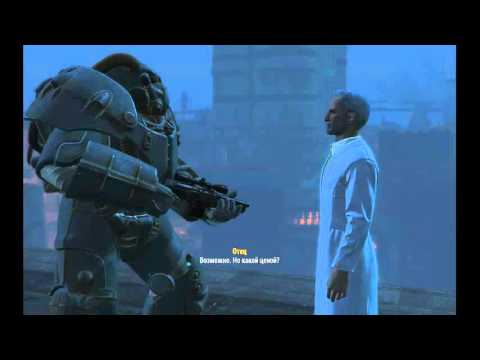 or you can read their recall codes by interacting with them individually, which will allow your companion Courser to escort them from Bunker Hill and back to the Institute.
In addition, you can kill the X4-18 Courser ., which will make the railroad soldiers friendly to you, and you can release runaway synths . This option is entirely up to you. However, it is important to understand that your choice can potentially affect your reputation with each faction and the dialogue you get when talking to faction leaders such as Father.
If you are on the side of the Institute, then read the Synth codes and let them return to the Institute. Then Leave Bunker Hill and go to the Institute. Father will talk to you briefly, and you will be able to explain the events of Bunker Hill to him.
NOTE: if you kill or free the synths, you can remain an ally of the Institute by telling your father that there was an ambush or that events do not matter; however, he will still be angry with you.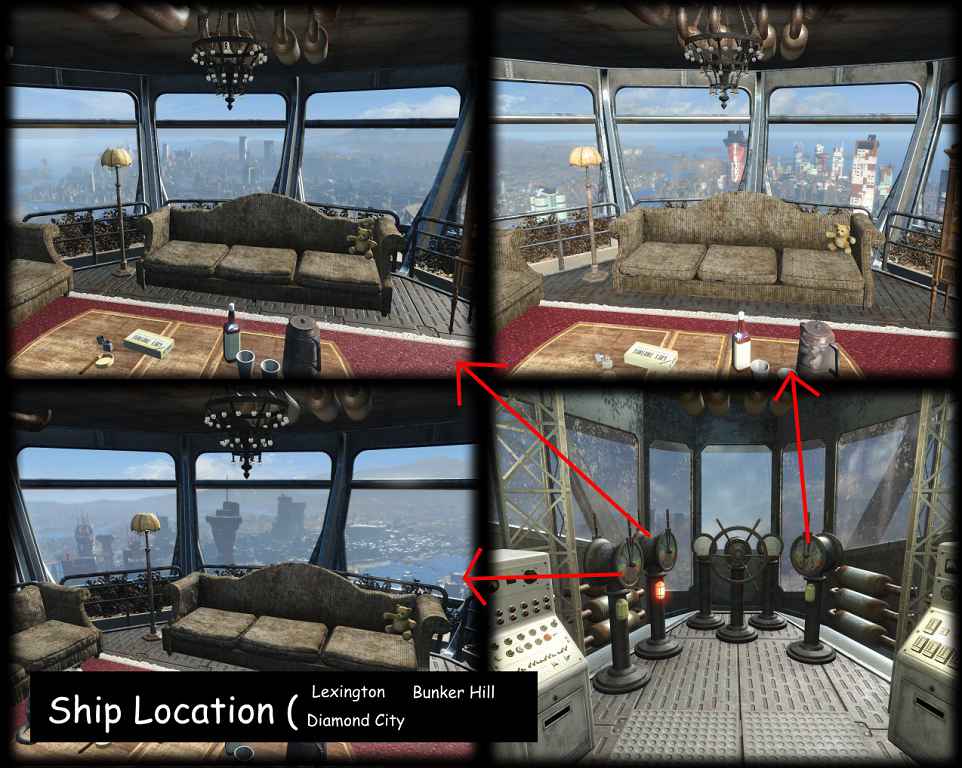
The quest is over and you can continue with the main chain.
Each reward for completing the Battle of Bunker Hill
The rewards you get for completing the Battle of Bunker Hill are not that great; however, they are useful. The first reward you earn is experience points , which you also get for completing other quests in Fallout 4. You also get 500 hats from your father, which you can spend on anything you want to acquire in the game.
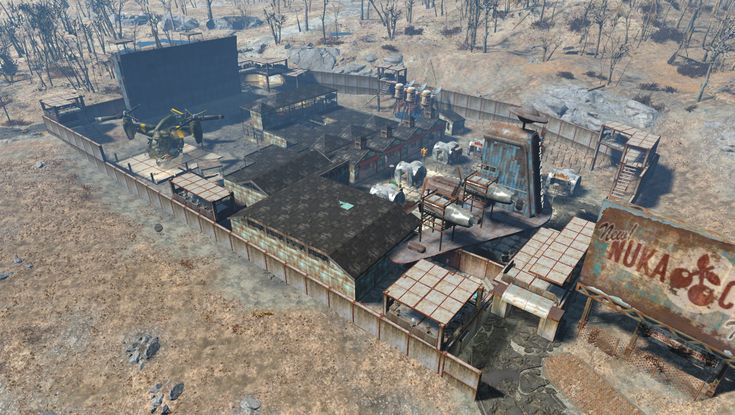
Depending on your choice and if you have been to Bunker Hill in the past, you can receive Bunker Hill as a settlement that you can build in , like other settlements such as Sanctuary Hills. The main reward you get for completing the Battle of Bunker Hill is the ability to progress further along the main quest chain , which is very important if you want to go through the story.
Walkthrough of the quest The Battle of Bunker Hill
At this stage, the passage of Fallout 4 has some variability, offering players to complete this mission in different ways. The Institute asks to fulfill the order, but you can deviate from this request and do everything in such a way as to help the old comrades from the Underground. Whichever option you choose, the outcome will be the same: the task will be counted as completed.
But if you decide to help that very «Underground», then the Father will reproach our hero that now it will not be easy for him to convince the Board of Directors of the Institute that we are their own person for them. At the same time, the refusal to help Podzemka by the latter will not have any negative consequences, therefore we suggest choosing the side of the Institute.
Among other things, we must warn you in advance that this mission is replete with all sorts of battles within the city, there are a lot of all sorts of objects, and this additionally loads the system, therefore, it may be advisable to lower the graphics quality settings and screen resolution for the sake of greater performance, however, it’s better to start only from how powerful your system is.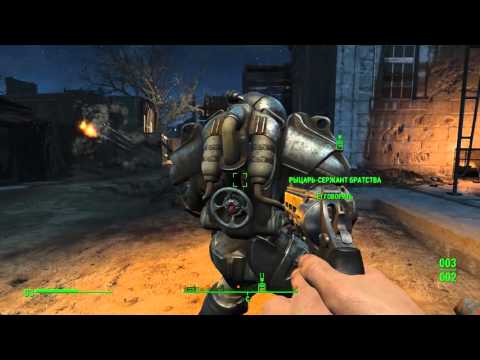
Now directly the passage of Fallout 4. Again, an order from the Institute, as already noted at the very beginning, the quest giver seeks to return the next batch of synths that escaped from them, and this time four units at once. Immediately after receiving the quest, you will have two markers: the first is an urgent meeting with X4-18, followed by the task itself, and the second is to warn the «Underground» that a capture is being prepared. Accordingly, if for some reason you decide to warn them, then first go to them, and we will go to a meeting with X4-18.
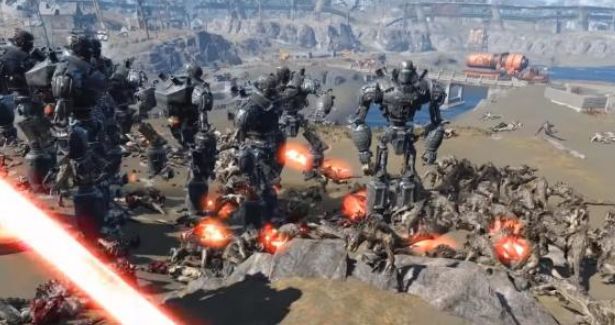
If you decide to help the subway, then you will have to kill him, but since we are trying not to quarrel with the Institute, we need to keep our way to Bunker Hill. There are fierce battles between three factions at once. In addition to old acquaintances from the «Underground», the synths of the Institute and representatives of the Brotherhood of Steel are also fighting. With the Fallout 4 playthrough that we have chosen and described, the Institute and Underground synths will not touch you, unlike the Brotherhood of Steel.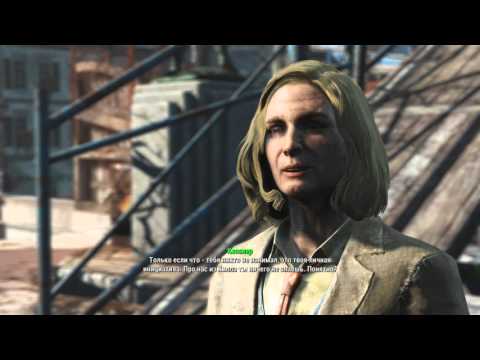
In general, despite the «turbo-mix» in the city, we can generally not get stuck in this massacre and bypass almost everyone, first rounding the fence, and then you will see an open door on the opposite side. You are required to enter inside, and then go down the hatch. Going down, you will see that all the same parties to the conflict continue to extinguish each other, but we are interested in the final room, marked with four markers — these are the four synths that we need to deliver to the Institute.
You need to talk to each of the synths separately, after which, as he answers you, a choice will appear — say a code phrase to turn off the robot, or let him go. It’s up to you to choose what to do here. No matter how you decide the fate of the fugitives, after the decision you need to climb to the roof of the old institute, where we communicate with the Father. The latter is firmly convinced that all inhabitants on the surface are doomed, and that the future of mankind lies only with the Institute.
