Batman: Arkham Origins Walkthrough
Batman: Arkham Origins Walkthrough
- Batman: Arkham Origins Achievements
- Batman: Arkham Origins News
- Forum108
- Clips2k
- Walkthrough*
- Reviews4*
- Scores
- DLC2
- Price
Please note that the details below reflect the time and playthroughs required to get all the Achievements in this walkthrough.
Walkthrough Summary
- Achievements in this walkthrough
- 50
- Total Gamerscore
- 1,000
- Total TrueAchievement
- 3,565
- Estimated Time
- 40 to 80 hours
- Playthroughs Required
- 3
- Missable Achievements
- 4
- Unobtainable Achievements
- 0
- Online only Achievements
- 0
- Contains DLC Achievements
- No
- Questions about this walkthrough
-
Walkthrough forum
Walkthrough pages
- 1
- Walkthrough overview
- 2
- General hints and tips
- 3
- Other Achievements & Missable Achievements
- 4
- Story walkthrough
- 5
- Boss Battles hints and tips
- 6
- Dark Knight System
- 7
- Collectibles
- 8
- Case Files & Most Wanted Case help
- 9
- New Game Plus & I Am The Night Mode
- 10
- Ranked Challenge Medals
- 11
- Campaign Challenge Medals
- 12
- Custom Challenge Medals
- 13
- Combat Training Challenge medals
- 14
- Multiplayer achievements
- 15
- Initiation DLC Ranked Medals
- 16
- Initiation DLC Campaign Medals
- 17
- Cold Cold Heart DLC
-
Full Printer-Friendly Version
Full Achievement Breakdown
- 39 of 50 are Offline Game Mode Achievements
- 39 of 50 are Single Player Achievements
- 11 of 50 are Discontinued Achievements
- 7 of 50 are Collectable Achievements
- 6 of 50 are Main Storyline Achievements
- 4 of 50 are Missable Achievements
- 3 of 50 are Cumulative + Achievements
- 2 of 50 are Difficulty Specific Achievements
- 2 of 50 are Multiple Playthroughs Required Achievements
- 1 of 50 is a Level Achievement
- 1 of 50 is a Buggy — Achievement
- 1 of 50 is a Buggy + Achievement
- 1 of 50 is a Story Completed Achievement
Gamers Involved
- Ergo Me Smart (Overseer)
- thirtysmooth (Overseer)
Walkthrough overview
Hide ads
- © 2022 TrueGaming Network Ltd, All Rights Reserved
- Terms & Conditions | Privacy Policy | Manage Cookie Settings
- Advertise on TrueAchievements
Batman: Arkham Origins Walkthrough | GameZone
Edward Nigma – RIDDLER
Lonnie Machin – ANARKY
Oswald Chesterfield Cobblepot – PENGUIN
Jervis Tetch – MAD HATTER
.
Edward Nigma – RIDDLER
.
Lonnie Machin – ANARKY
The first Anarky projection – you come across it when you exit Penguin’s boat.
You will find an Anarchist who is standing on the platform above the Projection and when you talk to him, he’ll tell you where the bomb is – you go after it within the time limit. Beat up the other guys within the time and then find the red lined glass box and break it to defuse the bomb.
Repeat this twice – find the other two Anarchists and do the same. Then Anarky will ask you to come to the Courthouse – go there and use the back door. During the fight he keeps throwing down a grenade after each wave of thugs you take down. During the last wave, Anarky will come down and throw grenades – he also has a electric baton with him – jump over him and hit him from behind or use special attacks on him. Make sure he is staying down so he does not throw grenades at you all the time.
.
Oswald Chesterfield Cobblepot – PENGUIN
After you get the Disruptor and come out of Gotham City HQ, Barbara calls this in and tell you about the six arms caches.
.
Jervis Tetch – MAD HATTER
You’ll find three mind controlled Bunnies as you exit the sewer carrying a message from Jarvis.
GameZone presents the Batman: Arkham Origins Walkthrough…
Blackgate
Assassin 1: Killer Croc
Searching for Penguin
Final Offer
Assassin 2: Executioner
Penguin’s Office
Assassin 3: Deathstroke
Blackmask is dead?
GCPD
Sewers
Gotham Merchant’s Bank
Most Wanted — Page 2
Training Console / Challenges — Page 3
.
BlackGate
Objective: Locate Black Mask
Go inside the prison and take out the first guy you come across.
Objective: Track down Commissioner Loeb
You’ll come to Cell Block A after which you should go ahead and the down the stairs – the next area you come to has some thugs – you get to interrogate the last guy.
Objective: Gain access to the Executioner’s Chamber
Next area is Block A Holding Cells. You’ll soon come across Croc and then come to Prisoner Processing. Switch on X Ray vision and then hit the switch to the top right here with a Batarang and go thru. You’ll come into an elevator shaft. The floor is weak is use your explosive gel on it.
Objective: Pursue Black Mask
Get into ventilator shaft to the left of the room –
You’ll come to some enemies and one of them get happy that steel bars are separating him from where you are – get thru the door to the right here and open the ventilation grate on the top with the Batclaw and go through. You’ll come to a weak wall, blow it up and the next area is the Execution Chamber Access. The next door has two switches, use the quick use batarang button ((default – 1)) and hit the button twice to hit the two switches –
There’s a ventilation grate above you, go in and you’ll come into view of the Execution Chamber – too late for Loeb!!!
Jump through the glass and you’re up against a lot of gangsters. Get thru the door and you’ll come into the Security Corridor. You’ll reach the roof soon where you come across your first assassin.
.
Assassin 1: Killer Croc
Each Boss fight is obviously unique – all you got to do is figure out their moves before they get your health down.
The only way to get him is to use Cape Stun – when he is running at you use the MMB and then a beatdown. After which he will jump to the gas cylinder at the edge of the roof and throw it at you – use the quick use batarang button twice to hit him with the batarang and blast the thing over himself.
After each sequence like this a couple of thugs jump down from a copter. You can take them out but be careful as Croc keeps running at you and you may not get enough time to evade. If he comes in too close then keep hitting the spacebar to counter him.
If you have a good eye what you can do is get Croc in a Beatdown and counter any of the others coming at you – be careful as after you counter Croc can sometimes come out of the stun so you need to stun him again and resume a beatdown. This way, you won’t have to get rid of any of the other guys and you’ll have Croc in your sight at all times.
Objective: Analyze the Memory Card
You’ll now see who all the Assassin’s Blackmask put after you are.
Go to the computers and you’ll see all the guys who are after your head –
Killer Croc
FireFly
CopperHead
DeathStroke
Electrocutioner
Shiva
Bane
DeadShot
and their payroller: BlackMask…
.
Searching for Penguin
Objective: Deactivate the Jamming Signal
The only way to get out of the Batcave is to interact with the Batwing and you’ll see the Fast Travel system. You’ll find out that someone is blocking your signal so get into the GCR building and you’ll come to some gangsters on the prow – get on top of the ledges and take them out one by one.
The last guy should be near the hostage – you can get him if you go thru the vent. After you secure the hostage go thru the other open vent to the right here which has a red glow inside it.
When you come to a dead end, use the grapple to get on top of a ledge and then you’ll reach a crime scene.
All you need to do is scan the marked places so you’ll get the clues. After you get thru scanning everything you’ll need to rewind to get the location of the Keycard which is behind the vent grill here.
Keep going thru Coventry and inside the comms tower, hack the console and you’ll be able to use Batwing here. You will also see many Network Relays – these are a part of Riddler’s Most Wanted mission.
Objective: Interrogate Loose Lips
Get to the marked area and you’ll see the arms deal going on-
Beat down all of them and talk to Loose Lips.
Objective: Deactivate the Jamming Signal
Go to the next marked location and use the remote batarang and send it thru the electricity and make it hit the fuse box –
Objective: Collect First SIM Card
Get to the marked location and take the card and you’ll head some of Penguin’s conversation.
Objective: Collect Second SIM Card
Get to the second location and do the same.
RIDDLER DATAPACK 1
To the right here on the top is a locked box with a Datapack. Use the cryptograph and open the box.
.
Final Offer
Objective: Gain Access to the Final Offer
Once you reach the ship you’ll find several gunmen standing guard so take them down.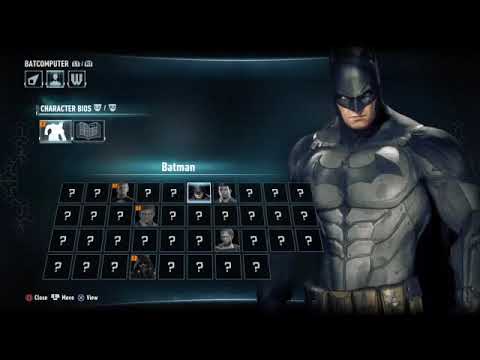 After you deal with them move into the ship. Take out the enemies and keep going
into the ship. You’ll come to a room with a few thugs so take them out and inspect the flying device you saw earlier. The next area is Deck 1 – you’ll be able to spot
a frozen RIDDLER DATAPACK 2 here. You can do anything till later in the game so remember this and come back later –
You’ll come to some enemies next –
Fly to them and beat them up. To the right here is a floating raft with a grapple hook use the raft to get to the next place where you need to pull down a weak wall
and go up. You’ll enter the Boiler room, go up the next ledge and you’ll find RIDDLER DATAPACK 3 which you can’t reach yet. Open the vent to the left top here and go
thru –
.
Assassin 2: Executioner
Just move close to him and take punch him once… (oh that’s not the end of him. .)
.)
.
Penguin’s Office
Several Thugs enter the arena next. Take all of them down and go out the exit to the Deck Access Corridor. Once you come out of the vents, look behind for a gap –
Inside is RIDDLER DATAPACK 4. After this get to the next area and go up the ledge and you’ll see another closed room here with RIDDLER DATAPACK 5 but you need to come back here later as you can’t open it yet so remember this place – look into your map and note the location.
You’ll come up to the Pump Entrance room. You’ll pass thru a metal gate, go ahead and pull down the weak roof and go up there – there’s a fuse box and RIDDLER DATAPACK 6 but again you need to come back later for it so remember the place. The next time you are here though – you’ll have electricity which is over the metal gate you just passed so use the remote controlled batarang to do the job.
To the left here is a vent and you’ll come to the Casino entrance after this. Once you enter the Casino you’ll see a stall with «Jackpot» and three large glowing $ signs — use the batarang quick use (1) three times to hit the $ signs and you’ll get RIDDLER DATAPACK 7.
There’s a vent to the right end here so go thru and hit the switch you come to – this will open the wall in the previous room. Go back and take out the thugs here. Soon you’ll come to a display case of the Final Offer – to the left here is a weak wall behind which is RIDDLER DATAPACK 8.
In the next area some guys are bullying a hostage – save him and he’ll go stand near the exit. To the left of the exit is a small gap you can go thru for RIDDLER DATAPACK 9.
Next up, you’ll come to Penguin but you are rudely intervened by another of your assassin.
.
Assassin 3: Deathstroke
This is undoubtedly one of the most interesting fights in the game.
The key to winning this fight is knowing when to counter attack. Get close to him and start hitting him, then when you see the symbol over his head counter him – you’ll need to counter him only once in the beginning and then move up to three times later on.
After you get his health down enough, he’ll flash you and jump at you – continuously hit the Counter button to avoid his attacks. Another move is that he’ll latch a claw onto you and an explosive barrel – use Counter to throw it back at him.
If he tries to shoot you (which is an immediate follow up to the exploding barrel) use the quick use batclaw to pull him towards you – keep hitting the claw till he gets close enough for you to punch him.
After the fight, you get his Remote Claw.
Objective: Find Penguin
You should now be able to make lines which you can grapple onto so look up and make one right now.
Before you go to the door thru which Penguin left go to the right and on a beam you’ll find RIDDLER DATAPACK 10.
You’ll see that the door thru which he left is locked. Get to the floor and leave thru the door to the right of the room. Keep going and get out of here – use your map to guide you and once you reach the exit – which is the first door you took to come into the ship – look up left and you’ll find a valve cover you can open to get
RIDDLER DATAPACK 11
–
.
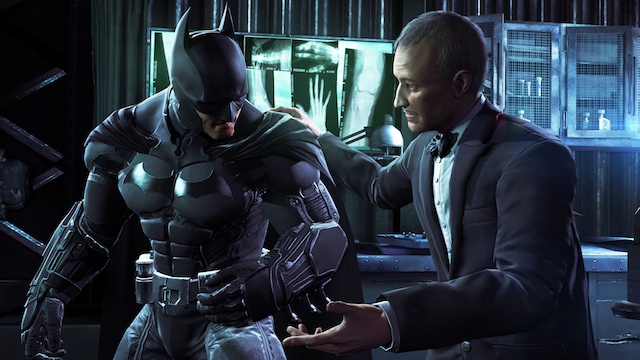
Blackmask is dead?
Go to Lacey’s towers and you’ll find RIDDLER DATAPACK 12 in the apartment –
Scan all of the targets in the crime scene. When you need to rewind and see the guy coming in thru the window. Scan the guy here and another rewind takes place near the kitchen with the assaulter coming up behind the woman. You need to scan the thing that flies off onto the carpet.
Then you need to go to the batcave and get the Concussion Detonator from the workbench.
.
GCPD
Objective: Access the GCPD Servers
Take out the cops with the guns and get inside the building. Blow up the weak wall and you’ll come on top of an elevator. After it stops jump ahead into the shafts and you’ll come behind a cop you can take down. Go thru the next areas and you’ll come to a hook on which you can make a line with the remote claw.
The next room you come to will have a cop ahead and to the left is a Restricted area room and you’ll find Loose Lips being interrogated by a cop. Get to him and in his room you’ll find a switch to open the lockbox in the previous room with RIDDLER DATAPACK 13 – you’ll need to quick grapple to grab it after jumping thru. Go back into the interrogation room and go thru the door here.
Next place is the locker room – first take out the guard in this room and then use your vision and you’ll find RIDDLER DATAPACK 14 inside –
Go thru the shaft and you’ll come into a place with more cops – get all predatory on them and then walk thru the room. Open the electronic lock and the next place you come to has a jammer inside which disrupts your x ray vision and sequencer.
Objective: Acquire Disruptor at Evidence Locker
Next up is basement access, more cops to take out. When you face the shields use cape stun and double jump in immediate succession to take them out. Keep going and you’ll come to more enemies – use the concussion grenade on them and take them out as soon as possible. Use the button here to get thru the gate and you’ll come to a weak elevator door which you can blow up.
Inside the shaft, use the remote grapple to hook up a line and go up. You’ll come into the room with the Disruptor soon. In this room you can find RIDDLER DATAPACK 15 but this one is really really tricky. You need to send the remote bataran thru the shaft here and you’ll find an electrical surge outside which you can charge the batarang with and turn it around – keep use the brakes on it to slow it down and then take it back to the fuse box and get the pack.
Get back down and you’ll reach another jammer, the disruptor needs to be aimed and you need to hold the fire button. In the next area you’ll find a lot of things with a bane look alike – be careful and try to avoid him when he’s raging. You’ll come back to the first jammer. Soon you’ll meet up with Barbara then come out of the GCPD.
.
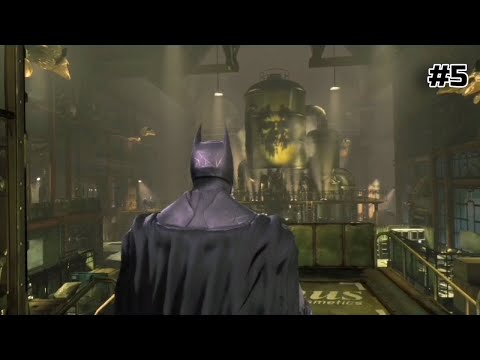
Sewers
The marked place is a sewer grate. You can get a line hooked to the left where you’ll find RIDDLER DATAPACK 16 inside a broken pipe in the wall –
Enter the pump room and grapple to the ledge and keep going till you get to some thugs. Take them out and after a while, you’ll reach a ladder and a switch. Hit it and use the ledges to keep going and you’ll reach a place where you can see a guy far below you standing alone – you need to fly to him. Use the elevator and you’ll reach the server.
Now you’ll solve the case of the apparent death of Blackmask…
.