God of War Deus Ex Malachite Favor walkthrough, collectibles, and items
In this God of War Deus Ex Malachite guide, we’ll walk you through every step of this favor. Your friend Brok, the dwarf who helps you craft items, will give you the “Deus Ex Malachite” side quest (Favor, in God of War parlance) any time you speak to him after completing Second Hand Soul and after a certain check point in the game. You’ll know it’s available when you speak to him, and the Triangle button reveals a new Favor.
The “Deus Ex Malachite” Favor will have you looking for Andvari’s Hammer in the Landsuther Mines, located on the south side of the Lake of Nine, west of Muspelheim Tower via the Landsuther Canyon waterway.
A note on God of War spoilers
God of War is full of surprises, and that makes guides particularly tricky to write. We want to help you with the game. We don’t want to spoil it. So we want you to know that we’ve written every guide with spoilers in mind.
If our guide doesn’t appear to get you every item (a chest, for example), there’s a reason for that. Rather than spoil that reason, our tables of contents and a big image in the guide indicating spoilers ahead will tell you when and why you find yourself in that situation — in the least spoilery way possible.
Table of contents
- Deus Ex Malachite walkthrough
- Down the ladder
- The cave
- Searching for the hammer
- Dark Elf Lord fight
- Finding Andvari’s Hammer
Deus Ex Malachite walkthrough
After sailing through the Landsuther Canyon, you’ll land on a beach. Dock there and hustle forward through a narrow opening, hop over a gap and through a wooden barrier to find a Mystic Gateway and Brok. Speaking to him there will give you this quest (if you didn’t have it already) and a Landsuther Entry Stone which will get you into the mines, which are down a slight hill.
Smash that palletSIE Santa Monica Studio/Sony Interactive Entertainment
Once inside, you’ll jog down a small tunnel leading into an area where two Tatzelwurms will be waiting. Take them out so you can smash the heavy pallet hanging above you into the wooden floor below. To do so, first go to one side of the room where you’ll notice a lever that, when activated, will drop a larger pallet of rocks onto the ground. Climb on top of that and shoot a shock arrow into the shatter crystal to send that pallet through the floor.
Doing so will unleash three Dark Elves, so take care of them before descending the ladder made visible through the hole. Before heading all the way down the ladder, make sure to veer off to the right for a coffin filled with resources.
Down the ladder
Don’t miss this side pathSIE Santa Monica Studio/Sony Interactive Entertainment
As you drop to the bottom of the ladder, watch out for the Nightmares that aim to give you some trouble. There’s a bit to explore down here, but before you do, turn your gaze back toward the ladder to find some tentacles you can throw your axe through. The path will have yet another Nightmare waiting for you and another coffin filled with some solid Svartalfheim steel and World Serpent scales.
Before climbing up, you’ll notice a lift to your left. Taking that up will lead you to back up to the starting area where you’ll find a coffin with even more solid Svartalfheim steel and World Serpent scales. Next to the coffin, you’ll find the Kneel Before Thor! treasure map. (Check out our Kneel Before Thor! treasure map guide for the location of the loot.)
You can do this now and loop back to where you started, or save that until the end.
The cave
A traveler and a Soul EaterSIE Santa Monica Studio/Sony Interactive Entertainment
When you do finally climb up the path to the next area, you’ll find some more tentacles to tear through. Moving past them, you’ll push through a small gap in the wall into a cave with a Soul Eater and a Traveler. Thankfully, you won’t need to tussle with the ancient, but you’ll still have your hands full.
When you engage the Traveler, some Nightmares will join him and eventually, so will some Tatzelwurms. If you have the Spartan Rage built up, it’s best to use it on the Traveler to rack up as much stun as you can so you can do a stun grab attack to shave off a healthy amount of damage. Use a combination of Runic attacks and Atreus’ bow to fend off the smaller enemies as you deal with the much more challenging Traveler.
Searching for the hammer
-
A chest of hacksilver is behind this wall
SIE Santa Monica Studio/Sony Interactive Entertainment
-
Drop this with your axe for some cash
SIE Santa Monica Studio/Sony Interactive Entertainment
-
Run towards this hacksilver to find a hidden area
SIE Santa Monica Studio/Sony Interactive Entertainment
-
Bust these to make your way toward a coffin
SIE Santa Monica Studio/Sony Interactive Entertainment
-
A great enchanment is in this coffin
SIE Santa Monica Studio/Sony Interactive Entertainment
-
A great, all-purpose enchantment
SIE Santa Monica Studio/Sony Interactive Entertainment
Continue your search for the hammer by climbing the ladder next to the Ancient. Keep moving forward until you can see a breakable wooden wall. Destroy it to get some hacksilver and as you turn around, you’ll notice a tentacle on the ceiling. Knock it down and jump below to grab the hacksilver it was hoarding. Turning around and heading toward the water under the walkway you were just on will reveal some more tentacles you can break to reveal a path to a coffin containing an enchantment, the Shard of the Elements, which offers a host of resistances.
Head up the small ledge to this lit corridorSIE Santa Monica Studio/Sony Interactive Entertainment
Heading back, climb up the small ledge into the brightly lit corridor where more Dark Elves will accost you. Once defeated, climb the wall at the back end of that room, shimmy to your right and head forward through a breakable wooden wall. To your left, is some hacksilver and, heading right over the gap, you’ll find a lever that will pull a pallet upward and let you climb the wall even higher. Take the zip line down and make your way up the wall to face off against the Dark Elf Lord.
Dark Elf Lord fight
The Dark Elf Lord’s blinding attacks can leave you wide openSIE Santa Monica Studio/Sony Interactive Entertainment
This will be one of the toughest dark elves you’ll face off against. He’ll bring in some standard Dark Elves as reinforcements, but you need to steer clear of any of his projectiles. If you’re hit by them, the entire area will become clouded and the Dark Elf Lord will slip in and out of this cover to take shots at you or to swoop in with a series of attacks from its staff.
Thankfully, his melee attacks are easy enough to dodge. If you do get caught by its blinding effects, remember that Atreus isn’t blinded and he can easily take shots at him while you wait for the effects to wear off. Shock arrows work well against him, stunning the Dark Elf Lord. Also, the Dark Elf Lord is a bit tricky, so don’t mash if you’re using Spartan Rage attacks as he may be able to dodge them. Use your meter wisely.
Putting down this tough elf will give you an epic talisman, Aegir’s Protection, which creates a zone of defense around Kratos and stops his attacks from being interrupted while reducing damage.
Finding Andvari’s Hammer
Atreus will get you into the room with the hammerSIE Santa Monica Studio/Sony Interactive Entertainment
Near the gate with the storeroom, will be a ledge you need to throw Atreus up. Once through, your son will unlock the room and you can find Andvari’s Hammer in the golden chest in the back. To the right of the chest, is a track leading up to a rock-filled mining cart. Push it down to smash through a wall leading you out of there, which also sets a Tatzelwurms loose.
From there, you can drop back down into the room where you previously broke through the floor. If you didn’t open the gate containing the coffin, you can drop down the hole to find the lift that will bring you to that room.
Either way, you can exit out the other end of that room, crawl back under the path and you’ll make your way back to Brok.
When speaking to Brok, you’ll get your hands on Andvari’s Soul, an epic enchantment that grants a high chance to get a health burst on any runic kill.
Deus Ex Malachite — Dwarves — Quests | God of War (2018)
Guide Info
Favorite
By
Ben Chard
View Full-size
Subscribe to Premium to Remove Ads
| Favor Giver | Rewards |
|---|---|
| Brok, Upon completion of Second Hand Soul | Andvari’s Soul, 3290 XP |
Once the water level in the Lake of Nine has dropped for a second time and you’ve finished the Second Hand Soul Favor, return to Brok to receive this follow up. Head to the Landsuther Canyon found to the west of Muspelheim Tower and dock at the beach at the end.
Follow the linear path through the tight paths and eventually you’ll stumble upon Brok who’s set up shop at the entrance to the mines. Speak to him to receive a ring with Andvari’s soul inside, thankfully Atreus can hear the Andvari’s voice from within. Brok hands you the Landsuther Entry Stone and sends you on your way.
Subscribe to Premium to Remove Ads
Be sure you have a Resurrection Stone from Brok and then face away from the shop and look into the air to spot a Raven perched there. Head to the gate now and insert the keystone to gain access to the mines. As you proceed and crawl through a tunnel, you’ll come to a large opening with a group of Tatzelwurms. Make use of area of effect Runic Attacks and Summons to defeat them.
View Full-size
12
(1 of 2) Turn away from Broks Shop and look into the air to find this Raven
View Full-size
View Full-size
Turn away from Broks Shop and look into the air to find this Raven (left), stand on the block you dropped to find the Shatter Crystal. (right)
Climb the small platform to the east and use the switch to drop a large block on the ground. Climb the rock to spot a Shatter Crystal on the other suspended rock in front of you and shoot it to drop it down, creating an opening for you below. A group of Dark Elves fly out from below as you drop down to the ground, the Murder of Crows Summon works wonders here as does Shock Arrows in general.
Subscribe to Premium to Remove Ads
With the enemies defeated, begin climbing down to the area below. As you climb down a few struts, climb to the side and get off. There’s a coffin you can open over the other side, do so and resume climbing to the bottom. As you drop into the cavern below, two Nightmares will spawn, take them out easily with arrows.
Turn to the left of where you dropped down to find some knots you can line up, flinging the axe through them to destroy them. Defeat another Nightmare as you head through this passage and open the coffin at the end. Retrace your steps and head into the water to find a sack of Hacksilver along with a Hacksilver chest. Before climbing up the ladder in front of you, take the lift to the side and ride it to the top where you can find a Treasure Map and a coffin along with a gate you can raise.
View Full-size
12
(1 of 2) Destroy the knots behind you to reach a coffin
View Full-size
View Full-size
Destroy the knots behind you to reach a coffin (left), another Treasure Map awaits you at the top of the lift. (right)
Subscribe to Premium to Remove Ads
Take the lift back down to the previous area and climb the ladder. Pick up the Rage stone, a sack of Hacksilver and turn to the right to spot some boards you can break, another Hacksilver chest hides inside. Destroy the knots in front of you and squeeze through the gap to come across a Soul Eater and a Traveller lurking ahead.
By now you should be getting used to fighting Travellers however make sure you take care of the Nightmares and Tatzelwurm that spawns during the battle. If you have the Talisman of Unbound Potential equipped then you can even begin the battle with four Runic Attacks at the start, all but defeating him in one go. Back up and hit him with Shock Arrows as you wait for the opportunity to finish him off. Pick up the spoils on the ground and climb the ledge near the deceased Soul Eater.
View Full-size
12
(1 of 2) Wait for the Traveller to expose himself before attacking him
View Full-size
View Full-size
Wait for the Traveller to expose himself before attacking him (left), search the area under the walkway to find some knots you can destroy leading to a coffin. (right)
Subscribe to Premium to Remove Ads
Leap across the gap and break open the boards ahead for a Hacksilver chest before dropping down to the ground below. Head back south and under the platform you just passed to find a sack of Hacksilver and then throw the axe through the knots to destroy them. Climb the ledges and leap the gap to find a coffin at the end to receive the Shard of the Elements Legendary Enchantment which will boost your resistance to all status effects.
Head back across the gap and climb the ledge to the west to continue your expedition through the mines. As you step into the open area in front of you, a trio of Dark Elves will land in front of you. Thankfully they line themselves up, perfect for an Ivaldi’s Anvil or other like minded Runic Attack. Once defeated, stand close to the water’s edge and look up to the northeast to spot the second Raven on the rocks.
View Full-size
Youll need to throw the axe higher to bring it down on the Raven from this position.
Subscribe to Premium to Remove Ads
Head to the ladder in front of you and climb it to reach a walkway to the right. Leap the gap to your left and climb up the ladder in the corner to reach a Hacksilver chest, open it and take the zipline back down. Follow this path through the wooden boards and operate the switch at the end, this will raise the platform obstructing the ladder. Take the zipline back down to the bottom and climb this ladder to the top.
You’ve getting closer to your target however a Dark Elf Lord drops down to prevent you from claiming it. Like all Dark Elf Lords, don’t be too aggressive and instead focus on dodging the mines he drops and wait for the opportunity to strike him after dodging his attacks. Once the other Dark Elfs enter the fray, ignore the Lord and take them out first, keeping an eye on your surroundings for any mines.
View Full-size
12
(1 of 2) Keep an eye on your surroundings especially when blinded
View Full-size
View Full-size
Keep an eye on your surroundings especially when blinded (left), focus on the regular Dark Elves before resuming your attack on the Lord. (right)
Subscribe to Premium to Remove Ads
Once the enemies are defeated, pick up the spoils including the Aegir’s Protection Epic Talisman from the Dark Elf Lord. This is a handy defensive Talisman which creates a small zone where you can stand in to reduce enemy damage and recover health at higher levels. This Talisman is more helpful on the harder difficulties where you have to be more tactical with your approach to combat.
Boost Atreus up the wall in front of you to have him go around the other side and open the gate for you. Proceed forward and to the right you’ll finally find the Legendary Chest you were looking for, open it to obtain Andvari’s Hammer. Before you leave, look in the south corner to find a Lore Marker giving you more information on the Soul Eaters origins. Follow the mine cart tracks to the north and give the cart a shove to have it tumble through the rocks. Defeat the Tatzelwurm and kick the chain down to return to the first open area.
Head back to Brok’s Shop and give him the hammer to complete the Favor and obtain Andvari’s Soul, a very useful Epic Enchantment.
Subscribe to Premium to Remove Ads
5 things you need to know before you play — DTF games
I suggest everyone write some tips that could help a newbie in the game. Pick a game you know a lot about and share your advice. Maybe you’ll write quick fixes to problems you’ve encountered yourself, or what you’re asked most often. Perhaps your advice will help an uninitiated person to join a new genre for himself. Alternatively, imagine what to say to a person who sits in front of a running game and knows absolutely nothing about it. Optional 5 pieces.
7264
views
You don’t need to read further 🙂
For example, I’ll take my favorite Astroneer. 5 things to know before playing Astroneer.
1. How to start the game correctly? You need to call a starter set of three items to the landing site, take the “oxygen generator” and the “medium platform type B” in your backpack and run with them until the air in the suit starts to run out. Then «unpack» (unpack) these items, put the generator on the platform so that the platform can transfer oxygen — and you are saved. When you need to return to the starting shelter, you do not have to drag them along, because they can be quickly returned to the starting landing site, just like you got them at the beginning of the game.
These three items from the starter set are unique (they have the word «starter» in their names). They can be «free» and unlimitedly packaged and teleported to the launch pad. Even from another planet.
Where to run? First you need to inspect the wreckage. Including spacecraft half-buried into the ground. You will be lucky to find a battery, power generators or resources that are not so easy to get at the beginning of the game.
2. What should I do first? You will need a «container» or «canister» in Russian localization. It is needed in order to be able not only to dig, but also to «build up» some figures from the already «collected» (mined) soil. Including bridges over abysses. You can add soil «for yourself» and thus rise up on an earthen pillar.
An important tip — if you find a «Technological Research Sample», instead of using it on the spot, build a «Research Chamber» and place it there. (on the first planet, such samples can lie near the wreckage of space vehicles and inside the «help containers from EXO Dynamics» that open when certain conditions are met) And so get more research points.
3. It’s very easy to get lost in this game! Especially in caves. If you move the mouse cursor over your character — the astroneer, then a compass will appear under his feet. Don’t forget to look at him. And turn around more. It seems to me that the key problem why the player is lost is that he cannot identify the area where he came from. It sounds like a big platitude, but people are used to schematic locations in games, not generated terrain.
Poles connected to a network that has an oxygen generator illuminate the area around them. Use them as light sources. You will quickly understand this, but what is more important — even single supports that are not connected to the network can be seen from afar as a small dot. Use supports as reference points.
Another tip — before you go down somewhere, first lay a line of supports in front of you that provides oxygen. This is in case the player slips and falls.
A rope is always pulled between the supports. You can use this cable as a guide to dig neat tunnels.
4. What’s next? Personally, I would set a goal to quickly leave the first planet (but you will still return to it). To do this, you need to carefully dispose of the «research points», for which you can unlock all sorts of new things, unlock the ability to make new items. The game is still about travel, despite how many of us like to equip one corner. At some point, you will find that in order for more advanced tools to become available, resources will be required that are simply not available on the first planet.
I don’t think it’s worth spending «research points» to unlock the ability to make your own generators. I’m sure you’ll almost certainly find a fair amount of different power generators in the rubble on the surface.
And in the future, the flight will give a noticeable increase in the progress of research, because «items» and «research samples» on other planets give more «research points» compared to the first planet in the game.
It’s a good idea to start building a small shuttle as soon as possible (2 aluminum, 1. 5k research points). «Rocket» is inexpensive in terms of resources and research points, but it can supply oxygen and slowly release energy. That is, shuttles can act as a weak power generator! They can even give off energy through a network of supports if placed inside an «oxygen generator» (yes, this item has a slightly wider function than it seems from the name). On a small shuttle there are two double slots — one supposedly for an oxygen generator (there will be a hologram of this object as a training), the other for a «rocket engine». These slots can be put to better use. For example, put a «warehouse» in the compartment for the oxygen generator, which already has 8 slots, for example, for resources (you can take resources for an item that takes up more space and «collect» (manufacture) it after the flight). And in place of the engine, you can put some kind of energy generator (for example, a «medium windmill»).
But first you need to get research points. To do this, you need to stay near the starting shelter, which unconditionally and constantly gives energy, from which the research chamber will work non-stop. You should walk through the caves and collect samples from stalagmites for research, they give more points than similar samples from plants on the surface of the planet. However, such «organic» and «mineral» «research samples» does not make sense to study in the «research chamber» — it is unprofitable in terms of time and energy. Next, you should look for «objects for research.» The best of them look like a green fruit (apple?) — this can be found under some plants on the surface (if you see a round bush with «samples» on it — carefully dig under it) and like a shaggy ball with antennae — this can be dug out from under dangerous plants («aggressive flora») in the caves (but deep, below the first two «levels»). But any found objects for research will do.
However, it would be best to open the «pyramids» — dropped help capsules from «EXO Dynamics». To open some of them, you need to feed such a «pyramid» some specific resource depicted on its body (resource icons can always be viewed in the «astropedia» in the game menu, just remember, a resource processed in a furnace is another resource). Others — require to charge their internal capacities with energy. And the third type — will open only with a sufficient input amount of energy. That is, if this one does not open, the problem is solved either by connecting a larger number of working generators, or by connecting working generators of greater power. I hope the principle is clear.
If you prefer solar panels as a source of energy (and this is the most convenient source of energy, in my opinion, which requires the least maintenance, so to speak), consider placing them higher (on top of a mountain, or «blind» yourself «high house) so that nothing casts its shadow on them.
Care should be taken to unlock the «small shuttle», «solid fuel engine», «landing pad», «tractor», «oxygen generator», «beacon» and «drill» of the first tier (which are not for vehicles, but in as a modification for the «warp tool»). With this set, you won’t be lost on another planet 🙂 Of course, none of this is necessary for the flight, and it’s completely unlockable while on another planet. But I brought it up as a tip for newbies.
5. The player is ready to fly to another planet — he has a rocket. What to take with you on your first flight? Of course — small batteries. Then — from a set of starting items — «starting oxygen generator» and «starting middle platform type B». Then aluminum, primarily for the «tractor» and «centrifuge», a modification of the «drill» for the deformation tool. At least one non-empty «container» in case you get carried into a difficult area. And preferably a beacon.
An important point. In this game, the rocket cannot land anywhere! Either to areas chosen by the game, or to «landing pads» placed by the player himself. Therefore, before you leave, make sure that the «launch landing pad» is empty, and nothing will prevent you from landing when you want to go back. And if you built a base farther from the «starting shelter» — place your «landing pad» there, and then the «beacon» so that a marker appears above the area, and you can find this place when viewed from space (the starting shelter without a beacon has its own marker).
The first planet to visit personally, I would recommend Kalidor — or «dry planet». On the surface, you are sure to find many solar power generators, and the long daylight hours on the planet will provide you with their long work. On this planet, the most common resources will be tungsten and malachite — it is they that the player will need to craft tools of the second tier, so to speak.
Something like that. Leave your collections of tips for your favorite games.
The best gems for weapons and armor in New World
Stones or gems in the New World are items that allow you to improve weapons or armor for free by adding additional perks or bonuses to the hero’s characteristics.
Author
Andrey Pavlenko
Publication date
November 3, 2021
Liked the article?
While traveling through the world of Aeternum, you have probably already found pieces of equipment and weapons with slots for stones. If this happens, be sure to equip the item and focus on finding gems that you can slot into that gear to get additional stat bonuses. AT New World there are many stones and in this article we will try to figure out which ones are the best.
This is what the weapon looks like with the gem slot:
Stones or gems in the New World are items that allow you to improve weapons or armor for free by adding additional perks or bonuses to the hero’s characteristics. They are very important in the formation of a quality build! Each gem in New World provides completely different bonuses that work differently depending on whether you place the item in armor or weapons. For example, an amber stone in armor reduces the amount of damage taken from the forces of nature by a certain percentage, and in weapons it gives additional damage by the forces of nature.
Different levels of stones provide their own advantages.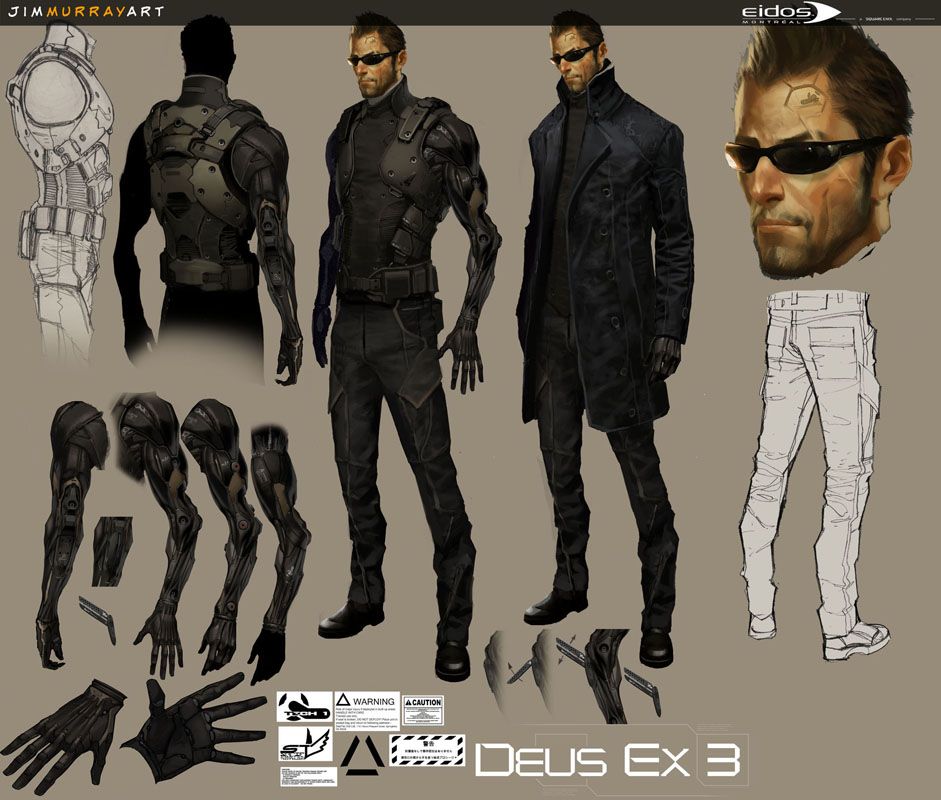 The higher the level of the stone, the higher the percentage of the bonus that it provides.
List of all stones for weapons and armor in New World
Amethyst
The best armor gems in New World
If you’re focused on PvE content, then you’re probably better off using the Carnelian gem. It reduces the threat level. If you are a fan of PvP, then here you should choose depending on which opponents you have more problems with. If they use fire damage, take a ruby, and so on.
The best weapon gems in New World
Article in progress…
Game guide
New World
- Platform: PC
- Genre: RPG
- Release date September 28, 2021
— Follow the game
More interesting articles
November 2, 2022
Hideo Kojima teases his new game again
We are shown another actress who took part in the development.
November 2, 2022
Perhaps a new part of Deus Ex is in development
However, so far the work on the project is at a very early stage.
November 1, 2022
November 2 we will know the release date of Atomic Heart
IGN will release a new trailer for the game tomorrow, which will indicate the release date.
