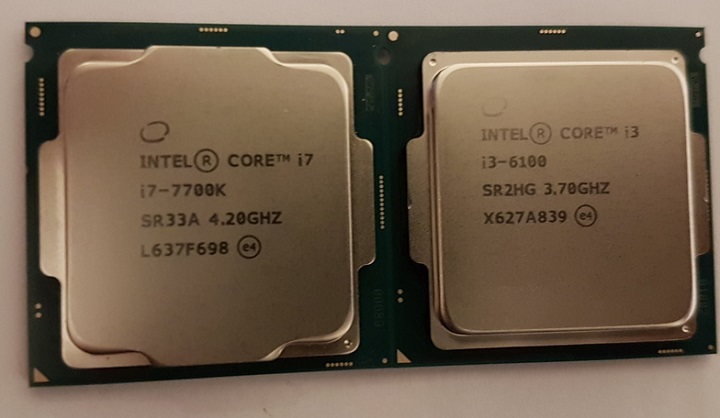
Overclocking Intel’s Core i7-7700K: Kaby Lake Hits The Desktop! — Tom’s Hardware
Today’s best MSI GTX 1080 Armor OC deals
No price information
Check Amazon
The greatest gift a review editor can receive is unexpected hardware, especially when that hardware is an anticipated CPU. What would you do with an early sample of Intel’s next-gen Desktop CPU? You would CPU overclock, of course! So would I.
[Editor’s Note: Intel declined to comment on our general findings. Although the CPU we received is not marked as an engineering part, we cannot confirm with certainty that it is a retail sample.]
I downloaded the latest Kaby Lake firmware for my most recently-tested Z170 motherboard sample and began running benchmarks.
That’s right, I said Z170. It turns out that while the next generation of motherboard may provide minor feature enhancements compared to the current generation, they’re both compatible with the new CPUs. That’s certain to be a big relief to overclockers who recently burned their Skylake-based processors, and it makes sense because of Intel’s recently-adjusted Tick-Tock-Tock strategy of releasing a new die process (Broadwell), followed by a new architecture (Skylake), followed by a process refinement or optimization (rather than another new process). To the point: Kaby Lake is a revision of Skylake.
Image 1 of 7
Intel says that taller transistor fins and wider gate pitch endow its 14nm+ process with an additional 300 to 400 MHz clock rate capability. That’s huge if it turns out to be true. As a motherboard reviewer, it’s also one of the first things I wanted to test!
| Kaby Lake | ||||||
| Model | Cores/Threads | Cache | Baseline Frequency | Max Turbo Boost | TDP | IGP |
| Core i7-7700K | 4/8 | 8MB | 4. 20 GHz 20 GHz |
4.50 GHz | 95W | 630 |
| Core i5-7600K | 4/4 | 6MB | 3.80 GHz | 4.00 GHz | 95W | 630 |
| Core i7-7700 | 4/8 | 8MB | 3.60 GHz | 4.20 GHz* | 65W | 630* |
| Core i5-7600 | 4/4 | 6MB | 3.50 GHz | 4.00 GHz* | 65W | 630* |
| Core i5-7500 | 4/4 | 6MB | 3.40 GHz | 3.80 GHz* | 65W | 630* |
| Skylake | ||||||
| Core i7-6700K | 4/8 | 8MB | 4.00 GHz | 4.20 GHz | 91W | 530 |
| Core i5-6600K | 4/4 | 6MB | 3.50 GHz | 3.90 GHz | 91W | 530 |
| Core i7-6700 | 4/8 | 8MB | 3.40 GHz | 4.00 GHz | 65W | 530 |
| Core i5-6600 | 4/4 | 6MB | 3. 30 GHz 30 GHz |
3.90 GHz | 65W | 530 |
| Core i5-6500 | 4/4 | 6MB | 3.20 GHz | 3.60 GHz | 65W | 530 |
Intel accidentally leaked a little information about its desktop Kaby Lake CPUs in a document concerning other variations of the processor. What the company didn’t mention was the graphics version or Intel Turbo Boost frequencies. It’s because we’ve seen the Core i7-7700K and Core i5-7600K in action that we can provide that data for those two processors, and the asterisks in the chart indicate guesses derived from Intel’s previous models. We can’t say much about the revised Intel HD Graphics 630 without access to Intel documentation, which should be forthcoming when the company provides its usual information exchange closer to launch time; and none of our programs can pick out any pertinent information.
We’re also told that process improvements will enhance efficiency, but there is no free lunch. Intel didn’t change the core micro architecture between Skylake and Kaby Lake, and our motherboard didn’t even read a voltage reduction for the Core i7-7700K, compared to the Core i7-6700K. Our motherboard set the Core i7-7700K to 1.30V at its 4.50 GHz max turbo, whereupon it behaved exactly the way we’d expect our Core i7-6700K to act when overclocked to 4.50 GHz at 1.30V.
This particular motherboard dropped the full-load CPU voltage by around 20mV and the maximum full-load multiplier to 42x after I changed from firmware defaults to manual configuration and then back to automatic settings. It did this twice, both times after I initially used the CLR_CMOS jumper. Maximum power draw then dropped to 141W when turbo boost was disabled (bringing us down to the default 4.20 GHz; see chart below). Idle energy also dropped to 24W after several hours, but an idle period of that length exceeds normal test procedure.
The “no free lunch” statement still applies since 141W is more than 133W, but the only way I’ll reach an accurate conclusion about how much more power the higher 4. 50 GHz frequency requires is to compare more boards. Update: Our first follow-up test has already confirmed a lower, 25W full-load power delta between the Core i7-7700K and Core i7-6700K when using a different motherboard. The new generation of motherboards that launch with this CPU will be the best boards to use for those tests, and we’ll have a batch of them ready when the NDAs of those manufacturers expire.
The power charts reveal my spoilers. This Core i7-7700K sample can be overclocked on this motherboard to 4.80 GHz at 1.30V, compared to the Core i7-6700K’s 4.60 GHz. I used Gigabyte’s GA-Z170X-Ultra for this test because it was my most recent review sample. The leftover chart tidbit — that I set the memory to DDR4-2933 — is due to this particular motherboard’s difficulty in achieving DDR4-3200 with four of my G.Skill DDR4-3600 modules installed.
The actual core overclock results of 4.78 GHz and 4.59 GHz are caused by the Z170X-Ultra’s oddball 99. 65 MHz BCLK; the DRAM overclocks are identical due to motherboard limits; and I eventually gave up in frustration when trying to adjust the CPU BCLK with the new CPU. I’m sure a few of you Gigabyte fanatics have experienced the same BCLK stickiness.
The limits of the test board should leave plenty of excitement for future reviews, where new boards and memory may reveal new DRAM and BCLK overclocking heights! For now, I’m simply satisfied to find a solid core clock increase.
MORE: Best CPUs
MORE: All CPU Content
MORE: Intel & AMD Processor Hierarchy
- 1
Current page:
Core i7-7700K Preview
Next Page Benchmark Results
Thomas Soderstrom is a Senior Staff Editor at Tom’s Hardware US. He tests and reviews cases, cooling, memory and motherboards.
Topics
CPUs
The Kaby Lake overclocking guide
Conroe, Sandy Bridge, Ivy Bridge, Haswell, Skylake, and anything in between, we’ve overclocked them all. Each had their pros and cons, but the standout architecture in that list is Sandy Bridge. Good samples were capable of achieving stable overclocks of 5GHz on air cooling. It’s a landmark that has proven elusive, until now. Finally, we have a worthy successor: Kaby Lake. Intel’s latest processors make 5GHz overclocks possible with air cooling, and you even can go beyond that. No need for lengthy intros when excitement levels are at fever pitch. Let’s get down to business!
Frequency expectations – i7-7700K
Our R&D dept has tested hundreds of CPUs and found the following frequency ranges are workable for overclocking Kaby Lake i7-7700K CPUs:
- 20% of samples are stable with Handbrake/AVX workloads when running at 5GHz CPU core speeds.
- The AVX offset parameter can be used to clock 80% of CPU samples to 5GHz for light workloads, falling back to 4.8GHz for applications that use AVX code.
- The ASUS Thermal Control Tool has now been ported into UEFI and can be used to configure profiles for light and heavy (non-AVX) workloads to extend CPU core overclocking margins on air and water cooling by up to 300MHz.
- Memory frequency: The best CPU samples can achieve speeds of DDR4-4133 with four DIMMs (ROG Maximus IX series of motherboards needed). DDR4-4266 is possible on the Maximus IX Apex. For mainstream use, we recommend opting for a memory kit rated no faster than DDR4-3600, as all CPUs are capable of achieving such speeds.
CPU power consumption and cooling requirements
One of the questions that always arises when we’re dealing with overclocking is “how much Vcore is safe?” Generally, we recommend constraining an overclock to stay below 2 X the stock power consumption of the processor under full load. To work out what that figure is, we can measure the CPU’s power draw via the EPS 12V power line using an oscilloscope and current probe.
To generate workloads, we tested with the brute-force loads of Prime95’s small FFT tests (AVX2 version) and also with ROG Realbench, which uses real-world rendering and encoding tests. Using both “synthetic” and real-world tests allows us to establish voltage recommendations for both scenarios.
Don’t fret if you can’t understand the captures, we’ve performed the calculations for you and show the figure in Watts beneath each image.
Stock frequency, ROG Realbench load current = ~45W
Stock frequency, Prime95 load current =~76W
5GHz CPU frequency, ROG Realbench load current = ~93W
5GHz CPU frequency, Prime 95 load current=~131W
With the data acquired, we can identify where our “self-imposed” limits lie. We will add our obligatory disclaimer at this point and state that overclocking has risks and voids warranty unless you opt for Intel’s Performance Tuning Protection Plan. Keep that in mind, as there’s no way for us to guarantee things won’t go awry if you overclock a CPU. All risks are your own. What follows is nothing more than a set of guidelines based upon our own experience.
In order run Prime95 at 5GHz, our CPU sample requires 1. 35Vcore. Power consumption under that load comes in at 131 Watts, which is comfortably below 2X the stock power consumption of Prime95. I must confess, CPUs are usually power rated by application power rather than Prime95, hence leaving some headroom below the 2X figure is prudent.
So, if you’re running Prime95 as a short-term stress test, we advise using no more than 1.35Vcore with a 7700K CPU. If the CPU has not been de-lidded/re-lidded for a thermal paste upgrade, you’re likely to run out of thermal headroom around that voltage anyway.
Now, if you happen to be the type of user that spends more time running Prime95 than using a PC for other tasks, then we advise you reduce the maximum Vcore. “By how much?”, you ask. Well, you’re on your own for that. Remember, it’s current that degrades or kills a CPU. Be mindful of how much load you’re placing on the chip long-term and act accordingly. There’s nothing worse than pushing insane levels of current through the die and then moaning when there’s degradation.
Realbench is far kinder to the silicon from a power consumption point of view. At 5GHz and 1.35 Vcore, the power drawn is only 93 Watts. The risk of degradation is far lower than when subjecting the CPU to the brutality of AVX-enabled versions of Prime95. In fact, you could push up to 1.40Vcore with Realbench, and still keep consumption below the power levels drawn by Prime95 at 1.35 Vcore, but that’s as far as we’d go for sustained exposure to such workloads.
Immediately apparent from this data is the fact that Kaby Lake is very power efficient. Sub-150-Watt power consumption when dealing with the nasty loads of Prime95 at 5GHz is incredible. Even if you were to find a gem Skylake CPU capable of operating at the same frequency, power levels would be up around the 200 Watt mark to obtain stability. The upshot is that Kaby Lake’s efficiency takes the focus off motherboard power delivery to a reasonable extent. Any motherboard costing more than $150 should be capable of overclocking these CPUs to the limits when using air or water cooling. That includes all the ASUS motherboards in our Z270 guide.
With the power side of things dealt with, we can take at whether the Kaby Lake architecture responds to lower temperatures when overclocking.
| CPU core frequency | Cooling | Vcore | Peak CPU temperature in Celsius | Realbench — 2 Hours Pass? |
|---|---|---|---|---|
| 5GHz | Dual radiator AIO (water temp 28C) | 1.28V | 70C | No |
| 5GHz | Triple radiator custom loop in temp controlled room. Water temp 18C | 1.28V | 63C | Yes |
| 5GHz | Noctua NH-D15 | 1.28V | 73C | No |
| 5GHz | Dual radiator AIO | 1.32V | 72C | Yes |
| 5GHz | Air — Noctua NH-D15 | 1.32V | 78C | Yes |
From an overclocking perspective, the only advantage a dual radiator AIO cooler has over the Noctua NH-D15 heatsink is lower CPU temperatures. Unfortunately for us, the temperature drop isn’t significant enough to reduce Vcore requirements. To obtain a Vcore advantage, our CPU sample requires its load temps are kept under 65 Celsius, which requires a water chiller holding the coolant temps to 18 Celsius, or an ambient room temperature of 13~15 Celsius with a custom water loop and 3 X 120MM radiator. Not exactly a mainstream scenario. Of course, there is variance between samples, so our results may not be reflective of all CPUs.
De-lidding the CPU’s IHS (integrated heat spreader), replacing the thermal paste with something more thermally conductive, and then re-lidding, can yield benefits. We’ve seen temperature drops between 13~25 Celsius when the procedure is performed correctly.
If you’re wondering why Intel uses paste that’s less thermally efficient than the exotic mixes available to consumers, consider all the thermal cycling a CPU is subjected to over a few years. Heat can cause thermal pastes to fracture, creep, or pump out over time, leading to hot-spots on the die. Intel’s choices are likely based on long-term evaluations and ease of mass-application on the production line. With that in mind, if you do happen to embark on the de-lidding journey, it’s probably wise to re-apply the paste periodically, especially if you’re using the CPU in a vertically installed motherboard.
The process of de-lidding is made easy due to the availability of tools such as the Delid-Die-Mate 2, designed by Roman Hartung (AKA Der8auer), and the Rockit 88 de-lidding tool. Both are simple to use, so choose whichever is available to you. The old fashioned method of using a razor blade to cut through the sealant is riddled with potential for failure, as it’s easy to damage the PCB, resulting in a partially-working or dead CPU – something we have experienced first hand.
The Delid Die Mate 2 – makes de-lidding easy
For our de-lidding expedition, we used Thermal Grizzly Conductonaut between the IHS and CPU, and also between the IHS and water block. Conductonaut is a liquid metal compound with excellent thermal conductivity – better than any other compound we’ve used to date. The application resulted in a 13~15 Celsius drop in core temperatures, leading to improved overclocking stability at lower voltages:
| CPU core frequency | Cooling | Vcore | Peak CPU temperature in Celsius | Realbench — 2 Hours Pass? |
|---|---|---|---|---|
| 5GHz | Dual Radiator AIO (water temp 28C) | 1.28V | 55C | Yes |
| 5GHz | Noctua NH-D15 | 1.28V | 62C | Yes |
Previously, the dual-radiator AIO setup wasn’t stable at 5GHz with anything less than 1.328V. The re-pasting adventure provided temp drops that are substantial enough to reduce required Vcore to 1.28V, which is in line with the previous result with water temps at 18 Celsius. The additional headroom also allows us to push the CPU 100MHz higher with a mere 16mv voltage hike (1. 344 Vcore). Prior to de-lidding, the CPU required 1.38Vcore for the same frequency. The gains are real. Just bear in mind that it will void Intel’s warranty. Interestingly, we have heard that some retailers are selling re-pasted CPUs and providing their own warranty (Case King and OCUK). It may be a worthwhile option if fiddly DIY doesn’t sit well with you.
Memory frequency expectations
From everything we have seen to date, Kaby Lake’s overclocking prowess also applies to the memory side of the bus. Speeds of up to DDR-4133 are possible with four memory modules on our ROG Maximus series boards, while the Maximus IX Apex and Strix Z270I Gaming models manage DDR4-4266 thank to their optimized two-slot design.
As always, we’re going to recommend being conservative and opting for memory kits rated below DDR4-3600 if you favour plug-and-play. Above those speeds, manual tuning can be required due to variance between CPUs and other aspects of the system. Leave faster kits to enthusiasts who like to spend their time tweaking the system.
Also of merit for plug-and-play aspirants: be sure not to combine memory kits. Purchase a single kit rated at the memory frequency and density you wish to run. When combining memory kits – even of the same make and model – there’s no guarantee that the kits will run at the rated timings and frequency of a single kit. In cases where such configurations do not work, a lot of manual tuning is required, which isn’t for those of us who are light on experience and short on time.
For the enthusiasts out there, right now, all the latest high-speed memory kits are using the famous Samsung B-die ICs. It’s good stuff. Should temptation get the better of you and you’ve got your sights set on a DDR4-4000+ kit, be sure to provide adequate airflow over the memory modules. Good B-die based modules are sensitive to temperature, which can affect their stability. A capable memory cooler pays dividends if you intend to push the memory hard.
GSkill’s DDR4-4266 TridentZ memory kit – 16GB of Samsung B-Die goodness….
Outside that, be mindful that some CPUs don’t like running high memory speeds when nearing the upper-end of their overclocking potential. In such cases, reducing the memory frequency by a ratio or two can help stabilize CPU core frequency without requiring additional Vcore.
Also noteworthy is that the highest working memory ratio is DDR4-4133. Higher speeds require adjustment of BCLK with the DDR4-4133 (or lower) ratio selected. If you do purchase a memory kit rated faster than DDR4-4133, don’t be alarmed if you see BCLK being changed to a higher value when you select XMP. The change is mandatory.
Uncore frequency
Uncore frequency – AKA Cache frequency in the ASUS firmware – can also be overclocked. The actual gains from overclocking the Uncore are application dependent, as it affects L3 cache access times. Generally, we prefer to focus on CPU frequency first, followed by memory frequency, and then we experiment with Uncore frequency.
Voltage wise, the Uncore shares the CPU Vcore rail. As a result, when we increase Vcore, we’re also increasing the Uncore voltage. That’s why there is some sense in overclocking the Uncore; you might as well claim the overclocking margin there is on the table, as you’ll be increasing voltage to the Uncore domain when you overclock the CPU.
From a frequency perspective, good CPU samples are capable of keeping Uncore frequency within 300MHz of the CPU core frequency when the processor is overclocked to the limits using air and water cooling. However, there may be a trade-off for the Uncore versus memory frequency on some CPU samples. If pushing memory frequency beyond DDR4-3800, it may be difficult to obtain stability with a Uncore frequency over 4.7GHz when the CPU cores are overclocked past 5GHz.
Typically, when Vcore is at 1.35V, Uncore frequencies between 4.7~4.9GHz are possible depending upon the quality of the CPU sample. As mentioned in the previous paragraph, CPU core and memory frequency affect how far the Uncore will overclock at a given level of voltage.
AVX offset
The AVX offset parameter allows us to define a separate CPU core multiplier ratio for applications that use AVX code. When AVX code is detected, the CPU Core multiplier ratio will downclock by the user-defined value. This feature is useful because AVX workloads generate more heat within the processor and they require more core voltage to be stable. Ordinarily, an overclock would be constrained by the hottest, most stressful application we run on the system. By using AVX offset, we can run non-AVX workloads, which don’t consume as much power, at a higher CPU frequency than AVX applications.
As an example, that means we can apply 50X ratio with a BCLK of 100MHz, resulting in a 5GHz overclock for non-AVX applications. We can then set the AVX offset parameter to a value 2 (or lower if required), which will reduce the CPU core ratio to 48X (4.8GHz) when an AVX workload is detected. This ensures the system stays within its thermal envelope, without our overclock being constrained solely by the AVX workload.
5GHz overclock maintained during non-AVX workloads
And downclocked to 4.8GHz during AVX workloads (AVX offset = 2)
For the most part, AVX offset works well in practice. The only caveat we have experienced is that we cannot apply a separate Vcore for the AVX ratio. Being able to define the amount of Vcore applied would help us to tune each CPU sample to the optimal voltage for AVX workloads. Crude workarounds for this limitation include using Offset Mode for Vcore to reduce the voltage, or by manipulating load-line calibration, which affects how much the voltage (Vcore) sags under load. Both of these workarounds have implications for stability, so cannot be employed in all cases. The option to manually set a core voltage for the AVX Offset ratio would be advantageous. We have already spoken to Intel about this and made suggestions for future iterations of AVX offset. The changes required are significant, so we likely won’t see them for a few generations; ergo, don’t expect them for Kaby Lake.
The other issue with AVX offset is that it only detects AVX workloads. There are applications and even some games that are multi-threaded, generating higher thermal loads than applications that aren’t as intensive. In such cases, overclocking headroom is more thermally constrained than it should be. Fortunately, there’s an exclusive ASUS workaround for the issue, and it’s called CPU overclocking temperature control…
ASUS CPU overclocking temperature control
First unveiled on the X99 platform back in June 2016, the ASUS Thermal Control utility makes its way to the Z270 platform. This time, instead of being software based, it’s coded directly into the UEFI, and gets a name change to CPU overclocking temperature control:
The temperature control options allow us to configure two CPU core frequency targets directly from firmware; one for light-load applications, such as games, the other, for more stringent workloads. Both overclock targets can be assigned separate voltage levels and temperature targets so that we can run games and light-load applications at higher frequencies than workloads that generate more heat. The feature works by monitoring temperature and then applying user-configured voltages and multiplier ratios when the defined thermal thresholds are breached.
Unlike AVX offset, the temperature control mechanism isn’t limited solely to AVX workloads. Any application that generates sufficient heat to breach the user-defined temperature threshold will result in the operating frequency and voltage being lowered to the user-applied values. In essence, this provides more flexibility than the AVX offset parameter and deals with some of its drawbacks.
Depending upon the cooling used, an extra 100~300MHz of overclocking headroom can be cajoled from a CPU with the ASUS temperature control features. It’s a handy tool for enthusiasts who want to wring out every MHz of headroom from the system.
|
3DNews Technologies and IT market. Overclocking news and system performance measurements. The most interesting in the reviews
11/28/2016 [10:27], Ivan Grudtsyn Every day there is more and more information about upcoming Intel Kaby Lake-S processors, but at the same time their overclocking potential is poorly understood. Cowcotland’s French colleagues managed to get evidence on the Web that the older quad-core Core i7-7700K model has good capabilities for increasing the frequency in excess of the standard 4.2 / 4.5 GHz.
The flagship of the Kaby Lake-S family is made in the LGA1151 design and has the sSpec number SR33A. The copy shown in the photo refers to a batch of L637F698 processors. According to the CPU-Z utility (current version 1.78.1), the Core i7-7700K sample belongs to the category of retail, not experimental. This can be judged by the absence of the ES prefix in the model name. The core stepping is defined as B0, and the thermal package (TDP) is 91 watts. The Intel Core i7-7700K described above was tested on an ASRock Z170 OC Formula motherboard with UEFI P7.00A released on October 18 (recall that boards based on Intel 100 Series chipsets can already work with Kaby Lake-S CPUs).
Based on a series of tests, the processor was stable at 4.9 GHz, obtained by increasing the multiplier from 42x to 49x. The CPU-Z program determined that the core voltage (Vcore) was 1.264 V, and the temperature of one of the x86-64 cores briefly increased to ~95 °C. This circumstance suggests that, firstly, an air cooler or a not very effective LSS served as a means of cooling the CPU, and secondly, the processor, most likely, was not subjected to “scalping” with the subsequent replacement of the thermal interface between the chip and the cover. Older Quad-Core 4.9 GHz @ 1.264 V — good or mediocre result? This question will help answer the statistics collected by overclocker Semyon «TaPakaH» Avdeev based on the results of testing one and a half hundred Core i7-6700K processors (the table below also contains the Core i5-6600K). Full size image — 1073 × 3361 pixels, 140 KB 4V (SuperPi 32M) to 1.35-1.45V (HWBot Prime). Accordingly, 4.9 GHz at 1.264 V «performed» by the Core i7-7700K is more than a worthy result. Sources:
If you notice an error, select it with the mouse and press CTRL+ENTER. Related materials Permanent URL: https://3dnews.ru/943418 Headings: Tags: ← В |
 .. Core i7-7700K overclocked to 4.9 G…
 Thanks to the support of Hyper-Threading technology, the chip can process data in eight threads. The amount of cache memory in the second level is 1 MB (4 × 256 KB), the third level is 8 MB (shared). The minimum processor frequency in idle mode is 800 MHz, the maximum ring bus frequency is 4200 MHz.
  The stability of the ASRock Z170 OC Formula and Core i7-7700K tandem was tested using the Prime95 utility.
 How to overclock an Intel Core i7-7700K processor to 5 GHz
Until recently, a significant increase in clock frequency could only be dreamed of by an ordinary user, this could only be done by enthusiasts using liquid cooling. Intel kicked off the concept of mass overclocking with the i7-7700K Kaby Lake processor, with a high base clock speed that promises to break the 5GHz limit with simple tools. We couldn’t help but try the new overclocking options on the 7700K test model and the Gigabyte GA-Z270X-Gaming 9 motherboard.with Intel Z270 Express chipset.
Overclocking: how and why?
The liquid cooling system consists of a water block (heat sink) (1) and a radiator (2) . Hot water is supplied through hoses to the radiator, cooled and returned to the water block already cold.
One of the main performance characteristics of a processor is its clock speed. It is not laid explicitly in silicon, but is established by the manufacturer as a result of exhaustive tests. In fact, the frequency of the chip during operation is determined by the motherboard: a special microcircuit is installed on it — a clock pulse generator. At certain intervals (cycles), the clock generator sends pulses that somehow pass through all the main components of the computer (for example, via PCIe or USB buses) and synchronize the operation of the components.
From the base clock frequency generated by the motherboard through a multiplier, the processor frequency is set, which can change and become much higher. In a sense, Intel processors are able to overclock themselves — they have a technology for automatically increasing the clock frequency under load as long as the thermal package and temperature allow. This technology is called Turbo Boost. If the cooling can’t keep up with the heat load, the processor starts to skip cycles, preventing the temperature from rising — this mechanism is called throttling or throttling.
Thus, there are two ways to increase the processor clock frequency: either by changing the base frequency of the clock generator, or by changing the multiplier. But the multiplier for most processors is protected from increasing by a certain limit, so there is an alternative way — to increase the base frequency, and this often causes instability in the system.
On some processors with the prefix «K» in the name, the protection against overclocking is removed, so you can experimentally determine at what maximum speed this processor will work stably. An increase in performance above the nominal causes an increase in power consumption and heat dissipation, so overclocking requires a productive cooling system. The fact is that to ensure stable operation at higher frequencies, it is necessary to increase the supply voltage inside the processor, as a result of which heat transfer increases disproportionately.
The key to successful overclocking: top-end motherboard and cooling system
From the above points, the conclusion follows: a cooling system that is much more efficient than the cooler supplied with the processor and provides good heat dissipation in standard operation mode is a necessary condition for overclocking. Currently, such cooling systems are presented on the market in sufficient quantities. An improved result, and, therefore, better results during overclocking, is provided by a liquid cooling system, since liquid has a higher heat capacity than air.
For our testing, we used a Corsair Hydro Series h215i water cooler assembly. The water block is attached to the motherboard, through the contact surface of the base, it removes heat from the processor cover and transfers it to water, which is supplied through the hose towards the radiator. Two 140mm fans force air through the radiator fins to dissipate excess heat, while a built-in pump pushes chilled water back to the water block.
The benefit of a pre-assembled liquid cooling system is that it is easy to assemble and mount, comparable to an air cooler. True, this requires an appropriate body. Our Be Quiet Silent Base 800 proved to be rather unsatisfactory. The chassis had a heatsink mount, but we barely secured both 140mm fans with two of the four screws provided for each, so that the fans were blowing air from the inside out. It looks rather awkward, but nevertheless, for testing with an open case, the idea worked. For a closed case, the fans must draw in fresh air from outside to inside.
Corsair Link tool allows you to adjust the water cooling system. The higher the CPU frequency, the faster the fans and the pump
Our water cooling system is powered by the SATA connector, and the fans are controlled by the CPU fan socket. In addition, the system connects to the motherboard using a USB cable that uses a management software called Corsair Link. To mitigate noise when working on a semi-passive power supply — in our case, the Corsair RM850i - in the fan control in Corsair Link, you need to select the «Silent» profile.
If you assemble the water cooling system yourself, then, provided that you use the motherboard of our choice, you can also connect it to the circuit without unnecessary manipulations — the GA-Z270X-Gaming 9 model comes from the factory with a hybrid radiator pre-installed on the power circuits, combined with water block. In addition, it is also notable for the presence of a special controller that ensures even distribution of PCI-e processor lines between connected devices, it has two high-speed LAN adapters Killer DoubleShot X3 Pro and a wireless Killer Wireless-AC 1535, each with two M. 2 and U. 2 for connecting high-speed SSD drives. In other words, it has everything that a gamer or computer enthusiast could wish for.
The i7-7700K processor on the Gigabyte GA-Z270X-Gaming 9 board runs in automatic overclocking mode by default (UEFI: «M.I.T. | CPU Upgrade = Auto»). Our processor under full load (test Prime95) in the mode increased to 4.5 GHz clock frequency was stable at temperatures up to 60 ° C. These values are still fully compliant with Intel’s specifications and should not, in our estimation, result in premature damage to the processor.
Overclocking settings via UEFI
Gigabyte GA-Z270X-Gaming 9 UEFI menucontains presets for automatic adjustment of overclocking parameters
In order not to once again endanger the processor, we adhered to the automatically set parameters of the Gigabyte overclocking function (UEFI: «M.I.T. | CPU Upgrade»). Here are the preset operating frequencies of the components along with the internal supply voltage and more. For overclocking itself, you only need a couple of clicks in UEFI: in the same “CPU Upgrade” menu, select the desired overclocking level, for example, “i7-7700K CPU 4.8 GHz”.
Our system started up and worked perfectly fine. If the processor fails from the start, the next boot process fails and UEFI displays an error message and a recommendation to check the settings. In this case, try lowering the frequency. So the processor should not be damaged, because in the event of overheating or overvoltage, it turns off.
Power Limit
Gigabyte GA-Z270X-Gaming 9 Motherboard with Corsair h215i Stable Prime9 Test5 at the highest level of overclocking through UEFI presets up to 5 GHz under full load for several hours. Against the i7-7700K’s nominal default clock speed of 4.2GHz (with stock cooling, 4.2GHz would have been the ceiling for the i7-7700K for a long time), the increase was 19%, which immediately reflected in performance: Cinebench R15 benchmark, which measures pure computing power when rendering graphic objects, earned 18. 3% faster. The increase in video encoding performance turned out to be slightly less: converting «Big Buck Bunny» using the Handbrake tool from 4K to 720p («iPad» profile) on an overclocked processor was about 10% faster.
At each overclocking attempt, we monitored the internal temperature of the processor using the SpeedFan tool. It changed at an astonishing rate: from as low as 25°C without load in less than a second, it could rise to the maximum when a stress test, for example, Prime95, fully loaded the processor. With the termination of the load, the temperature immediately dropped to its original values. Temperature changes depended on the level of overclocking and the type of load: if at 4.5 GHz the temperature could be 80 ° C, then at 5.0 GHz it was approaching 90°C. At the same time, individual cores now and then briefly slowed down to avoid overheating. To achieve higher frequencies, you need to resort to more daring methods, for example, to improve heat dissipation in the processor itself.
In total, we were surprised that the Kaby Lake Core i7 processor can be used with a 20% increase in clock speed without much effort and problems.
More power at your own risk
Fine manual UEFI tuning allows you to change a variety of parameters, which often turn out to be little described. Experts are also not alien to the anticipation of discoveries and the thirst for experimentation. One way or another, each cooling system sooner or later reaches its limits, which are primarily determined by the ability of the processor case to remove heat.
> Processor scalping means to remove the processor assembly. Between the crystal and the heat spreader — a metal protective cover that should evenly distribute heat to transfer to the base of the water block — Intel laid thermal paste, and with fairly average characteristics. Removal involves separating the thermal cover from the processor substrate, removing any remaining adhesive, applying a layer of high quality thermal interface compound (liquid metal), and then gluing the cover back using silicone sealant.

